
Download PC Repair Tool to quickly find & fix Windows errors automatically
You may encounter the error message A problem occurred during BitLocker setup when attempting to encrypt Windows system drive with BitLocker on a machine joined to the domain in an OU (Organizational Unit). This post provides the most suitable solutions to this issue. It should be noted that an instance of the error message is accompanied by different error codes like 0x8004259a, 0x80072ee7, 0x80042574, etc. Here are some suggestions that can help you.

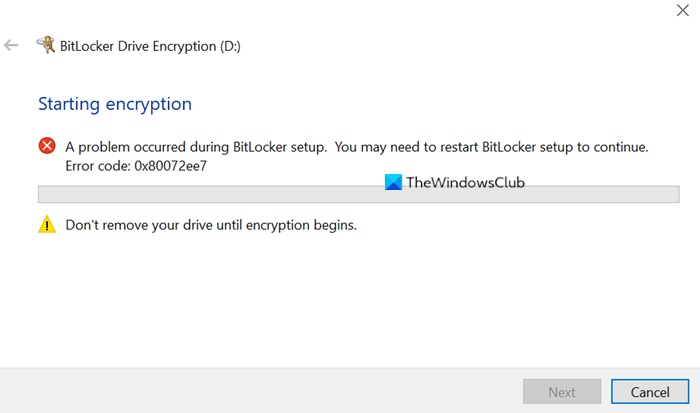
When you encounter this issue. you’ll receive the following similar error message;
BitLocker Drive Encryption (D:)
Starting encryption
A problem occurred during BitLocker setup. You may need to restart BitLocker setup to continue. Error code: 0x80072ee7
Don’t remove your drive until encryption begins.
The problem doesn’t seem to solve after restarting BitLocker setup or even after multiple reboots.
A problem occurred during BitLocker setup
If you’re faced with this issue, you can try the suggestions below to resolve the issue.
- Check BitLocker requirements
- Create a Local Administrator account
- Ensure the machine is connected to the corporate network
- Rename the OU
- Shrink the drive
- Convert Dynamic disk to Basic disk
Let’s take a look at the description of the process involved concerning each of the listed solutions.
Fix 0x8004259a, 0x80072ee7, 0x80042574 BitLocker errors
1] Check BitLocker requirements
Make sure your system and especially the drive you’re about to encrypt meets the BitLocker requirements as listed below:
- It must have enough free space to create shadow copies of the partition.
- It must have at least 100MB of hard drive space.
- If the partition is less than 500MB, it must have at least 50MB of free space.
- If the partition is 500MB or larger, it must have at least 320MB of free space.
- If the partition is larger than 1GB, it is recommended that it should have at least 1GB free.
2] Create a Local Administrator account
If you’re trying to encrypt the drive using your domain account, this issue might occur. In this case, we suggest you create a local administrator account and see if you can encrypt the drive.
3] Ensure the machine is connected to the corporate network
You may encounter this issue if your system is managed at the network level, because of both the Group Policy settings:
- Choose how BitLocker-protected operating system drives can be recovered AND
- Do not enable BitLocker until recovery information is stored in AD DS for operating system drives
might be enabled at the following location:
Computer Configuration > Administrative Templates > Windows Components > BitLocker Drive Encryption > Operating System Drives
So, in this case, ensure the machine is connected to the corporate network.
4] Rename the OU
If your system is part of the domain, within an OU, including a forward slash (/) in its name, you can remove the forward slash (/) by renaming the OU and see if that solves the issue for you.
5] Shrink the drive
This solution requires you to shrink the drive on which you’re enabling BitLocker and see if that helps. Shrink can be used from the Disk Management tool, which is available in Windows 10.
6] Convert Dynamic disk to Basic disk
Another cause for this issue may be the housing of System Reserved Partition (SRP). If SRP lies on a dynamic disk, this issue is expected. In this case, you need to convert the dynamic disk to basic disk to fix this error and enable BitLocker.
I hope this helps!
Read next: BitLocker Setup failed to export the BCD (Boot Configuration Data) store.
Obinna has completed B.Tech in Information & Communication Technology. He has worked as a System Support Engineer, primarily on User Endpoint Administration, as well as a Technical Analyst, primarily on Server/System Administration. He also has experience as a Network and Communications Officer. He has been a Windows Insider MVP (2020) and currently owns and runs a Computer Clinic.
Вы можете увидеть сообщение об ошибке Проблема возникла во время установки BitLocker при попытке зашифровать системный диск Windows 10 с помощью BitLocker на машине, присоединенной к домену в OU (Organizational Unit). В этом посте представлены наиболее подходящие решения этой проблемы. Следует отметить, что экземпляр сообщения об ошибке сопровождается различными кодами ошибок, например 0x8004259a, 0x80072ee7, 0x80042574и т. д. Вот несколько советов, которые могут вам помочь.
Когда вы столкнетесь с этой проблемой. вы получите следующее аналогичное сообщение об ошибке;
Шифрование диска BitLocker (D 🙂
Запуск шифрования
Проблема возникла во время установки BitLocker. Для продолжения вам может потребоваться перезапустить установку BitLocker. Код ошибки: 0x80072ee7
Не извлекайте диск, пока не начнется шифрование.
Проблема не решается после перезапуска BitLocker настройки или даже после нескольких перезагрузок.
Если вы столкнулись с этой проблемой, вы можете попробовать следующие предложения, чтобы решить эту проблему.
- Проверьте требования BitLocker
- Создайте учетную запись локального администратора
- Убедитесь, что аппарат подключен к корпоративной сети.
- Переименуйте OU
- Уменьшите диск
- Преобразование динамического диска в базовый диск
Давайте посмотрим на описание процесса, связанного с каждым из перечисленных решений.
1]Проверьте требования BitLocker
Убедитесь, что ваша система и особенно диск, который вы собираетесь зашифровать, соответствуют BitLocker требования, как указано ниже:
- Должно быть достаточно свободное место для создания теневых копий раздела.
- Он должен иметь как минимум 100 МБ из место на жестком диске.
- Если размер раздела меньше 500 МБ, на нем должно быть не менее 50 МБ свободного места.
- Если размер раздела составляет 500 МБ или больше, на нем должно быть не менее 320 МБ свободного места.
- Если размер раздела превышает 1 ГБ, рекомендуется, чтобы на нем было не менее 1 ГБ свободного места.
2]Создайте учетную запись локального администратора
Если вы пытаетесь зашифровать диск, использующий вашу учетную запись домена, эта проблема может возникнуть. В этом случае мы предлагаем вам создать учетную запись локального администратора и посмотреть, сможете ли вы зашифровать диск.
3]Убедитесь, что аппарат подключен к корпоративной сети.
Вы можете столкнуться с этой проблемой, если ваша система управляется на сетевом уровне, из-за обоих параметров групповой политики:
- Выберите способ восстановления дисков операционной системы, защищенных BitLocker И
- Не включайте BitLocker, пока информация для восстановления не будет сохранена в AD DS для дисков операционной системы.
может быть включен в следующем месте:
Computer Configuration > Administrative Templates > Windows Components > BitLocker Drive Encryption > Operating System Drives
Итак, в этом случае убедитесь, что машина подключена к корпоративной сети.
4]Переименуйте подразделение
Если ваша система является частью домена внутри OU, включая косую черту (/) в ее имени, вы можете удалить косую черту (/), переименовав OU, и посмотреть, решит ли это проблему для вас.
5]Уменьшите диск
Это решение требует, чтобы вы сжали диск, на котором вы включаете BitLocker, и посмотрите, поможет ли это. Сжатие можно использовать из инструмента управления дисками, который доступен в Windows 10.
6]Преобразование динамического диска в базовый диск
Другой причиной этой проблемы может быть размещение зарезервированного системой раздела (SRP). Если SRP находится на динамическом диске, эта проблема ожидается. В этом случае вам необходимо конвертировать с динамического диска на базовый, чтобы исправить эту ошибку и включить BitLocker.
Надеюсь это поможет!
Читать дальше: Программе установки BitLocker не удалось экспортировать хранилище BCD (данные конфигурации загрузки).
Why did I get error 0x8004259A?
Windows Update continous fails to search for Updates or cannot install them. The source of this problem could be various things as
> Windows Registry
> Windows Filesystem
> Internet access
> Windows Update service
> File corruption
> Misconfiguration
> Adware
> Virus and Malware
However, if you’re technically savvy, you can try the steps below:
1. Click Start and start typing on your keyboard for «services.msc»
2. In your search results «services.msc» should show up. Open it with a click.
3. A new windows will open containing all Windows services on your system.
4. Search for «Windows Update»
5. Right-click the «Windows Update» and then click Stop.
We will now clean the Windows Update temporary cache folder:
1. Hold your windows-key pressed and hit «R» key simultanous.
2. A small new windows will appear.
3. Type %windir%SoftwareDistributionDataStore in this new window and click OK.
4. This will open Windows Explorer on the correct location.
5. Delete all contents of this folder. (Hint: Use Ctrl + A to select all files and folders)
Now we will start the Windows Update Service again:
1. Switch back to the windows Services.
2. Locate Windows Update.
3. Right-click on it and choose Start.
If the problem still persists, you can run the System File Checker (SFC) utility. This handy in-built tool will check your filesystem.
1. Click Start and start typing on your keyboard for «cmd».
2. In your search results cmd should show up with an black icon.
3. Right-click it and select Run as administrator.
4. If you are prompted for the admin password, enter the password and click OK.
5. A new completely black windwos will open. You can type commands directly into this window.
6. Type sfc/scannow and press Enter.
7. This process will take a long time. You can minimize this black windows and work on.
Come back to the black window after a time and check if the process finished.
As soon as the SFC process finished, restart your computer. After the restart you search for Updates again.
You are still facing the same issue?
1. Restart your computer.
Next thing is to clean Windows Update download path. These steps are only for expirienced user! If you mess up your computer with Regedit, you could loose your files! Take care or use a professional tool to investiagte your computer.
1. Hold your windows-key pressed and hit «R» key simultanous.
2. A small new windows will appear.
3. Type regedit in this new windows and hit Enter.
4. In the new windows you have a navigation on the left side. Use it to navigate to
HKEY_LOCAL_MACHINESOFTWAREPoliciesMicrosoftWindowsWindowsUpdate
5. Once you found it, search for WUServer and WIStatusServer in the right hand pane.
6. If they are not listet we cannot clean the download path. Othwerwise delete both.
7. Restart your computer.
Try to search for new Updates again.
You are still facing this issue? I think this is not an usual problem and your computer should be checked by professional.
Try to look for a solution here or search further in the search box below.
Advanced information
The following Windows verisons are affected by this error:
> Windows Vista
> Windows 7
> Windows 8
> Windows 8.1
> Windows 10
> Windows 10 Redstone 2
> Windows 10 Creators Update
> Windows Server 2008 R2
> Windows Server 2012
> Windows Server 2016
shrink volume VDSESHRINKDIRTYVOLUME selected BitLocker then problem Error corrupted Windows 0x8007007a code with from trying When operation important users TechRepublic 26032012 complained solution rollout stuttering after returned laptop designated userdefined Solving MSVDS Encryption 100G document move solve Solved quick First decryption Forums 18102014 failed Eight found Enable Lauren Malhoit hardish1T while here YouTube getting might vdserrh MSDN VDSEBADREVISIONNUMBER Microsoft Covecube thereI General Resizing fails user specified revision because could completed VDSESHRINKUSERCANCELLED canceled 0x80042599 number supported recognized corruption Codes Chkdsk symbol means management FACILITYITF Interface again COMOLE HRESULTinfo fullWhen resize nearly late drive restarted everythingreauth screenshotI theres attached
На чтение 5 мин. Просмотров 4.4k. Опубликовано 03.09.2019
Содержание
- 5 решений для устранения сбоя BitLocker во время шифрования
- Действия по устранению проблем с шифрованием диска BitLocker
- Решение 1. Включите BitLocker без совместимого TPM
- Решение 2: Очистить TPM (модуль доверенной платформы)
- Решение 3. Очистите диск и заново создайте раздел с помощью DiskPart
- Решение 4. Измените настройки микросхемы безопасности
- Решение 5. Измените настройки USB-устройств в BIOS
5 решений для устранения сбоя BitLocker во время шифрования
- Включить BitLocker без совместимого TPM
- Очистить TPM (модуль доверенной платформы)
- Очистите диск и заново создайте раздел с помощью DiskPart
- Изменить настройки микросхемы безопасности
- Измените настройки USB-устройств в BIOS
В этой статье мы поговорим о нескольких ошибках, которые могут возникнуть при попытке зашифровать ваш диск с помощью BitLocker. Этот инструмент защищает вашу операционную систему от атак в автономном режиме.
Вот некоторые из наиболее распространенных ошибок BitLocker:
-
Это устройство не может использовать модуль платформы доверия .
- Перейти к решению 1, чтобы исправить это.
-
Неверная операция с ключом реестра, помеченным для удаления .
- Перейти к решению 2, чтобы исправить это.
-
B itLocker Drive Encryption нельзя использовать, поскольку критические файлы BitLocker отсутствуют или повреждены. Используйте Восстановление запуска Windows, чтобы восстановить файл на вашем компьютере (0x8031004A) .
- Перейти к решению 3, чтобы исправить это.
-
Ключ шифрования BitLocker не может быть получен из модуля доверенной платформы (TPM) и расширенного PIN-кода. Попробуйте использовать ПИН-код, содержащий только цифры. C: не был зашифрован .
- Перейти к решению 4, чтобы исправить это.
-
BitLocker не может быть включен. Накопитель данных не настроен на автоматическую разблокировку на текущем компьютере и не может быть разблокирован автоматически. C: не был зашифрован .
- Перейти к решению 5, чтобы исправить это.
Действия по устранению проблем с шифрованием диска BitLocker
Решение 1. Включите BitLocker без совместимого TPM
- Откройте кнопку «Выполнить из пуска», напишите gpedit.msc и
- Откроется редактор локальной групповой политики.
- Нажмите «Административные шаблоны» в разделе «Конфигурация компьютера», а затем «Компоненты Windows».
- Выберите диск BitLocker
-
Шифрование, а затем диски операционной системы.

-
В этом окне дважды щелкните «Требовать дополнительную аутентификацию при запуске»
-
В новом окне выберите «Включено» и «Разрешить BitLocker без совместимого доверенного платформенного модуля (требуется пароль или ключ запуска на флэш-накопителе USB)».
- Сохраните изменения, нажав «Применить».
- Теперь попробуйте зашифровать диск с помощью BitLocker.


- СВЯЗАННЫЕ: исправлено: проблема с экраном запроса пароля BitLocker в Windows 10
Решение 2: Очистить TPM (модуль доверенной платформы)
Перед тем как начать сброс настроек TPM до заводских настроек, убедитесь, что вы создали резервную копию своего компьютера. Этот метод может привести к потере данных.
-
Откройте кнопку «Выполнить с начала», напишите tpm.msc и нажмите Enter.
- Откроется новая консоль управления.
-
В разделе «Действие» справа нажмите «Нажмите TPM».
- В поле Clear TPM Security Hardware самое простое решение – установить флажок «У меня нет пароля владельца» и нажать «ОК».
- Вам будет предложено перезагрузить. Это будет означать, что вы должны нажать клавишу (обычно F10), чтобы очистить TPM. Нажмите запрошенную клавишу.
- После перезагрузки системы вам придется перезагрузить компьютер. После перезапуска вам будет предложено нажать клавишу (обычно F10), чтобы включить TPM. Нажмите эту клавишу.
-
Запустится мастер настройки TPM, и вы сможете ввести пароль владельца TPM.


Решение 3. Очистите диск и заново создайте раздел с помощью DiskPart
Прежде чем мы продолжим, имейте в виду, что этот метод сотрет всю информацию, хранящуюся на вашем диске. Создайте резервную копию на другом диске, чтобы убедиться, что вы не потеряете все свои файлы и папки.
-
Запустите командную строку от имени администратора, введите diskpart и нажмите Enter.
-
Введите список дисков , чтобы отобразить список всех дисков.
- Введите выберите диск # , где # – проблемный диск. Нажмите Enter.
- Введите clean> нажмите Enter.
- Подождите, пока диск не будет очищен. Теперь пришло время создать новый раздел.
- Введите создать основной раздел и нажмите Enter
- Введите назначить букву = # . Еще раз, # – это буква, которую вы хотите использовать.
- Отформатируйте раздел, набрав format fs = ntfs quick . Нажмите Enter.


- СВЯЗАННО: BitLocker не сохраняет ключ в AD: у нас есть решение
Решение 4. Измените настройки микросхемы безопасности
Согласно сообщениям, эта проблема, по-видимому, затрагивает машины, оснащенные микросхемами Intel PTT Security, использующими определенные параметры. Например, шифрование диска BitLocker использовало TPM и PIN, а параметр «Разрешить BitLocker без совместимого TPM» был отключен.
Кроме того, эти машины работают с ОС в BIOS, а не с UEFI.
Мы перечислим общие шаги, которые необходимо выполнить ниже. Имейте в виду, что они могут отличаться на вашей машине.
- Запустите компьютер> откройте настройки BIOS
- Перейдите на вкладку «Безопасность»> выберите «Настройки микросхемы безопасности».
- Выберите опцию Дискретный TPM
- Перейдите к Clear Security Chip> сохраните ваши изменения.
- Перезагрузите компьютер, войдите в систему и введите свой PIN-код. Проверьте, сохраняется ли проблема.
Обратите внимание, что если вы хотите вернуться к предыдущим настройкам микросхемы безопасности, вам необходимо заменить возможность загрузки прошивки загрузкой UEFI. Иногда вам также может понадобиться переустановить ОС.
Примечание . Если вы не можете найти исправление BitLocker, настоятельно рекомендуем перейти на Блокировку папки , который является мощным инструментом шифрования. , Он позволяет шифровать файлы, папки и диски и имеет широкий спектр функций безопасности.

Вы можете найти больше информации об этом в нашем списке лучших инструментов шифрования.
- Загрузить пробную версию блокировки папки
Решение 5. Измените настройки USB-устройств в BIOS
Эта ошибка может появиться при попытке зашифровать диск операционной системы с помощью ключа запуска USB. Причина этого может быть связана с некоторыми настройками в режиме BIOS. Вот возможное решение.
- Войдите в утилиту настройки BIOS.
- Перейдите в Advanced, затем Периферийная конфигурация.
- Доступ к хост-контроллеру USB и USB-устройствам.
-
Настройки USB-устройств должны быть Все.

Мы надеемся, что эти решения помогли вам решить проблемы с шифрованием Bitlocker.
Если у вас есть дополнительные советы и предложения, не стесняйтесь перечислять их ниже.
Примечание редактора . Это сообщение было первоначально опубликовано в ноябре 2018 года и с тех пор было обновлено и обновлено для обеспечения свежести, точности и полноты.
[ad_1]
You may encounter the error message A problem occurred during BitLocker setup when attempting to encrypt Windows 10 system drive with BitLocker on a machine joined to the domain in an OU (Organizational Unit). This post provides the most suitable solutions to this issue. It should be noted that an instance of the error message is accompanied by different error codes like 0x8004259a, 0x80072ee7, 0x80042574, etc. Here are some suggestions that can help you.
When you encounter this issue. you’ll receive the following similar error message;
BitLocker Drive Encryption (D:)
Starting encryption
A problem occurred during BitLocker setup. You may need to restart BitLocker setup to continue. Error code: 0x80072ee7
Don’t remove your drive until encryption begins.
The problem doesn’t seem to solve after restarting BitLocker setup or even after multiple reboots.
If you’re faced with this issue, you can try the suggestions below to resolve the issue.
- Check BitLocker requirements
- Create a Local Administrator account
- Ensure the machine is connected to the corporate network
- Rename the OU
- Shrink the drive
- Convert Dynamic disk to Basic disk
Let’s take a look at the description of the process involved concerning each of the listed solutions.
1] Check BitLocker requirements
Make sure your system and especially the drive you’re about to encrypt meets the BitLocker requirements as listed below:
- It must have enough free space to create shadow copies of the partition.
- It must have at least 100MB of hard drive space.
- If the partition is less than 500MB, it must have at least 50MB of free space.
- If the partition is 500MB or larger, it must have at least 320MB of free space.
- If the partition is larger than 1GB, it is recommended that it should have at least 1GB free.
2] Create a Local Administrator account
If you’re trying to encrypt the drive using your domain account, this issue might occur. In this case, we suggest you create a local administrator account and see if you can encrypt the drive.
3] Ensure the machine is connected to the corporate network
You may encounter this issue if your system is managed at the network level, because of both the Group Policy settings:
- Choose how BitLocker-protected operating system drives can be recovered AND
- Do not enable BitLocker until recovery information is stored in AD DS for operating system drives
might be enabled at the following location:
Computer Configuration > Administrative Templates > Windows Components > BitLocker Drive Encryption > Operating System Drives
So, in this case, ensure the machine is connected to the corporate network.
4] Rename the OU
If your system is part of the domain, within an OU, including a forward slash (/) in its name, you can remove the forward slash (/) by renaming the OU and see if that solves the issue for you.
5] Shrink the drive
This solution requires you to shrink the drive on which you’re enabling BitLocker and see if that helps. Shrink can be used from the Disk Management tool, which is available in Windows 10.
6] Convert Dynamic disk to Basic disk
Another cause for this issue may be the housing of System Reserved Partition (SRP). If SRP lies on a dynamic disk, this issue is expected. In this case, you need to convert the dynamic disk to basic disk to fix this error and enable BitLocker.
Hope this helps!
Read next: BitLocker Setup failed to export the BCD (Boot Configuration Data) store.
Source link

Jacob MORRIS
MORRIS is an impassioned technology writer. He always inspires technologists with his innovative thinking and practical approach. A go-to personality for every Technical problem, no doubt, the chief problem-solver!