- Вся активность
Join the conversation
You can post now and register later.
If you have an account, sign in now to post with your account.
Contents
- 1 P2P Troubleshooting Checklist
- 1.1 P2P Enabled (Dahua Device Only)
- 1.2 DHCP Enabled
- 1.3 DNS 1 = 8.8.8.8
- 1.4 DNS 2 = 8.8.4.4
- 1.5 Ping Test:Success
- 1.5.1 Ping Test:Results-Success
- 1.5.2 Ping Test:Results-Fail
- 1.6 Default TCP Port
- 1.7 Confirm All of the Above, Then Reboot
- 1.8 Network Sniffer Packet Backup New GUI
- 1.8.1 Prerequisites
- 1.8.2 Video Example
- 1.8.3 Instructions
P2P Troubleshooting Checklist
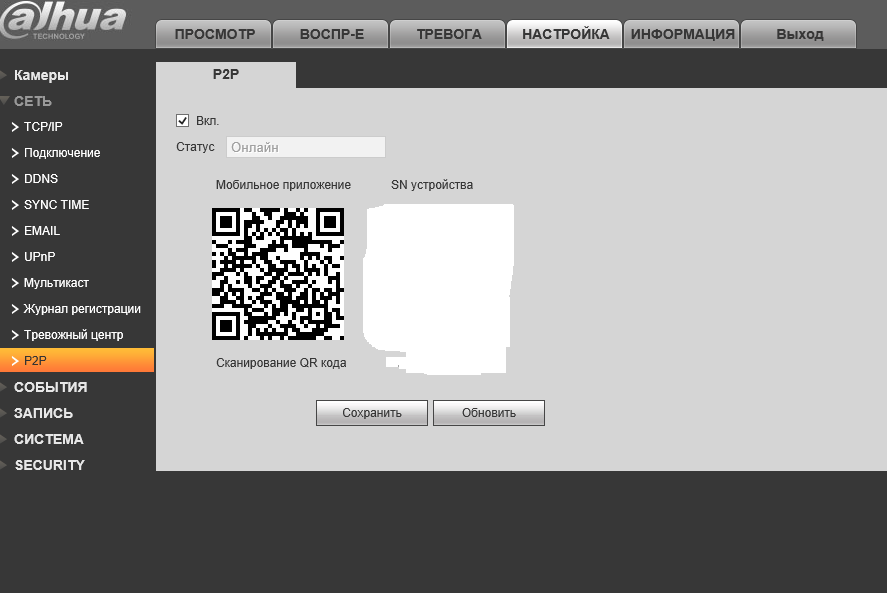
P2P Enabled (Dahua Device Only)
| Interface | Image |
|---|---|
| WebUI | 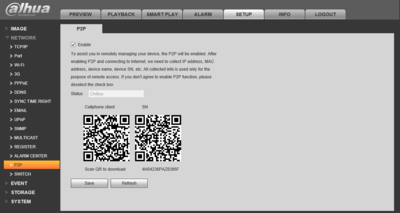
|
| SystemUI | 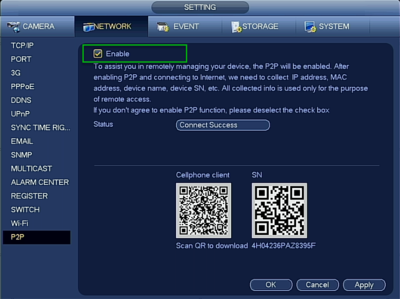
|
DHCP Enabled
| Interface | Image |
|---|---|
| WebUI | 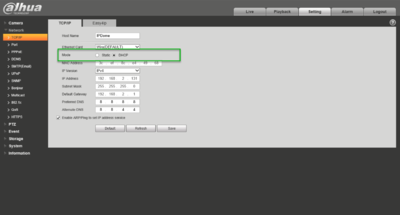
|
| SystemUI | 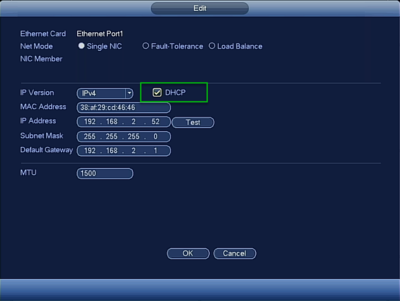
|
DNS 1 = 8.8.8.8
| Interface | Image |
|---|---|
| WebUI | 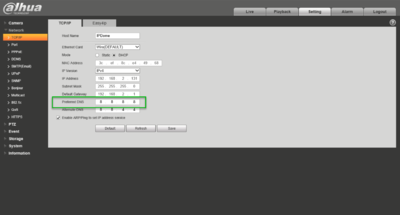
|
| SystemUI | 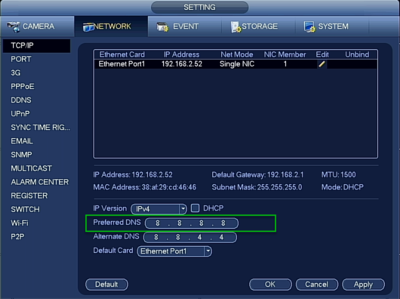
|
DNS 2 = 8.8.4.4
| Interface | Image |
|---|---|
| WebUI | 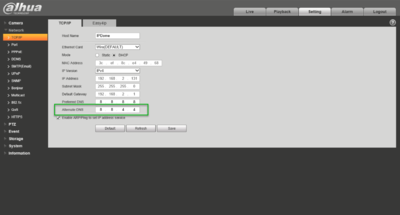
|
| SystemUI | 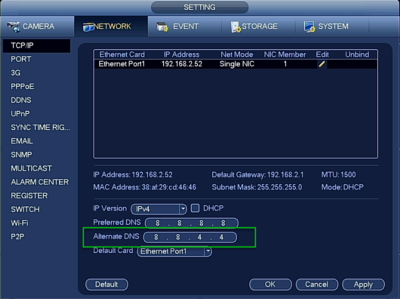
|
Ping Test:Success
SystemUI only.
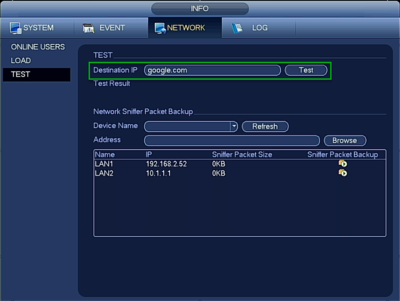
1. Navigate to Main Menu -> Info -> Network -> Test
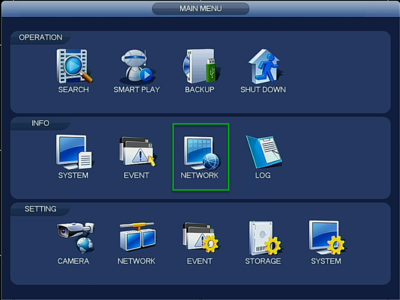
2. Input, «8.8.8.8» for Destination IP.
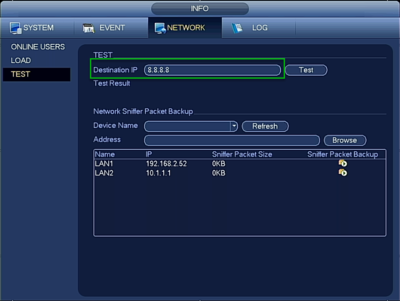
3. Click, «Test»
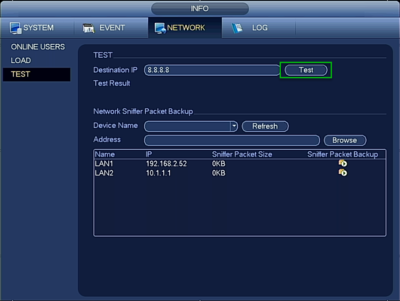
4. Repeat these steps, replace, «8.8.8.8» with, «google.com»
Ping Test:Results-Success
| Address | Status | Image |
|---|---|---|
| Google.com | Success | 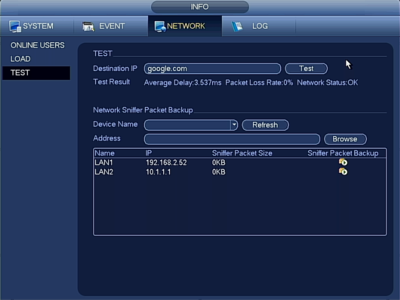
|
| 8.8.8.8 | Success | 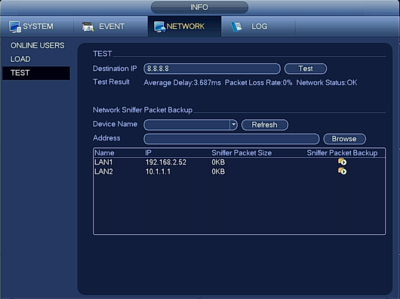
|
Ping Test:Results-Fail
| Address | Status | Image | Troubleshooting Tips |
|---|---|---|---|
| Google.com | Fail | 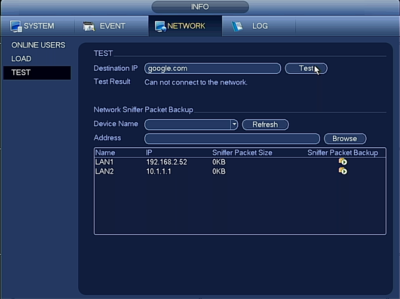
|
|
| 8.8.8.8 | Fail | 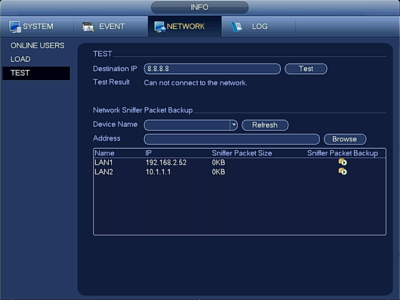
|
|
Default TCP Port
- 37777 for Dahua Device
- 35000 for FLIR device
Confirm All of the Above, Then Reboot
Reboot the recorder or camera after confirming all the above to be true
Network Sniffer Packet Backup New GUI
This feature is available at the SystemUI only.
Prerequisites
- USB drive, formatted to FAT32
- Dahua Recorder, connected to a network
Video Example
Instructions
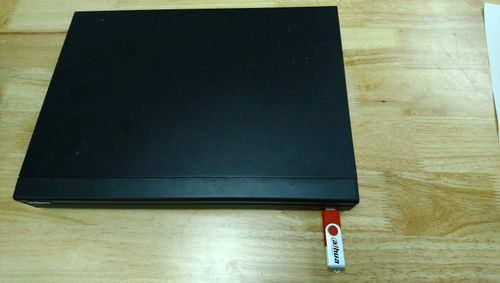
1. Insert a USB drive (FAT32 format) into the device. Most models of Dahua recorders will have a USB port on the front and rear of the unit, either can be used.
2. From the Main Menu go to Network
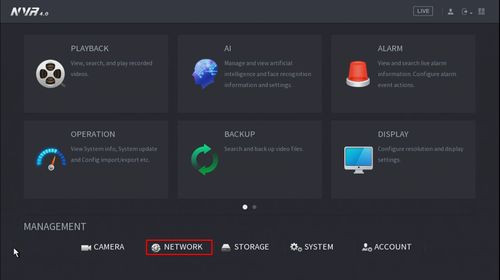
3. Click P2P
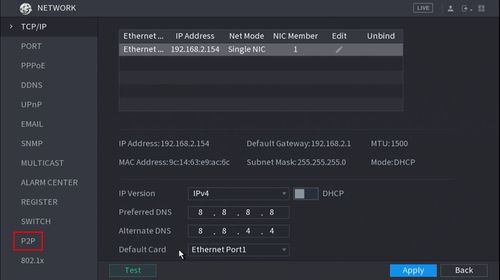
4. Click to disable the P2P feature
Click Apply
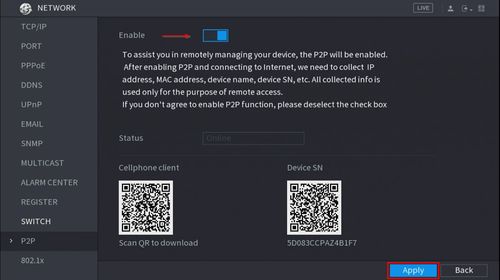
5. Return to the Main Menu
Click Operation
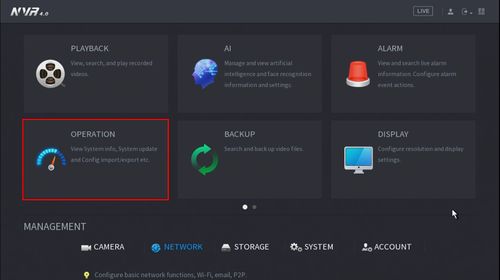
6. Click Network
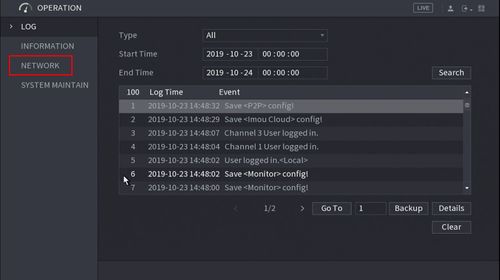
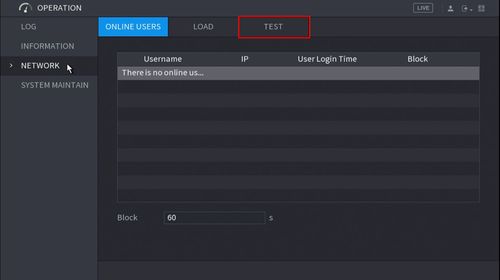
7. Click Test
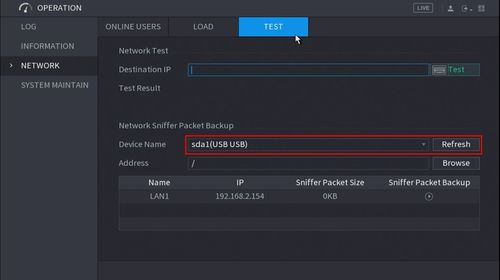
8. Confirm the USB drive is detected, under Device Name
Click ‘Refresh’ if you do not see the device in the drop-down box
9. Click ‘Sniffer Packet Backup’ next to the appropriate NIC card to begin the backup
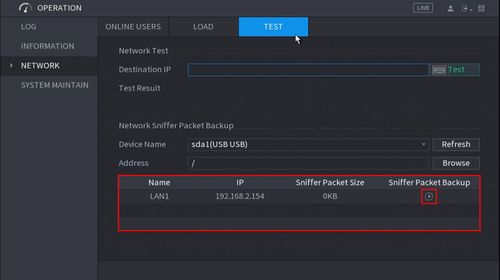
10. The icon will change once the backup has begun
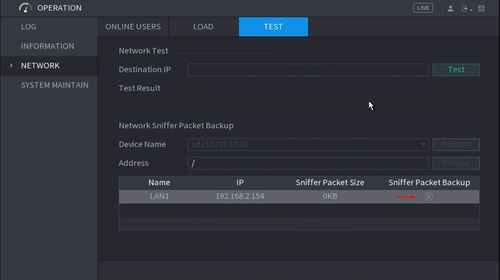
11. Return to the P2P menu
From Main Menu click Network

12. Click P2P
Click to enable the P2P service then click Apply
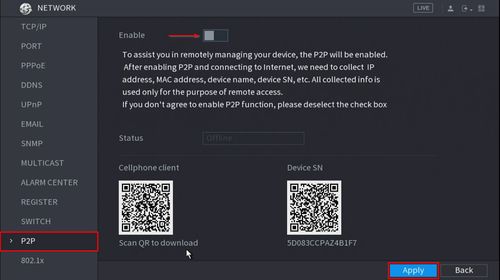
13. Return to the Main Menu
Click Operation
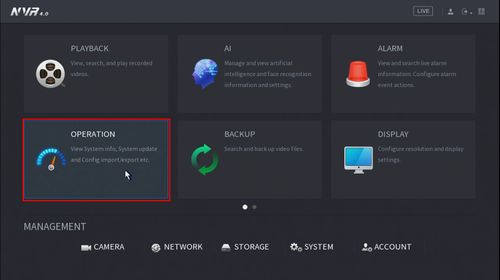
14. Click the Pause button under ‘Sniffer Packet Backup’
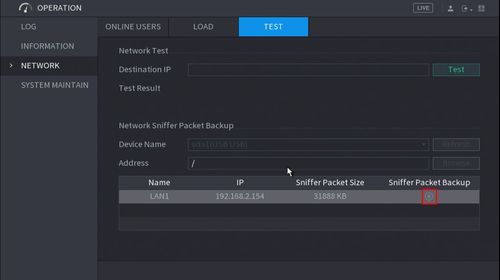
15. Remove the USB drive from the recorder and connect it to a PC
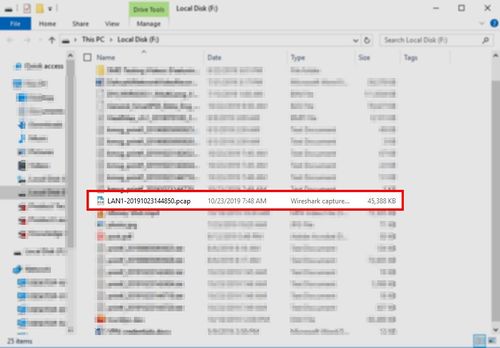
You should have one or several *.PCAP files. Please email these files to your Technical Support Representative for further analysis.
-
#1
Доброго времени суток!
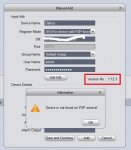
Камера на тесте на работе (инет закрыт, CentOS, Squid), на телефоне android в приложении все добавилось по SN и все робит wi-fi и 4G. Потом будет белый ip, SmartPSS пробовал разный, результат тот же) в чем трабл?
Всем Бобра и Мира!!!
-
#2
Инет закрыт?
Староватый SmartPSS и возможно и ответ такой.
-
#3
Инет закрыт?
Староватый SmartPSS и возможно и ответ такой.
Инет имелось ввиду, прокси стоит и все закрыто. По версии ставил и последнюю V2.003.0000004.0.R.201021, те же яйца вид с боку!) На андроид то P2P все кажет!)))
-
#4
Инет имелось ввиду, прокси стоит и все закрыто. По версии ставил и последнюю V2.003.0000004.0.R.201021, те же яйца вид с боку!) На андроид то P2P все кажет!)))
Давай серийник, посмотрим
-
#5
Либо выключено, либо не в сети.
-
#6
Либо выключено, либо не в сети.
Последнее редактирование: 25.01.2022
-
#7
Модель камеры версия прошивки ? На подобное последний раз попадал года полтора назад. Решил прошивкой — в свежей версии пофиксили мою проблему.
-
#8
китай), прошивки up не будет
-
#9
китай), прошивки up не будет
IPC-HFW4433F-ZSA
System Version2.621.0000.28.R, Build Date: 2018-11-10
Она просто не туда смотрит
-
#10
IPC-HFW4433F-ZSA
System Version2.621.0000.28.R, Build Date: 2018-11-10Она просто не туда смотрит
на велотренажер)
-
#11
на велотренажер)

Интересная была задача
Подразделы видеонаблюдения:
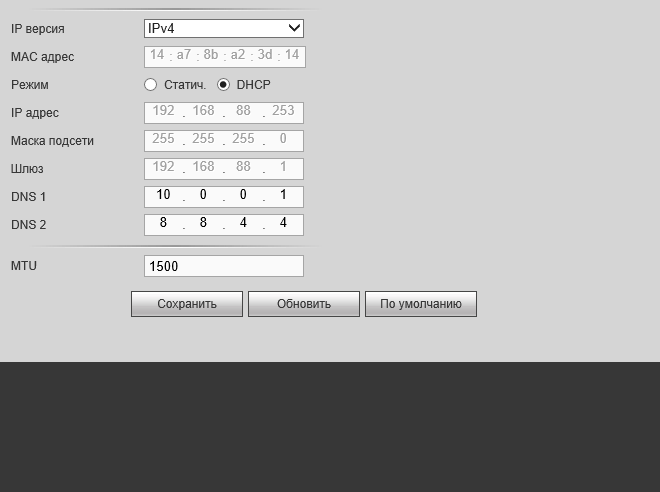
И так у вас видеорегистратор Dahua и модем Yota с каким-то роутером. В данном случае производитель роутера не важен. Вы всё красиво смонтировали, добрались до подключения телефона или компьютера к вашему видеорегистратору и обнаруживаете в админке(настройки) Dahua, что статус P2P у вас оффлайн. Хотя интернет работает и есть, звонок в техподдержку йоты вам не помогает. Добавлю больше, в ходе тестирования и диагностики данной проблемы, при подключении к другому провайдеру P2P сервис сразу становится в статус онлайн. Что же делать? Оказалось всё просто, проблема с DNS серверами, тоесть Yota, частично блокирует публичные днс сервера. В моем случае были прописаны гугловские днс сервера, поэтому к примеру днс сервера яндекса возможно работают, надо проверять.
И теперь, чтобы заработал P2P достаточно в DHCP сервере вашего роутера или сразу в настройках видеорегистратора указать днс сервер Yota 10.0.0.1
После чего P2P практически мгновенно начинает работать и появляется статус онлайн!
Остаётся подключить на телефоне или компьютере ваш видеорегистратор. Удачи!
PS: Предполагаю, что данный опыт может пригодиться и с другими производителями видеонаблюдения.
- Vkontakte
- Telegram
- RSS-лента
- #Видеорегистраторы
- #Диагностика
16 Июля 2019
Интересно почитать
how to troubleshoot P2P offline status
P2P Troubleshooting Checklist
P2P Enabled (dahua Device Only)
| Interface | Image |
|---|---|
| WebUI |  |
| SystemUI |  |
DHCP Enabled
| Interface | Image |
|---|---|
| WebUI |  |
| SystemUI |  |
DNS 1 = 8.8.8.8
| Interface | Image |
|---|---|
| WebUI |  |
| SystemUI |  |
DNS 2 = 8.8.4.4
| Interface | Image |
|---|---|
| WebUI |  |
| SystemUI |  |
Ping Test:Success
SystemUI only.
1. Navigate to Main Menu -> Info -> Network -> Test
2. Input, “8.8.8.8” for Destination IP.
3. Click, “Test”
4. Repeat these steps, replace, “8.8.8.8” with, “google.com”
Ping Test:Results-Success
| Address | Status | Image |
|---|---|---|
| Google.com | Success |  |
| 8.8.8.8 | Success |  |
Ping Test:Results-Fail
| Address | Status | Image | Troubleshooting Tips |
|---|---|---|---|
| Google.com | Fail |  |
|
| 8.8.8.8 | Fail |  |
|
default TCP Port
- 37777 for Dahua Device
- 35000 for flir device
Confirm All of the Above, Then Reboot
Reboot the recorder or camera after confirming all the above to be true
Network Sniffer Packet Backup New GUI
This feature is available at the SystemUI only.
Prerequisites
- USB drive, formatted to FAT32
- Dahua Recorder, connected to a network
video Example
instructions
1. Insert a USB drive (FAT32 format) into the device. Most models of Dahua recorders will have a USB port on the front and rear of the unit, either can be used.
2. From the Main Menu go to Network
3. Click P2P
4. Click to disable the P2P feature
Click Apply
5. Return to the Main Menu
Click Operation
6. Click Network
7. Click Test
8. Confirm the USB drive is detected, under Device Name
Click ‘Refresh’ if you do not see the device in the drop-down box
9. Click ‘Sniffer Packet Backup’ next to the appropriate NIC card to begin the backup
10. The icon will change once the backup has begun
11. Return to the P2P menu
From Main Menu click Network
12. Click P2P
Click to enable the P2P service then click Apply
13. Return to the Main Menu
Click Operation
14. Click the Pause button under ‘Sniffer Packet Backup’
15. Remove the USB drive from the recorder and connect it to a PC
You should have one or several *.PCAP files. Please email these files to your technical support Representative for further analysis.
Tags: Camera, ConfigTool, Configure, dahua, default, Device, DHCP, email, Feature, FLIR, guide, How to, how to setup, installation, Instructions, Management, Network, Recorder, recorders, Setup, setup guide, Software, Technical Support

