

ОФИЦИАЛЬНЫЙ ДИСТРИБЬЮТОР EFAS В РОССИИ
 8(987) 215-22-22

Понедельник — Пятница
c 9:00 до 17:00 по Москве
Идет поиск ждите … 
Тахограф Efas ошибка SrvID103
Описание: Внутренний аппаратный сбой (ошибочная контрольная сумма программы памяти)

|
EFAS 4 на Scania R480 — SrvId:S103 |
||||||
|
||||||
|
||||||
|
||||||
|
||||||
|
||||||
|
||||||
|
||||||
|
||||||
|
||||||
|
||||||
|
||||||
|
||||||
|
||||||
|


- Page 1
Digital Tachograph EFAS User’s Guide © 2008 by EFKON AG… - Page 2
© 2008 by EFKON AG… - Page 3
Copyright No specifications in this user’s guide may be changed without the written permission of EFKON AG. EFKON AG does not assume liability for this user’s guide. Use and reproduction are only permitted in accordance with the contractual stipulations. No part of this guide may be reproduced, stored in a retrieval system or translated into another language without the express written permission of EFKON AG. -
Page 4: Table Of Contents
Symbols ….. . 7 3 Operation of EFAS – Driver and Co-Driver ..24 Legal Requirements .
- Page 5
7.2.3 Keyboard Brightness… .65 4 Operation of EFAS – Workshop ….52 7.2.4 Contrast …..66 Performing a Test Run . - Page 6
15 Definitions ……. 121 (EFAS option) ……80 Other Error Messages . -
Page 7: Introduction
• General (chapter 1.3 on page 10) – describes the use of Introduction Digital Tachograph cards and printouts and the settings This is the user’s guide for the Digital Tachograph EFAS. automatically made by the Digital Tachograph EFAS. The Digital Tachograph EFAS logs the work periods, driving…
-
Page 8: Symbols
• “Technical Data” (chapter 14 on page 119) Texts which appear on the alpha- M1:complete • “Definitions” (chapter 15 on page 121) numeric display of EFAS are manual inputs? • «Index» (on page 123) printed in this font. Actions appear as a bold heading…
-
Page 9: Legal Requirements
• the revolution ratio has changed, • the registration number of the vehicle changes, Caution • the UTC time of the EFAS deviates by more than It is prohibited to falsify, disable or delete recordings of the 20 minutes from the correct UTC time.
-
Page 10: Regulations For Drivers
Digital Tachograph must be inspected at least every two • Always notify the responsible authorities of the loss of years. Ensure that the installation label is updated follow- your driver card immediately. ing each inspection. EFAS Introduction…
-
Page 11: Standards And Guidelines
Standards and Guidelines EEC on the approximation of the laws of the Member States relating to the type-approval of motor vehicles and EFAS fulfills the following standards and guidelines: their trailersText with EEA relevance. • EN 60079-0 : 05.2007 • Commission Regulation (EC) No 1360/2002 of 13 June…
-
Page 12: General
Do not use any abrasive cleaning materials to clean EFAS. the vehicle unit and on the driver card. Under no circumstances should you use solvents such as petrol, acetone, methylated spirits or alcohol.
-
Page 13: Handling Printouts
To facilitate the logging of driver activities, the Digital Tacho- soiled. Do not use solvents or abrasives. graph EFAS makes a number of automatic settings. • The tachograph cards can only be withdrawn by pressing • Whenever the vehicle starts, the Digital Tachograph auto- keys 1 or 2.
-
Page 14: Time Zones
UTC time. In the summer, two hours have to be deducted from local time to calculate UTC time. If you have set the time zone correctly for EFAS, the Digital Tachograph displays the local time on all standard displays during the journey.
-
Page 15: Display And Controls
Unknown Company mode: COMPANY Display Elements of EFAS Abb. 2-1 Controller mode: CONTROL The Digital Tachograph EFAS features the following display Workshop/test station elements: mode: CALIBRATION 1. Red LED to display the operating mode Manufacturer 2. Alphanumeric display Driver slot An additional buzzer is also installed.
-
Page 16: Symbol Combinations
Place ing Speed» on page 47 Manual entry of driver activities Register company on Digital Tachograph Security Deregister company from Digital Tachoraph Speed > No card — — — Total, summary Card valid to Daily Weekly EFAS Display and Controls…
-
Page 17: Led Display
2.1.3 LED Display 2.2.1 Meaning of the Acoustic Signals The red LED indicates different EFAS states. The table Tone Sequence Meaning below explains the meaning of the display. 1x long, 2x short Displayed warning to be Display Meaning acknowledged. The LED flashes upon activation 2x short, 1x long Failure;…
-
Page 18: Controls
8. Key OK 9. Key 2 for the co-driver 10. Card slot for the co-driver’s tachograph card The Digital Tachograph EFAS is activated by turning on the ignition, by motion pulses, by inserting a control device card or by pressing any key.
-
Page 19: Efas
Following activities are indicated by the Digital Tachograph After the vehicle starts to move the Digital Tachograph EFAS: EFAS switches after a short time automatically for the driver to driving time and for the co-driver to availability . If the…
-
Page 20: Modes Of Operation
( * ) In this state, the Digital Tachograph uses the tachograph card only in slot 1. In the inverse fields EFAS reports a card conflict. EFAS may not be able to select the desired operation mode. Remove the card which caused the card conflict. Select the desired operation mode with card combinations, which are not displayed in inverse in the table above.
-
Page 21: Displays
• Current local time • Symbol for the current mode EFAS displays the time in the standard display as local time. In all other cases the UTC time is displayed. The flashing colon indicates that local time is displayed. There is no flashing colon when UTC time is displayed.
- Page 22
• Total driving time in the last two weeks • Symbol for current activity of co-driver • Current duration of activity of co-driver • Current local time • Symbol for current mode (in this case OPERATIONAL) EFAS Display and Controls… - Page 23
The card symbol is hidden when no card is inserted. • Symbol for co-driver activity • The second line displays the following information: • Current speed in km/h (optionally also in mph) • Current local time • Symbol for the current mode Display and Controls EFAS… - Page 24
• Currently set time zone. Further information on the time zone can be found in the section «Time Zone» on page 69. • Symbol for the current mode For more information on the screen displays, see the section «Driving» on page 26. EFAS Display and Controls… -
Page 25: Operation Of Efas — Driver And Co-Driver
• Inserting a Reel of Paper Operation of EFAS – Driver and Co-Driver • Clearing a Paper Jam This section describes the use of EFAS for drivers and co- • Monitoring Speed drivers. • Resetting the Trip Meter Before reading this section, familiarise yourself with the general information in the section «Introduction»…
-
Page 26: Before Starting
Before Starting The display shows the question Complete Activities? Enter your EFAS login before starting. You may be asked to complete all your activities since the last card withdrawal. Note 3. If you do not want to complete your activities, select…
-
Page 27: Driving
Current activity and duration of this activity for driver utes, the Digital Tachograph will deactivate the automatic and co-driver change from driving time to work period. Use cursor keys to change to one of the above screens. Operation of EFAS – Driver and Co-Driver EFAS…
-
Page 28: Co-Driver Taking Over
The list of driver activities is printed. The driver card is drawn of the driver card. ejected. If you do not want to end the shift, use the cursor and press OK. Your driver keys to select EFAS Operation of EFAS – Driver and Co-Driver…
-
Page 29: Stopping, Withdrawing The Driver Card
If the special condition OUT (Digital Tachograph Not Required) is The list of driver activities will then be printed. If your active, the condition is automatically switched off after with- drawn of the driver card. Operation of EFAS – Driver and Co-Driver EFAS…
-
Page 30: Continuing A Shift
This is the only way the Digital Tachograph recognises that you want to continue a shift. Note When completing the activities, all times must be specified as UTC times. EFAS Operation of EFAS – Driver and Co-Driver…
- Page 31
Activities?“. The symbol for your activity is displayed on the left-hand side of the first line. The symbols are: Availability Rest period Work period 6. Press OK to acknowledge the selected activity. Operation of EFAS – Driver and Co-Driver EFAS… - Page 32
Digital Tachograph automatically changes to work period for the driver. If the stop is under 2 minutes, the Digital Tachograph will deactivate the automatic change from driving time to work period. EFAS Operation of EFAS – Driver and Co-Driver… -
Page 33: Continuing An Interrupted Shift
The date and the time (UTC) of the last card with- Example: drawal are displayed. Complete Activities The display shows „Complete Activities?“. Note When completing your activities, all times must be specified as UTC time. Operation of EFAS – Driver and Co-Driver EFAS…
- Page 34
5. Use the cursor keys to select your activity. The symbol for your activity is displayed on the left- hand side of the first line. The meaning of the symbols are: Availability Rest period Work period EFAS Operation of EFAS – Driver and Co-Driver… - Page 35
13. Use the cursor keys to select the country where your current shift starts and press OK. When selecting Spain as country, the region must also be selected. Operation of EFAS – Driver and Co-Driver EFAS… -
Page 36: Acknowledging Events Or Errors
The SrvIDs can be found in the section «Messages» on page 75. Note A list of EFAS warnings and messages is given in the If a Digital Tachograph or motion sensor error occurs, a SrvID may section «Messages» on page 75.
-
Page 37: Setting The Local Time
Note For more information on using the menus, see the section «General Settings» on page 62. 4. Press OK. The new time zone will be stored. Operation of EFAS – Driver and Co-Driver EFAS…
-
Page 38: Setting A Ferry/Train Crossing
3 seconds. Setting a Ferry/Train Crossing 1. Park your vehicle on the train or ferry. 2. Press OK. The main menu is displayed. 3. Select Inputs 4. Press OK. EFAS Operation of EFAS – Driver and Co-Driver…
-
Page 39: Digital Tachograph Not Required
The display shows and the local time. OUT End? 2. Select Inputs 3. Press OK. 4. Select Start 2. Press OK. The condition “Digital Tachograph Not Required” is deactivated. Operation of EFAS – Driver and Co-Driver EFAS…
-
Page 40: Displaying Data (Print Preview)
2. Press key once again to hide this additional information. Use the following keys to move around the displayed data: Next line Previous line Return to menu Scrolling and/or stop scrolling EFAS Operation of EFAS – Driver and Co-Driver…
- Page 41
10. Use the cursor keys to select if you want to print the displayed data. Select if you want to return to the menu without printing the data. 11. Press OK. Operation of EFAS – Driver and Co-Driver EFAS… -
Page 42: Printing Data
«Messages» on page 75. 4. Use the cursor keys to select the required Note data and press OK. Data cannot be printed when driving. Any printout is cancelled when the vehicle starts moving. EFAS Operation of EFAS – Driver and Co-Driver…
-
Page 43: Cancelling A Printout
6. Use the cursor keys to select the required date and press OK. Printing is aborted. 7. The stored data is printed. Note Sign the printouts and keep them in a dark place. Operation of EFAS – Driver and Co-Driver EFAS…
-
Page 44: Feed Paper
Example: Note Only use the approved thermal printer paper reels for Digital Tachographs from manufactures. Note Treat the printing module carefully. Avoid soiling. Note Use a brush to remove possible soiling. EFAS Operation of EFAS – Driver and Co-Driver…
- Page 45
The printing module slides out of the Digital Tacho- 5. Hold the printing module with both hands and using graph. both thumbs push the front panel forwards. 3. Pull the printing module completely out of the Digital Tachograph. Operation of EFAS – Driver and Co-Driver EFAS… - Page 46
Pay attention to paper box. the direction of the reel. Reel direction marks appear on the sides of the printing module. The printed reverse side of the paper must face upwards. EFAS Operation of EFAS – Driver and Co-Driver… -
Page 47: Clearing A Paper Jam
Please observe the applicable national regulations! Reel of Paper» on page 43. Clearing a Paper Jam 1. Remove the printing module. For instructions, see the section «Inserting a Reel of Paper» on page 43. Operation of EFAS – Driver and Co-Driver EFAS…
-
Page 48: Monitoring Speed
3.18 Monitoring Speed Besides statutory monitoring of the highest permissible vehicle speed, EFAS also enables monitoring of an individ- ually programmable speed limit. To activate the speed limit, proceed as follows. 1. Use cursor keys to activate the speed display.
-
Page 49: Resetting The Trip Meter
3. Press OK to reset the value to zero. In order to secure your driver card data, you can transfer the data to your company´s server. This function is only available, when the EFAS is connected to the RDD (Remote Data Download). Note The initiation of transfer of driver card data via RDD is only per- mitted when the vehicle is stationary.
-
Page 50: Remote Data Transmission Of Data Stored In The Mass Memory
4. If there´s a driver card in each of the card reader slots, 2 years by the company server. This function is only you have to choose which card has to be used for available, when EFAS is connected to the RDD (Remote data transmission. Data Download).
- Page 51
Currently no data transfer display the data transfer status. has been initiated and cur- rently no data is being trans- ferred. The data transfer equipment is ready is transfer data. Operation of EFAS – Driver and Co-Driver EFAS… - Page 52
(driver card reader slot / card reader slot (2 Co-driver). slot 1) to RDD is active. The transfer status of the data (driver card reader slot / slot 1) is not known. EFAS Operation of EFAS – Driver and Co-Driver… -
Page 53: Operation Of Efas — Workshop
This section describes how to enter the PIN after inserting on page 24. a workshop card. For more information about making entries with the workshop card, refer to the EFAS Workshop Entering the PIN Manual. This section is composed of the following sections: Note •…
-
Page 54: Output Of Warnings In Calibration Mode
19), storage of some EFAS warnings is suppressed. These warnings are displayed for a very short time on the EFAS display. For the list of SrvIDs, refer to the EFAS Workshop Guide. EFAS Operation of EFAS – Workshop…
-
Page 55: Operation Of Efas — Company Representatives
«Display ister your company on the Digital Tachograph. By doing so, and Controls» on page 14. For a summary of all EFAS mes- you have access to data that is stored as of this time (in sages, see the section «Messages»…
- Page 56
There is a different card in the Digital Tachograph, i.e. automatic registration is not possible. if another company is currently registered, the display shows the following screen Note If there is no entry within the next 30 seconds, registration will be cancelled. EFAS Operation of EFAS – Company Representatives… -
Page 57: Manual Registration Of Company
However it is important that your company was or is regis- tered on the Digital Tachograph EFAS. For information about registering on the Digital Tachograph, see the section «Automatic Registration of Company» on page 54 and the section «Activating the Company Lock»…
-
Page 58: Automatic Setting Of Activities After Ignition On/Off
Withdrawing Company Card 1. Press keys 1 or 2 for longer than 1.5 seconds to with- draw the card either from slot 1 or 2. The card will be ejected. EFAS Operation of EFAS – Company Representatives…
-
Page 59: Operation Of Efas — Controlling Bodies
1. Turn on the ignition. and the displays and controls in the section «Display and Controls» on page 14. For an overview of all EFAS 2. Make sure that no card is inserted or only one driver messages, see the section «Messages» on page 75 and for card.
- Page 60
OK Stop and/or start scrolling Displaying Stored Data 1. Make sure your control card is inserted into one of the card slots. The Digital Tachograph is then in the mode 6. The stored data is displayed. “CONTROL”. EFAS Operation of EFAS – Controlling Bodies… -
Page 61: Printing Of Data
• Daily reports from driver card The main menu is displayed. • Daily reports from the Digital Tachograph • Events and failures stored on the driver card • Events and failures stored in the Digital Tachograph • Speeding Operation of EFAS – Controlling Bodies EFAS…
-
Page 62: Downloading Stored Data
Note press OK. If during a download you insert a control card into a cardreader slot, the card will only be read by EFAS, after the download has completed. Note Do not disconnect the data connection to the Digital Tachograph 6.
-
Page 63: General Settings
Working with the menus 1. Press OK. This section describes how to change the general settings The main menu is displayed. of the Digital Tachograph EFAS. The settings comprise: 2. Use cursor keys to select the required menu. • Printing Press OK to acknowledge your choice.
-
Page 64: Printing
Time difference to UTC is 1 hours + DST (+1 hour for DST) = 2 hours. If the setting “Local Time” is chosen, a corresponding note will appear on the printout. However, this printout is not valid for a controlling body! EFAS General Settings…
-
Page 65: Display
However you can select the lanuage manually. Note The following national languages are available in EFAS: When a tachograph card is inserted or withdrawn, the language Deutsch English Français…
-
Page 66: Brightness
Brightness 7.2.3 Keyboard Brightness If your EFAS is not connected to the central brightness If your EFAS is not connected to the central brightness control for the dashboard lighting of your vehicle, the control for the dashboard lighting of your vehicle, the key- display brightness for day and night can be set via the board brightness for day and night can be set via the menu.
-
Page 67: Contrast
The current distance unit setting is displayed. 2. Use cursor keys to select the required contrast. Press OK. 2. Use cursor keys to select the required unit. The new contrast setting is stored. Press OK. The new unit setting is stored. General Settings EFAS…
-
Page 68: Tones
Settings ting. Press OK. → Tones Key Click The new setting is stored. The current key click setting is displayed. 2. Use cursor keys to select the required set- ting. Press OK. The new setting is stored. EFAS General Settings…
-
Page 69: Warning Tone
3. Press OK to store the correction. • Time setting The new setting is stored. • Time zone • Daylight saving time Press to cancel the correction. • UTC time The menu is displayed. • Date format General Settings EFAS…
-
Page 70: Time Zone
• AUTO – the Digital Tachograph changes automatically card. between daylight saving time and standard time on the last Sunday in March and on the last Sunday in October. • OFF – Standard time is permanently on EFAS General Settings…
-
Page 71: Date Format
The current setting for the date format is displayed. displayed. 2. Use cursor keys to select the required 2. Use cursor keys to access the required line. setting. Press OK. 3. Press to return to the menu. The new setting is stored. General Settings EFAS…
-
Page 72: Activating The Company Lock
“Activity Ignition”. This is set automatically after the This function is used to deactivate the company lock. ignition is turned on/off. Calling up this menu also EFAS General Settings…
-
Page 73: Warning
(see next section) to avoid your speeding being stored in the 4. Press OK to adopt the activity after ignition ON. Digital Tachograph and on the driver card. General Settings EFAS…
-
Page 74: Displaying Card Information
The name of the cardholder starts scrolling along the display if the name is too long for the display line. 3. Press OK to adopt your entry. 2. Press OK or to return to the menu. EFAS General Settings…
-
Page 75: Displaying The Device Data
Sym. Card status • Software creation date and time No card in card slot • Serial number of EFAS Data error on driver card • Production date Driver card — start of validity period not yet reached or expiry date exceeded…
-
Page 76: Messages
Messages The Digital Tachograph EFAS outputs different messages and warnings. The warnings are often accompanied by bleeps. This section provides a list of the most important messages and their meaning, ordered by subject. General Messages Display Meaning The Digital Tachograph is refusing to eject a card. The card can only be ejected when the vehicle has stopped and the display described in the section «Display and Controls»…
-
Page 77: Printout Messages
You removed the printer module from the Digital Tachograph. This terminates printing. Remove the printer module only when the display shows Insert paper. The vehicle started moving while printing was underway (here: daily reports from card). Printing is terminated. Stop the vehicle and restart printing. Messages EFAS…
-
Page 78: Event Messages
The power supply to the Digital Tachograph was interrupted. Have the Digital Tacho- graph checked if this message occurs repeatedly. 22, 23, A data error occurred when transmitting data from the distance and speed sensor. 24, 25, Have the Digital Tachograph checked if this message occurs repeatedly. 84, 101 EFAS Messages…
-
Page 79: Error Messages
Several SrvIDs may be displayed in relation to this event. Have your Digital Tachograph checked by an authorised workshop if this event is displayed. Inserted cards which EFAS does not recognise as tachograph cards will be ejected automatically. Error Messages Events are always marked “…
-
Page 80: Input Error Messages
Please remove this card and execute the lock-in via the menu. In calibration mode an attempt is made to set the date and time to a time outside of the range of 1.1.2007 to 31.12.2099. EFAS Messages…
-
Page 81: Messages Over Remote Data Transmission (Efas Option)
Messages over Remote Data Transmission (EFAS option) Messages over data transfer are indicated with the symbol Information about indicators which are not listed below can be found on the internet address www.intellic.eu. Display Meaning The data transfer with the RDD data transfer unit is faulty.
-
Page 82: Other Error Messages
The Digital Tachograph determines a serious internal error. In this case the logging of your driver activities must take place handwritten, see chapter «Completing Activities (Handwritten Form)» on page 46. Please see to it that the Digital Tachograph will be examined by a certified workshop as soon as possible. EFAS Messages…
-
Page 83: Printout Examples
(on page 100 ) 9.7 Speed profile — km/h (on page 103 ) (EFAS option) 9.8 Engine speed profiles — RPM (on page 105 ) (EFAS option) 9.9 D1/D2 status changes — D1/D2 (on page 107 ) (EFAS option) The numbers on the right-hand side are references to regulation (EC) No. 1360/2002.
-
Page 84: Driver Activities From The Card Daily Printout
GB/12345678901234 1 1 Validity date of card 14/05/2008 Start of section: vehicle identification ———— ———— Vehicle identification number XAD1117483A Country where the vehicle is registered/licence plate number D /B-M 4711 Start of section: Digital Tachograph ID ———— ———— EFAS Printout Examples 83…
- Page 85
Manufacturer name EFKON AG Part number EP000210 Start of section: last calibration of Digital Tachograph ———— ———— Name of workshop Schraub & Co. /12345678901234 1 1 6 Number of workshop card Date of last calibration 05/03/2007 Start of section: last inspection (by controller) - Page 86
Start of section: event 2; data record events/errors ——————— 12.4 12.4 12.4 12.4 Start of section: event 3; data record events/errors ——————— 12.4 12.4 12.4 13.1 Start of section for the last 5 events and errors in Digital Tachograph ————! ———- EFAS Printout Examples 85… - Page 87
Start of section: event 3; data record events/errors ——————— 13.4 13.4 13.4 Start of section: handwritten specifications ———————— 21.1 Place of inspection ….. 21.2 Signature of controller (if required) ….. 21.5 Signature of driver (if required) ….. Printout Examples EFAS… -
Page 88: Driver Activities From The Vehicle Unit Daily Printout
Country where the vehicle is registered D /B-M 4711 Start of section: Digital Tachograph ID ———— ———— Name of Digital Tachograph manufacturer EFKON AG Part number EP000210 Start of section: last calibration of Digital Tachograph ———— ———— Name of workshop; last inspection / calibration…
- Page 89
TEAM; blanks with ONE MAN MODE) 08:54 12:10 04h05 10.3 (Rest periods of at least 1 hour are marked with an asterisk.) 12:11 13:15 01h05 10.3a (Rest periods of at least 1 hour are marked with an asterisk.) 13:16 ——OUT—— Printout Examples EFAS… - Page 90
———————— 11.3 Surname of driver Farber 11.3 First name of driver Hans 11.3 Card number of driver I/147258369 11.4 Place of start or end of working day 06:19 IRL 11.4 km reading 1 495 420 km EFAS Printout Examples 89… - Page 91
Card ID of card holder I/836254363 Start of section: handwritten specifications ———————— 21.1 Place of inspection ….21.2 Signature of controller (if required) ….. 21.3 Start time ….21.4 End time ….21.5 Signature of driver ….. End of printout Printout Examples EFAS… -
Page 92: Events And Errors From Driver Card
Validity date of card 14/05/2008 Start of section: vehicle ID ———— ———— Vehicle ID XAD1117483A Country where the vehicle is registered/licence plate number D /B-M 4711 12.2 Start of section for all logged events on card ————! ———- EFAS Printout Examples 91…
- Page 93
Country where the vehicle is registered/licence plate number D/B-M 4711 Start of section: handwritten specifications ———————— 21.1 Place of inspection ….. 21.2 Signature of controller (if required) ….. 21.5 Signature of driver (if required) ….. End of printout Printout Examples EFAS… -
Page 94: Errors
Sensor malfunction Over speeding Internal Digital Tachograph >> (4), (5), (6) (0), (6) error Interruption of power supply (1), (2), (7) Motion data error (1), (2), (7) Security violation Time adjustment (by workshop) Over speeding control > EFAS Printout Examples 93…
- Page 95
10 days of occurrence one of the 5 most serious events within the last 365 days the first event or the first error after the last calibration an active event or a permanent error Printout Examples EFAS… -
Page 96: Events And Errors From Vehicle Unit
Pictogram event, data record object, start date/time No card available — — — 13.3 Start of section: event data records ——————— 13.4 Pictograms event, data record object, date/time start of card identifi- >> (4) 06/07/2007 15:45 cation EFAS Printout Examples 95…
- Page 97
Start of section for all logged and permanent error data records in the ———— ———— vehicle unit 13.4 Error data records Start of section: handwritten specifications ———————— 21.1 Place of inspection (handwritten) ….21.2 Signature of controller ….. 21.5 Signature of driver ….. End of printout Printout Examples EFAS… -
Page 98: Technical Data
Vehicle identification number XAD1117483A Country where the vehicle is registered/licence plate number /B-M 4711 Start of section: vehicle unit ID ———— ———— Manufacturer name EFKON AG Manufacturer address 8045 Graz, Austria Manufacturer part number EP000210 Design homologation number EFKON001 Serial number…
- Page 99
Old and new km reading 1 234 567 – 1 234 568 km Start of section: data records time setting ———— ———— 17.1 Old time 26/04/2007 14:59 17.1 New time 26/04/2006 14:02 17.1 Workshop which performed time setting Payman Ltd. Printout Examples EFAS… -
Page 100: Purpose Of Calibration
End of printout 9.5.1 Purpose of calibration Purpose of calibration Activation: Recording of calibration parameters known, at the moment of EFAS activation First installation: First calibration of EFAS after its activation Installation: First calibration of the VU in the current vehicle Periodic inspection.
-
Page 101: Over Speeding
Start of section: vehicle ID ———— ———— Vehicle identification number XAD1117483A Country where the vehicle is registered/licence plate number EG /B-M 4711 Start of section: speeding control details ———- >> ———- Date/time of last inspection > 21/02/2007 16:08 Printout Examples EFAS…
- Page 102
Maximum speed and average speed, no. of similar events of this day 95 km/h 93 km/h (0) 20.4 Surname of driver 20.4 First name of driver John 20.4 Card ID of driver EG /1357986422444 Start of section: handwritten specifications ———————— 21.1 Place of inspection ….EFAS Printout Examples 101… - Page 103
21.2 Signature of controller ….21.3 Start time ….21.4 End time ….21.5 Signature of driver ….End of printout Printout Examples EFAS… -
Page 104: Speed Profile
Speed profile EFAS stores up to 12 vehicle speed profile records for the last 28 calendar days (Device option). A record with a revolution profile is stored: • at 0:00 on each calendar day. • if a tachograph card ( only in driver slot ) is inserted or withdrawn.
- Page 105
Start time 26/04/2007 00:00 End time Start of power supply interruption of EFAS) 26/04/2007 10:20 Speed profile for above mentioned driver ——-km/h——— 0 <= v < 8 09h45 8 <= v < 16 00h05 112 <= v < 129 00h00 120 <= v <… -
Page 106: Engine Speed Profile
Engine speed profile EFAS stores up to 12 revolution profile records for the last 28 calendar days (Device option). A record with a revolution profile is stored: • at 0:00 on each calendar day. • if a tachograph card ( only in driver slot ) is inserted or withdrawn.
- Page 107
3500 <= n < 3750 00h00 3750 <= n < ..00h00 ———— ———— no card available — — — Start time End of power supply interruption of EFAS) 26/04/2007 11:35 End time 26/04/2007 20:10 ———RPM——— 0 <= n <… -
Page 108: D1/D2 Status Changes
D1/D2 status changes EFAS has two digital status inputs, the changes on inputs D1 and D2 can be chronologically recognized and stored (Device option). Start of printout Date and time at which the document is printed (time in UTC) 15/10/2007 15:15 (UTC)
- Page 109
End of printout Text which describes the use of the D1/D2 Status input signals. This text can be programmed by a workshop. Company lock which does not match the company card (see 3) in the card slot. Printout Examples EFAS… -
Page 110: Menu Structure
*1) Only available with versions of the unit that include speed profile, engine speed profile and monitoring of status ports D1 and D2. *2) Only available, if the remote download device RDD is connected. RDD is optional for EFAS. The menu items displayed depend on the inserted tachograph cards and the mode of EFAS.
- Page 111
The following figure shows the EFAS menu structure for remote download. Main menu Remote transm. send card data Status Configuration *3) — — — — — — — — — — — — — — PIN Input PUK input Change PIN… -
Page 112: Operating The Device In Explosive Areas
Service ID 1 or 2 or 3 appears. The 24V variant of the Digital Tachograph EFAS has also 3. Before entering an explosive area the service interface been designed for the use in dangerous goods trans- should be covered with the provided cover.
- Page 113
14. Care should be taken to plug in any connectors securely in order to avoid that the plug connectors do not come loose on their own. Danger EFAS must cool down for no less than 10 minutes before loading or unloading the vehicle. Use in Dangerous Goods Transporters EFAS… - Page 114
Mode of Operation Printer, printout Company mode Total, summary Sensor Control mode Tyre size Work mode Qualifiers Daily Vehicle, Vehicle unit Calibration mode Weekly Device not activated Two-weekly Special Conditions From or to Digital Tachograph not required Ferry/train crossing EFAS Symbol Overview… - Page 115
Printout technical data Driving Printout overspeed >> Driving time Printout speed profile km/h Driving time in one week Printout engine speed profile Driving time in two weeks Printout status changes of D1/D2 Daily driving time signals D1/D2 Symbol Overview EFAS… - Page 116
Interruption of power supply Input of place of start of Error in sensor working day Security violation Time setting in workshop Check of overspeed > Remote data transmission Remote data transmission Printaout init. data Driver card download EFAS Symbol Overview… -
Page 117: Nation & Region Codes, Time Zones
Bosnia and Herzegovina UTC+01 west UTC+05 Belarus UTC+02 east UTC+06 Switzerland UTC+01 Luxembourg UTC+01 Cyprus UTC+02 Lithuania UTC+01 Czech Republic UTC+01 Latvia UTC+01 Germany UTC+01 Malta UTC+01 Denmark UTC+01 Monaco UTC+01 Spain UTC+01 Moldova UTC+02 Nation & Region Codes, Time zones EFAS…
- Page 118
San Marino UTC+01 Russia Sweden UTC+01 Slovakia UTC+01 Slovenia UTC+01 Turkmenistan UTC+05 Turkey UTC+02 Ukraine UTC+02 Vatican City UTC+01 Yugoslavia (Serbia) UTC+01 Unknown European Community Rest of Europe Rest of the World EFAS Nation & Region Codes, Time zones 117… -
Page 119: List Of Region Codes For Spain
13.2 List of Region Codes for Spain Code Region Andalucía Aragón Asturias Cantabria Cataluña Castilla-León Castilla-La-Mancha Valencia Extremadura Galicia Baleares Canarias La Rioja Madrid Murcia Navarra País Vasco Nation & Region Codes, Time zones EFAS…
-
Page 120: Technical Data
Technical Data The table in this section contains the key technical data for the Digital Tachograph EFAS. Nominal-supply voltage 24 V 12 V Supply voltage range 18 V to 32 V 8 V to 16V Power input in operation with motion sensor supply typ.
- Page 121
SB-AA02, Fa. VITZRO CELL, 3,6 V, 1200 mAh, AA“ Typ 2 Primary Lithium Thionyl Chloride Battery (Li-SOCl SL750, Fa. TADIRAN BATTERIES, 3,6 V, 1100 mAh, Note The battery is only allowed to be changed by a authorized workshop. Technical Data EFAS… -
Page 122: Definitions
This is a slot at the front of the Digital Tachograph Tachograph. into which the tachograph card is inserted. Company card The company card is a tachograph card which is assigned by member states’ authorities to owners of vehicles in which the Digital Tachograph is installed. EFAS Definitions 121…
- Page 123
Digital Tachograph manu- facturers, installers, vehicle manufacturers or work- shops of a member state by this member state’s authorities. The workshop card identifies the card- holder and enables inspection, calibration and downloading of Digital Tachograph data. Definitions EFAS… -
Page 124: Index
Company card Automatic setting 71 withdrawing 57 activities 57 Company lock 70 activate 71 deactivate 71 Brightness 65 Company Representatives keyboard 65 regulations 9 Completing activities 46 Calibration Continuing Purpose of calibration 99 interrupted shift 32 shift 29 EFAS Index 123…
- Page 125
56 setting 37 Device data display 74 Display 20 Handling card information 73 card 11 device data 74 Handling Printouts element 14 Printout 12 LED 16 Handwritten setting 64 activities 46 symbol 14 Distance Unit 66 EFAS Index 124… - Page 126
16 Legal Requirements 8 Operation Local Time company 54 Setting 36 control 58 driver 24 workshop 52 Manual Other Error registration 56 Messages 81 Menu OUT 27 structure 109 Tachograph Not Required 27 working with 62 EFAS Index 125… - Page 127
Technical data 97 Speed Purpose of calibration 99 monitoring 47 Starting 25 Stopping 28 Symbol Region combination 15 code 118 display 14 Registration Symbols 7 company 54 manual 56 Tachograph Not Required OUT 27 Taking Over 27 EFAS Index 126… - Page 128
Warning Tone 68 Trip meter reset 48 UTC 69 Warning 72 calibration mode 53 Warning Tone 68 Withdrawing company card 57 control card 61 driver card 28 workshop card 53 Workshop operation 52 Workshop card inserting 52 withdrawing 53 EFAS Index 127… - Page 129
EFKON AG Andritzer Reichsstraße 66 8045 Graz — Andritz Austria www.efkon.com…
Перейти к содержимому раздела
![]()
Ошибка #103 тахографа ТЦА , как лечить?
Страницы 1
Чтобы отправить ответ, вы должны войти или зарегистрироваться
1
09/06/2021 07:41:08Ошибка #103 тахографа ТЦА , как лечить?
- 24Glonass
- Gurtam Partner
- Неактивен
- Зарегистрирован: 20/08/2013
- Сообщений: 3,051
- Карма: 356
Тема: Ошибка #103 тахографа ТЦА , как лечить?
Здравствуйте,
водители не вытаскивают карты, началась ошибка #103 тахографа ТЦА , как это можно вылечить, карты теперь выплевывает.
2Ответ от Vlad74uz
02/12/2021 07:13:57Ошибка #103 тахографа ТЦА , как лечить?
- Vlad74uz
- Wialon fan club
- Неактивен
- Откуда: Челябинск
- Зарегистрирован: 13/09/2013
- Сообщений: 104
- Карма: 14
Re: Ошибка #103 тахографа ТЦА , как лечить?
Я думаю Вы уже разобрались, но может еще у кого-нибудь подобная проблема вызовет вопрос.
Часть тахографов игнорируют эту ошибку, часть (VDO — не принимают такие карты). Как помочь — ТЦА-02НК, ТЦА-02НК»У» начиная с определённой версии прошивки, позволяют стирать «битый» ФАЙЛ. ПОСЛЕДОВАТЕЛЬНОСТЬ ДЕЙСТВИЙ: 1) вставить в тахограф карту Мастера. 2) вставить повреждённую карту. 3) Если тахограф сказал «карта повреждена, необходима выгрузка» — выгрузить повреждённую карту на ПК через USB ридер и любую программу(можно наш WorkShop, там есть кнопка со значком CD — диска). 4) Вставить повреждённую карту назад в тахограф с картой Мастера(Это должно быть сделано в тот же день, что и выгрузка, иначе её нужно будет повторить). 5) тахограф скажет «карта повреждена, стереть?» — ответить ДА. Если тахограф с картой Мастера по прежнему выдаёт ошибку карты 10Х — данная версия ПО не имеет такой функции, необходим другой тахограф или обновление ПО.
Сообщений 2
Страницы 1
Чтобы отправить ответ, вы должны войти или зарегистрироваться
Ошибка #103 тахографа ТЦА , как лечить?
Обновлено: 03.06.2023
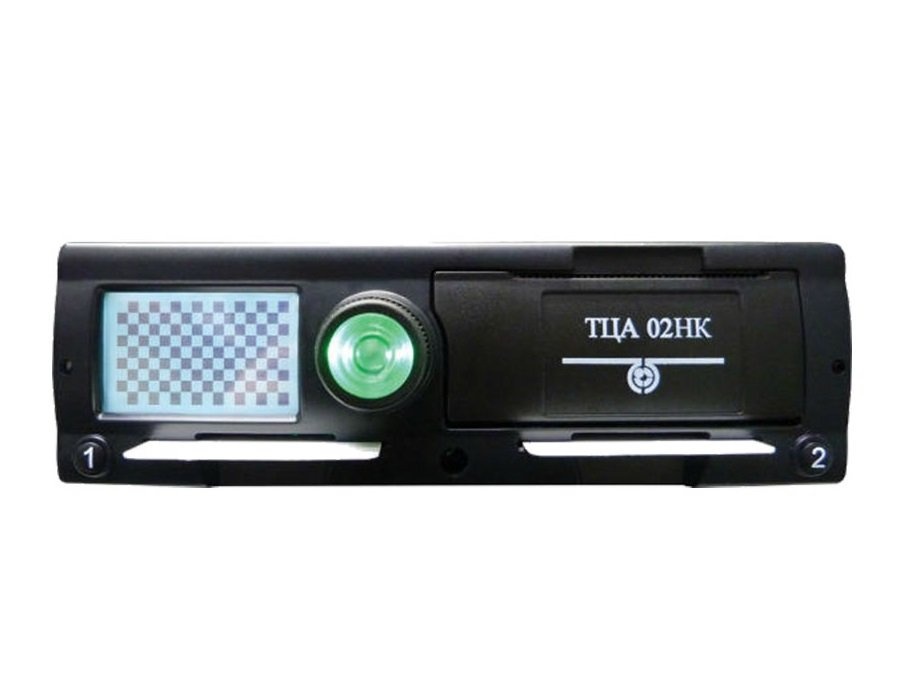
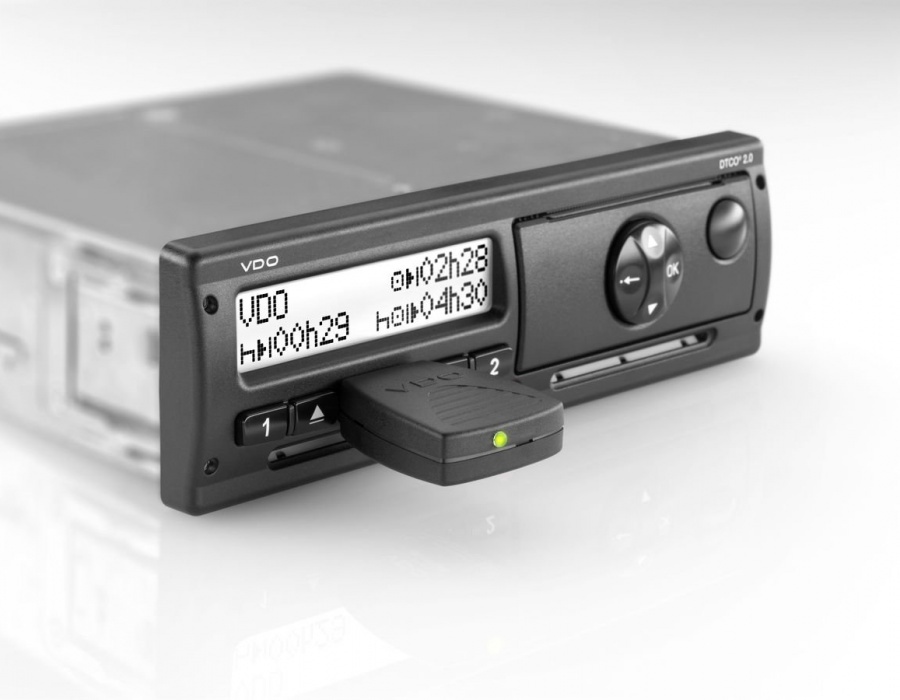
Тахограф ТЦА-02НК предназначен для контроля режима труда водителя: измерения и фиксации скорости транспортного средства, времени, проведенного в пути и в состоянии покоя. Полученные данные он регистрирует и сохраняет в качестве некорректируемой информации (зафиксированные им измерения не могут быть изменены).
Основные три модификации ТЦА-02НК:
Независимо от модели, задача тахографа – регистрация данных об основных характеристиках движения и нарушениях, касающихся превышения максимально допустимых параметров:
- скорости;
- непрерывного времени пути (четыре с половиной часа);
- времени вождения в течение одной смены (не более 9 часов за сутки).
А также контроль нарушений, связанных с эксплуатацией самого прибора:
- движение без использования карты водителя;
- отключение питания тахографа более, чем на четыре секунды;
- некорректное завершение работы и неправильная комбинация используемых карт;
- недостоверная информация о движении ТС.
Работает тахограф по сигналам навигационных спутниковых системы ГЛОНАСС. Информация должна выгружаться из памяти прибора в течение календарного года – 365 дней, а с ЧИП-карт – 28 суток.
Зафиксированные тахографом данные могут быть выведены на встроенный дисплей. Скопированы на внешние носители информации и распечатаны в виде конкретных отчетов по работе водителя.
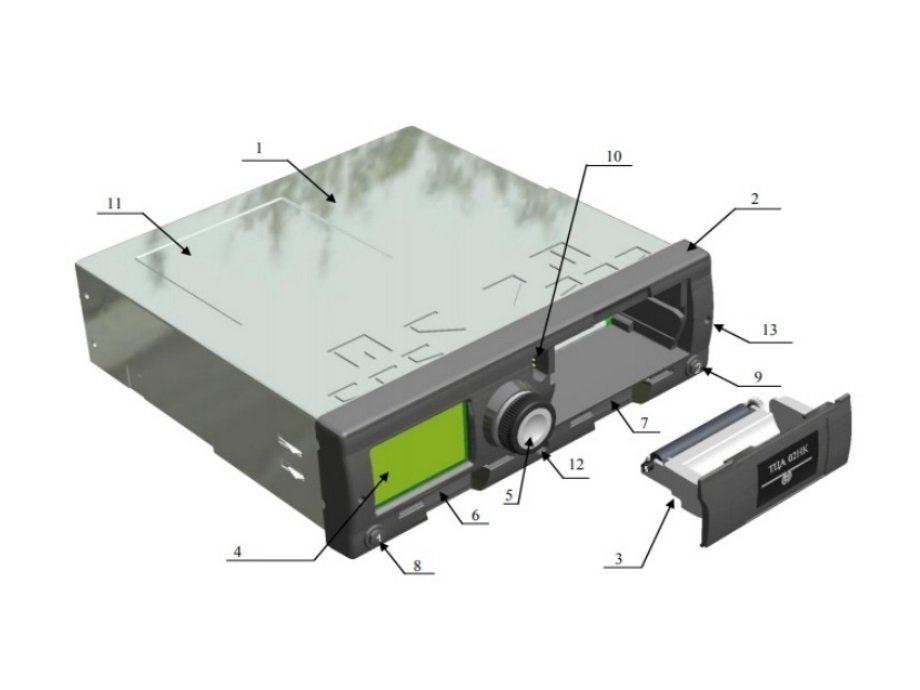
- Корпус тахографа;
- Лицевая панель;
- кассета принтера;
- Дисплей;
- Ручка энкодера;
- Слот водителя;
- Слот напарника;
- Кнопка извлечения карты и переключения режима деятельности водителя;
- Кнопка извлечения карты и переключения режима деятельности напарника;
- D-образный разъём для выгрузки и калибровки;
- Углубление для размещения шильдика;
- Пломба на лицевой панели;
- Отверстия для отжима фиксаторов тахографа в отсеке автомобиля.

- Корзина для установки тахографа в отсеке автомобиля;
- Защитная скоба с пломбировочной чашкой;
- Разъем антенны ГЛОНАСС;
- Болт заземления;
- Разъем A для подключения питания;
- Разъем B для подключения датчика скорости и спидометра;
- Разъем C;
- Разъем D для подключения спидометра через программируемый вывод;
Технические характеристики тахографа ТЦА 02НК
Прибор оснащен монохромным дисплеем со светодиодной подсветкой, которая изменяет цвет в зависимости от наличия или отсутствия ошибок водителя. Нормальная работа обозначается зеленым цветом, при нарушении параметров (со стороны водителя или сбоя самого тахографа) цвет меняется на красный. На дисплей выводится информация в виде четырех строк на десять символов.
Тахограф работает с навигационной системой ГЛОНАСС. Степень защиты оболочки — IP 40. Два вида электронной памяти:
- Непосредственно флэш-память самого устройства,
- Индивидуальные карты.
Встроенный принтер заправляется термобумагой на 57 миллиметров. Скорость печати приблизительно 60 мм в секунду.
- Интерфейс RS-232 для передачи данных на компьютер;
- Интерфейс ISO 9141 для работы с системой диагностики транспортного средства;
- CAN-интерфейс для взаимодействия с датчиками и электронными блоками ТС.
Оптимальные условия работы: влажность воздуха не выше 98% при температуре 35⁰С.
Диапазон рабочей температуры: минус 40 — плюс 70⁰С.
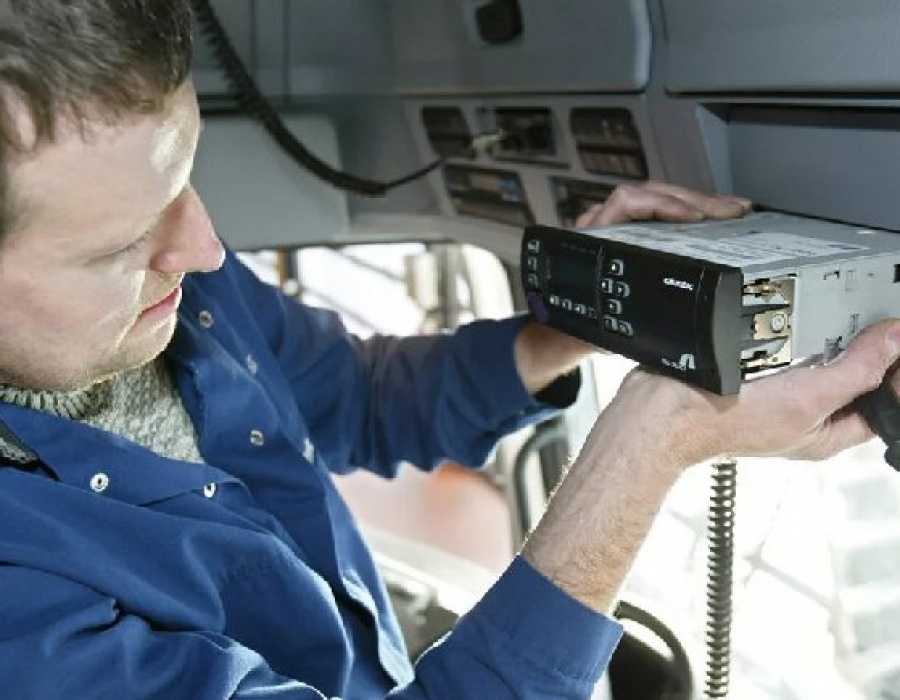
Особенности установки
Тахограф вставляется в отсек крепления нажатием. Должен раздаться характерный щелчок пружинных фиксаторов.
Наиболее подходящее место для установки (благодаря компактным размерам ТЦА-02НК) в углублении для стандартной магнитолы.
Далее производится подключение к питанию и всем приборам при посредстве стандартных восьми-контактных разъемов. Тахограф подключается одновременно со спидометром во избежание разногласия в их данных.
Следующий этап – активация при помощи карты мастера. Если в процессе установки была допущена ошибка, тахограф возвращается в исходное состояние, не пройдя активацию.
Если все сделано правильно, то после активации вставляется карта водителя чипом вниз (это непривычно для тех, кто пользовался другими моделям тахографа), и ТС готово к работе.
Точнее, к следующему важному процессу – калибровке. После ее начала тахограф подключается к ПК с соответствующей программой. Если соединение совершено правильно, открывается окно калибровки. Автомобиль проходит 20-ти метровое расстояние для контрольной фиксации количества импульсов на этом отрезке. Производится диагностика в режиме управления.
Затем читаем полученную информацию и включаем режим программирования. Мастер задает необходимые параметры. Завершающий этап – запись данных и распечатка акта калибровки.
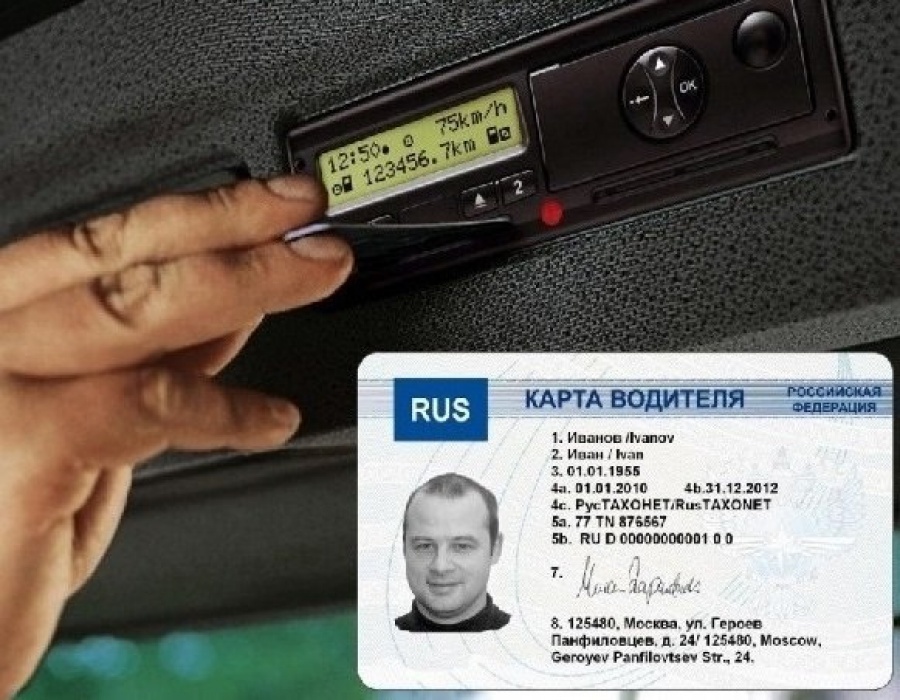
ТЦА 02НК инструкция для водителя
Тахограф предоставляет возможность водителю увидеть следующую информацию:
- Дату;
- Время в двух параметрах — UTC и местное;
- Свои координаты;
- Скорость;
- Весь пройденный путь;
- Путь за последние сутки;
- Время непрерывного движения;
- Суммарное время работы и отдыха.
Управлять тахографом можно при помощи кнопки джойстика — энкодера. В начале работы вводится четырехзначный PIN-код. Если код введен неверно, достаточно удержать нажатую кнопку джостика-энкодера свыше пяти секунд и можно вводить код заново.
Его вращение позволяет найти необходимый пункт меню (и подменю), нажатием регулятора указывается выбранная команда. Вернуться к основному экрану из меню после выбора команды можно также пятисекундным удержанием кнопки. Вращение энкодера и выбор пунктов происходит по принципу циферблата – за последним пунктом последует первый. Вращать джойстик можно в обе стороны.
Ошибки тахографа подлежат немедленному устранению, поскольку эксплуатация автомобиля с неисправным самописцем запрещена. Выявить причину поломки поможет встроенная система самодиагностики, но информацию она выдает в виде цифровых кодов — нужно уметь расшифровать их. Также необходимо знать, какие действия могут привести к сбою в работе прибора.
Причины возникновения ошибок в тахографе
Чаще всего прибор выходит из строя при следующих обстоятельствах:
- Неисправен датчик либо нарушен контакт в месте соединения с кабелем. Это наиболее уязвимые компоненты: коннекторы чувствительны к вибрации; сенсоры работают в тяжелых условиях, будучи закрепленными на движущихся частях (колесо, вал коробки передач).
- Применена испорченная или просроченная водительская карта (пластиковый ключ). Иногда путают ее тип: пытаются установить в тахограф с СКЗИ идентификатор от контрольного устройства стандарта ЕСТР.
- Поврежден один из внутренних элементов. В основном это случается из-за сильного удара, когда машина во время движения на большой скорости попадает колесом в яму или на бугор.
- Трижды неверно набран ПИН-код в процессе аутентификации. Это приводит к блокировке самописца.
- Не выгружена своевременно информация с пластикового ключа водителя или из памяти тахографа. Он больше не в состоянии выполнять свою основную функцию — писать данные на чип.
- Нарушена процедура извлечения карты. Например, ее выдернули раньше времени, из-за чего произошло прерывание записи либо самописец не успел корректно завершить сессию. Данные не сохранились либо содержат ошибки.
- На прибор пролита жидкость.
- Была попытка несанкционированного доступа (НСД). Прибор сделает запись об этом в своем журнале.
- Сбой питания устройства.
- Истек срок действия блока СКЗИ. Он составляет 3 года. За это время заполняется память модуля, а цифровая подпись становится ненадежной. Надо заменить модуль на новый и подвергнуть тахограф калибровке. В контрольных устройствах ЕСТР блоки средств криптографической защиты информации не меняют, но они тоже должны периодически проходить тарировку и поверку. Частота — каждый год или два, в зависимости от модели.
Причины непригодности идентификационной карты
Идентификационная карта водителя становится непригодной по следующим причинам:
- она долго находилась под прямыми лучами солнца (часто оставляют на приборной доске);
- на чипе появились следы масла или иные загрязнения;
- пластиковый ключ деформирован или исцарапан.
Пластиковый документ требует бережного обращения. Брать его рекомендуется за края и по возможности чистыми руками, хранить — в полимерном конверте. Тахографы некоторых марок быстро портят пластиковый ключ в силу несовершенства слота картридера. Тот выполнен по технологиям, заимствованным у производителей кассовых аппаратов, а они не рассчитаны на характерные для автоперевозки тяжелые условия.
Нарушения в работе тахографа случаются из-за поломок в автомобиле. Так, часто выходят из строя расположенные в коробке передач шестерни спидометра. При накручивании счетчика подмоткой может выгореть сигнальный вход самописца. Для выявления такого правонарушения необходимо вывести на печать тахограмму: на ней отображается неправдоподобно резкий скачок скорости.
Коды ошибок тахографа
Как расшифровать ошибки на тахографе
Трактовка каждой последовательности цифр приводится в инструкции по эксплуатации. Ниже приводятся часто встречающиеся коды для моделей «Штрих М» и VDO DTCO 1381 (3283):
В отличие от пиктограмм, коды ошибок у разных моделей тахографов могут отличаться.
Способы устранения ошибок
Действия зависят от того, по какой причине нарушена работа прибора:
- Если явных повреждений нет и, скорее всего, произошел сбой программного обеспечения, тахограф необходимо перезагрузить.
- При отказе принять карту ее очищают от грязи чистой ветошью и повторяют попытку. Снова неудача либо пластиковый ключ просрочен — оформляют новый.
- Самописец заблокирован из-за неверно введенного ПИН-кода. Как говорилось выше, это должно быть сделано три раза. Вводят PUK-код, пропечатанный на конверте, в котором выдавалась карта.
- Заполнена память. Выполняется загрузка данных на флешку, ноутбук или специальное считывающее устройство с последующей передачей автопредприятию на хранение. Удобны тахографы с функцией беспроводной передачи данных — не придется каждый раз заезжать для этого на базу.
- Если отказывается работать новый прибор, а владелец уверен, что он не подвергался ударам или иному повреждающему воздействию, следует обратиться с жалобой к производителю.
Только ее сотрудники имеют право выполнять:
- Любой ремонт, даже самый мелкий, например замену датчика или кабеля. Теоретически водитель может сделать это и своими силами, но после подобных операций положена калибровка прибора. Никто, кроме лицензированного автосервиса, не имеет права ее выполнять.
- Перевод или подстройку внутренних часов, изменение данных о собственнике или автомобиле.
- Ввод новых параметров, например длины окружности ведущих колес после установки шин другого диаметра.
- Замену блока СКЗИ на новый, его активацию.
- Установку исправного тахографа взамен необратимо поврежденного.
Самописец является измерительным устройством, поэтому калибровку выполняют после любых манипуляций с ним. Правильность настройки подтверждает последующая поверка. По ее итогам владельцу выдают сертификат, калибровочную таблицу и наклейку (шильдик) для размещения на стекле водительской дверцы.
Приборы, используемые для оценки основных эксплуатационных параметров автомобиля, просты в использовании. Однако работают они только совместно со специальными приложениями.
Последние отображают коды ошибок тахографа VDO, возникающие при программных или аппаратных сбоях. Расшифровать криптографические уведомления можно самостоятельно. Ошибки тахографа — довольно часто встречающееся событие.
Причины возникающих неполадок
Приборы VDO отличаются хорошим качеством сборки, надежностью, длительным сроком службы.
При правильном использовании тахографа поломки возникают нечасто.
К перебоям в работе оборудования приводят следующие причины:
- Физические воздействия. При движении по бездорожью возможны падения и удары тахографа, сопровождающиеся смещением или повреждением деталей. Функционирование устройства нарушается.
- Попадание воды или грязи внутрь корпуса.
- Загрязнение элементов оборудования. В этом случае прибор начинает работать некорректно. Тахограф передает неверные показания, зависает.
- Использование нерабочей карты. Такая ошибка способна привести к поломке прибора.
- Установка устаревшего программного обеспечения.
- Заводской брак.
- Воздействие солнечных лучей. Прибор не рекомендуется устанавливать на панели. Ультрафиолет повреждает детали, они со временем выходят из строя.
- Неисправность сенсоров. Часто возникает при самостоятельных попытках ремонта датчиков. Такую работу могут выполнять только специалисты.
- Выход из строя средств кодирования информации. Блок рекомендуется менять каждые 3 года. В противном случае возникают сбои в работе аппаратуры ВДО.
При возникновении любой неисправности лучше обратиться в сервис обслуживания.
Неисправный тахограф сообщает пользователю о поломке, используя специальные уведомления.
Основные коды ошибок
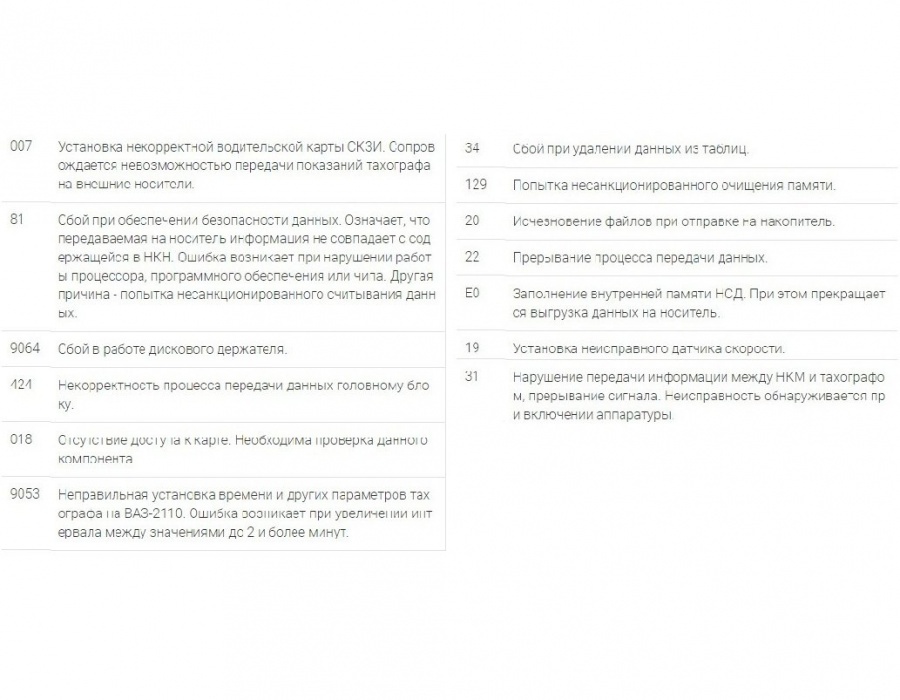
Установка некорректной водительской карты СКЗИ. Сопровождается невозможностью передачи показаний тахографа на внешние носители.
Сбой при обеспечении безопасности данных. Означает, что передаваемая на носитель информация не совпадает с содержащейся в НКН. Ошибка возникает при нарушении работы процессора, программного обеспечения или чипа. Другая причина — попытка несанкционированного считывания данных.

Различные ошибки карт тахографа и сбои в работе самого прибора могут доставить ряд неприятных минут водителю. Не все такие неисправности можно устранить сразу, но иногда есть шанс вернуть прибор в рабочее состояние максимально быстро.
Причины ошибок тахографа
И сами цифровые тахографы, и карты, которые используются для идентификации водителя, достаточно хорошо защищены от сбоев и ошибок. Все же ошибки в работе приборов иногда возникают — по самым разным причинам. В список таких причин войдут:
- Действия самого водителя (от ошибки при вводе ПИН-кода до попыток вмешательства в конструкцию самописца).
- Неправильный монтаж устройства, ошибки при калибровке или настройке.
- Сбои в ПО прибора.
- Неисправности чипа на карте тахографа.
- Физические поломки — как самого прибора, так и подключенных к нему устройств, например, датчика скорости.
Все это может привести к неправильной работе прибора, ошибкам при считывании карт и сборе данных. Такие сбои фиксируются в отчетах и могут стать причиной для претензий со стороны проверяющих из Ространснадзора или ГИБДД.

Некоторым поломкам производители присваивают специальные индексы. Так, ошибка 018 свидетельствует о сбое в работе карточки из-за внешних повреждений, ошибка 20 — о сбое считывания с карты (если не работает сам слот, прибор может выдать ошибку 65). О том, что водитель пытается использовать тахокарту с истекшим сроком службы, свидетельствуют ошибки 041, 042, 047, 048 или 051.
Если тахограф выдал ошибку, то водителю нужно понять, в чем заключается неисправность, и действовать соответственно:
- Неправильный ввод ПИНа — самая простая ситуация. Нужно ввести правильный код, и карточка заработает. Если ПИН был введен неправильно трижды, тахокарта будет заблокирована: для разблокировки используется PUK-код, который находится в конверте с документацией.
- При отказе считывать информация с карточки ее можно извлечь из слота прибора и попытаться очистить от загрязнений. Иногда пыль или смазка на чипе становятся причиной неисправности.
- Также перед обращением в сервисную службу можно проверить срабатывание карточки в другом приборе. Если и второй тахограф выдаст сбой — проблема в чипе, и его нужно заменить. Если читается — дело в самом приборе, потому ремонтировать придется самописец.
Замену выполняют и при поломке тахокарты, и при истечении срока годности (это стоит делать заранее). Если же неисправность заключается в самом приборе, то поможет только полноценная диагностика в сервисном центре. Самостоятельный ремонт таких устройств невозможен даже в том случае, если сломался не сам прибор, а датчик скорости или другая периферическая деталь. Все дело в том, что места подключения обязательно пломбируются. Это же касается и программных сбоев — устранять их могут только специалисты.
Любые ошибки карты водителя и неполадки в работе тахографа нельзя игнорировать. Если они произошли при выполнении рейса — по закону водитель может завершить поездку, но после этого придется разбираться в причинах и устранять их.
Читайте также:
- Схема центрального замка бмв е46
- Схема крепления двигателя рено меган 2
- Ошибка 0444 шевроле нива
- Ошибка вариатора ниссан теана l33
- P0925 ошибка ркпп ситроен