
- Errors caught by Flutter
- Define a custom error widget for build phase errors
- Errors not caught by Flutter
- Handling all types of errors
The Flutter framework catches errors that occur during callbacks
triggered by the framework itself, including errors encountered
during the build, layout, and paint phases. Errors that don’t occur
within Flutter’s callbacks can’t be caught by the framework,
but you can handle them by setting up an error handler on the
PlatformDispatcher.
All errors caught by Flutter are routed to the
FlutterError.onError handler. By default,
this calls FlutterError.presentError,
which dumps the error to the device logs.
When running from an IDE, the inspector overrides this
behavior so that errors can also be routed to the IDE’s
console, allowing you to inspect the
objects mentioned in the message.
When an error occurs during the build phase,
the ErrorWidget.builder callback is
invoked to build the widget that is used
instead of the one that failed. By default,
in debug mode this shows an error message in red,
and in release mode this shows a gray background.
When errors occur without a Flutter callback on the call stack,
they are handled by the PlatformDispatcher’s error callback. By default,
this only prints errors and does nothing else.
You can customize these behaviors,
typically by setting them to values in
your void main() function.
Below each error type handling is explained. At the bottom
there’s a code snippet which handles all types of errors. Even
though you can just copy-paste the snippet, we recommend you
to first get acquainted with each of the error types.
Errors caught by Flutter
For example, to make your application quit immediately any time an
error is caught by Flutter in release mode, you could use the
following handler:
import 'dart:io';

import 'package:flutter/foundation.dart';
import 'package:flutter/material.dart';

void main() {
  FlutterError.onError = (details) {
    FlutterError.presentError(details);
    if (kReleaseMode) exit(1);
  };
  runApp(const MyApp());
}

// rest of `flutter create` code...
This handler can also be used to report errors to a logging service.
For more details, see our cookbook chapter for
reporting errors to a service.
To define a customized error widget that displays whenever
the builder fails to build a widget, use MaterialApp.builder.
class MyApp extends StatelessWidget {
  const MyApp({super.key});

  @override
  Widget build(BuildContext context) {
    return MaterialApp(
      builder: (context, widget) {
        Widget error = const Text('...rendering error...');
        if (widget is Scaffold || widget is Navigator) {
          error = Scaffold(body: Center(child: error));
        }
        ErrorWidget.builder = (errorDetails) => error;
        if (widget != null) return widget;
        throw ('widget is null');
      },
    );
  }
}
Errors not caught by Flutter
Consider an onPressed callback that invokes an asynchronous function,
such as MethodChannel.invokeMethod (or pretty much any plugin).
For example:
OutlinedButton(
  child: const Text('Click me!'),
  onPressed: () async {
    const channel = MethodChannel('crashy-custom-channel')
    await channel.invokeMethod('blah')
  },
)
If invokeMethod throws an error, it won’t be forwarded to FlutterError.onError.
Instead, it’s forwarded to the PlatformDispatcher.
To catch such an error, use PlatformDispatcher.instance.onError.
import 'package:flutter/material.dart';
import 'dart:ui';

void main() {
  MyBackend myBackend = MyBackend();
  PlatformDispatcher.instance.onError = (error, stack) {
    myBackend.sendError(error, stack);
    return true;
  };
  runApp(const MyApp());
}
Handling all types of errors
Say you want to exit application on any exception and to display
a custom error widget whenever a widget building fails — you can base
your errors handling on next code snippet:
import 'package:flutter/material.dart';
import 'dart:ui';

Future<void> main() async {
  await myErrorsHandler.initialize();
  FlutterError.onError = (details) {
    FlutterError.presentError(details);
    myErrorsHandler.onErrorDetails(details);
  };
  PlatformDispatcher.instance.onError = (error, stack) {
    myErrorsHandler.onError(error, stack);
    return true;
  };
  runApp(const MyApp());
}

class MyApp extends StatelessWidget {
  const MyApp({super.key});

  @override
  Widget build(BuildContext context) {
    return MaterialApp(
      builder: (context, widget) {
        Widget error = const Text('...rendering error...');
        if (widget is Scaffold || widget is Navigator) {
          error = Scaffold(body: Center(child: error));
        }
        ErrorWidget.builder = (errorDetails) => error;
        if (widget != null) return widget;
        throw ('widget is null');
      },
    );
  }
}I have a url_launcher that opens up an Email app a an onTap listener and would like to show an error if there is no email app installed on the device ? How can this be achieved using the Flutter framework ?
The _launchcaller() throws an exception when an email app does not exist, but I would like the error message (custom message) to be displayed to the user so they know what is going to on ?
@override
  Widget build(BuildContext context) {
    return Scaffold(
        appBar: AppBar(
          title: Text("Thank you"),
        ),
        body: new ListView(children: <Widget>[
          new Column(
            children: <Widget>[
              new Padding(
                padding: new EdgeInsets.all(20.0),
                child: new AnimatedBuilder(
                  animation: animationController,
                  child: new Container(
                    height: 150.0,
                    width: 150.0,
                    child: new Image.asset('assets/angry_face.png'),
                  ),
                  builder: (BuildContext context, Widget _widget) {
                    return new Transform.rotate(
                      angle: animationController.value * 6.3,
                      child: _widget,
                    );
                  },
                ),
              ),
              new Column(
                children: <Widget>[
                  new Text(
                    'We are sorry for the inconvenience...',
                    style: new TextStyle(
                        fontSize: 16.0,
                        fontWeight: FontWeight.w700,
                        color: Colors.black87),
                  ),
                  new Padding(
                      padding: new EdgeInsets.symmetric(
                          vertical: 5.0, horizontal: 0.0)),
                  new Text(
                    'Please contact us to resolve this issue!',
                    style: new TextStyle(
                        fontSize: 13.0,
                        fontWeight: FontWeight.w200,
                        color: Colors.black87),
                  ),
                ],
              ),
              new Padding(
                padding:
                    new EdgeInsets.symmetric(vertical: 25.0, horizontal: 0.0),
                child: Row(
                  mainAxisAlignment: MainAxisAlignment.center,
                  crossAxisAlignment: CrossAxisAlignment.center,
                  children: <Widget>[
                    new GestureDetector(
                      onTap: _launchcaller,
                      child: new Icon(
                        Icons.contact_phone,
                        color: Colors.green,
                        size: 45.0,
                      ),
                    ),
                    new GestureDetector(
                      onTap: _launchcaller,
                      child: new Icon(
                        Icons.email,
                        color: Colors.blue,
                        size: 50.0,
                      ),
                    ),
                  ],
                ),
              ),
            ],
          ),
        ]));
  }

  _launchcaller() async {
    const url = 'mailto:enissl21@gmail.com?subject=subject&body=body';

    if (await canLaunch(url)) {
      await launch(url);
    } else {
      throw 'Could not launch $url';
    }
  }
}
Error handling is a complex process. It’s very boring and takes a lot of time. One of the problems is showing errors to the user in the Flutter application. Today we will talk about this.
All projects use different ways to showing exceptions and errors information to user.
Sometimes applications show common snackbars

Sometimes it realized with modal dialogs
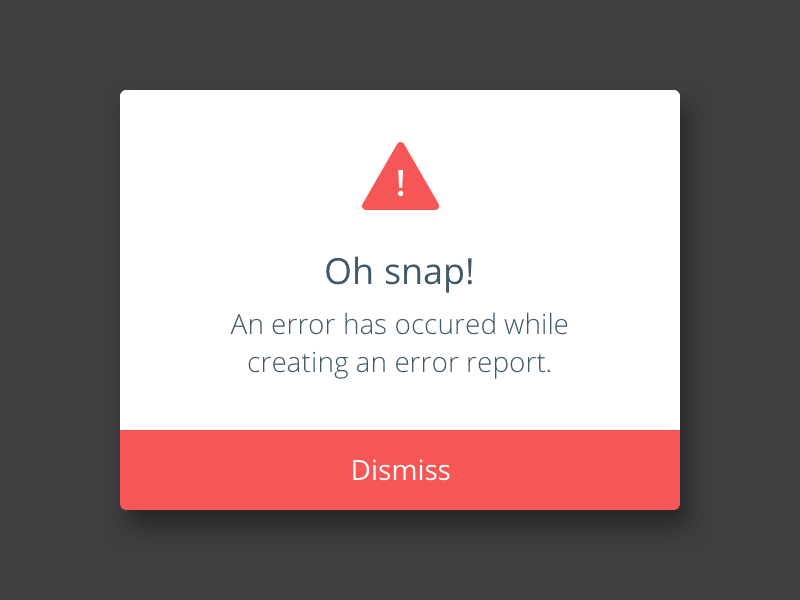
Sometimes it make with banner screens

But I thinks that’s not a problem.
We are all cool developers and know how to make any things in UI of our applications.
The problem starts at the moment when we need to understand which messages and where we want to show. And the most important problem is how to process them in a simple way for all services and repositories of the application
Just for this, you can use the talker library.
How to configure it for the application I showed in this article
But today we will talk about something else.
We need a simple way to set up the error messages showing once and not copy this code in the application all the time.
😎 Let’s do this…
1) Add talker_flutter dependency in pubspec.yaml
talker_flutter: ^1.4.0
Enter fullscreen mode
Exit fullscreen mode
2) Init talker for your application
void main() {
  final talker = Talker(
    loggerSettings: TalkerLoggerSettings(
      enableColors: !Platform.isIOS,
    ),
  );
  runZonedGuarded(
    () => runApp(
      CustomErrorMessagesExample(talker: talker),
    ),
    (Object error, StackTrace stack) {
      talker.handle(error, stack, 'Uncaught app exception');
    },
  );
}
Enter fullscreen mode
Exit fullscreen mode
3) You need to implement wrapper at initial route of your application or at screen which where you want to show error messages.
@override
  Widget build(BuildContext context) {
    return Scaffold(
      body: TalkerWrapper(
        talker: talker,
        options: const TalkerWrapperOptions(
          enableErrorAlerts: true,
        ),
        child: const Center(child: Text('Your screen')),
      ),
    );
  }
Enter fullscreen mode
Exit fullscreen mode
You can see the full example in the project repository.
And you can check talker_shop_app_example application example with BLoC as state management and tuned exceptions showing by talker

Customization
But everyone wants to use different widgets to display errors.
And this point can be solved using the talker_flutter library.
In order to customize snackbars, you can use options of TalkerWrapper
class TalkerWrapperOptions {
  final String exceptionTitle;
  final String errorTitle;
  final TalkerExceptionBuilder? exceptionAlertBuilder;
  final TalkerErrorBuilder? errorAlertBuilder;
  final bool enableErrorAlerts;
  final bool enableExceptionAlerts;
}
Enter fullscreen mode
Exit fullscreen mode
- Use exceptionAlertBuilder and errorAlertBuilder for build custom widgets in snackbars.
- Use enableErrorAlerts and enableExceptionAlerts for filtering snackbars.
- Use exceptionTitle and errorTitle for custom snackbar titles.
More customization
And if you want to show other widgets (other than Snackbars) — you can use TalkerListener instead of TalkerWrapper.
TalkerListener(
  talker: talker,
  listener: (data) {
    /// Show your error messages on modal dialogs, screens, etc
  },
  child: /// Your screen or app widget,
);
Enter fullscreen mode
Exit fullscreen mode
Conclusion
I hope I managed to explain everything I wanted in the article.
Thank you for reading this small post🙏!
Connect with me on GitHub and pls put ✨star✨ for talker package
I will be very pleased if you try to use it in your application

Hi Guys, Welcome to Proto Coders Point. In this Article will learn errors handling in flutter.
What is your code throws an error, suppose say initState method throws an error, this will simply return a red color screen with the error message printed in it, and no developer likes to see read color error screen in flutter development.
So here, In this flutter article, I have a solution for you, so that you learn how to handle errors in flutter by showing error with beautiful custom build design for error screen, so that we get rid of the red exception error page in flutter.
A ErrorWidget is an widget that is build specially for error handling, so this widget will render a separate custom build exception message screen when error occurs.
Flutter ErrorWidget is used when our app fails to build methods. and we can show error with custom UI, it will also help determine where the problem lies exactly.
How to show user friendly error page in flutter
It’s possible to show a custom UI error handling page by making use if ErrorWidget.builder (code example is below). Instead of Red error exception.
If your flutter app is published & is been used by lot’s of user, then at some point of time if error occurs then user might see red exception which is not good as user-experience & might leave a negative feedback about our app.
So it better to implement an custom global error handling in flutter by which we can show a user-freindly error page rather then red color error page with message.
How to use Flutter Error Widget
In void main(), before runApp(), add ErrorWidget.builder as shown below(UI Design in MaterialApp, customize as per your for error UI design).
void main() {
  // Set the ErrorWidget's builder before the app is started.
  ErrorWidget.builder = (FlutterErrorDetails details) {
    return MaterialApp(
       ....
    );
  };
  // Start the app.
  runApp(const MyApp());
}
Now, throws error, from where you think error might occur. Just for an example I am throwing error from initState() method as below:
@override
  void initState() {
    // TODO: implement initState
    super.initState();
    throw("Error thrown from initState(), This is Dummy Error Example");
}
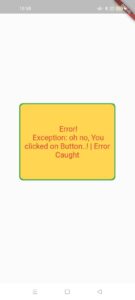
How to use ErrorWidget Builder in Flutter
Here is a example, The error is throws then user clicks on “don’t click me” button.
Complete Code with custom UI design for Error Widget for Error handling in flutter below. main.dart
import 'package:flutter/material.dart';

void main() {
  // Set the ErrorWidget's builder before the app is started.
  ErrorWidget.builder = (FlutterErrorDetails details) {
    // In release builds, show a yellow-on-blue message instead:
    return MaterialApp(
      home: Scaffold(
        body: Center(
          child: Container(
          alignment: Alignment.center,
          width: 250,
          height: 200,
          decoration: BoxDecoration(
              borderRadius: BorderRadius.circular(10),
              color: Colors.amber[300],
              boxShadow: [
                BoxShadow(color: Colors.green, spreadRadius: 3),
              ],
            ),
          child: Text(
            ' Error!n ${details.exception}',
            style: const TextStyle(color: Colors.red,fontSize: 20),
            textAlign: TextAlign.center,

            textDirection: TextDirection.ltr,
          ),
      ),
        ),),
    );
  };

  // Start the app.
  runApp(const MyApp());
}

class MyApp extends StatefulWidget {
  const MyApp({Key? key}) : super(key: key);

  static const String _title = 'ErrorWidget Sample';

  @override
  State<MyApp> createState() => _MyAppState();
}

class _MyAppState extends State<MyApp> {
  bool throwError = false;

  @override
  Widget build(BuildContext context) {
    if (throwError) {
      // Since the error widget is only used during a build, in this contrived example,
      // we purposely throw an exception in a build function.
      return Builder(
        builder: (BuildContext context) {
          throw Exception('oh no, You clicked on Button..! | Error Caught');
        },
      );
    } else {
      return MaterialApp(
        title: MyApp._title,
        home: Scaffold(
          appBar: AppBar(title: const Text(MyApp._title)),
          body: Center(
            child: TextButton(
                onPressed: () {
                  setState(() {
                    //by setting throwError to true, above if condition will execute.
                    throwError = true;
                  });
                },
                child: const Text('Do Not Click me')),
          ),
        ),
      );
    }
  }
}
Result of ErrorWidget for Error handling in flutter

Foreword
Due to the rising popularity of Flutter I feel it’s a good time to review some of the aspects of keeping your code clean and maintainable.
One of the things that developers might not pay so much attention to while building apps is error handling. While it might not be so glamorous it is definitely a key part of your application.
Who wants to use an app which looks unresponsive; having confusing error messages; or downright crashing in every step? With this article I’d like to give some good pointers on how to deal with error handling in flutter.
Set up
Let’s start by making a simple application. (If you want to skip right to the meaty part then check out the “handling errors” section.)
I will be using the test drive app as a base (https://flutter.dev/docs/get-started/test-drive#create-app) and start building it from there.

As you can see the app doesn’t do much at the moment. Let’s make a bit more exciting by trying to build a simple screen where you enter your phone number and it returns a one time password(OTP)
Let’s start by creating a number input field with a submit button.
import 'package:flutter/material.dart';
import 'package:flutter/services.dart';

...

class _MyHomePageState extends State<MyHomePage> {
 String _phoneNumber;

 void getOneTimePassword(){}

 @override
 Widget build(BuildContext context) {
   return Scaffold(
     appBar: AppBar(
       title: Text(widget.title),
     ),
     body: Center(
       child: Column(
         mainAxisAlignment: MainAxisAlignment.center,
         children: <Widget>[
           Container(
             child: TextField(
                 onChanged: (phoneNumber) {
                   setState(() {
                     _phoneNumber = phoneNumber;
                   });
                 },
                 decoration: InputDecoration(hintText: 'Enter a phone number'),
                 inputFormatters: [WhitelistingTextInputFormatter.digitsOnly],
                 keyboardType: TextInputType.number),
             width: MediaQuery.of(context).size.width * 0.5,
           ),
           RaisedButton(
             onPressed: () {getOneTimePassword();},
             child: Text('Get Code'),
           ),
         ],
       ),
     ),
   );
 }
}

This looks better. But it still doesn’t have any functionality yet. Let’s change that.
Adding more functionality
We will create a OneTimePasswordService and a mock HttpClient that servers our requests. Oh and we also need a response object that will parse the json string we get from the mock client. Let’s create the following 2 files.
import 'dart:math';
import 'otp_response.dart';

class MockHttpClient {
 var randomGenerator = new Random();

 Future<String> getResponseBody() async {
   await Future.delayed(Duration(milliseconds: 1000));
   return _generateOneTimePassword();
 }

 _generateOneTimePassword() {
   return '{ "verificationCode": "' +
       randomGenerator.nextInt(10).toString() +
       randomGenerator.nextInt(10).toString() +
       randomGenerator.nextInt(10).toString() +
       randomGenerator.nextInt(10).toString() +
       '"}';
 }
}

class OneTimePasswordService {
 final httpClient = MockHttpClient();
 Future<OneTimePasswordResponse> getOneTimePassword(String phoneNumber) async {
   final responseBody = await httpClient.getResponseBody();
   return OneTimePasswordResponse.fromJson(responseBody);
 }
}
import 'dart:convert';
import 'package:flutter/foundation.dart';
class OneTimePasswordResponse {
final String verificationCode;
OneTimePasswordResponse({
@required this.verificationCode,
});
static OneTimePasswordResponse fromMap(Map<String, dynamic> map) {
if (map == null) return null;
return OneTimePasswordResponse(
verificationCode: map['verificationCode'],
);
}
static OneTimePasswordResponse fromJson(String source) => fromMap(json.decode(source));
@override
String toString() {
return 'verificationCode: $verificationCode';
}
}
Let’s also modify our main.dart as well
...
import 'otp_service.dart';
...
class _MyHomePageState extends State<MyHomePage> {
 String _phoneNumber;
 String _oneTimePassword;
 final otpService = OneTimePasswordService();
 void getOneTimePassword() async {
   var oneTimePasswordResponse = await otpService.getOneTimePassword(_phoneNumber);
   setState(() {
     _oneTimePassword = oneTimePasswordResponse.toString();
   });
 }

 @override
 Widget build(BuildContext context) {
   return Scaffold(
...
             width: MediaQuery.of(context).size.width * 0.5,
           ),
           if(_oneTimePassword != null) Text(_oneTimePassword),
           RaisedButton(
...
Now it’s faintly starting to look like something that actually resembles an application.
In a perfect world, everything works flawlessly and there is no need to worry about errors or bugs that might ruin our day. Sadly we don’t live in a perfect world.
Let’s see what will happen if for some reason there is an error from the HttpClient side.
Since we are using our own Mock client we can just replace
return _generateOneTimePassword();
with
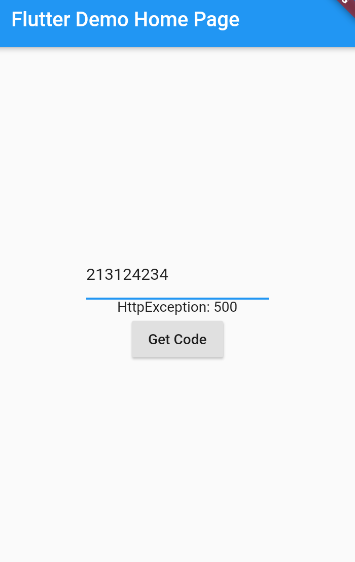
throw HttpException(‘500’);
in otp_service.dart
When we try to get the code this time we will be greeted by an error in the console. For the user however nothing will be shown. This is not good because the user might think the application is buggy and broken.
Catching exceptions
Let’s try catching the exception.
...
Future<OneTimePasswordResponse> getOneTimePassword(String phoneNumber) async {
 try {
   final responseBody = await httpClient.getResponseBody();
   return OneTimePasswordResponse.fromJson(responseBody);
 } catch (e) {
   print(e);
 }
}
...
Looks good right?
Well. Not really. We actually didn’t really make it any better since all it does now is that it prints the error message in the console. The user will still have no idea why the app is not working. We should avoid this blanket catching at all costs.
But the problem remains. We have to get the error message to the UI somehow.
Useful widgets
Luckily Flutter has an awesome widget called Futurebuilder just for this purpose.
I won’t go over the details for this but if you want to know more then check out the link:
https://api.flutter.dev/flutter/widgets/FutureBuilder-class.html
Let’s modify our main.dart to add the previously mentioned Widget
It will allow us to display the latest snapshot based on the otpResponseFuture response
...
import 'otp_response.dart';
...
class _MyHomePageState extends State<MyHomePage> {
 String _phoneNumber;
 Future<OneTimePasswordResponse> otpResponseFuture;
 final otpService = OneTimePasswordService();

 void getOneTimePassword() async {
   setState(() {
     otpResponseFuture = otpService.getOneTimePassword(_phoneNumber);
   });
 }
...
 width: MediaQuery.of(context).size.width * 0.5,
),
FutureBuilder<OneTimePasswordResponse>(
 future: otpResponseFuture,
 builder: (context, snapshot) {
   if (snapshot.connectionState == ConnectionState.waiting) {
     return CircularProgressIndicator();
   } else if (snapshot.hasError) {
     final error = snapshot.error;
     return Text(error.toString());
   } else if (snapshot.hasData) {
     final response = snapshot.data;
     return Text(response.toString());
   } else {
     return Text('After entering the phone number, press the button below');
   }
 },
),
RaisedButton(
...
We also need to remove the try catch block we added in OneTimePasswordService and let the error propagate to our Futurebuilder.
...
Future<OneTimePasswordResponse> getOneTimePassword(String phoneNumber) async {
final responseBody = await httpClient.getResponseBody();
return OneTimePasswordResponse.fromJson(responseBody);
}
Let’s try it out now!
Success! We can now display the error message. The only problem is that the user still won’t understand what this means. We shouldn’t actually show low-level error messages like that to the user.
Another big problem is that we let every exception propagate and get caught by the Futurebuilder. In some cases it might be better to let the app crash instead.
Customized exceptions
A good way is to catch only a particular set of exceptions and display a message based on those.
For that we are also going to create our own custom VerificationException class to customize our messages.
class VerificationException {
 final String message;

 VerificationException(this.message);

 @override
 String toString() => message;
}
Let’s also add an additional catch block for SocketExceptions. (You can additionally test it by throwing a SocketException instead of HttpException in our Mock client)
...
import 'verification_exception.dart';
...
try {
 final responseBody = await httpClient.getResponseBody();
 return OneTimePasswordResponse.fromJson(responseBody);
}
on SocketException {
 throw VerificationException('No Internet connection');
} on HttpException {
 throw VerificationException("Service is unavailable");
}
...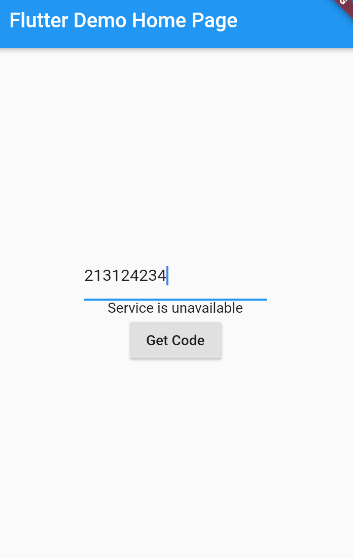
Looks much more readable for the user now doesn’t it?
There is still one issue we need to address. Namely our FutureBuilder currently still catches all errors and displays them which is bad. We only want to catch our own custom exceptions.
Having more control
Thankfully there is a better solution: ChangeNotifier (https://api.flutter.dev/flutter/foundation/ChangeNotifier-class.html)
Let’s create a new file called verification_change_notifier
import 'otp_response.dart';
import 'otp_service.dart';
import 'verification_exception.dart';
import 'package:flutter/cupertino.dart';

enum NotifierState { initial, loading, loaded }

class VerificationChangeNotifier extends ChangeNotifier {
  final _otpService = OneTimePasswordService();

  NotifierState _state = NotifierState.initial;
  NotifierState get state => _state;
  void _setState(NotifierState state) {
    _state = state;
    notifyListeners();
  }

  VerificationException _exception;
  VerificationException get exception => _exception;
  void _setVerificationException(VerificationException exception) {
    _exception = exception;
  }

  OneTimePasswordResponse _otpResponse;
  OneTimePasswordResponse get otpResponse => _otpResponse;
  void _setOtpResponse(OneTimePasswordResponse otpResponse) {
    _otpResponse = otpResponse;
  }

  void getOneTimePassword(String phoneNumber) async {
    _setState(NotifierState.loading);
    try {
      final otpResponse = await _otpService.getOneTimePassword(phoneNumber);
      _setOtpResponse(otpResponse);
    } on VerificationException catch (f) {
      _setVerificationException(f);
    }
    _setState(NotifierState.loaded);
  }
}
I feel a little bit of explanation is in order.
First of all we have a NotifierState with 3 values:
initial – This is the UI state for when the screen is initially loaded
loading – This state will display the loading indicator
loaded – Finally this state will display us the result or the error, depending on the response from the client
We also define getters and setters for private fields _state,_otpResponse,_exception
Now whenever we call the getOneTimePassword method it will set the correct state and only when we have our custom exception it will set the exception.
In our main class we will replace our Futurebuilder with a Consumer widget (Don’t forget to add the provider dependency)
...
 width: MediaQuery.of(context).size.width * 0.5,
),
Consumer<VerificationChangeNotifier>(
 builder: (_, notifier, __) {
   if (notifier.state == NotifierState.initial) {
     return Text('After entering the phone number, press the button below');
   } else if (notifier.state == NotifierState.loading) {
     return CircularProgressIndicator();
   } else {
     if (notifier.exception != null) {
       return Text(notifier.exception.toString());
     } else {
       return Text(notifier.otpResponse.toString());
     }
   }
 },
),
RaisedButton(
...
...
dependencies:
 flutter:
   sdk: flutter
 provider: ^3.2.0
...
We will replace our getOneTimePassword method as well and remove otpResponseFuture &otpService since our ChangeNotifier does everything already.
Finally we need to wrap all this into a ChangeNotifierProvider
...
class MyApp extends StatelessWidget {
 @override
 Widget build(BuildContext context) {
   return MaterialApp(
     title: 'Flutter Demo',
     theme: ThemeData(
       primarySwatch: Colors.blue,
       visualDensity: VisualDensity.adaptivePlatformDensity,
     ),
     home: ChangeNotifierProvider(
       create: (_) => VerificationChangeNotifier(),
       child: MyHomePage(title: 'Flutter Error Handling Demo'),
     ),
   );
 }
}
...
void getOneTimePassword() async {
 Provider.of<VerificationChangeNotifier>(context).getOneTimePassword(_phoneNumber);
}
...
There you have it! Now we have a working app that shows an intelligible error message to the user and also doesn’t catch and show all errors.
Conclusion
Handling errors is nothing you should be afraid of. It will save you a lot of headache later on if you properly manage your errors. The suggestions in this article is only the tip of the iceberg when it comes to error handling but I hope it gave a vague idea how it’s possible to do this in Flutter.
Happy Coding!