
[I18N] Hardcoded string «Happy Birthday Debashish», should use @string resource less… (Ctrl+F1)
Hardcoding text attributes directly in layout files is bad for several
reasons: * When creating configuration variations (for example for landscape or
portrait)you have to repeat the actual text (and keep it up to date when
making changes) * The application cannot be translated to other languages by
just adding new translations for existing string resources. In Android Studio
and Eclipse there are quickfixes to automatically extract this hardcoded string
into a resource lookup.

![]()
Phantômaxx
37.9k21 gold badges83 silver badges114 bronze badges
asked Dec 7, 2015 at 9:44
![]()
3
Ths is not an error but a warning. As a general rule, you should never use hard-coded strings in your layout but always use string resources instead (which means that all the strings are stored in one separate file where they are easily changeable for different languages and so on).
To convert a hard-coded string into a string resource:
- Put the curser on the hard coded string;
- Press ALT + Enter;
- Enter a name for your ressource;
- Click OK.
After doing this the warning will be gone.
![]()
answered Dec 7, 2015 at 10:09
![]()
BmuigBmuig
1,0597 silver badges12 bronze badges
1
This is just a warning.
Define your string in string.xml file
Happy Birthday Debashish
and in textView use this string as

 <TextView
        android:layout_width="match_parent"
        android:layout_height="wrap_content"
        android:text="@string/string_name"
        />
answered Dec 7, 2015 at 9:49
![]()
Navin GuptaNavin Gupta
7936 silver badges20 bronze badges
This is only a warning. The function will still work as intended. It is just recommended to place your text in the strings.xml file. This makes future changes much simpler and is easier to reference across multiple pages.
First, place the <string> element in values/strings.xml like this:
<string name="your_string_name">Happy Birthday Debashish</string>Then, you can reference the string in the .xml file as follows:
<TextView
        android:text="@strings/your_string_name"
        android:layout_width="wrap_content"
        android:layout_height="wrap_content" />
Again, it is not required to do it in this method. It just makes things simpler to manage and change in the future if needed.
![]()
answered Dec 7, 2015 at 10:12
![]()
    <TextView
        android:layout_width="wrap_content"
        android:layout_height="wrap_content"
        android:text="@string/title"
        tools:text="Happy Birthday Debashish" />
answered Jun 27, 2017 at 12:34
![]()
ak-SEak-SE
9701 gold badge7 silver badges27 bronze badges
When you are in the 2019 version. Go to the strings.xml and Add this in to it
<string name="Your text">Your Text</string>
Or
In the warning it has the Fix button you can click it for fix
answered Nov 22, 2019 at 11:25
![]()
As you set out on your exciting journey as an Android developer, you will almost certainly encounter errors in your applications. For example, you may notice the Android Studio editor sometimes has a red or yellow warning sign in the top right corner. These warning signs indicate there is a problem with the application’s code. Red warnings indicate a critical error that will prevent the app from running, while yellow warnings are advisory.
To find out more information, click the warning sign and Android Studio should explain the reason for the error. In this tutorial, we will explore how to resolve two common errors, which are called «Missing Constraints in ConstraintLayout» and «Hardcoded text», respectively.
Constraint errors
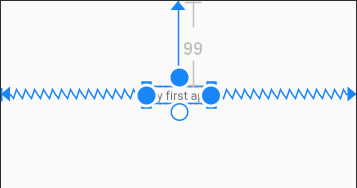
Constraints are a set of rules which determine how an object positions itself relative to other objects and the wider layout. Without constraints, the objects in your app would likely jump out of position when the app is loaded or the device is rotated. To automatically apply any missing constraints you can press the ‘Infer Constraints’ button at the top of the editor.

The red warning sign should now have turned yellow because we have resolved the missing constraints error. Also, the TextView object should have blue arrows coming out of it when selected in the editor. These blue arrows represent the constraints. They determine how the TextView object will position itself relative to the edges of the app interface.
The infer constraints button adds any missing constraints and resolves the error, but what if you want to fine-tune the position of the object? To adjust the position of an object, select it and refer to the Attributes panel. In this example, inferring constraints created a top margin of 99dp.
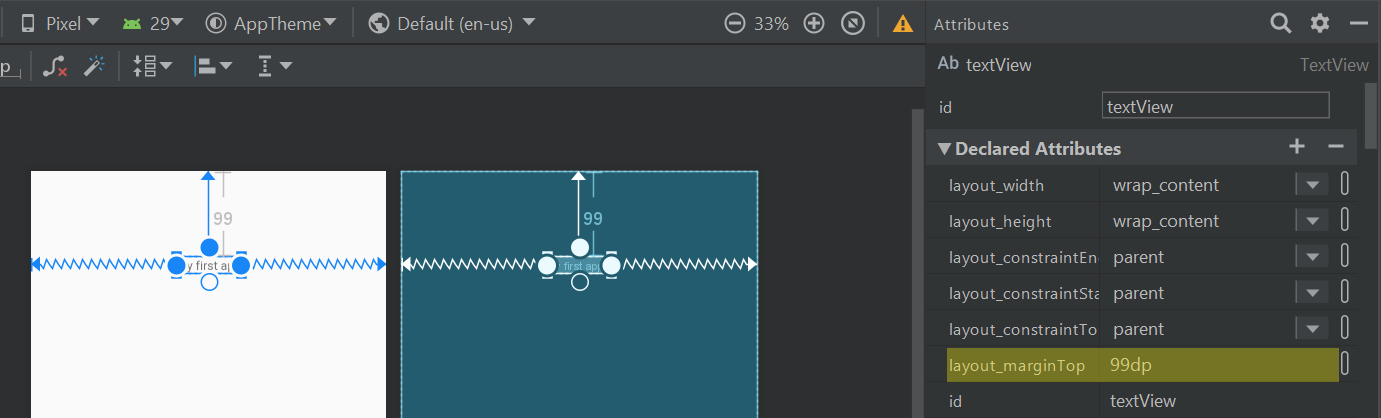
A margin is a type of constraint that creates a fixed distance between the object and another reference point (e.g. another object or the edge of the app interface). In the above example, we can adjust the distance between the TextView object and the top of the app layout by editing the value of the layout_marginTop attribute. For instance, if you wanted the TextView to sit near the top of the screen then you could set the layout_marginTop attribute to a small value such as 20dp.
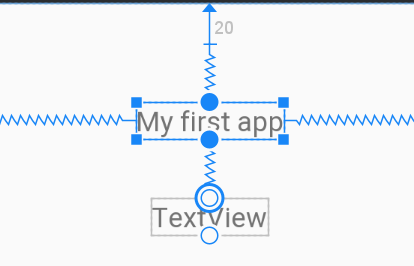
An alternative method for adding constraints is to drag and drop the blue arrows yourself. To illustrate how this is done, add a second TextView object below the first one (for a reminder on how to add TextView objects see this tutorial). Next, select the original TextView object and notice the four circles which appear on each side. Click the bottom circle and drag the arrow down to the top circle of the second TextView object. This creates a constraint connecting the two TextView objects. Note the second TextView object will now have some missing constraints of its own. You can fix this using the Infer Constraints button or by dragging the constraint arrows to the edge of the app layout yourself.
Hardcoded text warnings
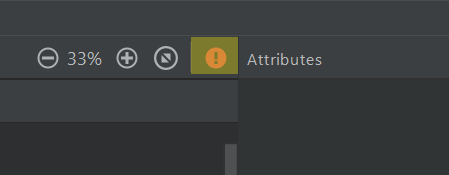
While the TextView widgets now have the appropriate constraints, there is still a yellow warning sign in the top right corner of the editor.
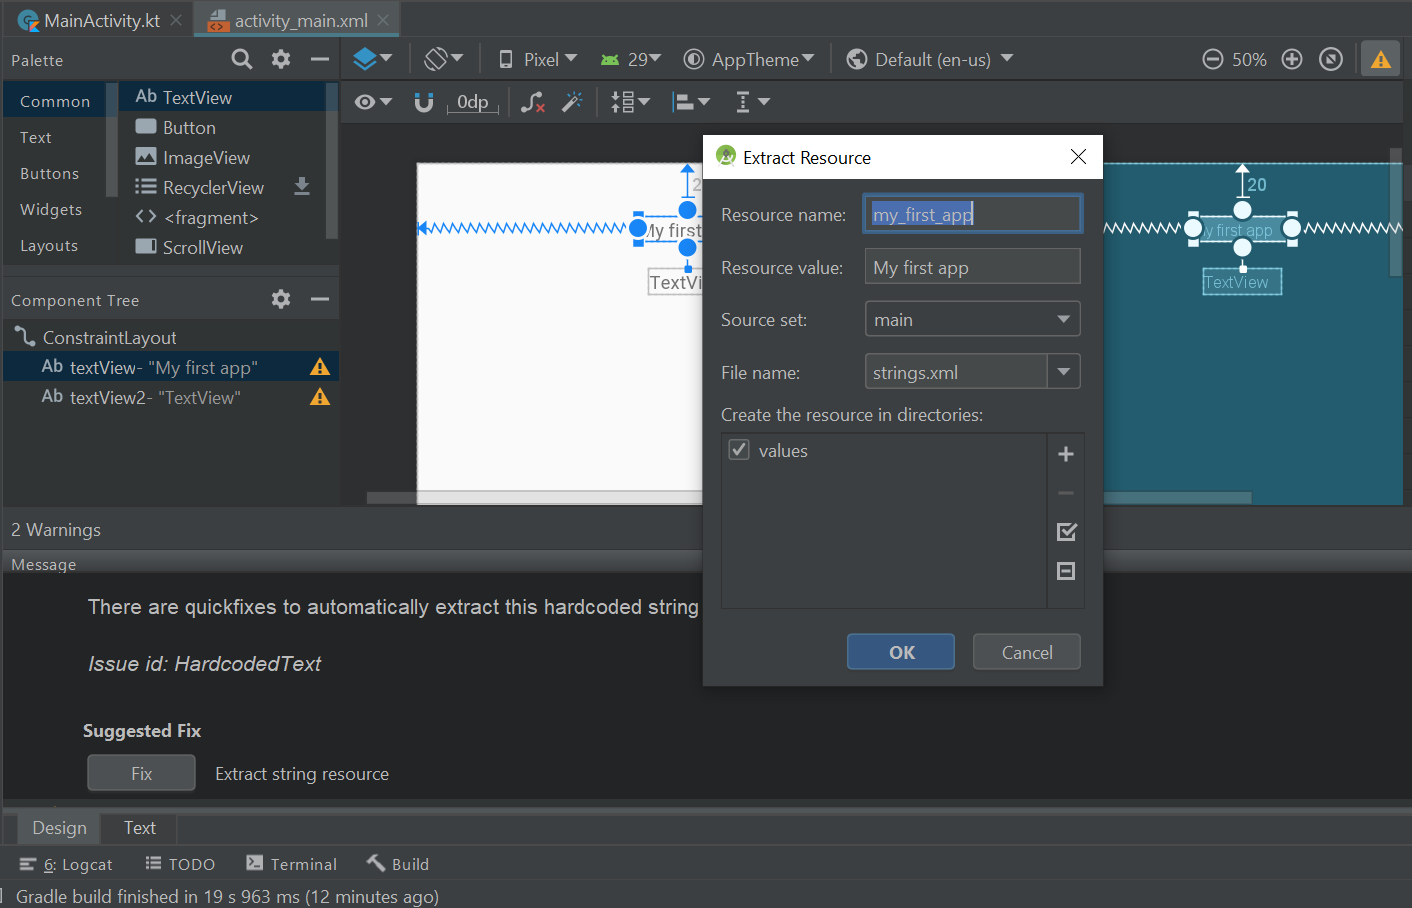
This yellow warning sign is there because the TextView widgets contain hardcoded text. Hardcoded text is text that is written directly into the layout file’s code. It can cause issues when the underlying code is being read and edited. Fortunately, hardcoded text is quite easy to rectify. Simply click the yellow warning sign in the top right corner, scroll to the bottom of the hardcoded text error message and press the ‘Fix’ button. In the Extract Resource window that opens, you can simply press OK and the attribute with the hardcoded text will be converted to a String resource. Android apps store all user-facing text as Strings in a resource file. The advantage of this is that a single String resource can be used in multiple locations throughout the app. If you ever need to change a String’s text, then you only need to update a single resource rather than tracking down all the areas that use the text. String resources also make it easier to translate your app into different languages.
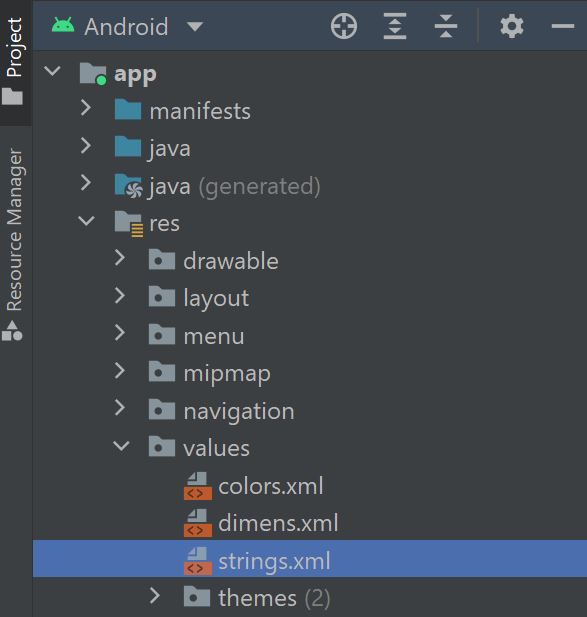
For larger projects, it is often best to define any text (or Strings) you intend to use in advance. That way you can prevent the hardcoded text warning from ever appearing. To define a String, open the Strings resource file by clicking Project > app > res > values > Strings.xml
There will likely already be some Strings in there. Simply add new Strings between the opening <resources> and closing </resources> resources tags in the following format:
<string name="title">Coders' Guidebook</string>The ‘name’ property is what you will use to refer to the String elsewhere in the app. The text between the two String tags will be displayed to the user whenever the String name is referred to. In other words, using the ‘title’ String will display ‘Coders’ Guidebook’.
<<< Previous
Next >>>
Resolving Hardcoded string, should use @string resource in Android
Application
When working with Android Application we might have faced this error after
placing a button or other controls on the Form indicating that Hardcoded string
should use @string resource.
Here we will learn how to resolve this issue when working with our Android
Application.
Structure of our Project
Here we, need to declare string variable for Button with the value that
should be displayed in the Label of Button control.
This can be done by navigating to values Menu in the Structure displayed.
Double-click on the string.xml the Android Resource Elements is displayed,
Now, it’s time to declare a string variable for the Button control. Click Add
button a screen pop-ups showing the creation of new element, select string and
click OK.

Next, we declare the Name and value of the Element to be defined as shown,
Now we have created a new element of string type with name Btn_Cancel and value
Cancel. We now have to switch from design view to XML view using
activity_main.xml in the screen.
Replace the Button Text property with the element name with the @string variable
we have defined as like this,
android:text=»@string/Btn_Cancel» />
And then, the XML File looks something like this,
Now, once we switch over to Graphical Layout, the screen is as shown below.
Hope this might be useful a little.
After creating a project using android studio and add some widgets like button or label… a warning show up saying: hardcoded string testbutton should use string resource . this warning appear because android use a separate file to define display string text, this mean the text show up in the button need to be defined in another string resource file, a lot of platforms use this method and it’s so much useful because this is make it easy to change the display text of any widget without keep open every file and searching for all display texts and change them.
Hardcoded String Should Use String Resource — Solved
To solve android studio Hardcoded String Should Use String Resource Warning you should use string resource file and define some strings instead of changing directly display text in the widgets, let’s see how to do that.
Resource File — Android Studio
Android string resource is a simple xml file and it can also called a string library , in this library you will define all your strings text and then in your android widgets you will just call a resource name to that string. when you create an android project your strings resource file located in «project name » — app — src — main — res — value — strings.xml . and by default it contain something like <resources></resources>
Add String Resource Line: To add string resource, just add a new string inside <resources></resources> tag example <resources><string name= «name «>Display Text</string></resources> , change the name and Display Text whatever you want, the name is what you will use in widgets and it shouldn’t be repeated.
Use String Resource: after you define strings resource go to your widgets, example button click over it, and click proprieties go to the text delete default text and double click inside input text a suggestion list will show up and it show all the defined string source just select your preferred string resource and that is it.
Редактор кода
Рассмотрим возможности редактора кода при написании приложений.
Инъекция языка
Студия позволяет делать инъекцию в существующий код. Что это такое? Например, JSON имеет свой формат данных. Если писать код вручную в данном формате, то можно столкнуться с неудобствами — вам приходится экранировать символы в большом фрагменте кода. Студия поможет нам. Создадим переменную jsonString:
String jsonString = "";
Помещаем курсор между кавычками и нажимаем комбинацию Alt+Enter, выбираем пункт Inject language or reference, в выпадающем списке выбираем JSON (JSON files).

Далее следует ещё раз нажать комбинацию Alt+Enter, чтобы инъекция была постоянной. Студия добавит комментарий к переменной.
//language=JSON
Если вы скопируете текст в формате JSON и вставите его между кавычками, то экранирование произойдёт автоматически.
// скопировать в буфер обмена
{"name":"Barsik"}

// после вставки в код между кавычками
String jsonString = "{"name":"Barsik"}";
Сам текст не обязательно копировать из другого источника, можете создавать JSON-запись в самой студии. Снова нажимаем Alt+Enter и выбираем пункт Edit JSON Fragment. Появится новая панель, в котором вы можете набирать текст, а в редакторе кода будет выводиться валидный код для работы.

Аналогично можно работать с регулярным выражением.

Перемещаем метод вверх или вниз
Иногда хочется для лучшей читаемости поменять местами методы в коде. Вырезать и вставлять в новое место слишком утомительно. Есть способ лучше. Установите указатель мыши на имени метода и нажмите комбинацию Ctrl+Shift+Стрелка_Вверх — метод автоматически перепрыгнет через метод над собой. Как переместить вниз вы сами догадаетесь.
Сворачиваем фрагменты кода
Студия умеет сворачивать фрагменты кода, которые являются структурной единицей, например, метод. Щёлкнув по фиговине (как это называется?), вы убираете код, чтобы не мозолил вам глаза.

Но мало кто знает, что свернуть можно любой свой код. Для этого ставим два слеша, как в комментариях, а затем добавляем слово region (без пробела) и через пробел название блока. Это будет началом блока. Конец блока обозначаем через //endregion
//region Коты
private String mCatName1 = "Мурзик";
private String mCatName2 = "Васька";
private String mCatName3 = "Рыжик";
private String mCatName4 = "Барсик";
//endregion
Теперь отмеченный блок можно сворачивать. Наведите порядок у себя в коде.
До

После

Редактор кода для XML в режиме Text
[I18N] Hardcoded string
Когда вы редактируете код разметки экрана активности, то можете встретить предупреждение [I18N] Hardcoded string «Какой-то ваш текст», should use @string resource.
![[I18N] Hardcoded string](https://developer.alexanderklimov.ru/android/studio/code_editor1.png)
Студия информирует вас о возможной проблеме, если вы в будущем задумаетесь о локализации приложения. Странное выражение I18N переводится очень просто. Здесь зашифровано слово INTERNATIONALIZATION — первая буква I, последняя буква N и восемнадцать букв между ними.
Вам нужно заменить свой жёстко закодированный текст на строковый ресурс. Установите курсор внутри текста, нажмите комбинацию клавиш Alt+Enter и выберите пункт Extract string resource. Далее в диалоговом окне придумываете имя для ресурса и выбираете файл для хранения (обычно, strings.xml).
Предположим, вы заменили везде текст на строковые ресурсы и решили отредактировать текст у кнопки. Снова ставим курсор на нужном тексте и нажимаем комбинацию клавиш Ctrl+B, у вас сразу откроется файл strings.xml и не надо его искать в дереве проекта.
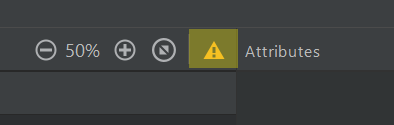
Ещё один приём — если вы хотите видеть вместо кода android:text=»@string/click» реальный текст из ресурса, то нажмите комбинацию Ctrl+- (клавиша минус на цифровой клавиатуре) и он подтянется.
Вкладки
Каждый файл проекта открывается в собственной вкладке. Вкладки можно менять местами перетаскиванием с помощью мыши. Переключаться можно через клавиши Alt-стрелка влево и Alt-стрелка вправо. Также можно вызвать Switcher с помощью комбинации Ctrl+Tab.
Если будет открыто слишком много вкладок, то часть из них сгруппируется и будет доступна через выпадающий список по нажатию на треугольник.
Если имя файла на вкладке подчёркнуто красной волнистой линией, значит в коде содержится ошибка и не нужно запускать программы, то время потеряете. Сначала исправьте ошибку.

Вкладку можно «отстегнуть». Нажмите на вкладку и удерживая мышку, перетащите вкладку на рабочий стол. Также её можно вернуть обратно.
Каждая вкладка имеет контекстное меню и значок для закрытия. Изучите пункты меню самостоятельно. Например, можно разбить редактор кода на две части (по вертикали или горизонтали), чтобы видеть разные участки кода одновременно.
Строка состояния
В нижней части студии находится строка состояния. В нижнем правом углу имеется текстовая метка с информацией о текущем местоположении курсора в документе (номер строки:номер символа). Если подвести мышку к надписи, то можно увидеть всплывающую подсказку Click to go to line. Щелчок вызовет диалоговое окно для быстрого перехода на нужную позицию.
Рядом также имеется текстовая метка с указанием кодировки, в которой пишется код. В последних версиях студии это стало проблемой для русскоязычных программистов. Студия может использовать системную кодировку, которая часто бывает windows-1551, но в Android принято использовать UTF-8, и после запуска приложения вместо текста можно увидеть кракозябры.
Остальные элементы не представляют интереса.
Информационный желоб
Слева от редактора кода имеется отдельная полоска, которую я назвал информационным желобом. На ней можно увидеть различные значки. Например, у класса MainActivity выводится значок, связанный XML-разметкой для данного класса. Нажав на него, вы можете быстро открыть нужный XML-файл.
Также выводятся значки для методов. Каждый тип методов имеет свой цвет.
В данном желобе устанавливаются точки останова (breakpoint).
Доступно контекстное меню. Например, можно выбрать показ номеров строки.
На границе желоба и редактора кода имеются маркеры для сворачивания блоков кода.
Если нажать клавишу F11, то текущая строка будет помечена как закладка и появится галочка.
Анализ кода
Справа от редактора кода находится анализатор кода. Если код содержит ошибки, сверху будет гореть красный прямоугольник. Если ошибок нет, но есть предупреждения, то будет гореть жёлтый прямоугольник. При правильном коде горит зелёный прямоугольник.
В случае ошибок или предупреждений также выводятся зарубки. Если подвести к ним курсор мыши, то можно прочитать сообщение или сразу перейти в нужную строку для исправления, нажав на неё. Также есть синие зарубки для выделенных слов и задач TODO.

Автодополнение кода
Студия поддерживает автодополнение кода, когда по первым символам подставляет нужные слова. Распространяться на эту тему не буду.
Основная комбинация Ctrl+Space.
Если написать имя метода, например, «private void onClick()» и нажать комбинацию Ctrl+Shift+Enter, то студия сгенерирует фигурные скобки.
Когда у вас есть кусок кода и вы начинаете исправлять его, то возникает следующая ситуация. Студия предлагает подсказку, вы соглашаетесь и нажимаете Enter.

В данном случае мы хотим заменить переменную name на catName, но если нажмём на Enter, то подсказка присоединится к старому коду и мы получим catNamename. В следующий раз нажимайте на клавишу Tab и тогда старый вариант заменится на новый.
Также изучите другие клавиатурные комбинации.
Периодически используйте команды меню Code: Reformat Code и Rearrange Code. Первая команда полезна для Java-кода, а вторая для XML-разметки. Код станет аккуратнее.
Перевод на новую строку
Если курсор находится в середине выражения и вы хотите начать новую строку, не обязательно гнать курсор в конец строки. Просто нажмите комбинацию Shift+Enter.