
Уважаемые мастера! Помогите приблизиться к решению этой проблемы. Случилась эта ошибка после разборки для очистки кофейного блока. Единственное, на мой взгляд, что я сделал при сборке немного не так, как было, это более обильная смазка.
Ситуация кажется технически не сложной, если есть сообщение, есть и сигнал. Для заварного блока я не увидел приборов контроля (типа конечных выключателей или др.) позиционирования. Только на редукторе привода есть 3 проводочка. Я пока не знаю, что это, но скорее всего это источник сигнала об ошибке. Если это конечные выключатели или оптопара, то нужно найти соответствие их срабатывания и окончания движения поршня заварника вверх. На завершении попытки движения заварника вверх возникает ошибка. Поэтому я, естественно, измеряю напряжение на конечниках привода, откручиваю его, вручную кручу шестерню редуктора и добиваюсь срабатывания, ставлю его обратно в зацепление, предварительно опускаю поршень на пару оборотов большой шестеренки типа для запаса хода и гарантированного срабатывания. Включаю, варю 2 или 3 чашки и снова та же ошибка! Теперь вопросы (возможно я пишу это для себя, так сказать для осмысления).
1. Как связано решение проблем с заеданием механизма и рекомендацией снять фаску с шестерни? Или Другие рекомендации по замене сита, колец, и особенно помола, и тд? Отвечаю для себя: c возможным контролем тока в цепи питания редуктора. Хорошо.
2. Если у меня варит несколько чашек, то управление питанием редуктора в порядке и ошибка связана с накоплением рассогласования в приводе мд положением ротора редуктора и положения заварника, поэтому нужно его правильно поставить!
3. Но не может же замена редуктора с его установкой быть сложной процедурой для сервиса, вероятно это должно быть просто!
4. Концов для контроля от редуктора идет 3. Это либо 2 конечника, либо 1 активный датчик типа оптопары и тп. Если это 2 КВ, возможно я меряю не ту напругу. А маряю я мд средним и верхним на плате. у меня прыгает с до 5v
5. заварник ходит очень плавно, ему ничего не мешает, при заваривании кофе или промывке под давлением пара поршень откатывается на 2-3 мм, естественно шестерни вращаются. Это нормально? Видимо да, тк в противном случае был бы самоблокирующий редуктор или стопор.
6. Я не понял, что за датчик расположен возле заварника. справа от него и слева от панели управления. Похож на геркон черненький, запаян в пластик, но вроде тяжеленький.
7. Не могу понять, как машина узнает, что ей не хватает зерен? Контроль тока мельницы? положение редуктора при прессовании в таблетку?
8. Мой план пока что такой: разобраться с редуктором, попробовать поискать сигнал на другой паре контактов, еще раз разобрать, посмотреть заварной блок.
Если кто-то может оказать методическую помощь или дать добрый совет, буду рад! Вся надежда на мастеров!
Современные кофемашины укомплектованы информативными дисплеями, где отображаются важные параметры работы, настройки и ошибки. Последние бывают текстовыми или цифровыми, имеют характерную расшифровку, которая позволяет быстрее устранить сбой или помочь мастеру в ремонте.

Самые распространенные коды ошибок кофемашин
Если кофемашина выдает ошибку, необходимо знать, как она расшифровывается и ознакомиться с инструкцией по устранению. Существует несколько распространенных графических обозначений, которые появляются на дисплее при возникновении сбоев в работе техники:
- Восклицательный знак. Указывает на сильное загрязнение внутренних компонентов. Чтобы устранить ошибку, достаточно разобрать машину и промыть заварочный блок.
- Восклицательный знак возле иконки шестеренки. Свидетельствует о необходимости удаления накипи или замены фильтра.
- Иконка молочной емкости. Оповещение об очистке трубок, которые расположены внутри контейнера для молока. Чтобы исправить ошибку, достаточно повернуть регулятор на капучинаторе в положение «Очистка» (Clean).
- Изображение фильтра. Указывает на загрязнение фильтра и необходимость его замены.
- Спирали и хаотичные точки на панели. Признак накопления накипи, которую нужно удалить, согласно инструкции из раздела «Техническое обслуживание.
Bosch и Siemens
На оборудовании марок Bosch и Siemens отображаются идентичные ошибки. Они расшифровываются следующим образом:
- Ошибка 1. Повреждение термодатчика.
- Ошибка 2. Выход из строя термодатчика, из-за чего кофемашина недостаточно нагревается.
- Ошибка 5. Поломка нагревателя термоблока.
- Ошибка 8. Повреждение редуктора.
- Add Bean. В емкости для кофе отсутствуют зерна.
- Brewing unit missing. Проблема с блоком заварки (блокировка или отсутствие компонента).
Jura
Сбои в кофемашинах Jura могут сопровождаться возникновением следующих ошибок на дисплее:
- Error 1. Короткое замыкание микродатчика температуры воды.
- Error 2. Выход из строя измерителя температуры нагрева кофемашины.
- Error 3. Замыкание преобразователя пара.
- Error 4. Сбои в термодатчике, отвечающем за подогрев пара.
- Error 5. Неполадки парового блока.
- Error 6. Система не может распознать паровой клапан.
- Error 7. Мультигазовый клапан не перемещается.
- Error 8. Механика и заварочные контроллеры выведены из строя.

Saeco
На кофемашинах марки Saeco могут появиться такие сбои:
- Ошибка 1 или Ошибка 2. Свидетельствует о блокировке мельничного механизма.
- Ошибка 3 или Ошибка 4. Оповещение о блокировке заварочного блока.
- Ошибка 5. Блокирование водяного контура.
- Ошибка 6. Проблемы с мультиклапаном.
- Ошибка 7. Осаждение капучинатора.
- Ошибка 8 Powercomm. Проблемы с электронными компонентами.
- Ошибка 9, 10. Блокировка водонагревательного элемента.

Krups
Владельцы кофеварок от производителя Krups сталкиваются со следующими ошибками:
- Ошибка 1, 2, 3. Поломка распределителя воды.
- Ошибка 4. Низкий объем проходящей воды после запуска помпы.
- Ошибка 5. Объем воды равен нулю при запуске водяного насоса.
- Ошибка 6. Протекание воды в поддон.
- Ошибка 7. Проблемы с гидропрессом, поломка насоса, повреждение датчика уровня воды.
- Ошибка 8. Отсутствие сигнала от контроллера воды в системе.

Delonghi
Кофейные аппараты итальянской компании Delonghi выделяются стильным дизайном и высоким качеством сборки. Кроме того, они продаются по приемлемым ценам, служат достаточно долго без поломок. Если же возникают какие-либо неполадки в работе, об этом можно узнать по ошибкам на дисплее:
- Fill Tank. Емкость для воды пустая либо установлена неправильно. А также ошибка возникает при загрязнении контейнера.
- Ground Too Fine. Медленное вытекание напитка или неспособность аппарата приготовить порцию кофе.
- Empty Grounds Container. Резервуар для гущи загрязнен или переполнен.
- Insert Groun Container. Контейнер-сборник кофейной гущи не установлен.
- Fill Beans Container. Зерновой блок пуст.
- Descale. Необходимо удалить накипь.
- Close Door. Нужно закрыть сервисную дверцу.
Nivona
Техника немецкой марки Nivona активно завоевывает российский рынок, обладая высоким качеством сборки и долговечностью. При разработке каждой модели производитель проработал все до мелочей и предусмотрел наличие информативной панели, на которой отображаются ошибки и сбои.
Они расшифровываются следующим образом:
- Fill System. Загрязнение, очистить водяной фильтр.
- Fill Water. Нехватка воды в емкости.
- Fill Beans. Нехватка зерен в резервуаре для кофе.
- Empty Trays. Нужна очистка поддона или лотка для переработанного кофе.
- Brewing Unit Missing. Отсутствие варочного блока.
- Change Filter. Требуется замена фильтра.
Поиск и устранение неисправностей
Чтобы продлить срок службы кофемашины, за ней нужно правильно ухаживать, не пропускать плановое сервисное обслуживание. В противном случае техника будет подвергаться износу и вскоре выйдет из строя.
При возникновении неполадок первым делом потребуется установить причину их появления и начать ремонт.
Самостоятельный ремонт
Обслуживание кофемашины без вызова мастера – хороший способ сэкономить деньги. Однако проводить любые действия, не имея опыта или подробного руководства, нельзя, т.к. это может привести к плачевным последствиям и выходу из строя других компонентов.
Вызов мастера
Устранить неисправности в кофемашинах с дисплеем намного проще, чем в моделях без информационной панели. Зная код ошибки, можно предоставить его мастеру перед вызовом на дом, что ускорит дальнейший ремонт и восстановление работоспособности оборудования.
- Главная
- Коды ошибок кофемашин
Коды ошибок кофемашин Bosch и Siemens
Модели TCA 6xxx TK 6xxxx
Ошибка Error 1 — Машина слишком холодная (< 5 C) Сломан датчик NTC (термодатчик)
Ошибка Error 2 — Нет нагрева термоблока (параблока)
Ошибка Error 5 — Нет нагрева термоблока (параблока)
Ошибка Error 8 — Неисправен заварной механизм. Либо концевик в поддоне, сломана лапка на поддоне.
Fill up pipe-system — заполнить систему
Empty trays — заполнен лоток отработанного кофе, электрическое сопротивление контактов поддона
Trays missing — вставить поддон, электрическое сопротивление контактов поддона
Brewing unit missing — Заварной блок отсутствует или заблокирован
Add beans — нет кофейных зерен в контейнере зерен
Коды ошибок кофемашин Jura
Модели Е10/Е25
Ошибки символьные обозначения:
Пар+открыть кран+поддон+чистка гидросистемы+чистка от накипи+фильтр — Не распознается (Заклинен) заварной механизм
Молотый кофе+открыть кран+поддон+чистка гидросистемы+чистка от накипи+фильтр — Сломан датчик NTC (термодатчик)
Чашка+открыть кран+поддон+чистка гидросистемы+чистка от накипи+фильтр — Короткое замыкание датчика NTC (термодатчик)
Промывка+открыть кран+поддон+чистка гидросистемы+чистка от накипи+фильтр — Нагрев не возможен
Модели Е30/Е40/Е50/Е60/Е65/Scala
Ошибки символьные обозначения:
Мигают 4 зеленых верхние лампочки — Начинается опустошение системы После подачи пара система не была заполнена / повернуть кран
Мигают 4 зеленых верхние лампочки + нижний красный индикатор — Проблемы в распознавании Датчик нагрева поврежден Машина слишком холодная
Мигают пар и чашка — Перегрев
Модели С5
Индикаторы на дисплее мигание:
Индикатор обслуживания + все индикаторы — Дефекты датчика термоблока Невозможно распознавание заварного механизма
Индикатор обслуживания + индикатор чиски гидросистемы — Машина очень горячая для чистки гидросистемы
Индикатор обслуживания + индикатор чиски от накипи — Машина очень горячая для чистки от накипи
Индикатор обслуживания + индикаторы обслуживания (налить воды, засыпать кофе, убрать поддон — Машина очень горячая для промывки
Модели S/X/XS
Ошибка 1 — Датчик температуры нагрева воды, короткое замыкание
Ошибка 2 — Датчик температуры нагрева кофе, сломан
Ошибка 3 — Датчик температуры нагрева пара, короткое замыкание
Ошибка 4 — Датчик температуры нагрева на пар, сломан
Ошибка 5 — Машина слишком холодная, нет нагрева пароблока
Ошибка 6 — Невозможно распознать пара клапан
Ошибка 8 — Неисправен заварной механизм
Модели F/XF/E80
Ошибка 1 — Датчик температуры нагрева, поврежден
Ошибка 5 — Нагрев невозможен
Ошибка 8 — Неисправен заварной механизм
Модели J/Z
Ошибка 1 — Датчик температуры нагрева воды, короткое замыкание
Ошибка 2 — Датчик температуры нагрева кофе, сломан
Ошибка 3 — Датчик температуры нагрева пара, короткое замыкание
Ошибка 4 — Датчик температуры нагрева на пар, сломан
Ошибка 5 — Машина слишком холодная, нет нагрева пароблока
Ошибка 6 — Невозможно распознать пара клапан
Ошибка 7 — Невозможно перемещение мультиклапана
Ошибка 8 — Неисправен заварной механизм
Модели X7/X9
Ошибка 0 — Энкодер
Ошибка 1 — Датчик температуры нагрева воды, короткое замыкание
Ошибка 2 — Датчик температуры нагрева кофе, сломан
Ошибка 3 — Датчик температуры нагрева пара, короткое замыкание
Ошибка 4 — Датчик температуры нагрева на пар, сломан
Ошибка 5 — Машина слишком холодная, нет нагрева пароблока
Ошибка 6 — Невозможно распознать пара клапан
Ошибка 7 — Невозможно перемещение мультиклапана
Ошибка 8 — Неисправен заварной механизм
Коды ошибок кофемашин Krups
Уважаемые Клиенты!
К сожалению, информацию о кодах ошибок кофемашин Krups производитель не разглашает.
Обозначения ошибок на нашем сайте, описаны нашими специалистами на основе собственного опыта, поэтому помимо наших обозначений,
коды ошибок могут также обозначать и другие неисправности.
Ошибка 1 — заблокирован водяной контур (распределитель воды — мотор распределителя, микровыключатель)
Ошибка 5 — заблокирован водяной контур (счетчик воды, помпа, рапределитель)
Ошибка 7 — заблокирована кофемолка
Ошибка 9 — нет нагрева (NTC — сопротивление)
Для моделей krups xp 7240, 7250 возможно произвести самодиагностику кофемашины через меню сервис.
Коды ошибок кофемашин Saeco
Модели Primea, Talea
Ошибка Error 1 — Кофемолка заблокирована
Ошибка Error 2 — Кофемолка заблокирована
Ошибка Error 3 — Заварной механизм заблокирован
Ошибка Error 4 — Заварной механизм заблокирован
Ошибка Error 5 — Водяной контур заблокирован
Ошибка Error 6 — Мультиклапан заблокирован
Ошибка Error 7 — Клапан капучинатора заблокирован
Ошибка Error 8 Powercomm — Неисправность электронной платы
Ошибка Error 9 — Датчик водонагревателя неисправен
Ошибка Error 10 — Датчик водонагревателя неисправен
Ошибка Error 11 — Датчик парового нагревателя неисправен
Ошибка Error 12 — Датчик парового нагревателя неисправен
Ошибка Error 13 — Водонагреватель неисправен
Ошибка Error 14 — Паровой нагреватель неисправен
Коды ошибок кофемашин Saeco Philips
Error 1 / Ошибка 1 — кофемолка заблокирована. (возможные проблемы : заклинены жернова, не верная работы датчика)
Error 3 / Ошибка 3 — заварной блок заблокирован в положении вверх
Error 4 / Ошибка 4 — заварной блок заблокирован в положении вниз
Error 5 / Ошибка 5 — водяной контур заблокирован ( гидросистема не может заполнится водой : неверная работа счетчика воды, неисправен насос, забит бойлер пара)
Error 6 / Ошибка 6 — не работает электромагнитный клапан ( неверная работа эл. магнитного клапана блока приготовления молочных напитков)
Error 10 / Ошибка 10 — неисправен бойлер кофе/термодатчик ( отсутствие сопротивления)
Error 11 / Ошибка 11 — неисправен бойлер кофе/термодатчик ( обрыв цепи)
Error 12 / Ошибка 12 — неисправен бойлер пара/термодатчик ( отсутствие сопротивления)
Error 13 / Ошибка 13 — неисправен бойлер пара/термодатчик ( обрыв цепи)
Error 14 / Ошибка 14 — отсутствует нагрев на кофе (вероятность термостат)
Error 15 / Ошибка 15 — отсутствует нагрев на пар (вероятность термостат)
Error 16 / Ошибка 16 — неисправен редуктор/заварной блок (микровыключатель неправильная работа)
Error 18 / Ошибка 18 — программная ошибка
Error 19 / Ошибка 19 — програмная ошибка / отсутствие эл.контакта (проверить шлейф)
Коды ошибок кофемашин WMF 1200 / дословный перевод
F2 — Brewer without electricity / Пивовар без электричества
F5 — Brewer shutoff / Отключение пивовара
F6 — Brewer over current / Брюэр над течением
F7 — Brewer timeout (no electricity) / Время ожидания пивовара (нет электричества)
F26 — Portioner 1 current malfunction / Неисправность тока Портера 1
F36 — Current malfunction Portioner 2 / Текущая дозатором неисправность 2
F87 — Boiler sensor damaged / Поврежден датчик котла
F88 — boiler excess temperature / избыточная температура котла
F89 — boiler heating time / время нагрева котла
F125 — EEprom missing or defective / EEprom отсутствует или неисправен
F126 — Front panel / CPU Communication error / Ошибка связи передней панели / процессора
F135 — Motor driver error (grinder or brewer motor) / Ошибка водителя мотора (мотор точильщика или винодела)
F161 — flowmeter malfunction during brewing / неисправность расходомера при заваривании
F162 — flowmeter malfunction during cleaning / неисправность расходомера во время очистки
F163 — flowmeter malfunction during checking / неисправность расходомера при проверке
F164 — flowmeter malfunction during hot water dosage / неисправность расходомера при дозировке горячей воды
F165 — flowmeter malfunction during choc dosage / неисправность расходомера при дозировке Чок
F166 — flowmeter malfunction during steam boiler / неисправность расходомера во время парового котла
F167 — flowmeter malfunction during descaling / неисправность расходомера при очистке от накипи
F186 — timeout during steam boiler filling / время ожидания при заполнении парового котла
F187 — Steam boiler sensor damage / Повреждение датчика парового котла
F188 — Excess temperature in steam boiler / Избыточная температура в паровом котле
F189 — Heating-time steam boiler / Боилер пара времени разогрева
Для самостоятельного ремонта кофемашины, Вы можете приобрести запчасти в нашем интернет-магазине
Похожие статьи
-
Contents
-
Table of Contents
-
Troubleshooting
-
Bookmarks
Quick Links
KLM1602
Intelligent Fresh Ground Coffee Machine
Service Manual
KLM1602-SM-EN V002
Related Manuals for Kalerm KLM1602
Summary of Contents for Kalerm KLM1602
-
Page 1
KLM1602 Intelligent Fresh Ground Coffee Machine Service Manual KLM1602-SM-EN V002… -
Page 3
KLM1602 Intelligent Fresh Ground Coffee Machine Service Manual English… -
Page 4: Table Of Contents
4.2.7 Disassemble control panel group 4.2.8 Disassemble drainage valve group 4.2.9 Disassemble solenoid valve group 4.2.10 Disassemble pump group 4.2.11 Disassemble PCBA 4.2.12 Disassemble dispenser valve 2W 4.2.13 Disassemble thermoblock group 4.2.14 Disassemble drive motor group KLM1602 Intelligent Fresh Ground Coffee Machine Service Manual…
-
Page 5
Contents 4.3 Precautions for maintenance and installation 4.3.1 Brew unit group 4.3.2 Grinder group 4.3.3 Control panel group Precautions for assembling 5. Function test and maintenance 5.1 Function test and test standards 5.2 Coffee machine maintenance 5.2.1 Coffee machine decalcifying 5.2.2 Rinse the brew unit 5.2.3 Wipe the coffee machine 6. -
Page 6: Introduction
The maintenance technician must inform the retailer or manufacturer promptly of any problems when installing ● or using the appliance. The coffee machine must be used at the temperature between 5℃ and 40℃. ● KLM1602 Intelligent Fresh Ground Coffee Machine Service Manual…
-
Page 7: Symbol Description
Introduction Symbol description Non-compliance with the operation, may cause electric shock, and threat to life. Non-compliance with the operation may cause coffee machine damaged, or personal injury. Non-compliance with the operation, may cause scalded or burned. This symbol, if prompted, please carefully read information with it.
-
Page 8: Structure
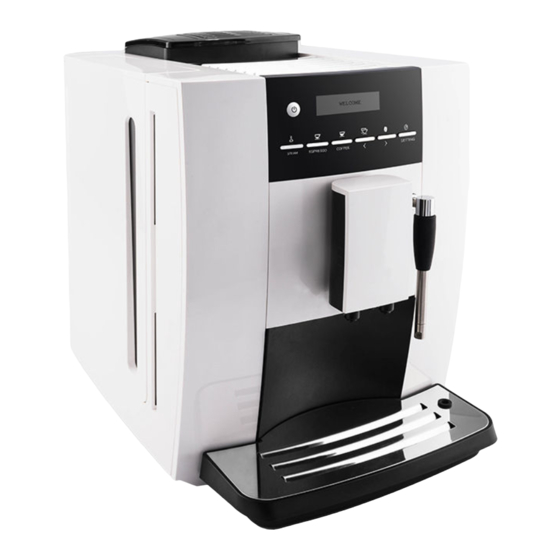
Bean container lid Drip tray decoration cover Water tank cover Top cover Water tank ornament cover Cup support Water tank Front cover right Front cover left Drip tray cover Export decorative cover Drip tray KLM1602 Intelligent Fresh Ground Coffee Machine Service Manual…
-
Page 9
Structure Bean container Grinder adjustment knob Ground coffee container lid Hot water export Coffee export Back cover Logo Right side section… -
Page 10
Structure Left side section Power line Power switch Americano button Espresso button Coffee button Double cup Coffee strength button Setting button Screen KLM1602 Intelligent Fresh Ground Coffee Machine Service Manual… -
Page 11: Description Of Internal Components
Structure Description of internal components Thermoblock Solenoid valve 2W Geared motor Dispenser valve 2W Support PCBA Pump Drainage valve Line pencil connector Transformer Base Brew unit Drip tray microswitch Reed sensor Flowmeter Valve support Control panel Grinder group…
-
Page 12: Water Circuit
Structure 2.3 Water circuit 2.3.1 Overview of water circuit Water tank Dispenser valve 2W Sieve Drainage valve Flowmeter Brew unit Pump Solenoid valve 2W Pressure maintaining valve Beverage export Coffee thermoblock KLM1602 Intelligent Fresh Ground Coffee Machine Service Manual…
-
Page 13: Water Circuit For Making Coffee
Structure 2.3.2 Water circuit for making coffee Water tank Dispenser valve 2W Sieve Drainage valve Flowmeter Brew unit Pump Beverage export Pressure maintaining valve Coffee thermoblock…
-
Page 14: Water Circuit For Making Hot Water
Structure 2.3.3 Water circuit for making water Water tank Solenoid valve 2W Sieve Beverage export Flowmeter Pump Pressure maintaining valve Coffee thermoblock KLM1602 Intelligent Fresh Ground Coffee Machine Service Manual…
-
Page 15: Schematic Circuit Diagram
Structure 2.4 Schematic circuit diagram Power switch Drive motor Data interface Transformer LCD screen Thermoblock fused-cord fused-cord Solenoid valve Flowmeter Pump Drip tray microswitch Filter Reed sensor Terminal LED light Power line Thermoblock Grinder motor Microswitch Feedback device Communication cable Power PCBA Solenoid valve 2W Stepper motor…
-
Page 16: Technical Data
Coffee grounds container 15 Pieces Coffee bean container 250g Coffee powder volume for brew unit MIN 5g; MAX 14g Various data Dimensions(length×width×height) 450×302×370 mm Cable Length approx 1.5 m Net weight approx 11.5kg KLM1602 Intelligent Fresh Ground Coffee Machine Service Manual…
-
Page 17: Troubleshooting
Troubleshooting 3. Troubleshooting check list 3.1 Troubleshooting check list Prob- Item Confirmation Problem Cause Remedy Remarks ability External YES — If necessary — replace the Disassemble the Examine parts are 3.1.1 external parts external parts external broken or NO — continue to 3.1.2 according to 4.2.1 damage damaged…
-
Page 18
3.3.2.3 water tank is make the ball move inside water sticked tank NO — continue to 3.3.2.4 The following should be replaced or repaired the water tank group KLM1602 Intelligent Fresh Ground Coffee Machine Service Manual… -
Page 19
Troubleshooting Prob- Item Confirmation Problem Cause Remedy Remarks ability YES — replace water tank group, item: 8810101020 The ball is fell off 3.3.2.4 NO — continue to 3.3.2.5 YES — replace water tank group, item: 8810101020 Ball damaged 3.3.2.5 NO — continue to 3.3.2.6 FILL WATER The following should be repaired by dismatling the machine 3.3.2… -
Page 20
4.2.10; YES — replace drainage valve Drainage valve 2. Replace or repair 3.3.6.3 group group damaged damaged components NO — continue to 3.3.6.4 according to drainage valve group explosive view 8810101006 KLM1602 Intelligent Fresh Ground Coffee Machine Service Manual… -
Page 21
Troubleshooting Prob- Item Confirmation Problem Cause Remedy Remarks ability YES — replace brew unit seal, item: Contropistone seal 1. Disassemble brew unit 3.3.6.4 73000065 damaged according to 4.2.3; NO — continue to 3.3.6.5 A little 2. Replace or repair water drops damaged components Press from coffee… -
Page 22
) Inside pipe connector YES — repair pipes or pipe damaged or connector at the back of brew dropped-coffee 3.5.3.3 unit continue to — 3.5.3.4 leakage(lots of coffee on the table) KLM1602 Intelligent Fresh Ground Coffee Machine Service Manual… -
Page 23
Troubleshooting Prob- Item Confirmation Problem Cause Remedy Remarks ability Drainage valve 1. Disassemble drainage group damaged, valve group according no water comes to 4.2.8; YES — replace drainage valve to brew unit; 2. Replace or repair 3.5.3.4 group water drops to damaged components NO — continue to 3.5.3.5 drip tray directly… -
Page 24
2 cups of 3.5.8.2 creama on too rough coffee, the 3rd cup will meet the the top standard NO — continue to 3.5.8.3 The following should be repaired by dismatling the machine KLM1602 Intelligent Fresh Ground Coffee Machine Service Manual… -
Page 25
8810101002 replace or coffee repair damaged components YES — use Kalerm provided coffee spoon, fill one full spoon of coffee Not enough LACK OF 3.6.2.1 powder coffee powder POWDER NO — continue to 3.6.1.2 displays on 3.6.2… -
Page 26
NO — continue to 3.12.1.7 according to 4.2.11 Connector or pipe 3.8.1.7 damaged- water YES — replace connector or pipe leakage Problem after press ON/OFF to Problems CLEANING refer to 3.3 till power KLM1602 Intelligent Fresh Ground Coffee Machine Service Manual… -
Page 27
Troubleshooting Prob- Item Confirmation Problem Cause Remedy Remarks ability Descale according to Decalcifyi 5.2.1 Clean coffee machine 3.10 cleaning according to 5.2.2 YES — Restart the machine System testing 3.12.1.1 3.11 Malfunction NO — continue to 3.12.1.2 YES — repair or replace coffee Thermoblock According to explosive thermoblock connection line;… -
Page 28
4.2.11 Replace or repair YES — repair or replace coder damaged components Feedback device 3.13.4.4 circuit board, item: 78000005 according to feedback damaged NO — continue to 3.13.4.5 device explosive view 8810101013 KLM1602 Intelligent Fresh Ground Coffee Machine Service Manual… -
Page 29
Troubleshooting Prob- Item Confirmation Problem Cause Remedy Remarks ability 1. Disassemble brew unit according to 4.2.3; 2. Replace or repair YES — replace or repair brew unit Brew unit parts 3.13.4.5 damaged components parts damaged BREW UNIT NO — continue to 3.16.4.4 according to brew unit Information RESET… -
Page 30: Check List For Minor Failure
EMPTY TRAY- terminal function is all right;If the screen does not remind EMPTY TRAY-internal line fault- disassemble and repair the machine. KLM1602 Intelligent Fresh Ground Coffee Machine Service Manual…
-
Page 31
Troubleshooting 3.2.1.4 Press button Operation all the function buttons on the control panel to judge if the press buttons are all right,and confirm issues and causes according to check list 3.1. 3.2.2 Circuit 3.2.2.1 Check fuse inside line pencil connector If the fuse is damaged, machine can not be started on. -
Page 32
When touch microswitch contactor, it is on-state. 3.2.3. Leakage Take off drip tray layer board as the picture shows, fill drip tray microswitch with paper, and press rinse button Check leakage of brew unit KLM1602 Intelligent Fresh Ground Coffee Machine Service Manual… -
Page 33
Troubleshooting Check leakage of connectors… -
Page 34: Repair
Repair 4. Repair 4.1 Tools preparation Torx screwdriver(T6,T10,T15,T20,T25) Slotted type screwdriver (3mm series) Multimeter Needle-nose pliers Electronic scale Temperature tester KLM1602 Intelligent Fresh Ground Coffee Machine Service Manual…
-
Page 35: General Disassembly
Repair 4.2 Disassemble process for components 4.2.1 Disassemble exterior parts 4.2.1.1 Take out movable parts 1. Take out drip tray 2. Take out bean container lid group 3. Take out water tank group 4.2.1.2 Disassemble back cover 1. Rotate the Logo support according 2.
-
Page 36
2. Take out front cover right and front the bottom cover left separately according to the direction of the arrow 4.2.1.4 Disassemble right cover 1. Take out right side section according to the direction of the arrow KLM1602 Intelligent Fresh Ground Coffee Machine Service Manual… -
Page 37
Repair 4.2.1.5 Disassemble coffee bean container group 1. Disassemble 4 screws from the coffee bean container, and take the coffee bean container out 4.2.1.6 Disassemble top cover 1. Disassemble 2 screws from the left 2. Loose top cover and hook of the side of the top cover frame 3. -
Page 38: Disassemble Power Cord
1. Refer to 4.2.1- Disassemble the exterior parts of the machine 2. Disassemble 2 screws from the 3. Disassemble 1 screw from support, cable rack loose 3 screws inside the line pencil connector and take out the power cord KLM1602 Intelligent Fresh Ground Coffee Machine Service Manual…
-
Page 39: Disassemble Brew Unit
Repair 4.2.3 Disassemble brew unit 1. Refer to 4.2.1- Disassemble exterior parts of the machine 2. Disassemble 3 screws, and take 3. Pull out silicon pipe from brew unit out frame support 4. Disassemble 3 screws from brew unit 5. Pull the brewing unit outward and 6.
-
Page 40: Disassemble Valve Support Group
2. Pull out the flowmeter terminal, and 3. Pull out the silicone pipe at two pull out the flowmeter according to sides of the flowmeter, and take out the arrow direction flowmeter KLM1602 Intelligent Fresh Ground Coffee Machine Service Manual…
-
Page 41: Disassemble Grinder Group
Repair 4.2.6 Disassemble grinder group 1. Refer to 4.2.1.1-4.2.1.6-disassemble top cover 2. Disassemble 3 screws 3. Pull out grinder motor terminal from PCBA and take out grinder group 4.2.8 Disassemble control panel group 1. Refer to 4.2.1-disassemble exterior parts 3. Pull out terminal on PCBA which 2.
-
Page 42: Disassemble Drainage Valve Group
1. Refer to4.2.1-disassemble exterior parts 2. Refer to4.2.3-disassemble brew unit group 3. Remove the spring clip,pull out 4. Pull out dispenser valve terminal on the connector PCBA, and take it out from the cable rack KLM1602 Intelligent Fresh Ground Coffee Machine Service Manual…
-
Page 43: Disassemble Solenoid Valve Group
Repair Note:There is a sealing element left at 5. Disassemble 4 screws from support the bottom after taking out drainage and take out drainage valve group valve group 4.2.9 Disassemble solenoid valve group 1. Refer to 4.2.1.1-4.2.1.4-disassemble right side section 2.
-
Page 44: Disassemble Pump Group
5. Take all cables out from the cable and take it out from the cable rack rack,pull out 3pcs screws ,remove the cable rack 6.Pull out the spring clip and teflon pipe,remove the pump KLM1602 Intelligent Fresh Ground Coffee Machine Service Manual…
-
Page 45: Disassemble Pcba
Repair 4.2.11 Disassemble PCBA 1. Refer to 4.2.1.1-4.2.1.4-disassemble right side section 2. Pull out all the terminals on PCBA 3. Disassemble 4 screws on PCBA, and take out PCBA 4.2.12 Disassemble dispenser valve 2W group 1. Refer to4.2.1.1-4.2.1.4-disassemble right side section 2.
-
Page 46: Disassemble Thermoblock Group
4. Pull out the terminal on soleniod 5. Pull out the spring clip and teflon valve pipe 6. Pull out the spring clip and teflon 7. Disassemble 2pcs screws pipe KLM1602 Intelligent Fresh Ground Coffee Machine Service Manual…
-
Page 47: Disassemble Drive Motor Group
Repair 8. Disassemble hooks from the support and take out thermoblock 4.2.14 Disassemble drive motor group 1. Refer to 4.2.1.1-4.2.1.4-disassemble right side section 2. Pull out the terminals on PCBA 3. Disassemble 2pcs screws ,remove and take it off cable rack the drive motor group…
-
Page 48: Precautions For Maintenance And Installation
4. Disassemble 4 hooks from the top the front position of cover of the brew unit,take out top the brew unit. It should cover of brew unit match the wiper KLM1602 Intelligent Fresh Ground Coffee Machine Service Manual…
-
Page 49
7. Take out left and right pull plate 8. Rotate the gear and pull plate sleeve KLM1602 Intelligent Fresh Ground Coffee Machine Service Manual 9. Take out the contropistone 10. Take out the connector, pay attention to the direction of the spring. -
Page 50
12. Disassemble release link,and release link. take out piston 14. Disassemble seal from 13. Disassemble the screw from contropistone contropistone, and take out filter screen KLM1602 Intelligent Fresh Ground Coffee Machine Service Manual… -
Page 51: Grinder Group
Repair 4.3.3 Grinder group 1. Disassemble the 3 hooks from the 2. Rotate the upper burr group grinder adjustment sector and take out anticlockwise the grinder adjustment sector 3. Disassemble the three hooks from 4. Disassemble 1 middle screw the motor support for grinder, and take out the grinder adjustment ring 5.
-
Page 52
10. Disassemble steel ball support and gearbox, and then take out the coffee 34 pcs steel ball 11. Take out the epicyclic gear 12. Take out filler piece and the group B epicyclic gear group A KLM1602 Intelligent Fresh Ground Coffee Machine Service Manual… -
Page 53: Control Panel Group
Repair 13. Disassemble the 2 screws inside the gearbox, and take out the grinder motor 4.3.4 Control panel group 1. Pull out the terminal 2. Disassemble 2pcs screws NOTE: the location of two silicone tube, top tube for 3. Remove the coffee outlet group coffee, bottom pipe for water…
-
Page 54
6. Remove the decorative cover 7. Disassemble 2pcs hooks on both panel and the power button sides 8. Remove the HMI,pull out 3pcs 9. Disassemble 2pcs hooks on both terminals sides and remove the switch support KLM1602 Intelligent Fresh Ground Coffee Machine Service Manual… -
Page 55
Repair 10. Remove the HMI 11. Remove the HMI group,disassemble 5pcs screws,pull out LCD terminal 12. Disassemble 2pcs hooks on both 13. Remove the LCD screen sides… -
Page 56: Precautions For Assembling
Repair Valve support group 1. When installing the support seal, the downside should be with bigger diameter. Brew unit 1. Install the piston and release link into the coffee brewing unit, oil(MI-setral-61B) coating position should be as the picture shows. 2.
-
Page 57
Note: The direction of the contropistone should be the same as the picture showed. 7. Rotate the gear onto the brew unit frame, install the sleeve pipe, the small head of sleeve pipe should be inward. KLM1602 Intelligent Fresh Ground Coffee Machine Service Manual… -
Page 58
Repair 8. Install the left and right pull plate and left and right cover on brew unit frame, oil (MI-setral-61B) coating position for left and right pull plate should be as the picture shows. Note: Pay attention to the direction of the brew unit top cover, the deeper groove should be in front. -
Page 59
Screw tightly. 10. Insert the already installed grinder motor 11. Install the coffee powder hopper on the in the grinder support, and lock screws. coffee powder container, and lock the screw. KLM1602 Intelligent Fresh Ground Coffee Machine Service Manual… -
Page 60
Repair 12. Install 3 spring sleeves into the hole of 13. Install the screw pin worm drive and the support lower grinder. conical burr to support lower grindor. 14. Put 3 conical burr protective steel balls 15. Put the felt ring into the already installed and spring into support lower grinder. -
Page 61
22. The already installed grinder group should be tested when the whole machine is installed. The thickness of the powder should be adjusted properly. KLM1602 Intelligent Fresh Ground Coffee Machine Service Manual… -
Page 62: Function Test And Test Standards
90~120ml 25~35s 5.2 Coffee machine maintenance 5.2.1 Coffee machine decalcifying Use Kalerm decalcifier only. It may damage machine if use other decalcifier. The whole process costs about 25 minutes. 1. Empty tray 2. Dissolve decalcifier in the clean water, and pour into the water tank- the water inside the water tank should be half of the water tank.
-
Page 63
11. The screen shows READY,cleaning is completed, then you can make coffee. Daily descale comparison table Water hardless level Descale cycle ●●●● around2~4weeks ●●●○ around4~6weeks ●●○○ around once per 2 months ●○○○ around once per 3 months KLM1602 Intelligent Fresh Ground Coffee Machine Service Manual… -
Page 64
Function test and maintenance methods 5.2.2 Rinse the brew unit Use Kalerm cleaning agent only. It may damage machine if use other cleaning agent. The whole process costs about 10 minutes. 1. When machine in READY state, press “P” button to enter in the program menu, press the button “<>”… -
Page 65: Function Test And Maintenance
Use dry rag or tissue clean rest oil inside bean container. Do not use water to wash bean container. 4. Clean hopper Use dry rag clean the channel of hopper. Do not use water to wash hopper channel. KLM1602 Intelligent Fresh Ground Coffee Machine Service Manual…
-
Page 66: Rinse The Brew Unit
Function vtest and maintenance methods 5. Clean the internal machine Clean base Clean brew unit-coffee brewing box( position 1) and contropistone( position 3 and position 2 is the back side) 6. Clean coffee machine. Use dry and soft rag to clean the appearance of the coffee machine.
-
Page 67: Wipe The Coffee Machine
Repair Grinder group 1. Assemble the grinder motor and gearbox together, and screw them tightly. The screw should be covered with loctite. The teeth of the gearbox should be coated with oil(MI-setral-61B). The red mark place should correspond to one hole of the gearbox. 2.
-
Page 78
Suzhou Industrial Park Kalerm Electric Appliances Co., Ltd www.kalerm.com +86-4006-800-866 Add: #100 Sumu Rd, SIP Suzhou,215021,Jiangsu China T e l : +86-512-68180758 F ax : +86-512-68181050…
- Home
- Brands
- Kalerm
- Coffee Maker
- KLM1602
- Service Manual
Manual for Kalerm KLM1602 Coffee Maker (78 pages)
Specifications:934/934258-klm1602.pdf file (10 Mar 2023) |
Read Kalerm KLM1602 PDF Manual Online:
Accompanying Data:
Kalerm KLM1602 Coffee Maker PDF Service Manual (Updated: Friday 10th of March 2023 11:06:13 AM)
Rating: 4.8 (rated by 61 users)
Compatible devices: EXECUTIVE, K90, KLM1601, Esperto Pro, HD8844, ITALIA SUP021 YR, BVMC-ECMP60 SERIES, HT-300AF.
Recommended Documentation:
Text of Service Manual
(Ocr-Read Version Summary of Contents, UPD: 10 March 2023)
-
19, 3.3.2.4 3.3.2.5 3.3.2.6 3.3.2.7 3.3 3.3.2 17 HMI damaged 3.3.3 3.3.3.1 3.3.3.2 3.3.3.3 3.3.3.4 3.3.3.5 3.3.3.6 3.3.4.2 3.3.2.8 3.3.4 3.3.4.1 Troubleshooting Item Confirmation No. No. Cause Remedy RemarksProblem Prob- ability Press On/Off to AUTO CHECKIN G and then to READY FILL WATER TANK on screen YES — replace water tank group, item: 8810101020 NO — continue to 3.3.2.5 …
-
37, Kalerm KLM1602 35 1 2 3 1 1 1 1. Disassemble 2 screws from the left side of the top cover 2. Loose top cover and hook of the frame 4.2.1.6 Disassemble top cover 3. Take out top cover according to the direction of the arrow 1. Disassemble 4 screws from the coffee bean container, and take the coffee bean container out 4.2.1.5 Disassemble coffee bean container group Repair
… -
38, 36 1 2 3 1 1 4.2.2 Disassemble power cord 1. Disassemble left side section according to the direction of the arrow 1. Refer to 4.2.1- Disassemble the exterior parts of the machine 4.2.1.7 Disassemble left cover 2. Disassemble 2 screws from the cable rack 3. Disassemble 1 screw from support, loose 3 screws inside the line pencil connector and take out the power cord Service…
-
56, Kalerm KLM1602 55 Repair 1. When installing the support seal, the downside should be with bigger diameter. 1 1. Install the piston and release link into the coffee brewing unit, oil(MI-setral-61B) coating position should be as the picture shows. 1 1 1 Valve support group Brew unit 1 2. Install the coffee brewing unit into the brew unit frame, and install reset base and connect part. 2 …
-
57, 56 3. Assemble the pin seal and pin together to drainage valve connection. Note: the direction of the pin seal. 4. Coating the contropistone seal with lubricating oil(SYN-setral-Al/C 2-FD) and install to the contropistone, and then lock the filter screen. 3 4 5. Assemble the connector, ball and spring into contropistone. Pay attention to the arrow direction. 6. …
-
36, Kalerm KLM1602 34 3 1 2 1 1 3. Take out back cover according to the arrow direction Repair Service Manual Intelligent Fresh Ground Coffee Machine KLM1602 1. Disassemble the 2 screws from the bottom 2. Take out front cover right and front cover left separately according to the direction of the arrow 4.2.1.3 Disassemble front cover right and front cover left 1. Take out right side section according …
Kalerm KLM1602 Recommended Instructions:
NN-SN668B, 1996 Adventurer, EL-6060, 96M5985o, ME4064 Series, SoundWorks SW310


-
Mr. Coffee
PTC13-099
©2006 Sunbeam Products, Inc., doing business as Jarden Consumer Solutions. All rights reserved.In the U.S., distributed by Sunbeam Products, Inc., doing business as Jarden Consumer Solutions, Boca Raton, FL 33431.In Canada, imported and distributed by Sunbeam Corporation (Canada), Limited, doing business as Jarden Consumer Solutions, Mississauga, Ontario L5R 3V8.AMB111006© …
PTC13-099 16
-
Curtis
G3 GEMX IntelliFresh FreshTrac GEMXSIFT Series
USER GUIDE READ AND SAVE THESE INSTRUCTIONS NOTICE TO INSTALLER: Please leave this booklet with the machine.øøøøø #’$(&.94*’5(&.95*’5’30/5$07&3 ‘SFW»G3 GEMX™ IntelliFresh® Coffee Brewing System with FreshTrac® Satellite 4UZMFWBSJFT.PEFM(&.94 …
G3 GEMX IntelliFresh FreshTrac GEMXSIFT Series 42
-
Mr. Coffee
PJX Series
© 2015 Sunbeam Products, Inc. doing business as Jarden Consumer Solutions. All rights reserved. Distributed by Sunbeam Products, Inc. doing business as Jarden Consumer Solutions, Boca Raton, Florida 33431. Sunbeam Products, Inc.is a subsidiary of Jarden Corporation (NYSE:JAH).© 2015 Sunbeam Products, Inc. operando bajo el nombre de Jarden Consumer Solutions. Todos los derechos reservados. D …
PJX Series 27
-
Breville
BES840XL
BES840XLthe Infuser™Instruction Booklet — Livret d’instructionswww.breville.comBreville is a registered trademark of Breville Pty. Ltd. A.B.N. 98 000 092 928. Copyright Breville Pty. Ltd. 2012. Due to continued product improvement, the products illustrated/photographed in this booklet may vary slightly from the actual product.Model BES840XL Issue — A11USAMail: B …
BES840XL 37
-
Gaggia
MILANO
GAGGIA S.p.a. si riserva il diritto di apportare tutte le modifiche ritenute necessarie.GAGGIA S.p.a. reserves the right to carry out all modifications which might be considered necessary.GAGGIA S.p.a. hält das Recht alle notwendigen Aenderungen durchzuführen.GAGGIA S.p.a. se réserve le droit d’apporter toute modification qui se rend nécessaire.GAGGIA S.p.a. se reserva …
MILANO 78
-
Hamilton Beach
43253R
CoffeemakerCafetière CafeteraLe invitamos a leer cuidadosamente este instructivo antesde usar su aparato.Read before use.Lire avant l’utilisation.Lea antes de usar.840200603HelpHamiltonBeachMakeaDifference!In an effort to reduce paper waste, Hamilton Beach Brands,Inc., has reduced the size of this Use and Care guide and madeit available online. We believe strongly in doing our part to helpca …
43253R 2
-
Mr. Coffee
ES11
Coffeemaker / CafeteraES Series / Serie de ESUser Manual /Manual de Usuario©2002 Sunbeam Products, Inc. All rights reserved.MR. COFFEE®is a registered trademark of Sunbeam Products, Inc.Distributed by Sunbeam Products, Inc., Boca Raton, Florida 33431.©2002 Sunbeam Products, Inc. Todos los derechos reservados.MR. COFFEE®es una marca registrada de Sunbeam Products, Inc.Distribuido po …
ES11 36
-
Philips
1200 Series
Fully automaticespresso machine1200 seriesEN USER MANUALDA BRUGERVEJLEDNINGDE BENUTZERHANDBUCHES MANUAL DEL USUARIOFR MODE D’EMPLOIIT MANUALE UTENTENL GEBRUIKSAANWIJZINGNO BRUKERHÅNDBOKPT MANUAL DO UTILIZADORFI KÄYTTÖOPASSV ANVÄNDARHANDBOKEL ΕΓΧΕΙΡΙΔΙΟ ΧΡΉΣΉΣwww.philips.com/coee-careOMNIA #0 COVER_FRONT_A5_WE/EE/RCA.indd 112-04-19 16:38 …
1200 Series 222
-
Black & Decker
HOME CAFE GT300
PLEASE READ AND SAVE THIS USE AND CARE BOOK.POR FAVOR LEA ESTE INSTRUCTIVO ANTES DE USAR EL PRODUCTO.VEUILLEZ LIRE ET CONSERVER CE GUIDE D’ENTRETIEN ET D’UTILISATION.Series, Serie, SérieGT300One-Cup CoffeemakerCafetera de una tazaCafetière de une tasseTo order more coffee pods,•Visit your favorite retailer• Go online www.homecafe.com• Call 1-800-HomeCafe (466-3223)Para comprar más …
HOME CAFE GT300 21
-
Mr. Coffee
mrx35
©2006 Sunbeam Products, Inc., doing business as Jarden Consumer Solutions. All rights reserved. Distributed by Sunbeam Products, Inc., doing business as Jarden Consumer Solutions,Boca Raton, Florida 33431. U.S. 1-800-MR COFFEE (1-800-672-6333) Canada 1-800-667-8623Visit us at www.mrcoffee.com You will find exciting and entertaining tips and ideas, including great recipes!SPR-101006©200 …
mrx35 44
Additional Information:
Product Types by Kalerm:
- Coffee Maker
Popular Right Now:
Operating Impressions, Questions and Answers:
Download Service manual of Kalerm KLM1601 Coffee Maker for Free or View it Online on All-Guides.com.

1

2

3

4

5

6

7

8

9

10

11

12

13

14

15

16

17

18

19

20

21

22

23

24

25

26

27

28

29

30

31

32

33

34

35

36

37

38

39

40

41

42

43

44

45

46

47

48

49

50

51

52

53

54

55

56

57

58

59

60

61

62

63

64

65

66

67

68

69

70

71

72

73

74

75

76

77

78

79

80

81

82

83

84

85

86

87

88

89

90

91

92

93

94

95

96

16
Service Manual
Intelligent Fresh Ground Coffee Machine
KLM1601
Troubleshooting
Item Confirmation No. No. Cause Remedy RemarksProblem
Prob-
ability
3.2
3.2.4
3.2.4.1
3.2.4.2
3.2.5.1
3.2.5.2
The following should be repaired or replaced water tank group
The following should be repaired or replaced powder container cover
The following should be repaired by dismatling the machine
3.2.6.1
3.2.6.2
3.3.1.1
3.3.1.2
3.3.1.3
3.3.1.4
3.2.5
3.2.6
3.3.1
3.3
Examine
the
external
movable
parts
Foam
rubber can
not be
installed
Wrong installation
for foam rubber
group
YES — confirm if the rubber foam
installed correct
NO — continue to 3.2.4.2
YES — replace 79000054 or
79000055
Replace or repair
damaged parts
according to foam
rubber explosive view
8810101022
Replace or repair
damaged components
according to water
tank explosive view
8810101020
Replace or repair
damaged components
according to bean
container explosive
view 8810101019
Disassemble and
replace components
according to 4.2.2
1. Disassemble control
panel according to
4.2.8;
2. Disassemble
microswitch and
replace according to
4.3.4
YES — move valve body in order to
make it reset
NO — continue to 3.2.5.2
YES — replace components
YES — clean the left coffee
powder
NO — continue to 3.2.6.2
YES — replace powder container
cover 79000123
YES — use proper voltage for the
machine
NO — continue to 3.3.1.2
YES — replug the powder cord to
the powder socket
NO — continue to 3.3.1.3
YES — replacepowder cord
NO — continue to 3.3.1.4
YES — replace microswitch
73000051
NO — continue to 3.3.1.5
Foam rubber is
damaged
Valve body is
stucked, can not
be reset
Components
damaged
Lots of coffee
powder left below
the powder
container cover
Powder container
cover deformed
Improper voltage
for the machine
Confirm if the
powder cord
connected
correct
Powder cord
damaged
Powder switch
damaged
Water
leakage
from the
bottom
when
taking out
water tank
or filling in
water tank
Powder
container
cover can
not be
covered
tightly
Machine
can not be
powered
on
Press
On/Off to
AUTO
CHECKIN
G and
then to
READY
Table of Contents for Kalerm KLM1602:
-
18 3.3 3.3.4 3.3.5 3.3.4.3 3.3.5.1 3.3.5.2 3.3.5.3 3.3.5.4 3.3.6.1 3.3.6.2 3.3.6.3 3.3.6 Troubleshooting Item Confirmation No. No. Cause Remedy RemarksProblem Prob- ability YES — replace or repair PCBA, item: 78000056 Disassemble PCBA, replace and repair according to 4.2.11 PCBA damaged The following should be repaired by dismatling the machine Press On/Off to AUTO CHECKIN G and then to READY EMPTY TRAY on screen No water comes from coffee export when C
-
32 Repair 4. Repair 4.1 Tools preparation Torx screwdriver(T6,T10,T15,T20,T25) Slotted type screwdriver (3mm series) Needle-nose pliers Electronic scale Temperature tester Multimeter Service Manual Intelligent Fresh Ground Coffee Machine KLM1602
-
36 1 2 3 1 1 4.2.2 Disassemble power cord 1. Disassemble left side section according to the direction of the arrow 1. Refer to 4.2.1- Disassemble the exterior parts of the machine 4.2.1.7 Disassemble left cover 2. Disassemble 2 screws from the cable rack 3. Disassemble 1 screw from support, loose 3 screws inside the line pencil connector and take out the power cord Service Manual Intelligent Fresh Ground Coffee Machine KLM1602 Repa
-
3.2 3.2.4.2 3.3.1.1 3.3.1.2 3.3.1.3 3.3.1.4 3.3.1 3.3 16 3.2.4 3.3.1.5 3.3.1.6 3.3.1.7 3.3.1.9 3.3.1.8 3.3.2.1 3.3.2.2 3.3.2.3 3.3.2 Examine the external moving parts Powder container cover can not be covered tightly Replace or repair damaged components according to bean container explosive view 8810101019 YES — replace powder container cover 79000123 Powder container cover deformed Machine can not be powered on Press On/Off to AUTO CHECKIN G and then to R
-
20 3.5 3.5.2.5 3.5.2.6 3.5.2.7 3.5.2.8 3.5.2.3 3.5.2.4 3.5.2 3.5.2.9 3.5.2.10 3.5.3.1 3.5.3.2 3.5.3.3 3.5.3 Troubleshooting Item Confirmation No. No. Cause Remedy RemarksProblem Prob- ability YES — choose normal dry coffee beans NO — continue to 3.5.2.4 YES — use provided coffee powder spoon to unclog NO — continue to 3.5.2.5 Use wet coffee beans Coffee powder channel is clogged The following should be repaired by dismatling the machine YES — take out bean container, and c
-
24 3.7 3.7.2.1 3.7.2.2 3.7.2.3 3.7.3.1 3.7.3.2 3.7.2 3.7.3 3.7.4 3.8.1.1 3.8.1.2 3.8.1.3 3.8.1.4 3.8.1.5 3.8.1.6 3.8.1.7 3.8 3.8.1 Item Confirmation No. No. Cause Remedy RemarksProblem Prob- ability Troubleshooting The volume of hot water is too little The process to make hot water The volume of hot water is too much Hot water temperatur e is too low YES — descale NO — continue to 3.7.2.2 Coffee machine needs descale (deposit makes pip
-
1 2 1 3 4 5 6 1 1 1 49 1. Disassemble the 3 hooks from the grinder adjustment sector and take out the grinder adjustment sector 2. Rotate the upper burr group anticlockwise 4.3.3 Grinder group Repair 3. Disassemble the three hooks from the motor support for grinder, and take out the grinder adjustment ring 4. Disassemble 1 middle screw 5. Take out the line pencil and conical burr group 6. Take out 1 screw from the coffee powder hopper
-
33 1 2 3 1 2 1 Repair 4.2 Disassemble process for components 1. Take out drip tray 2. Take out bean container lid group 4.2.1 Disassemble exterior parts 4.2.1.1 Take out movable parts 3. Take out water tank group 1. Rotate the Logo support according to the direction of the arrow 2. Dismantle 2 screws from the bottom of the Logo support 4.2.1.2 Disassemble back cover
-
13 1 1 1 2 1 3 NOTE: the location of two silicone tube, top tube for coffee, bottom pipe for water 51 Repair 13. Disassemble the 2 screws inside the gearbox, and take out the grinder motor 4.3.4 Control panel group 1. Pull out the terminal 2. Disassemble 2pcs screws 3. Remove the coffee outlet group
-
3.3.2.4 3.3.2.5 3.3.2.6 3.3.2.7 3.3 3.3.2 17 HMI damaged 3.3.3 3.3.3.1 3.3.3.2 3.3.3.3 3.3.3.4 3.3.3.5 3.3.3.6 3.3.4.2 3.3.2.8 3.3.4 3.3.4.1 Troubleshooting Item Confirmation No. No. Cause Remedy RemarksProblem Prob- ability Press On/Off to AUTO CHECKIN G and then to READY FILL WATER TANK on screen YES — replace water tank group, item: 8810101020 NO — continue to 3.3.2.5 YES — replace water tank group, item: 8810101020 NO — continue to 3.3.2.
-
4 1 5 1 6 7 1 1 8 1 9 1 1 52 Repair 4. Disassemble 2pcs screws 5. Disassemble 2pcs hooks 6. Remove the decorative cover panel and the power button 7. Disassemble 2pcs hooks on both sides 8. Remove the HMI,pull out 3pcs terminals 9. Disassemble 2pcs hooks on both sides and remove the switch support Service Manual Intelligent Fresh Ground Coffee Machine KLM1602
-
22 3.5 3.5.6.3 3.5.6.4 3.5.6.5 3.5.6.6 3.5.6.7 3.5.6.8 3.5.6.9 3.5.7.1 3.5.7.2 3.5.6 3.5.8 Item Confirmation No. No. Cause Remedy RemarksProblem Prob- ability Troubleshooting Service Manual Intelligent Fresh Ground Coffee Machine KLM1602 YES — power off coffee machine, restart (drainage valve will be reset automaticly when restart) NO — continue to 3.5.6.3 Drainage valve stepper motor does not reset (when making coffee, stepper motor is still in drainage position) The following should be repaired by dismatling the machine YES — re
-
8. Install the left and right pull plate and left and right cover on brew unit frame, oil (MI-setral-61B) coating position for left and right pull plate should be as the picture shows. 8 8 9. Install the brew unit top cover. 9 1 1 1 Note: Pay attention to the direction of the brew unit top cover, the deeper groove should be in front. 10. Lock the left side and right side cover screws. 10 10 1 1 57 Repair
-
14 Structure Service Manual Intelligent Fresh Ground Coffee Machine KLM1602 2.5 Technical data Total voltage/power China Europe 220V/50HZ 1200W 230V/50HZ 1400W Approvals CCC,CB,CE Power ratings Thermoblock Pump Solenoid valve 2W Grinder motor Drive motor Dispenser valve motor 220V 1200W 230V/50HZ 48W ULKA EP4 230V/50Hz 9-12VA DC 220V DC 24V DC 24V Capacities Water tank Coffee grounds container Coffee bean container Coffee powder volume for brew unit 1.8L 15 Pieces 250g MIN 5g; MAX 14g Various data D
Questions, Opinions and Exploitation Impressions:
You can ask a question, express your opinion or share our experience of Kalerm KLM1602 device using right now.