
Если ваш компьютер с Windows 11/10 внезапно покажет синий экран с сообщением об ошибке MEMORY_MANAGEMENT, сопровождаемым кодом 0x0000001A, это означает, что вы столкнулись с аппаратной проблемой. Это может быть проблема с RAM, жестким диском или вредоносным ПО. Эта ошибка также может возникать при обновлении Windows.
В этой инструкции о том, как исправить ошибку MEMORY MANAGEMENT на синем экране Windows 11/10.
1. Антивирусное сканирование
Обязательно сканируйте свой компьютер на наличие известных вирусов и вредоносных программ, используя один из популярных антивирусных сканеров.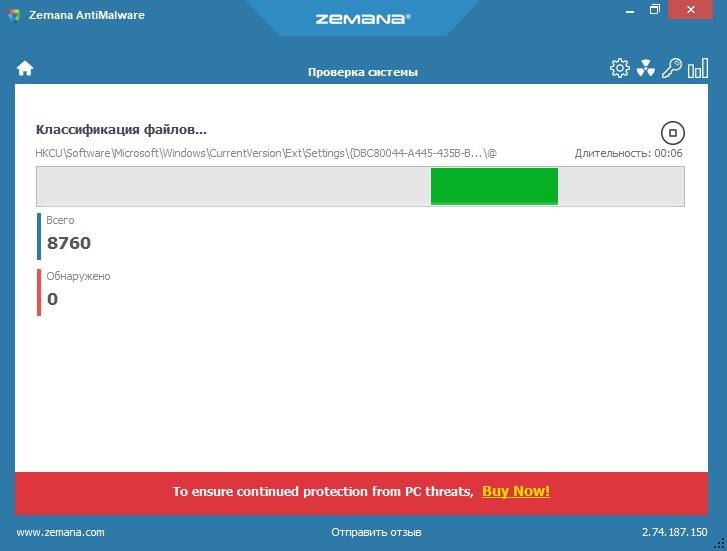
2. Аппаратная проблема RAM
Выключите ПК (из розетке тоже) и достаньте планку RAM, продуйте от пыли и вставьте обратно. Если у вас две планки, то вытягивайте и вставляйте по очереди в разные слоты, чтобы выявить виновную. Также, ошибка может возникнуть при использовании двух разных RAM планках.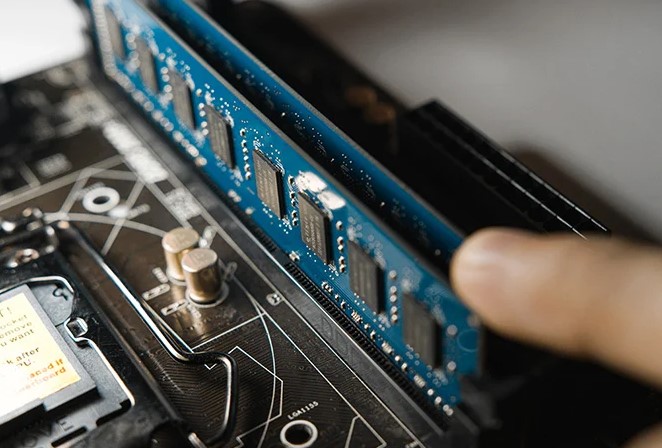
3. Обновление драйверов устройств
Проверьте обновления с помощью Центра обновления Windows, связанное с драйверами устройств. При необходимости вы всегда можете установить их вручную с веб-сайта OEM-производителей.
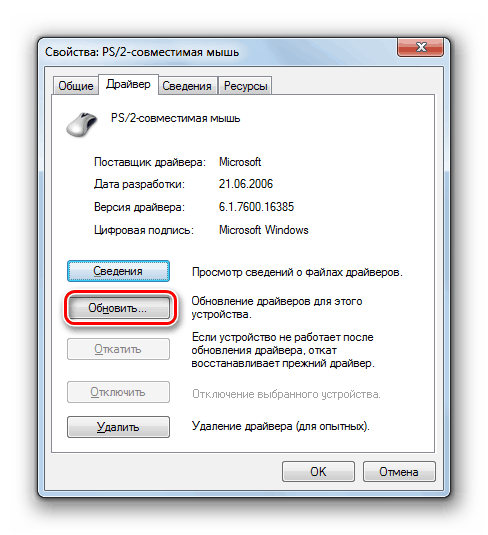
Нажмите Win+X и выберите Диспетчер устройств. Далее раздвигайте каждую графу устройств и посмотрите нети ли желтого восклицательного знака. Если есть, то нажмите по нему правой кнопкой мыши и Обновить устройство. В противном случае, вам нужно будет зайти на сайт производителя материнской платы и скачать официальные дарйвера. 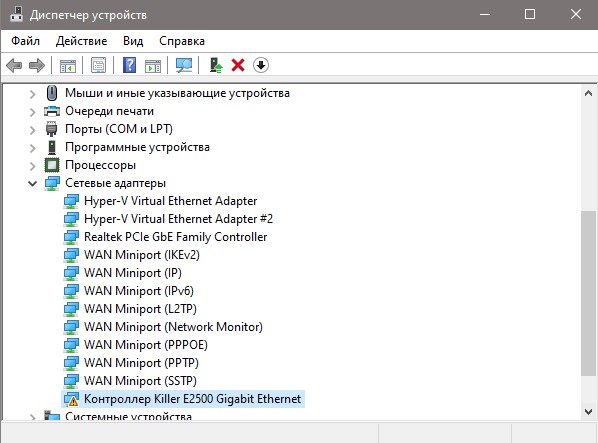
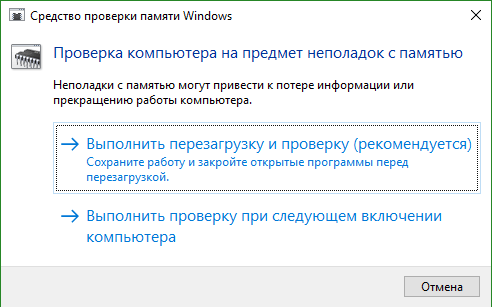
4. Проверьте оперативную память на ошибки
Поскольку это проблема с памятью, вы можете запустить средство диагностики памяти Windows, чтобы выяснить, поврежден ли модуль RAM. Если ваша RAM повреждена, вам придется купить новую или заменить материнскую плату в худшем случае.
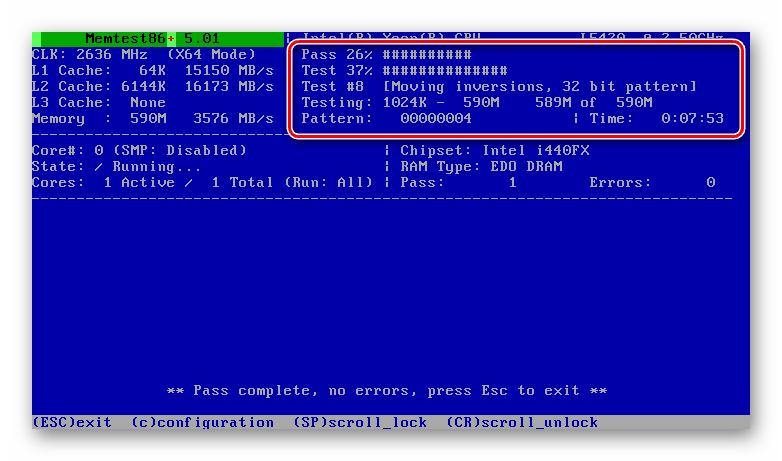
Нажмите Win+R и введите mdsched.exe, чтобы запустить диагностику оперативной памяти. В появившимся окне нажмите Выполнить перезагрузку и проверку, после запуска ПК будет выполнена диагностика ОЗУ и вывод результата.
Полное руководство по проверкеRAM на ошибки
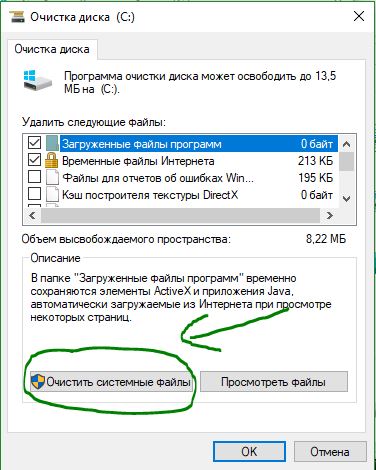
5. Очистка временных и системных файлов
Удаление временных фалов может исправить ошибку MEMORY MANAGEMENT на синем экране Windows 11/10. Для этого:
- Нажмите сочетание кнопок Win+R и введите команду cleanmgr.
- Выберите диск C, где установлена Windows
- Ниже нажмите очистить системные файлы
- Выберите обратно диск C
- Установите везде галочки и нажмите OK
Полное руководство по очистке ненужных файлов в Windows 11/10.
6. Запуск DISM, SFC и CHKDSK
Нужно проверить системные файлы на целостность с помощью инструментов DISM и SFC, а с командой CHKDSK, Вы проверите диск на ошибки. Система автоматически сканирует и пытается восстановить, будь то поврежденный диск или системные файлы.
Запустите командную строку от имени администратора и введите по очереди команды, нажимая Enter после каждой:
chkdsk c: /f /rsfc /scannowDISM /Online /Cleanup-Image /RestoreHealth

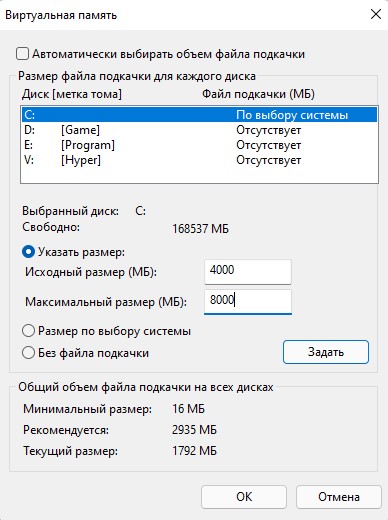
7. Увеличить виртуальную память
Если ошибка MEMORY MANAGEMENT появляется во время игры, то нужно увеличить виртуальную память (файл подкачки).
- Нажмите Win+R и введите sysdm.cpl
- Перейдите во вкладку Дополнительно и нажмите Параметры в графе быстродействие
- Далее перейдите во вкладку Дополнительно и ниже нажмите на Изменить

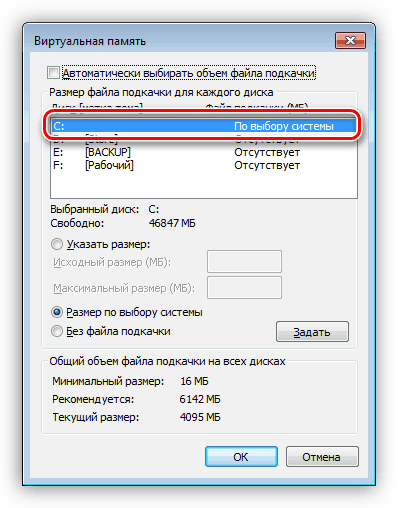
- Снимаем сверху галочку с пункта Автоматически выбирать объем файла подкачки
- Выделяем нажатием мышки диск C, и ниже ставим Указать размер
- Задаем для исходного и для максимального
- Нажимаем на кнопку Задать, и перезагружаемся
Важно: Исходный и Максимальный размер файла подкачки должен в 1,5 (исходный) и 4 (максимальный) раза превышать физическую память установленной на компьютере. Например, если на вашем компьютере 1 ГБ ОЗУ, минимальный размер файла подкачки должен быть 1,5 ГБ, а максимальный размер — 4 ГБ.
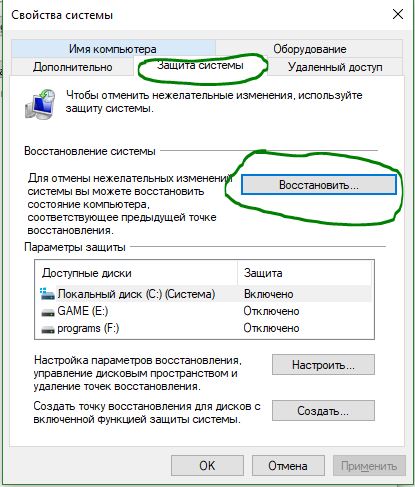
8. Восстановление системы
Лучше всего откатить систему WIndows на пару дней назад, когда ошибка MEMORY_MANAGEMENT еще не появлялась, если вы конечно не выключали точку восстановления.
- Нажмите Win+R и введите sysdm.cpl
- Перейдите во вкладку Защиты системы и нажмите Восстановить
- Следуйте рекомендациям на экране
Смотрите еще:
- Обновление функции до Windows 10 Версия 1709 Ошибка 0x80d02002
- Исправить ошибку 0XC000021A в Windows 10
- Как исправить код ошибки 0x800F081F в Windows 10
- Как исправить код ошибки 0xC0000225 в Windows 10
- Исправить ошибку 0x80071779 в Windows 10
[ Telegram | Поддержать ]
The memory management error 0x0000001a is a common issue for Windows 10 users. What can be the causes for this issue? How to fix it? MiniTool will talk about the possible causes and corresponding solutions for this annoying error.
About 0x0000001a Error
BSOD probably is one of the most frequently encountered Windows 10 problems. There are multiple kinds of BSOD errors including amifldrv64.sys error (when updating BIOS), hal.dll error, boot configuration data unreadable error 0xc000014c and the memory management error 0x0000001a discussed in this post, etc.
You may receive the error when attempting to install Windows Vista/7/8/10 OS and upgrade OS. Certainly, it may also occur to you suddenly. No matter for what, you need to work it out. To fix the stop code 0x0000001a successfully, you need to find out its possible causes.
According to the survey, there are several elements that can result in the error. As the error message “memory management” indicates, this error is related to your computer memory. Besides, hard disk issues can also cause the error. Malware or virus is responsible for the 0x0000001a error too.
How to fix this troublesome error? There are 7 available methods helping you solve it.
Top 7 methods to fix 0x0000001a error
- Scan for malware or virus
- Allocate more space for computer
- Check and fix disk errors
- Uninstall newly installed hardware or software
- Check for device drivers update
- Run system file checker
- Test your computer RAM
Solution 1: Scan Your Computer for Potential Malware
As malware and virus can cause the 0x0000001a error, scanning your computer for any malware is rather necessary. If you find any malicious programs on the computer, remove them from your PC temporarily and check if the issue can be fixed.
Certainly, you can also remove virus from laptop without antivirus software via some methods. For instance, you can end the virus-related programs via Task Manager, remove viruses via Command Prompt, check recently installed software and applications, delete virus by utilizing safe mode, etc.
You may like this: Is Windows Defender Enough? More Solutions to Protect PC
Solution 2: Allocate More Space for PC
When you don’t prepare enough free space for your computer, you may receive the memory management error 0x0000001a. Actually, the fact that the blue screen of death error happens due to the insufficient disk space is not rare. For example, the frequently encountered errors like Windows couldn’t be installed error 0x80300024 and 0x0000007e often occur because of low disk space.
Therefore, extending or freeing up disk space is an available fix for the error. How to do? The partition manager – MiniTool Partition Wizard can be helpful. It boasts the move/resize and extend partition magic, which allow you to obtain more disk space.
It enlarges your target partition by taking space from any other partitions or unallocated space on the same disk. If you want to expand a partition to non-contiguous unallocated or free space or there’s no unallocated or free space on the hard disk, extending partition is suitable for you.
Buy Now
Here are steps to extend partition.
Step 1: After restarting your computer with the help of the bootable media created by MiniTool Partition Wizard Pro Edition, enter the BIOS page and set the media as the first boot option by using the up and down arrow buttons.
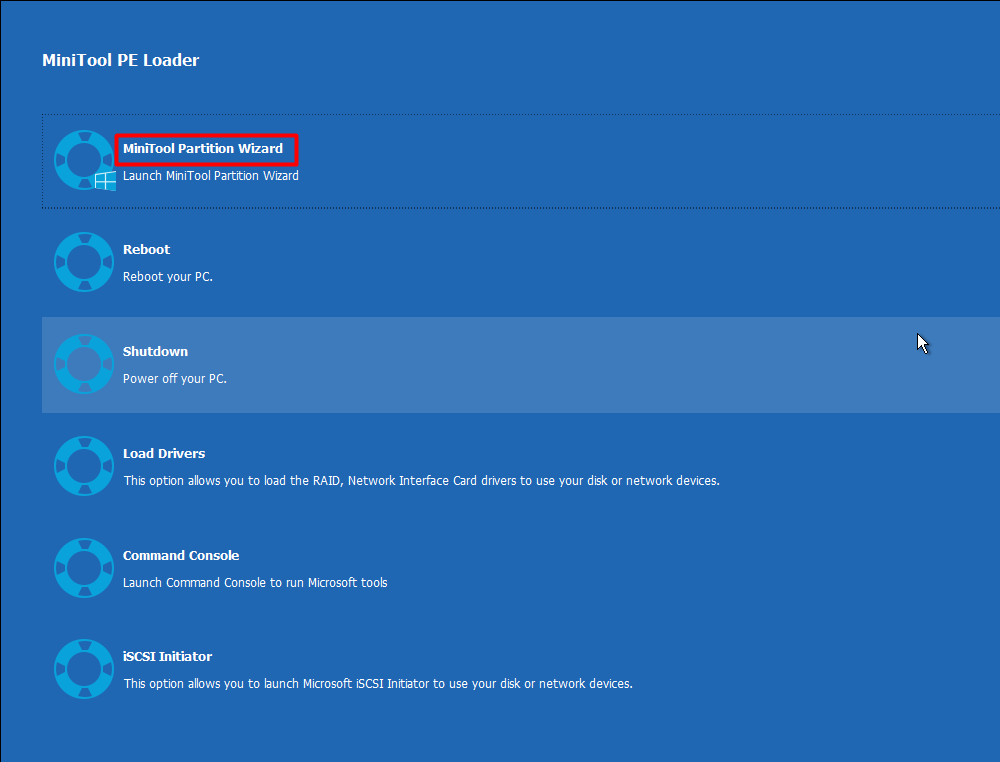
Step 2: Save and execute the operation by pressing that keys that pops up on the screen. In the MiniTool PE Loader page, click MiniTool Partition Wizard to go on.
Step 3: Click on Launch Application on the pop-up window.
Step 4: Right click the target partition (typically the C drive) and choose Extend Partition option from the prompted function menu.
Step 5: In the next window, choose a partition that you would like to take free space from, and then decide the amount of free space that you want to take from the selected partition by moving the handle bar. After that, click OK to save the change.
Tip: The partitions that you can take free space from are located on the same disk with your target partition. What’s more, you can only select the unused space of the selected partition.
Step 6: In the MiniTool Partition Wizard main interface, click on Apply to execute the pending operation.
Solution 3: Test Computer RAM
Since the 0x0000001a error is a memory related error, you can try testing your PC RAM via the Windows built-in Memory Diagnostics Tool to check if the RAM is the cause. If it is, you should replace it with a new one or even change the motherboard.
As the computer cannot boot properly, you need to boot into the safe mode (use Solution 5 in as your computer cannot boot normally) before running the Windows Memory Diagnostics Tool. Now, follow these steps to test your computer RAM.
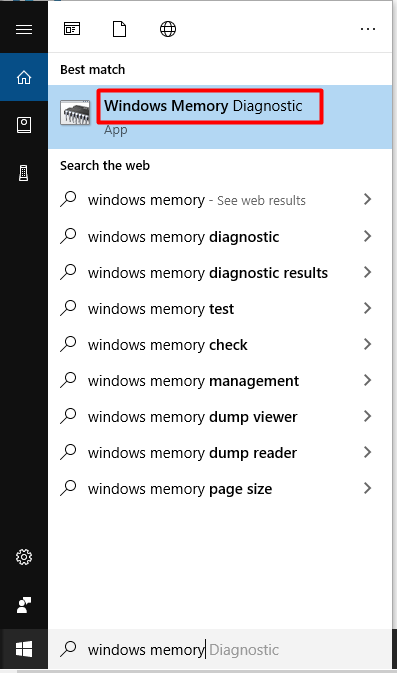
Step 1: Enter windows memory diagnostic or mdsched in the search box, and then select Windows Memory Diagnostic under the Best Match list.
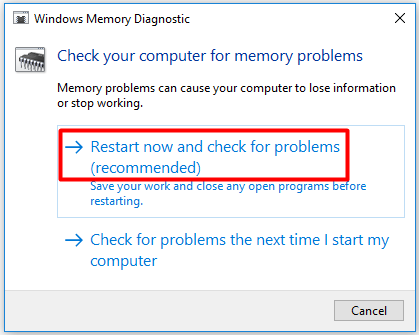
Step 2: Choose Restart now and check for problems (recommended) under the Check your computer for memory problems option list.
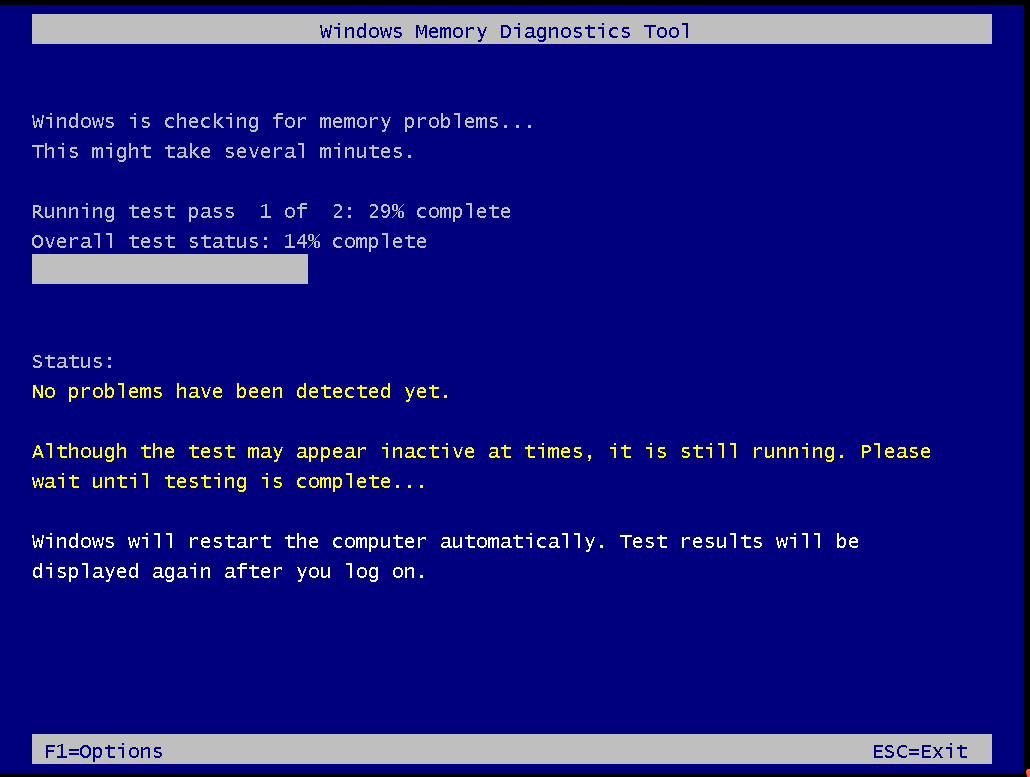
Step 3: Now, the Windows Memory Diagnostics Tool will immediately run by itself. You can see the scanning process and status on the screen as shown in the picture below. When the process ends, you are able to view the scanning results by logging on it again.
Solution 4: Uninstall Recently Installed Hardware/Software
If you have installed some hardware or software like internal memory chips, internal hard disk drive recently and receive the error, consider uninstalling them to solve the error. It is very likely that the newly installed hardware or software is incompatible with your OS. Hence, they cannot work properly and lead to the error.
There are some slight differences between uninstalling hardware and software, so follow the corresponding guide to uninstall them.
The guide for uninstalling hardware
To uninstall hardware from computer, you need to switch off the device and then remove the newly installed hardware. After that, switch on computer to see if the error is fixed or not.
The guide for uninstalling software
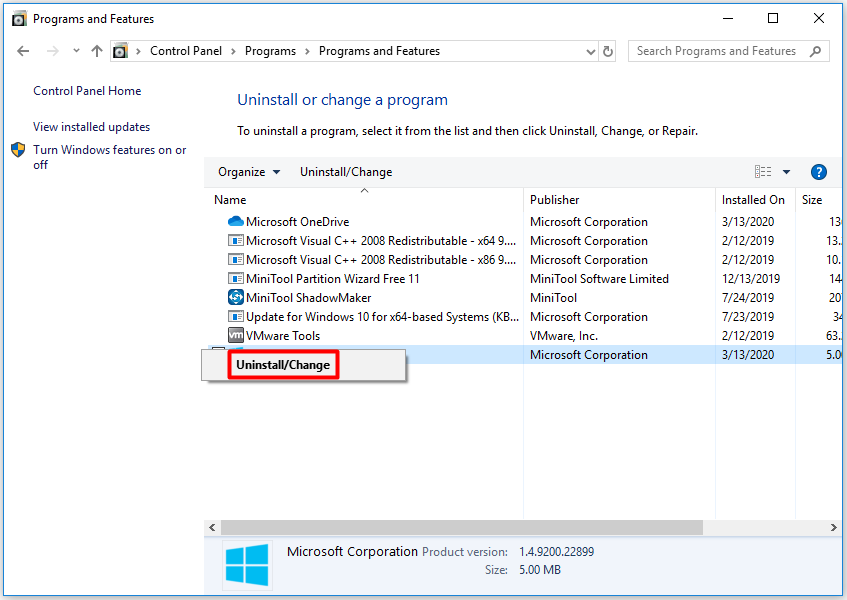
Here are detailed steps for uninstalling software through Control Panel.
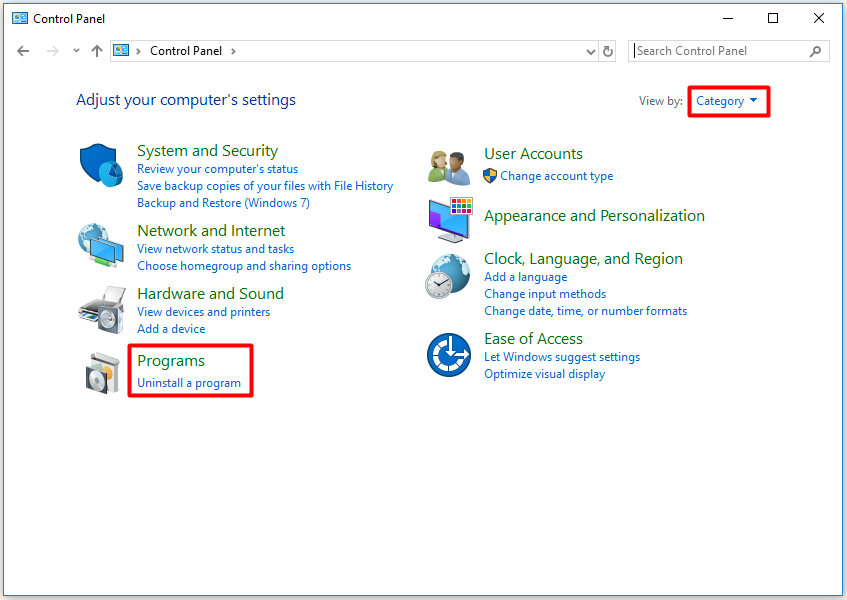
Step 1: Type control panel in the search box and click on Control Panel from the Best Match list.
Step 2: Change the View by to Category as the picture shows, and then click on Uninstall a program under the Program tab.
Step 3: Find and right click on the newly installed software, and then select Uninstall/Change option. Then, follow the on-screen instruction to complete the uninstallation operation.
Solution 5: Check for Device Drivers Update
The outdated or wrong driver can also trigger the blue screen error 0x0000001a. You can check Windows Update to see if there is any update associated to device drivers. If there are, update them immediately.
You are able to update device drivers manually and automatically. How to do? Here are steps.
Step 1: Open Device Manager, and then expand device drivers one by one.
Step 2: Right click on the driver and choose Update driver option. Here we take Display adapters for example.
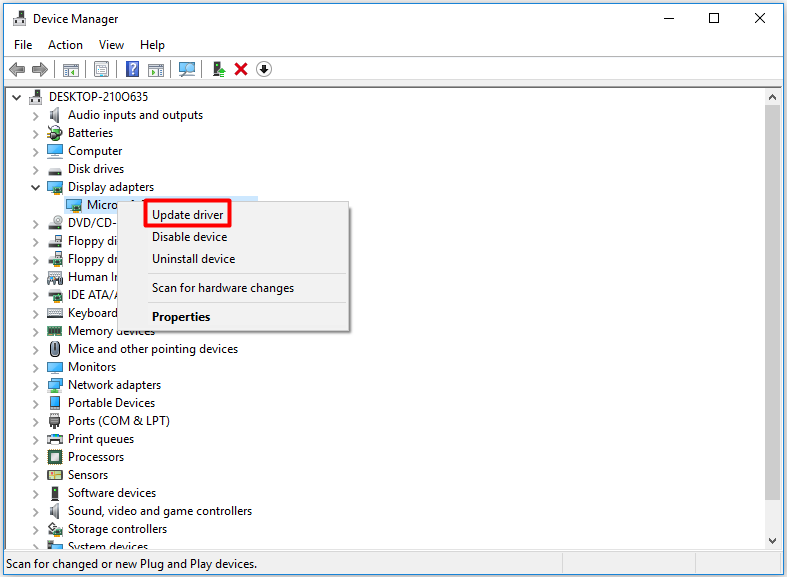
Step 3: In the next window, click Search automatically for updated software driver or Browse my computer for driver software based on you needs. Then, follow on-screen prompts to complete the update.

Solution 6: Run System Files Checker
Due to the broken or corrupted system files, the 0x0000001a BSOD Windows 10 will appear. To fix the damaged system files, you need to utilize a utility – SFC (system file checker). This utility is a Windows built-in program that can help you fix many system file related issues.
So, it is worth having a try to fix the error 0x0000001a. This method is only available if your computer can boot into safe mode. After entering the safe mode, you can follow the steps below.
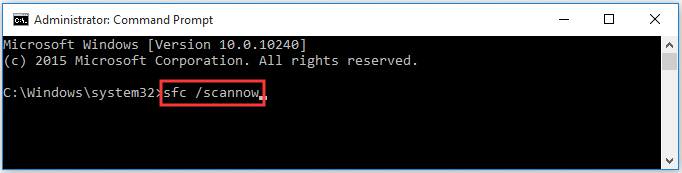
Step 1: Run Command Prompt as administrator in the search box.
Step 2: In the next window, type sfc /scannow and hit Enter.
Solution 7: Check and Fix Disk Errors
Computer hard disk drive issues like bad sectors, hard drive corruption/ failure can be the cause for the error 0x0000001a. Based on that fact, checking you hard drive for issues is a wise way to fix the 0x0000001a BSOD error.
MiniTool Partition Wizard can diagnose if there are any bad sectors on the hard drive for you. Through its Surface Test feature, you are able to find any bad sectors on the hard disk. As your computer cannot boot normally, you still need to reboot the PC via the bootable media generated by MiniTool Partition Wizard Pro Edition.
Buy Now
After setting the media as the first boot order, follow the on-screen instruction to launch MiniTool Partition Wizard Pro Edition and enter its main interface. Then, follow the steps below to test and fix hard drive bad sectors.
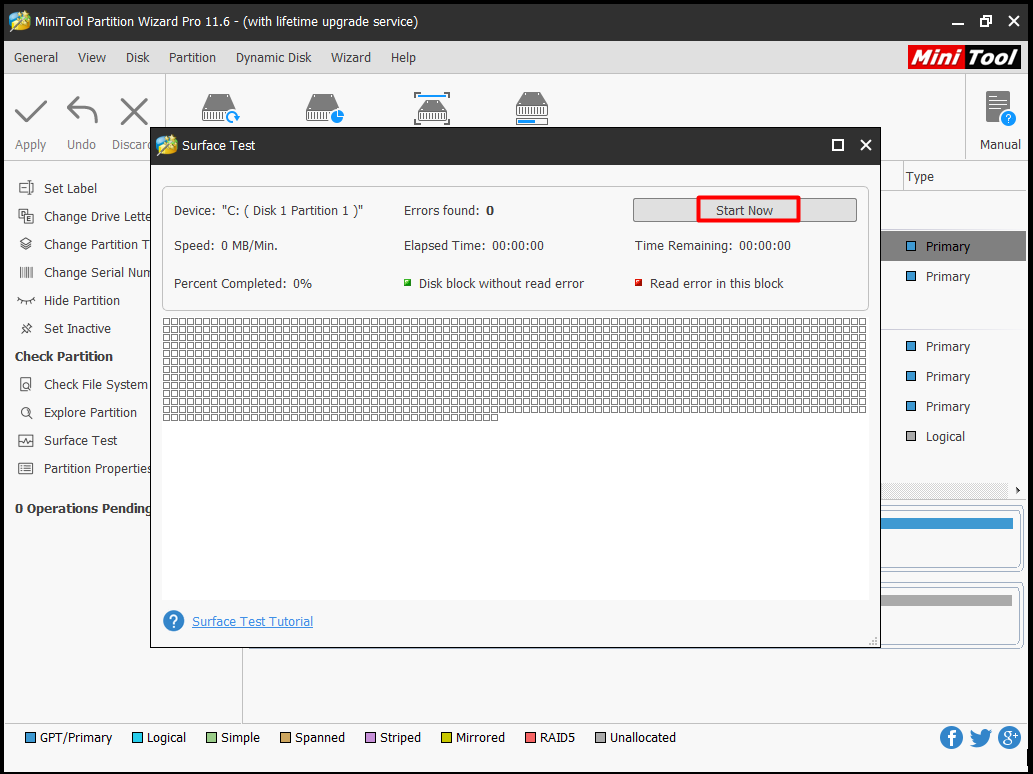
Step 1: Choose the system partition and click on the Surface Test feature in the left action panel.
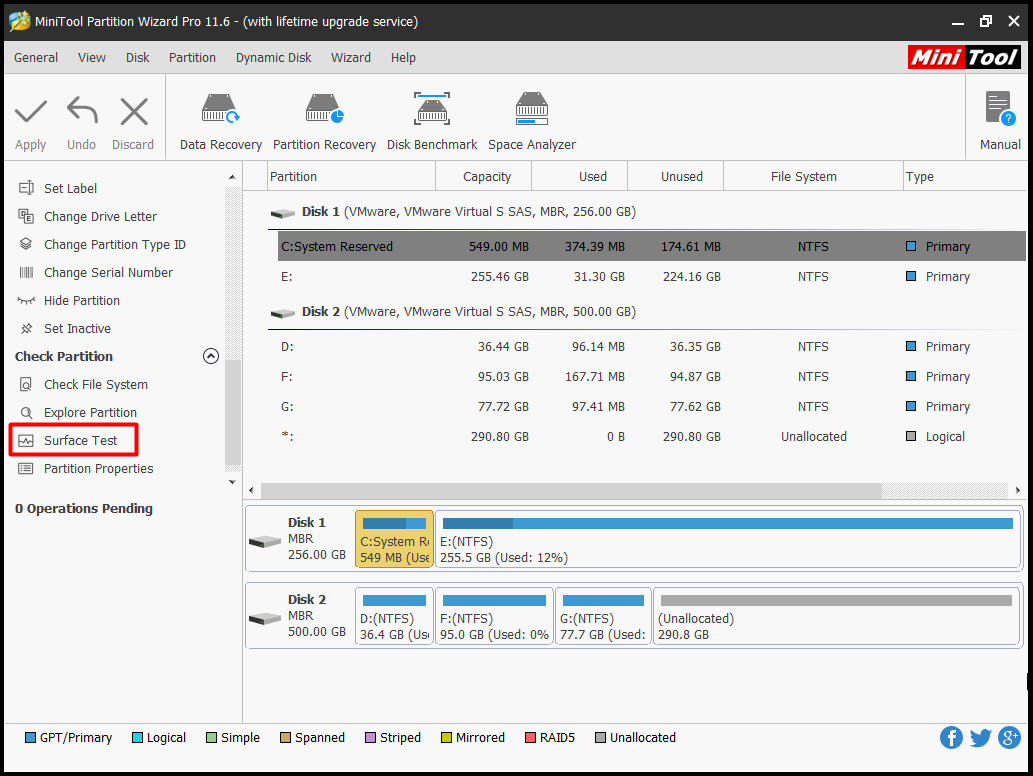
Step 2: In the next window, click the Start button to begin the scanning process. After the process ends, you can find that if your hard drive has any bad sectors via identifying the red blocks on the scan results.
Tip: If there are bad sectors on the hard drive, you need to continue to execute the following steps to fix them. If not, just skip these steps and move to other methods.
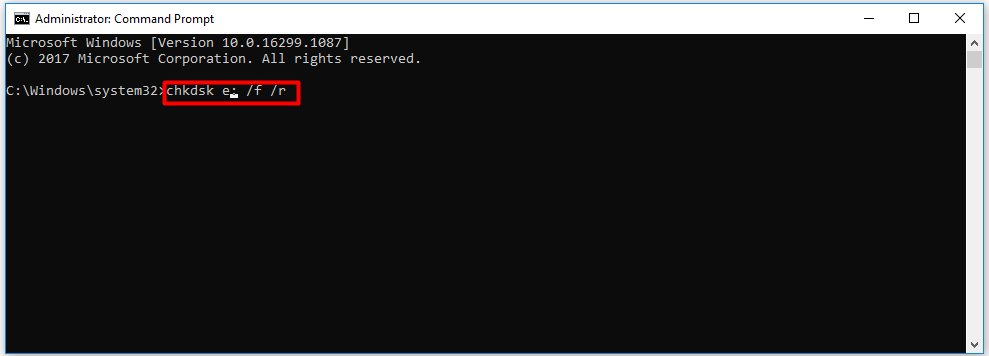
Step 3: Open Command Prompt as administrator, and then type chkdsk n: /f /r (n represents your system partition) and press Enter key to carry out the operation. After that, your hard drive can be used as before.
Note: You need to notice that the CHKDSK utility cannot fix the bad sectors physically. The bad sectors are just mapped out by the utility, which keeps them from being read and written.
You may also like this: 7 Fixes to File System Error – 2147219196 [Fix 3 Works Well]
I fixed the memory management error 0x0000001a with the methods offered by MiniTool. Are you bothered by it still? Click here to get these methods now. Click to Tweet
Conclusion
Now, 7 methods to 0x0000001a BSOD Windows 10 have been offered to you. It’s time to make a decision now. All of them are available and effective. If you have some new ideas about the error 0x0000001a, you can share them with us in the following comment area. You can send your advice with an email via [email protected].
The memory management error 0x0000001a is a common issue for Windows 10 users. What can be the causes for this issue? How to fix it? MiniTool will talk about the possible causes and corresponding solutions for this annoying error.
About 0x0000001a Error
BSOD probably is one of the most frequently encountered Windows 10 problems. There are multiple kinds of BSOD errors including amifldrv64.sys error (when updating BIOS), hal.dll error, boot configuration data unreadable error 0xc000014c and the memory management error 0x0000001a discussed in this post, etc.
You may receive the error when attempting to install Windows Vista/7/8/10 OS and upgrade OS. Certainly, it may also occur to you suddenly. No matter for what, you need to work it out. To fix the stop code 0x0000001a successfully, you need to find out its possible causes.
According to the survey, there are several elements that can result in the error. As the error message “memory management” indicates, this error is related to your computer memory. Besides, hard disk issues can also cause the error. Malware or virus is responsible for the 0x0000001a error too.
How to fix this troublesome error? There are 7 available methods helping you solve it.
Top 7 methods to fix 0x0000001a error
- Scan for malware or virus
- Allocate more space for computer
- Check and fix disk errors
- Uninstall newly installed hardware or software
- Check for device drivers update
- Run system file checker
- Test your computer RAM
Solution 1: Scan Your Computer for Potential Malware
As malware and virus can cause the 0x0000001a error, scanning your computer for any malware is rather necessary. If you find any malicious programs on the computer, remove them from your PC temporarily and check if the issue can be fixed.
Certainly, you can also remove virus from laptop without antivirus software via some methods. For instance, you can end the virus-related programs via Task Manager, remove viruses via Command Prompt, check recently installed software and applications, delete virus by utilizing safe mode, etc.
You may like this: Is Windows Defender Enough? More Solutions to Protect PC
Solution 2: Allocate More Space for PC
When you don’t prepare enough free space for your computer, you may receive the memory management error 0x0000001a. Actually, the fact that the blue screen of death error happens due to the insufficient disk space is not rare. For example, the frequently encountered errors like Windows couldn’t be installed error 0x80300024 and 0x0000007e often occur because of low disk space.
Therefore, extending or freeing up disk space is an available fix for the error. How to do? The partition manager – MiniTool Partition Wizard can be helpful. It boasts the move/resize and extend partition magic, which allow you to obtain more disk space.
It enlarges your target partition by taking space from any other partitions or unallocated space on the same disk. If you want to expand a partition to non-contiguous unallocated or free space or there’s no unallocated or free space on the hard disk, extending partition is suitable for you.
Buy Now
Here are steps to extend partition.
Step 1: After restarting your computer with the help of the bootable media created by MiniTool Partition Wizard Pro Edition, enter the BIOS page and set the media as the first boot option by using the up and down arrow buttons.
Step 2: Save and execute the operation by pressing that keys that pops up on the screen. In the MiniTool PE Loader page, click MiniTool Partition Wizard to go on.
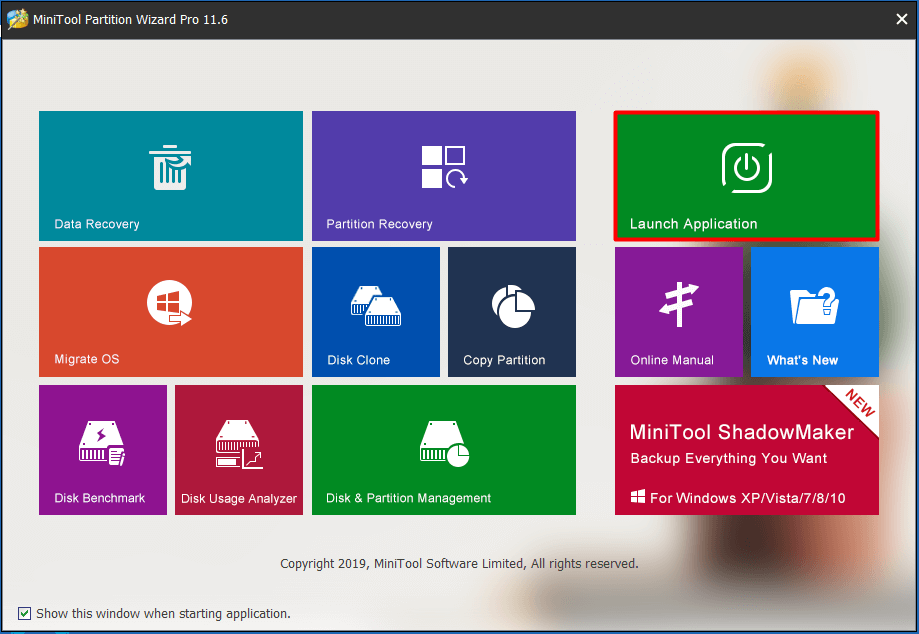
Step 3: Click on Launch Application on the pop-up window.
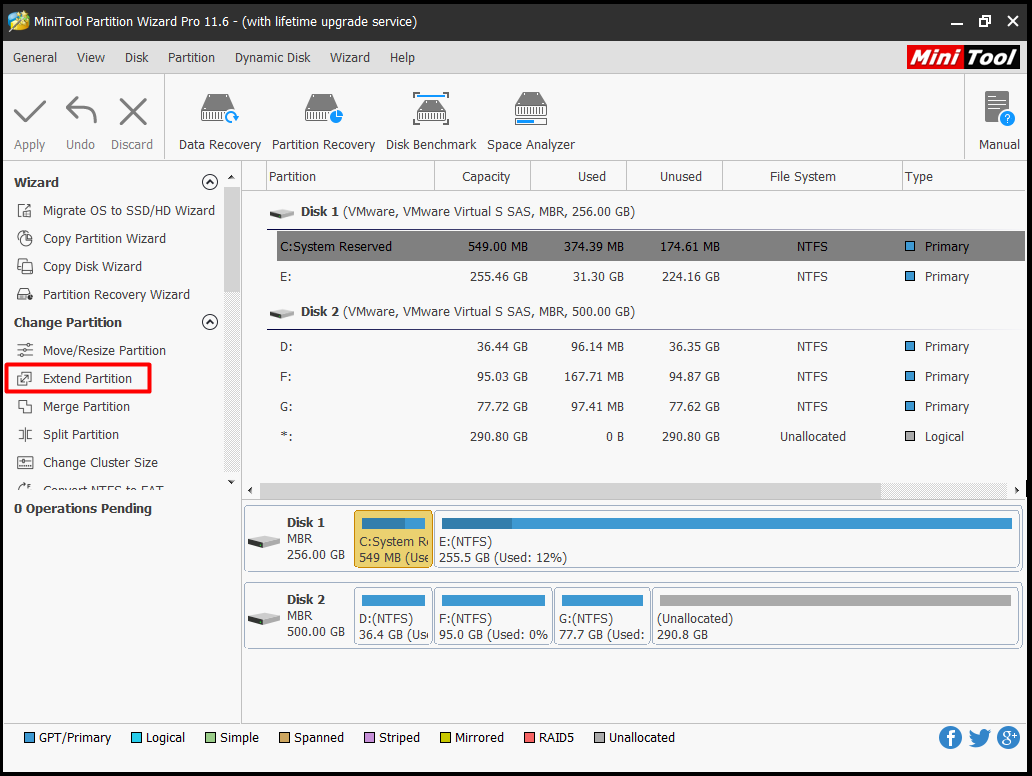
Step 4: Right click the target partition (typically the C drive) and choose Extend Partition option from the prompted function menu.
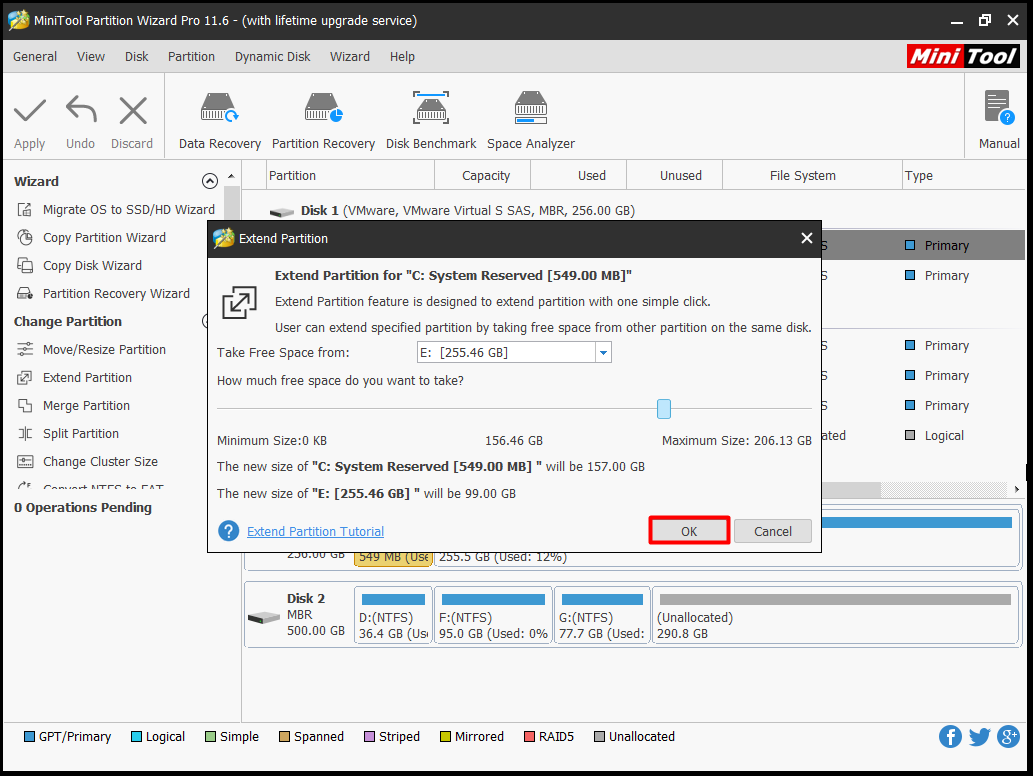
Step 5: In the next window, choose a partition that you would like to take free space from, and then decide the amount of free space that you want to take from the selected partition by moving the handle bar. After that, click OK to save the change.
Tip: The partitions that you can take free space from are located on the same disk with your target partition. What’s more, you can only select the unused space of the selected partition.
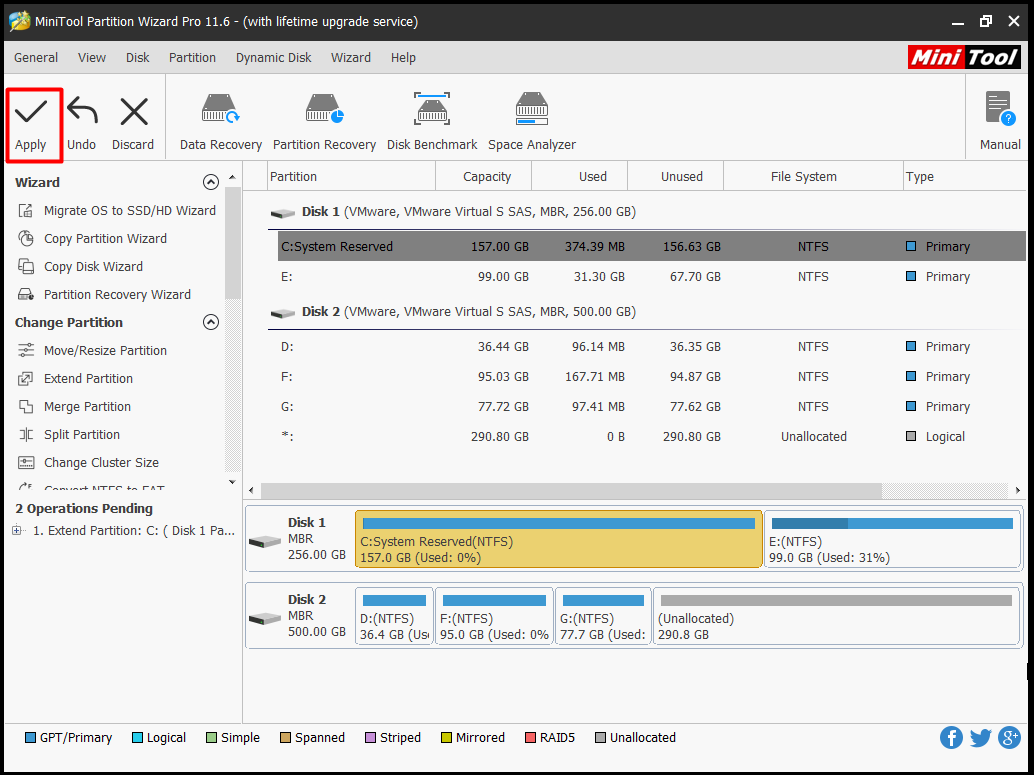
Step 6: In the MiniTool Partition Wizard main interface, click on Apply to execute the pending operation.
Solution 3: Test Computer RAM
Since the 0x0000001a error is a memory related error, you can try testing your PC RAM via the Windows built-in Memory Diagnostics Tool to check if the RAM is the cause. If it is, you should replace it with a new one or even change the motherboard.
As the computer cannot boot properly, you need to boot into the safe mode (use Solution 5 in as your computer cannot boot normally) before running the Windows Memory Diagnostics Tool. Now, follow these steps to test your computer RAM.
Step 1: Enter windows memory diagnostic or mdsched in the search box, and then select Windows Memory Diagnostic under the Best Match list.
Step 2: Choose Restart now and check for problems (recommended) under the Check your computer for memory problems option list.
Step 3: Now, the Windows Memory Diagnostics Tool will immediately run by itself. You can see the scanning process and status on the screen as shown in the picture below. When the process ends, you are able to view the scanning results by logging on it again.
Solution 4: Uninstall Recently Installed Hardware/Software
If you have installed some hardware or software like internal memory chips, internal hard disk drive recently and receive the error, consider uninstalling them to solve the error. It is very likely that the newly installed hardware or software is incompatible with your OS. Hence, they cannot work properly and lead to the error.
There are some slight differences between uninstalling hardware and software, so follow the corresponding guide to uninstall them.
The guide for uninstalling hardware
To uninstall hardware from computer, you need to switch off the device and then remove the newly installed hardware. After that, switch on computer to see if the error is fixed or not.
The guide for uninstalling software
Here are detailed steps for uninstalling software through Control Panel.
Step 1: Type control panel in the search box and click on Control Panel from the Best Match list.
Step 2: Change the View by to Category as the picture shows, and then click on Uninstall a program under the Program tab.
Step 3: Find and right click on the newly installed software, and then select Uninstall/Change option. Then, follow the on-screen instruction to complete the uninstallation operation.
Solution 5: Check for Device Drivers Update
The outdated or wrong driver can also trigger the blue screen error 0x0000001a. You can check Windows Update to see if there is any update associated to device drivers. If there are, update them immediately.
You are able to update device drivers manually and automatically. How to do? Here are steps.
Step 1: Open Device Manager, and then expand device drivers one by one.
Step 2: Right click on the driver and choose Update driver option. Here we take Display adapters for example.
Step 3: In the next window, click Search automatically for updated software driver or Browse my computer for driver software based on you needs. Then, follow on-screen prompts to complete the update.
Solution 6: Run System Files Checker
Due to the broken or corrupted system files, the 0x0000001a BSOD Windows 10 will appear. To fix the damaged system files, you need to utilize a utility – SFC (system file checker). This utility is a Windows built-in program that can help you fix many system file related issues.
So, it is worth having a try to fix the error 0x0000001a. This method is only available if your computer can boot into safe mode. After entering the safe mode, you can follow the steps below.
Step 1: Run Command Prompt as administrator in the search box.
Step 2: In the next window, type sfc /scannow and hit Enter.
Solution 7: Check and Fix Disk Errors
Computer hard disk drive issues like bad sectors, hard drive corruption/ failure can be the cause for the error 0x0000001a. Based on that fact, checking you hard drive for issues is a wise way to fix the 0x0000001a BSOD error.
MiniTool Partition Wizard can diagnose if there are any bad sectors on the hard drive for you. Through its Surface Test feature, you are able to find any bad sectors on the hard disk. As your computer cannot boot normally, you still need to reboot the PC via the bootable media generated by MiniTool Partition Wizard Pro Edition.
Buy Now
After setting the media as the first boot order, follow the on-screen instruction to launch MiniTool Partition Wizard Pro Edition and enter its main interface. Then, follow the steps below to test and fix hard drive bad sectors.
Step 1: Choose the system partition and click on the Surface Test feature in the left action panel.
Step 2: In the next window, click the Start button to begin the scanning process. After the process ends, you can find that if your hard drive has any bad sectors via identifying the red blocks on the scan results.
Tip: If there are bad sectors on the hard drive, you need to continue to execute the following steps to fix them. If not, just skip these steps and move to other methods.
Step 3: Open Command Prompt as administrator, and then type chkdsk n: /f /r (n represents your system partition) and press Enter key to carry out the operation. After that, your hard drive can be used as before.
Note: You need to notice that the CHKDSK utility cannot fix the bad sectors physically. The bad sectors are just mapped out by the utility, which keeps them from being read and written.
You may also like this: 7 Fixes to File System Error – 2147219196 [Fix 3 Works Well]
I fixed the memory management error 0x0000001a with the methods offered by MiniTool. Are you bothered by it still? Click here to get these methods now. Click to Tweet
Conclusion
Now, 7 methods to 0x0000001a BSOD Windows 10 have been offered to you. It’s time to make a decision now. All of them are available and effective. If you have some new ideas about the error 0x0000001a, you can share them with us in the following comment area. You can send your advice with an email via [email protected].
Содержание
- Синий экран с кодом 0x0000001a в Windows 7
- Причина 1: Устройства
- Причина 2: Разгон
- Причина 3: Проблемы с ОЗУ
- Причина 4: Жесткий диск
- Причина 5: Файл подкачки
- Причина 6: Программы и драйвера
- Причина 7: Обновления
- Причина 8: Системные файлы
- Причина 9: Вирусы
- Заключение
- Вопросы и ответы

Синие экраны смерти или BSOD являются следствием критических ошибок в системе. В большинстве случаев подобные неполадки мешают нормальной работе компьютера и требуют немедленного вмешательства. В этой статье мы разберем причины и способы устранения BSOD 0x0000001a в «семерке».
Факторов, вызывающих данную ошибку, несколько и большинство из них связано с некорректной работой памяти, как оперативной, так и постоянной (жесткие диски). Кроме того, «хулиганить» могут устройства и их драйвера, некоторые программы или вирусы. Далее мы рассмотрим способы устранения наиболее распространенных причин BSOD 0x0000001a.
Причина 1: Устройства
Довольно часто причиной ошибки являются неисправные или несовместимые с системой устройства. Проблемы могут возникать из-за любого навесного оборудования – звуковых и видеокарт, сетевых адаптеров, RAID-контроллеров и внешних накопителей (флешек и жестких дисков).
Проверить, какой девайс является виновником неполадки, довольно просто: нужно по очереди отключать все подключенные «железки» и мониторить появление синего экрана. При выявлении сбойного компонента нужно попытаться обновить драйвер (желательно с официального сайта производителя) или отказаться от его использования. В таких ситуациях имеет смысл обратиться в сервисный центр для получения гарантийного обслуживания.
Подробнее:
Обновление драйверов на Windows 7
Обновляем драйвера видеокарты на Windows 7
Причина 2: Разгон
Повышение частот комплектующих дает прибавку производительности, но также нередко приводит и к сбоям в работе компьютера. Причем проблемы могут появиться только спустя некоторое время из-за наличия дополнительных внешних факторов. Например, элементы, отвечающие за питание процессора или видеокарты, имеют склонность к «усталости», то есть потере своих свойств вследствие высокой нагрузки. Здесь поможет только снижение частот или полный отказ от оверклокинга.

Подробнее:
Как в БИОСе разогнать процессор
Как разогнать видеокарту NVIDIA GeForce
Как разогнать видеокарту AMD Radeon
Как выставить частоту оперативной памяти в БИОСе
Неизбежно появление ошибок и при подключении нового «железа» к ранее разогнанной системе. Если вы добавили планки памяти или заменил процессор, не забудьте сбросить параметры BIOS материнской платы. Этот же прием поможет вернуть настройки к начальным при проблемах с разгоном.

Подробнее:
Сбрасываем настройки BIOS
Что такое Restore Defaults в BIOS
Причина 3: Проблемы с ОЗУ
Причины, связанные с оперативной памятью, следующие:
- Разгон;
- Несовместимость планок между собой;
- Неисправность модулей.
С проблемами при разгоне мы разобрались во втором параграфе. В таких случаях достаточно сбросить БИОС. Проблемы же несовместимости могут возникать при использовании отличающихся по частоте или произведенных разными вендорами модулей. Стоит обратить внимание и на производителей самих «банок» (чипов). Например, планки с чипами Samsung могут «капризничать» от соседства с Micron или Hynix. Кроме того, существуют одно- и двухранговые модули. В первом случае микросхемы располагаются только с одной стороны платы, а во втором с двух. Комбинации этих двух типов могут приводить к ошибкам. ОЗУ из разных партий, даже от одного и того же производителя и с одинаковыми параметрами, довольно часто отказывается нормально функционировать вместе.
Исходя из всего написанного выше, при выборе оперативной памяти, особенно если происходит доукомплектация дополнительным «железом», следует помнить обо всех этих нюансах. При апгрейде системы лучше покупать сразу весь комплект ОЗУ, чтобы избежать проблем. Если же неполадки возникли с уже существующими планками, выявить сбойные можно, по очереди отключив их от ПК и попробовав разные комбинации.

Читайте также: Как выбрать оперативную память

Наиболее распространенной причиной BSOD является неисправность ОЗУ. Определить, в каком слоте возникают неполадки, можно с помощью специальных программ, как сторонних, так и системных. В случае выявления ошибок следует отключить планку или заменить новой.
Подробнее:
Проверяем оперативную память на компьютере с Windows 7
Как проверить оперативную память на работоспособность
Причина 4: Жесткий диск
Обсуждаемая ошибка также может возникать из-за аппаратных проблем с жестким диском, как системным, так и содержащим программу, при работе которой происходит «вылет». Если это HDD (с «блинами»), стоит произвести его проверку на наличие «плохих» секторов. При их выявлении необходимо в самое ближайшее время перенести информацию на другой носитель, а этот либо вовсе отправить на покой (возможно, сдать по гарантии) или использовать в качестве хранилища не важных файлов.

Подробнее: Проверка диска на наличие ошибок в Windows 7
Для проверки работоспособности SSD используются другие инструменты, которые считывают S.M.A.R.T устройства и определяют его «здоровье». Если программы выявляют проблемы, то такой диск крайне нежелательно использовать для любых целей. Обусловлено это тем, что, в отличие от HDD, такие накопители «умирают» сразу и навсегда.

Подробнее: Проверяем SSD на наличие ошибок
Причина 5: Файл подкачки
Файл подкачки (виртуальная память) – это особая область на диске, куда «складывается» невостребованная информация из оперативной памяти. Выше мы описали возможные проблемы с «хардами», которые также могут повлиять и на работу этого файла. Кроме того, данные, которые там хранятся, иногда приходят в негодность, а при повторном их запросе вызывают ошибки. В таких случаях можно пересоздать, то есть отключить, а затем включить виртуальную память, возможно даже на другом диске. Этим действием мы удалим всю информацию и подготовим новое пространство для записи и чтения.
Подробнее: Как создать, отключить, изменить файл подкачки в Windows 7
Причина 6: Программы и драйвера
Точно сказать, какие именно программы могут приводить к обсуждаемому нами сбою, сложно, но можно определить их тип. Это различные представители софта для работы с оперативной памятью и утилиты, которые способны заменить собой стандартные системные. В основном это «чистилки» и средства мониторинга температуры, нагрузки и так далее. Если работа прерывается BSOD при функционировании такого приложения, его необходимо удалить или переустановить.
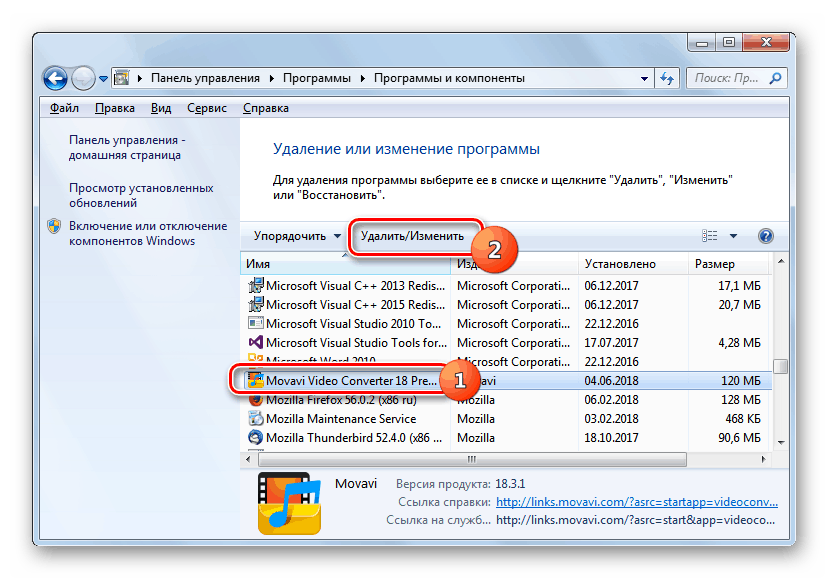
Подробнее: Установка и удаление программ в Windows 7
Что касается драйверов, особое внимание стоит уделить тем, что запускаются вместе с системой. В основном это программное обеспечение для устройств, к которым относится все подключаемое «железо» (см. первый параграф), а также виртуальные девайсы. Если речь идет о видеокарте, переустановить ее драйвер можно по инструкции ниже. «Дрова» для другого навесного оборудования обычно поставляются в виде отдельной программы, которую можно переустановить обычным способом (см. выше).

Подробнее: Переустанавливаем драйвера видеокарты
Существуют и девайсы, драйвера для которых уже встроены в систему, и работа с ними возможна только через «Диспетчер устройств». В этой оснастке отображаются возможные ошибки в работе управляющих программ, которые можно удалить и установить заново. О проблемах сигнализируют желтые и красные значки возле названий.

Подробнее:
Решение проблемы с неизвестным устройством в «Диспетчере устройств» на Windows 7
Устранение ошибки: «Для устройства не установлены драйверы (Код 28)»
Основные функции «Диспетчера устройств» в ОС Windows 7
В третьей статье необходимая информация содержится в параграфе «Работа с драйверами».
Если не удается выявить «хулигана» и все манипуляции не привели к желаемому результату, поможет восстановление системы. Здесь главное вспомнить, когда или после каких действий начались сбои.
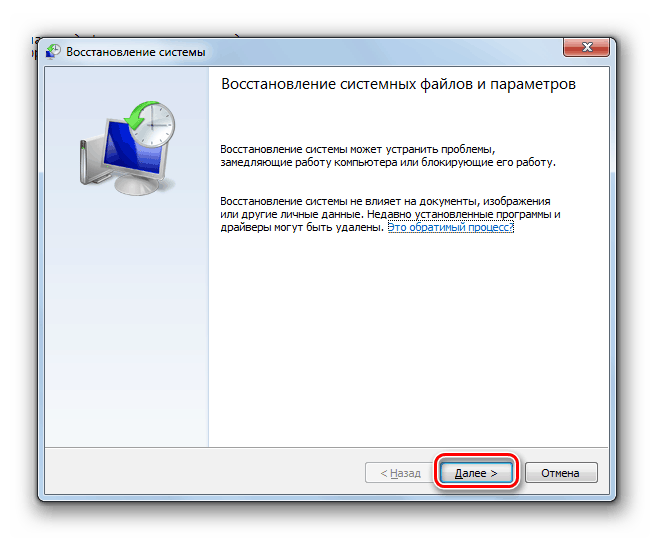
Подробнее: Восстановление системы в Windows 7
Причина 7: Обновления
Обновления, кроме добавления новых функций и повышения безопасности, обеспечивают совместимость программ и драйверов устройств. Если в системе отсутствуют необходимые апдейты, могут появляться ошибки, в том числе и 0x0000001a. Особенность способа заключается в том, чтобы удалить все установленные вручную драйвера и программы, описанные в параграфе 6, установить все пакеты через «Центр обновления», а затем инсталлировать необходимое ПО заново.

Подробнее: Как обновить компьютер с Windows 7
Причина 8: Системные файлы
Перед тем как использовать инструменты, описанные в этом параграфе, следует принять во внимание тот факт, что их применение может привести к неработоспособности Windows. В группе риска находятся пиратские сборки и системы, которые подверглись значительному изменению, например, при установке некоторых сторонних тем оформления или экранов загрузки. Кроме того, если имела место вирусная атака, повредившая ключевые компоненты, также возможны неприятные последствия.

Итак, если вы все же решились прибегнуть к этому методу, рассмотрим его подробнее. В силу различных причин системные файлы, отвечающие за нормальное функционирование системы, могут быть повреждены. В такой ситуации можно попытаться их восстановить. Делается это с помощью утилиты SFC или системы обслуживания образов DISM. Инструкции по их применению находятся ниже.
Подробнее:
Восстановление системных файлов в Windows 7
Восстановление поврежденных компонентов в Windows 7 при помощи DISM
Причина 9: Вирусы
Вредоносные программы, в зависимости от задумки создателя, могут как просто наблюдать за пользователем с целью кражи личных данных, так и наносить непоправимый вред системе. В контексте сегодняшней проблемы нас интересуют последние. Такие вирусы имеют в своем арсенале функции, позволяющие не только менять различные параметры, но и проникать довольно глубоко «под капот» Windows, повреждая или подменяя драйвера и системные компоненты. О том, как определить заражение, а после устранить вредителей, написано в материале по ссылке ниже.
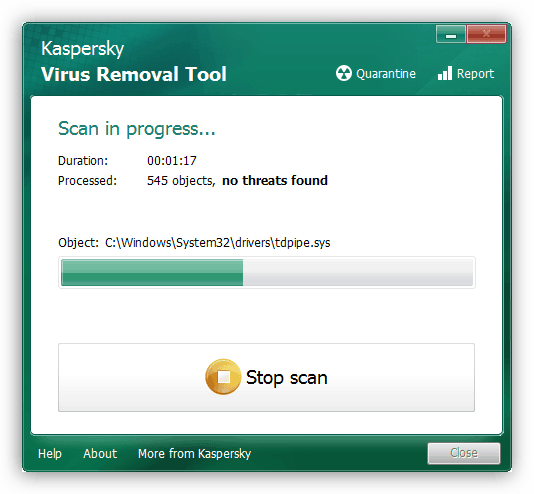
Подробнее: Борьба с компьютерными вирусами
Заключение
Из всего написанного выше, становится ясно, что выявить и устранить причины BSOD с кодом 0x0000001a довольно непросто, поэтому нужно действовать по определенному алгоритму. Вначале необходимо сбросить все настройки, измененные при разгоне, а затем обратить внимание на вновь подключенные устройства. Далее следует проверка оперативной памяти и жестких дисков. После того как все «железные» факторы были исключены, можно переходить к поиску и устранению программных. Если все средства были исчерпаны, поможет только переустановка системы или ее откат к заводским настройкам.

Подробнее:
Как установить Windows 7 с флешки
Как переустановить Windows 7 без диска и флешки
Как сбросить Windows 7 до заводских настроек
Необходимо также знать, что данная ошибка требует немедленного вмешательства, иначе существует опасность в ближайшее время потерять все важные данные.
- Remove From My Forums
-
Question
-
i uploaded the dumpfile here
https://1drv.ms/u/s!Ajb85w_NYaTZagSkejOMKfcUg7s
-
Edited by
Albert hinkle
Wednesday, August 22, 2018 7:33 AM -
Edited by
Karen_HuMicrosoft contingent staff
Thursday, August 23, 2018 6:42 AM
Do not post privacy information here
-
Edited by
All replies
-
To evaluate the BSOD please post logs for troubleshooting.
Using administrative command prompt copy and paste this whole command.
Make sure the default language is English so that the logs can be scanned and read.
https://www.tenforums.com/tutorials/3813-language-add-remove-change-windows-10-a.html
The command will automatically collect the computer files and place them on the desktop.
Then use 7zip to organize the files and one drive or drop box to place share links into the thread for troubleshooting.
https://support.office.com/en-us/article/Share-OneDrive-files-and-folders-9fcc2f7d-de0c-4cec-93b0-a82024800c07
This command will automatically collect these files: msinfo32, mini dumps, drivers, hosts, install, uninstall, services, startup, event viewer files, etc.
Open administrative command prompt and copy and paste the whole command:
copy %SystemRoot%minidump*.dmp «%USERPROFILE%Desktop»&dxdiag /t %Temp%dxdiag.txt© %Temp%dxdiag.txt «%USERPROFILE%DesktopSFdebugFiles»&type %SystemRoot%System32driversetchosts >> «%USERPROFILE%Desktophosts.txt»&systeminfo
> «%USERPROFILE%Desktopsysteminfo.txt»&driverquery /v > «%USERPROFILE%Desktopdrivers.txt» &msinfo32 /nfo «%USERPROFILE%Desktopmsinfo32.nfo»&wevtutil qe System /f:text > «%USERPROFILE%Desktopeventlog.txt»®
export HKEY_LOCAL_MACHINESOFTWAREMicrosoftWindowsCurrentVersionUninstall «%USERPROFILE%Desktopuninstall.txt»® export «HKEY_LOCAL_MACHINESOFTWAREMicrosoftActive SetupInstalled Components» «%USERPROFILE%Desktopinstalled.txt»&net
start > «%USERPROFILE%Desktopservices.txt»&REM wmic startup list full /format:htable >»%USERPROFILE%Desktopstartup.html»&wmic STARTUP GET Caption, Command, User >»%USERPROFILE%Desktopstartup.txt»There are two files for you to find manually:
a) C:WindowsMEMORY.DMP
Use file explorer > this PC > local C: drive > right upper corner search enter each of the above to find results.
b) dxdiag: In the left lower corner search type: dxdiag > When the DirectX Diagnostic Tool opens click on the next page button so that each tab is opened > click on save all information > save to desktop > post one drive or drop box
share link into the thread.
.
.
Please remember to vote and to mark the replies as answers if they help.
.
.
.
-
Hi Albert,
According to your dump file, we can see the following information:
Use !analyze -v to get detailed debugging information.

BugCheck 1A, {61941, ffffe001e2e130c8, 9, ffffd00020635b90}

Probably caused by : ntkrnlmp.exe ( nt!KiPageFault+13c )
Bugcheck 1A indicates a severe memory management error occurred. So let’s run this RAM check tool:
Run Diagnostics to Check Your System for Memory Problems
https://technet.microsoft.com/en-us/library/ff700221.aspx
Besides that, please also refer to the general guide to resolve the BSOD issue:
Troubleshoot blue screen errors
https://support.microsoft.com/en-us/help/14238/windows-10-troubleshoot-blue-screen-errors
Please remember to mark the replies as answers if they help.
If you have feedback for TechNet Subscriber Support, contact
tnmff@microsoft.com.-
Edited by
Chao_Lin
Thursday, August 23, 2018 11:38 AM
-
Edited by
01.09.2018
Просмотров: 4881
| Цифровое название ошибки | 0x0000001A |
| Название BSoD | MEMORY_MANAGEMENT |
| Причина появления | Ошибка памяти |
| Операционные системы | Windows 2000, XP, Windows Server 2008 |
Синий экран смерти MEMORY_MANAGEMENT с кодом 0x0000001A возникает по причине сбоев в работе оперативной памяти. Однако разработчики Microsoft выделяют ряд причин, по которым оперативная память может работать со сбоями и вызывать ошибку 0x0000001A:
- Работа вирусных программ;
- Сбои в работе винчестера;
- Устаревшая версия BIOSа;
- Неправильно выбранный план электропитания;
- Проблема с программным обеспечением.
Параметры синего экрана смерти MEMORY_MANAGEMENT:
| Параметр 1 | Причина ошибки |
| 0x1 | Разветвлённый клон счетчика ссылок поврежден (происходит на отладочных сборках Windows.) |
| 0x777 | При вызове разблокировался адрес системного кэша, который в настоящий момент не заблокирован. (Этот адрес или никогда не отображался или разблокирован дважды.) |
| 0x778 | Система использует последний адрес системного кэша, вместо того, чтобы сохранить его. |
|
0x780 0x781 |
PTE, отображающие параметры системного кэша, были повреждены. |
| 0x1000 | При вызове MmGetSystemAddressForMdl произошла попытка отобразить полностью кэшируемую физическую страницу как некэшируемую. |
| 0x1010 | Ошибка возникает при разблокировке раздела системного кеша, которая в настоящий момент не заблокирована. (Этот раздел или никогда не блокировался или разблокирован дважды.) |
| 0x1234 | Ошибка возникает при попытке блокировки не существующего раздела системного кеша. |
| 0x1235 | Ошибка возникает при попытке защитить MDL с недопустимым значением. |
| 0x3451 | PTE стека потока ядра, который был выгружен, поврежден. |
|
0x8888 0x8889 |
Структуры управления внутренней памяти повреждены. |
| 0x41283 | Индекс системного рабочего набора, закодированный в PTE, поврежден. |
| 0x41284 | PTE или список системного рабочего набора повреждены. |
| 0x41286 | Ошибка возникает при попытке освободить недопустимый адрес пула. |
| 0x41785 | Список системного рабочего набора поврежден. |
| 0x41287 | Структуры управления внутренней памяти повреждены. Чтобы далее исследовать причину необходимо исследовать файл дампа памяти ядра. |
| 0x61940 | PDE неожиданно лишен прав. |
| 0x03030303 | Загрузчик поврежден. (Это значение применяется только к машинам Intel Itanium.) |
| Other | Произошла неизвестная ошибка управления памятью. |
Синий экран 0x0000001A указывает, что произошла серьезная ошибка управления памятью.
Параметры MEMORY_MANAGEMENT:
| Параметр 1 | Причина ошибки |
| 0x1 | Разветвлённый клон счетчика ссылок поврежден (происходит на отладочных сборках Windows.) |
| 0x777 | При вызове разблокировался адрес системного кэша, который в настоящий момент не заблокирован. (Этот адрес или никогда не отображался или разблокирован дважды.) |
| 0x778 | Система использует последний адрес системного кэша, вместо того, чтобы сохранить его. |
|
0x780 0x781 |
PTE, отображающие параметры системного кэша, были повреждены. |
| 0x1000 | При вызове MmGetSystemAddressForMdl произошла попытка отобразить полностью кэшируемую физическую страницу как некэшируемую. |
| 0x1010 | Ошибка возникает при разблокировке раздела системного кеша, которая в настоящий момент не заблокирована. (Этот раздел или никогда не блокировался или разблокирован дважды.) |
| 0x1234 | Ошибка возникает при попытке блокировки не существующего раздела системного кеша. |
| 0x1235 | Ошибка возникает при попытке защитить MDL с недопустимым значением. |
| 0x3451 | PTE стека потока ядра, который был выгружен, поврежден. |
|
0x8888 0x8889 |
Структуры управления внутренней памяти повреждены. |
| 0x41283 | Индекс системного рабочего набора, закодированный в PTE, поврежден. |
| 0x41284 | PTE или список системного рабочего набора повреждены. |
| 0x41286 | Ошибка возникает при попытке освободить недопустимый адрес пула. |
| 0x41785 | Список системного рабочего набора поврежден. |
| 0x41287 | Структуры управления внутренней памяти повреждены. Чтобы далее исследовать причину необходимо исследовать файл дампа памяти ядра. |
| 0x61940 | PDE неожиданно лишен прав. |
| 0x03030303 | Загрузчик поврежден. (Это значение применяется только к машинам Intel Itanium.) |
| Other | Произошла неизвестная ошибка управления памятью. |
Решение
Windows XP
Для устранения Stop 0x0000001A необходимо установить рекомендуемое обновление системы защиты 931784 или KB929338.
Windows Server 2008 SP2 и Windows Server 2008 R2
BSoD происходит, потому что у процессоров Intel Westmere появилась новая возможность кэширования Virtual Machine Control Structure (VMCS). Эта опция добавлена, чтобы обеспечить помощь виртуализации, для увеличения производительности гипервизора. Поскольку эта функция была представлена после выпуска Windows 2008 SP2 и после Windows 2008 R2, гипервизор не обрабатывает кеширование VMCS правильно. Вследствие чего приводит повреждение памяти.
Для решения данной ошибки обновите Вашу операционную систему.
Windows 2000
Для решения Stop 0x0000001A необходимо установить пакет обновлений Service Pack 3.
Reader Interactions
- Remove From My Forums
-
Вопрос
-
Hello,
After building my new computer I’ve been plagued with frequent crashes that occur randomly during gaming. Although the screenshot says it’s a BSOD, the crashes are typically just a frozen screen and then a restart after I hit a few keys. I’ve had the problem
for months now and haven’t been able to trace down the issue. Hopefully this is a start!Running Windows 10 Home. Version 1803. OS Build 17134.472
Here is the dmp file: https://1drv.ms/u/s!AnISpLDjcjSvnRmdrDY-4eUKwTFr
Let me know if there is anymore information I need to provide.
Thanks!
Source
WindowsSummary
Shut down unexpectedlyDate
12/31/2018 11:27 PMStatus
Not reportedProblem signature
Problem Event Name: BlueScreen
Code: 1a
Parameter 1: 61941
Parameter 2: 40dedb0044cc
Parameter 3: d
Parameter 4: ffff8a0483a30a00
OS version: 10_0_17134
Service Pack: 0_0
Product: 768_1
OS Version: 10.0.17134.2.0.0.768.101
Locale ID: 1033Files that help describe the problem
123118-6484-01.dmp
sysdata.xml
MEMORY.DMP
WERInternalMetadata.xml
WERInternalRequest.xml
memory.csv
sysinfo.txt-
Перемещено
1 января 2019 г. 12:55
Question related to a Windows 10 bug check.
-
Перемещено
Ответы
-
Sorry for the inactivity over the past few months. Just wanted to update the situation.
After contacting the manufacturer, I was able to get replacement ram modules after returning my old ones. The process took several weeks.
Upon receiving the modules, I ran them through MemTest86 right away. Both modules experienced zero errors over 10 passes! Over the past few months I have put them through significant amounts of gaming as well (which is what usually causes the crashes). Happy
to report that I’ve had zero crashes since then! I am pretty confident that the issue is completely resolved.In conclusion, the issue was a faulty ram module.
Thank you for the assistance, I will be up voting your answers.
-
Изменено
Dannylvaldez
7 апреля 2019 г. 22:57
Adding a conclusion to the final post -
Помечено в качестве ответа
Dannylvaldez
7 апреля 2019 г. 22:58
-
Изменено
The memory management error 0x0000001a is a common issue for Windows 10 users. What can be the causes for this issue? How to fix it? MiniTool will talk about the possible causes and corresponding solutions for this annoying error.
About 0x0000001a Error
BSOD probably is one of the most frequently encountered Windows 10 problems. There are multiple kinds of BSOD errors including amifldrv64.sys error (when updating BIOS), hal.dll error, boot configuration data unreadable error 0xc000014c and the memory management error 0x0000001a discussed in this post, etc.
You may receive the error when attempting to install Windows Vista/7/8/10 OS and upgrade OS. Certainly, it may also occur to you suddenly. No matter for what, you need to work it out. To fix the stop code 0x0000001a successfully, you need to find out its possible causes.
According to the survey, there are several elements that can result in the error. As the error message “memory management” indicates, this error is related to your computer memory. Besides, hard disk issues can also cause the error. Malware or virus is responsible for the 0x0000001a error too.
How to fix this troublesome error? There are 7 available methods helping you solve it.
Top 7 methods to fix 0x0000001a error
- Scan for malware or virus
- Allocate more space for computer
- Check and fix disk errors
- Uninstall newly installed hardware or software
- Check for device drivers update
- Run system file checker
- Test your computer RAM
Solution 1: Scan Your Computer for Potential Malware
As malware and virus can cause the 0x0000001a error, scanning your computer for any malware is rather necessary. If you find any malicious programs on the computer, remove them from your PC temporarily and check if the issue can be fixed.
Certainly, you can also remove virus from laptop without antivirus software via some methods. For instance, you can end the virus-related programs via Task Manager, remove viruses via Command Prompt, check recently installed software and applications, delete virus by utilizing safe mode, etc.
You may like this: Is Windows Defender Enough? More Solutions to Protect PC
Solution 2: Allocate More Space for PC
When you don’t prepare enough free space for your computer, you may receive the memory management error 0x0000001a. Actually, the fact that the blue screen of death error happens due to the insufficient disk space is not rare. For example, the frequently encountered errors like Windows couldn’t be installed error 0x80300024 and 0x0000007e often occur because of low disk space.
Therefore, extending or freeing up disk space is an available fix for the error. How to do? The partition manager – MiniTool Partition Wizard can be helpful. It boasts the move/resize and extend partition magic, which allow you to obtain more disk space.
It enlarges your target partition by taking space from any other partitions or unallocated space on the same disk. If you want to expand a partition to non-contiguous unallocated or free space or there’s no unallocated or free space on the hard disk, extending partition is suitable for you.
Buy Now
Here are steps to extend partition.
Step 1: After restarting your computer with the help of the bootable media created by MiniTool Partition Wizard Pro Edition, enter the BIOS page and set the media as the first boot option by using the up and down arrow buttons.
Step 2: Save and execute the operation by pressing that keys that pops up on the screen. In the MiniTool PE Loader page, click MiniTool Partition Wizard to go on.
Step 3: Click on Launch Application on the pop-up window.
Step 4: Right click the target partition (typically the C drive) and choose Extend Partition option from the prompted function menu.
Step 5: In the next window, choose a partition that you would like to take free space from, and then decide the amount of free space that you want to take from the selected partition by moving the handle bar. After that, click OK to save the change.
Tip: The partitions that you can take free space from are located on the same disk with your target partition. What’s more, you can only select the unused space of the selected partition.
Step 6: In the MiniTool Partition Wizard main interface, click on Apply to execute the pending operation.
Solution 3: Test Computer RAM
Since the 0x0000001a error is a memory related error, you can try testing your PC RAM via the Windows built-in Memory Diagnostics Tool to check if the RAM is the cause. If it is, you should replace it with a new one or even change the motherboard.
As the computer cannot boot properly, you need to boot into the safe mode (use Solution 5 in as your computer cannot boot normally) before running the Windows Memory Diagnostics Tool. Now, follow these steps to test your computer RAM.
Step 1: Enter windows memory diagnostic or mdsched in the search box, and then select Windows Memory Diagnostic under the Best Match list.
Step 2: Choose Restart now and check for problems (recommended) under the Check your computer for memory problems option list.
Step 3: Now, the Windows Memory Diagnostics Tool will immediately run by itself. You can see the scanning process and status on the screen as shown in the picture below. When the process ends, you are able to view the scanning results by logging on it again.
Solution 4: Uninstall Recently Installed Hardware/Software
If you have installed some hardware or software like internal memory chips, internal hard disk drive recently and receive the error, consider uninstalling them to solve the error. It is very likely that the newly installed hardware or software is incompatible with your OS. Hence, they cannot work properly and lead to the error.
There are some slight differences between uninstalling hardware and software, so follow the corresponding guide to uninstall them.
The guide for uninstalling hardware
To uninstall hardware from computer, you need to switch off the device and then remove the newly installed hardware. After that, switch on computer to see if the error is fixed or not.
The guide for uninstalling software
Here are detailed steps for uninstalling software through Control Panel.
Step 1: Type control panel in the search box and click on Control Panel from the Best Match list.
Step 2: Change the View by to Category as the picture shows, and then click on Uninstall a program under the Program tab.
Step 3: Find and right click on the newly installed software, and then select Uninstall/Change option. Then, follow the on-screen instruction to complete the uninstallation operation.
Solution 5: Check for Device Drivers Update
The outdated or wrong driver can also trigger the blue screen error 0x0000001a. You can check Windows Update to see if there is any update associated to device drivers. If there are, update them immediately.
You are able to update device drivers manually and automatically. How to do? Here are steps.
Step 1: Open Device Manager, and then expand device drivers one by one.
Step 2: Right click on the driver and choose Update driver option. Here we take Display adapters for example.
Step 3: In the next window, click Search automatically for updated software driver or Browse my computer for driver software based on you needs. Then, follow on-screen prompts to complete the update.
Solution 6: Run System Files Checker
Due to the broken or corrupted system files, the 0x0000001a BSOD Windows 10 will appear. To fix the damaged system files, you need to utilize a utility – SFC (system file checker). This utility is a Windows built-in program that can help you fix many system file related issues.
So, it is worth having a try to fix the error 0x0000001a. This method is only available if your computer can boot into safe mode. After entering the safe mode, you can follow the steps below.
Step 1: Run Command Prompt as administrator in the search box.
Step 2: In the next window, type sfc /scannow and hit Enter.
Solution 7: Check and Fix Disk Errors
Computer hard disk drive issues like bad sectors, hard drive corruption/ failure can be the cause for the error 0x0000001a. Based on that fact, checking you hard drive for issues is a wise way to fix the 0x0000001a BSOD error.
MiniTool Partition Wizard can diagnose if there are any bad sectors on the hard drive for you. Through its Surface Test feature, you are able to find any bad sectors on the hard disk. As your computer cannot boot normally, you still need to reboot the PC via the bootable media generated by MiniTool Partition Wizard Pro Edition.
Buy Now
After setting the media as the first boot order, follow the on-screen instruction to launch MiniTool Partition Wizard Pro Edition and enter its main interface. Then, follow the steps below to test and fix hard drive bad sectors.
Step 1: Choose the system partition and click on the Surface Test feature in the left action panel.
Step 2: In the next window, click the Start button to begin the scanning process. After the process ends, you can find that if your hard drive has any bad sectors via identifying the red blocks on the scan results.
Tip: If there are bad sectors on the hard drive, you need to continue to execute the following steps to fix them. If not, just skip these steps and move to other methods.
Step 3: Open Command Prompt as administrator, and then type chkdsk n: /f /r (n represents your system partition) and press Enter key to carry out the operation. After that, your hard drive can be used as before.
Note: You need to notice that the CHKDSK utility cannot fix the bad sectors physically. The bad sectors are just mapped out by the utility, which keeps them from being read and written.
You may also like this: 7 Fixes to File System Error – 2147219196 [Fix 3 Works Well]
I fixed the memory management error 0x0000001a with the methods offered by MiniTool. Are you bothered by it still? Click here to get these methods now. Click to Tweet
Conclusion
Now, 7 methods to 0x0000001a BSOD Windows 10 have been offered to you. It’s time to make a decision now. All of them are available and effective. If you have some new ideas about the error 0x0000001a, you can share them with us in the following comment area. You can send your advice with an email via [email protected].

Выполнение задач на вашем компьютере может привести к ошибкам из-за различных проблем, препятствующих его работе. Это часто отражается в виде «синего экрана смерти» (BSOD), указывающего на тип ошибки. Одной из таких ошибок является ошибка BSoD 0x0000001a во время обновления или обновления Windows.
Следовательно, в этом руководстве будут описаны возможные решения для исправления этой и подобных ошибок, таких как ошибка Центра обновления Windows 0x80073701.
Что вызывает синий экран 0x0000001a?
Ошибка управления памятью 0x0000001A в Windows 11 — это ошибка обновления, возникающая при наличии проблемы с памятью. Другими факторами, которые могут быть причиной, являются:
- Память Проблемы с памятью и аппаратным обеспечением. Когда возникает серьезная ошибка управления памятью, вам не хватает памяти или устройство хранения неисправно. Кроме того, эту проблему могут вызвать другие аппаратные проблемы, такие как нехватка оперативной памяти.
- Поврежденные системные файлы. Если на вашем компьютере есть поврежденные системные файлы, это будет препятствовать процессу обновления и приведет к возникновению ошибки 0x0000001A на вашем компьютере.
- Устаревшие или несовместимые драйверы устройств. Драйверы устройств отвечают за бесперебойную работу устройств, установленных в системе. Таким образом, ошибка управления памятью 0x0000001A в Windows 11 может быть связана с устаревшими драйверами устройств хранения.
Эти факторы могут различаться на разных ПК. Тем не менее, мы обсудим некоторые исправления, чтобы устранить ошибку и запустить ваши обновления.
Как я могу исправить синий экран 0x0000001a?
Прежде чем приступать к каким-либо дополнительным действиям по устранению неполадок, выполните следующие действия:
- Отключите фоновые приложения, работающие на вашем ПК.
- Запустите полную антивирусную и антивирусную проверку системы.
- Перезапустите Windows в безопасном режиме и проверьте, сохраняется ли код ошибки 0x0000001A Blue Screen.
Если вы не можете исправить ошибку, воспользуйтесь следующими решениями:
1. Обновите драйверы вашего устройства
- Нажмите клавиши Windows +, R чтобы открыть окно «Выполнить», введите devmgmt.msc и нажмите «ОК», чтобы открыть диспетчер устройств.
- Разверните запись устройства, которое вы хотите обновить, щелкните устройство правой кнопкой мыши и выберите «Обновить драйвер» в раскрывающемся меню.

- Нажмите «Автоматический поиск» для обновленного варианта драйвера.

- Повторите шаги для других драйверов на вашем ПК.


Обновление драйверов устройств исправит ошибки, вызывающие проблемы с обновлениями Windows, и установит новые функции для повышения производительности на вашем ПК.
2. Запустите средство диагностики памяти Windows.
- Нажмите Windows + R , чтобы открыть диалоговое окно «Выполнить», введите mdsched.exe, затем нажмите, Enter чтобы открыть средство диагностики памяти Windows.

- Нажмите «Перезагрузить сейчас» и проверьте наличие проблем (рекомендуется), чтобы продолжить.

- Подождите, пока запустится диагностика памяти, и войдите в систему после сканирования, чтобы отобразить все обнаруженные результаты.


Запуск средства диагностики памяти Windows выявит и устранит проблемы с управлением памятью, которые могут вызвать ошибку 0x0000001A.
3. Запустите SFC и DISM для восстановления поврежденных системных файлов.
- Щелкните левой кнопкой мыши кнопку «Пуск», введите «Командная строка» и выберите параметр «Запуск от имени администратора».
- Нажмите «Да» в разделе «Контроль учетных записей» (UAC).
- Введите следующую команду и нажмите Enter :
sfc /scannow
- Введите следующее и нажмите Enter после каждого:
DISM /Online /Cleanup-Image /RestoreHealth - Перезагрузите компьютер и проверьте, сохраняется ли ошибка управления памятью 0x0000001A Blue Screen.


Запуск сканирования SFC обнаружит и восстановит поврежденные системные файлы, вызывающие проблемы с оборудованием во время обновлений и обновлений Windows.
4. Запустите утилиту проверки диска
- Щелкните левой кнопкой мыши кнопку «Пуск», введите «Командная строка» и выберите параметр «Запуск от имени администратора».
- Нажмите «Да» в разделе «Контроль учетных записей пользователей» (UAC).
- Введите следующую команду и нажмите Enter :
chkdsk C:/r/x - Перезагрузите компьютер и проверьте, сохраняется ли ошибка 0x0000001A при обновлении Windows.

Выполнение команды CHKDWe позволяет системе проверить диск памяти, прочитать скрытые разделы и устранить проблемы, которые могут вызвать ошибку.
Если у вас есть дополнительные вопросы или предложения, пожалуйста, используйте раздел комментариев.