
- Code: C0030
- Description: FAX PWB system error
- Causes: The FAX processing cannot be continued due to the firmware error.
- Remedy: 1 Reinstalling the firmware The firmware is faulty. Reinstall the firmware.
2 Checking the connection The connector is not properly connected or the wire is faulty. Clean the terminal of the following wire connectors and reconnect the connectors. If there is no continuity, replace the wire. • FAX PWB — Main/engine PWB
3 Replacing the FAX PWB The FAX PWB is faulty. Replace the FAX PWB.
4 Main/engine PWB replacement The main/engine PWB is faulty. Replace the main/engine PWB.
- Code: C0070
- Description: FAX PWB incompatible detection error
- Causes: Abnormal detection of FAX control PWB incompatibility in the initial communication with the FAX control PWB, any normal communication command is not transmitted.
- Remedy: 1 Checking the FAX PWB The incompatible FAX PWB is installed. Install the FAX PWB for the applicable model.
2 Reinstalling the firmware The firmware is faulty. Reinstall the firmware.
- Code: C0100
- Description: Backup memory device error
- Causes: The abnormal status is output from the flash memory.
- Remedy: 1 Resetting the main power The EEPROM does not operate properly. Turn off the power switch and pull out the power plug. After passing 5s, reinsert the power plug and turn on the power switch.
2 Reinstalling the EEPROM The EEPROM is not properly attached. Reattach the EEPROM on the main/engine PWB.
3 Replacing the EEPROM The EEPROM is faulty. Replace the EEPROM on the main/engine PWB and execute U004 when C0180 appears
4 Checking the main/engine PWB The connector and FFC are not connected properly or the wire, FFC or PWB is faulty. Clean the terminal of the connectors on the main/engine PWB, reconnect the connector of the wire, and reconnect the FFC terminal. If the wire or the FFC is faulty, repair or replace them. If not resolved, replace the main/engine PWB.
- Code: C0120
- Description: MAC address data error
- Causes: MAC address data was incorrect data.
- Remedy: 1 Resetting the main power The flash memory does not operate properly. Turn off the power switch and pull out the power plug. After passing 5s, reinsert the power plug and turn on the power switch.
2 Main/engine PWB replacement The MAC address is incorrect. Replace the main/engine PWB when the MAC address is not indicated on the network status page.
- Code: C0130
- Description: Backup memory reading/writing error
- Causes: The reading or writing into the flash memory is unavailable.
- Remedy: 1 Resetting the main power The flash memory does not operate properly. Turn off the power switch and pull out the power plug. After passing 5s, reinsert the power plug and turn on the power switch.
2 Checking the main/engine PWB The connector and FFC are not connected properly or the wire, FFC or PWB is faulty. Clean the terminal of the connectors on the main/engine PWB, reconnect the connector of the wire, and reconnect the FFC terminal. If the wire or the FFC is faulty, repair or replace them. If not resolved, replace the main/engine PWB.
- Code: C0140
- Description: Backup memory data error
- Causes: The data read from the flash memory is judged as abnormal at the startup.
- Remedy: 1 Resetting the main power The flash memory does not operate properly. Turn off the power switch and pull out the power plug. After passing 5s, reinsert the power plug and turn on the power switch.
2 Executing U021 The flash memory does not operate properly. Execute U021.
3 Checking the main/engine PWB The connector and FFC are not connected properly or the wire, FFC or PWB is faulty. Clean the terminal of the connectors on the main/engine PWB, reconnect the connector of the wire, and reconnect the FFC terminal. If the wire or the FFC is faulty, repair or replace them. If not resolved, replace the main/engine PWB.
- Code: C0150
- Description: EEPROM writing / reading error
- Causes: 1. No response from the device is detected for 5ms or more 5 times continuously when reading / writing the data. 2. The reading data of 2 points mismatches 8 times continuously. 3. The reading data and the writing data mismatch 8 times continuously.
- Remedy: 1 Resetting the main power The EEPROM does not operate properly. Turn off the power switch and pull out the power plug. After passing 5s, reinsert the power plug and turn on the power switch.
2 Reinstalling the EEPROM The EEPROM is not properly attached. Reattach the EEPROM on the main/engine PWB.
3 Replacing the EEPROM The EEPROM is faulty. Replace the EEPROM on the main/engine PWB and execute U004.
4 Checking the main/engine PWB The connector and FFC are not connected properly or the wire, FFC or PWB is faulty. Clean the terminal of the connectors on the main/engine PWB, reconnect the connector of the wire, and reconnect the FFC terminal. If the wire or the FFC is faulty, repair or replace them. If not resolved, replace the main/engine PWB.
- Code: C0160
- Description: EEPROM data error
- Causes: The data read from the EEPROM is judged as abnormal.
- Remedy: 1 Resetting the main power The EEPROM does not operate properly. Turn off the power switch and pull out the power plug. After passing 5s, reinsert the power plug and turn on the power switch.
2 Executing U021 The data stored in the EEPROM on the main/ engine PWB is faulty. Execute U021.
3 Replacing the EEPROM The EEPROM is faulty. Replace the EEPROM on the main/engine PWB and execute U004.
- Code: C0170
- Description: Charger count error
- Causes: The values in one of the billing counters, life counter or the scanner counter mismatch between the main side and the engine side.
- Remedy: 1 Reinstalling the EEPROM The EEPROM for the different main unit is installed. Execute U004 to check machine serial number at MAIN and ENGINE. If different numbers are displayed, attach the proper EEPROM to the main/engine PWB
2 Replacing the EEPROM The EEPROM is faulty. Replace the EEPROM on the main/engine PWB and execute U004 when C0180 appears
3 Checking the main/engine PWB The connector and FFC are not connected properly or the wire, FFC or PWB is faulty. Clean the terminal of the connectors on the main/engine PWB, reconnect the connector of the wire, and reconnect the FFC terminal. If the wire or the FFC is faulty, repair or replace them. If not resolved, replace the main/engine PWB.
- Code: C0180
- Description: Machine serial number mismatch
- Causes: The machine serial Nos. in the main PWB and the EEPROM on the engine PWB mismatch when turning the power on.
- Remedy: 1 Reinstalling the EEPROM The EEPROM for the different main unit is installed. Execute U004 to check machine serial number at MAIN and ENGINE. If different numbers are displayed, attach the proper EEPROM to the main/engine PWB
2 Replacing the EEPROM The EEPROM is faulty. Replace the EEPROM on the main/engine PWB and execute U004 when C0180 appears
- Code: C0190
- Description: Backup memory device error
- Causes: Data from the FRAM cannot be read at start-up (3 times retries)
- Remedy: 1 Resetting the main power FRAM (main/engine PWB) is faulty. Turn off the power switch and pull out the power plug. After passing 5s, reinsert the power plug and turn on the power switch.
2 Checking the main/engine PWB The connector and FFC are not connected properly or the wire, FFC or PWB is faulty. Clean the terminal of the connectors on the main/engine PWB, reconnect the connector of the wire, and reconnect the FFC terminal. If the wire or the FFC is faulty, repair or replace them. If not resolved, replace the main/engine PWB.
- Code: C0360
- Description: Communication error between the engine PWB and ASIC
- Causes: The checksum error appears or the video signal is not reversed when checking the read-back data after transmitting the data. (Successive failure 10 times)
- Remedy: 1 Resetting the main power The main/engine PWB does not operate correctly. Turn off the power switch and pull out the power plug. After passing 5s, reinsert the power plug and turn on the power switch.
2 Checking the engine relay PWB The connector and FFC are not connected properly or the wire, FFC or PWB is faulty. Clean the terminal of the connectors on the engine relay PWB, reconnect the connector of the wire, and reconnect the FFC terminal. If the wire or the FFC is faulty, repair or replace them. If not resolved, replace the engine relay PWB.
3 Checking the main/engine PWB The connector and FFC are not connected properly or the wire, FFC or PWB is faulty. Clean the terminal of the connectors on the main/engine PWB, reconnect the connector of the wire, and reconnect the FFC terminal. If the wire or the FFC is faulty, repair or replace them. If not resolved, replace the main/engine PWB.
- Code: C0640
- Description: Hard Disk (SSD) error
- Causes: The SSD I/O error is detected when accessing the file after the ready mode. (SSD format error after restart such as the system initialization, Sanitization or encrypted format after introducing the security kit)
- Remedy: 1 Resetting the main power The main/engine PWB does not operate correctly. Turn off the power switch and pull out the power plug. After passing 5s, reinsert the power plug and turn on the power switch.
2 Reinstalling HD-6/7 (SSD) The HD-6/7 (SSD) is not connected to the KUIO connector of the main/ engine PWB Turn the power switch off and disconnect the power cord. Check the HD-6/7 (SSD) is connected to the KUIO connector of the main/engine PWB properly and reinstalled the HD-6/7 (SSD).
3 Initializing HD-6/7 (SSD) HD-6 or HD-7 (SSD) does not operate correctly. Initialize the HD-6/7 (SSD) at [System Menu/Counter] key > [Adjustment/Maintenance] > [Service Settings] > [SSD Format].
4 Main/engine PWB replacement The main/engine PWB is faulty. Replace the main/engine PWB.
- Code: C0800
- Description: Image processing error
- Causes: The print sequence jam (J010x) is detected 2 times in succession.
- Remedy: 1 Checking the image data The image data is faulty. When this issue occurs only when handling the certain image data, check if the image data is faulty.
2 Checking the situation The printing operation of the certain file is faulty. Acquire the job’s log if the phenomenon can be reproduced by specifying the job when the error was detected.
3 Checking the main/engine PWB The connector and FFC are not connected properly or the wire, FFC or PWB is faulty. Clean the terminal of the connectors on the main/engine PWB, reconnect the connector of the wire, and reconnect the FFC terminal. If the wire or the FFC is faulty, repair or replace them. If not resolved, replace the main/engine PWB.
- Code: C0830
- Description: FAX PWB flash program area checksum error
- Causes: The program stored in the flash memory is broken so it cannot perform.
- Remedy: 1 Reinstalling the firmware The firmware is faulty. Reinstall the firmware.
2 Initializing the fax The FAX data is faulty. Execute U600 to initialize the FAX.
3 Checking the connection The connector is not properly connected or the wire is faulty. Clean the terminal of the following wire connectors and reconnect the connectors. If there is no continuity, replace the wire. • FAX PWB — Main/engine PWB
4 Replacing the FAX PWB The FAX PWB is faulty. Replace the FAX PWB.
5 Main/engine PWB replacement The main/engine PWB is faulty. Replace the main/engine PWB.
- Code: C0840
- Description: RTC error (‘Time for maintenance T’ appears)
- Causes: [Check at start-up] • RTC values are old. • Power has not been turned on for over 5 years. • RTC value is older than 2000/1/1 00:01. [Periodic check per 5 minutes after start-up] • RTC values are older than the ones at the last check. • Partial operation by power reset after C840 error and ‘Time for Maintenance T’ is indicated.
- Remedy: 1 Setting the RTC RTC is not properly set. Set the RTC in the System Menu.
2 Checking the life of the backup battery The backup battery has run out. If the same service call error appears after resetting the power, check the backup battery. If it has run out, replace the backup battery on the main/engine PWB.
3 Reattaching the main/ engine PWB The main/engine PWB is not properly attached. Retighten the screws for the main/engine PWB.
4 Checking the main/engine PWB The connector and FFC are not connected properly or the wire, FFC or PWB is faulty. Clean the terminal of the connectors on the main/engine PWB, reconnect the connector of the wire, and reconnect the FFC terminal. If the wire or the FFC is faulty, repair or replace them. If not resolved, replace the main/engine PWB.
- Code: C0870
- Description: Image data transmission error to FAX PWB
- Causes: Data was not properly transmitted even if the specified times of retry were made when the large volume data is transmitted into the FAX PWB
- Remedy: 1 Reinstalling the firmware The firmware is faulty. Reinstall the firmware.
2 Initializing the fax The FAX data is faulty. Execute U600 to initialize the FAX.
3 Checking the connection The connector is not properly connected or the wire is faulty. Clean the terminal of the following wire connectors and reconnect the connectors. If there is no continuity, replace the wire. • FAX PWB — Main/engine PWB
4 Replacing the FAX PWB The FAX PWB is faulty. Replace the FAX PWB.
5 Main/engine PWB replacement The main/engine PWB is faulty. Replace the main/engine PWB.
- Code: C0920
- Description: FAX file system error
- Causes: The backup data cannot be stored in the flash memory device due to the file system error
- Remedy: 1 Reinstalling the firmware The firmware is faulty. Reinstall the firmware.
2 Initializing the fax The FAX data is faulty. Execute U600 to initialize the FAX.
3 Checking the connection The connector is not properly connected or the wire is faulty. Clean the terminal of the following wire connectors and reconnect the connectors. If there is no continuity, replace the wire. • FAX PWB — Main/engine PWB
4 Replacing the FAX PWB The FAX PWB is faulty. Replace the FAX PWB.
5 Main/engine PWB replacement The main/engine PWB is faulty. Replace the main/engine PWB.
- Code: C1010
- Description: Lift motor error
- Causes: After installing cassette 1, either of the following 1 to 4 is detected 5 times continuously. 1. The lift motor excess current is detected for 80ms. 2. The lift sensor does not turn on when passing 10s after installing the cassette. 3. During printing, after detecting the lift sensor off, the lift sensor does not turn on when passing 1s after the ascending control. 4. During motor operation, the lock signal is detected for 1s continuously and it is detected 5 times continuously.
- Remedy: 1 Checking the lift plate The lift plate does not operate properly. If the lift plate does not ascend or descend, correct it or replace it.
2 Checking the drive gear The drive gear does not rotate properly. Check if MP lift plate elevation drive gears rotate or have no excessive load. And apply the grease to the frictional parts and repair the related parts so that they can rotate properly.
3 Checking the connection The connector or FFC is not connected properly. Or, the wire or FFC is faulty. Reconnect the following wire connectors and clean the FFC and reconnect. If there is no continuity, replace the wire. If the FFC terminal section is deformed or FFC is broken, replace the FFC. • Lift sensor — Engine relay PWB • Engine relay PWB — Main/ engine PWB
4 Checking the lift motor The lift motor is not properly attached, or it is faulty. Reattach the lift motor. If it is not repaired, replace it.
5 Checking the lift sensor The lift sensor is not properly attached, or it is faulty. Reattach PF lift upper limit sensor. If not repaired, replace it.
6 Replacing the engine relay PWB The engine relay PWB is faulty. Replace the engine relay PWB.
7 Firmware upgrade The firmware is not the latest version. Upgrade the engine firmware to the latest version
8 Main/engine PWB replacement The main/engine PWB is faulty. Replace the main/engine PWB.
- Code: C1020
- Description: PF lift motor 1 error
- Causes: Target: Paper feeder (1st) After installing the cassette, either of the following 1 to 3 is detected 5 times continuously. 1. The PF lift motor excess current is detected for 80ms. 2. The PF lift sensor does not turn on when passing 10s after installing the cassette. 3. During printing, after detecting the PF lift sensor off, the PF lift sensor does not turn on when passing 1s after the ascending control.
- Remedy: 1 Checking the lift plate The lift plate does not operate properly. If the lift plate does not ascend or descend, correct it or replace it.
2 Checking the drive gear The drive gear does not rotate properly. Check if MP lift plate elevation drive gears rotate or have no excessive load. And apply the grease to the frictional parts and repair the related parts so that they can rotate properly.
3 Reinstalling the paper feeder The paper feeder is not properly installed. Reinstall the paper feeder
4 Checking the connection The connector is not connected properly or, the wire or drawer connector is faulty. Check the following wire connection, and correct the terminals and reconnect the connectors all the way. If the wire has no continuity or the drawer connector is faulty, replace them.• PF lift sensor — PF PWB• PF lift motor — PF PWB• PF PWB — Drawer connector• Drawer connector — PF PWB (2nd paper feeder)
5 Checking the PF lift motor PF lift motor is not attached properly or faulty. Reattach the PF lift motor. If it is not repaired, replace it.
6 Checking the PF lift sensor The PF lift motor is not properly attached, or it is faulty. Reattach the PF lift sensor. If it is not repaired, replace it.
7 Replacing the PF PWB The PF PWB is faulty. Replace the PF PWB.
8 Firmware upgrade The firmware is not the latest version. Upgrade the engine firmware to the latest version
9 Replacing the engine relay PWB The engine relay PWB is faulty. Replace the engine relay PWB.
- Code: C1030
- Description: PF lift motor 2 error
- Causes: Target: Paper feeder (2nd) After installing the cassette, either of the following 1 to 3 is detected 5 times continuously. 1. The PF lift motor excess current is detected for 80ms. 2. The PF lift sensor does not turn on when passing 10s after installing the cassette. 3. During printing, after detecting the PF lift sensor off, the PF lift sensor does not turn on when passing 1s after the ascending control.
- Remedy: 1 Checking the lift plate The lift plate does not operate properly. If the lift plate does not ascend or descend, correct it or replace it.
2 Checking the drive gear The drive gear does not rotate properly. Check if MP lift plate elevation drive gears rotate or have no excessive load. And apply the grease to the frictional parts and repair the related parts so that they can rotate properly.
3 Reinstalling the paper feeder The paper feeder is not properly installed. Reinstall the paper feeder
3 Checking the connection The connector is not connected properly or, the wire or drawer connector is faulty. Check the following wire connection, and correct the terminals and reconnect the connectors all the way. If the wire has no continuity or the drawer connector is faulty, replace them.• PF lift sensor — PF PWB• PF lift motor — PF PWB• PF PWB — Drawer connector• Drawer connector — PF PWB (2nd paper feeder)
4 Checking the PF lift motor PF lift motor is not attached properly or faulty. Reattach the PF lift motor. If it is not repaired, replace it.
5 Checking the PF lift sensor The PF lift motor is not properly attached, or it is faulty. Reattach the PF lift sensor. If it is not repaired, replace it.
6 Replacing the PF PWB The PF PWB is faulty. Replace the PF PWB.
- Code: C1040
- Description: PF lift motor 3 error
- Causes: Target: Paper feeder (3rd) After installing the cassette, either of the following 1 to 3 is detected 5 times continuously. 1. The PF lift motor excess current is detected for 80ms. 2. The PF lift sensor does not turn on when passing 10s after installing the cassette. 3. During printing, after detecting the PF lift sensor off, the PF lift sensor does not turn on when passing 1s after the ascending control.
- Remedy: 1 Checking the lift plate The lift plate does not operate properly. If the lift plate does not ascend or descend, correct it or replace it.
2 Checking the drive gear The drive gear does not rotate properly. Check if MP lift plate elevation drive gears rotate or have no excessive load. And apply the grease to the frictional parts and repair the related parts so that they can rotate properly.
3 Reinstalling the paper feeder The paper feeder is not properly installed. Reinstall the paper feeder
4 Checking the connection The connector is not connected properly or, the wire or drawer connector is faulty. Check the following wire connection, and correct the terminals and reconnect the connectors all the way. If the wire has no continuity or the drawer connector is faulty, replace them.• PF lift sensor — PF PWB• PF lift motor — PF PWB• PF PWB — Drawer connector• Drawer connector — PF PWB (2nd paper feeder)
5 Checking the PF lift motor PF lift motor is not attached properly or faulty. Reattach the PF lift motor. If it is not repaired, replace it.
6 Checking the PF lift sensor The PF lift motor is not properly attached, or it is faulty. Reattach the PF lift sensor. If it is not repaired, replace it.
7 Replacing the PF PWB The PF PWB is faulty. Replace the PF PWB.
- Code: C1810
- Description: Paper Feeder communication error
- Causes: Target: Paper feeder (1st) The communication error was detected 10 times continuously.
- Remedy: 1 Reinstalling the paper feeder The paper feeder is not properly installed. Reinstall the paper feeder
2 Checking the connection The connector is not connected properly or, the wire or drawer connector is faulty. Check the following wire connection, and correct the terminals and reconnect the connectors all the way. If the wire has no continuity or the drawer connector is faulty, replace them.• PF lift sensor — PF PWB• PF lift motor — PF PWB• PF PWB — Drawer connector• Drawer connector — PF PWB (2nd paper feeder)
3 Firmware upgrade The firmware is not the latest version. Upgrade the firmware to the latest version.
4 Replacing the PF PWB The PF PWB is faulty. Replace the PF PWB.
5 Replacing the engine relay PWB The engine relay PWB is faulty. Replace the engine relay PWB.
- Code: C1820
- Description: Paper feeder communication error
- Causes: Target: Paper feeder (2nd) The communication error was detected 10 times continuously.
- Remedy: 1 Reinstalling the paper feeder The paper feeder is not properly installed. Reinstall the paper feeder
2 Checking the connection The connector is not connected properly or, the wire or drawer connector is faulty. Check the following wire connection, and correct the terminals and reconnect the connectors all the way. If the wire has no continuity or the drawer connector is faulty, replace them.• PF lift sensor — PF PWB• PF lift motor — PF PWB• PF PWB — Drawer connector• Drawer connector — PF PWB (2nd paper feeder)
3 Firmware upgrade The firmware is not the latest version. Upgrade the firmware to the latest version.
4 Replacing the PF PWB The PF PWB is faulty. Replace the PF PWB.
5 Replacing the PF PWB The PF PWB is faulty. Replace the PF PWB in the 1st paper feeder.
- Code: C1830
- Description: Paper feeder communication error
- Causes: Target: Paper feeder (3rd) The communication error was detected 10 times continuously.
- Remedy: 1 Reinstalling the paper feeder The paper feeder is not properly installed. Reinstall the paper feeder
2 Checking the connection The connector is not connected properly or, the wire or drawer connector is faulty. Check the following wire connection, and correct the terminals and reconnect the connectors all the way. If the wire has no continuity or the drawer connector is faulty, replace them.• PF lift sensor — PF PWB• PF lift motor — PF PWB• PF PWB — Drawer connector• Drawer connector — PF PWB (2nd paper feeder)
3 Firmware upgrade The firmware is not the latest version. Upgrade the firmware to the latest version.
4 Replacing the PF PWB The PF PWB is faulty. Replace the PF PWB.
5 Replacing the PF PWB The PF PWB is faulty. Replace the PF PWB in the 2nd paper feeder.
- Code: C1900
- Description: Paper Feeder EEPROM error
- Causes: Target: Paper feeder (1st) For the internal count The writing data and the reading data mismatch 4 times continuously when writing.
- Remedy: 1 Reinstalling the paper feeder The paper feeder is not properly installed. Reinstall the paper feeder
2 Checking the connection The connector is not properly connected or the wire is faulty. Reinsert the connectors into all the connectors on the PF PWB. Also, if there is no continuity, replace the wire.
3 Replacing the PF PWB The PF PWB is faulty. Replace the PF PWB.
- Code: C1910
- Description: Paper feeder EEPROM error
- Causes: Target: Paper feeder (2nd) For the internal count The writing data and the reading data mismatch 4 times continuously when writing.
- Remedy: 1 Reinstalling the paper feeder The paper feeder is not properly installed. Reinstall the paper feeder
2 Checking the connection The connector is not properly connected or the wire is faulty. Reinsert the connectors into all the connectors on the PF PWB. Also, if there is no continuity, replace the wire.
3 Replacing the PF PWB The PF PWB is faulty. Replace the PF PWB.
- Code: C1920
- Description: Paper feeder EEPROM error
- Causes: Target: Paper feeder (3rd) For the internal count The writing data and the reading data mismatch 4 times continuously when writing.
- Remedy: 1 Reinstalling the paper feeder The paper feeder is not properly installed. Reinstall the paper feeder
2 Checking the connection The connector is not properly connected or the wire is faulty. Reinsert the connectors into all the connectors on the PF PWB. Also, if there is no continuity, replace the wire.
3 Replacing the PF PWB The PF PWB is faulty. Replace the PF PWB.
- Code: C2101
- Description: Developer motor steady state error
- Causes: The steady signal turns off for 2s continuously after the motor is stabilized.
- Remedy: 1 Checking the developer unit The developer roller is faulty. Replace developer unit C, M or Y if the developer roller does not rotate.
2 Checking the driving parts The developer motor drive is not transmitted correctly. Check if the drive gear rotates smoothly and has no excessive load. And apply the grease to the frictional parts and repair the related parts so that the drive gear rotates smoothly.
3 Checking the connection The connector or FFC is not connected properly. Or, the wire or FFC is faulty. Reconnect the following wire connectors and clean the FFC and reconnect. If there is no continuity, replace the wire. If the FFC terminal section is deformed or FFC is broken, replace the FFC. • Developer motor — Engine relay PWB • Engine relay PWB — Main/ engine PWB
4 Checking the developer motor The developer motor is not properly attached, or it is faulty. Reattach the developer motor. If it is not repaired, replace it.
5 Firmware upgrade The firmware is not the latest version. Upgrade the engine firmware to the latest version
6 Replacing the engine relay PWB The engine relay PWB is faulty. Replace the engine relay PWB.
7 Main/engine PWB replacement The main/engine PWB is faulty. Replace the main/engine PWB.
- Code: C2111
- Description: Developer motor start-up error
- Causes: The steady signal does not turn on after passing 3s since the motor started up
- Remedy: 1 Checking the developer unit The developer roller is faulty. Replace developer unit C, M or Y if the developer roller does not rotate.
2 Checking the driving parts The developer motor drive is not transmitted correctly. Check if the drive gear rotates smoothly and has no excessive load. And apply the grease to the frictional parts and repair the related parts so that the drive gear rotates smoothly.
3 Checking the connection The connector or FFC is not connected properly. Or, the wire or FFC is faulty. Reconnect the following wire connectors and clean the FFC and reconnect. If there is no continuity, replace the wire. If the FFC terminal section is deformed or FFC is broken, replace the FFC. • Developer motor — Engine relay PWB • Engine relay PWB — Main/ engine PWB
4 Checking the developer motor The developer motor is not properly attached, or it is faulty. Reattach the developer motor. If it is not repaired, replace it.
5 Firmware upgrade The firmware is not the latest version. Upgrade the engine firmware to the latest version
6 Replacing the engine relay PWB The engine relay PWB is faulty. Replace the engine relay PWB.
7 Main/engine PWB replacement The main/engine PWB is faulty. Replace the main/engine PWB.
- Code: C2201
- Description: Drum motor 2 steady-state error
- Causes: The steady signal turns off for 2s continuously after the motor is stabilized.
- Remedy: 1 Checking the drum unit and the developer unit The drum does not rotate smoothly. Check if the drum and the drum cleaning screw rotates manually. If it locks up, replace drum unit C or Y.
2 Checking the driving parts The drum motor 2 drive is not transmitted correctly. Check if the drive gear rotates smoothly and has no excessive load. And apply the grease to the frictional parts and repair the related parts so that the drive gear rotates smoothly.
3 Checking the connection The connector or FFC is not connected properly. Or, the wire or FFC is faulty. Reconnect the following wire connectors and clean the FFC and reconnect. If there is no continuity, replace the wire. If the FFC terminal section is deformed or FFC is broken, replace the FFC. • Drum motor 2 — Engine relay PWB • Engine relay PWB — Main/ engine PWB
4 Checking drum motor 2 Drum motor 2 is not properly attached, or it is faulty. Reattach drum motor 2. If it is not repaired, replace it.
5 Firmware upgrade The firmware is not the latest version. Upgrade the engine firmware to the latest version
6 Replacing the engine relay PWB The engine relay PWB is faulty. Replace the engine relay PWB.
7 Main/engine PWB replacement The main/engine PWB is faulty. Replace the main/engine PWB.
- Code: C2202
- Description: Drum motor 1 steady-state error
- Causes: The steady signal turns off for 2s continuously after the motor is stabilized.
- Remedy: 1 Checking the drum unit and the developer unit The drum does not rotate smoothly. Check if the drum and the drum cleaning screw rotates manually. If it locks up, replace drum unit K or M.
2 Checking the driving parts The drum motor 1 drive is not transmitted correctly. Check if the drive gear rotates smoothly and has no excessive load. And apply the grease to the frictional parts and repair the related parts so that the drive gear rotates smoothly.
3 Checking the connection The connector or FFC is not connected properly. Or, the wire or FFC is faulty. Reconnect the following wire connectors and clean the FFC and reconnect. If there is no continuity, replace the wire. If the FFC terminal section is deformed or FFC is broken, replace the FFC. • Drum motor 1 — Engine relay PWB • Engine relay PWB — Main/ engine PWB
4 Checking drum motor 1 Drum motor 1 is not properly attached, or it is faulty. Reattach drum motor 1. If it is not repaired, replace it.
5 Firmware upgrade The firmware is not the latest version. Upgrade the engine firmware to the latest version
6 Replacing the engine relay PWB The engine relay PWB is faulty. Replace the engine relay PWB.
7 Main/engine PWB replacement The main/engine PWB is faulty. Replace the main/engine PWB.
- Code: C2211
- Description: Drum motor 2 standby error
- Causes: The steady signal does not turn on after passing 3s since the motor started up
- Remedy: 1 Checking the drum unit and the developer unit The drum does not rotate smoothly. Check if the drum and the drum cleaning screw rotates manually. If it locks up, replace drum unit C or Y.
2 Checking the driving parts The drum motor 2 drive is not transmitted correctly. Check if the drive gear rotates smoothly and has no excessive load. And apply the grease to the frictional parts and repair the related parts so that the drive gear rotates smoothly.
3 Checking the connection The connector or FFC is not connected properly. Or, the wire or FFC is faulty. Reconnect the following wire connectors and clean the FFC and reconnect. If there is no continuity, replace the wire. If the FFC terminal section is deformed or FFC is broken, replace the FFC. • Drum motor 2 — Engine relay PWB • Engine relay PWB — Main/ engine PWB
4 Checking drum motor 2 Drum motor 2 is not properly attached, or it is faulty. Reattach drum motor 2. If it is not repaired, replace it.
5 Firmware upgrade The firmware is not the latest version. Upgrade the engine firmware to the latest version
6 Replacing the engine relay PWB The engine relay PWB is faulty. Replace the engine relay PWB.
7 Main/engine PWB replacement The main/engine PWB is faulty. Replace the main/engine PWB.
- Code: C2212
- Description: Drum motor 1 standby error
- Causes: The steady signal does not turn on after passing 3s since the motor started up
- Remedy: 1 Checking the drum unit and the developer unit The drum does not rotate smoothly. Check if the drum and the drum cleaning screw rotates manually. If it locks up, replace drum unit K or M.
2 Checking the driving parts The drum motor 1 drive is not transmitted correctly. Check if the drive gear rotates smoothly and has no excessive load. And apply the grease to the frictional parts and repair the related parts so that the drive gear rotates smoothly.
3 Checking the connection The connector or FFC is not connected properly. Or, the wire or FFC is faulty. Reconnect the following wire connectors and clean the FFC and reconnect. If there is no continuity, replace the wire. If the FFC terminal section is deformed or FFC is broken, replace the FFC. • Drum motor 1 — Engine relay PWB • Engine relay PWB — Main/ engine PWB
4 Checking drum motor 1 Drum motor 1 is not properly attached, or it is faulty. Reattach drum motor 1. If it is not repaired, replace it.
5 Firmware upgrade The firmware is not the latest version. Upgrade the engine firmware to the latest version
6 Replacing the engine relay PWB The engine relay PWB is faulty. Replace the engine relay PWB.
7 Main/engine PWB replacement The main/engine PWB is faulty. Replace the main/engine PWB.
- Code: C2500
- Description: Conveying developer motor error
- Causes: The steady signal does not turn on after passing 3s since the motor started up or the steady signal turns off for 2s continuously after the motor is stabilized
- Remedy: 1 Checking the driving parts The conveying developer motor drive is not transmitted correctly. Check if the paper conveying roller and the drive gear rotate smoothly and have no excessive load. And apply the grease to the frictional parts and repair the related parts so that the drive gear rotates smoothly.
2 Checking the connection The connector or FFC is not connected properly. Or, the wire or FFC is faulty. Reconnect the following wire connectors and clean the FFC and reconnect. If there is no continuity, replace the wire. If the FFC terminal section is deformed or FFC is broken, replace the FFC. • Conveying developer motor — Engine relay PWB • Engine relay PWB — Main/ engine PWB • LSU — Main/engine PWB
3 Checking the conveying developer motor The conveying developer motor is not properly attached, or it is faulty. Reattach the conveying developer motor. If it is not repaired, replace it.
4 Replacing the conveying drive unit The conveying drive unit is faulty. Replace the conveying drive unit.
5 Firmware upgrade The firmware is not the latest version. Upgrade the engine firmware to the latest version
6 Replacing the engine relay PWB The engine relay PWB is faulty. Replace the engine relay PWB.
7 Main/engine PWB replacement The main/engine PWB is faulty. Replace the main/engine PWB.
- Code: C2600
- Description: PF feed motor error
- Causes: Target: Paper feeder (1st) The steady signal does not turn on for 5s continuously when the motor drives
- Remedy: 1 Checking the driving parts The PF feed motor drive is not transmitted correctly. Check if the PF feed roller or the drive gear rotates or have no excessive load. And apply the grease to the frictional parts and repair the related parts so that the drive gear rotates properly.
2 Checking the connection The connector is not properly connected or the wire is faulty. Clean the terminal of the following wire connectors and reconnect the connectors. If there is no continuity, replace the wire. • PF feed motor — PF PWB
3 Checking the PF feed motor The PF feed motor is not properly attached, or it is faulty. Reattach the PF feed motor. If it is not repaired, replace it.
4 Replacing the PF PWB The PF PWB is faulty. Replace the PF PWB.
- Code: C2610
- Description: PF feed motor error
- Causes: Target: Paper feeder (2nd) The steady signal does not turn on for 5s continuously when the motor drives
- Remedy: 1 Checking the driving parts The PF feed motor drive is not transmitted correctly. Check if the PF feed roller or the drive gear rotates or have no excessive load. And apply the grease to the frictional parts and repair the related parts so that the drive gear rotates properly.
2 Checking the connection The connector is not properly connected or the wire is faulty. Clean the terminal of the following wire connectors and reconnect the connectors. If there is no continuity, replace the wire. • PF feed motor — PF PWB
3 Checking the PF feed motor The PF feed motor is not properly attached, or it is faulty. Reattach the PF feed motor. If it is not repaired, replace it.
4 Replacing the PF PWB The PF PWB is faulty. Replace the PF PWB.
- Code: C2620
- Description: PF feed motor error
- Causes: Target: Paper feeder (3rd) The steady signal does not turn on for 5s continuously when the motor drives
- Remedy: 1 Checking the driving parts The PF feed motor drive is not transmitted correctly. Check if the PF feed roller or the drive gear rotates or have no excessive load. And apply the grease to the frictional parts and repair the related parts so that the drive gear rotates properly.
2 Checking the connection The connector is not properly connected or the wire is faulty. Clean the terminal of the following wire connectors and reconnect the connectors. If there is no continuity, replace the wire. • PF feed motor — PF PWB
3 Checking the PF feed motor The PF feed motor is not properly attached, or it is faulty. Reattach the PF feed motor. If it is not repaired, replace it.
4 Replacing the PF PWB The PF PWB is faulty. Replace the PF PWB.
- Code: C2760
- Description: Primary transfer motor startup error
- Causes: The steady signal does not turn on after passing 3s since the motor started up
- Remedy: 1 Checking the driving parts The primary transfer motor drive is not transmitted correctly. Check if the excessive load is given by rotating the drive gears, roller and the transfer belt, and clean the drive section for the primary transfer unit.
2 Checking the connection The connector or FFC is not connected properly. Or, the wire or FFC is faulty. Reconnect the following wire connectors and clean the FFC and reconnect. If there is no continuity, replace the wire. If the FFC terminal section is deformed or FFC is broken, replace the FFC. • Primary transfer motor — Engine relay PWB • Engine relay PWB — Main/ engine PWB
3 Checking the primary transfer motor The primary transfer motor is not properly attached, or it is faulty. Reattach the primary transfer motor. If it is not repaired, replace it.
4 Firmware upgrade The firmware is not the latest version. Upgrade the engine firmware to the latest version
5 Replacing the engine relay PWB The engine relay PWB is faulty. Replace the engine relay PWB.
6 Main/engine PWB replacement The main/engine PWB is faulty. Replace the main/engine PWB.
- Code: C2820
- Description: Primary transfer motor steady-state error
- Causes: The steady signal turns off for 2s continuously after the motor is stabilized.
- Remedy: 1 Checking the driving parts The primary transfer motor drive is not transmitted correctly. Check if the excessive load is given by rotating the drive gears, roller and the transfer belt, and clean the drive section for the primary transfer unit.
2 Checking the connection The connector or FFC is not connected properly. Or, the wire or FFC is faulty. Reconnect the following wire connectors and clean the FFC and reconnect. If there is no continuity, replace the wire. If the FFC terminal section is deformed or FFC is broken, replace the FFC. • Primary transfer motor — Engine relay PWB • Engine relay PWB — Main/ engine PWB
3 Checking the primary transfer motor The primary transfer motor is not properly attached, or it is faulty. Reattach the primary transfer motor. If it is not repaired, replace it.
4 Firmware upgrade The firmware is not the latest version. Upgrade the engine firmware to the latest version
5 Replacing the engine relay PWB The engine relay PWB is faulty. Replace the engine relay PWB.
6 Main/engine PWB replacement The main/engine PWB is faulty. Replace the main/engine PWB.
- Code: C3100
- Description: Scanner carriage error
- Causes: The home position is not correct when the power is turned on or at the end of a reading process of the table or document processor.
- Remedy: 1 Checking the scanner carriage A load is applied to the scanner movement. If there is an excessive load when manually operating the scanner carriage, check if foreign objects is on the drive belt. Then, clean the drive belt and after that, apply the grease to the ISU shaft.
2 Checking the connection The connector or FFC is not connected properly. Or, the wire or FFC is faulty. Reconnect the following wire connectors and clean the FFC and reconnect. If there is no continuity, replace the wire. If the FFC terminal section is deformed or FFC is broken, replace the FFC. • Scanner motor — Engine relay PWB • Engine relay PWB — Main/ engine PWB
3 Checking the home position sensor The home position sensor is not properly attached, or it is faulty. Reattach the home position sensor. If it is not repaired, replace it.
4 Checking the scanner motor The scanner motor is not attached properly or faulty. Reattach the scanner motor. If it is not repaired, replace it.
5 Replacing the scanner carriage The CCD PWB is faulty. Replace the scanner carriage.
6 Main/engine PWB replacement The main/engine PWB is faulty. Replace the main/engine PWB.
- Code: C3200
- Description: LED lamp error
- Causes: The white reference data retrieved by lighting the lamp at the initial operation is at the specified value or less.
- Remedy: 1 Checking the connection FFC is not properly connected, or it is faulty. Clean the following FFC terminal of the FFC and reconnect. If the FFC terminal is deformed or FFC is short circuited, replace FFC. • CCD PWB — Main/engine PWB
2 Replacing the scanner carriage The LED is faulty if the LED lamp does not turn on. Or, the CCD PWB is faulty. Replace the scanner carriage.
4 Main/engine PWB replacement The main/engine PWB is faulty. Replace the main/engine PWB.
- Code: C3210
- Description: CIS lamp error
- Causes: Target: Dual scan DP (For 35ppm model) The white reference data obtained by turning the lamp on at initialization is less than the specified value.
- Remedy: 1 Checking the connection The connector or FFC is not connected properly. Or, the wire or FFC is faulty. Reconnect the following wire connectors and clean the FFC and reconnect. If there is no continuity, replace the wire. If the FFC terminal section is deformed or FFC is broken, replace the FFC. • DPCIS — DPCIS relay PWB • DPCIS relay PWB — Main/ Engine PWB
2 (When the CIS lamp does not turn on) Replacing the DPCIS The DPCIS is faulty. Replace the DPCIS.
3 (When the CIS lamp does not turn on) Replacing the DPCIS relay PWB The DPCIS relay PWB is faulty. Replace the DPCIS relay PWB.
4 Main/engine PWB replacement The main/engine PWB is faulty. Replace the main/engine PWB.
- Code: C3500
- Description: Communication error between the scanner and ASIC
- Causes: The communication error was detected during communication
- Remedy: 1 Checking the connection FFC is not properly connected, or it is faulty. Clean the following FFC terminal of the FFC and reconnect. If the FFC terminal is deformed or FFC is short circuited, replace FFC. • CCD PWB — Main/engine PWB
2 Replacing the scanner carriage The CCD PWB is faulty. Replace the scanner carriage.
3 Main/engine PWB replacement The main/engine PWB is faulty. Replace the main/engine PWB.
- Code: C4001
- Description: Polygon motor KM startup error
- Causes: The steady signal of the motor does not turn on after passing 6s since the polygon motor starts up
- Remedy: 1 Checking the connection The connector is not properly connected or the wire is faulty. Clean the terminal of the following wire connectors and reconnect the connectors. If there is no continuity, replace the wire. • LSU(KM) — Main/engine PWB
2 LSU replacement The LSU is faulty. Replace the LSU (KM).
3 Firmware upgrade The firmware is faulty. Upgrade the engine firmware to the latest version
4 Main/engine PWB replacement The main/engine PWB is faulty. Replace the main/engine PWB.
- Code: C4002
- Description: Polygon motor CY startup error
- Causes: The steady signal of the motor does not turn on after passing 6s since the polygon motor starts up
- Remedy: 1 Checking the connection The connector is not properly connected or the wire is faulty. Clean the terminal of the following wire connectors and reconnect the connectors. If there is no continuity, replace the wire. • LSU(CY) — Main/engine PWB
2 LSU replacement The LSU is faulty. Replace the LSU (CY).
3 Firmware upgrade The firmware is faulty. Upgrade the engine firmware to the latest version
4 Main/engine PWB replacement The main/engine PWB is faulty. Replace the main/engine PWB.
- Code: C4011
- Description: Polygon motor KM stabilization error
- Causes: The steady signal of the motor turns off for 6s in succession after the polygon motor was stabilized
- Remedy: 1 Checking the connection The connector is not properly connected or the wire is faulty. Clean the terminal of the following wire connectors and reconnect the connectors. If there is no continuity, replace the wire. • LSU(KM) — Main/engine PWB
2 LSU replacement The LSU is faulty. Replace the LSU (KM).
3 Firmware upgrade The firmware is faulty. Upgrade the engine firmware to the latest version
4 Main/engine PWB replacement The main/engine PWB is faulty. Replace the main/engine PWB.
- Code: C4012
- Description: Polygon motor CY stabilization error
- Causes: The steady signal of the motor turns off for 6s in succession after the polygon motor was stabilized
- Remedy: 1 Checking the connection The connector is not properly connected or the wire is faulty. Clean the terminal of the following wire connectors and reconnect the connectors. If there is no continuity, replace the wire. • LSU(CY) — Main/engine PWB
2 LSU replacement The LSU is faulty. Replace the LSU (CY).
3 Firmware upgrade The firmware is faulty. Upgrade the engine firmware to the latest version
4 Main/engine PWB replacement The main/engine PWB is faulty. Replace the main/engine PWB.
- Code: C4101
- Description: Laser error (Black)
- Causes: The laser is not received for 1s since the light emission of the laser (Black) was started.
- Remedy: 1 Checking the connection The connector is not properly connected or the wire is faulty. Clean the terminal of the following wire connectors and reconnect the connectors. If there is no continuity, replace the wire. • LSU(KM) — Main/engine PWB
2 LSU replacement The LSU is faulty. Replace the LSU (KM).
3 Firmware upgrade The firmware is faulty. Upgrade the engine firmware to the latest version
4 Main/engine PWB replacement The main/engine PWB is faulty. Replace the main/engine PWB.
- Code: C4102
- Description: Laser error (Cyan)
- Causes: The laser is not received for 1s since the light emission of the laser (Cyan) was started.
- Remedy: 1 Checking the connection The connector is not properly connected or the wire is faulty. Clean the terminal of the following wire connectors and reconnect the connectors. If there is no continuity, replace the wire. • LSU(CY) — Main/engine PWB
2 LSU replacement The LSU is faulty. Replace the LSU (CY).
3 Firmware upgrade The firmware is faulty. Upgrade the engine firmware to the latest version
4 Main/engine PWB replacement The main/engine PWB is faulty. Replace the main/engine PWB.
- Code: C4103
- Description: Laser error (Magenta)
- Causes: The laser is not received for 1s since the light emission of the laser (Magenta) was started.
- Remedy: 1 Checking the connection The connector is not properly connected or the wire is faulty. Clean the terminal of the following wire connectors and reconnect the connectors. If there is no continuity, replace the wire. • LSU(KM) — Main/engine PWB
2 LSU replacement The LSU is faulty. Replace the LSU (KM).
3 Firmware upgrade The firmware is faulty. Upgrade the engine firmware to the latest version
4 Main/engine PWB replacement The main/engine PWB is faulty. Replace the main/engine PWB.
- Code: C4104
- Description: Laser error (Yellow)
- Causes: The laser is not received for 1s since the light emission of the laser (Yellow) was started.
- Remedy: 1 Checking the connection The connector is not properly connected or the wire is faulty. Clean the terminal of the following wire connectors and reconnect the connectors. If there is no continuity, replace the wire. • LSU(CY) — Main/engine PWB
2 LSU replacement The LSU is faulty. Replace the LSU (CY).
3 Firmware upgrade The firmware is faulty. Upgrade the engine firmware to the latest version
4 Main/engine PWB replacement The main/engine PWB is faulty. Replace the main/engine PWB.
- Code: C4201
- Description: Laser BD steady-state error (Black)
- Causes: The black BD signal is not detected during the polygon motor steady rotation
- Remedy: 1 Checking the connection The connector is not properly connected or the wire is faulty. Clean the terminal of the following wire connectors and reconnect the connectors. If there is no continuity, replace the wire. • LSU(KM) — Main/engine PWB
2 LSU replacement The LSU is faulty. Replace the LSU (KM).
3 Firmware upgrade The firmware is faulty. Upgrade the engine firmware to the latest version
4 Main/engine PWB replacement The main/engine PWB is faulty. Replace the main/engine PWB.
- Code: C4202
- Description: Laser BD steady-state error (Cyan)
- Causes: The black Cyan signal is not detected during the polygon motor steady rotation
- Remedy: 1 Checking the connection The connector is not properly connected or the wire is faulty. Clean the terminal of the following wire connectors and reconnect the connectors. If there is no continuity, replace the wire. • LSU(CY) — Main/engine PWB
2 LSU replacement The LSU is faulty. Replace the LSU (CY).
3 Firmware upgrade The firmware is faulty. Upgrade the engine firmware to the latest version
4 Main/engine PWB replacement The main/engine PWB is faulty. Replace the main/engine PWB.
- Code: C4203
- Description: Laser BD steady-state error (Magenta)
- Causes: The black Magenta signal is not detected during the polygon motor steady rotation
- Remedy: 1 Checking the connection The connector is not properly connected or the wire is faulty. Clean the terminal of the following wire connectors and reconnect the connectors. If there is no continuity, replace the wire. • LSU(KM) — Main/engine PWB
2 LSU replacement The LSU is faulty. Replace the LSU (KM).
3 Firmware upgrade The firmware is faulty. Upgrade the engine firmware to the latest version
4 Main/engine PWB replacement The main/engine PWB is faulty. Replace the main/engine PWB.
- Code: C4204
- Description: Laser BD steady-state error (Yellow)
- Causes: The Yellow Magenta signal is not detected during the polygon motor steady rotation
- Remedy: 1 Checking the connection The connector is not properly connected or the wire is faulty. Clean the terminal of the following wire connectors and reconnect the connectors. If there is no continuity, replace the wire. • LSU(CY) — Main/engine PWB
2 LSU replacement The LSU is faulty. Replace the LSU (CY).
3 Firmware upgrade The firmware is faulty. Upgrade the engine firmware to the latest version
4 Main/engine PWB replacement The main/engine PWB is faulty. Replace the main/engine PWB.
- Code: C4600
- Description: LSU cleaning motor error
- Causes: Excess current was detected for 5s continuously during the LSU cleaning motor operation
- Remedy: 1 Executing the Laser Scanner Cleaning The LSU cleaning drive gear or the cleaning spiral does not smoothly rotate due to the load. Execute Laser Scanner Cleaning.
2 Cleaning the LSU The LSU cleaning drive gear or the cleaning spiral does not smoothly rotate due to the load. Clean the LSU cleaning drive gear and the cleaning spiral, and then apply grease to these parts.
3 LSU replacement The LSU cleaning drive gear or the cleaning spiral is deformed or there is a fault in them. Replace the LSU.
4 Checking the connection The connector is not properly connected or the wire is faulty. Clean the terminal of the following wire connectors and reconnect the connectors. If there is no continuity, replace the wire. • LSU cleaning motor — Engine relay PWB
5 Checking the LSU cleaning motor The LSU cleaning motor is not properly attached, or it is faulty. Reattach the LSU cleaning motor. If it is not repaired, replace it.
6 Firmware upgrade The firmware is not the latest version. Upgrade the engine firmware to the latest version
7 Main/engine PWB replacement The main/engine PWB is faulty. Replace the main/engine PWB.
- Code: C4700
- Description: VIDEO ASIC device error
- Causes: 1. The communication with VIDEO ASIC failed 5 times continuously. 2. After writing the data to VIDEO ASIC, the value mismatching error repeated 8 times continuously by trying to read the data from the same address.
- Remedy: 1 Resetting the main power The ASIC operation on the PWB is faulty. Turn off the power switch and pull out the power plug. After passing 5s, reinsert the power plug and turn on the power switch.
2 Firmware upgrade The firmware is not the latest version. Upgrade the main firmware and the engine firmware to the latest version.
3 Checking the main/engine PWB The connector and FFC are not connected properly or the wire, FFC or PWB is faulty. Clean the terminal of the connectors on the main/engine PWB, reconnect the connector of the wire, and reconnect the FFC terminal. If the wire or the FFC is faulty, repair or replace them. If not resolved, replace the main/engine PWB.
- Code: C5101
- Description: Charger error (Black)
- Causes: Target: 40ppm model The rush-in current to drum unit K is less at the Vpp adjustment for the main charge adjustment
- Remedy: 1 Checking the drum unit and the developer unit The drum or drum screw does not rotate normally Replace the drum unit if the drum or the drum screw does not rotate smoothly.
2 Checking the main charger unit The main charger unit is not attached properly Reinstall the main charger unit on the drum unit properly. If it is not resolved, replace the main charger unit.
3 Checking the connection FFC is not properly connected, or it is faulty. Clean the following FFC terminal of the FFC and reconnect. If the FFC terminal is deformed or FFC is short circuited, replace FFC. • High voltage PWB — Main/ engine PWB
4 Replacing the high voltage PWB The high voltage PWB is faulty. Replace the high voltage PWB.
5 Firmware upgrade The firmware is not the latest version. Upgrade the main firmware and the engine firmware to the latest version.
6 Main/engine PWB replacement The main/engine PWB is faulty. Replace the main/engine PWB.
- Code: C5102
- Description: Charger error (Cyan)
- Causes: Target: 40ppm model The rush-in current to drum unit C is less at the Vpp adjustment for the main charge adjustment
- Remedy: 1 Checking the drum unit and the developer unit The drum or drum screw does not rotate normally Replace the drum unit if the drum or the drum screw does not rotate smoothly.
2 Checking the main charger unit The main charger unit is not attached properly Reinstall the main charger unit on the drum unit properly. If it is not resolved, replace the main charger unit.
3 Checking the connection FFC is not properly connected, or it is faulty. Clean the following FFC terminal of the FFC and reconnect. If the FFC terminal is deformed or FFC is short circuited, replace FFC. • High voltage PWB — Main/ engine PWB
4 Replacing the high voltage PWB The high voltage PWB is faulty. Replace the high voltage PWB.
5 Firmware upgrade The firmware is not the latest version. Upgrade the main firmware and the engine firmware to the latest version.
6 Main/engine PWB replacement The main/engine PWB is faulty. Replace the main/engine PWB.
- Code: C5103
- Description: Charger error (Magenta)
- Causes: Target: 40ppm model The rush-in current to drum unit M is less at the Vpp adjustment for the main charge adjustment
- Remedy: 1 Checking the drum unit and the developer unit The drum or drum screw does not rotate normally Replace the drum unit if the drum or the drum screw does not rotate smoothly.
2 Checking the main charger unit The main charger unit is not attached properly Reinstall the main charger unit on the drum unit properly. If it is not resolved, replace the main charger unit.
3 Checking the connection FFC is not properly connected, or it is faulty. Clean the following FFC terminal of the FFC and reconnect. If the FFC terminal is deformed or FFC is short circuited, replace FFC. • High voltage PWB — Main/ engine PWB
4 Replacing the high voltage PWB The high voltage PWB is faulty. Replace the high voltage PWB.
5 Firmware upgrade The firmware is not the latest version. Upgrade the main firmware and the engine firmware to the latest version.
6 Main/engine PWB replacement The main/engine PWB is faulty. Replace the main/engine PWB.
- Code: C5104
- Description: Charger error (Yellow)
- Causes: Target: 40ppm model The rush-in current to drum unit Y is less at the Vpp adjustment for the main charge adjustment
- Remedy: 1 Checking the drum unit and the developer unit The drum or drum screw does not rotate normally Replace the drum unit if the drum or the drum screw does not rotate smoothly.
2 Checking the main charger unit The main charger unit is not attached properly Reinstall the main charger unit on the drum unit properly. If it is not resolved, replace the main charger unit.
3 Checking the connection FFC is not properly connected, or it is faulty. Clean the following FFC terminal of the FFC and reconnect. If the FFC terminal is deformed or FFC is short circuited, replace FFC. • High voltage PWB — Main/ engine PWB
4 Replacing the high voltage PWB The high voltage PWB is faulty. Replace the high voltage PWB.
5 Firmware upgrade The firmware is not the latest version. Upgrade the main firmware and the engine firmware to the latest version.
6 Main/engine PWB replacement The main/engine PWB is faulty. Replace the main/engine PWB.
- Code: C6000
- Description: Broken fuser heater 1 error
- Causes: 1. During warm-up, the temperature detected by fuser thermistor 2 does not reach 100°C / 212°F when passing 20s. 2. During warm-up, when passing 30s after the temperature detected by fuser thermistor 2 reaches 100°C / 212°F , the ready state temperature is not reached.
- Remedy: 1 Removing a piece of paper The fuser thermistor cannot detect the normal temperature with paper strip Remove a piece of paper remaining in the fuser unit.
2 Checking the connection The connector is not properly connected or the wire is faulty. Clean the terminal of the following wire connectors and reconnect the connectors. If there is no continuity, replace the wire. • Fuser unit (fuser thermistor) — Exit PWB • Exit PWB — Main/engine PWB • Low voltage PWB — Main/ engine PWB
3 Replacing the fuser unit The normal temperature cannot be detected with the fuser heater not being turned on, broken fuser thermostat wire, etc. Replace the fuser unit.
4 Firmware upgrade The firmware is not the latest version. Upgrade the engine firmware to the latest version
5 Main/engine PWB replacement The main/engine PWB is faulty. Replace the main/engine PWB.
6 Replacing the low voltage PWB The low voltage PWB is faulty. Replace the low voltage PWB when the fuser heaters always turn on.
7 Replacing the exit PWB The exit PWB is faulty. Replace the exit PWB.
- Code: C6020
- Description: Fuser thermistor 2 high temperature error
- Causes: Fuser thermistor 2 detects 240°C / 464°F or more for 1s.
- Remedy: 1 Removing a piece of paper The fuser thermistor cannot detect the normal temperature with paper strip Remove a piece of paper remaining in the fuser unit.
2 Checking the connection The connector is not properly connected or the wire is faulty. Clean the terminal of the following wire connectors and reconnect the connectors. If there is no continuity, replace the wire. • Fuser unit (fuser thermistor) — Exit PWB • Exit PWB — Main/engine PWB • Low voltage PWB — Main/ engine PWB
3 Replacing the fuser unit The fuser thermistor cannot detect correct temperature due to foreign objects adhering to the fuser heat roller or fuser press roller, short-circuit of the fuser thermistor, etc. Replace the fuser unit.
4 Firmware upgrade The firmware is not the latest version. Upgrade the engine firmware to the latest version
5 Main/engine PWB replacement The main/engine PWB is faulty. Replace the main/engine PWB.
6 Replacing the low voltage PWB The low voltage PWB is faulty. Replace the low voltage PWB when the fuser heaters always turn on.
7 Replacing the exit PWB The exit PWB is faulty. Replace the exit PWB.
- Code: C6030
- Description: Broken fuser thermistor 1 error
- Causes: Fuser thermistor 2 detects the low temperature for 1.6s when the fuser thermistor 1 detects 30 °C / 86 °F or more.
- Remedy: 1 Removing a piece of paper The fuser thermistor cannot detect the normal temperature with paper strip Remove a piece of paper remaining in the fuser unit.
2 Checking the connection The connector is not properly connected or the wire is faulty. Clean the terminal of the following wire connectors and reconnect the connectors. If there is no continuity, replace the wire. • Fuser unit (fuser thermistor) — Exit PWB • Exit PWB — Main/engine PWB
3 Replacing the fuser unit The normal temperature cannot be detected with the fuser heater not being turned on, broken fuser thermostat wire, etc. Replace the fuser unit.
4 Firmware upgrade The firmware is not the latest version. Upgrade the engine firmware to the latest version
5 Main/engine PWB replacement The main/engine PWB is faulty. Replace the main/engine PWB.
6 Replacing the exit PWB The exit PWB is faulty. Replace the exit PWB.
- Code: C6040
- Description: Fuser heater error
- Causes: The input from fuser thermistor 2 is abnormal for 1s continuously.
- Remedy: 1 Removing a piece of paper The fuser thermistor cannot detect the normal temperature with paper strip Remove a piece of paper remaining in the fuser unit.
2 Checking the connection The connector is not properly connected or the wire is faulty. Clean the terminal of the following wire connectors and reconnect the connectors. If there is no continuity, replace the wire. • Fuser unit (fuser thermistor) — Exit PWB • Exit PWB — Main/engine PWB
3 Replacing the fuser unit The normal temperature cannot be detected with the fuser heater not being turned on, broken fuser thermostat wire, etc. Replace the fuser unit.
4 Firmware upgrade The firmware is not the latest version. Upgrade the engine firmware to the latest version
5 Main/engine PWB replacement The main/engine PWB is faulty. Replace the main/engine PWB.
6 Replacing the exit PWB The exit PWB is faulty. Replace the exit PWB.
- Code: C6050
- Description: Fuser thermistor 2 low temperature error
- Causes: During standby or printing, the fuser thermistor 2 detected 100°C / 212°F or less for 1s continuously.
- Remedy: 1 Checking the power supply voltage The power supply voltage reduces. Connect the power cord to a different wall outlet if the power supply voltage descends by 10% or more of the rated voltage, or multiple devices use the same outlet.
2 Removing a piece of paper The fuser thermistor cannot detect the normal temperature with paper strip Remove a piece of paper remaining in the fuser unit.
3 Checking the connection The connector is not properly connected or the wire is faulty. Clean the terminal of the following wire connectors and reconnect the connectors. If there is no continuity, replace the wire. • Fuser unit (fuser thermistor) — Exit PWB • Exit PWB — Main/engine PWB • Low voltage PWB — Main/ engine PWB
4 Replacing the fuser unit The normal temperature cannot be detected with the fuser heater not being turned on, broken fuser thermostat wire, etc. Replace the fuser unit.
5 Firmware upgrade The firmware is not the latest version. Upgrade the engine firmware to the latest version
6 Main/engine PWB replacement The main/engine PWB is faulty. Replace the main/engine PWB.
7 Replacing the low voltage PWB The low voltage PWB is faulty. Replace the low voltage PWB when the fuser heaters always turn on.
8 Replacing the exit PWB The exit PWB is faulty. Replace the exit PWB.
- Code: C6200
- Description: Fuser heater 1 error
- Causes: Target: 30ppm model 1. During warm-up, the fuser thermistor 1 does not detect 100°C / 212°F if turning the fuser heater 1 on for 30s continuously. 2. During warm-up, if turning the fuser heater 1 on for 30s continuously after the temperature detected by the fuser thermistor 1 reaches 100°C / 212°F , the fuser thermistor 1 does not detect the ready state temperature.
- Remedy: 1 Removing a piece of paper The fuser thermistor cannot detect the normal temperature with paper strip Remove a piece of paper remaining in the fuser unit.
Checking the connection The connector is not properly connected or the wire is faulty. Clean the terminal of the following wire connectors and reconnect the connectors. If there is no continuity, replace the wire. • Fuser unit (fuser thermistor) — Exit PWB • Exit PWB — Main/engine PWB • Low voltage PWB — Main/ engine PWB
3 Replacing the fuser unit The normal temperature cannot be detected with the fuser heater not being turned on, broken fuser thermostat wire, etc. Replace the fuser unit.
4 Firmware upgrade The firmware is not the latest version. Upgrade the engine firmware to the latest version
5 Main/engine PWB replacement The main/engine PWB is faulty. Replace the main/engine PWB.
7 Replacing the low voltage PWB The low voltage PWB is faulty. Replace the low voltage PWB when the fuser heaters always turn on.
8 Replacing the exit PWB The exit PWB is faulty. Replace the exit PWB.
- Code: C6200
- Description: Fuser heater 2 error
- Causes: Target: 35/40ppm model 1. During warm-up, fuser thermistor 1 does not detect 100°C / 212°F if turning the fuser heater 2 on for 30s continuously. 2. During warm-up, if turning the fuser heater 2 on for 30s continuously after the temperature detected by the fuser thermistor 1 reaches 100°C / 212°F , fuser thermistor 1 does not detect the ready state temperature.
- Remedy: 1 Removing a piece of paper The fuser thermistor cannot detect the normal temperature with paper strip Remove a piece of paper remaining in the fuser unit.
2 Checking the connection The connector is not properly connected or the wire is faulty. Clean the terminal of the following wire connectors and reconnect the connectors. If there is no continuity, replace the wire. • Fuser unit (fuser thermistor) — Exit PWB • Exit PWB — Main/engine PWB • Low voltage PWB — Main/ engine PWB
3 Replacing the fuser unit The normal temperature cannot be detected with the fuser heater not being turned on, broken fuser thermostat wire, etc. Replace the fuser unit.
4 Firmware upgrade The firmware is not the latest version. Upgrade the engine firmware to the latest version
5 Main/engine PWB replacement The main/engine PWB is faulty. Replace the main/engine PWB.
7 Replacing the low voltage PWB The low voltage PWB is faulty. Replace the low voltage PWB when the fuser heaters always turn on.
8 Replacing the exit PWB The exit PWB is faulty. Replace the exit PWB.
- Code: C6220
- Description: Fuser heater high temperature error
- Causes: Fuser thermistor 1 detected 240 °C / 464 °F for 1s continuously
- Remedy: 1 Removing a piece of paper The fuser thermistor cannot detect the normal temperature with paper strip Remove a piece of paper remaining in the fuser unit.
2 Checking the connection The connector is not properly connected or the wire is faulty. Clean the terminal of the following wire connectors and reconnect the connectors. If there is no continuity, replace the wire. • Fuser unit (fuser thermistor) — Exit PWB • Exit PWB — Main/engine PWB • Low voltage PWB — Main/ engine PWB
3 Replacing the fuser unit The normal temperature cannot be detected with the fuser heater not being turned on, broken fuser thermostat wire, etc. Replace the fuser unit.
4 Firmware upgrade The firmware is not the latest version. Upgrade the engine firmware to the latest version
5 Main/engine PWB replacement The main/engine PWB is faulty. Replace the main/engine PWB.
6 Replacing the low voltage PWB The low voltage PWB is faulty. Replace the low voltage PWB when the fuser heaters always turn on.
- Code: C6230
- Description: Broken fuser thermistor 1 error
- Causes: Fuser thermistor 1 detected low temperature for 1.6s continuously
- Remedy: 1 Removing a piece of paper The fuser thermistor cannot detect the normal temperature with paper strip Remove a piece of paper remaining in the fuser unit.
2 Checking the connection The connector is not properly connected or the wire is faulty. Clean the terminal of the following wire connectors and reconnect the connectors. If there is no continuity, replace the wire. • Fuser unit (fuser thermistor) — Exit PWB • Exit PWB — Main/engine PWB
3 Replacing the fuser unit The normal temperature cannot be detected with the fuser heater not being turned on, broken fuser thermostat wire, etc. Replace the fuser unit.
4 Firmware upgrade The firmware is not the latest version. Upgrade the engine firmware to the latest version
5 Main/engine PWB replacement The main/engine PWB is faulty. Replace the main/engine PWB.
6 Replacing the exit PWB The exit PWB is faulty. Replace the exit PWB.
- Code: C6250
- Description: Fuser thermistor 1 low temperature error
- Causes: Fuser thermistor 1 detects a temperature lower than 100 °C / 212 °F for 1s in succession during ready or print
- Remedy: 1 Checking the power supply voltage The power supply voltage reduces. Connect the power cord to a different wall outlet if the power supply voltage descends by 10% or more of the rated voltage, or multiple devices use the same outlet.
2 Removing a piece of paper The fuser thermistor cannot detect the normal temperature with paper strip Remove a piece of paper remaining in the fuser unit.
3 Checking the connection The connector is not properly connected or the wire is faulty. Clean the terminal of the following wire connectors and reconnect the connectors. If there is no continuity, replace the wire. • Fuser unit (fuser thermistor) — Exit PWB • Exit PWB — Main/engine PWB • Low voltage PWB — Main/ engine PWB
4 Replacing the fuser unit The normal temperature cannot be detected with the fuser heater not being turned on, broken fuser thermostat wire, etc. Replace the fuser unit.
5 Firmware upgrade The firmware is not the latest version. Upgrade the engine firmware to the latest version
6 Main/engine PWB replacement The main/engine PWB is faulty. Replace the main/engine PWB.
7 Replacing the low voltage PWB The low voltage PWB is faulty. Replace the low voltage PWB when the fuser heaters always turn on.
8 Replacing the exit PWB The exit PWB is faulty. Replace the exit PWB.
- Code: C6400
- Description: Zero-cross signal error
- Causes: The zero-cross signal is not input for 1s continuously when the fuser heater turns on and the 24V broken wire is not detected.
- Remedy: 1 Checking the connection The connector is not properly connected or the wire is faulty. Clean the terminal of the following wire connectors and reconnect the connectors. If there is no continuity, replace the wire. • Low voltage PWB — Main/ engine PWB
2 Replacing the low voltage PWB The low voltage PWB is faulty. Replace the low voltage PWB when the fuser heaters always turn on.
3 Firmware upgrade The firmware is not the latest version. Upgrade the engine firmware to the latest version
4 Main/engine PWB replacement The main/engine PWB is faulty. Replace the main/engine PWB.
- Code: C6610
- Description: Press-release sensor error
- Causes: The press-release sensor does not turn on or off after passing 30s from the start of the fuser compression or decompression.
- Remedy: 1 Removing a piece of paper The fuser thermistor cannot detect the normal temperature with paper strip Remove a piece of paper remaining in the fuser unit.
2 Checking the fuser pressure release operation The fuser press-release does not operate properly. Check if the pressure can be reduced by reverse-rotating the fuser gear
3 Checking the pressrelease sensor The press-release sensor is not properly attached. Check if the press-release sensor is interrupted by the actuator during the decompression operation.
4 Checking the connection The connector or FFC is not connected properly. Or, the wire or FFC is faulty. Reconnect the following wire connectors and clean FFC and reconnect. If there is no continuity, replace the wire. If the FFC terminal section is deformed or FFC is broken, replace the FFC. • Press-release sensor — Exit PWB • Exit PWB — Main/engine PWB • Fuser motor — Engine relay PWB • Engine relay PWB — Main/ engine PWB
5 Checking the fuser motor The fuser motor is not properly attached, or it is faulty. Reattach the fuser motor. If it is not repaired, replace it.
6 Replacing the fuser unit The parts such as the press-release sensor in the fuser unit are faulty. Replace the fuser unit.
7 Replacing the exit PWB The exit PWB is faulty. Replace the exit PWB.
8 Replacing the engine relay PWB The engine relay PWB is faulty. Replace the engine relay PWB.
9 Firmware upgrade The firmware is not the latest version. Upgrade the engine firmware to the latest version
10 Main/engine PWB replacement The main/engine PWB is faulty. Replace the main/engine PWB.
- Code: C6910
- Description: Engine firmware unexpected error
- Causes: 1. The drum motor drive continued for 60 min. or more while not printing. 2. The developer bias turns on while the main charger bias is off. (On for 3,263ms or more continuously) 3. The high voltage remote or main charger DC bias turns on while the drum motor is stopped. (On for 270ms or more continuously) 4. The periodic writing process to the EEPROM locked for 30s. (The EEPROM writing is not processed for 30s or other priority process occupies (locks) to have no process for the EEPROM.)
- Remedy: 1 Reset the main power The main power start-up is slow. Turn the power switch off and unplug the power plug. After 5s, reconnect the power plug and turn the power switch on.
2 Upgrade the firmware The firmware is not the latest version. Upgrade the engine firmware to the latest version.
3 Check Main/Engine PWB Main/Engine PWB is not attached and connected properly. Fix Main/Engine PWB with screws and reconnect the connectors so that the ground is secured.
4 Replace Main/Engine PWB Main/Engine PWB is faulty. Replace Main/Engine PWB.
- Code: C7001
- Description: Toner motor K error
- Causes: The excess current signal was detected for 5s continuously
- Remedy: 1 Replacing toner container K The spiral locks up. (It does not rotate.) Replace toner container K.
2 Checking the driving parts The drive gear or the coupling do not properly rotate or the excessive load is applied to them. Clean the drive gears and the couplings in the toner motor unit and apply the grease to them.
3 Checking the connection The connector or FFC is not connected properly. Or, the wire or FFC is faulty. Reconnect the following wire connectors and clean FFC and reconnect. If there is no continuity, replace the wire. If the FFC terminal section is deformed or FFC is broken, replace the FFC. • Toner motor K — Engine relay PWB • Engine relay PWB — Main/ engine PWB
4 Checking toner motor K Toner motor K is not properly attached, or it is faulty. Reattach toner motor K. If it is not repaired, replace it.
5 Replacing the toner motor unit The toner motor unit is faulty. Replace the toner motor unit.
6 Replacing the engine relay PWB The engine relay PWB is faulty. Replace the engine relay PWB.
7 Firmware upgrade The firmware is not the latest version. Upgrade the engine firmware to the latest version
8 Main/engine PWB replacement The main/engine PWB is faulty. Replace the main/engine PWB.
- Code: C7002
- Description: Toner motor C error
- Causes: The excess current signal was detected for 5s continuously
- Remedy: 1 Replacing toner container C The spiral locks up. (It does not rotate.) Replace toner container C.
2 Checking the driving parts The drive gear or the coupling do not properly rotate or the excessive load is applied to them. Clean the drive gears and the couplings in the toner motor unit and apply the grease to them.
3 Checking the connection The connector or FFC is not connected properly. Or, the wire or FFC is faulty. Reconnect the following wire connectors and clean the FFC and reconnect. If there is no continuity, replace the wire. If the FFC terminal section is deformed or FFC is broken, replace the FFC. • Toner motor C — Engine relay PWB • Engine relay PWB — Main/ engine PWB
4 Checking toner motor K Toner motor C is not properly attached, or it is faulty. Reattach toner motor C. If it is not repaired, replace it.
5 Replacing the toner motor unit The toner motor unit is faulty. Replace the toner motor unit.
6 Replacing the engine relay PWB The engine relay PWB is faulty. Replace the engine relay PWB.
7 Firmware upgrade The firmware is not the latest version. Upgrade the engine firmware to the latest version
8 Main/engine PWB replacement The main/engine PWB is faulty. Replace the main/engine PWB.
- Code: C7003
- Description: Toner motor M error
- Causes: The excess current signal was detected for 5s continuously
- Remedy: 1 Replacing toner container M The spiral locks up. (It does not rotate.) Replace toner container M.
2 Checking the driving parts The drive gear or the coupling do not properly rotate or the excessive load is applied to them. Clean the drive gears and the couplings in the toner motor unit and apply the grease to them.
3 Checking the connection The connector or FFC is not connected properly. Or, the wire or FFC is faulty. Reconnect the following wire connectors and clean the FFC and reconnect. If there is no continuity, replace the wire. If the FFC terminal section is deformed or FFC is broken, replace the FFC. • Toner motor M — Engine relay PWB • Engine relay PWB — Main/ engine PWB
4 Checking toner motor K Toner motor M is not properly attached, or it is faulty. Reattach toner motor M. If it is not repaired, replace it.
5 Replacing the toner motor unit The toner motor unit is faulty. Replace the toner motor unit.
6 Replacing the engine relay PWB The engine relay PWB is faulty. Replace the engine relay PWB.
7 Firmware upgrade The firmware is not the latest version. Upgrade the engine firmware to the latest version
8 Main/engine PWB replacement The main/engine PWB is faulty. Replace the main/engine PWB.
- Code: C7004
- Description: Toner motor Y error
- Causes: The excess current signal was detected for 5s continuously
- Remedy: 1 Replacing toner container Y The spiral locks up. (It does not rotate.) Replace toner container Y.
2 Checking the driving parts The drive gear or the coupling do not properly rotate or the excessive load is applied to them. Clean the drive gears and the couplings in the toner motor unit and apply the grease to them.
3 Checking the connection The connector or FFC is not connected properly. Or, the wire or FFC is faulty. Reconnect the following wire connectors and clean the FFC and reconnect. If there is no continuity, replace the wire. If the FFC terminal section is deformed or FFC is broken, replace the FFC. • Toner motor Y — Engine relay PWB • Engine relay PWB — Main/ engine PWB
4 Checking toner motor K Toner motor Y is not properly attached, or it is faulty. Reattach toner motor Y. If it is not repaired, replace it.
5 Replacing the toner motor unit The toner motor unit is faulty. Replace the toner motor unit.
6 Replacing the engine relay PWB The engine relay PWB is faulty. Replace the engine relay PWB.
7 Firmware upgrade The firmware is not the latest version. Upgrade the engine firmware to the latest version
8 Main/engine PWB replacement The main/engine PWB is faulty. Replace the main/engine PWB.
- Code: C7101
- Description: Toner sensor K error
- Causes: The sensor output value is 0.1v and less or 3.2v or more during a certain time.
- Remedy: 1 Reinstalling toner container K The toner container is not properly installed. Reinstall toner container K.
2 Replacing toner container K The toner supply opening of the toner container cannot be opened by operating the lever. Replace toner container K.
3 Checking the driving parts The drive gear or the coupling do not properly rotate or the excessive load is applied to them. Clean the drive gear and the coupling and apply the grease to them.
4 Correcting the toner supply opening The toner supply opening on the primary transfer unit is not opened even when installing toner container K. Correct the toner supply opening at the upper part of the primary transfer unit so that it is opened by the lever operation.
5 Checking the primary transfer unit Toner is clogged at the toner supply path in the primary transfer unit Clean the inside of the primary transfer unit. If not resolved, replace it.
6 Checking the connection The connector or FFC is not connected properly. Or, the wire or FFC is faulty. Reconnect the following wire connectors and clean the FFC and reconnect. If there is no continuity, replace the wire. If the FFC terminal section is deformed or FFC is broken, replace the FFC. • Developer unit K — Drum relay PWB • Drum relay PWB — Main/ engine PWB • Toner motor K — Engine relay PWB • Engine relay PWB — Main/ engine PWB
7 Replacing developer unit K The gear or spiral does not rotate in the developer unit, or toner sensor K is faulty. Replace developer unit K.
8 Checking toner motor K Toner motor K is not properly attached, or it is faulty. Reattach toner motor K. If it is not repaired, replace it.
9 Replacing the drum relay PWB The drum relay PWB is faulty. Replace the drum relay PWB.
10 Replacing the engine relay PWB The engine relay PWB is faulty. Replace the engine relay PWB.
11 Firmware upgrade The firmware is not the latest version. Upgrade the engine firmware to the latest version
12 Main/engine PWB replacement The main/engine PWB is faulty. Replace the main/engine PWB.
- Code: C7102
- Description: Toner sensor C error
- Causes: The sensor output value is 0.1v and less or 3.2v or more during a certain time.
- Remedy: 1 Reinstalling toner container C The toner container is not properly installed. Reinstall toner container C.
2 Replacing toner container C The toner supply opening of the toner container cannot be opened by operating the lever. Replace toner container C.
3 Checking the driving parts The drive gear or the coupling do not properly rotate or the excessive load is applied to them. Clean the drive gear and the coupling and apply the grease to them.
4 Correcting the toner supply opening The toner supply opening on the primary transfer unit is not opened even when installing toner container C. Correct the toner supply opening at the upper part of the primary transfer unit so that it is opened by the lever operation.
5 Checking the primary transfer unit Toner is clogged at the toner supply path in the primary transfer unit Clean the inside of the primary transfer unit. If not resolved, replace it.
6 Checking the connection The connector or FFC is not connected properly. Or, the wire or FFC is faulty. Reconnect the following wire connectors and clean the FFC and reconnect. If there is no continuity, replace the wire. If the FFC terminal section is deformed or FFC is broken, replace the FFC. • Developer unit C — Drum relay PWB • Drum relay PWB — Main/ engine PWB • Toner motor C — Engine relay PWB • Engine relay PWB — Main/ engine PWB
7 Replacing developer unit C The gear or spiral does not rotate in the developer unit, or toner sensor C is faulty. Replace the developer unit C.
8 Checking toner motor C Toner motor C is not properly attached, or it is faulty. Reattach toner motor C. If it is not repaired, replace it.
9 Replacing the drum relay PWB The drum relay PWB is faulty. Replace the drum relay PWB.
10 Replacing the engine relay PWB The engine relay PWB is faulty. Replace the engine relay PWB.
11 Firmware upgrade The firmware is not the latest version. Upgrade the engine firmware to the latest version
12 Main/engine PWB replacement The main/engine PWB is faulty. Replace the main/engine PWB.
- Code: C7103
- Description: Toner sensor M error
- Causes: The sensor output value is 0.1v and less or 3.2v or more during a certain time.
- Remedy: 1 Reinstalling toner container M The toner container is not properly installed. Reinstall toner container M.
2 Replacing toner container M The toner supply opening of the toner container cannot be opened by operating the lever. Replace toner container M.
3 Checking the driving parts The drive gear or the coupling do not properly rotate or the excessive load is applied to them. Clean the drive gear and the coupling and apply the grease to them.
4 Correcting the toner supply opening The toner supply opening on the primary transfer unit is not opened even when installing toner container M. Correct the toner supply opening at the upper part of the primary transfer unit so that it is opened by the lever operation.
5 Checking the primary transfer unit Toner is clogged at the toner supply path in the primary transfer unit Clean the inside of the primary transfer unit. If not resolved, replace it.
6 Checking the connection The connector or FFC is not connected properly. Or, the wire or FFC is faulty. Reconnect the following wire connectors and clean the FFC and reconnect. If there is no continuity, replace the wire. If the FFC terminal section is deformed or FFC is broken, replace the FFC. • Developer unit M — Drum relay PWB • Drum relay PWB — Main/ engine PWB • Toner motor M — Engine relay PWB • Engine relay PWB — Main/ engine PWB
7 Replacing developer unit M The gear or spiral does not rotate in the developer unit, or toner sensor M is faulty. Replace the developer unit M.
8 Checking toner motor M Toner motor M is not properly attached, or it is faulty. Reattach toner motor M. If it is not repaired, replace it.
9 Replacing the drum relay PWB The drum relay PWB is faulty. Replace the drum relay PWB.
10 Replacing the engine relay PWB The engine relay PWB is faulty. Replace the engine relay PWB.
11 Firmware upgrade The firmware is not the latest version. Upgrade the engine firmware to the latest version
12 Main/engine PWB replacement The main/engine PWB is faulty. Replace the main/engine PWB.
- Code: C7104
- Description: Toner sensor Y error
- Causes: The sensor output value is 0.1v and less or 3.2v or more during a certain time.
- Remedy: 1 Reinstalling toner container Y The toner container is not properly installed. Reinstall toner container Y.
2 Replacing toner container Y The toner supply opening of the toner container cannot be opened by operating the lever. Replace toner container Y.
3 Checking the driving parts The drive gear or the coupling do not properly rotate or the excessive load is applied to them. Clean the drive gear and the coupling and apply the grease to them.
4 Correcting the toner supply opening The toner supply opening on the primary transfer unit is not opened even when installing toner container Y. Correct the toner supply opening at the upper part of the primary transfer unit so that it is opened by the lever operation.
5 Checking the primary transfer unit Toner is clogged at the toner supply path in the primary transfer unit Clean the inside of the primary transfer unit. If not resolved, replace it.
6 Checking the connection The connector or FFC is not connected properly. Or, the wire or FFC is faulty. Reconnect the following wire connectors and clean the FFC and reconnect. If there is no continuity, replace the wire. If the FFC terminal section is deformed or FFC is broken, replace the FFC. • Developer unit Y — Drum relay PWB • Drum relay PWB — Main/ engine PWB • Toner motor Y — Engine relay PWB • Engine relay PWB — Main/ engine PWB
7 Replacing developer unit Y The gear or spiral does not rotate in the developer unit, or toner sensor Y is faulty. Replace the developer unit Y.
8 Checking toner motor Y Toner motor Y is not properly attached, or it is faulty. Reattach toner motor Y. If it is not repaired, replace it.
9 Replacing the drum relay PWB The drum relay PWB is faulty. Replace the drum relay PWB.
10 Replacing the engine relay PWB The engine relay PWB is faulty. Replace the engine relay PWB.
11 Firmware upgrade The firmware is not the latest version. Upgrade the engine firmware to the latest version
12 Main/engine PWB replacement The main/engine PWB is faulty. Replace the main/engine PWB.
- Code: C7200
- Description: Developer thermistor error
- Causes: The sensor input sampling exceeds the reference value. (After detection, controlled at 25 °C / 77.0 °F)
- Remedy: 1 Checking the connection The connector is not properly connected or the wire is faulty. Reinsert developer unit K into the main unit all the way to reconnect the connector. Also, if the wire is faulty, replace it. • Developer unit K — Drum relay PWB • Drum relay PWB — Main/ engine PWB
2 Replacing developer unit K Toner sensor K is faulty. Replace developer unit K.
3 Replacing the drum relay PWB The drum relay PWB is faulty. Replace the drum relay PWB.
4 Firmware upgrade The firmware is not the latest version. Upgrade the engine firmware to the latest version
5 Main/engine PWB replacement The main/engine PWB is faulty. Replace the main/engine PWB.
- Code: C7221
- Description: LSU thermistor K error
- Causes: The sensor input sampling exceeds the reference value. (After detection, controlled at 25 °C / 77.0 °F)
- Remedy: 1 Checking the connection The connector is not properly connected or the wire is faulty. Clean the terminal of the following wire connectors and reconnect the connectors. If there is no continuity, replace the wire. • LSU(KM) (LSU thermistor K) — Main/engine PWB
2 LSU replacement The LSU is faulty. Replace the LSU (KM).
3 Firmware upgrade The firmware is not the latest version. Upgrade the engine firmware to the latest version
4 Main/engine PWB replacement The main/engine PWB is faulty. Replace the main/engine PWB.
- Code: C7222
- Description: LSU thermistor C error
- Causes: The sensor input sampling exceeds the reference value. (After detection, controlled at 25 °C / 77.0 °F)
- Remedy: 1 Checking the connection The connector is not properly connected or the wire is faulty. Clean the terminal of the following wire connectors and reconnect the connectors. If there is no continuity, replace the wire. • LSU(CY) (LSU thermistor C) — Main/engine PWB
2 LSU replacement The LSU is faulty. Replace the LSU (CY).
3 Firmware upgrade The firmware is not the latest version. Upgrade the engine firmware to the latest version
4 Main/engine PWB replacement The main/engine PWB is faulty. Replace the main/engine PWB.
- Code: C7401
- Description: Developer unit K type mismatch error
- Causes: The main unit and developer unit K is not matched.
- Remedy: 1 Checking developer unit K The different type of the developer unit is installed. Install the correct developer unit.
- Code: C7402
- Description: Developer unit C type mismatch error
- Causes: The main unit and developer unit C is not matched.
- Remedy: 1 Checking developer unit C The different type of the developer unit is installed. Install the correct developer unit.
- Code: C7403
- Description: Developer unit M type mismatch error
- Causes: The main unit and developer unit M is not matched.
- Remedy: 1 Checking developer unit M The different type of the developer unit is installed. Install the correct developer unit.
- Code: C7404
- Description: Developer unit Y type mismatch error
- Causes: The main unit and developer unit Y is not matched.
- Remedy: 1 Checking developer unit Y The different type of the developer unit is installed. Install the correct developer unit.
- Code: C7411
- Description: Drum unit K type mismatch error
- Causes: The main unit and drum unit K is not matched.
- Remedy: 1 Checking drum unit K The different drum unit is installed. Install the proper drum unit.
- Code: C7412
- Description: Drum unit C type mismatch error
- Causes: The main unit and drum unit C is not matched.
- Remedy: 1 Checking drum unit C The different drum unit is installed. Install the proper drum unit.
- Code: C7413
- Description: Drum unit M type mismatch error
- Causes: The main unit and drum unit M is not matched.
- Remedy: 1 Checking drum unit M The different drum unit is installed. Install the proper drum unit.
- Code: C7414
- Description: Drum unit Y type mismatch error
- Causes: The main unit and drum unit Y is not matched.
- Remedy: 1 Checking drum unit Y The different drum unit is installed. Install the proper drum unit.
- Code: C7601
- Description: ID sensor 1 error (Machine left side)
- Causes: The measurement value of the ID sensor apply either of the following. 1. The P-wave of the light potential is lower than the p-wave of the dark potential +0.5V. 2. The S-wave of the light potential is lower than the S-wave of the dark potential. 3. The P/S-wave is more than 0.8V, or lower than 0.15V.
- Remedy: 1 Cleaning the ID sensors ID sensor 1 is dirty. Clean ID sensor 1 surface.
2 Reattaching the ID sensor ID sensor 1 is not properly attached. Reattach ID sensor 1.
3 Checking the connection The connector is not properly connected or the wire is faulty. Clean the terminal of the following wire connectors and reconnect the connectors. If there is no continuity, replace the wire. • ID sensor 1 — Main/engine PWB
4 Replacing the ID sensor ID sensor 1 is faulty, so the error is detected when executing Calibration. Replace ID sensor 1.
5 Firmware upgrade The firmware is not the latest version. Upgrade the engine firmware to the latest version
6 Main/engine PWB replacement The main/engine PWB is faulty. Replace the main/engine PWB.
- Code: C7602
- Description: ID sensor 2 error (Machine right side)
- Causes: The measurement value of the ID sensor apply either of the following. 1. The P-wave of the light potential is lower than the p-wave of the dark potential +0.5V. 2. The S-wave of the light potential is lower than the S-wave of the dark potential. 3. The P/S-wave is more than 0.8V, or lower than 0.15V.
- Remedy: 1 Cleaning the ID sensors ID sensor 2 is dirty. Clean ID sensor 2 surface.
2 Reattaching the ID sensor ID sensor 2 is not properly attached. Reattach ID sensor 2.
3 Checking the connection The connector is not properly connected or the wire is faulty. Clean the terminal of the following wire connectors and reconnect the connectors. If there is no continuity, replace the wire. • ID sensor 2 — Main/engine PWB
4 Replacing the ID sensor ID sensor 2 is faulty, so the error is detected when executing Calibration. Replace ID sensor 2.
5 Firmware upgrade The firmware is not the latest version. Upgrade the engine firmware to the latest version
6 Main/engine PWB replacement The main/engine PWB is faulty. Replace the main/engine PWB.
- Code: C7611
- Description: Bias calibration read value error (Black)
- Causes: The ID sensor cannot read the patch image density on the transfer belt normally when executing Calibration.
- Remedy: 1 Resetting the main power The ID sensor does not operate properly. Turn off the power switch and pull out the power plug. After passing 5s, reinsert the power plug and turn on the power switch.
2 Cleaning the ID sensors The ID sensor is dirty. Clean the surface of ID sensor 1, 2.
3 Reexecuting Calibration Calibration failed last time. Execute [Calibration] in [System Menu/Counter] key > [Adjustment/Maintenance].
Checking the ID sensor shutter The ID sensor shutter is not opened. Check if the ID sensor shutter opens and closes according to the paper tray opening and closing. If it does not open properly, repair it.
5 Checking the primary transfer unit The transfer belt surface is dirty or scratched Clean the transfer belt surface. Or, replace the primary transfer unit.
6 (When the image is too light) Checking the drum unit and developer unit The drum unit or developer unit parts are dirty or worn down. Clean drum unit K and developer unit K. If the parts are worn down, replace the unit.
7 Reattaching the ID sensor The ID sensor is not attached properly Reattach ID sensor 1, 2.
8 Checking the connection The connector is not properly connected or the wire is faulty. Clean the terminal of the following wire connectors and reconnect the connectors. If there is no continuity, replace the wire. • ID sensor 1, 2 — Main/engine PWB
9 Replacing the ID sensor ID sensor 1, 2 are abnormal and an error is detected when executing Calibration. Replace ID sensor 1, 2.
10 Firmware upgrade The firmware is not the latest version. Upgrade the engine firmware to the latest version
11 Main/engine PWB replacement The main/engine PWB is faulty. Replace the main/engine PWB.
- Code: C7612
- Description: Bias calibration read value error (Cyan)
- Causes: The ID sensor cannot read the patch image density on the transfer belt normally when executing Calibration.
- Remedy: 1 Resetting the main power The ID sensor does not operate properly. Turn off the power switch and pull out the power plug. After passing 5s, reinsert the power plug and turn on the power switch.
2 Cleaning the ID sensors The ID sensor is dirty. Clean the surface of ID sensor 1, 2.
3 Reexecuting Calibration Calibration failed last time. Execute [Calibration] in [System Menu/Counter] key > [Adjustment/Maintenance].
4 Checking the ID sensor shutter The ID sensor shutter is not opened. Check if the ID sensor shutter opens and closes according to the paper tray opening and closing. If it does not open properly, repair it.
5 Checking the primary transfer unit The transfer belt surface is dirty or scratched Clean the transfer belt surface. Or, replace the primary transfer unit.
6 (When the image is too light) Checking the drum unit and developer unit The drum unit or developer unit parts are dirty or worn down. Clean drum unit C and developer unit C. If the parts are worn down, replace the unit.
7 Reattaching the ID sensor The ID sensor is not attached properly Reattach ID sensor 1, 2.
8 Checking the connection The connector is not properly connected or the wire is faulty. Clean the terminal of the following wire connectors and reconnect the connectors. If there is no continuity, replace the wire. • ID sensor 1, 2 — Main/engine PWB
9 Replacing the ID sensor ID sensor 1, 2 are abnormal and an error is detected when executing Calibration. Replace ID sensor 1, 2.
10 Firmware upgrade The firmware is not the latest version. Upgrade the engine firmware to the latest version
11 Main/engine PWB replacement The main/engine PWB is faulty. Replace the main/engine PWB.
- Code: C7613
- Description: Bias calibration read value error (Magenta)
- Causes: The ID sensor cannot read the patch image density on the transfer belt normally when executing Calibration.
- Remedy: 1 Resetting the main power The ID sensor does not operate properly. Turn off the power switch and pull out the power plug. After passing 5s, reinsert the power plug and turn on the power switch.
2 Cleaning the ID sensors The ID sensor is dirty. Clean the surface of ID sensor 1, 2.
3 Reexecuting Calibration Calibration failed last time. Execute [Calibration] in [System Menu/Counter] key > [Adjustment/Maintenance].
4 Checking the ID sensor shutter The ID sensor shutter is not opened. Check if the ID sensor shutter opens and closes according to the paper tray opening and closing. If it does not open properly, repair it.
5 Checking the primary transfer unit The transfer belt surface is dirty or scratched Clean the transfer belt surface. Or, replace the primary transfer unit.
6 (When the image is too light) Checking the drum unit and developer unit The drum unit or developer unit parts are dirty or worn down. Clean drum unit M and developer unit M. If the parts are worn down, replace the unit.
7 Reattaching the ID sensor The ID sensor is not attached properly Reattach ID sensor 1, 2.
8 Checking the connection The connector is not properly connected or the wire is faulty. Clean the terminal of the following wire connectors and reconnect the connectors. If there is no continuity, replace the wire. • ID sensor 1, 2 — Main/engine PWB
9 Replacing the ID sensor ID sensor 1, 2 are abnormal and an error is detected when executing Calibration. Replace ID sensor 1, 2.
10 Firmware upgrade The firmware is not the latest version. Upgrade the engine firmware to the latest version
11 Main/engine PWB replacement The main/engine PWB is faulty. Replace the main/engine PWB.
- Code: C7614
- Description: Bias calibration read value error (Yellow)
- Causes: The ID sensor cannot read the patch image density on the transfer belt normally when executing Calibration.
- Remedy: 1 Resetting the main power The ID sensor does not operate properly. Turn off the power switch and pull out the power plug. After passing 5s, reinsert the power plug and turn on the power switch.
2 Cleaning the ID sensors The ID sensor is dirty. Clean the surface of ID sensor 1, 2.
3 Reexecuting Calibration Calibration failed last time. Execute [Calibration] in [System Menu/Counter] key > [Adjustment/Maintenance].
4 Checking the ID sensor shutter The ID sensor shutter is not opened. Check if the ID sensor shutter opens and closes according to the paper tray opening and closing. If it does not open properly, repair it.
5 Checking the primary transfer unit The transfer belt surface is dirty or scratched Clean the transfer belt surface. Or, replace the primary transfer unit.
6 (When the image is too light) Checking the drum unit and developer unit The drum unit or developer unit parts are dirty or worn down. Clean drum unit Y and developer unit Y. If the parts are worn down, replace the unit.
7 Reattaching the ID sensor The ID sensor is not attached properly Reattach ID sensor 1, 2.
8 Checking the connection The connector is not properly connected or the wire is faulty. Clean the terminal of the following wire connectors and reconnect the connectors. If there is no continuity, replace the wire. • ID sensor 1, 2 — Main/engine PWB
9 Replacing the ID sensor ID sensor 1, 2 are abnormal and an error is detected when executing Calibration. Replace ID sensor 1, 2.
10 Firmware upgrade The firmware is not the latest version. Upgrade the engine firmware to the latest version
11 Main/engine PWB replacement The main/engine PWB is faulty. Replace the main/engine PWB.
- Code: C7620
- Description: Automatic color registration failure
- Causes: The image patch position on the transfer belt is outside the range of the ID sensor reading. The transfer belt surface is dirty or image patch density is light.
- Remedy: 1 Resetting the main power The ID sensor does not operate properly. Turn off the power switch and pull out the power plug. After passing 5s, reinsert the power plug and turn on the power switch.
2 Cleaning the ID sensors The ID sensor is dirty. Clean the surface of ID sensor 1, 2.
3 Reexecuting Calibration Calibration failed last time. Execute [Calibration] in [System Menu/Counter] key > [Adjustment/Maintenance].
4 Checking the ID sensor shutter The ID sensor shutter is not opened. Check if the ID sensor shutter opens and closes according to the paper tray opening and closing. If it does not open properly, repair it.
5 Checking the primary transfer unit The transfer belt surface is dirty or scratched Clean the transfer belt surface. Or, replace the primary transfer unit.
6 (When the image is too light) Checking the drum unit, developer unit and LSU The parts for the drum unit, developer unit and LSU is dirty or worn out. Clean drum unit Y, developer unit Y and the LSU. If the parts are worn down, replace the unit.
7 (When the color shift occurs) Checking the LSU and the drum unit The LSU or drum unit is not installed in the proper position. The LSU is faulty. Reinstall the LSU and the drum unit. If it is not resolved, replace the LSU.
8 Reattaching the ID sensor The ID sensor is not attached properly Reattach ID sensor 1, 2.
8 Checking the connection The connector is not properly connected or the wire is faulty. Clean the terminal of the following wire connectors and reconnect the connectors. If there is no continuity, replace the wire. • ID sensor 1, 2 — Main/engine PWB
Replacing the ID sensor ID sensor 1, 2 are abnormal and an error is detected when executing Calibration. Replace ID sensor 1, 2.
10 Firmware upgrade The firmware is not the latest version. Upgrade the engine firmware to the latest version
11 Main/engine PWB replacement The main/engine PWB is faulty. Replace the main/engine PWB.
- Code: C7800
- Description: Outer thermistor error
- Causes: The sensor input sampling exceeds the reference value. (After detection, controlled at 25 °C / 77.0 °F)
- Remedy: 1 Checking the connection The connector is not properly connected or the wire is faulty. Clean the terminal of the following wire connectors and reconnect the connectors. If there is no continuity, replace the wire. • Outer temperature sensor — Main engine PWB
2 Checking the outer temperature sensor The outer temperature sensor is not properly attached, or it is faulty. Reattach the outer temperature sensor. If it is not repaired, replace it.
3 Firmware upgrade The firmware is not the latest version. Upgrade the engine firmware to the latest version
4 Main/engine PWB replacement The main/engine PWB is faulty. Replace the main/engine PWB.
- Code: C7901
- Description: Drum unit EEPROM error (Black)
- Causes: 1. No response from the device is detected for 5ms or more 5 times continuously when reading / writing the data. 2. The reading data of 2 points mismatches 8 times continuously. 3. The reading data and the writing data mismatch 8 times continuously.
- Remedy: 1 Resetting the main power The EEPROM data in drum unit K is faulty. Turn off the power switch and pull out the power plug. After passing 5s, reinsert the power plug and turn on the power switch.
2 Checking the connection The connector is not properly connected or the wire is faulty. Reinsert drum unit K into the main unit all the way to reconnect the connector. Also, if the wire is faulty, replace it. • Drum unit K — Drum relay PWB • Drum relay PWB — Main/ engine PWB
3 Replacing drum unit K The EEPROM in drum unit K is faulty. Replace drum unit K.
4 Firmware upgrade The firmware is not the latest version. Upgrade the engine firmware to the latest version
5 Replacing the drum relay PWB The drum relay PWB is faulty. Replace the drum relay PWB.
6 Main/engine PWB replacement The main/engine PWB is faulty. Replace the main/engine PWB.
- Code: C7902
- Description: Drum unit EEPROM error (Cyan)
- Causes: 1. No response from the device is detected for 5ms or more 5 times continuously when reading / writing the data. 2. The reading data of 2 points mismatches 8 times continuously. 3. The reading data and the writing data mismatch 8 times continuously.
- Remedy: 1 Resetting the main power The EEPROM data in drum unit C is faulty. Turn off the power switch and pull out the power plug. After passing 5s, reinsert the power plug and turn on the power switch.
2 Checking the connection The connector is not properly connected or the wire is faulty. Reinsert drum unit C into the main unit all the way to reconnect the connector. Also, if the wire is faulty, replace it. • Drum unit C — Drum relay PWB • Drum relay PWB — Main/ engine PWB
3 Replacing drum unit C The EEPROM in drum unit C is faulty. Replace drum unit C.
4 Firmware upgrade The firmware is not the latest version. Upgrade the engine firmware to the latest version
5 Replacing the drum relay PWB The drum relay PWB is faulty. Replace the drum relay PWB.
6 Main/engine PWB replacement The main/engine PWB is faulty. Replace the main/engine PWB.
- Code: C7903
- Description: Drum unit EEPROM error (Magenta)
- Causes: 1. No response from the device is detected for 5ms or more 5 times continuously when reading / writing the data. 2. The reading data of 2 points mismatches 8 times continuously. 3. The reading data and the writing data mismatch 8 times continuously.
- Remedy: 1 Resetting the main power The EEPROM data in drum unit M is faulty. Turn off the power switch and pull out the power plug. After passing 5s, reinsert the power plug and turn on the power switch.
2 Checking the connection The connector is not properly connected or the wire is faulty. Reinsert drum unit M into the main unit all the way to reconnect the connector. Also, if the wire is faulty, replace it. • Drum unit M — Drum relay PWB • Drum relay PWB — Main/ engine PWB
3 Replacing drum unit M The EEPROM in drum unit M is faulty. Replace drum unit M.
4 Firmware upgrade The firmware is not the latest version. Upgrade the engine firmware to the latest version
5 Replacing the drum relay PWB The drum relay PWB is faulty. Replace the drum relay PWB.
6 Main/engine PWB replacement The main/engine PWB is faulty. Replace the main/engine PWB.
- Code: C7904
- Description: Drum unit EEPROM error (Yellow)
- Causes: 1. No response from the device is detected for 5ms or more 5 times continuously when reading / writing the data. 2. The reading data of 2 points mismatches 8 times continuously. 3. The reading data and the writing data mismatch 8 times continuously.
- Remedy: 1 Resetting the main power The EEPROM data in drum unit Y is faulty. Turn off the power switch and pull out the power plug. After passing 5s, reinsert the power plug and turn on the power switch.
2 Checking the connection The connector is not properly connected or the wire is faulty. Reinsert drum unit Y into the main unit all the way to reconnect the connector. Also, if the wire is faulty, replace it. • Drum unit Y — Drum relay PWB • Drum relay PWB — Main/ engine PWB
3 Replacing drum unit Y The EEPROM in drum unit Y is faulty. Replace drum unit Y.
4 Firmware upgrade The firmware is not the latest version. Upgrade the engine firmware to the latest version
5 Replacing the drum relay PWB The drum relay PWB is faulty. Replace the drum relay PWB.
6 Main/engine PWB replacement The main/engine PWB is faulty. Replace the main/engine PWB.
- Code: C7911
- Description: Developer unit EEPROM error (Black)
- Causes: 1. No response from the device is detected for 5ms or more 5 times continuously when reading / writing the data. 2. The reading data of 2 points mismatches 8 times continuously. 3. The reading data and the writing data mismatch 8 times continuously.
- Remedy: 1 Resetting the main power The EEPROM data in developer unit K is faulty. Turn off the power switch and pull out the power plug. After passing 5s, reinsert the power plug and turn on the power switch.
2 Checking the connection The connector is not properly connected or the wire is faulty. Reinsert developer unit K into the main unit all the way to reconnect the connector. Also, if the wire is faulty, replace it. • Developer unit K — Drum relay PWB • Drum relay PWB — Main/ engine PWB
3 Replacing developer unit K The EEPROM in developer unit K is faulty. Replace developer unit K.
4 Firmware upgrade The firmware is not the latest version. Upgrade the engine firmware to the latest version
5 Replacing the drum relay PWB The drum relay PWB is faulty. Replace the drum relay PWB.
Main/engine PWB replacement The main/engine PWB is faulty. Replace the main/engine PWB.
- Code: C7912
- Description: Developer unit EEPROM error (Cyan)
- Causes: 1. No response from the device is detected for 5ms or more 5 times continuously when reading / writing the data. 2. The reading data of 2 points mismatches 8 times continuously. 3. The reading data and the writing data mismatch 8 times continuously.
- Remedy: 1 Resetting the main power The EEPROM data in developer unit C is faulty. Turn off the power switch and pull out the power plug. After passing 5s, reinsert the power plug and turn on the power switch.
2 Checking the connection The connector is not properly connected or the wire is faulty. Reinsert developer unit C into the main unit all the way to reconnect the connector. Also, if the wire is faulty, replace it. • Developer unit C — Drum relay PWB • Drum relay PWB — Main/ engine PWB
3 Replacing developer unit C The EEPROM in developer unit C is faulty. Replace the developer unit C.
4 Firmware upgrade The firmware is not the latest version. Upgrade the engine firmware to the latest version
5 Replacing the drum relay PWB The drum relay PWB is faulty. Replace the drum relay PWB.
6 Main/engine PWB replacement The main/engine PWB is faulty. Replace the main/engine PWB.
- Code: C7913
- Description: Developer unit EEPROM error (Magenta)
- Causes: 1. No response from the device is detected for 5ms or more 5 times continuously when reading / writing the data. 2. The reading data of 2 points mismatches 8 times continuously. 3. The reading data and the writing data mismatch 8 times continuously.
- Remedy: 1 Resetting the main power The EEPROM data in developer unit M is faulty. Turn off the power switch and pull out the power plug. After passing 5s, reinsert the power plug and turn on the power switch.
2 Checking the connection The connector is not properly connected or the wire is faulty. Reinsert developer unit M into the main unit all the way to reconnect the connector. Also, if the wire is faulty, replace it. • Developer unit M — Drum relay PWB • Drum relay PWB — Main/ engine PWB
3 Replacing developer unit M The EEPROM in developer unit M is faulty. Replace the developer unit M.
4 Firmware upgrade The firmware is not the latest version. Upgrade the engine firmware to the latest version
5 Replacing the drum relay PWB The drum relay PWB is faulty. Replace the drum relay PWB.
6 Main/engine PWB replacement The main/engine PWB is faulty. Replace the main/engine PWB.
- Code: C7914
- Description: Developer unit EEPROM error (Yellow)
- Causes: 1. No response from the device is detected for 5ms or more 5 times continuously when reading / writing the data. 2. The reading data of 2 points mismatches 8 times continuously. 3. The reading data and the writing data mismatch 8 times continuously.
- Remedy: 1 Resetting the main power The EEPROM data in developer unit Y is faulty. Turn off the power switch and pull out the power plug. After passing 5s, reinsert the power plug and turn on the power switch.
2 Checking the connection The connector is not properly connected or the wire is faulty. Reinsert developer unit Y into the main unit all the way to reconnect the connector. Also, if the wire is faulty, replace it. • Developer unit Y — Drum relay PWB • Drum relay PWB — Main/ engine PWB
3 Replacing developer unit Y The EEPROM in developer unit Y is faulty. Replace the developer unit Y.
4 Firmware upgrade The firmware is not the latest version. Upgrade the engine firmware to the latest version
5 Replacing the drum relay PWB The drum relay PWB is faulty. Replace the drum relay PWB.
6 Main/engine PWB replacement The main/engine PWB is faulty. Replace the main/engine PWB.
- Code: C9180
- Description: DP reverse motor error
- Causes: Target: 30ppm model For the internal count The home position cannot be detected at 3 time of retries. .*HP (home position) detection: Retry is executed if HP is not detected after driving the DP reversing motor for one round when moving to HP.
- Remedy: 1 Resetting the main power The DP reverse motor is not controlled normally. Turn off the power switch and pull out the power plug. After passing 5s, reinsert the power plug and turn on the power switch.
2 Checking the connection The connector is not properly connected or the wire is faulty. Clean the terminal of the following wire connectors and reconnect the connectors. If there is no continuity, replace the wire. • DP reverse motor — Main/ engine PWB • DP reverse sensor — Main/ engine PWB
3 Checking the DP reverse motor The DP reverse motor does not normally rotate, or it is faulty. Remove the DP reverse motor and fix it by rotating the drive parts manually. Then, reattach it. If not fixed, replace it.
4 Checking the DP reverse sensor The DP reverse sensor is not properly attached, or it is faulty. Reattach the DP reverse sensor. If it is not repaired, replace it.
5 Firmware upgrade The firmware is not the latest version. Upgrade the engine firmware to the latest version
6 Main/engine PWB replacement The main/engine PWB is faulty. Replace the main/engine PWB.
- Code: C9540
- Description: Backup data error
- Causes: When multiple parts are replaced at the same time, the internal data is changed and it interferes with the machine operation. Consequently, the main unit cannot recover.
- Remedy: 1 Checking the PWB Multiple PWBs were replaced at the same time. Recover to the original, if 2 or more of the following related parts were replaced at the same time. • Related parts: Memory, each PWB
2 Checking the unit Multiple units were replaced at the same time. Be sure not to perform the following works at the same time when the memory or each PWB is replaced. • Replacing the drum unit or the developer unit
- Code: F000
- Description: System Error
- Causes: Communication error between the main/engine PWB and the operation panel PWB
- Remedy: 1 Resetting the main power The communication is faulty between the main/ engine PWB and the operation panel PWB. Turn off the power switch and pull out the power plug. After passing 5s, reinsert the power plug and turn on the power switch.
2 Checking the connection The connector is not properly connected or the wire is faulty. Clean the terminal of the following wire connectors and reconnect the connectors. If there is no continuity, replace the wire. • Main/engine PWB — Operation panel PWB
3 Executing U021 The backup RAM data is faulty. Execute U021 to initialize the backup RAM data.
4 Replacing the main/engine PWB The main/engine PWB is faulty. Replace the main/engine PWB.
5 Replacing the operation panel PWB The operation panel PWB is faulty. Replace the operation panel PWB.
- Code: F010
- Description: System Error
- Causes: Program ready error
- Remedy: 1 Resetting the main power The checksum in the main/ engine PWB is faulty. Turn off the power switch and pull out the power plug. After passing 5s, reinsert the power plug and turn on the power switch.
Checking the main/engine PWB The connector and FFC are not connected properly or the wire, FFC or PWB is faulty. Clean the terminal of the connectors on the main/engine PWB, reconnect the connector of the wire, and reconnect the FFC terminal. If the wire or the FFC is faulty, repair or replace them. If not resolved, replace the main/engine PWB.
- Code: F020
- Description: System Error
- Causes: RAM checksum error
- Remedy: 1 Resetting the main power The checksum in the main/ engine PWB is faulty. Turn off the power switch and pull out the power plug. After passing 5s, reinsert the power plug and turn on the power switch.
2 Checking the main/engine PWB The connector and FFC are not connected properly or the wire, FFC or PWB is faulty. Clean the terminal of the connectors on the main/engine PWB, reconnect the connector of the wire, and reconnect the FFC terminal. If the wire or the FFC is faulty, repair or replace them. If not resolved, replace the main/engine PWB.
- Code: F040
- Description: System Error
- Causes: Communication error between the controller and the print engine
- Remedy: 1 Resetting the main power The communication between the controller and the print engine is faulty. Turn off the power switch and pull out the power plug. After passing 5s, reinsert the power plug and turn on the power switch.
2 Checking the main/engine PWB The connector and FFC are not connected properly or the wire, FFC or PWB is faulty. Clean the terminal of the connectors on the main/engine PWB, reconnect the connector of the wire, and reconnect the FFC terminal. If the wire or the FFC is faulty, repair or replace them. If not resolved, replace the main/engine PWB.
- Code: F050
- Description: System Error
- Causes: Print engine main program error
- Remedy: 1 Firmware upgrade The firmware is not the latest version. Upgrade the engine firmware to the latest version
2 Resetting the main power The print engine ROM checksum is faulty. Turn off the power switch and pull out the power plug. After passing 5s, reinsert the power plug and turn on the power switch.
3 Reinstalling the EEPROM The EEPROM is not properly attached. Reattach the EEPROM on the main/engine PWB.
4 Checking the main/engine PWB The connector and FFC are not connected properly or the wire, FFC or PWB is faulty. Clean the terminal of the connectors on the main/engine PWB, reconnect the connector of the wire, and reconnect the FFC terminal. If the wire or the FFC is faulty, repair or replace them. If not resolved, replace the main/engine PWB.
- Code: F12X
- Description: System Error
- Causes: An error is detected at scan control section
- Remedy: 1. Check the wire or connector between Scan/DP PWB (CCD PWB or DP relay PWB) and Main/ engine PWB and correct it if necessary. (Reconnect the connector or replace the wire) Check the operation after that. 2. Execute U021 (Init memory) and check function. 3. Replace the CCD PWB or DP relay PWB and check function. 4. Replace the main/engine PWB and check function. 5. Retrieve the USBLOG and contact the Service Administrative Division.
Authentication device: Card Reader, etc.
- Code: F14D
- Description: System Error
- Causes: An error in the FAX control section is detected.
- Remedy: 1 Reinstalling the firmware The firmware is faulty. Reinstall the firmware.
2 Checking the connection The connector is not properly connected or the wire is faulty. Clean the terminal of the following wire connectors and reconnect the connectors. If there is no continuity, replace the wire. • FAX PWB — Main/engine PWB
3 Replacing the FAX PWB The FAX PWB is faulty. Replace the FAX PWB.
4 Replacing the main/engine PWB The main/engine PWB is faulty. Replace the main/engine PWB.
- Code: F14X
- Description: System Error
- Causes: An error is detected at the FAX control section
- Remedy: 1. Check the wire or connector between FAX PWB, IO replay PWB and Main/engine PWB and correct it if necessary. (Reconnect the connector or replace the wire) Check the operation after that. 2. Execute U021 (Init memory) and check function. 3. Replace the FAX PWB and check function. 4. Replace the main/engine PWB and check function. 5. Retrieve the USBLOG and contact the Service Administrative Division.
[Checking the FAX connector connection] FAX exclusive I/F (It is not the eKUIO)
- Code: F15X
- Description: System Error
- Causes: An error is detected at the authentication device control section
- Remedy: 1. Check the wire or connector between the authentication device and Main/engine PWB and correct it if necessary. (Reconnect the connector or replace the wire) Check the operation after that. 2. Execute U021 (Init memory) and check function. 3. Replace the main/engine PWB and check function. 4. Retrieve the USBLOG and contact the Service Administrative Division.
- Code: F17X
- Description: System Error
- Causes: An error is detected at the print data control section
- Remedy: 1. Execute U021 (Init memory) and check function. 2. Replace the main/engine PWB and check function. 3. Retrieve the USBLOG and contact the Service Administrative Division.
- Code: F18X
- Description: System Error
- Causes: An error is detected at the Video control secion
- Remedy: 1. Execute U021 (Init memory) and check function. 2. Replace the main/engine PWB and check function. 3. Retrieve the USBLOG and contact the Service Administrative Division.
- Code: F1DX
- Description: System Error
- Causes: An error is detected at the Image memory management section
- Remedy: 1. Execute U021 (Init memory) and check function. 2. Replace the main/engine PWB and check function. 3. Retrieve the USBLOG and contact the Service Administrative Division.
* Poor arrangement of F1D4:Random Access Memory (1) Confirmation of U340 (2) Initialization of a set point (U021)
- Code: F21X, F22X, F23X
- Description: System Error
- Causes: An error is detected at the Image processing section
- Remedy: 1. Check contact of the DIMM by releasing and reinserting, and check the function. Replace DIMM if available, and check function. 2. Execute U021 (Init memory) and check function. 3. Replace the main/engine PWB and check function. 4. Retrieve the USBLOG and contact the Service Administrative Division.
- Code: F24X
- Description: System Error
- Causes: An error is detected at the System management section
- Remedy: 1. Check contact of the DIMM by releasing and reinserting, and check the function. Replace DIMM if available, and check function.??? 2. Execute U021 (Init memory) and check function. 3. Replace the main/engine PWB and check function. 4. Retrieve the USBLOG and contact the Service Administrative Division.
F248 eror is printer process error. If it repeats with a certain print data, retrieve the capture data and USBLOG.
- Code: F25X
- Description: System Error
- Causes: Abnormality detecting in a network management department
- Remedy: 1. Execute U021 (Init memory) and check function. 2. Replace the main/engine PWB and check function. 3. Retrieve the USBLOG and contact the Service Administrative Division.
[Main body to External network] Ethernet connector
- Code: F26X … F2AX
- Description: System Error
- Causes: An error is detected at the System management section
- Remedy: 1. Execute U021 (Init memory) and check function. 2. Replace the main/engine PWB and check function. 3. Retrieve the USBLOG and contact the Service Administrative Division.
- Code: F2BX … F32X
- Description: System Error
- Causes: Abnormality detecting in a network control part
- Remedy: 1. Execute U021 (Init memory) and check function. 2. Replace the main/engine PWB and check function. 3. Retrieve the USBLOG and contact the Service Administrative Division.
- Code: F33X
- Description: System Error
- Causes: An error is detected at the Scan management section
- Remedy: 1. Check the wire or connector between Scan/DP PWB (CCD PWB or DP relay PWB) and Main/ engine PWB and correct it if necessary. (Reconnect the connector or replace the wire) Check the operation after that. 2. Execute U021 (Init memory) and check function. 3. Replace the operation panel PWB and check function. 4. Replace the main/engine PWB and check function. 5. Retrieve the USBLOG and contact the Service Administrative Division.
- Code: F34X
- Description: System Error
- Causes: An error is detected at the Panel management section
- Remedy: 1. Check the wire and the connection of the connectors between the operation panel PWB and the main/engine PWB, and check function. (For HyPAS model only) 2. Execute U021 (Init memory) and check function. 3. Replace the operation panel PWB and check function. (For HyPAS model only) 4. Replace the main/engine PWB and check function. 5. Retrieve the USBLOG and contact the Service Administrative Division.
- Code: F35X
- Description: System Error
- Causes: An error is detected at the Print control section
- Remedy: 1. Execute U021 (Init memory) and check function. 2. Replace the main/engine PWB and check function. 3. Retrieve the USBLOG and contact the Service Administrative Division.
- Code: F38X
- Description: System Error
- Causes: An error is detected at the Authentication/ permit management section
- Remedy: 1. Execute U021 (Init memory) and check function. 2. Replace the main/engine PWB and check function. 3. Retrieve the USBLOG and contact the Service Administrative Division.
- Code: F3AX … F45X
- Description: System Error
- Causes: An error is detected at the Entity control section
- Remedy: 1. Execute U021 (Init memory) and check function. 2. Replace the main/engine PWB and check function. 3. Retrieve the USBLOG and contact the Service Administrative Division.
- Code: F46X
- Description: System Error
- Causes: An error is detected at the Print image process section
- Remedy: 1. Replace the main/engine PWB and check function. 2. Retrieve the USBLOG and contact the Service Administrative Division. (or retrieve the print capture data by case)
F46F eror is printer process error. If it repeats with a certain print data, retrieve the capture data and USBLOG.
- Code: F47X, F48X
- Description: System Error
- Causes: An error is detected at the Image edit process control section
- Remedy: 1. Execute U021 (Init memory) and check function. 2. Replace the main/engine PWB and check function. 3. Retrieve the USBLOG and contact the Service Administrative Division.
- Code: F4DX
- Description: System Error
- Causes: An error is detected at the Entity control section
- Remedy: 1. Execute U021 (Init memory) and check function. 2. Replace the main/engine PWB and check function. 3. Retrieve the USBLOG and contact the Service Administrative Division.
- Code: F4FX
- Description: System Error
- Causes: An error is detected at the Job control section
- Remedy: 1. Execute U021 (Init memory) and check function. 2. Replace the main/engine PWB and check function. 3. Retrieve the USBLOG and contact the Service Administrative Division.
- Code: F50X
- Description: System Error
- Causes: An error is detected at the FAX control section
- Remedy: 1. Execute U021 (Init memory) and check function. 2. Replace the main/engine PWB and check function. 3. Retrieve the USBLOG and contact the Service Administrative Division.
- Code: F52X … F57X
- Description: System Error
- Causes: An error is detected at the Job control section
- Remedy: 1. Execute U021 (Init memory) and check function. 2. Replace the main/engine PWB and check function. 3. Retrieve the USBLOG and contact the Service Administrative Division.
- Code: F63X
- Description: System Error
- Causes: An error is detected at the Device control section
- Remedy: 1. Execute U021 (Init memory) and check function. 2. Replace the main/engine PWB and check function. 3. Retrieve the USBLOG and contact the Service Administrative Division.
- Code: F68X
- Description: System Error
- Causes: An error is detected at the Storage device control section
- Remedy: 1. Execute U021 (Init memory) and check function. 2. Replace the main/engine PWB and check function. 3. Retrieve the USBLOG and contact the Service Administrative Division.
- Code: F90X
- Description: System Error
- Causes: Abnormality detecting in the extension application service part
- Remedy: 1. Execute U021 (Init memory) and check function. 2. Replace the main/engine PWB and check function. 3. Retrieve the USBLOG and contact the Service Administrative Division.
- Code: F93X
- Description: System Error
- Causes: Abnormality detecting in the extension application management part
- Remedy: 1. Execute U021 (Init memory) and check function. 2. Replace the main/engine PWB and check function. 3. Retrieve the USBLOG and contact the Service Administrative Division.
- Code: F9FX
- Description: System Error
- Causes: Abnormality detecting in the extension application various service part
- Remedy: 1. Execute U021 (Init memory) and check function. 2. Replace the main/engine PWB and check function. 3. Retrieve the USBLOG and contact the Service Administrative Division.
- Code: FC0X
- Description: System Error
- Causes: Abnormality detecting in system application
- Remedy: 1. Execute U021 (Init memory) and check function. 2. Replace the main/engine PWB and check function. 3. Retrieve the USBLOG and contact the Service Administrative Division.
- Code: FCAX
- Description: System Error
- Causes: Abnormality detecting in Print application
- Remedy: 1. Execute U021 (Init memory) and check function. 2. Replace the main/engine PWB and check function. 3. Retrieve the USBLOG and contact the Service Administrative Division.
- Code: FD4X
- Description: System Error
- Causes: Abnormality detecting in Box application
- Remedy: 1. Execute U021 (Init memory) and check function. 2. Replace the main/engine PWB and check function. 3. Retrieve the USBLOG and contact the Service Administrative Division.
- Code: FD9X
- Description: System Error
- Causes: Abnormality detecting in FAX application
- Remedy: 1. Execute U021 (Init memory) and check function. 2. Replace the main/engine PWB and check function. 3. Retrieve the USBLOG and contact the Service Administrative Division
- Code: FDEX
- Description: System Error
- Causes: Abnormality detecting in maintenance application
- Remedy: 1. Execute U021 (Init memory) and check function. 2. Replace the main/engine PWB and check function. 3. Retrieve the USBLOG and contact the Service Administrative Division.
- Code: FF7X
- Description: System Error
- Causes: Abnormality detecting in a report creation part
- Remedy: 1. Execute U021 (Init memory) and check function. 2. Replace the main/engine PWB and check function. 3. Retrieve the USBLOG and contact the Service Administrative Division.
[Controller failure] Only turn off/on the power to solve the problem. It is necessary to provide USBLOG for the investigation.
Ошибки Kyocera ECOSYS M2030dn
Ошибки Kyocera ECOSYS M2030pn
Ошибки Kyocera ECOSYS M2035dn
Ошибки Kyocera ECOSYS M2040dn
Ошибки Kyocera ECOSYS M2135dn
Ошибки Kyocera ECOSYS M2530dn
Ошибки Kyocera ECOSYS M2535dn
Ошибки Kyocera ECOSYS M2540dn
Ошибки Kyocera ECOSYS M2540dw
Ошибки Kyocera ECOSYS M2635dn
Ошибки Kyocera ECOSYS M2635dw
Ошибки Kyocera ECOSYS M2640idw
Ошибки Kyocera ECOSYS M3040dn
Ошибки Kyocera ECOSYS M3040idn
Ошибки Kyocera ECOSYS M3145dn
Ошибки Kyocera ECOSYS M3145idn
Ошибки Kyocera ECOSYS M2735dw
Ошибки Kyocera ECOSYS M3540dn
Ошибки Kyocera ECOSYS M3540idn
Ошибки Kyocera ECOSYS M3550idn
Ошибки Kyocera ECOSYS M3560idn
Ошибки Kyocera ECOSYS M3645dn
Ошибки Kyocera ECOSYS M3645idn
Ошибки Kyocera ECOSYS M3655idn
Ошибки Kyocera ECOSYS M3660idn
Ошибки Kyocera ECOSYS M3860idn
Ошибки Kyocera ECOSYS M3860idn
Ошибки Kyocera ECOSYS M4125idn
Ошибки Kyocera ECOSYS M4132idn
Ошибки Kyocera ECOSYS M5521cdn
Ошибки Kyocera ECOSYS M5521cdw
Ошибки Kyocera ECOSYS M5526cdn
Ошибки Kyocera ECOSYS M5526cdw
Ошибки Kyocera ECOSYS M6026cdn
Ошибки Kyocera ECOSYS M6026cidn
Ошибки Kyocera ECOSYS M6030cdn
Ошибки Kyocera ECOSYS M6035cidn
Ошибки Kyocera ECOSYS M6230cidn
Ошибки Kyocera ECOSYS M6235cidn
Ошибки Kyocera ECOSYS M6526cdn
Ошибки Kyocera ECOSYS M6526cidn
Ошибки Kyocera ECOSYS M6530cdn
Ошибки Kyocera ECOSYS M6535cidn
Ошибки Kyocera ECOSYS M6630cidn
Ошибки Kyocera ECOSYS M6635cidn
Ошибки Kyocera ECOSYS M8124cidn
Ошибки Kyocera ECOSYS M8130cidn
Ошибки Kyocera ECOSYS P2035d
Ошибки Kyocera ECOSYS P2040dn
Ошибки Kyocera ECOSYS P2040dw
Ошибки Kyocera ECOSYS P2135d
Ошибки Kyocera ECOSYS P2135dn
Ошибки Kyocera ECOSYS P2235dn
Ошибки Kyocera ECOSYS P2235dw
Ошибки Kyocera ECOSYS P3045dn
Ошибки Kyocera ECOSYS P3050dn
Ошибки Kyocera ECOSYS P3055dn
Ошибки Kyocera ECOSYS P3060dn
Ошибки Kyocera ECOSYS P3145dn
Ошибки Kyocera ECOSYS P3150dn
Ошибки Kyocera ECOSYS P3155dn
Ошибки Kyocera ECOSYS P3160dn
Ошибки Kyocera ECOSYS P3260dn
Ошибки Kyocera ECOSYS P4035dn
Ошибки Kyocera ECOSYS P4040dn
Ошибки Kyocera ECOSYS P5021cdn
Ошибки Kyocera ECOSYS P5021cdw
Ошибки Kyocera ECOSYS P5026cdn
Ошибки Kyocera ECOSYS P5026cdw
Ошибки Kyocera ECOSYS P6021cdn
Ошибки Kyocera ECOSYS P6026cdn
Ошибки Kyocera ECOSYS P6030cdn
Ошибки Kyocera ECOSYS P6035cdn
Ошибки Kyocera ECOSYS P6130cdn
Ошибки Kyocera ECOSYS P6230cdn
Ошибки Kyocera ECOSYS P6235cdn
Ошибки Kyocera ECOSYS P7035cdn
Ошибки Kyocera ECOSYS P7040cdn
Ошибки Kyocera ECOSYS P7240cdn
Ошибки Kyocera ECOSYS P8060cdn
Ошибки Kyocera FS-C8600DN
Ошибки Kyocera FS-C8650DN
Ошибки Kyocera FS1016MFP
Ошибки Kyocera FS1018MFP
Ошибки Kyocera FS1020MFP
Ошибки Kyocera FS1024MFP
Ошибки Kyocera FS1025MFP
Ошибки Kyocera FS1028MFP
Ошибки Kyocera FS1030MFP
Ошибки Kyocera FS1035MFP
Ошибки Kyocera FS1040
Ошибки Kyocera FS1050
Ошибки Kyocera FS1060DN
Ошибки Kyocera FS1100
Ошибки Kyocera FS1110
Ошибки Kyocera FS1116MFP
Ошибки Kyocera FS1118MFP
Ошибки Kyocera FS1120
Ошибки Kyocera FS1120MFP
Ошибки Kyocera FS1124MFP
Ошибки Kyocera FS1125MFP
Ошибки Kyocera FS1128MFP
Ошибки Kyocera FS1130MFP
Ошибки Kyocera FS1135MFP
Ошибки Kyocera FS1200
Ошибки Kyocera FS1220MFP
Ошибки Kyocera FS1300D
Ошибки Kyocera FS1320D
Ошибки Kyocera FS1320MFP
Ошибки Kyocera FS1325MFP
Ошибки Kyocera FS1350DN
Ошибки Kyocera FS1370DN
Ошибки Kyocera FS1500
Ошибки Kyocera FS6020
Ошибки Kyocera FS6025MFP
Ошибки Kyocera FS6025MFPB
Ошибки Kyocera FS6030MFP
Ошибки Kyocera FS6500
Ошибки Kyocera FS6525MFP
Ошибки Kyocera FS6530MFP
Ошибки Kyocera FS6700
Ошибки Kyocera FS6900
Ошибки Kyocera FS6950DN
Ошибки Kyocera FS8000CD
Ошибки Kyocera FS8000CN
Ошибки Kyocera FS8100DN
Ошибки Kyocera TASKalfa 180
Ошибки Kyocera TASKalfa 1800
Ошибки Kyocera TASKalfa 1801
Ошибки Kyocera TASKalfa 181
Ошибки Kyocera TASKalfa 205c
Ошибки Kyocera TASKalfa 220
Ошибки Kyocera TASKalfa 2200
Ошибки Kyocera TASKalfa 2201
Ошибки Kyocera TASKalfa 221
Ошибки Kyocera TASKalfa 2420w
Ошибки Kyocera TASKalfa 2460ci
Ошибки Kyocera TASKalfa 2470ci
Ошибки Kyocera TASKalfa 250ci
Ошибки Kyocera TASKalfa 2510i
Ошибки Kyocera TASKalfa 2520i
Ошибки Kyocera TASKalfa 255
Ошибки Kyocera TASKalfa 2550ci
Ошибки Kyocera TASKalfa 2551ci
Ошибки Kyocera TASKalfa 2552ci
Ошибки Kyocera TASKalfa 2553ci
Ошибки Kyocera TASKalfa 255b
Ошибки Kyocera TASKalfa 255c
Ошибки Kyocera TASKalfa 265ci
Ошибки Kyocera TASKalfa 300ci
Ошибки Kyocera TASKalfa 300i
Ошибки Kyocera TASKalfa 3010i
Ошибки Kyocera TASKalfa 3011i
Ошибки Kyocera TASKalfa 305
Ошибки Kyocera TASKalfa 3050ci
Ошибки Kyocera TASKalfa 3051ci
Ошибки Kyocera TASKalfa 306ci
Ошибки Kyocera TASKalfa 307ci
Ошибки Kyocera TASKalfa 308ci
Ошибки Kyocera TASKalfa 3212i
Ошибки Kyocera TASKalfa 3252ci
Ошибки Kyocera TASKalfa 3253ci
Ошибки Kyocera TASKalfa 3500i
Ошибки Kyocera TASKalfa 3501i
Ошибки Kyocera TASKalfa 350ci
Ошибки Kyocera TASKalfa 3510i
Ошибки Kyocera TASKalfa 3511i
Ошибки Kyocera TASKalfa 3550ci
Ошибки Kyocera TASKalfa 3551ci
Ошибки Kyocera TASKalfa 3552ci
Ошибки Kyocera TASKalfa 3553ci
Ошибки Kyocera TASKalfa 356ci
Ошибки Kyocera TASKalfa 358ci
Ошибки Kyocera TASKalfa 4002i
Ошибки Kyocera TASKalfa 4003i
Ошибки Kyocera TASKalfa 400ci
Ошибки Kyocera TASKalfa 4012i
Ошибки Kyocera TASKalfa 4052ci
Ошибки Kyocera TASKalfa 4053ci
Ошибки Kyocera TASKalfa 406ci
Ошибки Kyocera TASKalfa 408ci
Ошибки Kyocera TASKalfa 420i
Ошибки Kyocera TASKalfa 4500i
Ошибки Kyocera TASKalfa 4501i
Ошибки Kyocera TASKalfa 4550ci
Ошибки Kyocera TASKalfa 4551ci
Ошибки Kyocera TASKalfa 4820w
Ошибки Kyocera TASKalfa 5002i
Ошибки Kyocera TASKalfa 5003i
Ошибки Kyocera TASKalfa 500ci
Ошибки Kyocera TASKalfa 5052ci
Ошибки Kyocera TASKalfa 5053ci
Ошибки Kyocera TASKalfa 508ci
Ошибки Kyocera TASKalfa 520i
Ошибки Kyocera TASKalfa 5500i
Ошибки Kyocera TASKalfa 5501i
Ошибки Kyocera TASKalfa 550c
Ошибки Kyocera TASKalfa 552ci
Ошибки Kyocera TASKalfa 5550ci
Ошибки Kyocera TASKalfa 5551ci
Ошибки Kyocera TASKalfa 6002i
Ошибки Kyocera TASKalfa 6003i
Ошибки Kyocera TASKalfa 6052ci
Ошибки Kyocera TASKalfa 6053ci
Ошибки Kyocera TASKalfa 620
Ошибки Kyocera TASKalfa 6500i
Ошибки Kyocera TASKalfa 6501i
Ошибки Kyocera TASKalfa 650c
Ошибки Kyocera TASKalfa 6550ci
Ошибки Kyocera TASKalfa 6551ci
Ошибки Kyocera TASKalfa 7002i
Ошибки Kyocera TASKalfa 7003i
Ошибки Kyocera TASKalfa 7052ci
Ошибки Kyocera TASKalfa 7353ci
Ошибки Kyocera TASKalfa 750c
Ошибки Kyocera TASKalfa 7550ci
Ошибки Kyocera TASKalfa 7551ci
Ошибки Kyocera TASKalfa 8000i
Ошибки Kyocera TASKalfa 8001i
Ошибки Kyocera TASKalfa 8002i
Ошибки Kyocera TASKalfa 8003i
Ошибки Kyocera TASKalfa 8052ci
Ошибки Kyocera TASKalfa 820
Ошибки Kyocera TASKalfa 8353ci
Ошибки Kyocera TASKalfa 9002i
Ошибки Kyocera TASKalfa 9003i
Инструкция по сбросу ошибки неоригинального тонера в принтерах Куосера
Ошибка Kyocera «Неоригинальный картридж с тонером» возникает, когда Вы пытаетесь снова что-то распечатать после заправки расходных материалов в своем устройстве. В этой инструкции мы расскажем, что делать в такой ситуации в первую очередь и какие клавиши нажимать, если принтер пишет подобные уведомления. Способы решения проблемы точно актуальны для моделей 1125, m2040dn, fs 1020mfp, 1025mfp, taskalfa 1800, многих других.
Почему возникает ошибка
Принтеры или МФУ, которые японцы продали за последние почти десять лет, были оснащены специальной системой слежения за использованием расходных материалов. Представляет она собой небольшую микроплату (чип), расположенную на корпусе картриджа. Если порошок заканчивается, то выводится сообщение сначала «Добавьте тонер», а потом «Закончился тонер» и печать, а собственно вся работа аппарата, останавливается.

Дальнейшими действиями владельца принтера будет заправка имеющегося «расходника» или покупка нового, но не всегда фирменного товара. Описанная выше система слежения может это определять, а потому и происходит блокировка печатающего устройства с «требованием» использовать оригинальные расходники. А также все это может сопровождаться уведомлением «Установлен неизвестный тонер pc Kyocera».
Кроме вывода документов на принтер, также будут недоступны некоторые кнопки на корпусе в панели управления. Не стоит пугаться или думать, что те поломались.
Еще одной причиной может быть плохой контакт между чипом на картридже и считывающим устройством внутри принтера. Чтобы устранить это, нужно правильно установить тубу с порошком внутрь устройства. Действуйте по инструкции:
Что делать (какие клавиши нажимать) для продолжения печати
Не нужно разочаровываться из-за этой проблемы, так как выход из ситуации есть. В принтерах Киосера все же предусмотрена возможность печати с использованием не их фирменного тонера. Чтобы ее активировать, следует единожды нажать определенную комбинации клавиш или зажать на несколько секунд несколько кнопок одновременно. Такую процедуру нужно проводить после каждого пополнения тонера или замены картриджа на новый неоригинальный.
Ниже приведены точные комбинации для разных моделей. Найдите среди них свою, а затем выполните рекомендации.
Источник
Когда в картридже Kyocera заканчивается тонер, то на дисплее принтера (или компьютера) незамедлительно всплывает соответствующее сообщение. Кроме того, полностью блокируется работа печатающего устройства. У некоторых МФУ даже сканер перестает нормально функционировать. Выйти из ситуации можно тремя способами:

С первым пунктом все ясно. Заказали оригинальный картридж соответствующей модели, изъяли старый расходник, установили новое изделие, перезагрузили принтер и можно снова печатать. Со вторым и третьим пунктами все не так однозначно. Но сложностей минимум. Просто помимо тех действий, которые были указаны выше, после установки перезаправленного или неоригинального расходного материала нужно нажать определенную комбинацию клавиш на панели управления принтера.
Как уже было сказано, чтобы избавиться от ошибки «Установлен неоригинальный картридж», нужно нажать на определенные кнопки, расположенные на панели управления принтера. Как правило, следует одновременно зажать на 3 секунды кнопки выбора и сброса печати. Однако у некоторых моделей функциональное назначение клавиш может значительно отличаться. Поэтому мы добавили таблицу, в которой указано, какими клавишами нужно сбрасывать ошибку установки совместимых и перезаправленных картриджей для некоторых моделей оргтехники Kyocera:
Модели Kyocera
Кнопки для сброса ошибки (одновременно зажать на 3 секунды)
Изображение панели управления МФУ Kyocera
FS-118mfp
[Enter] и [Stop/Clear, красную]

FS-1020mfp
[Выбор режима печати] и [Стоп/Сброс, красную]

FS-1025mfp
FS-1120mfp
FS-1125mfp
FS-1320mfp
FS-1325mfp
[Ок] и [Stop/Reset, красную]

FS-1040
FS-1041
FS-1060dn
FS-1061dn
[GO, зеленую] и [Отмена, красную]

FS-1030mfp
FS-1130mfp
FS-1035mfp
FS-1135mfp
ECOSYS M2030dn
ECOSYS M2035dn
ECOSYS M2530dn
ECOSYS M2535dn

FS-1100
FS-1110
FS-1120d
FS-1300d
FS-1320d
FS-1320dn
ECOSYS P2035d
[Зеленую, с изображением неполного круга] и [Красную, с изображением треугольника в круге]

FS-1370dn
ECOSYS P2135dn
[Ok] и [Красную, с изображением треугольника в круге]

FS-2000d
[Ok] и [Красную, с изображением треугольника в круге]

FS-2100d
FS-2100dn
FS-4100dn
FS-4200dn
FS-4300dn
ECOSYS P3045dn
ECOSYS P3050dn
ECOSYS P3055dn
ECOSYS P3060dn
ECOSYS P4040dn
[Ok] и [Cancel, красную]

FS-C8600dn
FS-C8650dn
[Ок] и [Отмена, красную]

FS-9130dn
FS-9530dn
[Ok] и [Cancel, красную]

ECOSYS P2040dn
ECOSYS P2040dw
ECOSYS P5021cdn
ECOSYS P5021cdw
ECOSYS P5026cdn
ECOSYS P5026cdw
[Ok] и [Красную, с изображением треугольника в круге]

ECOSYS M2040dn
ECOSYS M2135dn
ECOSYS M2540dn
ECOSYS M2540dw
ECOSYS M2635dn
ECOSYS M2635dw

ECOSYS M2235dn
ECOSYS M2735dn
ECOSYS M2835dw
ECOSYS P2335d
ECOSYS P2335dn
ECOSYS P2335dw

ECOSYS P2235dn
ECOSYS P2235dw
[GO, зеленую] и [Красную, с изображением треугольника в круге]

TASKalfa 1800

ECOSYS M3040dn
ECOSYS M3145dn
ECOSYS M3540dn
ECOSYS M3645dn
ECOSYS M5521cdn
ECOSYS M5521cdw
ECOSYS M6030cdn
ECOSYS M6530cdn
TASKalfa1801
TASKalfa 2201

ECOSYS P6130cdn
ECOSYS P6230cdn
[Ok] и [Cancel, красную]

ECOSYS P6035cdn
ECOSYS P6235cdn
ECOSYS P7040cdn
ECOSYS P7240cdn
[Ok] и [Cancel, красную]

ECOSYS M2640idw
ECOSYS M2735dw
ECOSYS M3040idn
ECOSYS M3145idn
ECOSYS M3540idn
ECOSYS M3550idn
ECOSYS M3560idn
ECOSYS M3645idn
ECOSYS M3655idn
ECOSYS M3660idn
ECOSYS M4125idn
ECOSYS M4132idn
ECOSYS M6035cidn
ECOSYS M6230cidn
ECOSYS M6235cidn
ECOSYS M6535cidn
ECOSYS M6630cidn
ECOSYS M6635cidn
ECOSYS M8124cidn
ECOSYS M8130cidn
ECOSYS P8060cdn
FS-6525mfp
FS-6530mfp
FS-C8520mfp
FS-C8525mfp
TASKalfa 306ci
TASKalfa 307ci
TASKalfa 356ci
TASKalfa 406ci
TASKalfa 2552ci
TASKalfa 3011i
TASKalfa 3212i
TASKalfa 3511i
TASKalfa 4002i
TASKalfa 5002i
TASKalfa 5052ci
TASKalfa 6002i
TASKalfa 6052ci
TASKalfa 7002i
TASKalfa 7052ci
TASKalfa 8002i
TASKalfa 8052ci
TASKalfa 9002i
Внимание:

Заказать картриджи для принтеров Kyocera как оригинального, так и аналогового образца можно в нашем интернет-магазине. Здесь представлен огромный выбор расходников для оргтехники Kyocera по самым лояльным расценкам. Качество продукции соответствует всем международным нормам и стандартам качества. Решение заказать картридж для принтера Kyocera у нас является верным. Мы гарантируем это.
Источник
Сброс сообщения «Неоригинальный картридж с тонером» в аппаратах Kyocera
Во всех новых печатающих устройствах Kyocera на тонер-картриджах установлены чипы. Данные чипы позволяют пользователю контролировать остаток тонера, а также стимулируют к покупке новых картриджей. В этой статье описаны способы, как обойти блокировку на принтерах и МФУ компании Kyocera после заправки картриджа.
После заправки тонер-картриджа Kyocera, Ваше печатающее устройство, скорее всего выдаст сообщение: «Установлен неоригинальный картридж с тонером» или «Тонер отсутствует«. И тут большинство пользователей впадают в ступор)))
 |
Поскольку не хотят прочитать, что же написано в Справке аппарата, которую он любезно показывает совместно с ошибкой. |
А ведь Ваш аппарат Kyocera пытается Вам рассказать, что же необходимо сделать для дальнейшей работы устройства.
Для того, чтобы продолжить использовать заправленные картриджи, в большинстве случаев, необходимо на панели аппарата зажать одновременно две клавиши [СТОП] и [ОК] и подержать 3-5секунд.

Но не все советы одинаково полезны )))
На некоторых аппаратах используется другая комбинация клавиш. Найдите в списке Ваше печатающее устройство и выполните соответствующие инструкции.
Зажать красную и зеленую кнопки на корпусе принтера на 3 секунды или дольше.
Если нужно использовать установленный в настоящее время контейнер с тонером, одновременно нажмите и удерживайте клавиши [OK] и [Стоп] в течение минимум 3 с.
Можете смело предъявлять претензии заправщику, либо, как вариант, положение спасет новый картридж Kyocera TK-1200.
Внимание: у цветных принтеров и мфу Kyocera нет возможности сброса сообщения при помощи кнопок. Необходимо обязательно при заправке картриджа менять чип!
Источник
Сброс ошибки уровня тонера на аппаратах Kyocera


Расположение кнопок в зависимости от модели устройства Kyocera:

Сброс информации в МФУ Kyocera M3040DN, M3540DN

Сброс информации в МФУ Kyocera M2030DN, M2035DN, M2535DN

Сброс информации в принтерах Kyocera FS-2100DN, FS-4100DN, FS-4200DN

Сброс информации в Ecosys P2035d, FS-1120D, FS-1320dn, FS-1110

Сброс информации в FS-1370dn, P2135dn


28 лет на рынке расходных
материалов и офисной техники
Премьер дилер по продажам МФУ Toshiba e-Studio в г. Рязань
Авторизованный сервисный центр по ремонту и техническому обслуживанию МФУ Toshiba e-Studio
Авторизованный дилер по продажам документ-систем SHARP в Российской Федерации
Авторизованный сервисный центр по ремонту и техническому обслуживанию LED-плоттеров и инженерных систем TERIOPRINT (Seiko I Infotec)
© 1993-2021 СТВ-СЕРВИС. Расходные материалы для принтеров
Источник
Kyocera m2040dn закончился тонер сброс
«Установлен неизвестный тонер»
Причина сообщения – в отсутствующем или заблокированном чипе, установленном на картридже.
У всех МФУ и принтеров Kyocera в т.ч. и Kyocera Ecosys m2040dn последних поколений на оригинальном тонер-картридже установлен чип. Помимо определения оригинальности тонера, аппарат использует его для хранения данных о % заполнения листа при печати, а также данных об остатке тонера в тонер-картридже. После определения окончания тонера датчиком чип помечается использованным. Таким образом перезаправка ни как «не оживит» чип картриджа.
При появлении сообщения о неизвестном тонере для разблокировки для большинства принтеров и МФУ Kyocera, в том числе и для Kyocera m2040dn, нужно одновременно нажать и удерживать 4-5 секунд комбинацию клавиш [OK] + [Стоп].
Произойдет сброс и вы сможете спокойно работать дальше.
Во всех новых печатающих устройствах Kyocera на тонер-картриджах установлены чипы. Данные чипы позволяют пользователю контролировать остаток тонера, а также стимулируют к покупке новых картриджей. В этой статье описаны способы, как обойти блокировку на принтерах и МФУ компании Kyocera после заправки картриджа.
После заправки тонер-картриджа Kyocera, Ваше печатающее устройство, скорее всего выдаст сообщение: «Установлен неоригинальный картридж с тонером» или «Тонер отсутствует«. И тут большинство пользователей впадают в ступор)))
| FS-1020MFP | Если вы хотите использовать картридж с тонером, установленный на данный момент, одновременно нажмите Клавиша выбора режима и [Стоп/Сброс] и удерживайте не менее 3 секунд. |
| Если вы хотите использовать картридж с тонером, установленный на данный момент, одновременно нажмите [Стоп/Сброс] и [OK] и удерживайте не менее 3 секунд. | |
| Если вы хотите использовать картридж с тонером, установленный на данный момент, одновременно нажмите клавиши [GO] и [Отмена] и удерживайте не менее 3 секунд. | |
| Если требуется использовать установленный сейчас картридж с тонером, нажмите клавишу [OK] и клавишу [Стоп] одновременно и удерживайте их 3 секунды или дольше. | |
| Если вы хотите использовать установленный контейнер с тонером, одновременно удерживайте кнопки [OK] и [Отмена] на протяжении как минимум 3 секунд. | |
| ECOSYS M2135dn ECOSYS M2040dn ECOSYS M2635dn ECOSYS M2635dw ECOSYS M2540dn ECOSYS M2540dw |
Если нужно использовать установленный в настоящее время контейнер с тонером, одновременно нажмите и удерживайте клавиши [OK] и [Стоп] в течение минимум 3 с. |
| Если требуется использовать установленный сейчас картридж с тонером, нажмите клавишу [OK] и клавишу [Стоп] одновременно и удерживайте их 3 секунды или дольше. | |
|
Поскольку не хотят прочитать, что же написано в Справке аппарата, которую он любезно показывает совместно с ошибкой. |
А ведь Ваш аппарат Kyocera пытается Вам рассказать, что же необходимо сделать для дальнейшей работы устройства.
Для того, чтобы продолжить использовать заправленные картриджи, в большинстве случаев, необходимо на панели аппарата зажать одновременно две клавиши [СТОП] и [ОК] и подержать 3-5секунд.
Но не все советы одинаково полезны )))
На некоторых аппаратах используется другая комбинация клавиш. Найдите в списке Ваше печатающее устройство и выполните соответствующие инструкции.
Зажать красную и зеленую кнопки на корпусе принтера на 3 секунды или дольше.
Если нужно использовать установленный в настоящее время контейнер с тонером, одновременно нажмите и удерживайте клавиши [OK] и [Стоп] в течение минимум 3 с.
Можете смело предъявлять претензии заправщику, либо, как вариант, положение спасет новый картридж Kyocera TK-1200.
Внимание: у цветных принтеров и мфу Kyocera нет возможности сброса сообщения при помощи кнопок. Необходимо обязательно при заправке картриджа менять чип!
Новые модели принтеров и МФУ Kyocera (выпущенные после 2013 года) при использовании неоригинальных картриджей без чипа или заправке картриджей блокируются:
– блокируется функция печати
– появляется уведомление на дисплее об ошибке и/или красная световая индикация
Тем не менее производитель, компания Kyocera, допускает работу с устройством и информация о сбросе ошибки указана в инструкции по эксплуатации. Необходимо выполнить одновременное нажатие на две кнопки и удержание в течение 3-4 секунд – до момента исчезновения надписи предупреждающей надписи на устройствах с экраном и/или появления зеленой индикации предупреждающих диодов.
В большинстве случаев для сброса информации об ошибке необходимо нажать кнопки [Сброс] (оранжевая) и [Ок] за исключением моделей серии Aquarius:

Сброс информации в МФУ Kyocera FS-1020mfp – кнопка [Стоп/Сброс] и кнопка выбора

Сброс информации в МФУ Kyocera FS-1025mfp, Kyocera FS-1120mfp – кнопки [Стоп/Сброс] и [OK]

Сброс информации в МФУ Kyocera FS-118MFP

Сброс информации FS-2000D

Сброс информации в принтерах Kyocera FS-1040, Kyocera FS-1060DN – кнопки [GO] и [Отмена]
Расположение кнопок в зависимости от модели устройства Kyocera:

Сброс информации в МФУ Kyocera M3040DN, M3540DN

Сброс информации в МФУ Kyocera M2030DN, M2035DN, M2535DN

Сброс информации в принтерах Kyocera FS-2100DN, FS-4100DN, FS-4200DN

Сброс информации в Ecosys P2035d, FS-1120D, FS-1320dn, FS-1110

Сброс информации в FS-1370dn, P2135dn


Сброс информации в P3045dn /P3050dn /P3055dn /P3060dn/ P4040DN


Сброс информации в P5021cdn/P5021cdw
Сброс информации в P5026cdn/P5026cdw
Сброс информации в МФУ Kyocera M5521cdn/ M5521cdw

Сброс информации в МФУ Kyocera M6030cdn/M6530cdn

Сброс информации в TASKalfa 1800

Другие устройства Kyocera
В остальных устройствах: выпускавшихся ранее, новых цветных или серии TASKalfa информация носит предупреждающий характер, работа принтера или МФУ не блокируются.
Источник
Adblock
detector
| FS-1020MFP | Если вы хотите использовать картридж с тонером, установленный на данный момент, одновременно нажмите Клавиша выбора режима и [Стоп/Сброс] и удерживайте не менее 3 секунд. |
| Если вы хотите использовать картридж с тонером, установленный на данный момент, одновременно нажмите [Стоп/Сброс] и [OK] и удерживайте не менее 3 секунд. | |
| Если вы хотите использовать картридж с тонером, установленный на данный момент, одновременно нажмите клавиши [GO] и [Отмена] и удерживайте не менее 3 секунд. | |
| Если требуется использовать установленный сейчас картридж с тонером, нажмите клавишу [OK] и клавишу [Стоп] одновременно и удерживайте их 3 секунды или дольше. | |
| Если вы хотите использовать установленный контейнер с тонером, одновременно удерживайте кнопки [OK] и [Отмена] на протяжении как минимум 3 секунд. | |
| ECOSYS M2135dn ECOSYS M2040dn ECOSYS M2635dn ECOSYS M2635dw ECOSYS M2540dn ECOSYS M2540dw |
Если нужно использовать установленный в настоящее время контейнер с тонером, одновременно нажмите и удерживайте клавиши [OK] и [Стоп] в течение минимум 3 с. |
| Если требуется использовать установленный сейчас картридж с тонером, нажмите клавишу [OK] и клавишу [Стоп] одновременно и удерживайте их 3 секунды или дольше. |
Содержание
- Ошибки у принтеров Kyocera FS-1020MFP, FS-1025MFP, FS-1030MFP, FS-1120MFP, FS-1125MFP, FS-1220MFP и прочих моделей? Советы по сбросу и устранению!
- Сброс ошибок у принтеров Kyocera своими руками
- Устранение ошибок у принтеров Kyocera в сервисном центре
- Коды ошибок Kyocera FS 1030-1035/2030-2035
- Рекомендуем к прочтению
Ошибки у принтеров Kyocera FS-1020MFP, FS-1025MFP, FS-1030MFP, FS-1120MFP, FS-1125MFP, FS-1220MFP и прочих моделей? Советы по сбросу и устранению!
Японский производитель оргтехники Kyocera выпускает одни из самых качественных печатающих устройств на рынке, которые, в первую очередь, пользуются высоким спросом у бизнеса. А это уже говорит о многом!
Тем не менее, даже самая качественная оргтехника может давать сбои. Особенно, если за ней не следить!
Поэтому сегодня мы рассмотрим наиболее распространенные коды ошибок у популярных принтеров Kyocera FS-1020MFP, FS-1025MFP, FS-1030MFP, FS-1120MFP, FS-1125MFP, FS-1220MFP и прочих моделей, чтобы разобраться, какие неполадки можно устранить своими руками, а в каких случаях необходимо воспользоваться помощью специалистов.
Под сбросом ошибок у принтеров Kyocera нужно понимать комплекс мероприятий, которые потенциально может осуществить опытный пользователь, чтобы восстановить работоспособность печатающих устройств без обращения в сервисный центр.
Ошибка №
Причина
Решение проблемы
E-0001
В принтере установлен совместимый картридж или чип расходника был поврежден.
Проблема решается несколькими способами:
1. установка оригинального картриджа;
2. замена поврежденного чипа;
3. прошивка принтера – затем в печатающее устройство можно будет установить любой картридж неограниченное количество раз;
4. сброс ошибки – зажмите на несколько секунд кнопки «Режим» и «Сброс».
E-0002
Регион используемого картриджа не соответствует характеристикам принтера.
Проблема решается несколькими способами:
1. установка соответствующего региону принтера картриджа;
3. прошивка принтера.
E-0003
Память печатающего устройства заполнена.
Распечатайте уже отсканированные документы или сбросьте операцию соответствующей кнопкой.
E-0007
В картридже закончился тонер.
Замените картридж на новый оригинальный, совместимый или заправьте расходник.
E-0008
Одна из крышек принтера не закрыта.
Захлопните заднюю и переднюю крышки принтера, ощутив характерный щелчок.
E-0009
Лоток с отпечатками переполнен.
Извлеките распечатанные листы с бумагой, а затем возобновите печать кнопкой «Старт».
E-0012
Память принтера заполнена.
Измените разрешение печати в меньшую сторону – до 600 dpi.
E-0014
Установлена бумага такого формата, который принтер не поддерживает.
Замените бумагу листами совместимого формата.
Иногда функционал принтера может быть ограничен на софтверном уровне.
Чтобы расширить диапазон форматов, мы рекомендуем обновить ПО печатающего устройства.
E-0015
1. У принтера отсутствует питание.
2. Сетевой кабель не подключен.
3. На персональном компьютере отсутствует драйвер.
Проверьте целостность сетевого кабеля.
При необходимости установите драйвер.
E-0018
Выбранный файл отсутствует в очереди на печать.
Сбросьте операцию, нажав на кнопку «Сброс». Затем выберите новый файл и продолжите печать.
E-0019
Формат печати не поддерживается принтером.
Сбросьте операцию, нажав на кнопку «Сброс».
J-0511
Бумагу зажевало.
Аккуратно извлеките остатки бумаги из корпуса принтера.
PF
Отсутствует бумага во входном лотке.
Установите бумагу во входной лоток и возобновите печать, нажав на кнопку «Старт».
Устранение ошибок у принтеров Kyocera в сервисном центре
Возможная причина
0030
0100
Неисправна Flash-память или плата PWB.
0120
0190
0630
2000
2. неисправен соединительный кабель или нарушена целостность соединения контактов;
3. неисправен привод или его отдельные узлы.
3100
2. неисправен датчик положения;
3. неисправен привод сканера;
4. неисправна PWB-плата.
3300
2. неисправен датчик CIS;
3. неисправна PWB-плата.
3500
4000
2. неисправен привод;
3. неисправна PWB-плата.
4200
2. неисправна PWB-плата и отдельные компоненты.
6000
2. неисправен термостат;
3. неисправен нагреватель фьюзера;
4. неисправна PWB-плата и отдельные компоненты.
6020
2. выявлен дефект у термистора.
6030
2. выявлен дефект у термистора;
3. неисправен термостат;
4. неисправна PWB-плата и отдельные компоненты.
6400
2. неисправна PWB-плата и отдельные компоненты.
F000
F020
F040
F05D
2. неисправна PWB-плата и отдельные компоненты.
| Ошибка № | Неисправна Flash-память. |
| Неисправна Flash-память или плата PWB. | |
| Неисправна PWB-плата. | |
| 1. Неисправна PWB-плата; | |
| 1. Неисправен соединительный кабель или нарушена целостность соединения контактов; | |
| 1. Неисправен соединительный кабель или нарушена целостность соединения контактов; | |
| Неисправна PWB-плата. | |
| 1. Неисправен соединительный кабель или нарушена целостность соединения контактов; | |
| 1. Неисправен соединительный кабель или нарушена целостность соединения контактов; | |
| 1. Неисправен соединительный кабель или нарушена целостность соединения контактов; | |
| 1. Неисправна PWB-плата и отдельные компоненты; | |
| 1. Неисправен соединительный кабель или нарушена целостность соединения контактов; | |
| 1. Неисправен соединительный кабель или нарушена целостность соединения контактов; | |
| Неисправна PWB-плата и отдельные компоненты. | |
| Неисправна PWB-плата. | |
| Неисправна PWB-плата. | |
| 1. Неисправно программное обеспечение привода; |
Попытались самостоятельно устранить ошибку на принтере Kyocera, но проблемы с печатью остались нерешенными? Сервисный центр МосТонер – круглосуточный бесплатный выезд мастера в пределах МКАД. Вы платите только за результат!
Коды ошибок Kyocera ecosys m2040dn, 2040, kyocera m2040dn ошибка, kyocera 2040 ошибка, коды ошибок kyocera m2040dn, сброс ошибки, 7990, C7990, код ошибки, как сбросить ошибку, сброс
kyocera m2040dn как сбросить ошибку, kyocera m2040 ошибка, kyocera 2040 ошибка C7990, kyocera m2040dn ошибка, сброс, ECOSYS 2040 код ошибки, сброс, Коды ошибок Kyocera Ecosys 2040, kyocera 2040 ошибка C0030, C0070, C0100, C0120, C0130, C0140, C0150, C0160, C0170, C0180, C0190, C0500, C0510, C0530, C0540, C0800, C0830, C0840, C0870, C0920, C0970, C1810, C1820, C2000, C2010, C2600, C2610, C3100, C3200, C3210, C3300, C3310, C3500, C4000, C4010, C4201, C6000, C6020, C6030, C6050, C6200, C6220, C6230, C6250, C6400, C6600, C6610, C6650, C7220, C7800, C7990, CF000, CF010, CF020, CF040, CF041, CF050, CF051 0030, 0070, 0100, 0120, 0130, 0140, 0150, 0160, 0170, 0180, 0190, 0500, 0510, 0530, 0540, 0800, 0830, 0840, 0870, 0920, 0970, 1810, 1820, 2000, 2010, 2600, 2610, 3100, 3200, 3210, 3300, 3310, 3500, 4000, 4010, 4201, 6000, 6020, 6030, 6050, 6200, 6220, 6230, 6250, 6400, 6600, 6610, 6650, 7220, 7800, 7990, F000, F010, F020, F040, F041, F050, F051
Решил сделать небольшую шпаргалку с кодами ошибок к принтерам Kyocera FS 1030/1035, 1130/1135, 2030/2035. Может быть и вам пригодится.
Коды ошибок Kyocera FS 1030-1035/2030-2035
В серии Kyocera FS код ошибки выводится в формате С#### или F###. Небольшая сводная таблица по ним:
| Код | Значение | Описание | Причина | Решение |
|---|---|---|---|---|
| C0030 | Системная ошибка в управлении факсом | Обработка при помощи программного обеспечения факса была отключена из за проблем с оборудованием | Неисправность в системе управления факсом PWB | Заменить систему управления факсом PWB |
| C0070 | Обнаружена несовместимость платы управления PWB | Обнаружена несовместимость при первичной инициализации системы управления факсом PWB. Никакие команды связи не проходят. | Дефект программного обеспечения факса | Установить программное обеспечение для факса |
| C0100 | Ошибка при резервном копировании памяти устройства | Неисправна флеш память | Заменить плату управления PWB | |
| C0120 | Ошибка данных MAC адреса | Неисправность в плате управления PWB | Заменить плату управления PWB | |
| C0130 | Ошибка чтения/записи при резервном копировании | Неисправна флеш память | Заменить плату управления PWB | |
| C0140 | Ошибка при резервном копировании данных | Неисправна флеш память | Заменить плату управления PWB | |
| C0150 | Ошибка EEPROM платы управления PWB | Обнаружена ошибка связи PWB EEPROM (U17) | Неправильная установка PWB EEPROM (U17) | Проверить установку EEPROM (U17) и при необходимости исправить |
| C0170 | Ошибка счетчика | 1. Неисправность control PWB. |
2. Повреждения данных PWB EEPROM (U17)
1. Заменить плату управления PWB.
2. Обратиться в сервис обслуживания
C0180
Номер аппарата не совпадает
Основной номер и номер двигателя не совпадают
1. Основная PWB или PWB двигателя была заменена.
2. Повреждения данных PWB EEPROM (U17)
1. U004 Задать номер.
2. Обратиться в сервис обслуживания
C0420
Ошибка связи с системой подачи бумаги
Ошибка коммуникации между платой PWB и дополнительным устройством подачи бумаги
1. Неправильная установка устройства подачи бумаги
2. Повреждение провода между платой PWB (YC30) и интерфесным разъемом устройства подачи, либо разъем подключен неправильно.
3. Неисправен кабель между PF основной PWB и подачей бумаги, либо разъем не вставлен. Плата PF неисправна.
4. Неисправность control PWB
1. Еще раз внимательно прочитайте инструкцию по установке.
2. Убедитесь, что разъем подключен, а кабель не поврежден. При необходимости — замените.
3. Убедитесь, что разъем подключен, а кабель не поврежден.Заменить печатную плату.
4. Заменить плату управления PWB.
C0830
Ошибка контрольной суммы прошивки FAX control PWB
Произошла ошибка контрольной суммы программы управления FAX control PWB
1. Дефект программного обеспечения факса.
2. Неисправность в системе управления факсом PWB
1. Установить программное обеспечение для факса.
2. Заменить плату управления факсом PWB
C0840
Неисправность RTС
Расхождение во времени между RTC и текущим пять и более лет.
1. Неисправность control PWB
2. Отсоединена батарея.
1. Заменить плату управления PWB.
2. Визуально проверить и при необходимости исправить.
C0870
Проблема передачи данных большой емкости между FAX control PWB и control PWB
Не выполняется передача данных между FAX control PWB и control PWB, даже при повторе через заданный промежуток
Неправильная установка FAX control PWB
Переставить FAX control PWB
C0920
Ошибка файловой системы факса
Резервное копирование данных не производится по причине ошибки файловой системы флеш-памяти
Неисправность в системе управления факсом PWB
Заменить плату управления факсом PWB
C2000
Ошибка главного двигателя
Главный двигатель не выходит на готовность в течение 2 секунд после включения
1. Неисправен кабель между основным двигателем (CN1) и платой PWB (YC17) или разъем вставлен неправильно.
2. Неисправен привод основного двигателя.
3. Неисправен двигатель.
4. Неисправность control PWB
1. Вставьте разъем. Проверьте целостность кабеля.
2. Проверьте плавность вращения роликов и шестерней. При необходимости смажьте. Убедитесь в отсутсвии разрывов передач.
4. Заменить.
C2610
Ошибка дигателя устройства подачи бумаги
Двигатель устройства подачи бумаги лотка 2 не выходит на готовность более чем через 2 секунды после включения.
Неисправность кабеля между двигателем устройства подачи бумаги и control PWB (YC4).
Вставьте разъем. Проверьте целостность кабеля (Обратитесь к инструкции)
C2620
Ошибка дигателя устройства подачи бумаги
Двигатель устройства подачи бумаги лотка 3 не выходит на готовность более чем через 2 секунды после включения.
Неисправность кабеля между двигателем устройства подачи бумаги и control PWB (YC4).
Вставьте разъем. Проверьте целостность кабеля (Обратитесь к инструкции)
C3100
Ошибка исходного положения ISU
1. Неисправность FFC между CCD PWB (YC1) и control PWB (YC8).
2. Неисправность FFC между control PWB (YC6) и сканера WPB (YC103) или неправильная установка FCC.
3. Неисправность датчика исходного положения.
4. Неисправность кабеля между двигателем ISU и сканером PWB (YC104) или разъем вставлен неправильно.
1. Заменить блок сканера ISU
2. Переставить FFC. Проверить на разрыв, при необходимости заменить.
3. Заменить датчик.
4. Вставьте разъем. Проверьте целостность кабеля.
C3200
Ошибка лампы экспозиции
Лампа экспозиции не включается
1. Повреждения FFC между сканером PWB (YC103) и control PWB (YC6), либо некорректная установка FFC.
2. Повреждения FFC между CCD PWB (YC1) и control PWB (YC8).
3. Неисправен кабель между CCD PWB (YC3) и LED приводом PWB (YC1) либо разъем не подключен.
4. Неисправен кабель между LED приводом PWB (YC2) и лампой экспонирования.
5. Лампа экспонирования вышла из строя.
6. Неисправен светодиодный привод.
1. Переустановите FFC. Проверьте целостность, при необходимости замените.
2. Заменить блок сканера.
3. Убедитесь, что разъем подключен, а кабель не поврежден. При необходимости — замените.
4. Убедитесь, что разъем подключен, а кабель не поврежден. При необходимости — замените.
5. Заменить лампу.
6. Заменить привод.
C3300
Ошибка AGC
1. Повреждения FFC между CCD PWB (YC1) и control PWB (YC8).
2. Лампа экспонирования вышла из строя.
3. Неисправность CCD PWB
4. Неисправность control PWB
1. Заменить блок сканера.
2. Заменить лампу.
3. Заменить CCD PWB
4. Заменить control PWB
C3500
Ошибка связи CPU — ASIC (CCD PWB)
Обнаружен код ошибки
1. Повреждения FFC между CCD PWB (YC1) и control PWB (YC8).
2. Неисправность CCD PWB.
3. Неисправность control PWB
1. Заменить блок сканера (ISU).
2. Заменить CCD PWB
3. Заменить control PWB
C4000
Ошибка полигон-мотора (блока лазерного сканера)
Полигон-мотор не выходит на готовность после 6 секунд после включения.
1. Поврежден кабель между полигон-мотором и control PWB (YC10) или разъем не вставлен.
2. Неисправен блок лазерного сканера.
3. Неисправность control PWB
1. Убедитесь, что разъем подключен, а кабель не поврежден. При необходимости — замените.
2. Заменить блок сканера.
3. Заменить control PWB
C4200
Ошибка BD (блока лазерного сканера)
1. BD датчик не обнаруживает лазерный луч из-за скопления конденсата на зеркале.
2. Неисправен блок лазерного сканера.
1. Выключите питание машины минимум на 30 минут, затем снова включите, если это не помогает необходимо менять блок сканера.
2. Заменить блок сканера.
C6000
Выход из строя термо-элемента (фьюзера)
Температура фьюзера не поднимается после включения устройства.
1. Плохой контакт клемм термистора фьюзера.
2. Плохой контакт в местах подключения нагревателя термоблока.
3. Термисторы фьюзера установлены неправильно.
4 . Срабатывает термореле
5. Нагреватель фьюзера установлен неправильно
6. Выход из строя термо-элемента
1. Проверьте контакты.
2. Проверьте контакты.
3. Заменить блок закрепления
4. Заменить блок закрепления
5. Заменить блок закрепления
6. Заменить блок закрепления
C6020
Слишком высокая температура фьюзера
Термистор фьюзера обнаружил аномально высокую температуру.
Пробой термистора фьюзера
Заменить блок закрепления
C6030
Поврежден шлейф термистора термоэлемента
Значени на входе термистора равно 0
1. Плохой контакт в клеммах термистора.
2. Неисправен шлейф термистора
3. Термистор установлен некорректно
4. Срабатывает термореле
Проверить контакты
Заменить блок закрепления
C6400
Ошибка пересечения нуля
Сигнал пересечения нуля не достигает контрольной платы за указанное время
1. Неисправен кабель между PWB высокого напряжения(YC202) и control PWB (YC23) или разъем не вставлен
2. Дефект соединения между источником питания PWB (YC103) и PWB высокого напряжения (YC201)
3. Неисправен источник питания PWB
4. Неисправность control PWB
1. Переподключите коннектор.Убедитесь что кабель не поврежден.
2. Переподключите коннектор
3. Заменить источник питания
4. Заменить control PWB
C7990
Бункер отработки переполнен
Датчик тонера обнаружил, что бункер для отработки переполнен
1. Бункер отработки драм-юнита переполнен.
2. Неисправен датчик отработки
3. Неисправность control PWB
1. Перезагрузите машину кратковременным выключением питания, если ошибка не исчезла замените драм-юнит.
2. Замените датчик.
3. Заменить control PWB
4. Очистите драм юнит (инструкция по очистке бункера отработанного тонера)
F000
Ошибка связи control PWB — панель управления PWB
1. Неисправность соединения панели управления PWB (YC1) и control PWB (YC7).
2. Неисправность панели управления
3. Неисправность control PWB
1. Переподключите коннектор.Убедитесь что кабель не поврежден.
2. Замените панель.
3. Заменить control PWB
F020
Ошибка контрольной суммы RAM control PWB
1. Неисправность основной микросхемы памяти (ОЗУ) на главной плате управления PWB
2. Неисправность платы расширения памяти (DIMM)
1. Перезагрузите машину кратковременным выключением питания, если ошибка не исчезла, замените control PWB
2. Замените плату расширения (DIMM)
F040
Ошибка связи control PWB двигателя
Обнаружена ошибка связи
Неисправность control PWB
Перезагрузите машину кратковременным выключением питания, если ошибка не исчезла, замените control PWB
F041
Ошибка связи между гланой платой управления и платой управления сканером
Обнаружена ошибка связи
Неисправна главная плата управления или управления сканером
Перезагрузите машину кратковременным выключением питания, если ошибка не исчезла, замените control PWB или scanner PWB
F050
Ошибка контрольной суммы платы управления двигателем
1. Такие ошибки могут происходить при обновлении прошивки control PWB
2. Неисправность control PWB
1. Скачайте прошивку снова
2. Перезагрузите машину кратковременным выключением питания, если ошибка не исчезла, замените control PWB
F186
Ошибка управления видеоданными главной панели управления
Неисправность control PWB
Перезагрузите машину кратковременным выключением питания, если ошибка не исчезла, замените control PWB
Надеюсь вам пригодится эта табличка. Меня она иногда сильно выручает.
Расположение кнопок в зависимости от модели устройства Kyocera:
Сброс информации в МФУ Kyocera M3040DN, M3540DN
Сброс информации в МФУ Kyocera M2030DN, M2035DN, M2535DN
Сброс информации в принтерах Kyocera FS-2100DN, FS-4100DN, FS-4200DN
Сброс информации в Ecosys P2035d, FS-1120D, FS-1320dn, FS-1110
Сброс информации в FS-1370dn, P2135dn
28 лет на рынке расходных
материалов и офисной техники
Премьер дилер по продажам МФУ Toshiba e-Studio в г. Рязань
Авторизованный сервисный центр по ремонту и техническому обслуживанию МФУ Toshiba e-Studio
Авторизованный дилер по продажам документ-систем SHARP в Российской Федерации
Авторизованный сервисный центр по ремонту и техническому обслуживанию LED-плоттеров и инженерных систем TERIOPRINT (Seiko I Infotec)
© 1993-2021 СТВ-СЕРВИС. Расходные материалы для принтеров
Источник
Сброс сообщения об ошибке установки заправленного или неоригинального картриджа в принтерах Kyocera
Когда в картридже Kyocera заканчивается тонер, то на дисплее принтера (или компьютера) незамедлительно всплывает соответствующее сообщение. Кроме того, полностью блокируется работа печатающего устройства. У некоторых МФУ даже сканер перестает нормально функционировать. Выйти из ситуации можно тремя способами:
С первым пунктом все ясно. Заказали оригинальный картридж соответствующей модели, изъяли старый расходник, установили новое изделие, перезагрузили принтер и можно снова печатать. Со вторым и третьим пунктами все не так однозначно. Но сложностей минимум. Просто помимо тех действий, которые были указаны выше, после установки перезаправленного или неоригинального расходного материала нужно нажать определенную комбинацию клавиш на панели управления принтера.
Сброс ошибки установки совместимого или заправленного картриджа в принтере Kyocera: комбинации кнопок
Как уже было сказано, чтобы избавиться от ошибки «Установлен неоригинальный картридж», нужно нажать на определенные кнопки, расположенные на панели управления принтера. Как правило, следует одновременно зажать на 3 секунды кнопки выбора и сброса печати. Однако у некоторых моделей функциональное назначение клавиш может значительно отличаться. Поэтому мы добавили таблицу, в которой указано, какими клавишами нужно сбрасывать ошибку установки совместимых и перезаправленных картриджей для некоторых моделей оргтехники Kyocera:
Модели Kyocera
Кнопки для сброса ошибки (одновременно зажать на 3 секунды)
Изображение панели управления МФУ Kyocera
FS-118mfp
[Enter] и [Stop/Clear, красную]
FS-1020mfp
[Выбор режима печати] и [Стоп/Сброс, красную]
FS-1025mfp
FS-1120mfp
FS-1125mfp
FS-1320mfp
FS-1325mfp
[Ок] и [Stop/Reset, красную]
FS-1040
FS-1041
FS-1060dn
FS-1061dn
[GO, зеленую] и [Отмена, красную]
FS-1030mfp
FS-1130mfp
FS-1035mfp
FS-1135mfp
ECOSYS M2030dn
ECOSYS M2035dn
ECOSYS M2530dn
ECOSYS M2535dn
FS-1100
FS-1110
FS-1120d
FS-1300d
FS-1320d
FS-1320dn
ECOSYS P2035d
[Зеленую, с изображением неполного круга] и [Красную, с изображением треугольника в круге]
FS-1370dn
ECOSYS P2135dn
[Ok] и [Красную, с изображением треугольника в круге]
FS-2000d
[Ok] и [Красную, с изображением треугольника в круге]
FS-2100d
FS-2100dn
FS-4100dn
FS-4200dn
FS-4300dn
ECOSYS P3045dn
ECOSYS P3050dn
ECOSYS P3055dn
ECOSYS P3060dn
ECOSYS P4040dn
[Ok] и [Cancel, красную]
FS-C8600dn
FS-C8650dn
[Ок] и [Отмена, красную]
FS-9130dn
FS-9530dn
[Ok] и [Cancel, красную]
ECOSYS P2040dn
ECOSYS P2040dw
ECOSYS P5021cdn
ECOSYS P5021cdw
ECOSYS P5026cdn
ECOSYS P5026cdw
[Ok] и [Красную, с изображением треугольника в круге]
ECOSYS M2040dn
ECOSYS M2135dn
ECOSYS M2540dn
ECOSYS M2540dw
ECOSYS M2635dn
ECOSYS M2635dw
ECOSYS M2235dn
ECOSYS M2735dn
ECOSYS M2835dw
ECOSYS P2335d
ECOSYS P2335dn
ECOSYS P2335dw
ECOSYS P2235dn
ECOSYS P2235dw
[GO, зеленую] и [Красную, с изображением треугольника в круге]
TASKalfa 1800
ECOSYS M3040dn
ECOSYS M3145dn
ECOSYS M3540dn
ECOSYS M3645dn
ECOSYS M5521cdn
ECOSYS M5521cdw
ECOSYS M6030cdn
ECOSYS M6530cdn
TASKalfa1801
TASKalfa 2201
ECOSYS P6130cdn
ECOSYS P6230cdn
[Ok] и [Cancel, красную]
ECOSYS P6035cdn
ECOSYS P6235cdn
ECOSYS P7040cdn
ECOSYS P7240cdn
[Ok] и [Cancel, красную]
ECOSYS M2640idw
ECOSYS M2735dw
ECOSYS M3040idn
ECOSYS M3145idn
ECOSYS M3540idn
ECOSYS M3550idn
ECOSYS M3560idn
ECOSYS M3645idn
ECOSYS M3655idn
ECOSYS M3660idn
ECOSYS M4125idn
ECOSYS M4132idn
ECOSYS M6035cidn
ECOSYS M6230cidn
ECOSYS M6235cidn
ECOSYS M6535cidn
ECOSYS M6630cidn
ECOSYS M6635cidn
ECOSYS M8124cidn
ECOSYS M8130cidn
ECOSYS P8060cdn
FS-6525mfp
FS-6530mfp
FS-C8520mfp
FS-C8525mfp
TASKalfa 306ci
TASKalfa 307ci
TASKalfa 356ci
TASKalfa 406ci
TASKalfa 2552ci
TASKalfa 3011i
TASKalfa 3212i
TASKalfa 3511i
TASKalfa 4002i
TASKalfa 5002i
TASKalfa 5052ci
TASKalfa 6002i
TASKalfa 6052ci
TASKalfa 7002i
TASKalfa 7052ci
TASKalfa 8002i
TASKalfa 8052ci
TASKalfa 9002i
Внимание:
Заказать картриджи для принтеров Kyocera как оригинального, так и аналогового образца можно в нашем интернет-магазине. Здесь представлен огромный выбор расходников для оргтехники Kyocera по самым лояльным расценкам. Качество продукции соответствует всем международным нормам и стандартам качества. Решение заказать картридж для принтера Kyocera у нас является верным. Мы гарантируем это.
Источник
Kyocera m2040dn закончился тонер сброс
«Установлен неизвестный тонер»
Причина сообщения – в отсутствующем или заблокированном чипе, установленном на картридже.
У всех МФУ и принтеров Kyocera в т.ч. и Kyocera Ecosys m2040dn последних поколений на оригинальном тонер-картридже установлен чип. Помимо определения оригинальности тонера, аппарат использует его для хранения данных о % заполнения листа при печати, а также данных об остатке тонера в тонер-картридже. После определения окончания тонера датчиком чип помечается использованным. Таким образом перезаправка ни как «не оживит» чип картриджа.
При появлении сообщения о неизвестном тонере для разблокировки для большинства принтеров и МФУ Kyocera, в том числе и для Kyocera m2040dn, нужно одновременно нажать и удерживать 4-5 секунд комбинацию клавиш [OK] + [Стоп].
Произойдет сброс и вы сможете спокойно работать дальше.
Во всех новых печатающих устройствах Kyocera на тонер-картриджах установлены чипы. Данные чипы позволяют пользователю контролировать остаток тонера, а также стимулируют к покупке новых картриджей. В этой статье описаны способы, как обойти блокировку на принтерах и МФУ компании Kyocera после заправки картриджа.
После заправки тонер-картриджа Kyocera, Ваше печатающее устройство, скорее всего выдаст сообщение: «Установлен неоригинальный картридж с тонером» или «Тонер отсутствует«. И тут большинство пользователей впадают в ступор)))
|
Поскольку не хотят прочитать, что же написано в Справке аппарата, которую он любезно показывает совместно с ошибкой. |
А ведь Ваш аппарат Kyocera пытается Вам рассказать, что же необходимо сделать для дальнейшей работы устройства.
Для того, чтобы продолжить использовать заправленные картриджи, в большинстве случаев, необходимо на панели аппарата зажать одновременно две клавиши [СТОП] и [ОК] и подержать 3-5секунд.
Но не все советы одинаково полезны )))
На некоторых аппаратах используется другая комбинация клавиш. Найдите в списке Ваше печатающее устройство и выполните соответствующие инструкции.
Зажать красную и зеленую кнопки на корпусе принтера на 3 секунды или дольше.
Если нужно использовать установленный в настоящее время контейнер с тонером, одновременно нажмите и удерживайте клавиши [OK] и [Стоп] в течение минимум 3 с.
Можете смело предъявлять претензии заправщику, либо, как вариант, положение спасет новый картридж Kyocera TK-1200.
Внимание: у цветных принтеров и мфу Kyocera нет возможности сброса сообщения при помощи кнопок. Необходимо обязательно при заправке картриджа менять чип!
Новые модели принтеров и МФУ Kyocera (выпущенные после 2013 года) при использовании неоригинальных картриджей без чипа или заправке картриджей блокируются:
– блокируется функция печати
– появляется уведомление на дисплее об ошибке и/или красная световая индикация
Тем не менее производитель, компания Kyocera, допускает работу с устройством и информация о сбросе ошибки указана в инструкции по эксплуатации. Необходимо выполнить одновременное нажатие на две кнопки и удержание в течение 3-4 секунд – до момента исчезновения надписи предупреждающей надписи на устройствах с экраном и/или появления зеленой индикации предупреждающих диодов.
В большинстве случаев для сброса информации об ошибке необходимо нажать кнопки [Сброс] (оранжевая) и [Ок] за исключением моделей серии Aquarius:
Сброс информации в МФУ Kyocera FS-1020mfp – кнопка [Стоп/Сброс] и кнопка выбора
Сброс информации в МФУ Kyocera FS-1025mfp, Kyocera FS-1120mfp – кнопки [Стоп/Сброс] и [OK]
Сброс информации в МФУ Kyocera FS-118MFP
Сброс информации FS-2000D
Сброс информации в принтерах Kyocera FS-1040, Kyocera FS-1060DN – кнопки [GO] и [Отмена]
Расположение кнопок в зависимости от модели устройства Kyocera:
Сброс информации в МФУ Kyocera M3040DN, M3540DN
Сброс информации в МФУ Kyocera M2030DN, M2035DN, M2535DN
Сброс информации в принтерах Kyocera FS-2100DN, FS-4100DN, FS-4200DN
Сброс информации в Ecosys P2035d, FS-1120D, FS-1320dn, FS-1110
Сброс информации в FS-1370dn, P2135dn
Сброс информации в P3045dn /P3050dn /P3055dn /P3060dn/ P4040DN
Сброс информации в P5021cdn/P5021cdw
Сброс информации в P5026cdn/P5026cdw
Сброс информации в МФУ Kyocera M5521cdn/ M5521cdw
Сброс информации в МФУ Kyocera M6030cdn/M6530cdn
Сброс информации в TASKalfa 1800
Другие устройства Kyocera
В остальных устройствах: выпускавшихся ранее, новых цветных или серии TASKalfa информация носит предупреждающий характер, работа принтера или МФУ не блокируются.
Источник
Adblock
detector
| FS-1020MFP | Если вы хотите использовать картридж с тонером, установленный на данный момент, одновременно нажмите Клавиша выбора режима и [Стоп/Сброс] и удерживайте не менее 3 секунд. |
| Если вы хотите использовать картридж с тонером, установленный на данный момент, одновременно нажмите [Стоп/Сброс] и [OK] и удерживайте не менее 3 секунд. | |
| Если вы хотите использовать картридж с тонером, установленный на данный момент, одновременно нажмите клавиши [GO] и [Отмена] и удерживайте не менее 3 секунд. | |
| Если требуется использовать установленный сейчас картридж с тонером, нажмите клавишу [OK] и клавишу [Стоп] одновременно и удерживайте их 3 секунды или дольше. | |
| Если вы хотите использовать установленный контейнер с тонером, одновременно удерживайте кнопки [OK] и [Отмена] на протяжении как минимум 3 секунд. | |
| ECOSYS M2135dn ECOSYS M2040dn ECOSYS M2635dn ECOSYS M2635dw ECOSYS M2540dn ECOSYS M2540dw |
Если нужно использовать установленный в настоящее время контейнер с тонером, одновременно нажмите и удерживайте клавиши [OK] и [Стоп] в течение минимум 3 с. |
| Если требуется использовать установленный сейчас картридж с тонером, нажмите клавишу [OK] и клавишу [Стоп] одновременно и удерживайте их 3 секунды или дольше. |
Японская компания Kyocera производит высококачественные лазерные принтеры и МФУ для офисной печати. Их продукция одна из самых востребованных на сегодняшний день. Ведь печатающие устройства Kyocera характеризуются высокой надежностью, износостойкостью и большим сроком эксплуатации. Однако даже их изделия не являются вечными. Со временем принтеры Kyocera начинают сбоить.
К счастью, оргтехника Kyocera оснащена системой самодиагностики (так же, как и струйные принтеры Canon). Поэтому, в случае возникновения проблемы, устройство самостоятельно выявит уязвимое место и сообщит Вам об этом миганием соответствующего индикатора на панели управления либо кодом ошибки, выведенным на дисплей принтера.
Если Вы не являетесь мастером по обслуживанию принтеров и МФУ Kyocera, то, чтобы понять, о чем сообщает печатающее устройство, Вам потребуется расшифровать указанный им код. Для этого мы добавили в статью таблицу кодов ошибок лазерных принтеров Kyocera серии FS и не только.
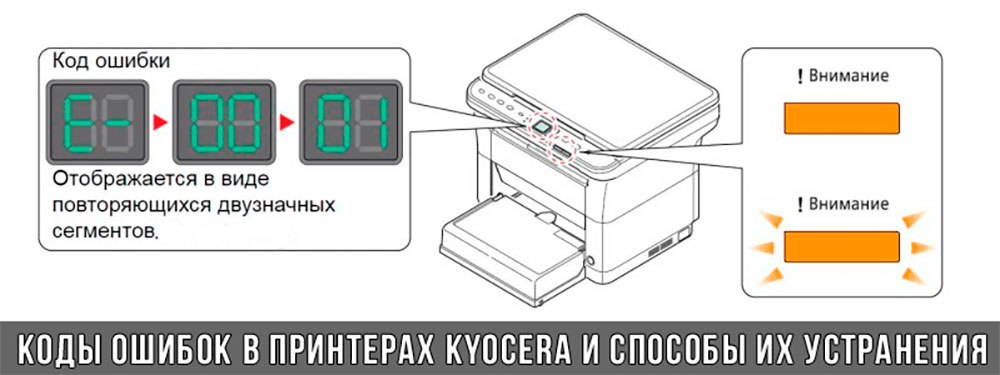
Коды ошибок принтеров и МФУ Kyocera, которые можно исправить самостоятельно
|
Код ошибки |
Значение ошибки |
Решение проблемы |
|
E-0001 (E1) |
Поврежден чип картриджа либо установлен неоригинальный картридж. |
Замените установленный картридж оригинальной версией изделия. Если хотите сэкономить, тогда купите и установите новый чип на картридж или перепрошейте принтер Kyocera. Однако предварительно не помешает попробовать сбросить ошибку соответствующей комбинацией клавиш (как это сделать, читайте в статье «Сброс ошибки установки неоригинального картриджа в принтерах Kyocera»). |
|
E-0002 (E2) |
Регион использования картриджа и принтера не совпадают. |
Замените чип или прошейте принтер Kyocera. |
|
E-0003 (E3) |
Заполнена память принтера или МФУ Kyocera. |
Отпечатайте ранее отсканированные листы или очистите очередь печати нажатием кнопки Стоп/Сброс (ранее отсканированные листы также удалятся из памяти принтера, даже если они еще не были распечатаны). |
|
E-0007 (E7) |
Тонер-картридж Kyocera израсходовал ресурс красящего вещества. |
Замените или заправьте картридж Kyocera (если используете совместимый или перезаправленный расходник, то после установки его в принтер не забудьте сбросить ошибку зажатием на 3-5 секунды кнопок [Ок] и [Сброс/Стоп]). |
|
E-0008 (E8) |
Открыта крышка принтера либо не работает датчик закрытия крышек устройства. |
Откройте и еще раз закройте переднюю и заднюю крышку принтера. Во время закрытия Вы должны услышать характерный щелчок. Если не помогло, то причина в неисправности датчика. |
|
E-0009 (E9) |
Лоток приема бумаги полон. |
Уберите все отпечатанные листы бумаги из выходящего лотка. Чтобы возобновить печать, нажмите кнопку [Старт]. |
|
E-0012 (E12) |
Ошибка памяти принтера Kyocera. |
Попробуйте уменьшить разрешение печати. Скорее всего, формат создаваемого отпечатка не соответствует возможностям принтера. |
|
E-0014 (E14) |
Установлен неверный формат бумаги (неподдерживаемый принтером Kyocera). |
Поменяйте бумагу на поддерживаемую принтером либо смените ее формат в настройках печати. Попробуйте обновить программное обеспечение. Возможно, это расширит поддерживаемые принтером Kyocera форматы. |
|
E-0015 (E15) |
Устройство не подключено к электрической сети либо на компьютере нет (не работает) драйвера принтера Kyocera. |
Проверьте подключение печатающего аппарата к электрической сети, а также целостность кабеля. Если ошибка не исчезает, скачайте драйвер принтера Kyocera и установите его на компьютер. |
|
E-0017 (E17) |
Ошибка передачи данных. |
Проверьте подключение принтера к компьютеру. Кабель не должен быть длиннее 5 метров, а также обязан поддерживать стандарт USB 2.0. Кроме того, переустановите драйвер принтера и утилиту Kyocera Client Tool. |
|
E-0018 (E18) |
Очередь печати заполнена. |
Очистите очередь печати нажатием кнопки [Сброс] либо через драйвер принтера. |
|
E-0019 (E19) |
Неверный формат печати. |
Отмените печать нажатием кнопки [Стоп/Сброс]. Выберите в настройках принтера соответствующий режим печати, а также установите в лоток поддерживаемый принтером формат бумаги. |
|
J-0000 (jam0000) |
Замятие бумаги за задней крышкой. |
Откройте крышку и извлеките бумагу. Проверьте надежность крепления бумаги в лотке, а также принтер на наличие посторонних предметов. Еще причина может быть в пружине выходного флажка. Если она растянулась, то может плохо работать фиксатор. Также проблема может быть из-за печки, сделайте ее ревизию, переборку и смазку. |
|
J-0501 (jam0501) |
Бумага застряла в принтере Kyocera |
Извлеките замятую бумагу. Проверьте надежность установки бумаги во входной лоток. Проверьте целостность роликов протяжки бумаги, а также принтер на наличие посторонних предметов. Если не помогло, стоит внимательно осмотреть ребра на направляющей пластине. На них могут образоваться сколы, трещины и заусенцы. Их можно слегка подчистить наждачной бумагой (нулевкой). |
|
J-0511 (jam0511) |
Принтер Kyocera замял бумагу. |
Извлеките замятую бумагу и повторите печать. Если проблема не исчезла, несите принтер в сервис. Скорее всего, изношен ролик протяжки бумаги. |
|
C7990 |
Бункер драм-картриджа (блока фотобарабана) заполнен отработанным тонером либо неисправен счетчик отработки красящего вещества. Еще проблема может быть в главной плате PWB. |
Осуществите чистку драм-картриджа (блока фотобарабана). Если проблема в датчике или плате, то нужно отнести принтер в СЦ на диагностику. |
|
F248 |
Ошибка обработки отпечатываемого материала. |
Перезагрузите принтер. Уберите неподдерживаемые спецсимволы из отпечатка. Обновите ПО принтера Kyocera. Смените режим работы принтера с PDL на GDI (Пуск -> Принтеры -> Свойства -> Параметры устройства). |
|
PF |
Отсутствует бумага в лотке подачи. |
Загрузите листы бумаги во входной лоток. Если принтер по-прежнему не печатает, значит нужно искать проблему в чем-то другом. |
|
1101 |
Ошибка сканирования через сеть из-за неправильного имени SMTP сервера. |
Пропишите DNS-адреса помимо прочих настроек печати по сети. |
|
1102 |
Некорректная настройка сканера для работы через сеть |
Зайдите в Web-панель управления принтером (нужно в адресную строку браузера ввести iP принтера Kyocera). Далее в зависимости от модели введите логин и пароль (Admin/Admin или просто admin00 без логина). Далее следуйте инструкции:
Логин и пароль нужны обязательно, если их нет, то следует создать. |
|
2101 |
Ошибка передачи данных при сканировании через сеть. |
Правильно настройте параметры (как для ошибки 1102), только предварительно отключите на ПК антивирус и брандмауэр. |
Если Вы испытали все способы, но не смогли убрать ошибку, то следует нести печатающее устройство в сервисный центр. Кроме того, есть ряд ошибок (высвечиваемых на дисплее принтера), которые нельзя устранить в домашних условиях. Соответствующие коды ошибок принтеров Kyocera представляем в очередной таблице.
Коды ошибок принтеров и МФУ Kyocera, которые нужно устранять в сервисном центре
|
Код ошибки |
Значение ошибки |
Решение проблемы |
|
0030 |
Неисправность платы управления факсом принтера. |
Замена платы. |
|
0100 |
Неисправность платы управления или флеш-памяти принтера. |
Замена платы. |
|
0120 |
Ошибка чтения mac-адреса из-за неисправности флеш-памяти принтера. |
Замена платы. |
|
0190 |
Неисправность платы управления или флеш-памяти принтера. |
Замена платы. |
|
0630 |
Неисправность платы управления принтера. |
Замена платы. |
|
1020 |
Неисправность мотора, привода или отсутствие контакта. |
Разборка принтера и замена изношенных частей. Проверка надежности подключений, замена разорванных (прогоревших) кабелей. Ремонт или замена привода мотора. |
|
1040 |
Неисправность мотора, привода или отсутствие контакта. |
Разборка принтера и замена изношенных частей. Проверка надежности подключений, замена разорванных (прогоревших) кабелей. Ремонт или замена привода мотора. |
|
2000 |
Неисправность главной платы управления, соединительного кабеля или привода принтера. |
Проверить ремни, шестерни и ролики привода. Смазать или заменить, если есть дефекты. Заменить привод или главную плату. |
|
3100 (C3100) |
Неисправность главной платы, привода сканера, датчика положения или нарушение целостности соединений. |
Проверить наличие разрывов и отсутствия контакта. Смазать или заменить изношенные элементы привода. Заменить привод, главную плату, датчик или соединительный кабель. Если Вам повезло, то возможно забыли отключить фиксатор блока сканера. |
|
3101 |
Сетевой кабель не подсоединен, или нарушена работа концентратора. Еще может быть из-за наличия вирусов в системе или неправильно заданным параметрам сервера SMTP. |
Проверить соединения, правильно настроить параметры сети. |
|
3300 |
Неисправность главной платы, датчика CIS или соединительного кабеля. |
Проверить контакты, заменить плату или датчик. |
|
3500 |
Неисправность главной платы или нарушение соединения контактов. |
Проверить контакты, заменить плату. |
|
4000 (C4000) |
Неисправность главной платы, привода сканера или нарушение соединений. Однако чаще всего ошибка лазера. |
Проверить контакты, заменить плату или привод блока сканера. Почистить лазер, смазать ось полигон-мотора, либо полностью заменить блок лазера. |
|
4200 |
Неисправность главной платы, блока сканера или датчика BD. |
Отключить питание принтера на 30 минут. Если не помогло, то следует заменить привод сканера или главную плату принтера. |
|
6000 (С6000) |
Неисправность главной платы, термостата, печки или нарушение соединения контактов. |
Проверить и поправить контакты. Заменить фьюзер. Ремонт или замена печки, термодатчика, термопредохранителя и т.д. |
|
6020 |
Сгорание термистора или главной платы. |
Замена термистора или главной платы. |
|
6030 |
Неисправность главной платы, термостата или термистора. Возможно, причина в отсутствии контакта. |
Проверить соединения. Заменить плату, термостат или термистор. |
|
6400 |
Неисправность главной платы, отсутствие питания или контакта. |
Заменить плату или источник питания. |
|
F000 |
Неисправность главной платы или отсутствие контакта. |
Проверить соединение ремня безопасности. Заменить ремень или плату управления. |
|
F020 |
Неисправность элементов памяти принтера. |
Перезагрузить принтер. Если ошибка не устранилась – заменить плату управления. |
|
F040 |
Неисправность главной платы принтера. |
Перезагрузить принтер. Если ошибка не устранилась – заменить плату управления. |
|
F05D |
Неисправность главной платы. Сбой программного оборудования привода. Проблемы с прошивкой принтера Kyocera. |
Перезагрузить принтер. Если ошибка не устранилась – заменить плату управления. Перепрошить принтер Kyocera. |
|
F245 F246 F247 F375 |
Принтер Kyocera заблокирован из-за проблемы, вызванной отказом источника питания. |
Нужно перепрошить принтер специальной сервисной микропрограммой. |
Обратите внимание: Если у печатающего устройства нет дисплея, то определить проблему можно по светодиодным индикаторам, встроенным в панель управления принтером. Например, у Kyocera Ecosys P2135D нужно сосчитать количество миганий индикаторов красного цвета и таким образом определить число, указывающее на ту или иную ошибку. В свою очередь, у модели Kyocera FS-1040 все зависит от темпа мигания светодиода с надписью «Внимание!» («Attention!»):
- Мигает медленно – указывает на отсутствие бумаги в лотке или тонера в картридже.
- Мигает быстро – оповещает о проблеме с памятью устройства, переполненном лотке или замятии бумаги, а также об использовании неоригинальных расходных материалов.
- Горит постоянно – говорит о проблемах с картриджем или фотобарабаном либо указывает на открытые крышки принтера.

Чтобы потребитель мог наверняка определить проблему, рекомендуем использовать утилиту Kyocera Client Tool, которая идет в комплекте с драйверами принтера.
Ваше Имя:
Ваш вопрос:
Внимание: HTML не поддерживается! Используйте обычный текст.
Оценка:
Плохо
Хорошо
Введите код, указанный на картинке:

