
Comments
![]()
Compatibility Report
- Name of the game with compatibility issues: Stray
- Steam AppID of the game: 1332010
System Information
- GPU: AMD RX 6700XT
- Driver/LLVM version: Mesa 22.1.3, amdgpu 22.10.2.50102-1408194
- Kernel version: 5.14.21
- Link to full system information report: sysinfo.txt
- Proton version: Proton Experimental (Also tried with stable 7.0-3 and recent Proton GE 7-24, no luck)
I confirm:
- [ x ] that I haven’t found an existing compatibility report for this game.
- [ x ] that I have checked whether there are updates for my system available.
Symptoms
- Default proton version (and many others) exits without any messages
- When prefix is cleaned and changed to Proton Experimental user is presented with MessageBox dialog stating that MSVC++ libraries are missing — but I find the latter hard to believe given the prefix has every single one under the sun seems to be provided by default.
Proton log: steam-1332010.log
Error dialog: «The following component(s) are required to run this program: Microsoft Visual C++ Runtime»

Reproduction
- Install the game and try to launch: Nothing happens with whichever the default proton version the Steam runtime decided and prematurely exits with no dialog.
- Clean the prefix and try forcing any other version of Proton, be it: stable 7.0-3, experimental or 3rd party none of them seem to work out of box
- Using Proton Experimental at least gives the dialog complaining about MSVC++ libs
- Tried forcing installation of vc2019 and mfc2015 via winetricks/protontricks but this didn’t seem to work either
![]()
kisak-valve
changed the title
Stray — Unable to launch, silent error or ‘Missing MSVC++ Runtime’
Stray (1332010)
Jul 21, 2022
![]()
System Information
- GPU: RX 6400 / RX 470
- Driver/LLVM version: Mesa 22.1.4 — kisak-mesa PPA
- Kernel version: 5.15.0-41-generic (Ubuntu 22.04)
- Link to full system information report as Gist:
- Proton version: 7.0-3
it just work on my PC. (screenshot)
update (25 Jul 2022):
- [v] Enable Shader Pre-Caching
- [_] Allow background processing of Vulkan shaders
VK_ICD_FILENAMES=/usr/share/vulkan/icd.d/radeon_icd.i686.json:/usr/share/vulkan/icd.d/radeon_icd.x86_64.json
![]()
Mistakenly clicked wrong option, my bad!
![]()
Interesting, do happen to know which version of DXVK is being used?
![]()
Interesting, do happen to know which version of DXVK is being used?
from Proton 7.0-3 Changelog,
Update dxvk to v1.10.1-57-g279b4b7e.
![]()
Same issue across multiple Proton versions
GPU: RTX 3070
Driver/LLVM version: 510.73.05
Kernel version: 5.15.0-41-generic #44~20.04.1-Ubuntu SMP
Proton version: Tried following
Proton-6.21-GE-1
GE-Proton-7-10
Proton Experimental
Proton 7.0-3
![]()
Brief update:
Yesterday I had tried latest Proton GE 7-26 with the same dialog as before.
Today I’ve just now got online, and interestingly two new updates were queued.
One for the game and the other for Steam Runtime, and these seem to have helped/solved the issue!
Steam re-ran the installation script with three actions and launched the game to the menu with no issues.
One of the items was DirectX installation, so I can only assume some libraries were unintentionally missing in the prefix.
I’ve not yet done a diff of the directories to know what else/why.
Note: This is still with Proton GE 7-26, I’ve changed nothing else not even cleaning out the prefix directory.
Secondly the d3d11.log + dxgi.log (Which gets dumped in the games’ installation area in steamapps) now populates with the expected feature checks as expected
There’s still some log spam with trace unwinds but it at least functions and got to the main menu.
![]()
had same «fatal error» problem with both proton 7.0-3 and proton GE 7-26
got it to run by using wine3d11 with the launch option PROTON_USE_WINED3D11=1 %command%, but its not really playable — many objects are missing in-game, and black squares are often flashing
maybe this could be related to dxvk?
system info gist
![]()
@penguinuwu That’s odd, everything looks fine from the system information dump.
It doesn’t appear like the Vulkan ICD is missing, which is one issue I’d had before.
I would expect Mesa to be the appropriate choice for Intel Xe for OpenGL and the libvulkan_intel packages as you have installed are perfectly fine.
Although I’m unsure how well supported the Xe family of parts are currently/what functional limitations there are in Linux.
Three basic things to check would be:
glxinfovulkaninfo
Test whether simple OpenGL/Vulkan apps perform as you expect with:glxgearsandvkmark?
The only other thing you can try, when you have multiple Vulkan providers that conflict, is to enforce the correct ICD gets used by adding:
... VK_ICD_FILENAMES="/path/to/vulkan.icd" ...
In this case: ... VK_ICD_FILENAMES="/usr/share/vulkan/icd.d/intel_icd.x86_64.json" ...
Last resort is to refresh the prefix entirely:
- Move the game prefix directory to keep a backup (eg:
mv /home/$USER/.steam/steam/steamapps/compatdata/1332010 /home/$USER/.steam/steam/steamapps/compatdata/1332010.orig) - Remove the environment overrides
- To force the game to retry the installation, I found validating the game files and then try launching it to be best. (I believe, validating the game files restores the installation script when it detects the prefix is missing but this might only be coincidence)
Also if you have a failure log that’s significantly different, go ahead and attach one in a reply.
On my end the game now runs fine with the update patches that came in, in fact very much identical performance to Windows!
Only performance issues of not are large stutters happening when looking in certain directions, this is identical across Windows and Linux.
e.g. It often happens when quickly looking directly downwards, I suspect a divide by zero issue using trigonometry functions as the camera angle tends towards zero on a relative axis.
![]()
Also getting a «fatal error!» popup before the game crashes on GE-Proton7-20, Proton Experimental, and Proton 7.0-3.
Gathered the following after verifying game files:
- Proton logs: steam-1332010.log
- Steam System Information excerpt (please let me know if I omitted anything relevant):
- Pop!_OS 22.04 LTS (64 bit)
- CPU Brand: 11th Gen Intel(R) Core(TM) i5-1135G7 @ 2.40GHz
- Steam Runtime Version: steam-runtime_0.20220315.0
- Driver: Intel Mesa Intel(R) Xe Graphics (TGL GT2)
- Driver Version: 4.6 (Compatibility Profile) Mesa 22.0.1
- OpenGL Version: 4.6
![]()
@jfshorter thanks for the suggestions, i’ve given those a try but had no luck
glxinfo, vulkaninfo, glxgears, and vkmark all ran without errors. i’m not sure what else to look for, here are the results in a gist
i tried enforcing the ICD files by running steam with the command VK_ICD_FILENAMES='...' steam and also setting the launch options to VK_ICD_FILENAMES='...' %command% but it would still not launch. i used the values:
VK_ICD_FILENAMES='/usr/share/vulkan/icd.d/intel_icd.i686.json:/usr/share/vulkan/icd.d/intel_icd.x86_64.json'VK_ICD_FILENAMES='/usr/share/vulkan/icd.d/intel_icd.x86_64.jsonVK_ICD_FILENAMES='/usr/share/vulkan/icd.d/intel_icd.i686.json'(this one resulted in the error «A D3D11-compatible GPU (Feature Level 11.0, Shader Model 5.0) is required to run the engine.» instead of the «Fatal error!» — guess i’m not supposed to use the 32-bit version)
next i tried: delete prefix directory -> verify integrity of game files -> reset launch options -> launch game. the «performing first time setup» window popped up and installed some microsoft stuff, but it still ended in the «Fatal error!» window. it doesn’t look too different, but i noticed a few warnings — maybe those might be significant? here is the logs gist (i tried this on proton GE 7-26, Experimental, 7.0-3 and got similar results)
i’m out of ideas to try, not sure what’s going on; might just wait for mesa/dxvk/proton updates and try again later…
![]()
@junefish Ahh okay, I spotted something in that log which gives me an idea:
info: DXVK: Read 0 valid state cache entries info: DXVK: Using 5 compiler threads ../src/intel/isl/isl.c:2216: FINISHME: ../src/intel/isl/isl.c:isl_surf_supports_ccs: CCS for 3D textures is disabled, but a workaround is available. 18777.100:0138:013c:trace:seh:dispatch_exception code=c0000005 flags=0 addr=000000014181FA8A ip=000000014181FA8A tid=013c 18777.100:0138:013c:trace:unwind:dispatch_exception info[0]=0000000000000000 18777.100:0138:013c:trace:unwind:dispatch_exception info[1]=0000000000000000 18777.100:0138:013c:warn:seh:dispatch_exception EXCEPTION_ACCESS_VIOLATION exception (code=c0000005) raised
I have a feeling the game is trying to launch a non-existent Windows native shader compiler and failing when the game needs to rely on Steams’ fossilise tool to have the shaders pre-prepared for your GPU for DXVK to pick up on run time.
This is a long shot, but try going through the menus: Steam -> Settings -> Shader Pre-Caching:
Tick the «Enable Shader Pre-Caching» + «Allow background processing of Vulkan shaders enabled»
This will consume more CPU time when you download game updates but will launch games quicker, and ensures the Vulkan shader cache always matches the version of the game you have.
I’ve had so many other similarly weird problems with other games after updates without this turned on, that I’m surprised it is not a default-on setting for Linux.
3kliksphilip voice «Valve, please fix»
(Sorry if you and others already have this setting enabled already)
@penguinuwu Looking at those results from a driver provider perspective all look perfect, thanks for sharing.
It seems like the Proton log matches junefish’s so might be worth trying the above if you happen to run without shader pre-caching enabled
I hope this is the magic bullet for you guys, or at least it’s just some other minor oversight that can be fixed if this does not work.
![]()
just got the game to work purfectly! all i did was downgrade to proton 6.3-8 💀 here is the proton log to compare
i noticed that the working log is lacking the warning:
warn:seh:dispatch_exception EXCEPTION_ACCESS_VIOLATION exception (code=c0000005) raised
maybe that’s the problem in proton 7 and newer?
@jfshorter i have both settings ticked already, but i tried unticking both options and it just replaced the DXVK error with
warn:  DXVK: No state cache file found
warn:  DXVK: Creating new state cache file
seems like that’s not the problem here
![]()
just FYI,
my configuration:
- [v] Enable Shader Pre-Caching
- [_] Allow background processing of Vulkan shaders
VK_ICD_FILENAMES=/usr/share/vulkan/icd.d/radeon_icd.i686.json:/usr/share/vulkan/icd.d/radeon_icd.x86_64.json
![]()
I have a feeling the game is trying to launch a non-existent Windows native shader compiler and failing when the game needs to rely on Steams’ fossilise tool to have the shaders pre-prepared for your GPU for DXVK to pick up on run time.
This is a long shot, but try going through the menus: Steam -> Settings -> Shader Pre-Caching: Tick the «Enable Shader Pre-Caching» + «Allow background processing of Vulkan shaders enabled»
This will consume more CPU time when you download game updates but will launch games quicker, and ensures the Vulkan shader cache always matches the version of the game you have.
@jfshorter I had «Enable shader pre-caching» checked already, but not «allow background processing of vulkan shaders». I checked the latter and it started processing a bunch of games, with the «pre-cached» number going up (it was at 0MB when I opened Settings). A bunch of games including Stray showed up in completed Downloads.
I then tried launching Stray again on 7.0-3 and it had a «processing vulkan shaders…» progress bar popup, but it still exited with «fatal error».
just got the game to work purfectly! all i did was downgrade to proton 6.3-8
@penguinuwu tried changing to proton 6.3-8 and still got fatal error unfortunately. steam-1332010.log
![]()
Tried adding @penguinuwu’s launch option VK_ICD_FILENAMES=/usr/share/vulkan/icd.d/radeon_icd.i686.json:/usr/share/vulkan/icd.d/radeon_icd.x86_64.json (verified that both files are present w/same paths). Then I verified integrity of game files again, and tried to launch using Proton 6.3-8.
This time I got the error:
A D3D11-compatible GPU (Feature Level 11.0, Shader Model 5.0) is required to run the engine.
I’m not sure whether this means my GPU is actually not compatible, or if it’s a settings issue. (I see that penguin got the same message earlier, with a slightly different launch option?)
![]()
@junefish Ahh right, looking at Intel’s Tiger Lake Xe-LP GT2 it seems to claim DirectX 12.1 feature compatibility: Intel ARK — i5-1135G7 Specifications
[Note: This can be ambiguous where DirectX 12.0 is essentially the same as full featured DirectX 11, similar for many releases the x.0 is just «everything the previous version supported». Thanks for that misleading dual naming, Micro$oft.]
I can only assume either:
- The game doesn’t recognise Xe-LP / have a known supported entry for settings (Testing for sanity on Windows might give a clue if that’s an option?)
- DXVK failed to init and detect Xe-LP with Proton 6.3-8
Feel free to attach another log if you have one for that second failure, could be useful if someone has an idea.
Sorry I haven’t been much of a help haha!
![]()
just got the game to work purfectly! all i did was downgrade to proton 6.3-8 skull here is the proton log to compare
@penguinuwu Could you try dropping the dxvk files from 7.0-3 where it fails into 6.3-8 to try to confirm if this is a dxvk regression or not? To do this:
cp -rf ~/.steam/steam/steamapps/common/Proton 7.0/dist/lib/wine/dxvk/* ~/.steam/steam/steamapps/common/Proton 6.3/dist/lib/wine/dxvk/.
cp -rf ~/.steam/steam/steamapps/common/Proton 7.0/dist/lib64/wine/dxvk/* ~/.steam/steam/steamapps/common/Proton 6.3/dist/lib64/wine/dxvk/.
After you are done testing, you can «revert» the change by deleting the whole 6.3 «dist» folder — it will recreate itself.
![]()
@alasky17 the game worked just fine after the steps, seems like that’s not the problem. i’ve pasted a log of my commands below
also think it’s worth noting that i’m mainly testing on wayland (swaywm). i just tried running on x11 (kde) (because one of my mouse buttons wasn’t working), then ran into the same «Fatal error!» issue with proton 6.3-8 and above. however, proton 5.13-6 ran just fine??? luckily the game works for me, but i have no clue what’s going on…
$ # commands log
$ cd my-steam-root/steamapps/common/
$ cp -vrf 'Proton 7.0'/dist/lib/wine/dxvk/* 'Proton 6.3'/dist/lib/wine/dxvk/
'Proton 7.0/dist/lib/wine/dxvk/d3d10_1.dll' -> 'Proton 6.3/dist/lib/wine/dxvk/d3d10_1.dll'
removed 'Proton 6.3/dist/lib/wine/dxvk/d3d10_1.dll'
'Proton 7.0/dist/lib/wine/dxvk/d3d10core.dll' -> 'Proton 6.3/dist/lib/wine/dxvk/d3d10core.dll'
removed 'Proton 6.3/dist/lib/wine/dxvk/d3d10core.dll'
'Proton 7.0/dist/lib/wine/dxvk/d3d10.dll' -> 'Proton 6.3/dist/lib/wine/dxvk/d3d10.dll'
removed 'Proton 6.3/dist/lib/wine/dxvk/d3d10.dll'
'Proton 7.0/dist/lib/wine/dxvk/d3d11.dll' -> 'Proton 6.3/dist/lib/wine/dxvk/d3d11.dll'
removed 'Proton 6.3/dist/lib/wine/dxvk/d3d11.dll'
'Proton 7.0/dist/lib/wine/dxvk/d3d9.dll' -> 'Proton 6.3/dist/lib/wine/dxvk/d3d9.dll'
removed 'Proton 6.3/dist/lib/wine/dxvk/d3d9.dll'
'Proton 7.0/dist/lib/wine/dxvk/dxgi.dll' -> 'Proton 6.3/dist/lib/wine/dxvk/dxgi.dll'
removed 'Proton 6.3/dist/lib/wine/dxvk/dxgi.dll'
'Proton 7.0/dist/lib/wine/dxvk/openvr_api_dxvk.dll' -> 'Proton 6.3/dist/lib/wine/dxvk/openvr_api_dxvk.dll'
removed 'Proton 6.3/dist/lib/wine/dxvk/openvr_api_dxvk.dll'
'Proton 7.0/dist/lib/wine/dxvk/version' -> 'Proton 6.3/dist/lib/wine/dxvk/version'
removed 'Proton 6.3/dist/lib/wine/dxvk/version'
$ cp -vrf 'Proton 7.0'/dist/lib64/wine/dxvk/* 'Proton 6.3'/dist/lib64/wine/dxvk/
'Proton 7.0/dist/lib64/wine/dxvk/d3d10_1.dll' -> 'Proton 6.3/dist/lib64/wine/dxvk/d3d10_1.dll'
removed 'Proton 6.3/dist/lib64/wine/dxvk/d3d10_1.dll'
'Proton 7.0/dist/lib64/wine/dxvk/d3d10core.dll' -> 'Proton 6.3/dist/lib64/wine/dxvk/d3d10core.dll'
removed 'Proton 6.3/dist/lib64/wine/dxvk/d3d10core.dll'
'Proton 7.0/dist/lib64/wine/dxvk/d3d10.dll' -> 'Proton 6.3/dist/lib64/wine/dxvk/d3d10.dll'
removed 'Proton 6.3/dist/lib64/wine/dxvk/d3d10.dll'
'Proton 7.0/dist/lib64/wine/dxvk/d3d11.dll' -> 'Proton 6.3/dist/lib64/wine/dxvk/d3d11.dll'
removed 'Proton 6.3/dist/lib64/wine/dxvk/d3d11.dll'
'Proton 7.0/dist/lib64/wine/dxvk/d3d9.dll' -> 'Proton 6.3/dist/lib64/wine/dxvk/d3d9.dll'
removed 'Proton 6.3/dist/lib64/wine/dxvk/d3d9.dll'
'Proton 7.0/dist/lib64/wine/dxvk/dxgi.dll' -> 'Proton 6.3/dist/lib64/wine/dxvk/dxgi.dll'
removed 'Proton 6.3/dist/lib64/wine/dxvk/dxgi.dll'
'Proton 7.0/dist/lib64/wine/dxvk/openvr_api_dxvk.dll' -> 'Proton 6.3/dist/lib64/wine/dxvk/openvr_api_dxvk.dll'
removed 'Proton 6.3/dist/lib64/wine/dxvk/openvr_api_dxvk.dll'
'Proton 7.0/dist/lib64/wine/dxvk/version' -> 'Proton 6.3/dist/lib64/wine/dxvk/version'
removed 'Proton 6.3/dist/lib64/wine/dxvk/version'
![]()
GPU: Radeon RX 5500XT 8GB
CPU: Ryzen 5 5600X
Kernel: 5.18.14-zen1-1-zen (arch linux)
Mesa: 22.1.3-1
Proton: 7.0-3
I have to report some things related to performance:
if I don’t use PROTON_NO_ESYNC=1 PROTON_NO_FSYNC=1 %command%, one core of my CPU in some parts of the map will be stuck at 100% usage
and also the GPU performance of the game is way worse if compared to windows, even considering that on benchmarks my Linux OS outperforms Windows in GPU performance
![]()
I just discovered that using proton experimental (bleeding edge) fixes all the performance problems!
![]()
Replying to #6017 (comment)
Just to test I tried GE-Proton7-20 and a (newly updated) Experimental (steam-1332010.log) with the VK_ICD_FILENAMES=/usr/share/vulkan/icd.d/radeon_icd.i686.json:/usr/share/vulkan/icd.d/radeon_icd.x86_64.json launch option, and they also gave me the D3D11-compatible GPU required error, so it doesn’t seem to be related to Proton version directly.
Also, realised I forgot to mention this before, but if I use PROTON_USE_WINED3D11=1 launch option the game does run, but basically nothing works except for the menus. If I start a game I hear the rain sounds and see a vaguely static image.
![]()
Hey, fellas. I thought this was known but doing a search for d3d12 in the thread, I’m not seeing it.
Stray runs vastly better on my Steam Deck when launching with the -d3d12 argument. I can get a (mostly) locked 60 fps at 80% res scale, low settings. That’s compared to low-mid 40s on the default d3d11 backend. Go ahead and give it a try if you have a hankering for frames! 🐸
Haven’t tested on my desktop, but I would assume the same principle applies there. Just keep in mind d3d12 is not officially supported by the game.
![]()
I was able to get it running (and working) by setting the launch options to:
VK_ICD_FILENAMES=/usr/share/vulkan/icd.d/intel_icd.i686.json:/usr/share/vulkan/icd.d/intel_icd.x86_64.json PROTON_USE_WINED3D11=1 %command%
I also have shader pre-caching enabled (and allow background processing); not sure if it’s required though. Proton 7.0 and Experimental are super glitchy graphics-wise. 6.3 has some glitches too, but it’s much better.
One thing I also tried that did not work was removing PROTON_USE_WINED3D11=1, and adding -d3d12 to the end. The game launched, and the menus worked, but none of the graphics displayed at all.
For reference, I have an Intel 12th-gen i7, with Xe graphics («Intel Corporation Alder Lake-P Integrated Graphics Controller (rev 0c)»).
![]()
hey there!
it works on my nvidia? but i dont know how to enable RTX effects? (is it has RayTrace reflections? on many screenshots from internet it has much better reflections, then mine, but i set all avaliable settings to maximum )
Посмотрите на мир глазами бродячего кота и взаимодействуйте с окружением самыми причудливыми способами. При встрече со странными обитателями этого чуждого мира вам предстоит быть незаметным, проворным, неблагоразумным, а порой и надоедливым.
Разработчик Stray – BlueTwelve Studio. Если у вас возникли технические проблемы с игрой, то первым делом проверьте свой ПК на соответствие системным требованиям.
Если вам самостоятельно удалось найти решение какой-либо проблемы, пожалуйста помогите другим пользователям и напишите о своем варианте решения в комментариях.
Важно: Путь к игре не должен содержать русских букв и спец. символов. Все названия папок должны быть на латинице.
Чаще всего игроки сталкиваются со следующими ошибками:
- Черный экран Stray
- Зависла в диспетчере
- Проблемы звука / Пропадает звук
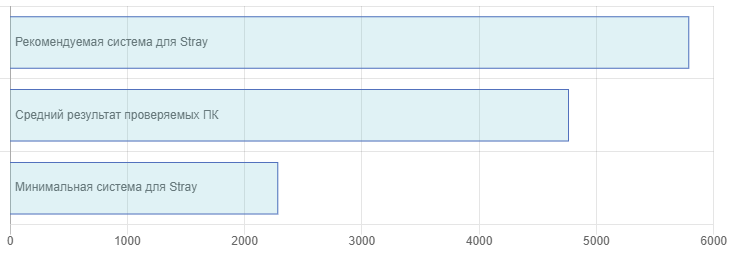
- Оптимизация Stray / Слабый ПК
- Вылетает на рабочий стол
- Не на весь экран
- Низкая производительность
- Stray перестала запускаться
- Не работает управление
- Ошибка «Недостаточно памяти»
- Не сохраняется
- Ошибка при установке
- Ошибка DirectX
- Ошибки DLL
- Ошибка 0xc000007b
- При запуске ничего не происходит
- Ошибка Microsoft Visual C++ 2015
- Stray лагает
- «Синий экран смерти» (BSOD)
Черный экран Stray
Черный экран может означать разные ошибки, однако чаще всего это связано с какой-либо ошибкой со стороны видеокарты, и в некоторых случаях причиной является планка оперативной памяти. Также откатите разгон элементов ПК в том случае, если используется.
Возможные действия при появлении данной ошибки
Запуск Stray в оконном режиме
Оконный режим в Steam
- Откройте библиотеку Steam
- Кликните правой кнопкой мыши по Stray, и перейдите в «Свойства»
- Перейдите на вкладку «Общие» и нажмите «Установить параметры запуска»
- Добавить -windowed
Оконный режим через .exe
- Правый клик по ярлыку игры на рабочем столе, и перейдите в «Свойства»
- В строке «Объект» после кавычек («) добавить » -windowed «
- «C:GamesStrayBinWin64Stray.exe» –windowed
Закрыть программы для захвата видео
Одной из причин черного экрана могут быть программы для видеозаписи: Fraps, Camtasia Studio, Ezvid и т.д.
Также проблемы могут вызывать приложения, связанные с «улучшением» графики в играх. К примеру: SweetFX, Saturation Toggler и многие другие. Различные моды также могут вызывать ошибки. Используйте главное правило: чем меньше программ работает одновременно с игрой, тем лучше. Закройте все лишнее.
Тестирование оперативной памяти
Виновником изредка становится оперативная память компьютера.
- Проведите тестирование с помощью утилиты для проверки оперативной памяти. Например: RamSmash. О том, как проверить память встроенным приложением в Windows 10, 8, 7 читайте здесь.
- Попробуйте поменять модули DDR на другие слоты.
- Если в ПК 2 и более планок, то попробуйте оставить только одну.
- Детальные инструкции по диагностике памяти можно найти на специализированных сайтах.
Stray зависла в диспетчере
Запустите Stray в режиме совместимости с другой ОС.
Иногда проблемой является надстройка драйвера Nvidia GeForce Experience. Отключите в ней все оптимизации для игры.
На видеокартах AMD проблемы может создавать приложение Gaming Evolved (Raptr). Попробуйте его временно отключить или удалить.
Если в диспетчере задач есть Nvidia Capture Service, попробуйте завершить процесс. Завершите другие процессы, связанные с захватом видео.
Обновите драйвер видеокарты.
Также см. советы «Не запускается».
Проблемы аудио / Нет звука в Stray
Советы при возникновении неполадок звуковой карты
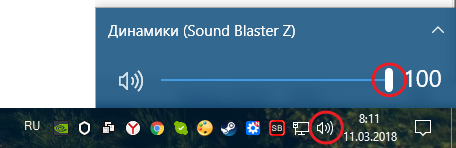
Для начала перезагрузите вашего компьютера и проверьте есть ли звук в операционной системе: кликните два раза значок громкоговорителя в нижнем правом углу и нажимайте по ползунку громкости.
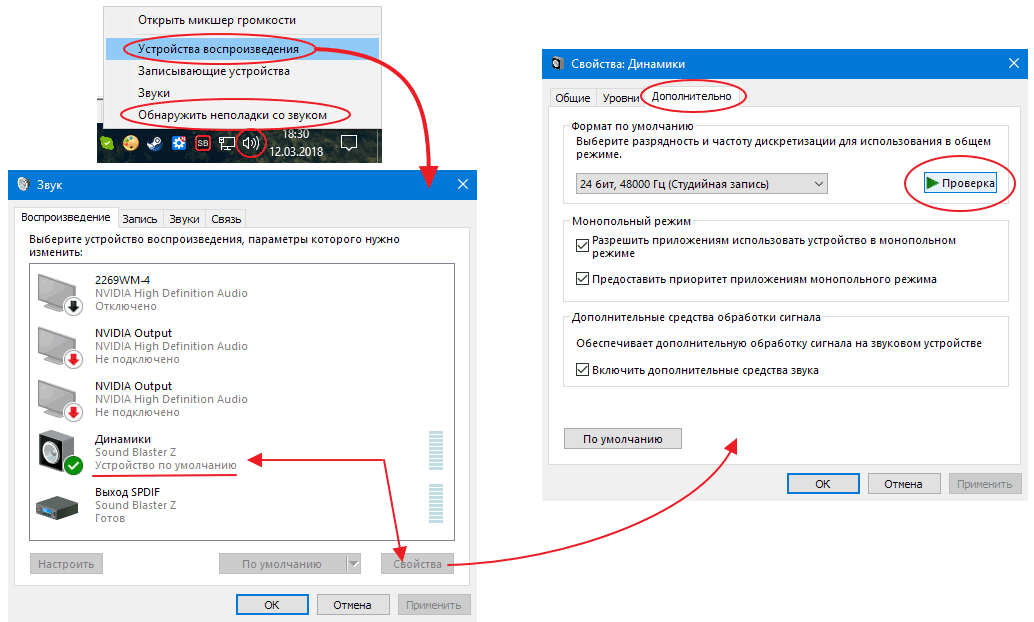
Если ничего не слышно, то кликните правой кнопкой мыши (ПКМ) по значку динамика и перейдите в «Устройства воспроизведения». На вкладке вопроизведение проверьте, какой источник звука выбран по-умолчанию. По нему ПКМ и нажать «Проверка». Если звука нет, то ПКМ по значку и нажать «Обнаружить неполадки со звуком».
Есть звук в Windows, но нет в игре:
Проверить опции громкости звука в настройках Stray. Обновить DirectX, а также аудиодрайвер.
Есть звук, но нет голосов:
Возникли проблемы с файлами озвучки при установке. Проверьте целостность файлов игры в Steam.
Советы по решению проблем со звуком Creative
Перезапустите аудио-панель Creative. Проверьте в ней настройки звуковой карты.
Советы по устранению неполадок со звуком Realtek
Перезапустите панель управления аудио Realtek. Проверьте в ней настройки звуковой карты. В Realtek HD Audio Manager переключите тип аудио с Quadraponic (квадрафонический) на Stereo (стерео).
Оптимизация Stray на PC
Это достаточно большой вопрос. Можно выполнить множество действий для повышения производительности.
Советы по оптимизации Stray
Установите последний драйвер видеокарты
Nvidia / AMD
Используйте пониженные настройки графики
Это первое, что следует сделать. Попробуйте понизить графические настройки в игре и поставить минимально возможное разрешение. Наибольшее значение на производительность оказывают: настройки сглаживания, детализация, качество теней и текстур, а также дальность прорисовки.
Используйте разгон видеокарты и процессора
При условии хорошего охлаждения, вы можете попробовать разогнать тактовую частоту процессора или видеокарты. Разгон приводит к дополнительному нагреву, поэтому может потребоваться усиленное охлаждение системы (обязательно используйте программы для мониторинга температуры компонентов). Как правило, все современные материнские платы обладают специализированным набором утилит от производителя, с помощью которых можно безопасно разгонять видеокарту, процессор или оперативную память. Учтите, что некоторые процессоры в принципе нельзя разогнать. Имейте ввиду, что производительность интегрированных видеокарт слишком мала, а их температуры зачастую выше, чем у дискретных собратьев, поэтому разгонять их не стоит. Более подробные сведения по этой теме можно найти в интернете
NVIDIA GeForce Experience (и аналоги у других производителей) поможет оптимизировать Stray под вашу конфигурацию ПК
NVIDIA GeForce Experience / AMD Gaming Evolved / Intel HD Graphics Control Panel — специальные утилиты с самыми различными инструментами, среди которых имеется оптимизация игр.
Здесь можно найти описание
Освободите место на диске
Существуют различные специальные программы для оптимизации и очистки компьютера. Glary Utilities 5 — популярная утилита с богатым функционалом для очистки ПК от мусора.
Очистка и оптимизация диска
Перейдите в свойства жесткого диска. Откройте вкладку «Сервис» -> нажмите кнопку «Оптимизировать (или дефрагментировать)». Не забудьте также выполнить проверку и очистку диска.
Панель управления NVIDIA / AMD
Откройте панель управления NVIDIA (или AMD) перейдите на вкладку «Управление параметрами 3D» (NVIDIA), или Игры -> Настройки 3D-приложений (AMD). Вы можете задать здесь как глобальные настройки обработки графики, так и отдельно для Stray. Или перейдите в «Регулировка настроек изображения с просмотром» (для NVIDIA), далее «Пользовательские настройки -> Производительность», передвинув ползунок влево.
Убрать из автозагрузки лишние программы
Нажмите кнопку Пуск (в левом нижнем углу). Введите в поисковую строку msconfig, после чего нажмите Enter. Откроется окно конфигурации системы перейдите на вкладку «Автозагрузка» (в Win 10 нажать CTRL+ALT+DELETE и перейти на такую же вкладку). Здесь собраны все программы, которые подгружаются при запуске Windows. Попробуйте отключить ненужные программы, чтобы они не занимали память (не убирайте из автозагрузки неизвестные вам приложения, в противном случае вы можете нарушить запуск системы). Перезагрузите компьютер. Не запускайте приложения (браузер, Skype и т.д.). Запустите Stray.
Оптимизируйте работу ОС
Отключите визуальные эффекты, деактивируйте индексирование поиска, системные звуки и прочее.
Флешка как оперативная память
Нажмите правой кнопкой мыши по диску USB и выберите «Свойства». Выберите вкладку «Ready Boost», поставьте галочку «Использовать это устройство» (“Use this device”).
Stray вылетает на рабочий стол
Попробуйте временно отключить антивирус (особенно в случае с Avast!). Также смотрите советы в разделе ошибок при запуске.
Stray не на весь экран
Нажмите ALT+ENTER. Проверьте настройки игры (оконный режим, разрешение и т.д.). В некоторых случаях помогает изменение частоты обновления (в панели управления Nvidia) с 60 Гц на 59 Гц (нажать «Применить»), и снова вернуть на 60 Гц. Еще один способ: также в панели управления Nvidia перейти в раздел «Регулировка размера и положения рабочего стола». В правом верхнем углу нажать «Восстановить».
Низкая производительность в Stray
Причина медленной работы приложений и игр может быть аппаратной или программной. Установите последний драйвер видеоадаптера (Nvidia, AMD или Intel). Перезагрузите компьютер. Уменьшите разрешение и используйте пониженный уровень визуальных эффектов в настройках графики. Не рекомендуется использовать всякого рода программные «ускорители», потому что они могут содержать вредоносное ПО, и при этом их реальная эффективность, как правило, крайне незначительна. В то время как вы рискуете заразить вирусом свой ПК. Переустановка Windows. Данный способ стоит использовать лишь на крайний случай, когда прочие методы не действуют. Суть проблемы в том, что с течением временем операционная система разрастается устаревшими файлами и процессами настолько, что значительно тормозится выполнение приложений. Более подробно советы по оптимизации Stray.
Stray перестала запускаться
Какие изменения вы производили на компьютере? Возможно причиной проблемы стала установка новой программы. Откройте список установленных программ (Пуск -> Установка и удаление программ), отсортируйте по дате. Удалите недавно установленные. Переустановите Stray.
Также проверьте диспетчер задач. Если запущены копии процессов Stray, завершите их все.
Не работает управление в Stray
Вытащите устройство ввода (геймпад, мышь) из USB и снова вставьте. Если не работает мышь и клавиатура, то попробуйте отключить геймпад и другие USB-устройства.
Для Origin
Библиотека > Правой кнопкой Stray > Свойства > Снять галочку «Включить внутриигровой экран»
Ошибка «Недостаточно памяти»
Возможные причины: игре не хватает оперативной памяти; на жестком диске не хватает места для файла подкачки; вы сами настраивали размер файла подкачки (или отключили его, или использовали софт); некая программа вызывает утечку памяти (откройте диспетчер задач CTRL+ALT+DELETE и отсортируйте приложения по потреблению памяти).
Stray Не сохраняется
Путь к игре не должен содержать русских букв, только латиница.
Ошибка при установке Stray
Не устанавливается. Путь к игре не должен содержать русских букв, только латиница. Выполните проверку и очистку жесткого диска (в редких случаях может помочь замена кабеля SATA). Попробуйте изменить путь установки.
Ошибка DirectX в Stray
Ошибки вида: DirectX Runtime Error, DXGI_ERROR_DEVICE_HUNG, DXGI_ERROR_DEVICE_REMOVED, DXGI_ERROR_DEVICE_RESET.
Рекомендации по устранению ошибки
- Выполнить «чистую» установку только драйвера видеокарты. Не устанавливать аудио, GeForce Experience … То же самое в случае AMD.
- Отключить второй монитор (при наличии) и любые другие периферийные устройства.
- Отключить G-Sync.
- Использовать средство проверки системных файлов
- Для карт NVIDIA. Правый клик по рабочему столу -> Панель управления NVIDIA. Вверху, где Файл, Правка, Вид … нажмите «Справка» и включите «Режим отладки».
- Иногда причиной может являться перегрев видеокарты. Используйте утилиту FurMark для проверки работы видеокарты под нагрузкой. Попробуйте понизить частоты. Более подробную информацию смотрите в интернете по запросам: андервольтинг и понижение частоты видеокарты.
Ошибка DLL в Stray
Ошибки вида: dll is missing, d3d11.dll, msvcp110.dll не найден и другие.
ВАЖНО: не рекомендуется скачивать DLL-файлы со сторонних сайтов в попытке заменить ваши отсутствующие или поврежденные файлы DLL. Используйте этот вариант только в крайнем случае.
Обратите внимание, что путь к игре не должен содержать русских букв, только латиница!
Стандартные действия при появлении ошибки DLL
Стандартные действия при появлении ошибки DLL:
- Перезагрузите компьютер
- Восстановите удаленный DLL-файл из корзины (или используйте программу восстановления файлов). Разумеется этот вариант подойдет в том случае, если вы удаляли файл
- Просканируйте компьютер на вирусы и вредоносные программы
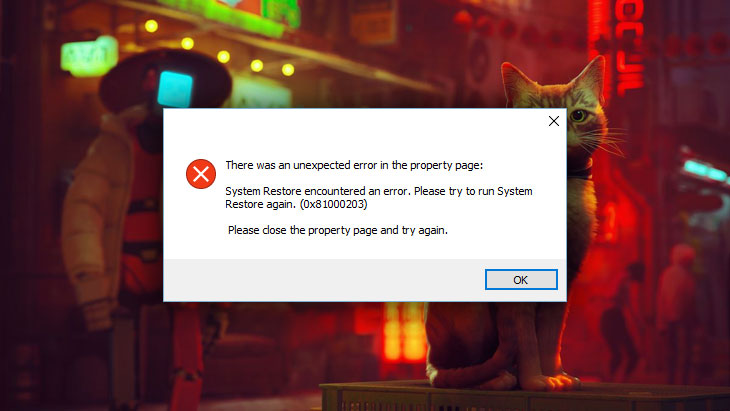
- Используйте восстановление системы (смотрите инструкции в интернете)
- Переустановите Stray
- Обновите драйверы
- Использование средство проверки системных файлов в Windows 10 (смотрите инструкции в интернете)
- Обновите Windows при наличии патчей
- Выполните чистую установку Windows
- Если после чистой установки Windows ошибка DLL сохраняется, то эта проблема связана не с программным обеспечением, а с компонентами вашего PC.
Ошибки с конкретными DLL
Сообщение об ошибке MSVCP140.dll. Вам необходимо обновить/установить пакет Visual C++
Это можно сделать по ссылке
https://www.microsoft.com/ru-ru/download/details.aspx?id=48145
Если у вас подключены какие-либо USB-контроллеры (или другие устройства), подключенные к сети, попробуйте отключить их. Сбои при запуске с именами модулей сбоев ntdll.dll и EZFRD64.DLL могут (в частности, для последних) быть связаны с USB-контроллерами или PS2-USB-адаптерами (для различных игр).
Если у вас возникают ошибки api-ms-win-crt-runtime-l1-1-0.dll на Windows 7 или Windows 8.1, Microsoft выпустила патч для устранения этой проблемы.
https://support.microsoft.com/en-us/kb/2999226
Если появляется сообщение об ошибке MSVCR120.dll, перейдите в C:WindowsSystem 32 и найдите «MSVCR120.dll». Удалите этот файл. Перейдите в C:Program Files (x86)SteamsteamappscommonStray_CommonRedistvcredist2013 и запустите «vcredist_x64.exe». Затем нажмите «repair» (исправить).
Stray и ошибка 0xc000007b
This application was unable to start correctly (0xc000007b). Самая частая причина появления ошибки при запуске приложения 0xc000007b — проблемы с драйверами NVidia.
Возможные решения
- Переустановите драйвера видеокарты
- Попробуйте запустить игру от имени администратора
- Установите/обновите DirectX, Visual C++, .Net Framework. Все файлы загружайте только с официального сайта Microsoft.
- Откройте командную строку «Выполнить» через меню «Пуск» и пропишите sfc /scannow. С помощью этой команды ваш ПК просканирует системные файлы и исправит некоторые ошибки.
- Удалите лишний софт, который может конфликтовать с видеодрайвером. В основном это различные «улучшатели» графики. Чем меньше у вас работает дополнительных приложений, тем лучше.
Метод с помощью программы Dependency Walker 64bit
- Скачайте и распакуйте Dependency Walker 64bit.
- Запустите программу, перейдите в View > Full paths. Теперь выберите файл .exe Stray. После того как вы выбрали .exe игры может всплывать окно в котором вы увидите ошибки, просто закройте его. В разделе module, прокрутите блок вниз до конца ошибки и вы увидите несколько значений в столбцах.
- Теперь в колонке CPU все DLL файлы должны быть x64-битные для вашей игры. Если есть x86 DLL-файл будет в красном столбце CPU. Этот файл и вызывает ошибку 0xc000007b.
- Теперь перейдите на сайт dll-files.com и скачайте там 64-битную версию этого DLL файла и поместить его в корневую папку с игрой и в C:Windowssystem32. Игра теперь должна запустится без проблем.
Ошибка при запуске Stray
Общие рекомендации
Попробуйте удалить Visual C++. Затем установите Visual C++ из папки с игрой:
- Откройте библиотеку Steam
- Выберите Stray из списка
- Щелкните правой кнопкой мыши по игре и выберите «Свойства»
- Выберите «Локальные файлы»
- Выберите Обзор локальных файлов …
- Перейдите в папку _CommonRedistvcredist
Если Stray не запускается и при этом нет никаких ошибок. Если это первый запуск, то попробуйте просто подождать.
Рекомендации от разработчиков:
Установите последние драйверы видеокарты
Убедитесь, что вы используете последние версии Nvidia PhysX (для видеокарт Nvidia) и DirectX.
Directx Webinstall: http://www.microsoft.com/download/en/confirmation.aspx?id=35
Убедитесь, чтобы в настройках панели управления Nvidia опция была установлена на «Application Controlled» (Управление из приложения).
Еще один способ – запуск игры от имени администратора:
- Перейдите в библиотеку Steam
- Выберите из списка Stray
- Щелкните правой кнопкой мыши по игре и выберите «Свойства»
- Выберите «Локальные файлы»
- Выберите Обзор локальных файлов …
- В папке с игрой выберите .exe файл игры
- Кликните файл правой кнопкой мыши
- В раскрывающемся меню выберите «Свойства»
- В окне «Свойства» выберите вкладку «Совместимость»
- В разделе «Параметры» установите флажок «Выполнять эту программу от имени администратора»
- Нажмите «Применить»
- Запустите игру
Попробуйте понизить разрешение экрана перед запуском игры.
Также убедитесь, чтобы ваша операционная система Windows и стороннее программное обеспечение было обновлено до новых версий.
Загрузите Visual C ++ 2017 Redistributable:
Для Windows 64-bit:
- Visual C++ Redistributable for Visual Studio 2017 (64-bit)
Для Windows 32-bit:
- Visual C++ Redistributable for Visual Studio 2017 (32-bit)
Установите обе версии.
Также, установите программное обеспечение .NET:
Microsoft .NET Framework 4.7.1
DirectX End-User Runtime Web Installer – скорее всего, вы уже его установили
Просмотрите также дополнительные рекомендации ниже:
Для пользователей Windows:
- Обновите систему при необходимости до последней версии
- Проверьте целостность кэша файлов (для Steam)
- Перезагрузите компьютер
- Переустановите игру
- Попробуйте отключить программы, потенциально конфликтующие с игрой (антивирусы, файрволы и проч)
- Убедитесь, что ваша система удовлетворяет минимальным требованиям
- Убедитесь, что на системном диске есть свободное место в размере 5-6 Гб
- Проверьте PC антивирусом
- В некоторых случаях может помочь переустановка операционной системы
Для Mac:
- Обновите версию Mac OS
- Выполните проверку целостности кэша Stray в Steam
- Попробуйте временно отключить программы, потенциально конфликтующие с игрой (антивирусы, файрволы и тд)
- Удостоверьтесь, что компьютер подходит под все минимальные системные требования игры
Ошибка Microsoft Visual C++ 2015
«The following component(s) are required to run this program: Microsoft Visual C++ 2015 Runtime»
Установите недостающую библиотеку с сайта Microsoft
Stray зависает
Постоянные подвисания могут являться причиной нестабильной работы системы. Уберите разгон видеокарты и/или процессора при условии, что он используется. Выполните диагностику оперативной памяти, жесткого диска, процессора и видеокарты. Специализированные приложения можно выбрать в интернете. Подробнее про рекомендации по оптимизации Stray.
Stray — BSOD или «Синий экран»
BSOD, как правило, означает какую-то серьезную неполадку в вашей системе, которая не связана с игрой. Первым делом проверьте свой блок питания. При перегреве он будет отключаться. Также, если системе не хватает от него питания, то возможны различные ошибки, включая BSOD. Проведите тестирование других компонентов вашего ПК. В сети можно найти различные утилиты для проверки памяти, жесткого диска и видеокарты.
Recently user’s have reported a problem causing Stray not to launch properly. This is a very common issue amongst the new players of the game and the issue can be caused by plenty of reasons.
What Causes Stray to not launch properly
- Corrupt game files- During the installation process the files might not have been properly installed due to many factors that might be internet problems or an unstable connection to the server.
- Missing Visual C++ redistributables- Visual C++ redistributable is a runtime library that contains essential components that are required by applications & games created in a Visual studio environment. Missing Visual C++ redistributables might be causing the error we are facing.
- Outdated Graphics drivers- Users have reported their outdated graphics drivers to be a cause to them facing this inconvenience.
- Outdated Windows version- An outdated windows version might lead the users to this error as the outdated windows version is most probably full of bugs and is not deemed stable. Updating to a newer and stable version will help us fix this error.
- Hardware Compatibility– Since stray was just released this year, older hardware might not be compatible enough to run the game with ease. Check system requirements for stray before continuing to fixes.
1. Verify game file integrity
Steam comes equipped with a built-in feature that helps users verify game files that repairs any corrupt game files automatically, Follow these steps to verify game file integrity:
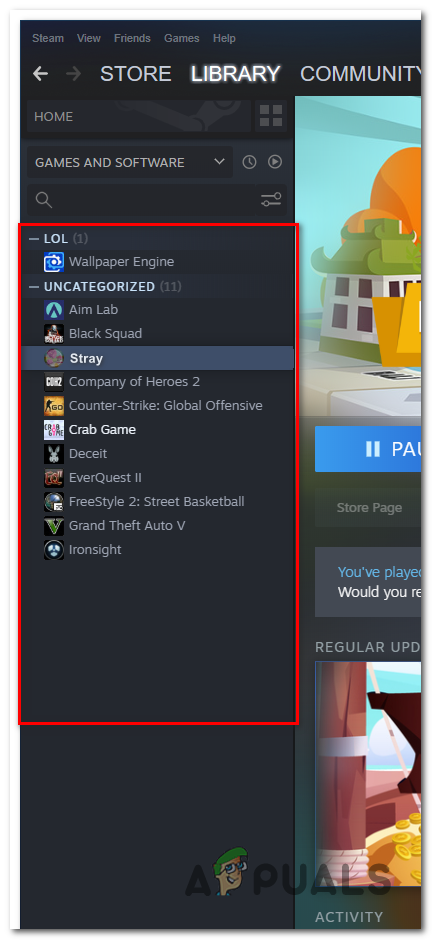
- Open Steam.
- On the left panel find Stray and Right–Click on it.

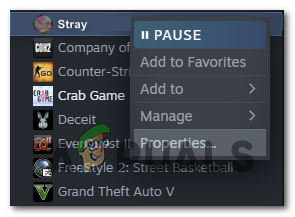
Verifying game file integrity of stray - Click on Properties.

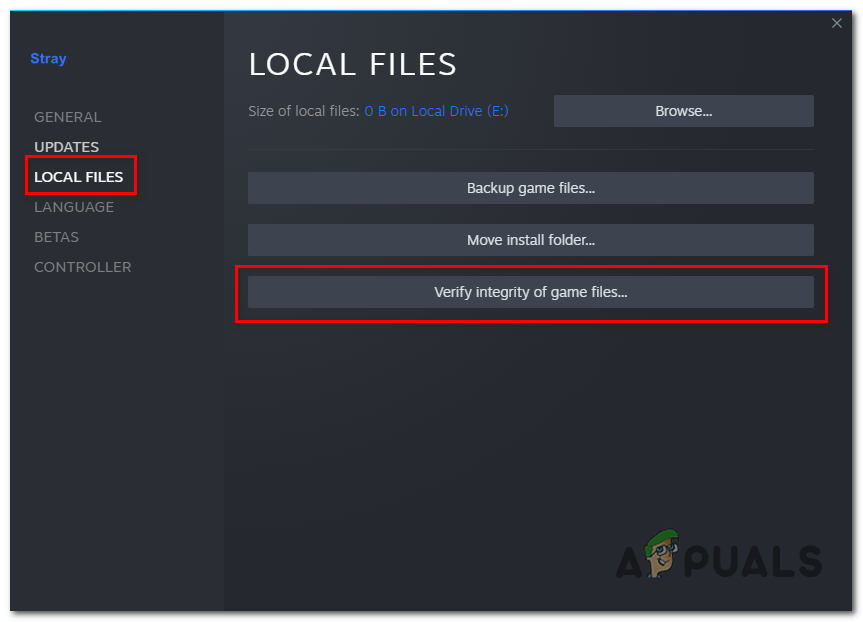
verifying game file integrity - In the new box that opened Click on Local files.
- Tap on Verify game file integrity.

verifying game file integrity - Wait for a while till the steam finishes processing and validates the process.
Once done, try launching the game if the issue persists continue to the next step.
2. Install Microsoft Visual C++ redistributables.
Visual C++ redistributables is a runtime library and is a necessary component for software and games created in a visual studio environment. Before installing C++ redistributables we’ll check if we even need to do so or not
2.1 Check availability of Visual C++ redistributables
To check if visual C++ redistributables are available on your computer or not follow these steps:
- Press Windows + R to open the Run Dialog box.
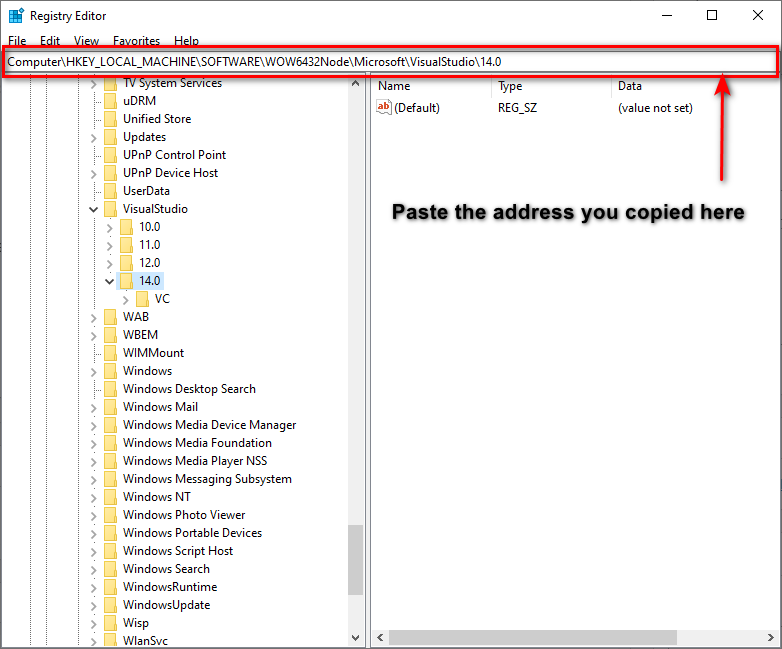
- Type Regedit to open the registry editor.
- Paste in the following address in the Address bar.
ComputerHKEY_LOCAL_MACHINESOFTWAREWOW6432NodeMicrosoftVisualStudio
- Once Pasted, Hit the enter key.

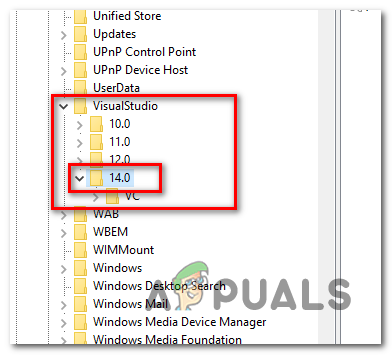
Confirming visual C++ availability on your computer - If you find a folder with the name 14.0 skip this method if you do not proceed to the heading 2.0 to learn how to install the latest Visual C++ redistributables. The 14.0 folder contains the latest visual C++ redistributables.

Confirming visual C++ availability on your computer
2.2 Install Visual C++ Redistributables.
Once you have confirmed that you do not have the latest Microsoft Visual C++ redistributables on your computer, Follow these straightforward steps to Download and install Visual C++ redistributables:
- Click here to Visit the Microsoft Visual C++ redistributables download page.
- Once on the page, Scroll down and download both the x86 and x64 versions.

downloading and installing visual c++ redistributables. - Install by clicking on the file you just downloaded.

Once installed, Restart your PC and try launching stray. If the issue persists continue to the next step.
3. Clean boot your PC
A clean boot is a method of starting your PC with the least possible services being active. This will allow us to identify if the issue we are facing is due to intrusion from background applications. Follow these steps to clean boot your PC:
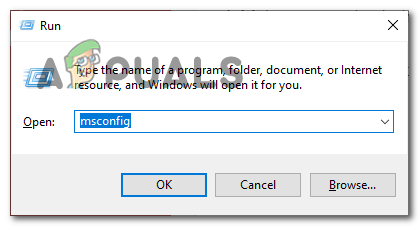
- Tap on Windows + R key simultaneously to open the run dialog box.
- Type in msconfig in the run dialog box’s search box.

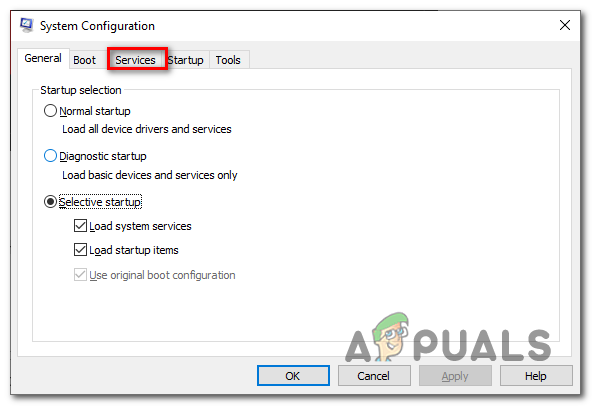
clean booting PC - On the menu bar select services by clicking on it.

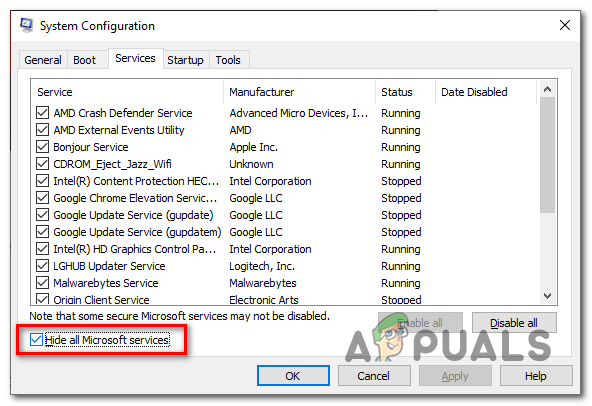
clean booting PC - Make sure to check the box that says Hide all Microsoft services.
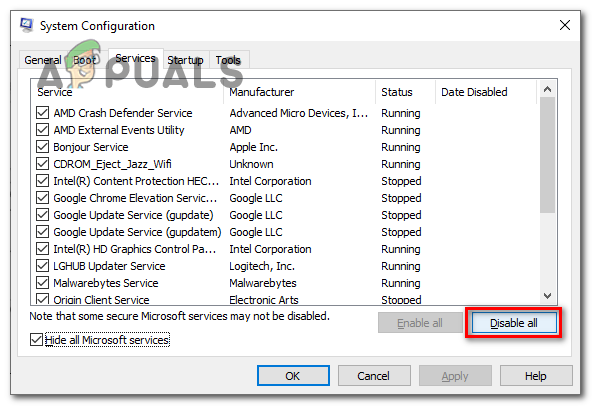
clean booting PC - Click on Disable all.
clean booting PC - Hit apply and click Ok.
- Restart your PC.
Once your computer has restarted, it would function normally. Start steam and try launching stray, if the issue presumes continue to the next method.
4. Reinstall Display Drivers
Display driver updates are necessary when playing newly launched games as they might be graphically demanding and it is advised to always keep your display drivers updated. Follow these steps to perform a clean installation of display drivers.
4.1 Uninstall existing Display drivers
We’ll be taking an advanced approach that involves completely uninstalling existing display drivers using a third-party software since the normal uninstall feature that comes equipped with your graphic card’s manufactures software always leaves corrupt registry entries and residual files which might slow your PC down in future. Follow these steps to uninstall existing Display drivers:
- Download a Display Driver Uninstaller (DDU) by clicking here.
- Scroll down until you see the download feature, and click on any link to download.
- Once Downloaded extract the .zip to a new folder.
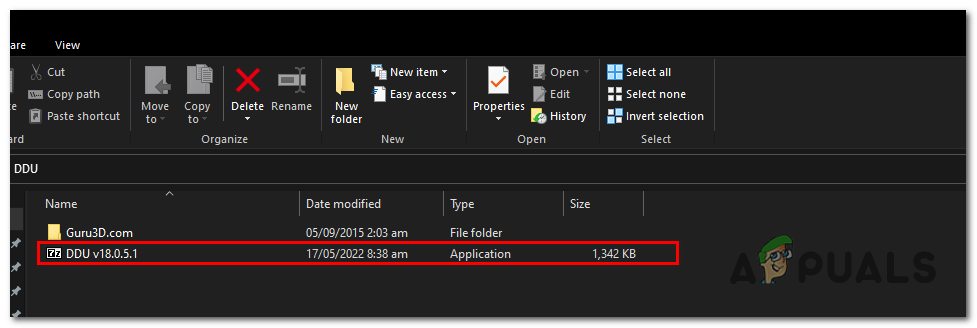
- Open the folder that contains extracted .zip contents and click on the highlighted application (as shown in the image)

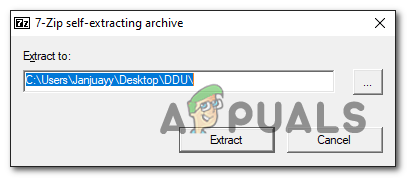
Installing Display driver uninstaller - In the popup box that just opened, click on extract.

Installing Display driver uninstaller - Open the folder that it just created and click on the Display Driver Uninstaller application file.
- Close the popup box it just opened by clicking on the close button in the bottom right.
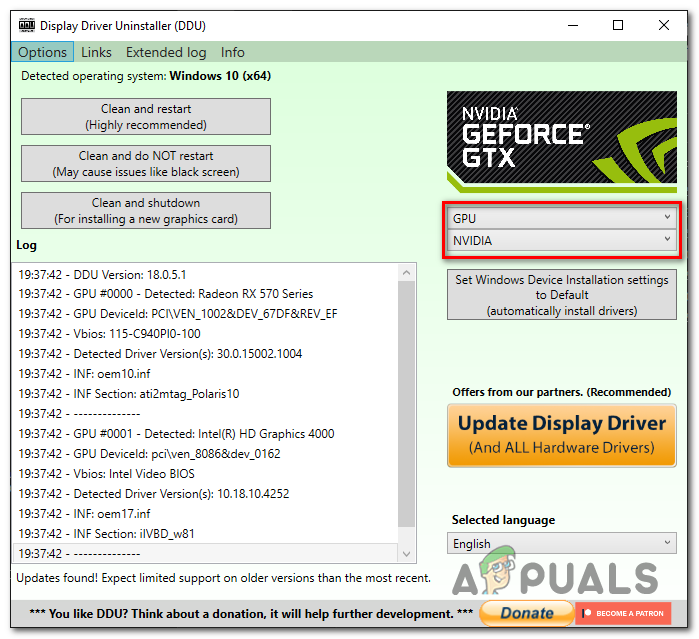
- Select your GPU Vendor Display driver uninstaller on the right panel, in my case it is nvidia.

Installing Display driver uninstaller - Now Click on the Clean and restart button.
4.2 Download and Install Display drivers
To download and install the latest version of graphics drivers available for your graphic card visit your graphic card manufacturer’s website.
- Click here to Download and Install Graphics drivers here for AMD graphics cards.
- Click here to Download and Install Graphics drivers here for Nvidia graphics cards.
Once You have downloaded and installed fresh graphics card drivers, it is recommended to restart. Once restarted try relaunching stray and if the issue persists continue to the next step.
5. Disable Overlay applications
Players of the stray have reported affective outcomes by disabling applications that provide overlay features such as Discord. Discord here is used as an example, here is how to disable the discord overlay.
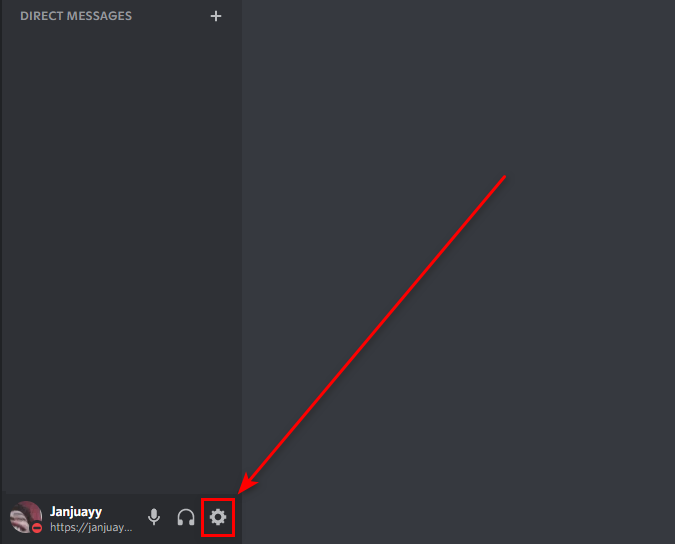
- Open Discord.
- On the bottom-right click on the settings icon.

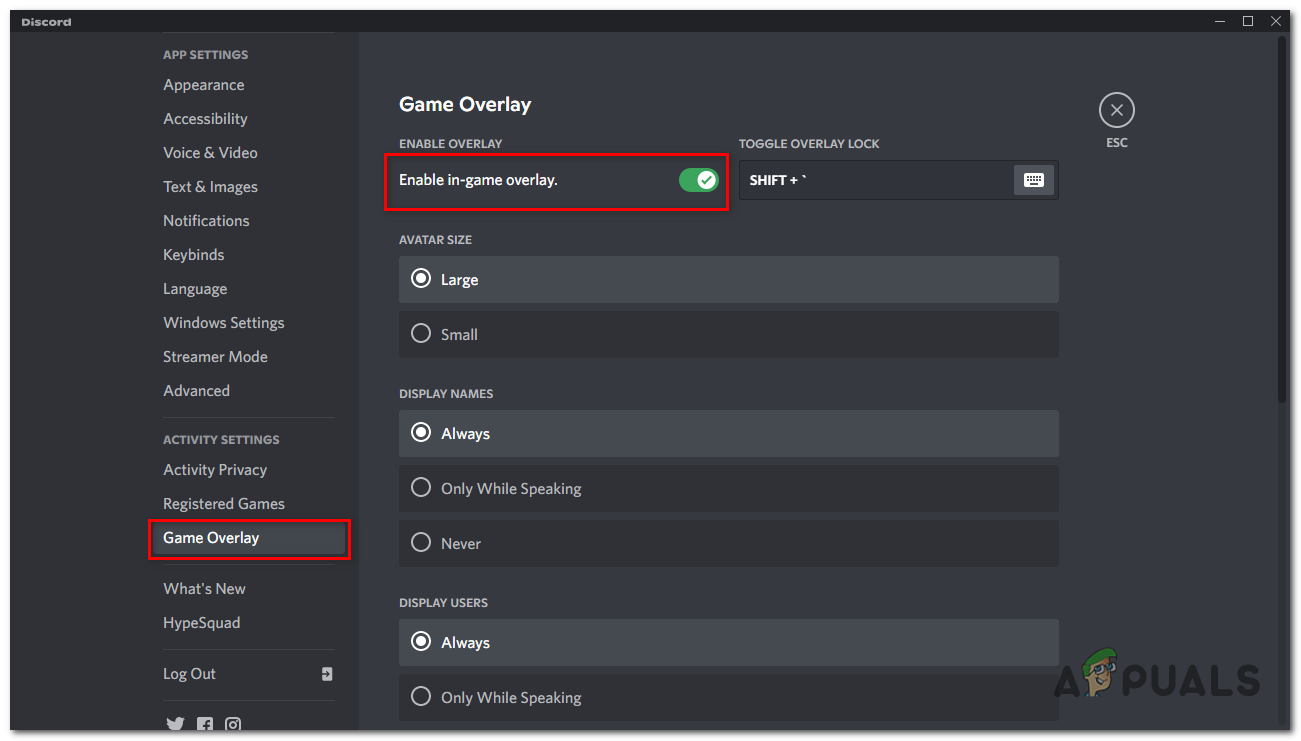
disabling discord overlay. - Scroll down till you see the Game overlay button and click on it.
- Toggle the Enable in-game overlay switch to off.

disabling discord overlay.
Once done, try launching stray once again if the issue persists continue to the next step.
6. Update windows
There might be an issue with your current windows version, updating is easy and is recommended by Microsoft as new updates usually fix bugs and errors found in previous versions. Follow these really easy steps to update your windows to the latest version.
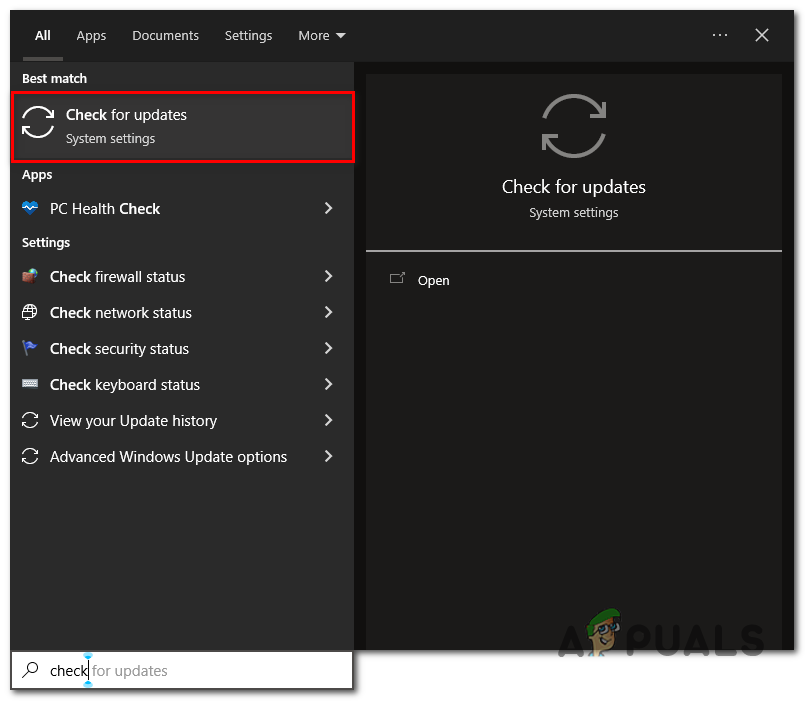
- Tap the Windows key on your keyboard.
- In the start menu search bar, type Check for Updates.

updating windows - Click on Check for updates

updating windows - Windows will automatically install any updates if available.
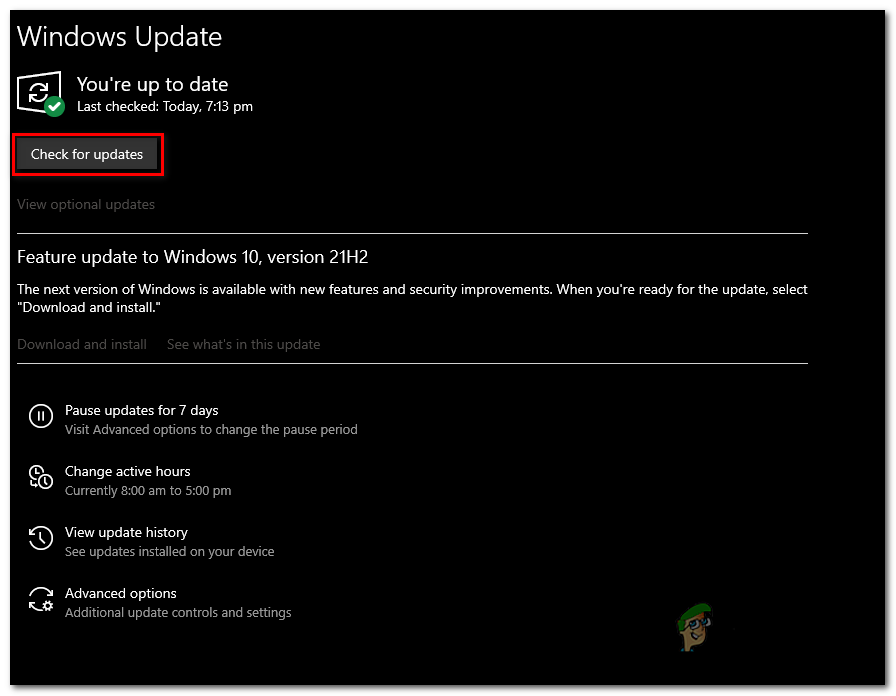
Once updated, retry launching if the issue persists continue to the final method.
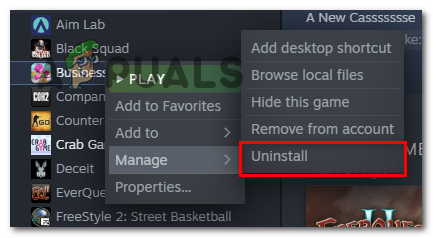
7. Reinstall Stray
If none of the methods mentioned above hasn’t worked for you, it is best to reinstall stray. To reinstall stray follow these steps:
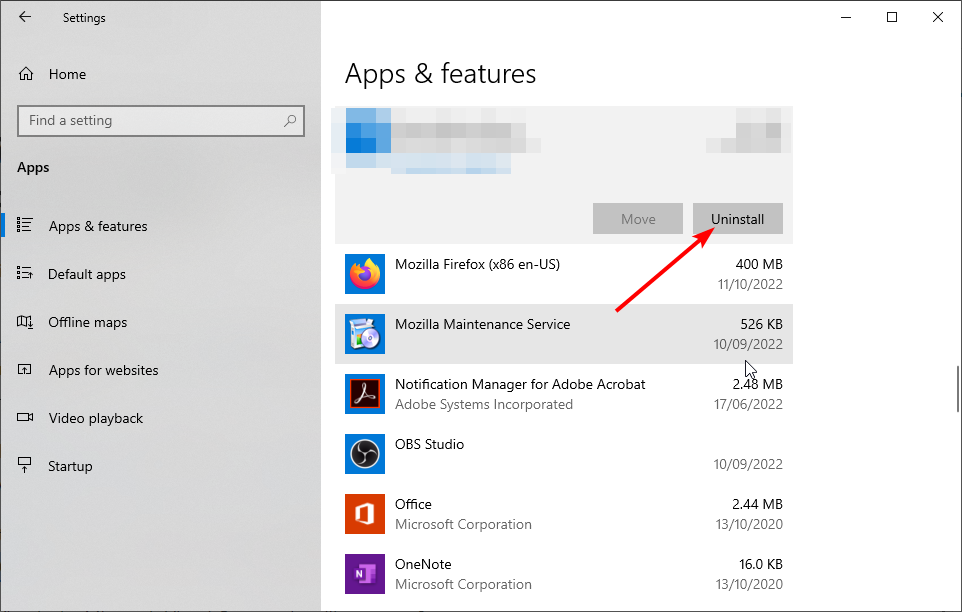
- Open Steam client.
- Right-click on stray and hover onto Manage.
- Click on the Uninstall button.

Uninstalling stray - Once uninstalled, Restart your computer for effective uninstalltion.
- After the restart, open the steam client and install stray.
This should fix and your game should launch just fine.

Dawood Janjua
Dawood Janjua is a highly skilled technology enthusiast with a wealth of knowledge in Windows troubleshooting and gaming. He holds a CCNA certification and has a proven track record of providing exceptional support to customers. While currently working as an author, Dawood aspires to obtain the prestigious CCIE certification in the future to expand his technical expertise and provide regional-level support. With his passion for gaming and expertise in technology, Dawood is committed to sharing his knowledge with the community to help others improve their skills and knowledge in the field.
Go to Lutris
r/Lutris
r/Lutris
Open source gaming platform for Linux.
Github Repository: https://github.com/lutris/lutris
Members
Online
•
by
fuccintendo
Game needs microsoft visual c++ runtime
Even after installing several versions of vcrun game named Stray says that there is no microsoft visual c++ runtime
what should i do
Find out how to perform a clean boot and more to solve this error
by Ivan Jenic
Passionate about all elements related to Windows and combined with his innate curiosity, Ivan has delved deep into understanding this operating system, with a specialization in drivers and… read more
Updated on November 16, 2022
Reviewed by
Vlad Turiceanu

Passionate about technology, Windows, and everything that has a power button, he spent most of his time developing new skills and learning more about the tech world. Coming… read more
- The Microsoft Visual C++ runtime library error is usually caused by the absence of Runtime components of Visual C++.
- Removing the graphics card driver and using drivers updated to the latest version may help.
- Perform a clean boot, as third-party and startup apps can interfere with the OS.
XINSTALL BY CLICKING THE DOWNLOAD FILE
This software will repair common computer errors, protect you from file loss, malware, hardware failure and optimize your PC for maximum performance. Fix PC issues and remove viruses now in 3 easy steps:
- Download Restoro PC Repair Tool that comes with Patented Technologies (patent available here).
- Click Start Scan to find Windows issues that could be causing PC problems.
- Click Repair All to fix issues affecting your computer’s security and performance
- Restoro has been downloaded by 0 readers this month.
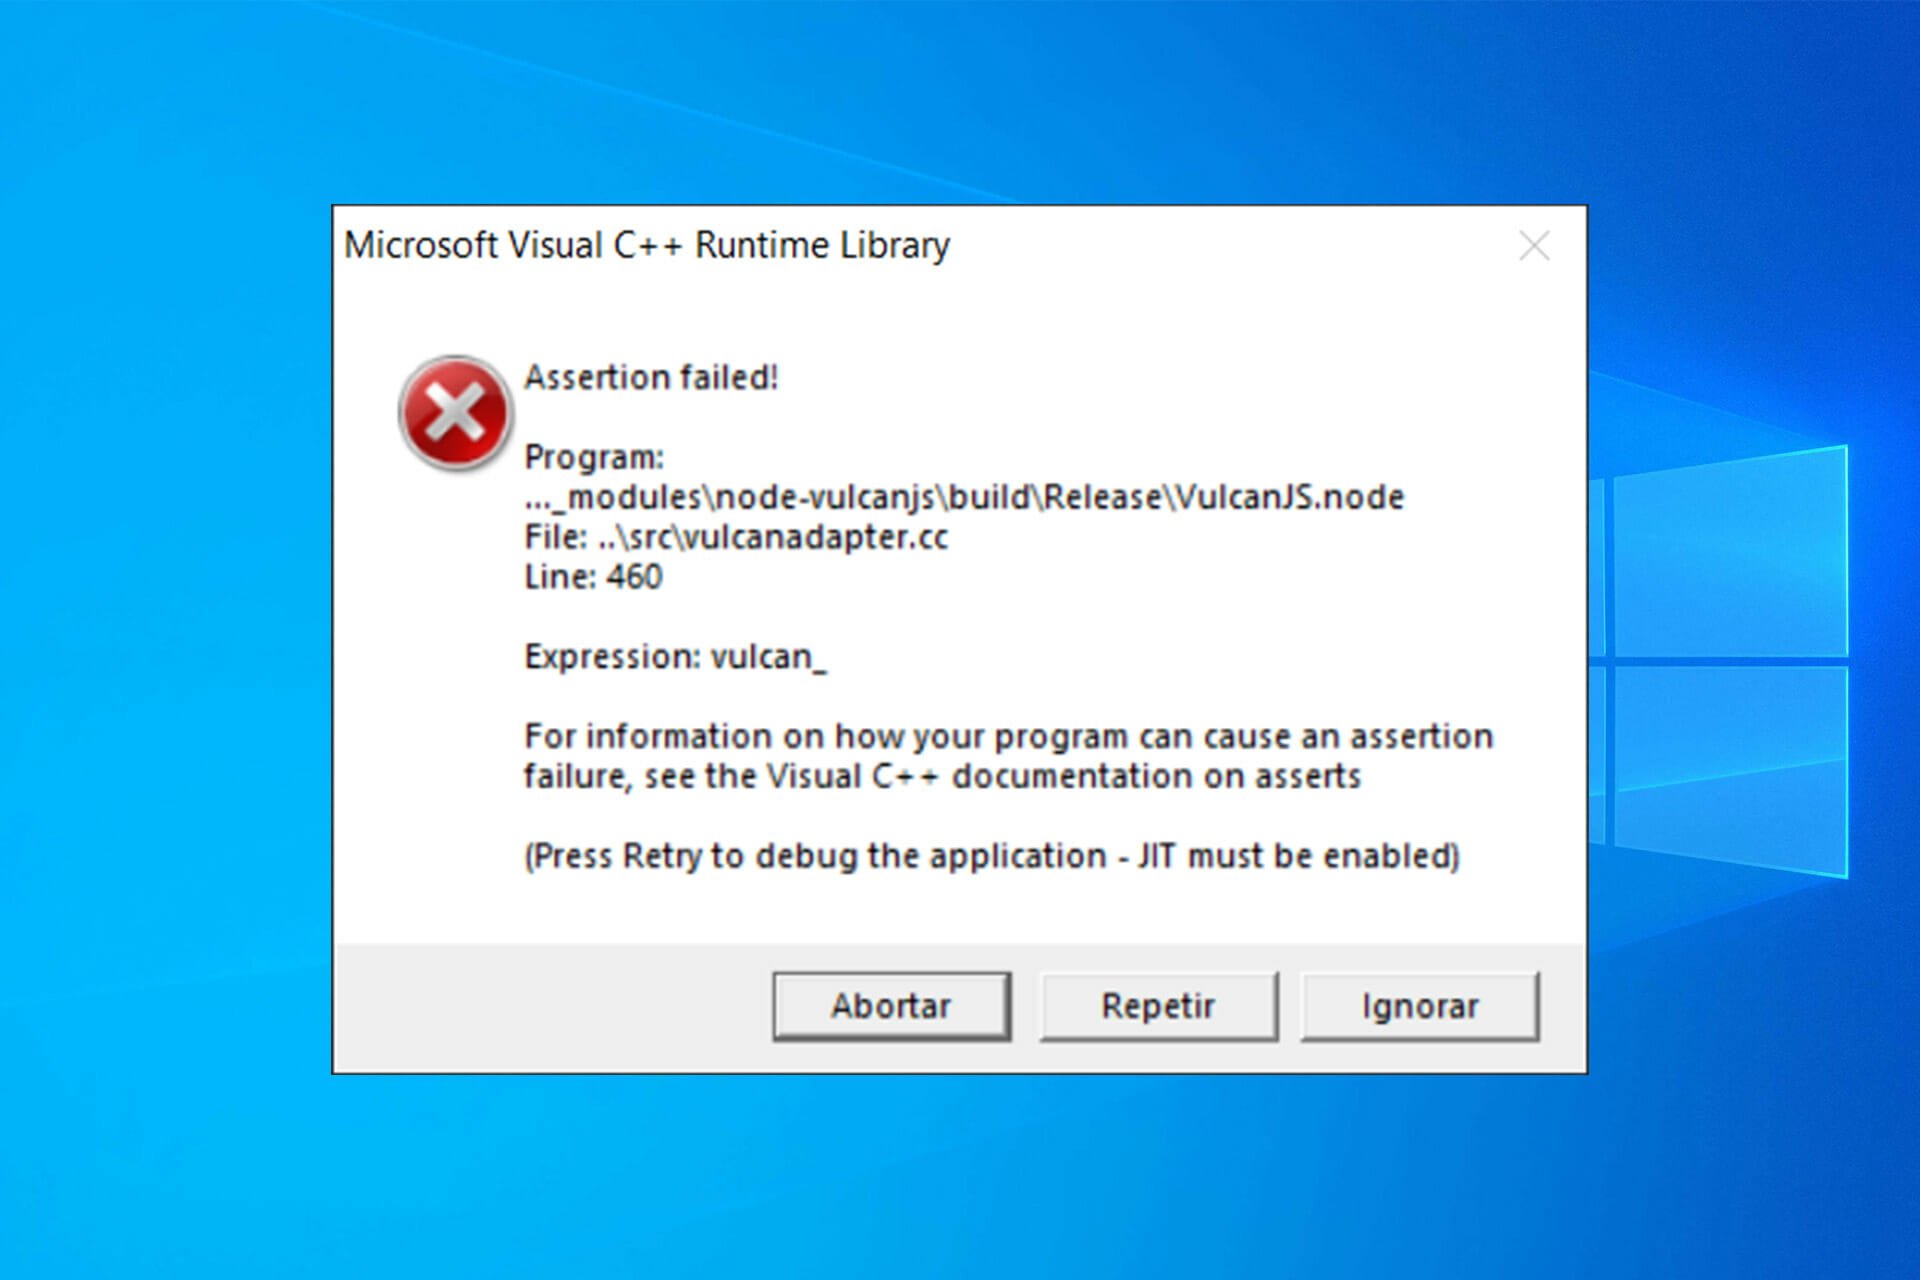
After updating your PC to the latest version, you expect everything should work perfectly. However, users are complaining that they are prompted by a Microsoft Visual C++ runtime error.
This message reads: This application has requested the runtime to terminate it in an unusual way. Just like with the Microsoft Visual C++ error 0x80070666 error, you can fix this issue with our solutions.
Still, you won’t need to worry because we have a fix to the Visual C++ runtime library error in Windows 10 and you can continue your normal use of the operating system afterward.
What is the Microsoft Visual C++ runtime library error?
There’s also a chance that the Visual C++ feature is broken or corrupt. In this case, we recommend a third-party tool to automatically download all the outdated drivers on your PC.
What is a C++ runtime error?
A program is said to have a runtime error if its syntax is proper yet it has a bug that can only be found while the program is being executed.
This error could be brought on by the absence of Runtime components of Visual C++ Libraries, or it might be the result of a fault with the software.
What causes Microsoft Visual C++ runtime error?
Visual C++ is a basic component of many applications, and if it gets damaged, you’ll get various error messages on your PC.
Many users reported that they Cannot install Visual C++ 2015, and that can negatively impact all applications that require this component.
These issues affect every version of Windows, and many reported Runtime error in Windows 11 as well. Luckily, there are ways to fix these problems, and this guide will show you how to do that.
The Microsoft Visual C++ runtime error can be problematic, and speaking of errors, users reported the following issues as well:
- Microsoft Visual C++ runtime error r6025, r6034, r6016, r6030, r6002 – When this error comes with an error code, it can be due to corrupt files.
- Microsoft Visual C++ runtime error in explorer.exe, qbw32.exe, atibtmon.exe, csrss.exe, nvvsvc.exe: This is caused by a problem with a particular application that depends on the Visual C++ feature. You can fix it by reinstalling the application.
- A Microsoft Visual C++ runtime error in Excel, Internet Explorer, Skype, Steam, Java: In this case also, the error occurs due to an application that depends on one of the Redistributables.
- Microsoft Visual C++ runtime error on startup: This is usually caused by your startup applications.
- Microsoft Visual C++ runtime error in Nvidia: This version of the error is caused by outdated or faulty drivers.
- The Microsoft Visual C++ setup failed, not installing: Several users reported that they can’t install Visual C++. According to them, the setup fails to complete on their PC.
- Microsoft Visual C++ unspecified error: This can be a big problem, but you should be able to fix it using one of our solutions.
- Microsoft Visual C++ keeps crashing: This can also be caused by broken or missing files. You need to reinstall Visual C++ Redistributables to fix it.
- Microsoft Visual C++ runtime error assertion failed: This problem is usually down to the app that gives the error while trying to run it.
- A Microsoft Visual C++ runtime error abnormal program termination: If you encounter this issue on startup, it might be down to one of the startup programs.
- Microsoft Visual C++ runtime error stray: This is an error that occurs if you are missing one of the Redistributables on your PC.
- Mechwarrior 5 Microsoft Visual C++ runtime error: This is another error that occurs if one of the runtime redistributable is missing on your PC.
- Microsoft Visual C++ runtime error games: Sometimes, the error occurs in games because of an outdated or broken Microsoft Visual C++ runtime version.
Can we uninstall Microsoft Visual C++?
Yes, you can uninstall some of the Microsoft Visual C++ Redistributables but it is not advisable. This is because there are software and programs on your PC that rely on one or more of them.
So, when you uninstall any one of the Redistributables, the software that relies on it stops working.
How do I fix the Microsoft Visual C++ runtime library error on Windows 10?
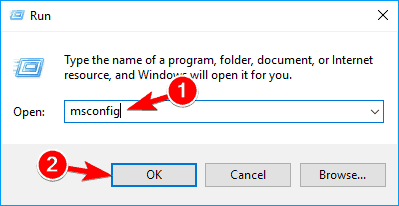
1. Perform a clean boot
- Press the Windows key + R, type msconfig, and click OK to run it.

- Click the Services tab in the top and check the box next to Hide all Microsoft services.
- Now, click the Disable all button.

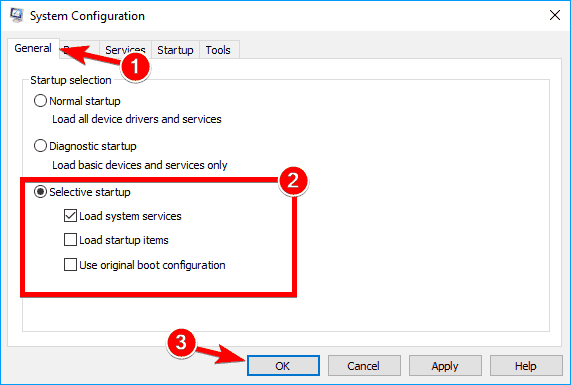
- Select the General tab at the top.
- From here, tick the Selective startup box and uncheck the box next to Load startup items.
- Finally, click Apply and OK to save changes. and restart your system.
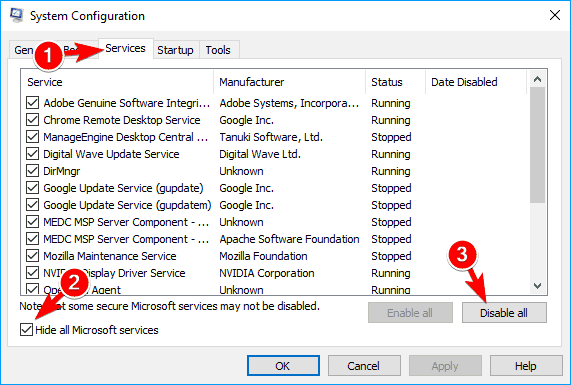
Sometimes, third-party and startup applications can interfere with your system and cause Microsoft Visual C++ runtime errors to appear. To fix this problem, you need to perform a clean boot.
If you do not get the error anymore you will have to do this step, but this time disable the applications one by one and see exactly which of them is causing this error to appear.
Your graphics card driver can often cause Microsoft Visual C++ runtime error, and to fix it you need to reinstall your graphics card driver.
If you do not then it means that you need to update your graphics card driver to the latest version that is compatible with your Windows 10 system version.
To see how to update your drivers, we advise you to check out our detailed guide on how to update your graphics card driver.
Another solution is to automatically update your graphic card drivers using a dedicated tool that keeps you away from harming your PC by updating or installing the wrong drivers.
With DriverFix, you can update all of your drivers quickly and safely with only a few clicks.

DriverFix
Maintain all your drivers updated and automatically boost your device performance.
3. Reinstall Windows 10
- Restart your PC several times during the boot and select Troubleshoot > Reset this PC.
- Choose whether to keep your personal files or Remove everything.
- Insert Windows 10 installation media, if you are asked to do so.
- Select the installed version of Windows and choose Only the drive where Windows is installed > Just remove my files.
- Now, click the Reset button.
- Finally, follow the instructions on the screen to complete the reset.
If the problem still persists, your only option might be to reinstall Windows. Before you do that, try to access your files and back them up. To reinstall Windows 10, you’ll need a Windows installation media.
To create one, you’ll need to use Media Creation Tool on a working PC. After creating an installation media, follow the above steps.
After you successfully reinstalled the operating system, you will have to make sure that you do not update your PC until Microsoft fixes the issues with Visual C++ runtime error.
4. Reinstall Microsoft Visual C++ Redistributables
To fix the Microsoft Visual C++ runtime error, you can learn the simple but efficient method to reinstall your Visual C++ Redistributables. To do that, follow the steps detailed below.
Some PC issues are hard to tackle, especially when it comes to corrupted repositories or missing Windows files. If you are having troubles fixing an error, your system may be partially broken.
We recommend installing Restoro, a tool that will scan your machine and identify what the fault is.
Click here to download and start repairing.
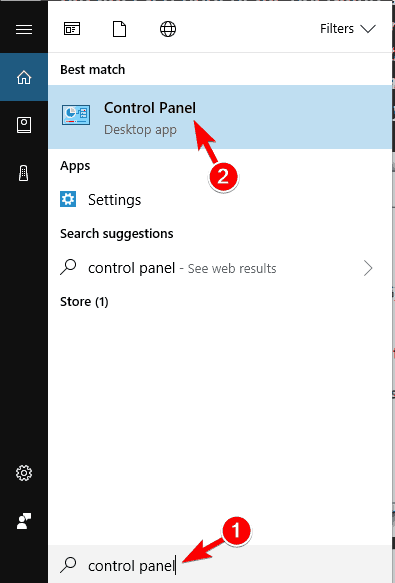
1. Press the Windows key + S, enter Control panel and select Control Panel from the list.
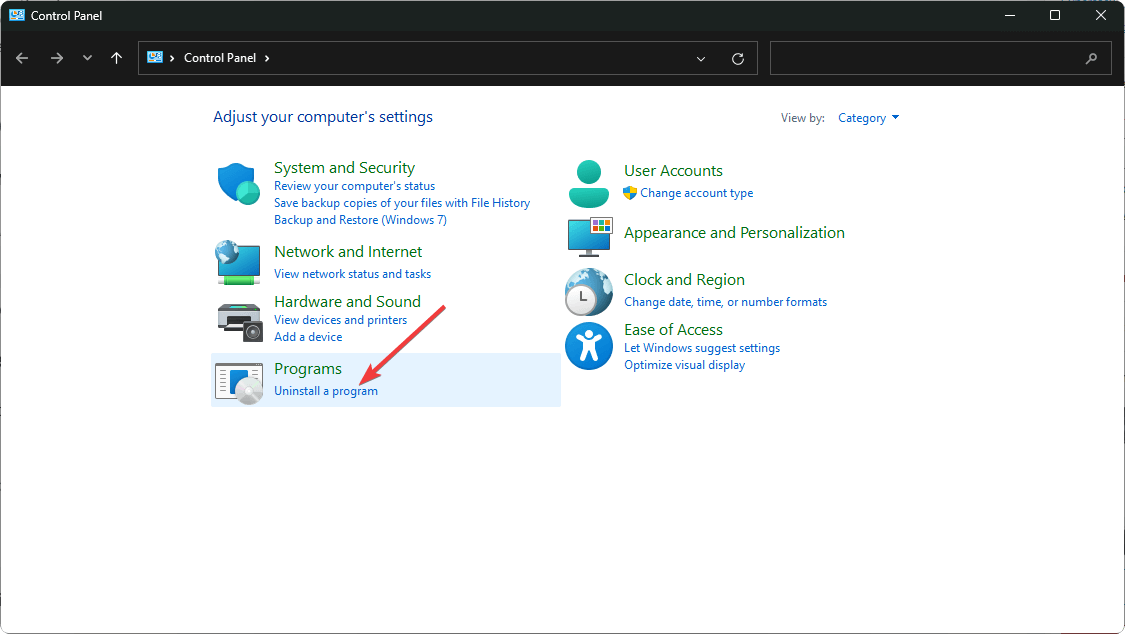
2. Choose Uninstall a program under the Programs option.
3. Locate Microsoft Visual C++ Redistributable, and double-click it to remove.
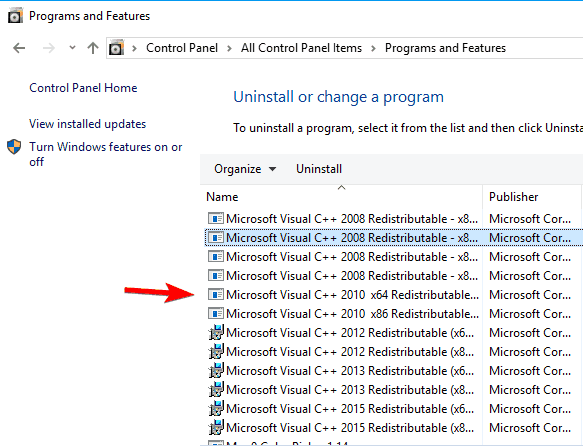
4. Finally, click the Yes button when prompted to complete the process.
Once you remove all Redistributables, you have to download them from Microsoft’s website. Keep in mind that you’ll have to install all available Redistributables in order to fix this problem.
Instead of reinstalling the Redistributables, you can also repair your installation by following the steps below:
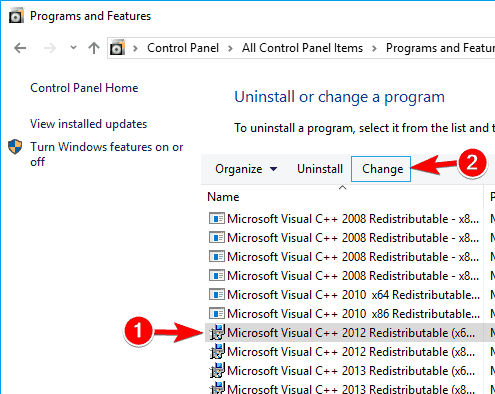
1. Repeat Steps 1 and 2 from above, and click on the Redistributable to repair.
2. Click the Change button at the top.
3. Click on the Repair button in the setup windows and follow the onscreen instructions to complete the process.
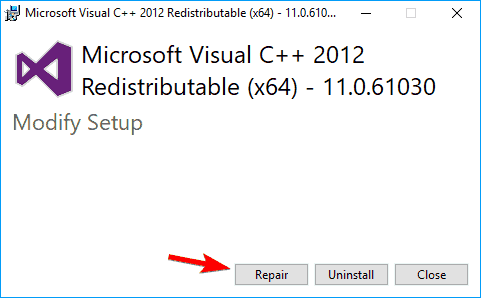
Keep in mind that not all Redistributables support repair. If the Change option from step 2 isn’t available, your only option is to remove the selected Redistributable.
This might be a bit tedious solution, but many users reported that reinstalling Visual C++ Redistributables fixed the problem for them, so be sure to try it.
- How to fix the Activation context generation failed error
- Fix side-by-side configuration error in Windows 10/11
- Fix: Side by side configuration is incorrect [Windows 10/11]
- Full Fix: The file or directory is corrupted and unreadable
5. Create a new user account
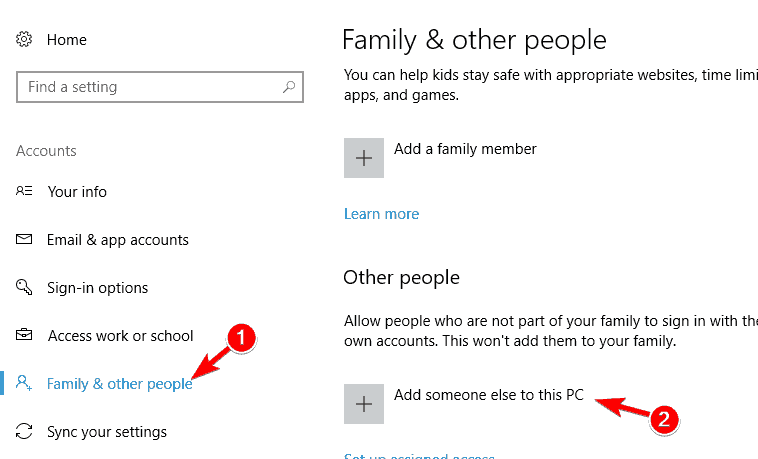
- Press the Windows key + I to open the Settings app, and select Accounts.

- Click Family & other people in the left pane and select Add someone else to this PC.

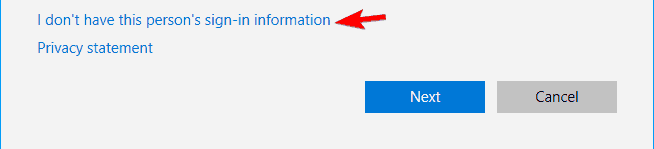
- Click on I don’t have this person’s sign-in information.

- Now click on Add a user without a Microsoft account.

- Enter the desired name for a new account and click on Next.


If you’re still getting Microsoft Visual C++ runtime library error, you might be able to fix the problem simply by creating a new user account.
After creating a new account, you need to sign out from your current account and switch to a new one. If the problem doesn’t appear, it means that your old account is corrupted.
To fix the problem, move your personal files to a new account and use it instead of your old account.
6. Turn off the Compatibility mode
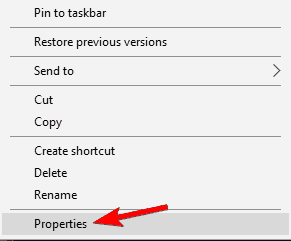
- Right-click the app causing the problem and choose Properties from the menu.

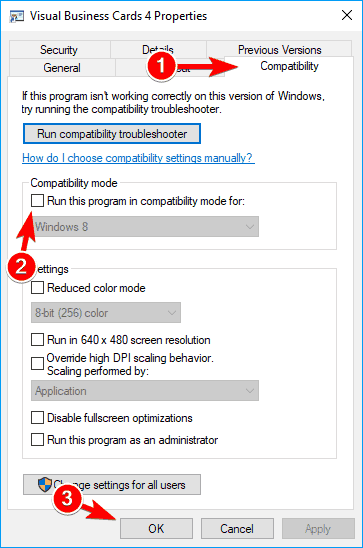
- Go to the Compatibility tab and uncheck Run this program in compatibility mode for.
- Now, click on Apply and OK to save changes.

Compatibility mode is a useful feature that allows you to run old applications on your PC. However, this feature can sometimes cause Microsoft Visual C++ runtime error to appear.
To fix the problem, you need to disable Compatibility Mode by following the above steps. After doing that, try to run the application again and the error message shouldn’t appear.
7. Reinstall the problematic application
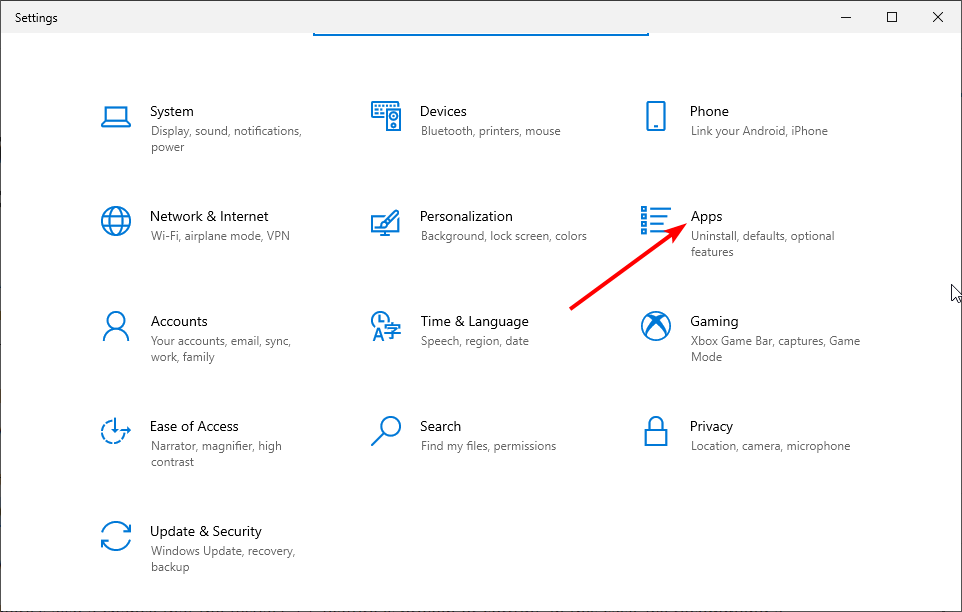
- Press the Windows key + I and select Apps.

- Click on the app to remove, select Uninstall, and follow the onscreen instruction to complete the process.
- Finally, download and install the app from official sources.
If you’re getting the Microsoft Visual C++ error while trying to run a specific app, you might want to try reinstalling that application. Sometimes your files can get corrupted, and that can cause this error to appear.
You are done, the steps above will fix your Microsoft Visual C++ runtime library error in the shortest time possible.
For other error that crashes important software on your PC, check out our comprehensive guide to fix the runtime error r6025 in Visual C++.
If you encounter any other troubles along the way, you can write us below in the comments section of the page and we will help you further with this issue.
Also, please leave there any other suggestions or questions you may have.
Still having issues? Fix them with this tool:
SPONSORED
If the advices above haven’t solved your issue, your PC may experience deeper Windows problems. We recommend downloading this PC Repair tool (rated Great on TrustPilot.com) to easily address them. After installation, simply click the Start Scan button and then press on Repair All.
![]()