
hp-concentra-wrapper-portlet
![]()
Actions
This document provides error-code troubleshooting information

Legal information
Copyright and License
© Copyright 2022 HP Development Company, L.P.
Reproduction, adaptation, or translation without prior written permission is prohibited, except as allowed under the copyright
laws.
The information contained herein is subject to change without notice.
The only warranties for HP products and services are set forth in the express warranty statements accompanying such products
and services. Nothing herein should be construed as constituting an additional warranty. HP shall not be liable for technical
or editorial errors or omissions contained herein.
Edition 4, 11/2022
Trademark Credits
Adobe®, Adobe Photoshop®, Acrobat®, and PostScript® are trademarks of Adobe Systems Incorporated.
Apple and the Apple logo are trademarks of Apple Inc., registered in the U.S. and other countries.
macOS is a trademark of Apple Inc., registered in the U.S. and other countries.
AirPrint is a trademark of Apple Inc., registered in the U.S. and other countries.
Google™ is a trademark of Google Inc.
Microsoft®, Windows®, and Windows Server® are U.S. registered trademarks of Microsoft Corporation.
UNIX® is a registered trademark of The Open Group.
Document last updated
The following is the last time this document was updated:
Last update: May 11, 2022
About this document
This document provides error-code troubleshooting information.
Important:
Procedures and part numbers change. For current information, use the browser-based format.
Verify PDF is the most current before use. PDF part numbers must be verified with web-based error code information or parts
look-up before parts are ordered.
Choose the format that best meets your needs.
|
Format |
Document title example |
Recommended use |
|---|---|---|
|
Web-based |
Go to: Product Detail page > Error Code Look-up |
|
|
Web-Base |
Go To: WISE default Search page > Enter [Product] and error code |
|
|
|
[Product] — Control Panel Message Document (CPMD) PDF |
Note: Always refer to the printer service manual for removal and replacement procedures Note: For current information, use the Web-based format. |
Control-panel message types
The control-panel messages and event code entries indicate the current printer status or situations that might require action.
Note:
Event log errors do not appear on the control-panel display. Open the event log to view or print the event log errors.
A control-panel message displays temporarily and might require you (or the applicable user) to acknowledge the message by
touching the OK button to resume printing or by touching the Stop button to cancel the job.
With certain messages, the job might not finish printing, or the print quality might be affected. If the message is related
to printing and the auto-continue feature is on, the printer will attempt to resume printing after the message has appeared
for 10 seconds without acknowledgement.
For some messages, restarting the printer might fix the problem. If a critical error persists, the printer might require service.
Error-code and control-panel-message troubleshooting overview
This section provides information on error codes and searching for information.
Error codes
Error codes and control-panel messages display on the printer control panel to indicate the current printer status or situations
that might require action. Error codes are numerical, or alphanumerical, and have a set structure with six characters (example:
13.WX.YZ).
-
The first two characters are numeric and represent the system component that is causing the error. For example, in error code
10.22.15, 10 = Supplies for HP LaserJets. -
The remaining four characters (W, X, Y, and Z values) further define the error.
HP LaserJet and HP PageWide Enterprise error codes are documented in the control panel message document (CPMD) for each printer.
The CPMD is a comprehensive list of error codes, diagnostic and troubleshooting steps to clear or resolve the error, and other
helpful information such as service mode pins and part numbers.
The CPMD is continually updated and republished with the latest information for the following error codes.
|
Error code |
System Component |
System Error Description |
|---|---|---|
|
10.WX.YZ |
Supplies (LaserJet) |
Supply error or supply memory error. |
|
11.WX.YZ |
Real-time clock |
Internal error with the clock on the formatter. |
|
13.WX.YZ |
Jam (LaserJet) |
Paper jam or open door jam error. |
|
15.WX.YZ |
Jam (PageWide) |
Paper jam or open door jam error. |
|
17.WX.YZ |
Supplies (PageWide) |
Supply error or supply memory error. |
|
20.WX.YZ |
Printer memory |
Insufficient memory or buffering error. |
|
21.WX.YZ |
Page |
Page complexity causing a decompression error when trying to process job. |
|
30.WX.YZ |
Scanner |
Flatbed scanner error occurring inside the unit. |
|
31.WX.YZ |
Document feeder |
Document feeder, scanner, or jam error. |
|
32.WX.YZ |
Backup, restore, or reset |
Backup, restore, or reset notification or error. |
|
33.WX.YZ |
Security |
Backup, Disk, EFI BIOS, Firmware integrity (SureStart), or Trusted Platform Module (TPM) notification or error. |
|
40.WX.YZ |
Input/Output (I/O) |
Partition manager, secure erase, or USB accessory error. |
|
41.WX.YZ |
Fuser, Laser scanner, or Paper path |
Miscellaneous error including general and misprint or mismatch errors typically involving (but not limited to) the fuser, |
|
42.WX.YZ |
Firmware |
Firmware failure involving the Event Log, Shell, System Manager, or other component. |
|
44.WX.YZ |
Firmware |
Firmware failure involving a digital sending component. |
|
45.WX.YZ |
OXPd/Web Kit (PageWide) |
Informational notifications involving the OXPd Web Kit (communications log). |
|
46.WX.YZ |
Engine (LaserJet) |
Engine communication error. |
|
47.WX.YZ |
Firmware |
Job parser or printer calibration error. |
|
48.WX.YZ |
Firmware |
PJA job accounting, job management, or job pipeline error. |
|
49.WX.YZ |
Firmware |
Firmware communication error. |
|
50.WX.YZ |
Fuser (LaserJet) |
Fuser error. |
|
51.WX.YZ |
Laser scanner (LaserJet) |
Laser scanner beam error. |
|
52.WX.YZ |
Laser scanner (LaserJet) |
Laser scanner startup error. |
|
54.WX.YZ |
Sensor |
Sensor error (not jam related). |
|
55.WX.YZ |
DC controller (LaserJet) |
DC controller communication error. |
|
56.WX.YZ |
Paper handling (LaserJet) |
Paper input/output or accessory error. |
|
57.WX.YZ |
Fan |
Fan error. |
|
58.WX.YZ |
Sensor |
Engine sensor failure. |
|
59.WX.YZ |
Motor (LaserJet) |
Motor error. |
|
60.WX.YZ |
Tray motor error (LaserJet) |
Tray lifting or pick up error. |
|
61.WX.YZ |
Engine (PageWide) |
Print engine error with the 8–bit data package. |
|
62.WX.YZ |
System (LaserJet) Print bar (PageWide) |
LaserJet internal system error. PageWide print system error. |
|
63.WX.YZ |
Engine (LaserJet) |
General engine error (electrical, communication, etc.). |
|
65.WX.YZ |
Connector |
Output accessory connection error. |
|
66.WX.YZ |
Output accessory |
Output accessory error. |
|
67.WX.YZ |
Input accessory |
Input accessory connection error |
|
69.WX.YZ |
Duplexer |
Duplexer error. |
|
70.WX.YZ |
DC controller (LaserJet) |
DC controller firmware error. |
|
80.WX.YZ |
Managed device |
Embedded Jetdirect error. |
|
81.WX.YZ |
Near Field Communication (NFC) |
Wireless, Bluetooth or internal EIO error. |
|
82.WX.YZ |
Memory (hard disk, EMMC, etc.) |
Disk hardware error. |
|
90.WX.YZ |
Internal diagnostics |
Internal test of systems (i.e. disk, CPB, display) or interconnection error. |
|
98.WX.YZ |
Hard disk |
Hard disk partition error. |
|
99.WX.YZ |
Firmware installer |
Remote Firmware Upgrade (RFU), firmware install (engine or accessory), or disk error. |
How to search for printer documentation
The CPMD, error codes, and other support documentation for each printer is found on the internal HP portals.
These portals are on WISE for Channel (please see Accessing WISE for HP channel partners (HP Partner Portal) below for instructions on how to navigate to the site) and WISE. WISE for Channel is available to HP channel partners and WISE is available to call agents, service technicians, and other
HP internal users. The level of detail available will depend on your access credentials. To learn how to find support content
in WISE, watch the video here.
WISE — How to access and use
Learn how to access and use Web-based Interactive Search Engines (WISE) to locate available support information. WISE is a
repository of technical support documentation including service manuals, user guides, videos, and general support information.
Accessing WISE
Learn how to access Web-based Interactive Search Engines (WISE) if you are an HP channel partner or an internal HP user.
Accessing WISE for HP channel partners (HP Partner Portal)
Learn how to access WISE by accessing the HP Partner Portal if you are an HP Channel Partner.
Note:
If this is your first visit to the HP Partner Portal, you will be asked to create an account. Follow the setup directions
using your HP Partner credentials.
-
-
Select the Services & Support tab, and then select Technical Support.
-
Select Technical Documentation.
-
You will be taken to the WISE portal.
Play the video:

Accessing WISE for internal HP users
Using WISE to search for error codes
Learn how to use WISE to look up error codes.
Note:
The model used in the instructional videos is an example. The same steps apply to all printer models.
You will need the printer type (e.g. HP LaserJet), model number (e.g. M607), and bundle option (e.g. dn, dh, z).
Search for error codes using the lookup widget
Learn how to search for a specific error code using the WISE Error Code Lookup widget.
-
Select Products in the navigation bar of the WISE portal home page.
-
Using the type, model number and bundle option of the printer to be repaired, select HP Printers
> Type of Printer >
Model Group > Model Number >
Bundle Option >
Product Number, and then select Launch Product Detail Page. The PDP page will open.
-
Enter the error code in the widget in the Error Code Lookup area at the bottom-right of the screen and click the search icon or press the Enter button.
-
Select the desired topic from the search results.
Search for error codes from the WISE home page
Learn how to search for a specific error code from the WISE home page.
-
Enter the model number in the search field on the WISE home page. The search is predictive, and a drop-down menu will appear
with available selections.Note:
Selecting the series item from the drop-down list is recommended for the most accurate search return.
-
Enter the error code in the search field.
-
Select the desired topic from the search results.
Using WISE to access repair and replace videos for FRUs
Learn how to use WISE to access repair and replace videos for FRUs.
Note:
The model used in the instructional videos is an example. The same steps apply to all printer models.
You will need the printer type (e.g. HP LaserJet), model number (e.g. M607), and bundle option (e.g. dn, dh, z).
Search for a printer’s Product Detail Page (PDP)
Learn how to search WISE for product specific information. Quickly review the steps and then play the video.
-
Select Products in the navigation bar of the WISE portal home page.
-
Using the type, model number and bundle option of the printer to be repaired, select HP Printers > Type of Printer > Model Group > Model Number > Bundle Option > Product Number, and then select Launch Product Detail Page. The PDP page will open.
-
Select the link to Videos in the Other Content menu at the bottom-right of the screen.
-
Select the desired video from the list of videos.
Play the video:
Perform a model number search using the search function
Learn how to search WISE using the model number. Quickly review the steps and then play the video.
-
Enter the model number in the search field on the WISE home page. The search is predictive, and a drop-down menu will appear
with available selections.Note:
Selecting the series item from the drop-down list is recommended for the most accurate search return.
-
Click the search icon to the right.
-
To refine the search results, select the radio button labeled video in the upper-right portion of the screen.
Tip:
To refine video search results, append a part name to the model detail shown in the search bar. For example, adding the word
fuser to the detail in the search bar will return videos related to repair and replacement of the fuser.
Play the video:
Printer service information
Service pin for printer
Last update: May 11, 2022
Service mode PIN numbers:
Important:
To enter the Service Menu the technician will have to enter the PIN that is on the label on the cartridge tray. That PIN is
also used to access the EWS. The EWS PIN can be changed by the Admin but the Service PIN will always be the PIN printed on
the label.
-
HP LaserJet Pro M304, M305, M404, M405
-
HP LaserJet Pro MFP M329, M428, M429
Note:
When possible, always update the printer firmware to the latest available version at HP.com as part of the troubleshooting
performed for any of the following errors.
Numerical control panel messages
Use the following numerical error message troubleshooting to resolve your issue.
10.WX.YZ error messages
13.WX.YZ error messages
21.WX.YZ error messages
30.WX.YZ error messages
31.WX.YZ error messages
32.WX.YX error messages
33.WX.YZ error messages
44.WX.YZ error messages
50.WX.YZ error messages
51.WX.YZ, 52.WX.YZ error messages
53.WX.YZ error messages
54.WX.YZ error messages
55.WX.YZ error messages
56.WX.YZ error messages
57.WX.YZ error messages
58.WX.YZ error messages
59.WX.YZ error messages
60.WX.YZ error messages
10.00.00 Supply memory error
The toner cartridge experienced a memory error.
The printer is unable to read the toner cartridge data. The toner cartridge is present but defective.
-
10.00.00 Black toner cartridge
Recommended action for customers
Follow these troubleshooting steps in the order presented.
-
Open the front door and remove the toner cartridge causing the error.
-
Reinstall the toner cartridge.
-
Close the front door. If the message reappears, turn the printer off, and then on.
-
Verify if the cartridge is a genuine HP toner cartridge. To check the authenticity of your cartridges, go to hp.com/go/anticounterfeit or visit hp.com/go/ok and enter the serial number from the security label.
-
If the error persists, and it is a genuine HP toner cartridge, contact your HP-authorized service or support provider or contact
HP customer support for assistance in resolving the issue. -
If it is an aftermarket (non-hp) or re-manufactured toner cartridge, return the defective toner cartridge to the vendor where
purchased.Note:
Service or repairs that are required as a result of using unsupported supplies is not covered under HP warranty.
10.00.0z
Unable to authenticate toner cartridge.
The printer is unable to authenticate the toner cartridge. The toner cartridge is detected but cannot be authenticated.
When this error occurs, a question mark appears on the gas gauge of the supply or supplies with the error.
z = error and can be any number from 1-3 or 5-8.
Examples:
-
10.00.01, 10.00.02, 10.00.03, 10.00.05, 10.00.06, 10.00.07, 10.00.08: Black toner cartridge
Recommended action for customers
Follow these troubleshooting steps in the order presented.
-
Open the front door and remove the toner cartridge causing the error.
-
Reinstall the toner cartridge.
-
Close the front door. If the message reappears, turn the printer off, and then on.
-
Verify if the cartridge is a genuine HP toner cartridge. To check the authenticity of your cartridges, go to hp.com/go/anticounterfeit or visit hp.com/go/ok and enter the serial number from the security label.
-
If the error persists, and it is a genuine HP toner cartridge, contact your HP-authorized service or support provider or contact
HP customer support for assistance in resolving the issue. -
If it is an aftermarket (non-hp) or re-manufactured toner cartridge, return the defective toner cartridge to the vendor where
purchased.Note:
Service or repairs that are required as a result of using unsupported supplies is not covered under HP warranty.
10.00.10 Supply memory error
The printer is unable to read the toner cartridge data. The toner cartridge is present but defective.
When this error occurs, a question mark appears on the gas gauge of the supply or supplies with the error.
-
10.00.10 Black toner cartridge
Recommended action for customers
Follow these troubleshooting steps in the order presented.
-
Open the front door and remove the suspected toner cartridge.
-
Check the supplies memory chip. If it is damaged, replace the toner cartridge.
-
Reinstall the toner cartridge.
-
Close the front door.
-
If the message displays again, turn the printer off, then on again.
-
Verify if the cartridge is a genuine HP toner cartridge. To check the authenticity of your cartridges, go to hp.com/go/anticounterfeit or visit hp.com/go/ok and enter the serial number from the security label.
-
If the error persists, and it is a genuine HP toner cartridge, contact your HP-authorized service or support provider or contact
HP customer support for assistance in resolving the issue. -
If it is an aftermarket (non-hp) or re-manufactured toner cartridge, return the defective toner cartridge to the vendor where
purchased.Note:
Service or repairs that are required as a result of using unsupported supplies is not covered under HP warranty.
10.00.11 or 10.00.12
Supply memory error.
When this error occurs, a question mark appears on the gas gauge of the supply or supplies with the error.
-
10.00.11 or 10.00.12 Black toner cartridge
Recommended action for customers
Follow these troubleshooting steps in the order presented.
-
Open the front door and remove the toner cartridge causing the error.
-
Reinstall the toner cartridge.
-
Close the front door. If the message reappears, turn the printer off, and then on.
-
Verify if the cartridge is a genuine HP toner cartridge. To check the authenticity of your cartridges, go to hp.com/go/anticounterfeit or visit hp.com/go/ok and enter the serial number from the security label.
-
If the error persists, and it is a genuine HP toner cartridge, contact your HP-authorized service or support provider or contact
HP customer support for assistance in resolving the issue. -
If it is an aftermarket (non-hp) or re-manufactured toner cartridge, return the defective toner cartridge to the vendor where
purchased.Note:
Service or repairs that are required as a result of using unsupported supplies is not covered under HP warranty.
10.00.30 Unauthorized supply
Unauthorized black supply.
Unauthorized Cartridge (Admin configures printer to only accept HP cartridges).
-
10.00.30 Black toner cartridge
Recommended action for customers
Follow these troubleshooting steps in the order presented.
-
Install a genuine HP toner cartridge in the corresponding slot.
-
If a genuine HP toner cartridge is installed, validate the authenticity of your cartridges, go to hp.com/go/anticounterfeit or visit hp.com/go/ok and enter the serial number from the security label.
-
If the error persists, and it is a genuine HP toner cartridge, contact your HP-authorized service or support provider or contact
HP customer support for assistance in resolving the issue.
10.00.31 Starting to print with non-HP cartridge
A non-HP cartridge is in use.
The 10.00.31 is an Event Log only code.
The printer will display the message Starting to print with non-HP cartridge.
-
10.00.31 Black toner cartridge
Recommended action
Follow these troubleshooting steps in the order presented.
-
No action necessary.
-
If the customer believes they purchased a new genuine HP supply, go to hp.com/go/anticounterfeit or visit hp.com/go/ok and enter the serial number from the security label.
Note:
Service or repairs that are required as a result of using unsupported supplies is not covered under HP warranty.
10.00.33 Starting to print with used or counterfeit supplies.
A used or counterfeit supply is in use.
The 10.00.31 is an Event Log only code.
The printer will display the message Starting to print with used or counterfeit supplies..
-
10.00.33 Black toner cartridge
Recommended action
Follow these troubleshooting steps in the order presented.
-
No action necessary.
-
If the customer believes they purchased a new genuine HP supply, go to hp.com/go/anticounterfeit or visit hp.com/go/ok and enter the serial number from the security label.
Note:
Service or repairs that are required as a result of using unsupported supplies is not covered under HP warranty.
10.00.40 No longer printing with non-HP supplies
No longer printing with non-HP supplies.
The printer displays this message when genuine HP supplies are in use.
The 10.00.40 is an event log only message, it will not show on the control panel.
Recommended action
-
No action necessary.
10.00.57 Protected supply installed
A protected toner cartridge is installed.
The printer indicates when the supplies in use are protected for anti-theft.
-
10.00.57 Black toner cartridge
Recommended action
-
No action necessary.
10.00.70 Printing with very low black supply
The printer indicates when one of the supplies is very low. The actual remaining supply life might vary. You do not need to
replace the toner cartridge at this time unless the print quality is no longer acceptable.
The 10.00.70 is an event log only message, it will not show on the control panel. The only message to display will be a warning
message <Supply> very low.
-
10.00.70 Black toner cartridge (event code)
Recommended action
Follow these troubleshooting steps in the order presented.
-
If the print quality is no longer acceptable, the customer must order and pay for a new toner cartridge.
Note:
After an HP supply has reached the very low threshold, the HP Premium Protection Warranty ends and the customer is responsible
for replacing the supply.Note:
Advise the customer that HP recommends that they have replacement supplies available to install when the print quality is
no longer acceptable.Toner cartridge part numbers
Printer Series
Description
Part Number
All Models Contract ONLY
XC Black Contract Toner
W2150XC
All Models Contract ONLY
XC Cyan Contract Toner
W2151XC
All Models Contract ONLY
XC Yellow Contract Toner
W2152XC
All Models Contract ONLY
XC Magenta Contract Toner
W2153XC
Printer Series
Description
Part Number
4201/4301 Series ONLY
210A Black Toner Crtg; standard
W2100A
4201/4301 Series ONLY
210A Cyan Toner Crtg; standard
W2101A
4201/4301 Series ONLY
210A Yellow Toner Crtg; standard
W2102A
4201/4301 Series ONLY
210A Magenta Toner Crtg; standard
W2103A
4201/4301 Series ONLY
210X Black Toner Crtg; high capacity
W2100X
4201/4301 Series ONLY
210X Cyan Toner Crtg; high capacity
W2101X
4201/4301 Series ONLY
210X Yellow Toner Crtg; high capacity
W2102X
4201/4301 Series ONLY
210X Magenta Toner Crtg; high capacity
W2103X
Printer Series
Description
Part Number
4202/4302 Series ONLY
220A Black Toner Crtg EMEA; standard
W2200A
4202/4302 Series ONLY
220A Cyan Toner Crtg EMEA; standard
W2201A
4202/4302 Series ONLY
220A Yellow Toner Crtg EMEA; standard
W2202A
4202/4302 Series ONLY
220A Magenta Toner Crtg EMEA; standard
W2203A
4202/4302 Series ONLY
220X Black Toner Crtg EMEA; high capacity
W2200X
4202/4302 Series ONLY
220X Cyan Toner Crtg EMEA; high capacity
W2201X
4202/4302 Series ONLY
220X Yellow Toner Crtg EMEA; high capacity
W2202X
4202/4302 Series ONLY
220X Magenta Toner Crtg EMEA; high capacity
W2203X
Printer Series
Description
Part Number
4203/4303 Series ONLY
230A Black Toner Crtg; standard
W2300A
4203/4303 Series ONLY
230A Cyan Toner Crtg; standard
W2301A
4203/4303 Series ONLY
230A Yellow Toner Crtg; standard
W2302A
4203/4303 Series ONLY
230A Magenta Toner Crtg; standard
W2303A
4203/4303 Series ONLY
230X Black Toner Crtg; high capacity
W2300X
4203/4303 Series ONLY
230X Cyan Toner Crtg; high capacity
W2301X
4203/4303 Series ONLY
230X Yellow Toner Crtg; high capacity
W2302X
4203/4303 Series ONLY
230X Magenta Toner Crtg; high capacity
W2303X
10.00.71 Starting to print in black only
Printing Black in black only has started.
The printer lets the end user know when the printer is printing in black only mode.
The 10.00.71 is an event log only message and will not appear. The control panel will display printing in black only.
Recommended action
-
No action necessary.
10.00.81 No longer printing in black only
Black only printing has ended.
The printer lets the end user know when the printer is no longer printing in black only mode.
the 10.00.81 is an event log only message and will not appear. The control panel will display No longer printing in black only.
Recommended action
-
No action necessary.
10.00.35, 10.00.43, 10.10.43, 10.20.43 Incompatible <supply>
The printer displays this message when the indicated supply is not compatible with this printer.
The 10.00.35 and 10.wx.43 are an event log only message, it will not show on the control panel. The only message to display
will be Incompatible <supply> .
-
10.00.35, 10.00.43, 10.10.43, 10.20.43 Black toner cartridge (event code)
Recommended action
Follow these troubleshooting steps in the order presented.
-
Install a supply that is designed for this printer.
10.20.43 Incompatible Cartridge
The printer displays this message when the indicated supply is not compatible with this printer.
An error message «Incompatible Cartridge. Event Code 10.20.43» displays on a control panel of an HP LaserJet Pro after replacing a regionalized toner cartridge.
This issue occurs when the replacement toner cartridge part number does not match the original region toner cartridge (designed
for use only in a specific region) part number that was installed when the printer was set up out of the box.
HP manufactures toner cartridges specific to three worldwide regions (AMS, APJ, EMEA). The toner cartridge designed for each
region has a different part number. The cartridge region set on the printer depends on the region the toner cartridge was
installed in the printer at the first initial power up of the printer.
Recommended action for customers
Follow these troubleshooting steps in the order presented.
-
Open the front door and remove the toner cartridge causing the error.
-
Verify that the toner cartridge being used is the correct region for the printer.
-
Install a toner cartridge for the specific region.
-
If the error persists, and it is a genuine HP toner cartridge for the specified region, contact your HP-authorized service
or support provider or contact HP customer support for assistance in resolving the issue.
Methods to modify the «Printer Supply Region Reset” setting to re-regionalize the printer
Use one of the following methods to modify the Printer Supply Region Reset setting option.
-
Method one: Use the printer control panel to modify the «Printer Supply Region Reset” setting
-
Method two: Use the EWS to modify the «Printer Supply Region Reset” setting
Method one: Use the printer control panel to modify the «Printer Supply Region Reset” setting
Depending on a touchscreen or LCD (2-line LCD) display printer control panel, follow these steps to resolve the issue.
-
From the Home screen, select the Setup menu.
-
Touchscreen display: From the Home screen, touch the Settings
icon, and then select the Setup menu.
-
LCD display: From the Home screen, press the OK button to go to the Main Menu, and then select the Setup menu.
LCD display: Setup menu
-
-
Select the Printer Maintenance menu.
Touchscreen display: Printer Maintenance menu
LCD display: Printer Maintenance menu
-
Select the Restore menu.
Touchscreen display: Restore menu
LCD display: Restore menu
-
On the Restore menu, select the Printer Supply Region Reset option.
Touchscreen display: Printer Supply Region Reset option
LCD display: Printer Supply Region Reset option
-
Select the OK button to reset the printer supply region for the new toner cartridge.
Warning:
Do not attempt to modify the «Printer Supply Region Reset” more than twice, the printer region setting will be locked and set to the last cartridge region.
Touchscreen display: Message confirming to reset the printer supply region
LCD display: Message confirming to reset the printer supply region
Method two: Use the EWS to modify the «Printer Supply Region Reset” setting
Follow these steps to open the Embedded Web Server (EWS) and modify the Printer Supply Region Reset” setting option.
-
Open the HP Embedded Web Server (EWS).
-
Obtain the IP address or hostname of the printer from either the control panel or a Configuration Page.
-
Open a web browser, type the IP address or host name in the address bar and then press the Enter key on the keyboard to open the Embedded Web Server (EWS).
Note:
If the printer in use requires a PIN number to access the printer settings in the EWS, open the cartridge door of the printer
to obtain the default PIN.
-
-
Select the Settings tab.
-
In the left navigation pane, select the Security setting, and then select the Printer Supply Region Reset option.
-
Read the information on the Printer Supply Region Reset section, and then click the Apply button.
-
A message confirming the «Printer Supply Region Reset» operation was successful will display on the EWS screen.
13.* errors
Errors in the 13.* family are related to jams.
More than 1000 unique error codes are possible. Use the following information to understand the jam code. Not all codes apply
to all printers.
Message format: 13.WX.YZ
-
W represents the jam location.
-
X represents the sensor or door that triggered the jam.
-
Y represents the jam condition (delay, stay, wrap, etc.)
-
Z represents the paper source, fuser mode, or destination
|
W |
Jam location |
X |
Sensor or door |
|---|---|---|---|
|
A |
Input area |
0 |
Envelope feeder |
|
A |
Input area |
1 |
Tray 1 feed (unless Tray 1 feed is the registration sensor) |
|
A |
Input area |
2 |
Tray 2 feed (unless Tray 2 feed is the registration sensor) |
|
A |
Input area |
3 |
Tray 3 feed |
|
A |
Input area |
4 |
Tray 4 feed |
|
A |
Input area |
5 |
Tray 5 feed |
|
A |
Input area |
6 |
Tray 6 feed |
|
A |
Input area |
7 |
Optional tray exit sensor |
|
A |
Input area |
A |
Door 1 |
|
A |
Input area |
B |
Door 2 |
|
A |
Input area |
C |
Door 3 |
|
A |
Input area |
D |
Door 4 |
|
A |
Input area |
E |
Door 5 |
|
A |
Input area |
F |
Multiple sensors or doors |
|
B |
Image area |
0 |
Media sensor for forbidden transparencies |
|
B |
Image area |
2 |
Registration/top of page |
|
B |
Image area |
3 |
Top of page |
|
B |
Image area |
4 |
Loop |
|
B |
Image area |
5 |
Fuser input |
|
B |
Image area |
9 |
Fuser output |
|
B |
Image area |
A |
Door 1 |
|
B |
Image area |
B |
Door 2 |
|
B |
Image area |
F |
Multiple sensors or doors |
|
C |
Switchback area (between the fuser and the output bin) |
1 |
Intermediate switchback sensor |
|
C |
Switchback area (between the fuser and the output bin) |
2 |
Switchback media stay sensor |
|
C |
Switchback area (between the fuser and the output bin) |
3 |
Paper delivery sensor |
|
D |
Duplex area |
1 |
Duplex switchback |
|
D |
Duplex area |
2 |
Duplex delivery |
|
D |
Duplex area |
3 |
Duplex refeed |
|
D |
Duplex area |
A |
Door 1 (if different than the imaging area) |
|
D |
Duplex area |
B |
Door 2 (if different than the imaging area) |
|
D |
Duplex area |
F |
Multiple sensors or doors |
|
E |
Output or intermediate paper transport unit (IPTU) area |
1 |
Output bin full sensor |
|
E |
Output or intermediate paper transport unit (IPTU) area |
2 |
IPTU feed sensor 1 |
|
E |
Output or intermediate paper transport unit (IPTU) area |
3 |
IPTU sensor 2 |
|
E |
Output or intermediate paper transport unit (IPTU) area |
4 |
IPTU sensor 3 |
|
E |
Output or intermediate paper transport unit (IPTU) area |
5 |
IPTU bin full sensor 4 |
|
E |
Output or intermediate paper transport unit (IPTU) area |
6 |
Output sensor |
|
E |
Output or intermediate paper transport unit (IPTU) area |
A |
Door 1 |
|
E |
Output or intermediate paper transport unit (IPTU) area |
F |
Multiple sensors or doors |
|
F |
Multiple subsystems (occurs when paper is stuck in several areas) |
F |
Multiple sensors or doors |
|
1 |
Jetlink input device |
4 |
Tray 4 feed sensor |
|
1 |
Jetlink Input device |
5 |
Tray 5 feed sensor |
|
1 |
Jetlink Input device |
6 |
Tray 6 feed sensor |
|
1 |
Jetlink Input device |
7 |
Tray 7 feed sensor |
|
1 |
Jetlink Input device |
8 |
Tray 8 feed sensor |
|
1 |
Jetlink Input device |
9 |
Tray 9 feed sensor |
|
1 |
Jetlink Input device |
A |
Door 1 |
|
1 |
Jetlink Input device |
B |
Door 2 |
|
1 |
Jetlink Input device |
F |
Multiple sensors or doors |
|
2 |
Buffer pass unit |
0 |
Buffer pass inlet sensor |
|
2 |
Buffer pass unit |
9 |
Buffer pass exit sensor |
|
2 |
Buffer pass unit |
A |
Door 1 |
|
3 |
Page insert unit |
0 |
Page insertion inlet sensor |
|
3 |
Page insert unit |
1 |
Page insertion tray 1 feed sensor |
|
3 |
Page insert unit |
2 |
Page insertion tray 2 feed sensor |
|
3 |
Page insert unit |
3 |
Page insertion tray 3 feed sensor |
|
3 |
Page insert unit |
4 |
Page insertion tray 4 feed sensor |
|
3 |
Page insert unit |
7 |
Output path feed sensor |
|
3 |
Page insert unit |
9 |
Page insertion exit sensor |
|
3 |
Page insert unit |
A |
Door 1 |
|
4 |
Punch unit |
0 |
Puncher inlet sensor |
|
4 |
Punch unit |
1 |
Puncher jam sensor |
|
4 |
Punch unit |
9 |
Puncher exit sensor |
|
4 |
Punch unit |
A |
Door 1 |
|
5 |
Folding unit |
0 |
Folder inlet sensor |
|
5 |
Folding unit |
1 |
Folder sensor |
|
5 |
Folding unit |
9 |
Folder exit sensor |
|
5 |
Folding unit |
A |
Door 1 |
|
6 |
Stacker unit |
0 |
Stacker inlet sensor |
|
6 |
Stacker unit |
4 |
Stacker outlet sensor |
|
6 |
Stacker unit |
7 |
Stacker switchback entrance sensor |
|
6 |
Stacker unit |
8 |
Stacker switchback registration sensor |
|
6 |
Stacker unit |
9 |
Stacker switchback lower sensor |
|
7 |
Multi-bin mailbox (MBM) unit |
0 |
MBM inlet sensor |
|
7 |
Multi-bin mailbox (MBM) unit |
1 |
MBM middle sensor |
|
7 |
Multi-bin mailbox (MBM) unit |
9 |
Stapler sensor |
|
7 |
Multi-bin mailbox (MBM) unit |
A |
Door 1 |
|
7 |
Multi-bin mailbox (MBM) unit |
B |
Door 2 |
|
7 |
Multi-bin mailbox (MBM) unit |
C |
Door 3 |
|
7 |
Multi-bin mailbox (MBM) unit |
F |
Multiple sensors or doors |
|
8 |
Stapler/stacker (SS) unit |
0 |
SS inlet sensor |
|
8 |
Stapler/stacker (SS) unit |
1 |
SS Bin Z |
|
8 |
Stapler/stacker (SS) unit |
3 |
SS unit middle sensor |
|
8 |
Stapler/stacker (SS) unit |
4 |
SS unit outlet sensor 1 |
|
8 |
Stapler/stacker (SS) unit |
5 |
SS unit outlet sensor 2 |
|
8 |
Stapler/stacker (SS) unit |
9 |
Stapler sensor |
|
8 |
Stapler/stacker (SS) unit |
A |
Door 1 |
|
8 |
Stapler/stacker (SS) unit |
B |
Door 2 |
|
9 |
Booklet maker unit |
0 |
Booklet maker input sensor |
|
9 |
Booklet maker unit |
2 |
Booklet maker feed sensor 2 |
|
9 |
Booklet maker unit |
2 |
Booklet maker feed sensor 3 |
|
9 |
Booklet maker unit |
4 |
Booklet maker delivery sensor |
|
9 |
Booklet maker unit |
5 |
Booklet maker vertical paper path sensor |
|
9 |
Booklet maker unit |
6 |
Booklet unit front staple sensor |
|
9 |
Booklet maker unit |
7 |
Booklet unit rear staple sensor |
|
9 |
Booklet maker unit |
8 |
Booklet unit outlet sensor |
|
9 |
Booklet maker unit |
A |
Door 1 |
|
9 |
Booklet maker unit |
B |
Door 2 |
|
9 |
Booklet maker unit |
C |
Door 3 |
|
9 |
Booklet maker unit |
F |
Multiple sensors or doors |
|
0 |
Unknown |
0 |
Unknown |
|
Y |
Jam condition |
|---|---|
|
0 |
Unknown |
|
1 |
Unexpected sheet (duplex) |
|
2 |
Staple jam |
|
3 |
Jam caused by an open door (duplex) |
|
4 |
Stay jam (the page never left the tray – duplex) |
|
A |
Stay jam (the page never left the tray – simplex) |
|
B |
Multifeed |
|
C |
Wrap |
|
D |
Delay (the page did not reach the sensor within the expected time – simplex) |
|
E |
Door open |
|
F |
Residual (paper is detected in the paper path when it should not be there) |
The information represented by the value for Z depends on where the paper is in the paper path.
|
Paper location |
Z |
Source, fuser mode, or destination |
|---|---|---|
|
When paper has not reached the fuser, Z represents the paper source. |
1 |
Tray 1 |
|
Z represents the paper source. |
2 |
Tray 2 |
|
Z represents the paper source. |
3 |
Tray 3 |
|
Z represents the paper source. |
4 |
Tray 4 |
|
Z represents the paper source. |
5 |
Tray 5 |
|
Z represents the paper source. |
6 |
Tray 6 |
|
Z represents the paper source. |
D |
Duplexer |
|
Z represents the paper source. |
E |
Envelope feeder |
|
When paper has reached the fuser, is in the duplex path, or in the output path, Z represents the fuser mode. Jams can occur when there is a mismatch between the actual paper and the fuser mode setting. |
0 |
Photo 1, 2, or 3 Designated 2 or 3 |
|
Z represents the fuser mode. |
1 |
Normal (automatically sensed rather than based on the paper type set at the control panel) |
|
Z represents the fuser mode. |
2 |
Normal (based on the paper type set at the control panel) |
|
Z represents the fuser mode. |
3 |
Light 1, 2, or 3 |
|
Z represents the fuser mode. |
4 |
Heavy 1 |
|
Z represents the fuser mode. |
5 |
Heavy 2 |
|
Z represents the fuser mode. |
6 |
Heavy 3 |
|
Z represents the fuser mode. |
7 |
Glossy 1 |
|
Z represents the fuser mode. |
8 |
Glossy 2 |
|
Z represents the fuser mode. |
9 |
Glossy 3 |
|
Z represents the fuser mode. |
A |
Glossy Film |
|
Z represents the fuser mode. |
B |
Transparency |
|
Z represents the fuser mode. |
C |
Label |
|
Z represents the fuser mode. |
D |
Envelope 1, 2, or 3 |
|
Z represents the fuser mode. |
E |
Rough |
|
When paper has entered the output bin, Z represents the output bin, numbered from top to bottom. |
0 |
Unknown bin |
|
Z represents the output bin |
1 |
Bin 1 |
|
Z represents the output bin |
2 |
Bin 2 |
|
Z represents the output bin |
3 |
Bin 3 |
|
Z represents the output bin |
4 |
Bin 4 |
|
Z represents the output bin |
5 |
Bin 5 |
|
Z represents the output bin |
6 |
Bin 6 |
|
Z represents the output bin |
7 |
Bin 7 |
|
Z represents the output bin |
8 |
Bin 8 |
|
Z represents the output bin |
9 |
Bin 9 |
|
All paper locations |
E |
Door open jam |
|
All paper locations |
F |
Residual jam |
|
All paper locations |
0 |
Forbidden OHT jam (when Y=2) |
Recommended action for customers
Follow these troubleshooting steps in the order presented.
-
Follow the instructions on the control panel to clear the jam. Check for paper in all possible jam locations.
-
Verify that no doors are open.
-
Check the paper tray to make sure paper is loaded correctly. The paper guides should be adjusted to the correct size, and
the tray should not be filled above the maximum fill marks or tabs. -
Make sure the type and quality of the paper being used meets the HP specifications for the printer.
-
Use a damp, lint-free cloth to clean the rollers in the appropriate tray. Replace rollers that are worn.
-
Open all doors and covers and ensure the paper path is completely clear of paper or obstructions.
-
If the error persists, contact your HP-authorized service or support provider, or contact customer support at www.hp.com/go/contactHP.
To prevent future paper jams in the printer, follow these recommendations:
-
Use only paper that meets HP specifications for this printer.
For more information, refer to the printer User Guide or search for the «HP LaserJet Printers — Print Media Guide» (c06117757).
-
Make sure the printing environment is within recommended specifications.
-
Do not use paper that is wrinkled, folded, or damaged.
-
Do not overload the tray with paper.
-
Make sure that the paper guides in the tray are adjusted correctly for the size of paper.
-
Make sure that the tray is fully inserted in the printer.
-
If printing on heavy, embossed, or perforated paper, use the manual feed feature and feed sheets one at a time.
-
Open the Trays menu on the printer control panel. Verify that the tray is configured correctly for the paper type and size.
13.02.yz Paper is jammed in Tray 1
Paper jam when printing from tray 1.
Y and Z are variables and can be any of the following 0-9 or A-F.
Recommended action for customers
Follow these troubleshooting steps in the order presented.
-
Clear the paper jam.
-
Slowly remove all jammed paper from tray 1.
Remove paper from tray 1
-
Open the front cover and clear any paper found.
Open front door
-
Look for and clear any paper present or obstructions in the paper path.
Check for paper
-
-
Ensure the type and quality of the paper being used meets the HP specifications for the printer.
-
Ensure that the tray 1 width and length guides are set to the correct paper size being installed into the tray and that the
tray is not over filled above the fill mark or over the tab on the tray.Load tray 1
-
If the error persists, please contact customer support at: www.hp.com/go/contactHP.
13.03.yz Paper is jammed in Tray 2
Paper jam when printing from tray 2
Y and Z are variables and can be any of the following 0-9 or A-F.
Recommended action for customers
Follow these troubleshooting steps in the order presented.
-
Clear the paper jam.
-
Open tray 2.
Open tray 2
-
Remove the paper from the tray, and discard any damaged paper.
Remove paper
-
-
Make sure the type and quality of the paper being used meets the HP specifications for the printer.
-
If the error persists, ensure that the tray width and length guides are set to the correct paper size for the paper being
installed.Check tray 2 rear guide
Check tray 2 side guides
-
Load the paper into the tray. Make sure that the stack is flat at all four corners and that the top of the stack is below
the maximum-height indicators.Load paper
-
Clear paper from inside the printer.
-
Open the front cover.
Open front door
-
Remove the toner cartridge.
-
Lift the jam-access and remove any paper found.
Open registration jam access
-
Lift the paper feed jam access and remove any paper found.
Open jam access
-
-
Reinstall the toner cartridge and close the front door to allow the printer clear the jam message.
-
If the error persists, contact customer support at www.hp.com/go/contactHP, or contact an HP-authorized service or support provider.
13.04.yz
Paper is jammed in Tray 3
Paper jam when printing from tray 3.
Y and Z are variables and can be any of the following 0-9 or A-F.
Recommended action for customers
Follow these troubleshooting steps in the order presented.
-
Clear the paper jam.
-
Open tray 3.
Open tray 3
-
Remove the paper from the tray, and discard any damaged paper.
Remove paper
-
-
Make sure the type and quality of the paper being used meets the HP specifications for the printer.
-
If the error persists, ensure that the tray width and length guides are set to the correct paper size for the paper being
installed.Check tray 3 rear guide
Check tray 3 side guides
-
Load the paper into the tray. Make sure that the stack is flat at all four corners and that the top of the stack is below
the maximum-height indicators.Load paper
-
Clear paper from inside the printer.
-
Open the front cover.
Open front door
-
Remove the toner cartridge.
-
Lift the jam-access and remove any paper found.
Open registration jam access
-
Lift the paper feed jam access and remove any paper found.
Open jam access
-
-
Reinstall the toner cartridge and close the front door to allow the printer clear the jam message.
-
If the error persists, contact customer support at www.hp.com/go/contactHP, or contact an HP-authorized service or support provider.
13.08.yz,13.09.yz Paper is jammed in the cartridge area
Paper is jammed in the toner cartridge area of the printer.
Y and Z are variables and can be any of the following 0-9 or A-F.
Recommended action for customers
Follow these troubleshooting steps in the order presented.
-
Clear paper from inside the printer.
-
Open the front cover.
Open front door
-
Remove the toner cartridge.
-
Lift the jam-access and remove any paper found.
Open registration jam access
-
Lift the paper feed jam access and remove any paper found.
Open jam access
-
Remove paper from the inside of the printer.
Remove paper
-
Reinstall the toner cartridge and close the front door.
-
-
Ensure the type and quality of the paper being used meets the HP specifications for the printer.
-
Ensure the printer is located in an area meets the environmental specifications for the printer.
-
Adjust the paper guides in the tray. Ensure the front paper guide is pushing the paper against the back edge of the tray.
-
If the error persists, please contact customer support at: www.hp.com/go/contactHP.
13.10.yz, 13.11.yz, 13.13.yz Paper is jammed in the output bin
Paper is jammed in the output bin of the printer.
Y and Z are variables and can be any of the following 0-9 or A-F.
Recommended action for customers
Follow these troubleshooting steps in the order presented.
-
Follow the instructions on the control panel to clear the jammed paper.
-
Remove paper from the output tray.
-
Clear paper from inside the printer.
-
Open the front cover.
Open front door
-
Remove the toner cartridge.
-
Lift the paper feed jam access and remove any paper found.
Open jam access
-
Remove paper from the inside of the printer.
Remove paper
-
Reinstall the toner cartridge and close the front door.
-
-
Open the rear door and clear paper from the area.
-
Open the rear door.
Open rear door
(MFP) Open rear door
-
Remove paper from the area.
Remove paper
-
-
Close the rear door to allow the printer to attempt to clear the jam message.
-
Ensure the type and quality of the paper being used meets the HP specifications for the printer.
-
Ensure the printer is located in an area meets the environmental specifications for the printer.
-
Adjust the paper guides in the tray. Ensure the front paper guide is pushing the paper against the back edge of the tray.
-
If the error persists, please contact customer support at: www.hp.com/go/contactHP.
13.14.yz, 13.15.yz Paper is jammed inside the printer
Paper is jammed in the duplex area inside the printer.
Y and Z are variables and can be any of the following 0-9 or A-F.
Recommended action for customers
Follow these troubleshooting steps in the order presented.
-
Clear the paper jam.
-
Completely remove Tray 2 from the printer.
Remove tray 2
-
Push the green button to release the duplex pan.
Push green button
-
Remove paper from inside duplex paper path.
Remove paper for this area
-
Reinstall tray 2.
-
-
Ensure the type and quality of the paper being used meets the HP specifications for the printer.
-
Ensure the printer is located in an area meets the environmental specifications for the printer.
-
Adjust the paper guides in the tray. Ensure the front paper guide is pushing the paper against the back edge of the tray.
-
If the error persists, please contact customer support at: www.hp.com/go/contactHP.
21.* errors
Errors in the 21.* family are related to the printer memory and complexity of the image being printed. The page might require
more memory than the printer has available.
Recommended action
Follow these troubleshooting steps in the order presented.
Use the following general troubleshooting steps to try to resolve the problem. If the error persists, contact your HP-authorized
service or support provider, or contact HP support at www.hp.com/go/contactHP.
-
Touch the OK button to clear the error.
-
Reduce the page complexity.
-
Add product memory.
21.00.00 Misprint, Page Too Complex
The printer displays this message to indicate that the page decompression process was too slow for the printer.
Recommended action
Follow these troubleshooting steps in the order presented.
-
Touch the OK button to continue. There may be some data loss on the page that was being formatted when the error occurred.
-
Reduce the page complexity.
-
Try changing Advanced printer driver settings for «Print Data Optimization» and or «Raster Compression«.
-
Print the job again.
30.01.08 Home position error
The scanner optic failed to return to the home position.
Recommended action for customers
Follow these troubleshooting steps in the order presented.
-
Turn the printer off, and then on.
-
If the error persists, contact your HP-authorized service or support provider, or contact customer support at www.hp.com/go/contactHP.
30.03.14
Front side scanner EEPROM (NVM) error has occurred.
Recommended action for customers
Follow these troubleshooting steps in the order presented.
-
Turn the printer off, and then on.
-
If the error persists, contact your HP-authorized service or support provider, or contact customer support at www.hp.com/go/contactHP.
30.03.20
The firmware cannot communicate with the PCA on the
assembly.
Recommended action for customers
Follow these troubleshooting steps in the order presented.
-
Turn the printer off, and then on.
-
If the error persists, contact your HP-authorized service or support provider, or contact customer support at www.hp.com/go/contactHP.
30.03.22 Scanner failure
Front side illumination calibration failure.
The scan module cannot see the illumination module, or the illumination is
marginal.
The optical assembly might not be parked under the calibration strip.
Recommended action for customers
Follow these troubleshooting steps in the order presented.
-
Turn the printer off, and then on.
-
If the error persists, contact your HP-authorized service or support provider, or contact customer support at www.hp.com/go/contactHP.
30.03.30 Scanner Failure
Flatbed motor shutdown.
The scanner control board (SCB) cannot communicate with the flatbed scanner
motor.
Recommended action for customers
Follow these troubleshooting steps in the order presented.
-
Turn the printer off, and then on.
-
If the error persists, contact your HP-authorized service or support provider, or contact customer support at www.hp.com/go/contactHP.
31.01.47 Document feeder not detected
The document feeder was not detected. The document feeder might not be
connected.
The flatbed glass is still available for scanning.
Recommended action for customers
Follow these troubleshooting steps in the order presented.
-
Turn the printer off, and then on.
-
If the error persists, contact your HP-authorized service or support provider, or contact customer support at www.hp.com/go/contactHP.
31.03.14
Backside scanner EEPROM (NVM) error.
A non-fatal error has occurred.
Recommended action for customers
Follow these troubleshooting steps in the order presented.
-
Turn the printer off, and then on.
-
If the error persists, contact your HP-authorized service or support provider, or contact customer support at www.hp.com/go/contactHP.
31.03.20 backside scanner not
detected
Backside scanner is not detected.
Recommended action for customers
Follow these troubleshooting steps in the order presented.
-
Turn the printer off, and then on.
-
If the error persists, contact your HP-authorized service or support provider, or contact customer support at www.hp.com/go/contactHP.
31.03.22 Scanner calibration failure
Backside illumination calibration failure.
Recommended action for customers
Follow these troubleshooting steps in the order presented.
-
Turn the printer off, and then on.
-
If the error persists, contact your HP-authorized service or support provider, or contact customer support at www.hp.com/go/contactHP.
31.03.31 Document feeder motor stall
The document feeder feed motor is not turning.
Recommended action for customers
Follow these troubleshooting steps in the order presented.
-
Turn the printer off, and then on.
-
If the error persists, contact your HP-authorized service or support provider, or contact customer support at www.hp.com/go/contactHP.
31.13.01
Document feeder job error, pick error.
Paper pick was initiated, but the page didn’t did not make it to the pick
success sensor.
Recommended action for customers
Follow these troubleshooting steps in the order presented.
-
Remove the paper jam
-
Open the document feeder cover.
Open document feeder
-
Gently pull the jammed paper out.
Remove paper
-
Clean the document feeder rollers with a damp lint free cloth.
Clean rollers
-
Close the document-feeder cover. Make sure it is completely closed.
-
Open the document feeder tray cover.
Open tray cover
-
Gently pull the jammed paper out.
Remove paper
-
Close the document feeder tray cover.
-
Open the scanner lid. If paper is jammed in the scanner lid, gently pull it out, and then close the scanner lid.
Clear jam
-
-
Check the paper guides and make sure that they are set to the correct paper width.
-
Make sure that the input tray is not overloaded and the tray guides are correctly aligned to both edges of the paper.
-
Verify that the paper meets the printer specifications.
-
Verify there are no staples or paper clips on the stack of originals. Verify the originals are straightened out from previous
folds or curl. -
If the error persists, contact customer support at www.hp.com/go/contactHP, or contact an HP-authorized service or support provider.
31.13.02
Document feeder jam error.
The paper passed the pick success sensor, and then jammed in the document
feeder paper path.
Recommended action for customers
Follow these troubleshooting steps in the order presented.
-
Remove the paper jam
-
Open the document feeder cover.
Open document feeder
-
Gently pull the jammed paper out.
Remove paper
-
Clean the document feeder rollers with a damp lint free cloth.
Clean rollers
-
Close the document-feeder cover. Make sure it is completely closed.
-
Open the document feeder tray cover.
Open tray cover
-
Gently pull the jammed paper out.
Remove paper
-
Close the document feeder tray cover.
-
Open the scanner lid. If paper is jammed in the scanner lid, gently pull it out, and then close the scanner lid.
Clear jam
-
-
Check the paper guides and make sure that they are set to the correct paper width.
-
Make sure that the input tray is not overloaded and the tray guides are correctly aligned to both edges of the paper.
-
Verify that the paper meets the printer specifications.
-
Verify there are no staples or paper clips on the stack of originals. Verify the originals are straightened out from previous
folds or curl. -
If the error persists, contact customer support at www.hp.com/go/contactHP, or contact an HP-authorized service or support provider.
32.* errors
Errors in the 32.* family are related to either product start events or to backup and restore events.
Recommended action
Use the following general troubleshooting steps to try to resolve the problem. If the error persists, contact your HP-authorized
service or support provider, or contact HP support at www.hp.com/go/contactHP.
-
Turn the printer off, and then on.
-
Retry the job.
32.21.11
Cold Reset Performed
The printer has had a cold reset performed.
Recommended action
-
No action necessary.
33.05.00 Boot code corrupt
The boot firmware boot code is corrupt.
Recommended action for customers
Follow these troubleshooting steps in the order presented.
-
Turn the printer off, and then on.
-
If the error persists, upgrade to the latest version of firmware, or re-download the firmware.
-
Upgrade the firmware.
-
If the error persists, contact your HP-authorized service or support provider, or contact customer support at www.hp.com/go/contactHP.
33.05.04 Upgrade corrupt
the firmware upgrade is corrupt.
Recommended action for customers
Follow these troubleshooting steps in the order presented.
-
Turn the printer off, and then on.
-
If the error persists, upgrade to the latest version of firmware, or re-download the firmware.
-
Upgrade the firmware.
-
If the error persists, contact your HP-authorized service or support provider, or contact customer support at www.hp.com/go/contactHP.
33.05.10 Code sign error
The printer experienced a code sign error.
Recommended action for customers
Follow these troubleshooting steps in the order presented.
-
Turn the printer off, and then on.
-
If the error persists, upgrade to the latest version of firmware, or re-download the firmware.
-
Upgrade the firmware.
-
If the error persists, contact your HP-authorized service or support provider, or contact customer support at www.hp.com/go/contactHP.
44.34.10 Fax DSP not detected
The Fax DSP PCA was not detected.
Recommended action for customers
Follow these troubleshooting steps in the order presented.
-
Turn the printer off, and then on.
-
If the error persists, contact your HP-authorized service or support provider, or contact customer support at www.hp.com/go/contactHP.
50.* errors
Errors in the 50.* family indicate a problem with the fuser.
Recommended action for customers
Follow these troubleshooting steps in the order presented.
-
Turn the printer off, and then on.
-
If the error persists, contact your HP-authorized service or support provider, or contact customer support at www.hp.com/go/contactHP.
50.00.00
Low fuser temperature failure
Recommended action for customers
Follow these troubleshooting steps in the order presented.
-
Turn off the power by using the power switch, and then wait at least 30 seconds.
-
Turn on the power and wait for the product to initialize
-
If the error returns, turn the printer off, unplug the device from any power-strips or uninterrupted power supplies, and plug
printer directly in to a wall socket. -
Ensure that the power source meets the printer requirements. Ensure that the printer is the only device using the circuit.
-
Ensure the paper type and fuser mode are correct for paper being used.
-
If the error persists, please contact customer support at: www.hp.com/go/contactHP.
50.01.00
Low fuser temperature failure
Recommended action for customers
Follow these troubleshooting steps in the order presented.
-
Turn off the power by using the power switch, and then wait at least 30 seconds.
-
Turn on the power and wait for the product to initialize
-
If the error returns, turn the printer off, unplug the device from any power-strips or uninterrupted power supplies, and plug
printer directly in to a wall socket. -
Ensure that the power source meets the printer requirements. Ensure that the printer is the only device using the circuit.
-
Ensure the paper type and fuser mode are correct for paper being used.
-
If the error persists, please contact customer support at: www.hp.com/go/contactHP.
50.02.00
Slow fuser error.
Recommended action for customers
Follow these troubleshooting steps in the order presented.
-
Turn off the power by using the power switch, and then wait at least 30 seconds.
-
Turn on the power and wait for the product to initialize
-
If the error returns, turn the printer off, unplug the device from any power-strips or uninterrupted power supplies, and plug
printer directly in to a wall socket. -
Ensure that the power source meets the printer requirements. Ensure that the printer is the only device using the circuit.
-
Ensure the paper type and fuser mode are correct for paper being used.
-
If the error persists, please contact customer support at: www.hp.com/go/contactHP.
50.03.00
High fuser temperature.
Recommended action for customers
Follow these troubleshooting steps in the order presented.
-
Turn off the power by using the power switch, and then wait at least 30 seconds.
-
Turn on the power and wait for the product to initialize
-
If the error returns, turn the printer off, unplug the device from any power-strips or uninterrupted power supplies, and plug
printer directly in to a wall socket. -
Ensure that the power source meets the printer requirements. Ensure that the printer is the only device using the circuit.
-
Ensure the paper type and fuser mode are correct for paper being used.
-
If the error persists, please contact customer support at: www.hp.com/go/contactHP.
50.04.00
Fuser drive error.
Recommended action for customers
Follow these troubleshooting steps in the order presented.
-
Turn off the power by using the power switch, and then wait at least 30 seconds.
-
Turn on the power and wait for the product to initialize
-
If the error returns, turn the printer off, unplug the device from any power-strips or uninterrupted power supplies, and plug
printer directly in to a wall socket. -
Ensure that the power source meets the printer requirements. Ensure that the printer is the only device using the circuit.
-
Ensure the paper type and fuser mode are correct for paper being used.
-
If the error persists, please contact customer support at: www.hp.com/go/contactHP.
50.05.00
Fuser error.
Recommended action for customers
Follow these troubleshooting steps in the order presented.
-
Turn off the power by using the power switch, and then wait at least 30 seconds.
-
Turn on the power and wait for the product to initialize
-
If the error returns, turn the printer off, unplug the device from any power-strips or uninterrupted power supplies, and plug
printer directly in to a wall socket. -
Ensure that the power source meets the printer requirements. Ensure that the printer is the only device using the circuit.
-
Ensure the paper type and fuser mode are correct for paper being used.
-
If the error persists, please contact customer support at: www.hp.com/go/contactHP.
50.07.00
Fuser open error.
Recommended action for customers
Follow these troubleshooting steps in the order presented.
-
Turn off the power by using the power switch, and then wait at least 30 seconds.
-
Turn on the power and wait for the product to initialize
-
If the error returns, turn the printer off, unplug the device from any power-strips or uninterrupted power supplies, and plug
printer directly in to a wall socket. -
Ensure that the power source meets the printer requirements. Ensure that the printer is the only device using the circuit.
-
Ensure the paper type and fuser mode are correct for paper being used.
-
If the error persists, please contact customer support at: www.hp.com/go/contactHP.
50.08.00
Fuser low sub-thermistor fuser error.
Recommended action for customers
Follow these troubleshooting steps in the order presented.
-
Turn off the power by using the power switch, and then wait at least 30 seconds.
-
Turn on the power and wait for the product to initialize
-
If the error returns, turn the printer off, unplug the device from any power-strips or uninterrupted power supplies, and plug
printer directly in to a wall socket. -
Ensure that the power source meets the printer requirements. Ensure that the printer is the only device using the circuit.
-
Ensure the paper type and fuser mode are correct for paper being used.
-
If the error persists, please contact customer support at: www.hp.com/go/contactHP.
50.09.00
Fuser high sub-thermistor fuser error.
Recommended action for customers
Follow these troubleshooting steps in the order presented.
-
Turn off the power by using the power switch, and then wait at least 30 seconds.
-
Turn on the power and wait for the product to initialize
-
If the error returns, turn the printer off, unplug the device from any power-strips or uninterrupted power supplies, and plug
printer directly in to a wall socket. -
Ensure that the power source meets the printer requirements. Ensure that the printer is the only device using the circuit.
-
Ensure the paper type and fuser mode are correct for paper being used.
-
If the error persists, please contact customer support at: www.hp.com/go/contactHP.
51.* errors
Errors in the 51.* family are related to the laser scanner.
Recommended action for customers
-
Turn the printer off, and then on.
-
Upgrade the firmware.
-
If the error persists, contact your HP-authorized service or support provider, or contact customer support at www.hp.com/go/contactHP.
51.wx.00
An error with the laser/scanner assembly has occurred in the printer.
-
51.00.00 Beam detect or laser error
-
51.20.00 Black laser scanner error
-
51.21.00 Cyan laser scanner error
-
51.22.00 Magenta laser scanner error
-
51.23.00 Yellow laser scanner error
-
51.30.00 Beam detect or laser error
Recommended action for customers
Follow these troubleshooting steps in the order presented.
-
Turn the printer off, and then on.
-
If the error persists, contact your HP-authorized service or support provider, or contact customer support at www.hp.com/go/contactHP.
52.* errors
Errors in the 52.* family are related to the laser scanner.
Recommended action for customers
-
Turn the printer off, and then on.
-
Upgrade the firmware.
-
If the error persists, contact your HP-authorized service or support provider, or contact customer support at www.hp.com/go/contactHP.
52.00.00 or 52.00.10
A printer laser/scanner motor error occurred.
Recommended action for customers
Follow these troubleshooting steps in the order presented.
-
Turn the printer off, and then on.
-
If the error persists, contact your HP-authorized service or support provider, or contact customer support at www.hp.com/go/contactHP.
53.17.00
Recommended action for customers
Follow these troubleshooting steps in the order presented.
-
Open the indicated tray and remove all the paper.
-
Close the tray and see if the error still persists.
-
Reload the paper tray making sure the tray guides are set correctly and the tray is not over loaded.
-
If the error persists, please contact customer support at: www.hp.com/go/contactHP.
53.18.00
Recommended action for customers
Follow these troubleshooting steps in the order presented.
-
Open the indicated tray and remove all the paper.
-
Close the tray and see if the error still persists.
-
Reload the paper tray making sure the tray guides are set correctly and the tray is not over loaded.
-
If the error persists, please contact customer support at: www.hp.com/go/contactHP.
54.19.00 or 54.25.00
TOP / Registration sensor failure
54.19.00 — Bad TOP Sensor
54.25.00 — TOP Sensor error
Recommended action for customers
Follow these troubleshooting steps in the order presented.
-
Turn the printer off, and then on.
-
If the error persists, contact your HP-authorized service or support provider, or contact customer support at www.hp.com/go/contactHP.
54.21.00
Laser/scanner beam detect error.
Recommended action for customers
Follow these troubleshooting steps in the order presented.
-
Turn the printer off, and then on.
-
If the error persists, contact your HP-authorized service or support provider, or contact customer support at www.hp.com/go/contactHP.
55.* errors
Errors in the 55.* family often indicate a problem with the DC controller.
Recommended action for customers
Follow these troubleshooting steps in the order presented.
-
Turn the printer off, and then on.
-
If the error persists, contact your HP-authorized service or support provider, or contact customer support at www.hp.com/go/contactHP.
55.00.00, 55.01.00, 55.00.05, 55.00.08, 55.30.00, or 55.40.00
Engine communication or memory error.
-
55.00.00 Engine communication error.
-
55.01.00 DC Controller memory error.
-
55.05.00 DCC Engine HW memory error.
-
55.08.00 DCC Engine HW rationalization error.
-
55.30.00 Engine communication error.
-
55.40.00 Engine communication timeout error.
Recommended action for customers
Follow these troubleshooting steps in the order presented.
-
Turn the printer off, and then on.
-
If the error persists, contact your HP-authorized service or support provider, or contact customer support at www.hp.com/go/contactHP.
Recommended action for call center agents and onsite technicians
-
Turn off the power by using the power switch, and then wait at least 30 seconds.
-
Turn on the power and wait for the product to initialize.
-
If the error persists, replace the DC controller PCB Assembly:
DC controller PCA part number: RM3-7580-000CN
55.03.00
Engine or formatter communication error.
Recommended action for customers
Follow these troubleshooting steps in the order presented.
-
Turn the printer off, and then on.
-
If issue remains, perform a firmware upgrade.
-
If the error persists, please contact customer support at: www.hp.com/go/contactHP.
55.06.01, 55.06.02
DC controller NVRAM memory error.
-
55.06.01 — DC controller NVRAM data error
-
55.06.02 — DC controller NVRAM access error.
Recommended action for customers
Follow these troubleshooting steps in the order presented.
-
Turn the printer off, and then on.
-
If the error persists, contact your HP-authorized service or support provider, or contact customer support at www.hp.com/go/contactHP.
Recommended action for call center agents and onsite technicians
-
Turn off the power by using the power switch, and then wait at least 30 seconds.
-
Turn on the power and wait for the product to initialize.
-
If the error persists, replace the DC controller PCB Assembly:
DC controller PCA part number: RM3-7580-000CN
55.90.28
DC controller NVRAM restore.
Recommended action
-
No action necessary.
Note:
This is an information message only.
56.* errors
Errors in the 56.* family indicate a communication problem with an optional paper tray or other external accessory.
Recommended action
Follow these troubleshooting steps in the order presented.
Use the following general troubleshooting steps to try to resolve the problem. If the error persists, contact your HP-authorized
service or support provider, or contact HP support at www.hp.com/go/contactHP.
-
Turn the printer off, and then on.
-
If any third-party hardware is installed, remove it and try printing again.
-
If an optional paper tray is installed, remove it. Check the connectors on the tray for damage. If the connector is damaged,
replace the tray. -
Reinstall the tray, and make sure it is correctly seated.
56.01.00
The printer experienced an illegal input.
Recommended action
Follow these troubleshooting steps in the order presented.
-
Turn the printer off, then on.
-
Remove any third-party hardware and test again.
57.* errors
Errors in the 57.* family indicate a problem with a fan.
Recommended action for customers
Follow these troubleshooting steps in the order presented.
-
Press the Power button on the front of the printer to turn it off, and then wait 10 seconds.
-
Press the Power button again to turn on the printer.
-
If the error persists, contact your HP-authorized service or support provider, or contact customer support at www.hp.com/go/contactHP.
57.01.00 Fan failure
Main fan FM1 failure.
Recommended action for customers
Follow these troubleshooting steps in the order presented.
-
Turn the printer off, and then on.
-
If the error persists, contact your HP-authorized service or support provider, or contact customer support at www.hp.com/go/contactHP.
58.* errors
Errors in the 58.* family indicate an electrical problem inside the printer.
Recommended action for customers
Follow these troubleshooting steps in the order presented.
-
Turn the printer off, and then on.
-
Make sure the printer is connected to a dedicated power outlet and not to a surge protector or other type of extension cord.
-
If the error persists, contact your HP-authorized service or support provider, or contact customer support at www.hp.com/go/contactHP.
58.04.00
AC/LVPS Power Failure.
Recommended action for customers
Follow these troubleshooting steps in the order presented.
-
Turn the printer off, and then on.
Note:
This error might be caused by source power related issues.
Determine if the area where the printer is located has experienced brown outs or is subject to power quality issues.
-
If the error persists, please contact customer support at: www.hp.com/go/contactHP.
59.* errors
Errors in the 59.* family indicate a problem with one of the motors or with the lifter drive assembly for one of the trays.
Recommended action for customers
Follow these troubleshooting steps in the order presented.
-
Turn the printer off, and then on.
-
If the error persists, contact your HP-authorized service or support provider, or contact customer support at www.hp.com/go/contactHP.
59.09.00 or 59.0A.00
Main motor error.
A main motor error has occurred.
Recommended action for customers
Follow these troubleshooting steps in the order presented.
-
Turn the printer off, and then on.
-
If the error persists, contact your HP-authorized service or support provider, or contact customer support at www.hp.com/go/contactHP.
60.* errors
Errors in the 60.* family are related to one of the optional trays.
Recommended action for customers
Use the following general troubleshooting steps to try to resolve the problem.
Note:
You can determine the tray number from the last digit in the error number. For example:
-
60.00.02 or 60.01.02 = Tray 2
-
60.00.03 or 60.01.03 = Tray 3
-
Open the failing tray and remove all paper from the tray.
-
Close the tray to check if the error persists.
-
Reload the paper and test the printer.
-
If the error persists, contact your HP-authorized service or support provider, or contact customer support at www.hp.com/go/contactHP.
60.03.00
Recommended action for customers
Follow these troubleshooting steps in the order presented.
-
Open the indicated tray and remove all the paper.
-
Close the tray and see if the error still persists.
-
Reload the paper tray making sure the tray guides are set correctly and the tray is not over loaded.
-
If the error persists, please contact customer support at: www.hp.com/go/contactHP.
Alphabetical control panel messages
Use the following alphabetical message to see further information on the message.
Alphabetical messages
Canceling…<jobname>
The printer is canceling the current job <jobname>.
Recommended action
-
No action necessary.
Cartridge Memory Error
Unable to read cartridge data from the indicated cartridges.
Recommended action
Follow these troubleshooting steps in the order presented.
-
Remove and the install the toner cartridge.
-
If the problem still occurs, replace the toner cartridge now.
Cartridge Memory Missing
Unable to read cartridge data from the indicated cartridges.
Recommended action
Follow these troubleshooting steps in the order presented.
-
Remove and the install the toner cartridge.
-
If the problem still occurs, replace the toner cartridge now.
Checking engine
The printer is conducting an internal test.
Recommended action
-
No action necessary.
Checking paper path
The printer is checking for possible paper jams.
Recommended action
-
No action necessary.
Cleaning
The printer is performing an automatic cleaning cycle. Printing will continue after the cleaning is complete.
Recommended action
-
No action necessary.
Close the cartridge access door
The front cartridge access door is open.
Recommended action for customers
Follow these troubleshooting steps in the order presented.
-
Close the front cartridge access door.
-
If the message persists with the door closed, please contact customer support at: www.hp.com/go/contactHP.
Recommended action for call-center agents and onsite technicians
-
Close the front cartridge access door.
-
Check the flat projection part on the top left on the inside of the door. If it is damaged, replace the front door assembly.
Check front door
M304/M305/M404/M405 Cartridge door assembly part number: RM2-2562-000CN
M329/M428/M429 Cartridge door assembly part number: RM2-2567-000CN
-
If the problem persists, please elevate the case using the Standard Support Process.
Toner cartridge low
The indicated toner cartridge is nearing the end of its useful life.
Recommended action
Follow these troubleshooting steps in the order presented.
-
Printing can continue, but consider having a replacement supply on hand.
Toner cartridge very low
The indicated toner cartridge is very low.
The indicated toner cartridge is at the end of its useful life. A customer configurable option on this product is «Low threshold»
this can be set to the percentage for the very low message. This option is provided as a customer convenience and is not an
indication these pages will have acceptable print quality.
Recommended action
Follow these troubleshooting steps in the order presented.
-
To ensure optimal print quality, HP recommends replacing the toner cartridge at this point. You can continue printing until
you notice a decrease in print quality. Actual cartridge life might vary.Note:
Once an HP supply has reached Very Low, HP’s Premium Protection Warranty on that supply has ended. All print defects or cartridge
failures incurred when an HP supply is used in Continue at very low mode will not be considered to be defects in materials
or workmanship in the supply under the HP Print Cartridge Warranty Statement.
Data received To print last page press “OK”
The printer is waiting for the command to print the last page.
Recommended action
-
Touch the “OK” button on the control panel to print the last page of the job.
Cooling device
The printer is cooling.
Recommended action
-
No action necessary.
Device error. Press [OK] to continue
Paper has been delayed as it moves through the product.
Recommended action
Follow these troubleshooting steps in the order presented.
-
Press the OK button to clear the message.
-
To avoid this problem, try the following solutions:
-
Adjust the paper guides in the tray. Ensure the front paper guide is pushing the paper against the back edge of the tray.
-
Use paper that meets HP specifications. Store paper unopened in its original packaging.
-
Use the product in an area that meets the environmental specifications for this product.
-
Device is busy. Tray again later
The product is currently in use.
Recommended action
Follow these troubleshooting steps in the order presented.
-
Wait for the product to finish the current job, or to finish initializing.
-
Turn the product off, then on, to see whether it comes to a Ready state.
-
Restore the device to the factory default settings. (Setup Menu -> Service Menu -> Restore Defaults)
-
If the issue persists, upgrade to the latest firmware.
Document feeder jam. Clear and reload
Paper is jammed in the document feeder tray or a sensor has incorrectly detected media in the document feeder paper path.
Recommended action for customers
Follow these troubleshooting steps in the order presented.
-
Remove the paper jam
-
Open the document feeder cover.
Open document feeder
-
Gently pull the jammed paper out.
Remove paper
-
Clean the document feeder rollers with a damp lint free cloth.
Clean rollers
-
Close the document-feeder cover. Make sure it is completely closed.
-
Open the document feeder tray cover.
Open tray cover
-
Gently pull the jammed paper out.
Remove paper
-
Close the document feeder tray cover.
-
Open the scanner lid. If paper is jammed in the scanner lid, gently pull it out, and then close the scanner lid.
Clear jam
-
-
Check the paper guides and make sure that they are set to the correct paper width.
-
Make sure that the input tray is not overloaded and the tray guides are correctly aligned to both edges of the paper.
-
Verify that the paper meets the printer specifications.
-
Verify there are no staples or paper clips on the stack of originals. Verify the originals are straightened out from previous
folds or curl. -
If the error persists, contact customer support at www.hp.com/go/contactHP, or contact an HP-authorized service or support provider.
Document feeder mispick. reload
Recommended action for customers
Follow these troubleshooting steps in the order presented.
-
Remove the paper jam
-
Open the document feeder cover.
Open document feeder
-
Gently pull the jammed paper out.
Remove paper
-
Clean the document feeder rollers with a damp lint free cloth.
Clean rollers
-
Close the document-feeder cover. Make sure it is completely closed.
-
Open the document feeder tray cover.
Open tray cover
-
Gently pull the jammed paper out.
Remove paper
-
Close the document feeder tray cover.
-
Open the scanner lid. If paper is jammed in the scanner lid, gently pull it out, and then close the scanner lid.
Clear jam
-
-
Check the paper guides and make sure that they are set to the correct paper width.
-
Make sure that the input tray is not overloaded and the tray guides are correctly aligned to both edges of the paper.
-
Verify that the paper meets the printer specifications.
-
Verify there are no staples or paper clips on the stack of originals. Verify the originals are straightened out from previous
folds or curl. -
If the error persists, contact customer support at www.hp.com/go/contactHP, or contact an HP-authorized service or support provider.
Fax is busy. Canceled send
The fax line to which you were sending a fax was busy. The product has canceled sending the fax.
Recommended action
Follow these troubleshooting steps in the order presented.
-
Call the recipient to ensure that the fax machine is on and ready.
-
Verify that the fax number is correct.
-
Verify that the Redial if Busy option is enabled.
-
Open the Support menu, and then touch the Fax Diagnostics menu. Touch the Run Fax Test button.
Note:
This test verifies that the phone cord is connected to the correct port and that the phone line has a signal. The product
prints a report with the results. -
For additional fax sending/receiving troubleshooting search for this document.
HP LaserJet Pro MFP — Solve problems sending or receiving faxes (including fax error messages)
Fax line surge
The product experienced current on the fax line over 125 mA for more than 15 seconds.
Recommended action
Follow these troubleshooting steps in the order presented.
-
Disconnect and reconnect the fax line.
-
If the error persists, contact HP support to see if the fax surge value can be changed.
Fax send error
An error occurred while trying to send a fax.
Recommended action
Follow these troubleshooting steps in the order presented.
-
Resend the fax.
-
Try faxing to another fax number.
-
To verify that the telephone cord is securely connected, disconnect and reconnect the telephone cord. Check that the telephone
cord is securely connected by unplugging and replugging the cord. -
Verify that you are using the telephone cord that came with the product.
-
Open the Setup menu, and then go to Fax Tools, choose Run Fax Test.
Note:
This test verifies that the phone cord is connected to the correct port and that the phone line has a signal. The product
prints a report with the results. -
Connect the product to a different phone line.
-
Set the fax resolution to Standard instead of the default of Fine .
-
For additional fax sending/receiving troubleshooting search for this document.
HP LaserJet Pro MFP — Solve problems sending or receiving faxes (including fax error messages)
Fax receive error
An error occurred while trying to receive a fax.
Recommended action
Follow these troubleshooting steps in the order presented.
-
Ask the sender to resend the fax.
-
To verify that the telephone cord is securely connected, disconnect and reconnect the telephone cord.
-
Verify that you are using the telephone cord that came with the product.
-
Open the Setup menu, and then go to Fax Tools, choose Run Fax Test.
Note:
This test verifies that the phone cord is connected to the correct port and that the phone line has a signal. The product
prints a report with the results. -
Decrease the fax speed. Ask the sender to resend the fax.
-
Turn off error-correction mode. Ask the sender to resend the fax.
Note:
Turning off error-correction mode might reduce the quality of the fax image.
-
Connect the product to a different phone line.
-
For additional fax sending/receiving troubleshooting search for this document.
HP LaserJet Pro MFP — Solve problems sending or receiving faxes (including fax error messages)
Genuine HP cartridge installed
A new genuine HP toner cartridge has been installed. The message appears for about 6 seconds before the printer returns to
the READY state.
Recommended action
-
No action necessary.
Genuine HP supply installed
A new genuine HP supply has been installed.
Recommended action
-
Touch the Hide button to remove this message.
Initializing…
The printer is starting.
Recommended action
-
No action necessary.
Insert or close Tray <X> to continue.
A paper tray is open causing a blocked paper path.
Recommended action
Follow these troubleshooting steps in the order presented.
-
Insert or close Tray <X> to continue.
Install toner cartridge
The toner cartridge is missing or not seated correctly.
Recommended action
Follow these troubleshooting steps in the order presented.
-
If the toner cartridge is missing, install a new toner cartridge.
-
If the toner cartridge is installed, remove and reinstall the toner cartridge.
Jam in output bin. Open rear door and clear jam.
A paper jam occurred in the output bin area of the printer.
Recommended action for customers
Follow these troubleshooting steps in the order presented.
-
Follow the instructions on the control panel to clear the jammed paper.
-
Remove paper from the output tray.
-
Clear paper from inside the printer.
-
Open the front cover.
Open front door
-
Remove the toner cartridge.
-
Lift the paper feed jam access and remove any paper found.
Open jam access
-
Remove paper from the inside of the printer.
Remove paper
-
Reinstall the toner cartridge and close the front door.
-
-
Open the rear door and clear paper from the area.
-
Open the rear door.
Open rear door
(MFP) Open rear door
-
Remove paper from the area.
Remove paper
-
-
Close the rear door to allow the printer to attempt to clear the jam message.
-
Ensure the type and quality of the paper being used meets the HP specifications for the printer.
-
Ensure the printer is located in an area meets the environmental specifications for the printer.
-
Adjust the paper guides in the tray. Ensure the front paper guide is pushing the paper against the back edge of the tray.
-
If the error persists, please contact customer support at: www.hp.com/go/contactHP.
Jam in print paper path. Open rear door and clear jam.
A paper jam occurred in the rear door/fuser area.
Recommended action for customers
Follow these troubleshooting steps in the order presented.
-
Clear paper from inside the printer.
-
Open the front cover.
Open front door
-
Remove the toner cartridge.
-
Lift the jam-access and remove any paper found.
Open registration jam access
-
Lift the paper feed jam access and remove any paper found.
Open jam access
-
Remove paper from the inside of the printer.
Remove paper
-
Reinstall the toner cartridge and close the front door.
-
-
Ensure the type and quality of the paper being used meets the HP specifications for the printer.
-
Ensure the printer is located in an area meets the environmental specifications for the printer.
-
Adjust the paper guides in the tray. Ensure the front paper guide is pushing the paper against the back edge of the tray.
-
If the error persists, please contact customer support at: www.hp.com/go/contactHP.
Jam in Tray 1. Clear the jam, and then press «OK».
A paper jam occurred while printing from tray 1.
Recommended action for customers
Follow these troubleshooting steps in the order presented.
-
Clear the paper jam.
-
Slowly remove all jammed paper from tray 1.
Remove paper from tray 1
-
Open the front cover and clear any paper found.
Open front door
-
Look for and clear any paper present or obstructions in the paper path.
Check for paper
-
-
Ensure the type and quality of the paper being used meets the HP specifications for the printer.
-
Ensure that the tray 1 width and length guides are set to the correct paper size being installed into the tray and that the
tray is not over filled above the fill mark or over the tab on the tray.Load tray 1
-
If the error persists, please contact customer support at: www.hp.com/go/contactHP.
Jam in Tray 2. Clear the jam, and then press «OK».
A paper jam occurred when printing from tray 2.
Recommended action for customers
Follow these troubleshooting steps in the order presented.
-
Clear the paper jam.
-
Open tray 2.
Open tray 2
-
Remove the paper from the tray, and discard any damaged paper.
Remove paper
-
-
Make sure the type and quality of the paper being used meets the HP specifications for the printer.
-
If the error persists, ensure that the tray width and length guides are set to the correct paper size for the paper being
installed.Check tray 2 rear guide
Check tray 2 side guides
-
Load the paper into the tray. Make sure that the stack is flat at all four corners and that the top of the stack is below
the maximum-height indicators.Load paper
-
Clear paper from inside the printer.
-
Open the front cover.
Open front door
-
Remove the toner cartridge.
-
Lift the jam-access and remove any paper found.
Open registration jam access
-
Lift the paper feed jam access and remove any paper found.
Open jam access
-
-
Reinstall the toner cartridge and close the front door to allow the printer clear the jam message.
-
If the error persists, contact customer support at www.hp.com/go/contactHP, or contact an HP-authorized service or support provider.
Jam in Tray 3. Clear the jam, and then press «OK».
Paper jam while printing from tray 3.
Recommended action for customers
Follow these troubleshooting steps in the order presented.
-
Clear the paper jam.
-
Open tray 3.
Open tray 3
-
Remove the paper from the tray, and discard any damaged paper.
Remove paper
-
-
Make sure the type and quality of the paper being used meets the HP specifications for the printer.
-
If the error persists, ensure that the tray width and length guides are set to the correct paper size for the paper being
installed.Check tray 3 rear guide
Check tray 3 side guides
-
Load the paper into the tray. Make sure that the stack is flat at all four corners and that the top of the stack is below
the maximum-height indicators.Load paper
-
Clear paper from inside the printer.
-
Open the front cover.
Open front door
-
Remove the toner cartridge.
-
Lift the jam-access and remove any paper found.
Open registration jam access
-
Lift the paper feed jam access and remove any paper found.
Open jam access
-
-
Reinstall the toner cartridge and close the front door to allow the printer clear the jam message.
-
If the error persists, contact customer support at www.hp.com/go/contactHP, or contact an HP-authorized service or support provider.
Load Tray <X>: [Type], [Size] To use another tray, press “OK”
This message displays when the indicated tray is selected, but is not loaded, and other paper trays are available for use.
It also displays when the tray is configured for a different paper type or size than the print job requires.
Recommended action
Follow these troubleshooting steps in the order presented.
-
Load the correct paper in the tray.
-
If prompted, confirm the size and type of paper loaded.
-
Otherwise, press the OK button to select another tray.
Manually feed output stack Then touch «OK» to print second side
The printer has printed the first side of a manual duplex job and is waiting for you (or the applicable user) to insert the
output stack to print the second side.
Recommended action
-
Maintaining the same orientation, remove the pages from the output bin.
-
Flip the document printed side up.
-
Load the document in Tray 1.
-
Touch the OK button to print the second side of the job.
Manually feed: <Type><Size>
This message appears when manual feed is selected, Tray 1 is not loaded, and other trays are empty.
Recommended action
-
Load the tray with requested paper.
-
If the paper is already in the tray, press the Help button to exit the message and then press the OK button to print.
-
To use another tray, clear paper from Tray 1, press the Help button to exit the message and then press the OK button.
Misprint. Press [OK] to continue.
Paper has been delayed as it moves through the product.
Recommended action
Follow these troubleshooting steps in the order presented.
-
Press the OK button to clear the message.
-
To avoid this problem, try the following solutions:
-
Adjust the paper guides in the tray. Ensure the front paper guide is pushing the paper against the back edge of the tray.
-
Use paper that meets HP specifications. Store paper unopened in its original packaging.
-
Use the product in an area that meets the environmental specifications for this product.
-
No Dial tone
The product could not detect a dial tone.
Recommended action
Follow these troubleshooting steps in the order presented.
-
Check for a dial tone on the phone line by touching the Start Fax button.
-
Unplug the telephone cord from both the product and the wall. Reconnect the cord at both ends ensuring you are using the FAX
port on the back of the printer. Looking at the back of the printer, the FAX port is towards the middle. DO NOT connect the
fax line to the port with the telephone icon. -
Verify that you are using the telephone cord that came with the product.
-
Open the Support menu, and then touch the Fax Diagnostics menu. Touch the Run Fax Test button.
Note:
This test verifies that the phone cord is connected to the correct port and that the phone line has a signal. The product
prints a report with the results. -
For additional fax sending/receiving troubleshooting go to, or search for this document.
No Fax detected
The product answered the incoming call but did not detect that a fax machine was calling.
Recommended action
Follow these troubleshooting steps in the order presented.
-
Open the Setup menu, and then go to Fax Tools, choose Run Fax Test.
Note:
This test verifies that the phone cord is connected to the correct port and that the phone line has a signal. The product
prints a report with the results. -
For additional fax sending/receiving troubleshooting go to, or search for this document.
-
If the error persists, replace the Fax PCA.
Part numbers:
Fax PCA kit (USA) — W1A78-67906
Fax PCA kit (EURO) — W1A78-67907
Fax PCA kit (Brazil) — W1A78-67908
Fax PCA kit (Philippines) — W1A78-67909
No job to cancel
You have pressed the stop button but the printer is not actively processing any jobs.
Recommended action
-
No action necessary.
NON HP Supply Installed
This message is displayed for about 6 seconds when a new non-HP supply is installed.
10.99.31 (event code)
Recommended action
-
Use a genuine HP supply for the printer.
-
If you believe a genuine HP supply is being used, go to www.hp.com/go/anticounterfeit.
Printer out of memory, job too big
Printer out of memory, job too big.
Recommended action
Follow these troubleshooting steps in the order presented.
-
Touch the OK button to print the transferred data. Some data might be lost.
-
Reduce the page complexity.
Output Bin Full
This message displays when the output bin is full and paper must be removed before printing can continue.
Recommended action for customers
-
Remove the paper from the output bin.
-
If the message persists and the tray is empty, please contact customer support at: www.hp.com/go/contactHP.
Paused…
The printer is paused, and there are no error messages pending at the display. The I/O continues receiving data until the
memory is full.
Recommended action
-
Press the Stop button.
Printing Help Page…
The printer is printing the Help page.
Recommended action
-
No action necessary.
Printing Menu Map…
The printer is printing the Menu Map pages.
Recommended action
-
No action necessary.
Printing Supplies Status Page…
The printer is printing the Supplies Status page.
Recommended action
-
No action necessary.
Ready <IP Address>
The printer is online and ready for data. No status or printer attendance messages are pending at the display. The printer
IP address displays.
Recommended action
-
No action necessary.
Power Failure Recovery
Recovering from power failure. Please wait.
Recommended action
-
No action necessary.
Power supply malfunction.
Power supply malfunction. Restart the printer.
Recommended action
Follow these troubleshooting steps in the order presented.
-
Turn the printer on to restart it.
Printing Configuration…
The printer is printing the Configuration page.
Recommended action
-
No action necessary.
Printing engine test…
The printer is printing an engine test page.
Recommended action
-
No action necessary.
Printing Event Log…
The printer is printing the Event Log page.
Recommended action
-
No action necessary.
Printing Font List…
The printer is printing the Font List pages.
Recommended action
-
No action necessary.
Printing File Directory…
The printer is printing the File Directory pages.
Recommended action
-
No action necessary.
Printing Usage Page…
The printer is printing the Usage page.
Recommended action
-
No action necessary.
Protected cartridge
A previously protected cartridge was installed in a printer other than the one that initiated the cartridge protection.
The indicated cartridges can only be used in the printer or fleet of printers that initially protected the cartridges using
the HP Cartridge Protection feature.
Recommended action
Follow these troubleshooting steps in the order presented.
-
Please check the printer and replace the cartridge.
Note:
The indicated cartridges can only be used in the printer or fleet of printers that initially protected the cartridges using
the HP Cartridge Protection feature. These cartridges are not usable in this printer and must be replaced.The HP Cartridge Protection feature allows a printer or fleet owner to restrict usage of a cartridge to their printer or fleet
of printers. If you believe you purchased Genuine HP cartridges, visit us at: www.hp.com/go/anticounterfeit for more information
or to report fraud
Ready
The printer is online and ready for data. No status or printer attendance messages are pending at the display.
Recommended action
-
No action necessary.
Rear door open
The rear door of the printer is open.
Recommended action for customers
Follow these troubleshooting steps in the order presented.
-
Close the rear door of the printer.
-
If the message persists with the rear door completely closed, please contact customer support at: www.hp.com/go/contactHP.
Replace Supplies
This alert displays only if the printer is configured to stop when a supply reaches the very low threshold. The printer indicates
when a supply level is at its estimated end of life. The actual life remaining might be different than estimated.
The supply does not need to be replaced now unless the print quality is no longer acceptable.
Note:
HP recommends having replacement supplies available to install when the print quality is no longer acceptable.
The printer can be configured to stop when the supply level is very low. The supply might still be able to produce acceptable
print quality.
Recommended action
Follow these troubleshooting steps in the order presented.
-
Replace the specified supply.
Or, configure the printer to continue printing using the Manage Supplies menu on the printer control panel.
Tray <X> lifting error
Tray «X» has experienced a tray lifting error.
Recommended action for customers
Follow these troubleshooting steps in the order presented.
-
Open the indicated tray and check the paper guides.
-
Ensure the paper is correctly install in the paper tray and that the tray is not over-filled.
-
If the message persists, please contact customer support at: www.hp.com/go/contactHP.
Tray <X> Overfilled
Too much paper has been loaded in Tray <X>
Recommended action
Follow these troubleshooting steps in the order presented.
-
Open the tray and make sure the paper is below the paper stack tab or line shown on the tray.
Tray <X> empty: [Type], [Size]
The specified tray is empty and the current job does not need this tray to print.
-
X = 1: Tray 1
-
X = 2: Tray 2
-
X = 3: Tray 3
-
X = 4: Tray 4
-
X = 5: Tray 5
Recommended action
Follow these troubleshooting steps in the order presented.
-
Refill the tray at a convenient time.
Note:
This could be a false message. If the tray is loaded without removing the shipping lock, the printer does not sense that the
paper is loaded. Remove the shipping lock, and then load the tray.
Used or Counterfeit in Use
A used cartridge has been installed.
Recommended action
Follow these troubleshooting steps in the order presented.
-
A used cartridge has been installed. If you believe you purchased a genuine HP cartridge, visit us at http://www.hp.com/go/anticounterfeit.
Any printer repair required as a result of using used supplies is not covered under warranty. Supply status and features depending
on supply status will not be available. Press «OK» to continue.
Used supply installed To continue, touch “OK” OR Used supply in use
The toner cartridges or supplies has been previously used.
Recommended action
Follow these troubleshooting steps in the order presented.
-
If you believe a genuine HP supply is being used, go to www.hp.com/go/anticounterfeit.
Restore Factory Settings
The printer is restoring factory settings.
Recommended action
-
No action necessary.
Supplies low
Multiple supplies on the printer have reached the low threshold.
Recommended action
-
Replace the supply when print quality is no longer acceptable.
Supply memory warning
The printer cannot read or write to the e-label or the e-label is missing.
Recommended action
-
No action necessary.
Type mismatch Tray <x>
The specified tray contains a paper type that does not match the configured type.
Recommended action
The specified tray will not be used until this condition is addressed. Printing can continue from other trays.
-
Load the correct paper in the specified tray.
-
On the printer control panel, make sure the paper type loaded in the tray matches the specified setting for the tray.
Waiting for tray <x> to lift
The specified tray is in the process of lifting paper to the top of the tray (so it can correctly feed).
Recommended action
-
No action necessary.
 Ошибка памяти расходных материалов в принтерах и МФУ HP — как исправить
Испытываете ли вы проблемы с принтером HP, и бывает так, что видите на экране сообщение «Ошибка памяти 10.1000», «10 .0002» или что-то подобное?
Если ответ «да», вы, вероятно, уже пытались выключить и снова включить принтер, вынуть и снова вставить тонер-картриджи, и вы просто не можете решить проблему с принтером, ничего не работает, и вы готовы сдаться!
Не волнуйтесь, мы поможем в решении данной проблемы. Вот что вы узнаете на этой странице:
- Почему на принтере HP отображается сообщение «Ошибка памяти картриджей»
- Какие распространенные вещи вызывают ошибки в Memory Supply?
- Как исправить ошибку в памяти расходных материалов и снова заставить принтер работать.
Почему мой принтер отображает сообщение — «Ошибка памяти расходных материалов»?
Ошибка памяти расходных материалов возникает, когда металлические контакты / микросхема картриджа с тонером неправильно соединяются с соответствующими контактами внутри принтера. После этого принтер не может обнаружить установленный картридж с тонером и отображает сообщение «Ошибка памяти расходных материалов» на панели дисплея принтера. Ошибка также может быть вызвана неисправными совместимыми картриджами, в которых данные микрочипа устарели.
Эта проблема затрагивает различные модели HP LaserJet Pro и модели многофункциональных принтеров, в частности, принтеры HP M1212nf и модели LaserJet Pro M277dw.
Этот тип проблемы иногда возникает после замены пустого картриджа новым тонером, и существует несколько возможных причин. Читайте дальше, чтобы узнать, что это может быть …
Что вызывает ошибку памяти HP Supply и как их исправить.
Есть 4 простых и распространенных вещи, которые могут вызвать проблему с принтером, не давая ему работать, и, к счастью, их очень легко исправить.
- Замятую бумагу или защитные полоски, которые не были удалены.
- Раздавленные металлические контакты, которые больше не соединяют тонер с принтером.
- Сломанные кусочки пластика приводят к тому, что тонер оказывается не на своем месте.
- Устаревшее программное обеспечение / прошивка принтера.
Чтобы ваш принтер снова заработал, попробуйте следующие исправления:
1. Защитные полоски
Когда вы собираетесь установить новый картридж с тонером, есть оранжевые защитные полоски и пластиковые зажимы, чтобы убедиться, что картридж не поврежден во время транспортировки. Каждый из этих зажимов и защитная полоса на барабане должны быть удалены перед установкой нового тонера, иначе они будут препятствовать печати вашего принтера.
Зажимы легко обнаружить, защитная полоса находится на стороне тонера и имеет оранжевое кольцо, которое нужно вынуть чтобы удалить полоску, или оно будет похоже на кусок целлофана, как на изображении ниже.

2. Раздавленные металлические контакты
Чтобы ваш принтер мог обнаружить установленный картридж с тонером, 2 крошечных металлических контакта соединяются с соответствующими контактами на картридже. Металлические контакты в принтере и те, что на тонере, замыкают цепь, и если контакты не соприкасаются. Ваш принтер будет считать, что тонер не установлен.
Извлеките картридж с тонером и найдите что-то похожее на микрочип или два металлических квадрата. Теперь представьте, где они будут подключаться к принтеру, и найдите соответствующие разъемы внутри принтера (убедитесь, что принтер выключен и отсоединен от сети).
Если два металлических разъема кажутся сдавленными, аккуратно (чтобы ничего не сломалось), потяните их вперед. Это должно позволить им правильно подключиться к тонеру после его повторной установки.
Также возможно, что потеря кусочков упаковочного материала или замятие бумаги могут вызвать проблемы, поэтому перед установкой нового тонера убедитесь, что принтер чист.

3. Сломанные пластиковые кусочки
Если картридж с тонером был поврежден одной из сторон, так что пластиковые прорези сломались, он может неправильно поместиться в принтере и по аналогии с предыдущей причиной проблемы с памятью расходных материалов, контакты не будут правильно соединяться, и Единственный способ решить эту проблему — заменить картридж с тонером на новый.

4. Устаревшая прошивка / программное обеспечение
Производитель вашего принтера будет регулярно обновлять ваш принтер новым программным обеспечением. Если это программное обеспечение устарело по какой-либо причине, вы можете получить ошибку. Посетите Google и введите «[ваш принтер модель] прошивки» в строке поиска и загрузите последнюю версию для вашего компьютера / принтера. После обновления это часто может исправить многие проблемы с принтером. Последние обновления прошивки вы можете найти на сайте HP.
Последняя возможная причина сообщения об ошибке памяти расходных материалов может быть вызвана тем, что при установке совместимого или восстановленного картриджа с тонером , данные хранящиеся на микрочипе картриджей, устарели.
Затем микропрограмма принтера может доставить сообщение об ошибке в памяти расходных материалов, и единственный способ решить эту проблему — это заставить компанию, у которой вы приобрели принтер, заменить его новым, а затем заменить его на своем принтере.
Вот, пожалуйста, эти советы были полезны, и ваш принтер снова работает сделайте репост статьи, чтобы как можно больше пользы она принесла вашим друзьям и близким, спасибо. А мы в свою очередь по вашим просьбам, будем и дальше изучать, писать и помогать вам в решении проблем связанных с принтерами и МФУ.
Обновлено: 03.06.2023
«Supply memory error in black» (Ошибка запоминания черного картриджа)
«Supply memory error in cyan» (Ошибка запоминания голубого картриджа)
«Supply memory error in yellow» (Ошибка запоминания желтого картриджа)
«Supply memory error in magenta» (Ошибка запоминания пурпурного картриджа)
Решение первое. Убедитесь, что используются оригинальные картриджи HP
Выполните следующие действия, чтобы убедиться, что установлены оригинальные картриджи HP.
Шаг 1. Убедитесь, что используются оригинальные картриджи HP
Компания Hewlett-Packard не рекомендует использовать картриджи других производителей, в том числе повторно заправленные, новые или восстановленные. Никакой ущерб, причиненный устройству вследствие установки картриджа стороннего производителя, не подпадает под действие гарантии HP и сервисных соглашений. См. документ Заявление об ограниченной гарантии на картриджи и барабаны переноса изображений HP LaserJet (c01848047) (на английском языке).
Рис. : Полностью откройте переднюю дверцу доступа

Нажмите фиксатор голубого цвета на лотке картриджа и полностью выдвиньте лоток.
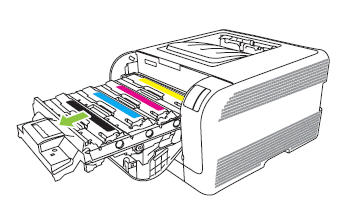
Возьмитесь за один из картриджей по центру и потяните его вверх, чтобы извлечь из лотка.
Рис. : Пример процесса извлечения картриджа.

Во избежание повреждения картриджа не оставляйте его на свету больше чем на несколько минут.
Не прикасайтесь к зеленому ролику (барабану переноса изображений), который расположен в нижней части картриджа. Отпечатки пальцев, оставленные на барабане переноса изображений, могут привести к ухудшению качества печати.
Рис. : Не прикасайтесь к барабану переноса изображений
Проверьте, имеется ли на картридже логотип HP. На оригинальных картриджах HP всегда имеется отпечатанная этикетка HP, Hewlett-Packard или логотип HP ().
Если картриджи являются оригинальными картриджами HP, вставьте картридж в соответствующее гнездо и переходите к следующему этапу.
Если картриджи не являются оригинальными картриджами HP, замените их на оригинальные картриджи HP.
Расположите картридж таким образом, чтобы барабан переноса изображений был обращен вниз, а затем установите картридж в соответствующее гнездо.

Убедившись, что оригинальные картриджи HP установлены, полностью закройте крышку отсека картриджей.
Рис. : Полностью закройте крышку отсека картриджей

Рис. : Полностью закройте переднюю дверцу доступа

Шаг 2. Выключите принтер и снова включите его
Если эти действия привели к устранению неполадки, дальнейшие действия не требуются.
Если проблема остается, перейдите к следующему решению.
Решение второе. Очистите металлические контакты картриджей
Нажмите фиксатор голубого цвета на лотке картриджа и полностью выдвиньте лоток.
При помощи безворсовой ткани протрите контакт электронной метки вверху картриджа в направлении влево.
Рис. : Пример электронной метки на картридже
При помощи безворсовой ткани протрите металлические контакты на конце картриджа.
Заново установите картридж в соответствующее гнездо.
Если эти действия привели к устранению неполадки, дальнейшие действия не требуются.
Если проблема остается, перейдите к следующему решению.
Решение третье. Установите проблемный картридж в другое гнездо
Выполните следующие действия, чтобы определить, является ли источником проблемы сам картридж или гнездо, в котором он находится.
Нажмите фиксатор голубого цвета на лотке картриджа и полностью выдвиньте лоток.
Извлеките из своего гнезда один из исправных картриджей.
Установите проблемный картридж в освободившееся гнездо.
Установите другой картридж в гнездо проблемного картриджа.
hp-feedback-input-portlet
hp-feedback-banner-portlet
hp-country-locator-portlet
Выбор местоположения
Северная и Южная Америка
Европа, Ближний Восток, Африка
Азиатско-Тихоокеанский регион и Океания
Выберите язык
hp-detect-load-my-device-portlet
hp-hero-support-search
Примеры: “LaserJet 1020 замятие бумаги”, “Pavilion g6-1200 bios”
Если ответ «да», вы, вероятно, уже пытались выключить и снова включить принтер, вынуть и снова вставить тонер-картриджи, и вы просто не можете решить проблему с принтером, ничего не работает, и вы готовы сдаться!
Не волнуйтесь, мы поможем в решении данной проблемы. Вот что вы узнаете на этой странице:
Эта проблема затрагивает различные модели HP LaserJet Pro и модели многофункциональных принтеров, в частности, принтеры HP M1212nf и модели LaserJet Pro M277dw.
Этот тип проблемы иногда возникает после замены пустого картриджа новым тонером, и существует несколько возможных причин. Читайте дальше, чтобы узнать, что это может быть .
- Замятую бумагу или защитные полоски, которые не были удалены.
- Раздавленные металлические контакты, которые больше не соединяют тонер с принтером.
- Сломанные кусочки пластика приводят к тому, что тонер оказывается не на своем месте.
- Устаревшее программное обеспечение / прошивка принтера.
Чтобы ваш принтер снова заработал, попробуйте следующие исправления:
1. Защитные полоски
Когда вы собираетесь установить новый картридж с тонером, есть оранжевые защитные полоски и пластиковые зажимы, чтобы убедиться, что картридж не поврежден во время транспортировки. Каждый из этих зажимов и защитная полоса на барабане должны быть удалены перед установкой нового тонера, иначе они будут препятствовать печати вашего принтера.
Зажимы легко обнаружить, защитная полоса находится на стороне тонера и имеет оранжевое кольцо, которое нужно вынуть чтобы удалить полоску, или оно будет похоже на кусок целлофана, как на изображении ниже.
2. Раздавленные металлические контакты
Чтобы ваш принтер мог обнаружить установленный картридж с тонером, 2 крошечных металлических контакта соединяются с соответствующими контактами на картридже. Металлические контакты в принтере и те, что на тонере, замыкают цепь, и если контакты не соприкасаются. Ваш принтер будет считать, что тонер не установлен.
Извлеките картридж с тонером и найдите что-то похожее на микрочип или два металлических квадрата. Теперь представьте, где они будут подключаться к принтеру, и найдите соответствующие разъемы внутри принтера (убедитесь, что принтер выключен и отсоединен от сети).
Если два металлических разъема кажутся сдавленными, аккуратно (чтобы ничего не сломалось), потяните их вперед. Это должно позволить им правильно подключиться к тонеру после его повторной установки.
Также возможно, что потеря кусочков упаковочного материала или замятие бумаги могут вызвать проблемы, поэтому перед установкой нового тонера убедитесь, что принтер чист.
3. Сломанные пластиковые кусочки
Если картридж с тонером был поврежден одной из сторон, так что пластиковые прорези сломались, он может неправильно поместиться в принтере и по аналогии с предыдущей причиной проблемы с памятью расходных материалов, контакты не будут правильно соединяться, и Единственный способ решить эту проблему — заменить картридж с тонером на новый.
4. Устаревшая прошивка / программное обеспечение
Вот, пожалуйста, эти советы были полезны, и ваш принтер снова работает сделайте репост статьи, чтобы как можно больше пользы она принесла вашим друзьям и близким, спасибо. А мы в свою очередь по вашим просьбам, будем и дальше изучать, писать и помогать вам в решении проблем связанных с принтерами и МФУ.
Коды ошибок и состояний принтеров HP LaserJet. Часть 2.
Описание
10001
00 READY ON LINE
Принтер находится в режиме готовности — в состоянии ON LINE . Принтер может принимать данные от ПК.
68 READY/SEVICE или
PERFORM USER MAINTENANCE
Требуется осуществить пользовательское обслуживание принтера, заключающееся в очистке памяти.
68 NVRAM FULL, SETTING NOT SAVED
Переполнение энергонезависимой памяти NVRAM , что препятствует записи в нее пользовательских установок.
10002
00 READY OFF LINE или
68 READY/SEVICE
Принтер находится в режиме OFF LINE , т.е. не может осуществлять прием данных от ПК.
10003
02 WARMING UP
Проходит процедура прогрева принтера (прогревается печка).
10004
05 SELF TEST или INTERNAL TEST
Осуществляется распечатка встроенного теста принтера.
10005
07 RESET или CLEARING MEMORY
Осуществлен сброс принтера (т.е. его возврат в первоначальное состояние) и очистка памяти от заданий.
10006
16 TONER LOW
В картридже осталось мало тонера.
1 0007
CANCELING JOB
Отмена задания . При этом осуществляется очистка памяти.
10010
STATUS BUFER OVERFLOW
Переполнение буфера (памяти) состояния принтера.
10011
18 AUX INIT или 18 AUX IO NT RDY или 18 MIO NOT RDY или HP MIO1 INITIALIZING или HP MIO 2 INITIALIZING или HP MIO 1 NOT READY или HP MIO 2 NOT READY или HP MIO INITIALIZING
10013
04 SELF TEST
Осуществляется распечатка встроенного теста принтера.
10014
06 PRINTING TEST или PRINTING CONFIGURATION PAGE или INTERNAL TEST
Осуществляется распечатка встроенного теста принтера или листа конфигурации принтера.
10015
06 TYPEFACE LIST или PRINTING FONT LIST
Осуществляется распечатка списка шрифтов принтера.
10016
15 ENGINE TEST
Осуществляется распечатка теста механизмов.
10017
06 DEMO PAGE или PRINIG DEMO PAGE
Осуществляется распечатка демонстрационного листа прин-тера.
10018
09 MENU RESET или RESETTING MENUS TO DEFAULTS
Выбрано меню сбросов. Через меню сбросов осуществлена установка всех параметров принтера в значения «по-умолча-нию».
10019
09 RST ACTIVE IO или RESETTING ACTIVE IO
В меню сбросов выбрана функция сброса всех активных портов ввода/вывода.
10020
09 RESET ALL I/O
В меню сбросов выбрана функция сброса всех портов ввода/вывода.
10021
08 COLD RESET или RESTORING FACTORY SETTINGS
Выполняется «холодный сброс» принтера, при котором принтер устанавливается в значения «по-умолчанию» и происходит очистка неиспользуемых областей памяти NVRAM .
10022
06 CONFIG PAGE или PRINTING CONFIGURATION PAGE
Осуществляется распечатка листа конфигурации.
10023
PROCESSING JOB
Осуществляется обработка задания.
PROCESSING JOB FROM ENV FEEDER
Осуществляется обработка задания для лотка подачи конвертов.
PROCESSING JOB FROM TRAY [X]
Осуществляется обработка задания для лотка бумаги [ X ].
10024
PRESS SELECT TO FORMFEED
Необходимо нажать кнопку [Выбрать] для загрузки бумаги.
DATA RECEIVED
Идет передача данных.
10025
ACCESS DENIDED
10026
NO JOB TO CANCEL
Нет задания для отмены.
10027
CLEARING PAPER PATH
Очистить тракт подачи бумаги.
10028
PRINTING ERROR LOG
Осуществляется распечатка журнала событий.
10029
FORMFEEDING
Осуществляется загрузка бумаги
10030
10031
ENGINE CLEANING
Осуществляется очистка механизмов принтера.
10032
10033
INVALID PIN
Введен неправильный PIN -код.
10034
INTERRAPTING JOB
10035
RESUMING JOB
Продолжить выполнение задания.
10036
02 WARMING UP
Проходит процедура прогрева принтера (прогревается печка).
10200
ORDER BLACK TONER [n] PAGES LEFT
Требуется замена черного тонера, но принтер может отпечатать примерно [ n ] листов.
10201
ORDER CYAN TONER [n] PAGES LEFT
Требуется замена голубого тонера, но принтер может отпечатать примерно [ n ] листов.
10202
ORDER MAGENTA TONER [n] PAGES LEFT
Требуется замена пурпурного тонера, но принтер может отпечатать примерно [ n ] листов.
10203
ORDER YELLOW TONER [n] PAGES LEFT
Требуется замена желтого тонера, но принтер может отпечатать примерно [ n ] листов.
10204
ORDER IMAGE DRUM
Требуется замена имидж-барабана принтера.
10205
ORDER BLACK DRUM
Требуется замена «черного» фотобарабана.
10206
ORDER CYAN DRUM
Требуется замена «голубого» фотобарабана.
10207
ORDER MAGENTA DRUM
Требуется замена «пурпурного» фотобарабана.
10208
ORDER YELLOW DRUM
Требуется замена «желтого» фотобарабана.
10209
ORDER BLACK TONER
Требуется замена черного тонера.
10210
ORDER CYAN TONER
Требуется замена голубого тонера.
10211
ORDER MAGENTA TONER
Требуется замена пурпурного тонера.
10212
ORDER YELLOW TONER
Требуется замена желтого тонера.
10213
ORDER TRANSPORT KIT
Требуется замена транспортирующего комплекта.
10214
ORDER CLEANING KIT
Требуется замена чистящего комплекта.
10215
ORDER TRANSFER KIT
Требуется замена комплекта переноса изображения.
10216
ORDER FUSER KIT
Требуется замена комплекта блока фиксации.
10217
PERFORM PRINTER MAINTENANCE
Осуществите обслуживание принтера.
10218
ORDER SUPPLIES [n] PAGES LEFT
Требуется замена расходных материалов, но принтер может отпечатать примерно [ n ] листов.
10300
REPLACE BLACK TONER
Замените черный тонер.
10301
REPLACE CYAN TONER
Замените голубой тонер.
10302
REPLACE MAGENTA TONER
Замените пурпурный тонер.
10303
REPLACE YELLOW TONER
Замените желтый тонер.
10304
REPLACE IMAGE DRUM
10305
REPLACE BLACK DRUM
Замените «черный» фотобарабан.
10306
REPLACE CYAN DRUM
Замените «голубой» фотобарабан.
10307
REPLACE MAGENTA DRUM
Замените «пурпурный» фотобарабан.
10308
REPLACE YELLOW DRUM
Замените «желтый» фотобарабан.
10309
REPLACE BLACK CARTRIDGE
Замените «черный» картридж.
10310
REPLACE CYAN CARTRIDGE
Замените «голубой» картридж.
10311
REPLACE MAGENTA CARTRIDGE
Замените «пурпурный» картридж.
10312
REPLACE YELLOW CARTRIDGE
Замените «желтый» картридж.
10313
REPLACE TRANSPORT KIT
Замените транспортирующий комплект.
10314
REPLACE CEANING KIT
Замените чистящий комплект.
10315
REPLACE TRANSFER KIT
Замените комплект переноса изображения.
10316
REPLACE FUSER KIT
Замените комплекта блока фиксации.
10317
PERFORM PRINTER MAINTENANCE
Осуществите обслуживание принтера.
10318
REPLACE SUPPLIES
Установите расходные материалы.
10400
NON-HP SUPPLIES IN USE
Расходные материалы не являются продукцией HP .
10401
GENUINE HP SUPPLIES
Расходные материалы производства HP
10402
У Вашего принтера HP появились проблемы в работе? Вместо нормального функционирования он выдает ошибку запоминания картриджа «Supply Memory Error» или что-то аналогичное этому? Вы уже попробовали провести манипуляции с включением и отключением принтера, извлечением и установкой расходников, но проблема так и не была решена? Не спешите выбрасывать устройство и картриджи в «окно». Для начала сделайте то, что мы Вам посоветуем.
В этой статье Вы найдете ответы на следующие вопросы:
Почему мой принтер выдает ошибку запоминания картриджа (Supply Memory Error)?
Стоит отметить, что эта проблема актуальна как для струйных МФУ, так и для лазерных (HP LaserJet Pro M1212nf/ M277dw и прочие модели). В основном ошибка Supply Memory появляется тогда, когда принтер теряет связь с картриджем. Например, из-за нарушения работы контактов. Еще подобное может произойти после установки неоригинальных, восстановленных или перезаправленных картриджей. Особенно техника строга к тем расходникам, которые используют устаревшие чипы и микросхемы.
Из-за чего появляется ошибка памяти картриджа?
Всего существует пять основных моментов, влияющих на появление этой ошибки у печатающих аппаратов HP. В частности, речь идет о следующих факторах:
- Не были извлечены защитные пленки, крышки и т.д.
- За время эксплуатации загрязнились или износились металлические контакты.
- Механические дефекты нарушают положение картриджа.
- Необновленное ПО принтера блокирует работу картриджа.
- Чип картриджа несовместим с принтером.
К счастью, все сказанное выше легко устранить, даже неопытному пользователю оргтехники.
Что нужно сделать, чтобы принтер HP вновь заработал?
Избавиться от ошибки Supply Memory Error можно несколькими способами, все зависит от источника, влияющего на возникновение причины.
1. Средства защиты картриджей
Эта причина появления ошибки запоминания расходников не несет каких-либо страшных последствий. Чтобы ее устранить, достаточно вытащить картридж из принтера, внимательно осмотреть его и удалить оставшиеся элементы защиты.
У лазерных картриджей на торце есть специальное кольцо (кусочек торчащей пленки), за которое следует потянуть, чтобы извлечь защитную ленту. Еще под крышкой, закрывающей фотобарабан, может находиться пластиковая или бумажная пластинка. Что касается струйных картриджей, то здесь все куда проще. Защите подвергаются только контакты и печатающая головка, которые видно невооруженным глазом.
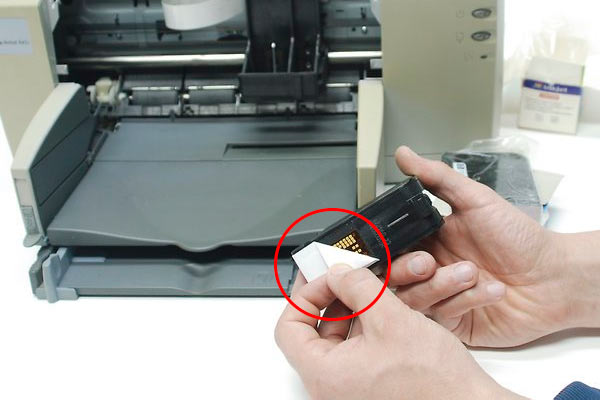
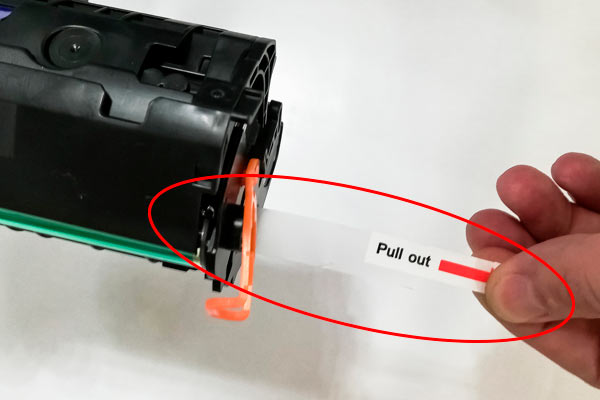
2. Тонкие металлические контакты принтера и картриджей
Соединение принтера HP с картриджем осуществляется при помощи крохотных металлических контактов. Такие элементы есть на обоих изделиях. Их соприкосновение замыкает цепь, разрыв которой влечет за собой появление ошибки Supply Memory Error.
У картриджей контакты имеют форму цельных пластин или микросхем, установленных неподвижно, обычно на задней панели корпуса. В свою очередь, у оргтехники эти элементы выполнены в виде пружинистых пластинок или подвижных проводков.
Прерывание связи, влекущее появление ошибки запоминания расходников, может произойти по нескольким причинам:
- Что-то попало между контактами картриджа и принтера.
- Контакты принтера были деформированы.
Чтобы решить любую из проблем, следует извлечь картридж из принтера и осмотреть его контакты на наличие царапин или грязи. Если они загрязнены, то протрите изделие безворсовой тканевой салфеткой. В случае с сильными механическими повреждениями поможет только замена картриджа. Можно попробовать сменить саму пластину. Но, скорее всего, это дело обернется провалом. Поэтому лучше не тратьте зря времени, а сразу купите новый картридж.
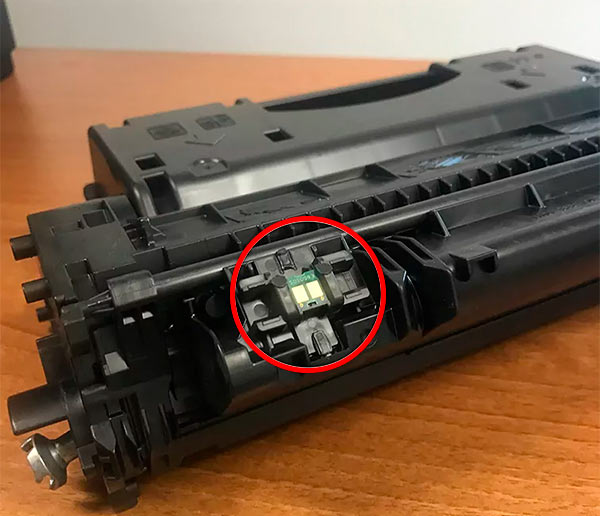
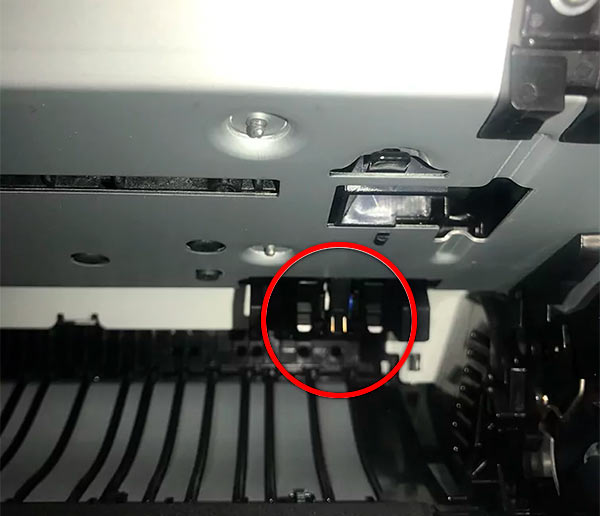
После проведенных с картриджем процедур, загляните во внутреннюю часть печатающего аппарата. В процессе эксплуатации там могло скопиться немало пыли, грязи, ошметков бумаги и прочего мусора. Очистите все. Найдите контакты принтера и проверьте их целостность. Если видно деформацию, то попробуйте аккуратно выгнуть их обратно. Если процесс прошел успешно, вставляйте картриджи и приступайте к печати. Если сломали контакт или он был сломан еще до Вашего вмешательства, несите принтер в сервисный центр.
3. Механические повреждения корпуса картриджа и принтера
На лазерных картриджах есть специальные выступы, удерживающие его в правильном положении. Если хотя бы один из них сломается, то позиция расходника изменится, из-за чего нарушится его связь с принтером (немного похоже на то, что было описано в предыдущем случае). Единственный способ решения проблемы – замена тонер-картриджа. Жмите, чтобы подобрать нужный расходник.
Похожая проблема может быть и у картриджей струйного типа. Но здесь история обстоит несколько иначе. Тут могут не только счесаться ушки расходника, но и сломаться крепежи, удерживающие его в принтере. Погрешность устраняется заменой картриджа или ремонтом оргтехники. Кроме того, ошибка Supply Memory может возникнуть из-за того, что картридж банально не полностью защелкнулся во время установки.
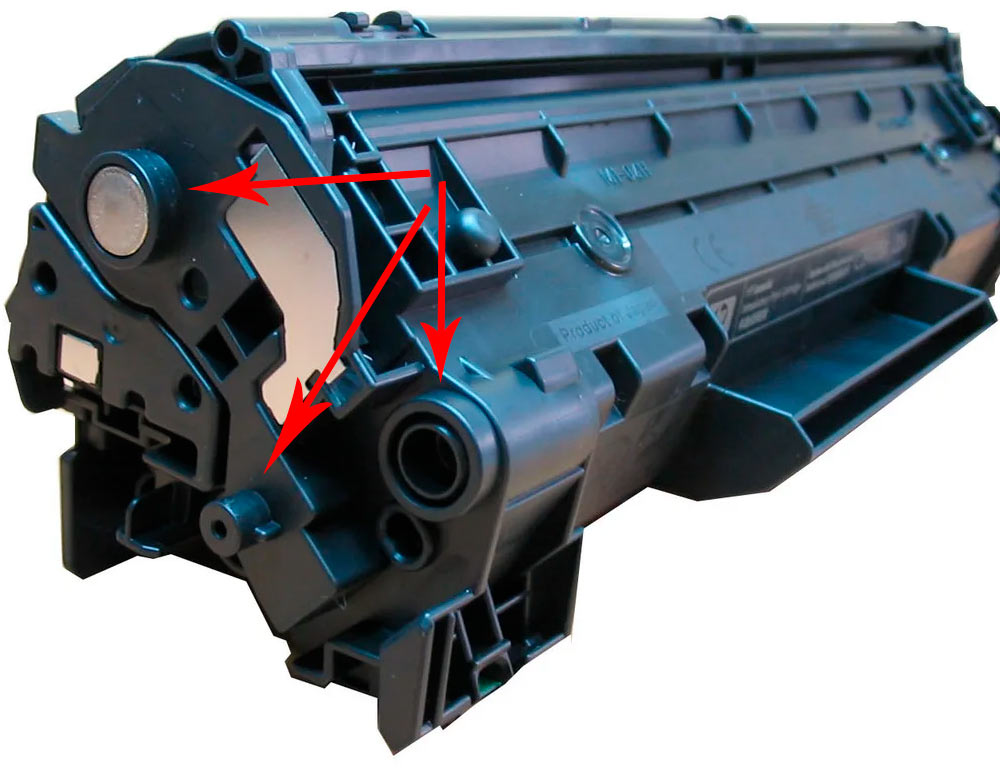

4. Программное обеспечение принтера HP
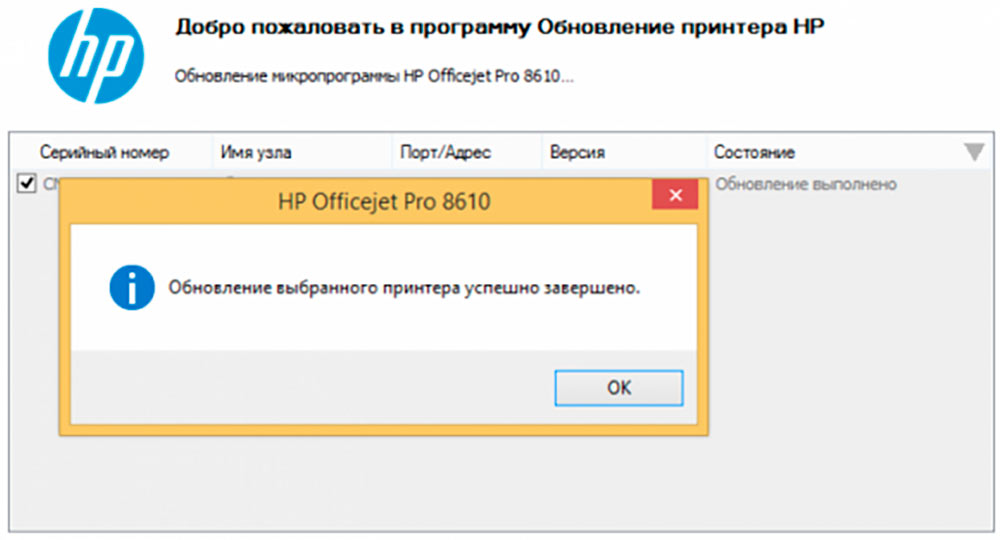
5. Чипы и микросхемы восстановленных картриджей
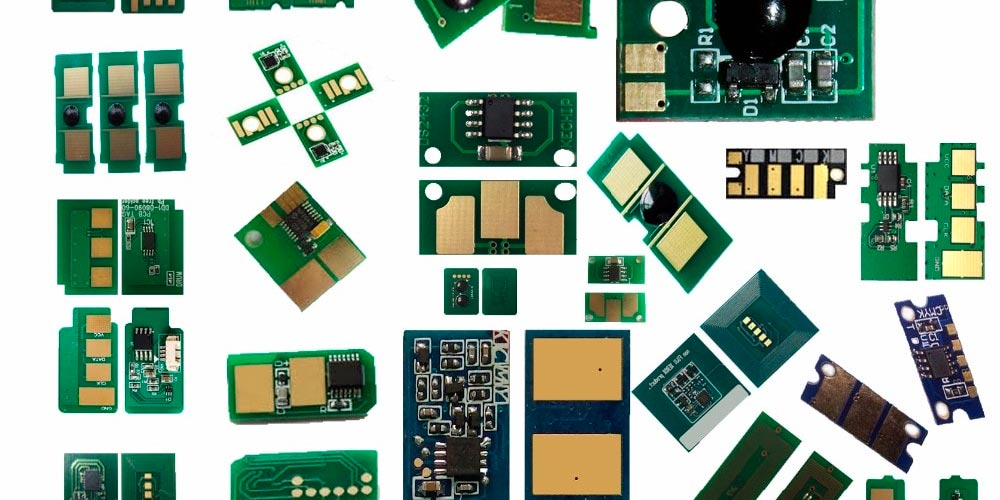
Если вы пытаетесь подключить принтер HP к ПК с Windows в первый раз или после чистой установки, вам необходимо сначала установить драйвер принтера HP, чтобы начать процесс печати.
Как и большинство периферийных устройств, принтеру HP также необходимо сначала установить соответствующие драйверы.
Иногда драйверы могут автоматически устанавливаться автоматически после подключения принтера через USB-кабель, в противном случае вам может понадобиться загрузить этот конкретный драйвер принтера и установить его вручную.
В обеих ситуациях процесс установки принтера HP прост и не займет более нескольких минут.
Однако для некоторых пользователей все может быть сложно. Некоторые пользователи сообщают, что при установке драйверов принтера HP на ПК с Windows появляется неустранимая ошибка.
В этой статье я перечислил все возможные проблемы с неустранимыми ошибками принтера HP и несколько быстрых способов их устранения.
- Также читайте: Microsoft тайно добавляет виртуальный принтер в OneNote
Некоторые из распространенных ошибок драйвера принтера HP:
Решение 1. Отключите HP Smart Install
Таким образом, если вы столкнулись с фатальной ошибкой при установке драйвера принтера HP, отключение опции HP Smart Install решит проблему. Выполните следующие действия, чтобы отключить HP Smart Install.
- На экране принтера перейдите в Настройка> Сервис.
- Откройте HP Smart Install и убедитесь, что эта функция отключена.
- Теперь попробуйте установить драйвер и посмотреть, если отключение функции решило ошибку.
Решение 2. Запустите средство устранения неполадок Windows
Чтобы устранить неполадки вашего принтера, выполните следующие действия.
Если проблема не устранена, закройте средство устранения неполадок и перейдите к следующим шагам.
- Также читайте: 6 лучших программ для управления принтером для оптимизации производительности
Решение 3. Отключите и снова подключите принтер
Иногда простые решения, такие как отключение и повторное подключение принтера, могут решить эту проблему.
Итак, выключите принтер и отсоедините от компьютера. Подождите несколько секунд и снова подключите принтер, но на этот раз используйте другой порт USB. Иногда USB-порт также может вызывать досадные ошибки.
Решение 4. Извлеките принтер из панели управления.
- Откройте Панель управления . Если вы не знаете, как это сделать, просто введите «Панель управления» на панели «Кортана/поиск» и выберите ее из результатов.
- В разделе Оборудование и звук нажмите Просмотр устройств и принтеров.
- Выберите любой из перечисленных принтер HP и нажмите Удалить устройство.
- Перезагрузите компьютер, как только он будет удален.
- Нажмите Windows Key + R , введите следующую команду и нажмите ОК. Printui.exe/s
- Откроется окно Свойства сервера печати .Нажмите на вкладку Драйверы, выберите любой из перечисленных принтеров HP и нажмите кнопку Удалить .
- Выберите вариант Удалить драйвери пакет драйверов и нажмите ОК .
Попробуйте установить драйвер еще раз, чтобы увидеть, если проблема решена. Если нет, перезагрузите компьютер и попробуйте снова.
- Также прочитайте: что делать, если драйвер принтера для Windows 10 недоступен
Решение 5. Остановите службу диспетчера очереди печати

- Откройте диалоговое окно «Выполнить», нажав клавишу Windows + R . Введите «services.msc » и нажмите ввод.
- Откроется окно Службы . Найдите Диспетчер очереди печати в списке.
- Нажмите правой кнопкой мыши на Диспетчер очереди печати и выберите Стоп . Закрыть окно служб.
- Снова откройте диалоговое окно «Выполнить», введите Буфер и нажмите Enter.
- Удалить все в этой папке. Если будет запрошено разрешение администратора, нажмите ОК .
- Снова откройте окно «Службы» с помощью диалогового окна «Запуск» и запустите службу Диспетчер очереди печати . Нажмите правой кнопкой мыши и выберите Пуск.
Перезапустите установочный пакет драйвера и проверьте наличие улучшений.
- Также прочитайте: что делать, если на вашем компьютере не работает служба очереди печати
Решение 6. Установите драйвер принтера вручную из диспетчера устройств
Диспетчер устройств позволяет отключить/включить и установить/удалить драйверы для любого оборудования, подключенного к вашему компьютеру.
Таким образом, если у вас возникают проблемы при установке драйверов принтера HP, вы можете попробовать установить их вручную.
Когда компьютер попросит вас подключить USB-кабель во время установки, выполните следующие действия.
Перезагрузите компьютер и убедитесь, что установка драйвера принтера вручную устранила фатальную ошибку, и вы можете использовать принтер.
- Также читайте: Как заблокировать Anatova Ransomware на ПК с Windows 10
Решение 7. Установите принтер с помощью драйвера принтера Windows
Windows 10 поставляется с общими драйверами для большого количества оборудования, включая дисплей и принтеры. Если вам не удается установить официальные драйверы принтера HP, попробуйте установить принтер с использованием драйверов по умолчанию.
Вот как это сделать. Начните с подключения вашего принтера к компьютеру. Существует несколько способов подключения любого принтера, включая USB-соединение, беспроводное соединение через Wi-Fi и проводное соединение с вашей сетью.
- На панели Cortana/Search введите Добавить принтер и откройте Добавить принтер или сканер .
- Снова нажмите кнопку Добавить принтер или сканер в разделе Настройки и следуйте инструкциям на экране для установки драйвера принтера.
Теперь напечатайте как образец документа, чтобы проверить, успешно ли установлен драйвер принтера.
- Также читайте: 5 лучших беспроводных принтеров, совместимых с Windows 10
Решение 8. Загрузите 32-разрядный установщик для 32-разрядной и 64-разрядной версий Windows
Если вы используете 64-разрядную версию Windows и сталкиваетесь с фатальной ошибкой, попробуйте вместо этого использовать 32-разрядную версию.
Некоторые пользователи сообщают, что 32-разрядный драйвер принтера HP работает без сбоев даже в 64-разрядной версии Windows без фатальной ошибки.
Вы можете скачать соответствующую 32-разрядную версию драйвера для вашего принтера с официального сайта HP.
Решение 9. Обратитесь в службу поддержки HP
Если ни одно из решений не работает и вы все еще получаете неустранимую ошибку, поддержка HP может помочь вам решить проблему. Агенты службы поддержки клиентов подключаются к вашему компьютеру удаленно и устраняют ошибку, если она доступна.
Вы можете перейти отсюда и разрешить службе поддержки устранить ошибку, подключившись к компьютеру удаленно.
Решение 10. Восстановите систему до более ранней точки
Если вам повезло и вы создали точку восстановления системы, вы можете восстановить свой компьютер до более ранней точки, когда компьютер и принтер работали безупречно.
Это долгий путь, но Windows создает обычную точку восстановления системы, которая помогает восстановить ПК до более раннего момента времени, чтобы устранить серьезные проблемы с компьютером.
Компьютеры с Windows 10 обычно создают точку восстановления системы автоматически всякий раз, когда пользователь устанавливает новую программу или когда ПК получает обновление ОС.
Примечание. . Точка восстановления удаляет все программы, установленные на вашем компьютере после создания Точки восстановления. Но это не влияет ни на один из файлов на вашем компьютере.
Вот как выполнить восстановление системы:
Следуйте инструкциям на экране, и через несколько минут система будет восстановлена до выбранной вами точки. Попробуйте снова использовать принтер, чтобы проверить, работает ли он.
Заключение
Сообщите нам исправление, которое сработало для вас, или если у вас есть новое исправление, которое не указано в этой статье в комментариях ниже.
Читайте также:
- Копирование песен из apple music на ipod не поддерживается что делать
- Hp elitebook 8540w как разобрать
- Vpn instance huawei настройка
- Как убрать надпись на фото honor 10
- Huawei gt2 после обновления health показывают неправильное время
Обладатели печатной продукции от компании HP иногда сталкиваются с тем, что на экране появляется уведомление «Ошибка печати». Причин возникновения этой неполадки может быть несколько и каждая из них решается по-разному. Сегодня мы подготовили для вас разбор основных способов исправления рассматриваемой проблемы.
Исправляем ошибку печати на принтере HP
Каждый приведенный ниже метод имеет разную эффективность и будет наиболее подходящим в определенной ситуации. Мы по порядку рассмотрим все варианты, начиная от самого простого и действенного, а вы, следуя инструкциям, решите поставленную задачу. Однако сначала мы рекомендуем обратить внимание на эти советы:
- Перезапустите компьютер и переподключите устройство печати. Желательно, чтобы перед следующим подключением принтер находится в выключенном состоянии не менее одной минуты.
- Проверьте картридж. Иногда ошибка появляется в тех случаях, когда в чернильнице закончилась краска. О том, как заменить картридж вы можете прочитать в статье по ссылке ниже.
Если приведенные советы ничем не помогли, переходите к осуществлению следующих методов решения «Ошибка печати» при использовании периферии компании HP.
Способ 1: Проверка принтера
В первую очередь советуем проверить отображение и конфигурацию оборудования в меню «Устройства и принтеры». От вас потребуется произвести всего несколько действий:
-
Через меню «Панель управления» и переместитесь в «Устройства и принтеры».
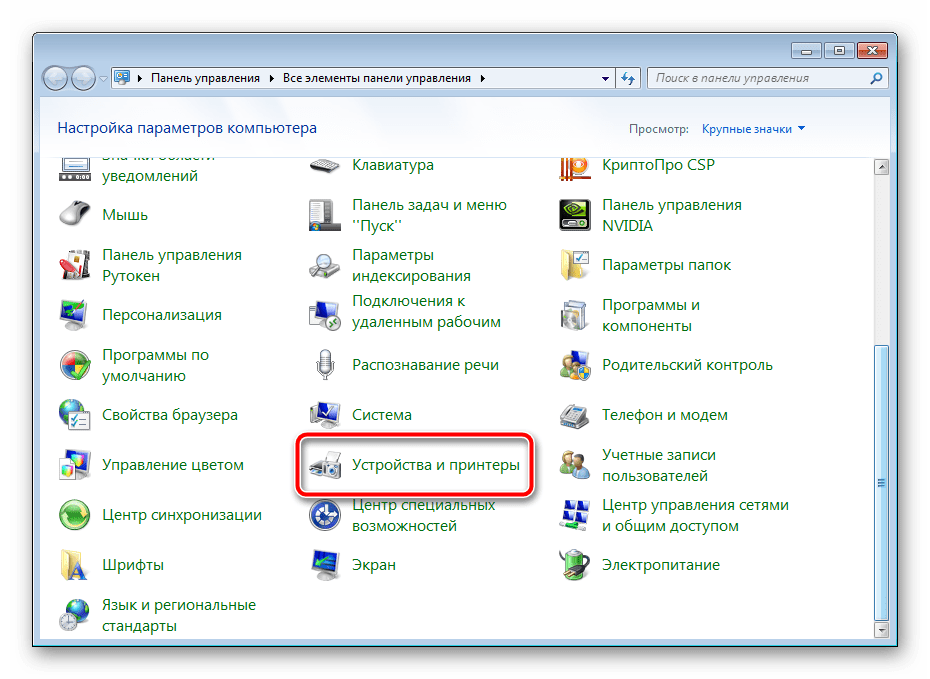
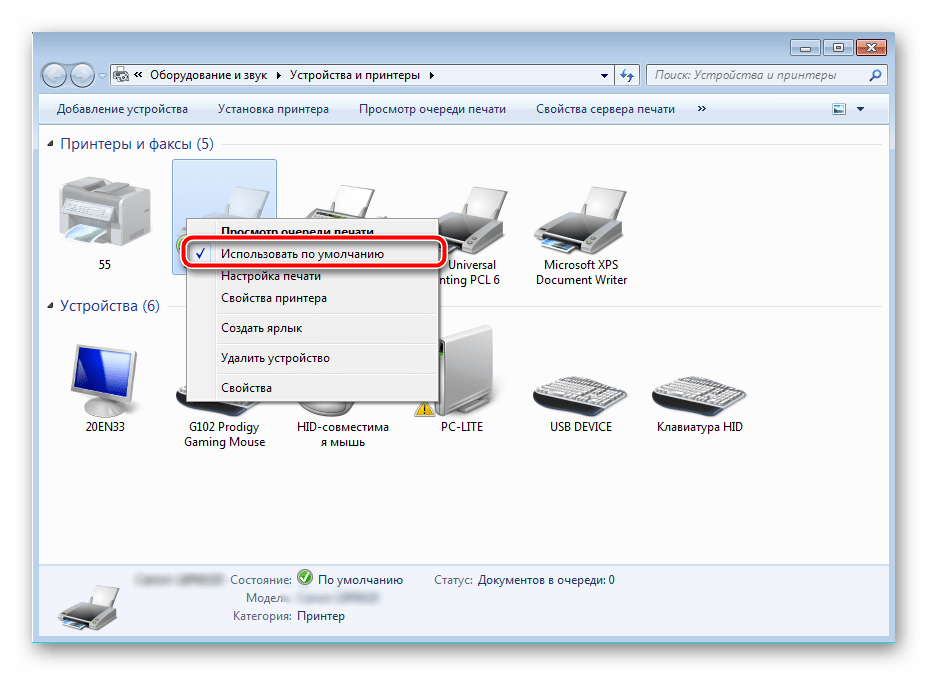
Кроме этого рекомендуется проверить параметры передачи данных. Зайдите в меню «Свойства принтера».
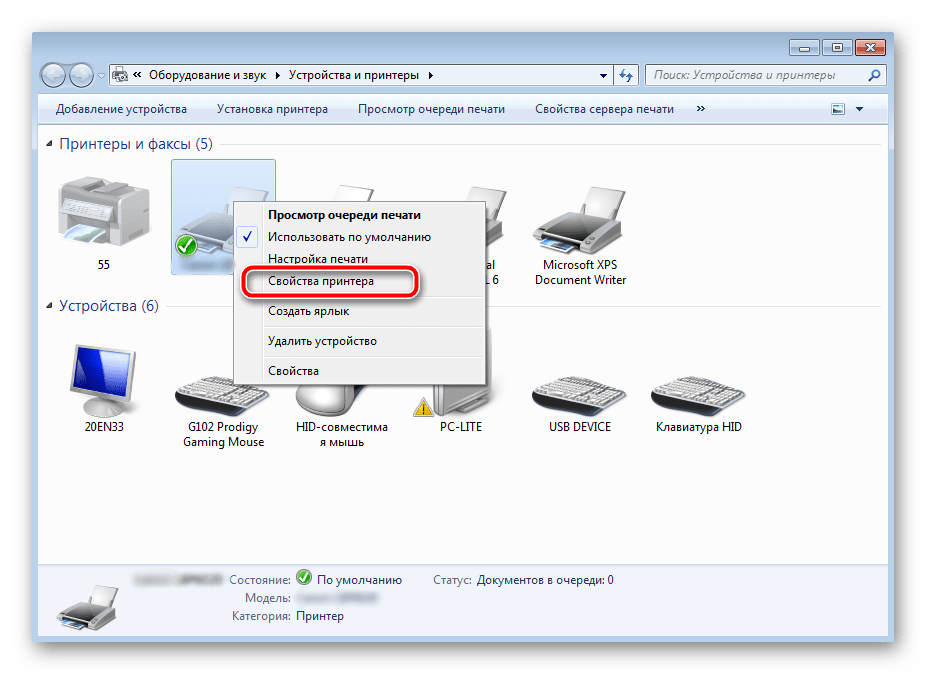
Здесь вас интересует вкладка «Порты».
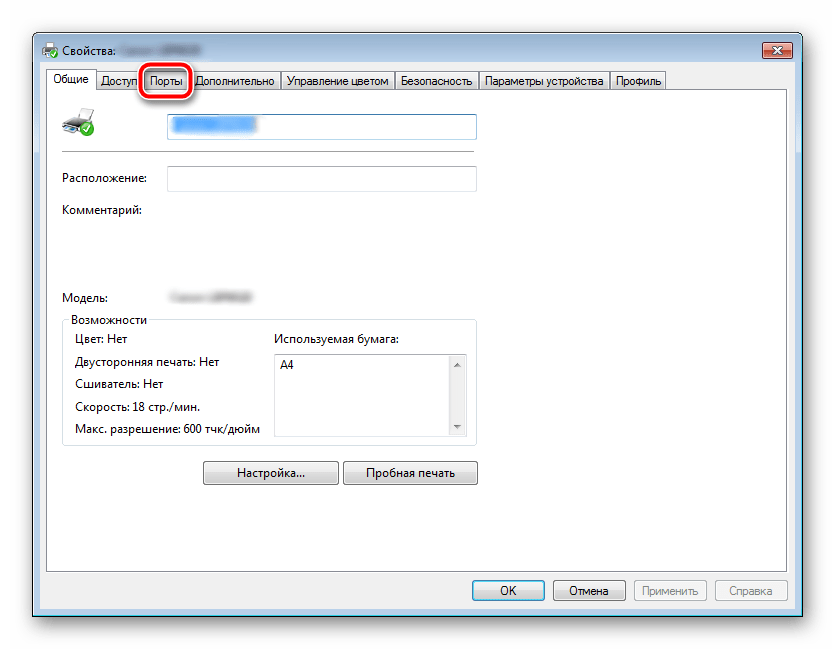
Отметьте галочкой пункт «Разрешить двусторонний обмен данными» и не забудьте применить изменения.
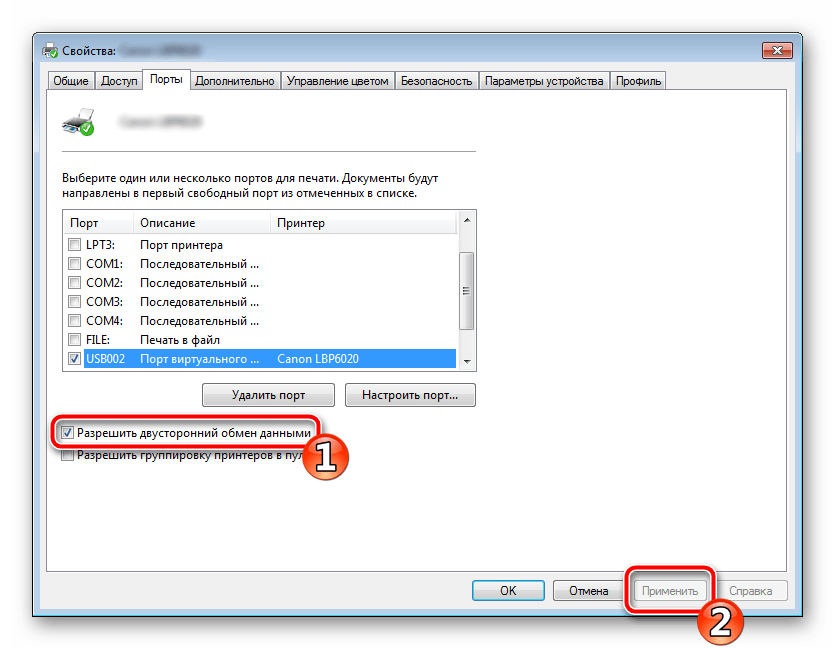
По окончании процесса рекомендуется перезагрузить ПК и переподключить оборудование, чтобы все изменения точно стали активными.
Способ 2: Разблокирование процедуры печати
Иногда происходят скачки напряжения или различные системные сбои, вследствие чего периферия и ПК перестают нормально выполнять определенные функции. По таким причинам и может возникать ошибка печати. В таком случае вам следует проделать следующие манипуляции:
-
Снова перейдите в «Устройства и принтеры», где правым кликом мыши на активном оборудовании выберите пункт «Просмотр очереди печати».
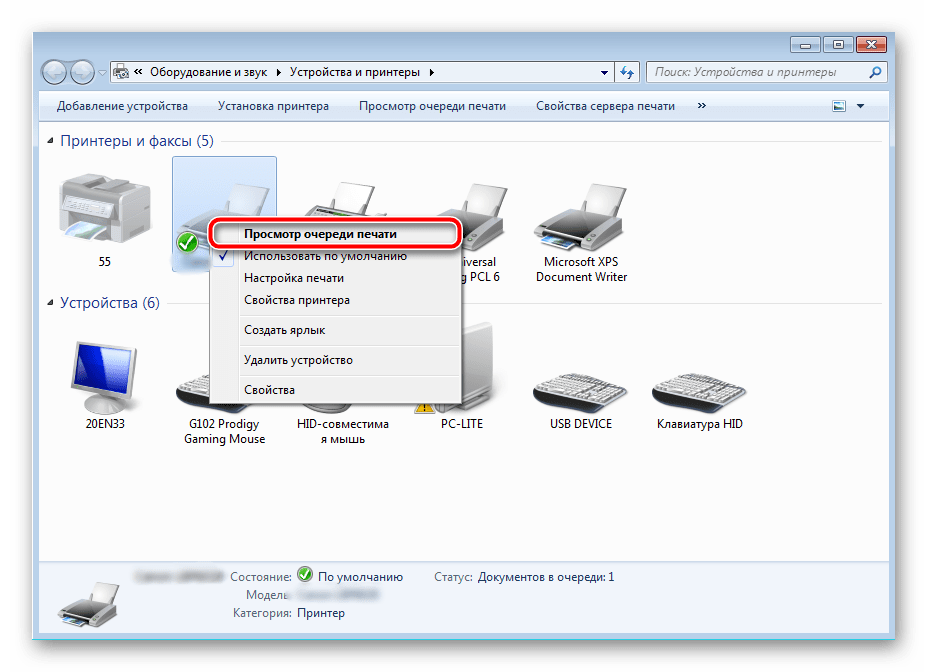
Нажмите ПКМ на документ и укажите «Отменить». Повторите это со всеми присутствующими файлами. Если процесс по каким-либо причинам не отменяется, советуем ознакомиться с материалом по ссылке ниже, чтобы осуществить эту процедуру одним из других доступных методов.
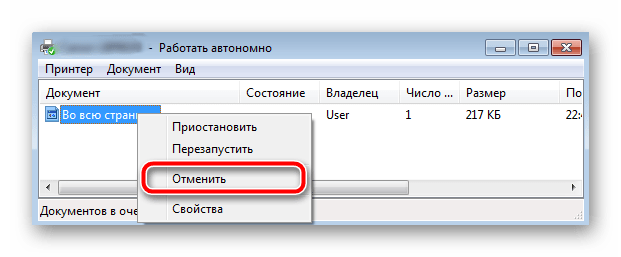
Вернитесь в «Панель управления».
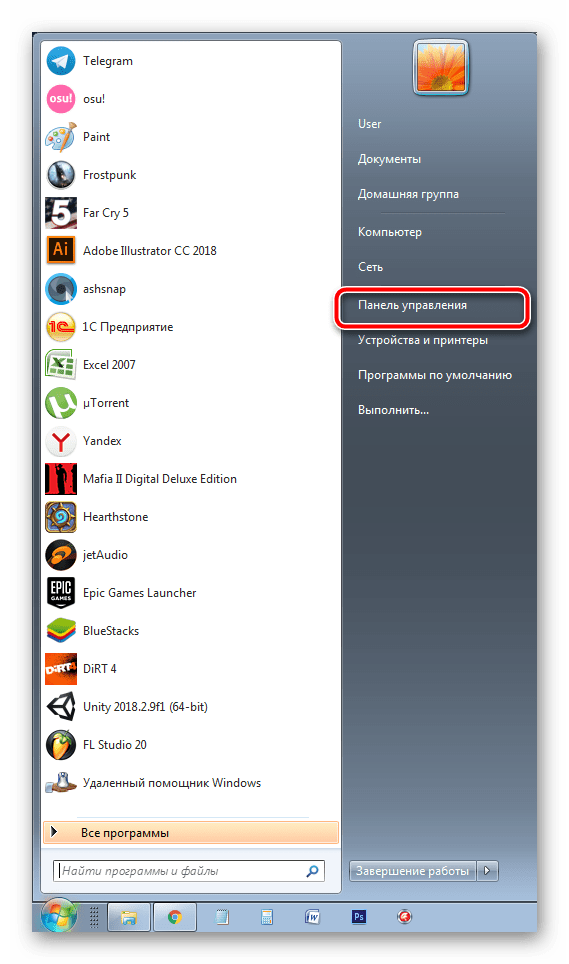
В ней откройте категорию «Администрирование».
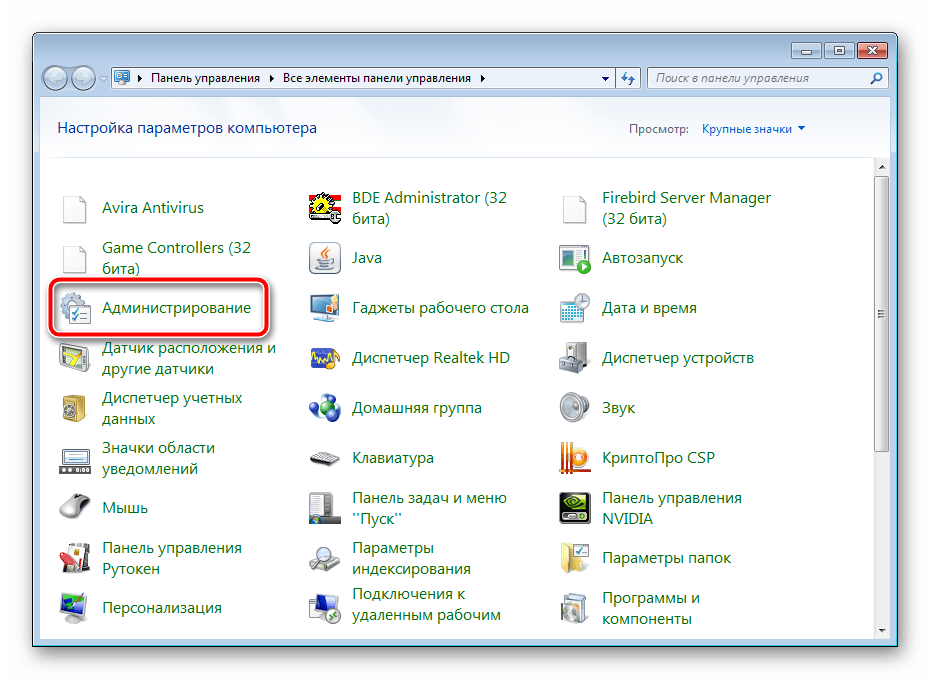
Здесь вас интересует строка «Службы».
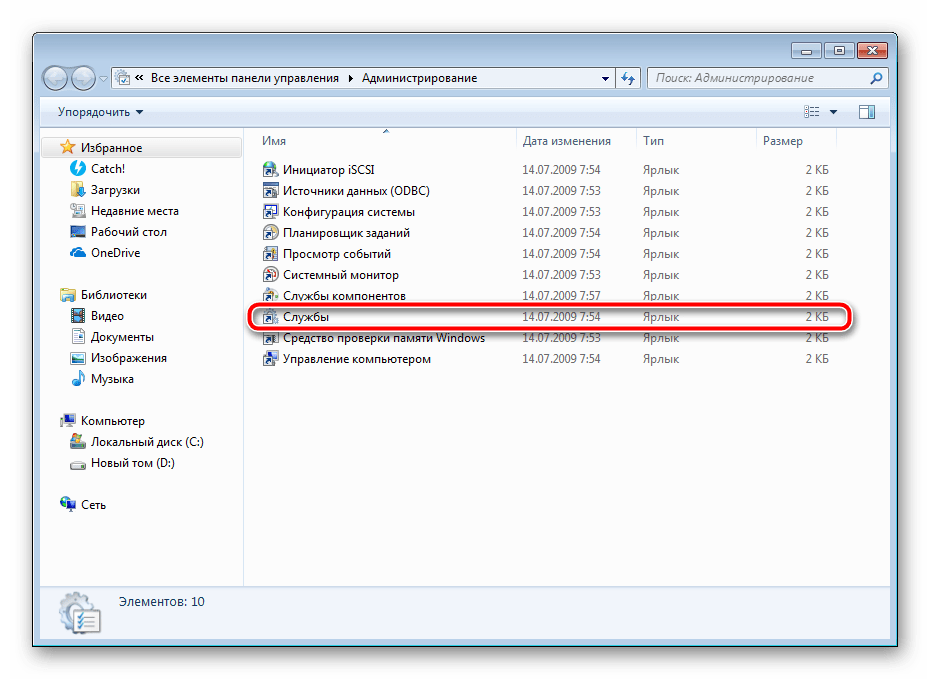
В списке отыщите «Диспетчер печати» и дважды нажмите на нем ЛКМ.
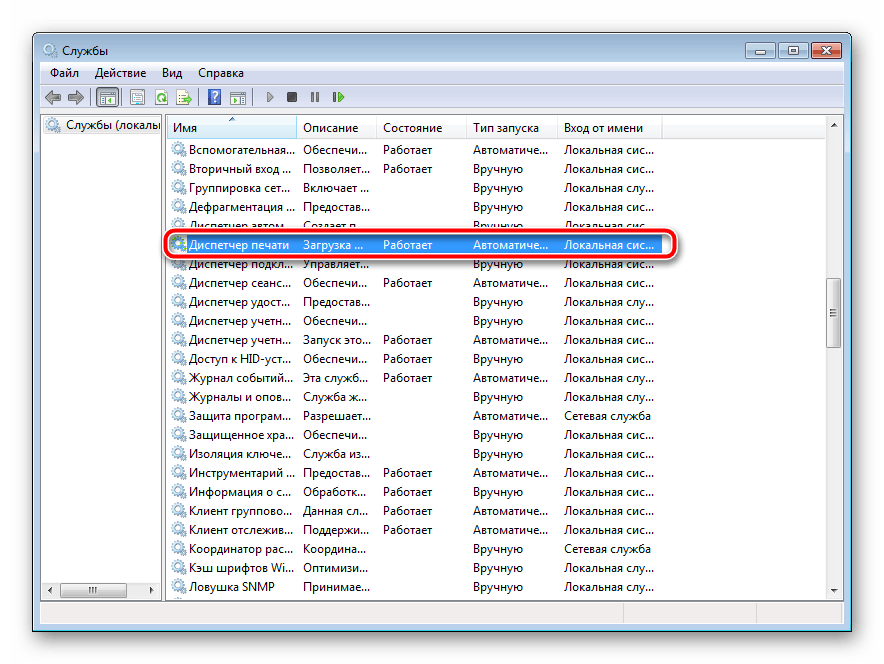
В «Свойства» обратите внимание на вкладку «Общие», где убедитесь, что тип запуска стоит «Автоматический», после чего следует остановить службу и применить настройки.
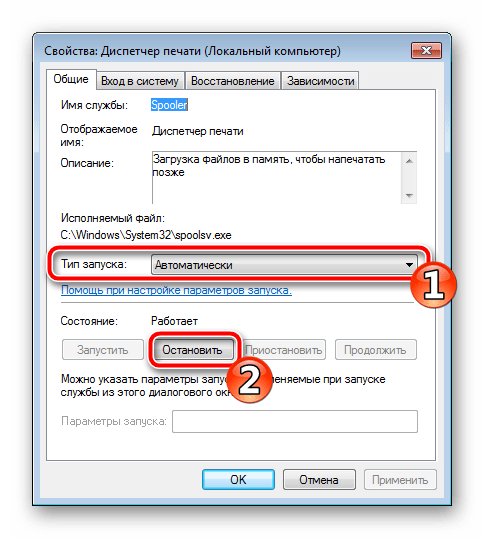
Закройте окно, запустите «Мой компьютер», переместитесь по следующему адресу:
Удалите все присутствующие файлы в папке.
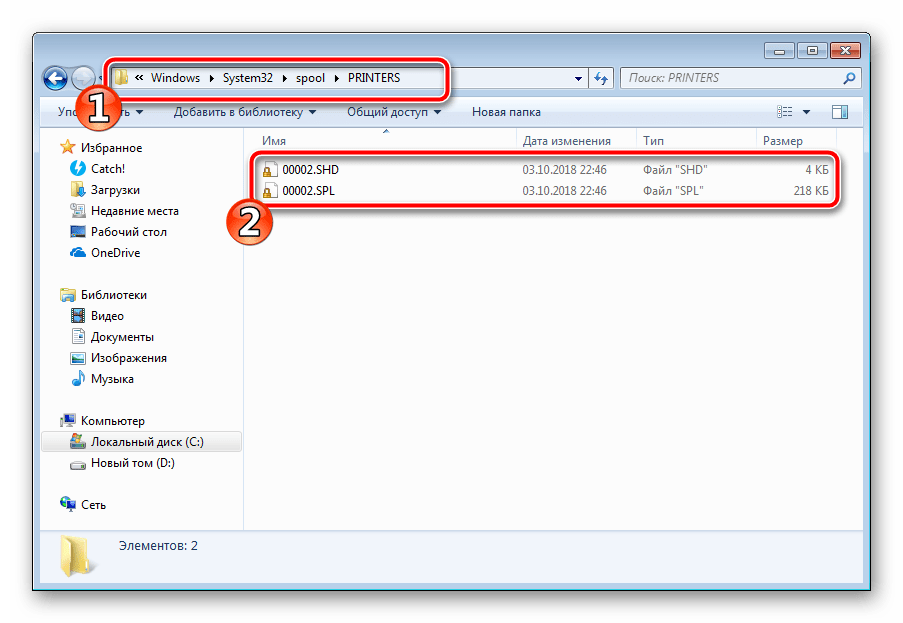
Осталось только выключить продукт компании HP, отключить его от питания, дать так постоять примерно минуту. После этого перезагрузите ПК, соедините оборудование и повторите процесс печати.
Способ 3: Отключение брандмауэра Windows
Иногда защитник Windows блокирует отправленные данных с компьютера на устройство. Связано это может быть с некорректной работой брандмауэра или различными системными сбоями. Мы советуем на время отключить защитник Виндовс и повторить попытку печати. Детальнее о деактивации этого инструмента читайте в другом нашем материале по следующим ссылкам:
Подробнее: Отключение брандмауэра в Windows XP, Windows 7, Windows 8
Способ 4: Переключение учетной записи пользователя
Рассматриваемая проблема порой возникает тогда, когда попытка отправки в печать производится не с той учетной записи пользователя Windows, с которой происходило добавление периферии. Дело в том, что каждый профиль имеет свои привилегии и ограничения, что приводит к появлению подобного рода неполадок. В таком случае нужно попробовать сменить запись юзера, если у вас их конечно добавлено больше, чем одна. Развернуто о том, как это сделать в разных версиях Виндовс читайте в статьях ниже.
Подробнее: Как сменить учетную запись пользователя в Windows 7, Windows 8, Windows 10
Способ 5: Восстановление Windows
Часто случается, что ошибки печати связаны с определенными изменениями в операционной системе. Самостоятельно обнаружить их достаточно сложно, однако состояние ОС можно вернуть, откатив все изменения. Осуществляется данная процедура с помощью встроенного компонента Виндовс, а детальное руководство по этой теме вы найдете в другом материале от нашего автора.
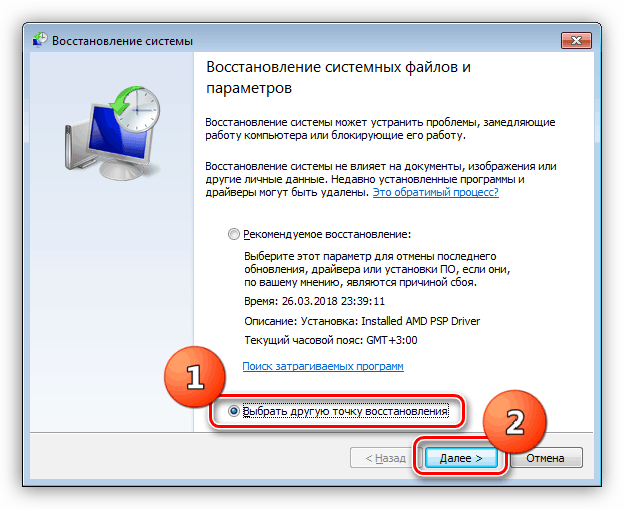
Способ 6: Переустановка драйвера
Мы поставили этот способ последним, поскольку он требует от пользователя выполнения большого количества различных манипуляций, а также является достаточно сложным для новичков. Если никакие приведенные выше инструкции вам не помогли, значит остается только переустановить драйвер устройства. Для начала следует избавиться от старого. О том, как это сделать, читайте далее:
По завершении процедуры удаления задействуйте один из методов инсталляции программного обеспечения для периферии. Всего существует пять доступных способов. Развернуто с каждыми из них знакомьтесь в другой нашей статье.
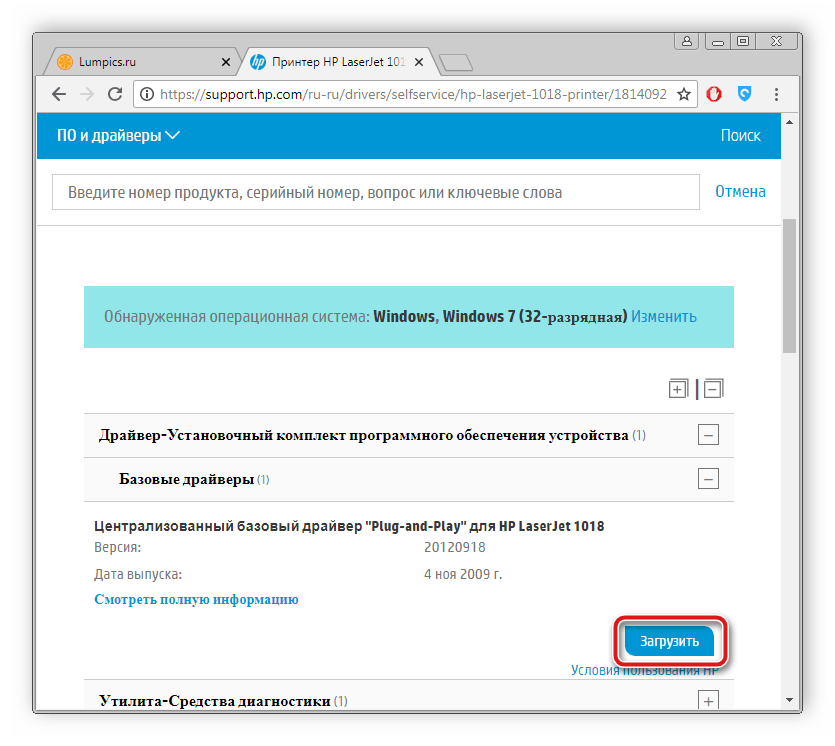
Как видите, методов исправления ошибки печати принтера HP существует достаточно большое количество, и каждый из них будет полезен в разных ситуациях. Надеемся, приведенные выше инструкции помогли вам без труда решить возникшую проблему, а продукт компании снова функционирует корректно.
Отблагодарите автора, поделитесь статьей в социальных сетях.
Как исправить, если принтер пишет «ошибка печати»
Одна из самых распространенных ошибок при работе с принтером – документация подготовлена к печати, устройство подключено, но результата нет. После многочисленных неудачных попыток распечатать необходимый документ, пользователь может увидеть надпись «Не удалось распечатать».
Обзор аппарата не дает никаких результатов, в лоток загружена бумага, но принтер упорно отказывается работать. Он может «выплюнуть» чистый лист или листок с размазанными кляксами. Что делать в подобной ситуации?
О чём пойдет речь:
Проверить подключение
Если принтер пишет «Ошибка печати», при этом ранее он работал исправно, то стоит проверить подключение к электросети, выключить устройство и запустить его повторно. Осмотрите сетевые шнуры, убедитесь в их целостности.
Проверьте лоток для бумаги, если листов мало, то доложите их. Если бумаги много, то попробуйте убрать часть, затем положите ее назад. Выполните перезапуск компьютера и принтера Canon. Действия не дали результата, попробуйте разобраться, почему аппарат выдает ошибку.
Это важно! Чаще всего ошибка печати – результат неверно выбранного принтера. Если вы приобретаете бюджетную модель устройства, то приготовьтесь к тому, что в любой момент оно сломается. Для ежедневного использования стоит приобрести модель из средней ценовой категории.
Выбираем принтер
Первым делом при появлении надписи «ошибка» стоит проверить, верно ли выбрано устройство. Для этого совершите следующие действия:
- В панели управления выберите раздел «Устройства и принтеры». Откроется окно, где отображаются все устройства подключенные к ПК;
- Находим нужный девайс, убедитесь, что он имеет статус «Подключен»;
- Наведите курсор мышки на значок принтера Canon и щелкните на ней правой кнопкой. В появившемся меню выберите строку «Использовать по умолчанию». Возле устройства отобразится галочка зеленого цвета.
Если аппарат обозначен бледным цветом, значит, компьютер его не видит.
Проверка свойств устройства
Если принтер не печатает и пишет «Ошибка печати», во вкладке «Устройства» зайдите в категорию «Принтеры и факсы». Найдите нужный девайс и щелкните по нему правой кнопкой мышки, в появившемся меню выберите строку «Свойства». Откроется окно, вам нужен раздел «Обмен данными», нажмите «Отключить» и перезапустите аппарат.
Еще один способ: найти пиктограмму принтера Canon, два раза щелкнуть по ней мышкой и проверить состояние. Если увидите надпись «Работа в автономном режиме», измените параметр, выполнив следующие действия:
- Через меню «Пуск» зайдите в панель управления, найдите раздел «Устройства и принтеры»;
- В открывшемся окне найдите нужный аппарат, щелкните на нем и в выпавшем меню уберите галку напротив строки «Работать автономно»;
- Убедитесь, что очередь печати пуста и перезагрузите девайс.
Проверка проводов
Часто причиной ошибки становится проблема с сетевым кабелем. Приобретая устройство, в комплекте с ним идет стандартный провод, обладающий слабой скоростью передачи. Иногда документация передается между гаджетами в течение шестидесяти минут. Если вы столкнулись с подобной проблемой, то принтер Canon после запуска ПК может пустить на печать вчерашний документ.
Чтобы избавиться от подобной проблемы, приобретите шнур с ферритовыми кольцами. Он надежный, стабильно работает и быстро передает документы на печать, примерно в четыре раза «шустрее», чем стандартный кабель. Если и эти действия не помогли решить проблему, скорей всего придется «разбираться» с драйверами.
Переустановка драйвера
Причиной неисправности устройства и появившейся ошибки может стать сбой в драйверах. Проверить их состояние можно следующим способом:
- Зайдите в меню «Устройства и принтеры» через панель управления;
- Найдите нужный аппарат и посмотрите на его значок, если он горит зеленым цветом, значит, драйвер исправен;
- Если нет, проведите деинсталляцию драйвера и установите его повторно.
Чтобы переустановить программу печати, воспользуйтесь диском, который идет в комплекте с аппаратом. Если его нет, то скачайте драйвер в интернете, его можно найти на сайте производителя.
Иногда принтер «отказывается» печатать, если необходима замена картриджа. Многие новые модификации оборудованы специальным чипом, блокирующим работу девайса при малом количестве краски.
В любом случае, прежде чем вызывать специалиста и оплачивать его услуги, попробуйте самостоятельно разобраться с причиной неисправности. Только не нужно разбирать аппарат и разбирать его на мелкие детали, особенно если у вас нет специальных навыков. Если вышеперечисленные действия не помогли устранить ошибку, то обратитесь в сервисную службу.
Распространенные коды ошибок на принтерах hp
Принтеры HP зарекомендовали себя с положительной стороны. Выпускаются модели для разной печати, спросом пользуются недорогие варианты, которые выдают чёрно-белую картинку. Коды ошибок на принтерах HP возникают тогда, когда техника отказывается работать.
Сбой печати на принтерах HP
Когда печать прерывается, пользователь спешит проверить питание, однако причина может быть куда серьёзней. Наиболее распространенной, считается проблема с микропроцессором, тогда оборудование не способно обрабатывать сигнал. Также она может быть связана с картриджем. В таком случае полностью проверяется печатающая головка.

ВНИМАНИЕ! Когда возникает ошибка печати, рекомендуется обратить внимание на надпись (высвечивается на дисплее).
Распространенные коды ошибок:
- Поломка 49.
- Ошибка 60.
- Поломка 79.
- Ошибка Е3.
- Поломка Е8.
Версии принтеров, которые чаще всего страдают от неисправностей:
Когда произошла заминка в печати, главное не паниковать, принять правильное решение.
Как устранить ошибку Е8
На примере принтера m1132 ошибка Е8 возникает часто, и пользователи теряются в догадках. Проблема кроется в сканере и не обойтись без разбора всей конструкции.

При подсоединении техники к персональному компьютеру, на экране появляется надпись «used supply in use hp», значит необходимо действовать по инструкции:
- Отсоединяется крышка.
- Снимается каретка.
- Откручиваются винты.
- Отсоединяется мотор сканера на принтере HP.
- Чистится грязь.
- Заменяется сканер.
У HP Laserjet M1132 mfp ошибка E8 возникает по таким причинам:
- Загрязнённость принтера.
- Проблемы с прошивкой.
- Поломка платы.
Если заменить сканер, получится исправить ошибку, и тогда все будет работать на отлично. Во время ремонта рекомендуется воздержаться от прочистки шлейфа, это может привести к потере сигнала. Ошибка E8 встречается даже у устройств последней серии, и там трудности чаще всего возникают именно с прошивкой.
Что касается грязи, она скапливается на шестеренках. Ошибка E8 в любом случае не является критичной и может быть устранена без обращения в сервисный центр. Из инструментов потребуется лишь шестигранный ключ под винты.
СПРАВКА. Ошибка сканера в запущенной форме может привести к тому, что техника начнёт сбоить и шлейф перегорает. У некоторых пользователей принтер просто не отвечает на сигналы.
Устранение проблемы с кодом Е3
На примере принтера HP Laserjet 3380 надо разобрать проблему установки картриджа. Когда на дисплее возникает ошибка E3, пользователи полагают, что у техники попросту закончилась краска. На самом деле причина может заключаться в неправильной установке картриджа.
Первым делом рассматривается механизм, важно обратить внимание на заслонку. Порой проблема связана с рычагом, который фиксирует элемент, его необходимо лишь немного подправить. Чтобы добраться до картриджей, естественно, снимается крышка. Если рассматривать аппарат M125RA, у него элемент находится в нижней части корпуса и придется потратить некоторое время, чтобы добраться до кармашка.
ВНИМАНИЕ! Когда рычажок вернулся на старую позицию, ошибка с дисплея исчезнет сразу или через некоторое время.
Если устройство в дальнейшем отказывается работать, придётся подумать над тем, как отнести его в сервисный центр. Как вариант, можно самостоятельно произвести диагностику, тогда первым делом на технике нажимается кнопка выкл. Далее важно отсоединить устройство от сети, под крышкой проверяется состояние сетевого фильтра, необходимо протереть его сухой тряпкой. Когда принтер выключен или находится в спящем режиме, пользователю ничего не угрожает.
Устранение ошибки 79
Если на дисплее появилась надпись 79 service error, рекомендуется не спешить нести принтер в сервисный центр. Зачастую проблему связывают с печатью поврежденного файла. На примере HP 2605 ошибка 79 означает попытку открытия документа в расширении pdf. Чтобы разобраться в ситуации, первым делом перезагружается персональный компьютер.
У принтеров HP ошибка 79 любит возвращаться, намекая на необходимость прошивки. Специалисты решают проблему путем сброса настроек. «Ошибка 79» принтер HP 400 показывает, если ПО несовместимо с техникой. Когда после сброса настроек печать не начинается, рекомендуется проверить обновление драйверов. «Ошибка 79» принтер HP 400 показывается, в случае использования пиратского программного обеспечения. В такой ситуации необходимо также переустановить систему, и проверить новые драйвера.
Если все сделано правильно, то с дисплея пропадёт надпись 79 service error.
Сброс ошибок на принтерах HP
У принтеров HP ошибка 49, или 60, 79, e3, е8 может быть устранена хитрым способом. В арсенале пользователя есть такой инструмент, как служба поддержки. Метод носит название «сброс принтера HP».
Без какого-либо разбора конструкции прямо во время печати рекомендуется произвести следующие действия:
- Вызов меню.
- Кнопка печать.
- Вызов техподдержки.
- Отправка отчета.

Когда принтер выключен или возникла другая ошибка, возможно придется обратиться в сервисный центр. Если проблема может быть устранена путем обновления программы, метод точно поможет. К примеру, ошибка 60 02 устраняется лишь специалистам сервисного центра, и нет смысла экспериментировать. Осуществляя сброс принтера HP, главное, убедиться в том, что установлены последние драйвера и в картридже имеются чернила.
Если долгое время сохраняется ошибка принтера рекомендуется перебрать все элементы оборудования, выяснить, в чем может быть загвоздка. На принтерах старой версии не редко вылетает головка. Через некоторое время пользователю будет известны все уязвимые места модели. Даже незначительная оплошность может потребовать серьезных финансовых вложений. У пользователей, естественно, нет желания платить за дорогую плату либо шлейф.
СПРАВКА. Если документ не отправляется на печать, первоначально следует убедиться в том, что горит кнопка вкл.
Рассматривая частные случаи, принтеры могут показывать проблему с сетью, это ошибка 1132. В качестве заключения стоит отметить, что принтеры HP являются надежными, однако, как любая техника, она выходит из строя и приходится предпринимать меры. Если нет желания вникать в тонкости оборудования, рекомендуется обратиться в сервисный центр.
Ошибки принтера HP: коды ошибок и пути их решения
В работе любой оргтехники могут наблюдаться всевозможные неполадки. То же самое относится и к принтерам HP. К счастью, все современные печатающие машины являются компьютеризированными устройствами с собственным программным обеспечением. Именно благодаря этому при возникновении каких-либо неисправностей принтер сразу же “сообщает” это пользователю в виде кода ошибки на экране компьютера и/или на встроенном LCD-дисплее. Рассмотрим наиболее часто встречающиеся ошибки принтеров HP и пути их решения.
Ошибки замятия бумаги
Следующие ошибки возникают при замятии бумаги и/или застревании внутри принтера посторонних предметов.
13.3.хх или CHECK INPUT/OUTPUT DEVICE
Здесь и далее под символами “хх” в коде ошибки следует подразумевать какой-либо набор букв или цифр. Касательно самих ошибок — они означают, что в принтере застряла бумага, т.е. произошло ее замятие. То же самое принтер сообщит в случае механической неисправности ролика подачи бумаги. Если с последним все нормально, то для решения проблемы достаточно извлечь из принтера замятую бумагу. Устранение неисправностей с валиком, возможно, потребует разборки принтера, ремонта или полной замены детали.

13.5.хх
Данная ошибка также сигнализирует о замятии бумаги, а конкретно — в термоблоке принтера. Это одна из важнейших деталей лазерных устройств и МФУ, без которой работа машины не представляется возможной. Здесь также два пути решения проблемы — извлечение застрявшей бумаги либо ремонт/замена термоблока.
13.6.хх
Ошибка возникает по той же причине, что и в предыдущем случае. Разница лишь в том, что ошибка сигнализирует о замятии бумаги не внутри, а на выходе из термоблока. Решение проблемы то же, что и в предыдущем случае.
13.9.хх
Более серьезная ошибка, также связанная с замятием бумаги. Она сигнализирует о наличии неисправности в функционировании валика подачи бумаги и/или термоблока. В данном случае придется проверять работу обеих деталей. Если причина в замятии бумаги, ее достаточно извлечь из принтера. Любые аппаратные/механические неполадки решаются путем разбора, диагностики и ремонта/замены протягивающего ролика и/или термоблока.

13.20.хх (также может выводиться, как 13.A)
Это общая ошибка, возникающая при неисправностях одного или нескольких электронно-механических компонентов принтера, отвечающих за подачу бумаги. Помимо протягивающего ролика и термоблока, причиной ошибки может стать неправильное функционирование датчиков, соленоидов, транспортеров движения и других деталей. В большинстве случаев возникновение данной ошибки сигнализирует о необходимости диагностики и ремонта принтера в целом.
Аппаратно-технические неисправности
Следующие коды ошибок сигнализируют о наличии аппаратно-технических неисправностей принтера.
20 или 21
Одна из этих ошибок возникает при сбое печати, связанном с нехваткой объема встроенной в принтер оперативной памяти (ОЗУ). Обычно такое происходит при переполнении очереди печати, т.е. на принтер поступило слишком большое количество команд на распечатку, но устройство технически не справляется с задачей. Решение — нужно очистить очередь печати на компьютере (или на всех компьютерах, если принтер используется по локальной сети).

Также ошибку может помочь устранить переключение параметра “Page Protect” (в настройках принтера) из положения “On” в “Auto”. Некоторые модели принтеров HP поддерживают установку дополнительного объема оперативной памяти. Увеличение ОЗУ в особенности рекомендуется для принтеров, использующихся множеством пользователей по локальной сети.
22 EIO
Данная ошибка возникает только на тех моделях принтеров HP, которые оборудованы модульным интерфейсом MIO или более совершенным — EIO. Данные интерфейсы предназначены для подключения к машине сетевых интерфейсных карт, жестких дисков и т.д. Ошибка 22 EIO может возникнуть при неисправности подключаемого устройства, неправильных настройках либо его занятости протокола MIO другим устройством в сети. Для решения проблемы можно попробовать просто перезагрузить принтер и/или перенастроить параметры локальной сети.
22 PARALLEL I/O, 22 SERIAL I/O
Ошибки возникают только в том случае, если принтер подключен к компьютеру через параллельный порт стандарта IEEE-1284. Неисправность может быть связана со сбоями в работе или несовместимостью установленного драйвера с используемым принтером.
Также ошибка может означать физическое повреждение кабеля или ошибками ввода-вывода информации (поступила нераспознанная команда, компьютер использует неправильный номер порта для связи с принтеров). Решение — переустановка драйвера либо (если не помогает) замена кабеля.

40 BAD SERIAL TRANSSMISION, 40 EIO x BAD TRANSSMISION
Ошибки, возникающие при различных неисправностях сетевой карты принтера. Если проблема не решается путем перезагрузки принтера и/или переустановки его драйвера, остается только заменить сетевую карту.
41.х, 51.х и 52.х
Присутствуют аппаратные неисправности в работе лазер-сканера. Возникновение одной из этих ошибок сигнализирует о необходимости ремонта или замены данной детали либо одного из ее электронных компонентов.
Возникает при неисправностях электронной платы, отвечающей за управление размером бумаги. Ошибка также может быть связана с неправильно заданными параметрами размера бумаги, загруженной в лоток в данный момент. Решение — попробовать задать правильный размер, что можно сделать с LCD-дисплея принтера либо в приложении на компьютере, из которого осуществляется печать. Если не помогает, придется ремонтировать/заменить плату.
Возникновение данной ошибки связано с аппаратными неисправностями термоблока. Самым простым решением является извлечение и установка термоблока на свое место. В остальных случаях данную деталь придется ремонтировать или заменять.

53.хх.хх и 62.х
Ошибки, связанные с работой оперативной памяти принтера. Здесь также можно попробовать извлечь ОЗУ из гнезда и установить заново. Если не помогает, остается заменить неисправный модуль памяти. Какая именно из планок ОЗУ не работает, можно узнать по цифре в коде “62.х”, где “х” — номер слота, в который установлен нерабочий модуль.
57.х FAN FAILURE
Присутствуют неисправности в работе встроенных вентиляторов (кулеров) охлаждения принтера, что может приводить к перегреву оборудования. Решение — очистить от пыли и смазать кулеры моторным маслом (если вращаются недостаточно быстро) либо заменить их.
Ошибки, связанные с неполадками в работе механизма поднятия лотка. Возможно, в лотке или самом механизме застрял посторонний предмет. Во всех остальных случаях потребуется ремонт данной детали.
Неисправности главного мотора печатающей машины. Если перезагрузка принтера не помогает, потребуется ремонт или замена мотора.

Ошибка характерна только для моделей принтеров HP, оснащенных дуплексом — устройством, позволяющим печатать одновременно на обеих сторонах листа. Аппаратные неисправности дуплекса также потребует произвести ремонт.
79.хххх
Это общие ошибки, связанные с управлением данными печатающей машины. Неполадки в работе могут быть вызваны неправильным функционированием драйвера принтера. Также ошибки возникают при сбоях в работе модулей памяти, сетевой карты, USB-портов, последовательного порта или других электронных компонентов. Сначала следует переустановить драйвер, заменить используемый USB или последовательный кабель. Если не помогает, придется прибегнуть к помощи специалистов.
8х.хххх
Ошибки, сигнализирующие о неисправности сетевой карты. Также может возникать по причине физического повреждения или наличия замыкания в сетевом кабеле. Первым делом нужно попробовать заменить кабель. Если ошибка повторится, замените сетевую карту.
Содержание
- Сбой печати на принтерах HP
- Как устранить ошибку Е8
- Устранение проблемы с кодом Е3
- Устранение ошибки 79
- Сброс ошибок на принтерах HP
Принтеры HP зарекомендовали себя с положительной стороны. Выпускаются модели для разной печати, спросом пользуются недорогие варианты, которые выдают чёрно-белую картинку. Коды ошибок на принтерах HP возникают тогда, когда техника отказывается работать.
Сбой печати на принтерах HP
Когда печать прерывается, пользователь спешит проверить питание, однако причина может быть куда серьёзней. Наиболее распространенной, считается проблема с микропроцессором, тогда оборудование не способно обрабатывать сигнал. Также она может быть связана с картриджем. В таком случае полностью проверяется печатающая головка.
ВНИМАНИЕ! Когда возникает ошибка печати, рекомендуется обратить внимание на надпись (высвечивается на дисплее).
Распространенные коды ошибок:
- Поломка 49.
- Ошибка 60.
- Поломка 79.
- Ошибка Е3.
- Поломка Е8.
Версии принтеров, которые чаще всего страдают от неисправностей:
- 090d.
- 1132.
- 1536.
- 1536dnf.
- 3f0.
- 4250.
Когда произошла заминка в печати, главное не паниковать, принять правильное решение.
Как устранить ошибку Е8
На примере принтера m1132 ошибка Е8 возникает часто, и пользователи теряются в догадках. Проблема кроется в сканере и не обойтись без разбора всей конструкции.
При подсоединении техники к персональному компьютеру, на экране появляется надпись «used supply in use hp», значит необходимо действовать по инструкции:
- Отсоединяется крышка.
- Снимается каретка.
- Откручиваются винты.
- Отсоединяется мотор сканера на принтере HP.
- Чистится грязь.
- Заменяется сканер.
У HP Laserjet M1132 mfp ошибка E8 возникает по таким причинам:
- Загрязнённость принтера.
- Проблемы с прошивкой.
- Поломка платы.
Если заменить сканер, получится исправить ошибку, и тогда все будет работать на отлично. Во время ремонта рекомендуется воздержаться от прочистки шлейфа, это может привести к потере сигнала. Ошибка E8 встречается даже у устройств последней серии, и там трудности чаще всего возникают именно с прошивкой.
Что касается грязи, она скапливается на шестеренках. Ошибка E8 в любом случае не является критичной и может быть устранена без обращения в сервисный центр. Из инструментов потребуется лишь шестигранный ключ под винты.
СПРАВКА. Ошибка сканера в запущенной форме может привести к тому, что техника начнёт сбоить и шлейф перегорает. У некоторых пользователей принтер просто не отвечает на сигналы.
Устранение проблемы с кодом Е3
На примере принтера HP Laserjet 3380 надо разобрать проблему установки картриджа. Когда на дисплее возникает ошибка E3, пользователи полагают, что у техники попросту закончилась краска. На самом деле причина может заключаться в неправильной установке картриджа.
Первым делом рассматривается механизм, важно обратить внимание на заслонку. Порой проблема связана с рычагом, который фиксирует элемент, его необходимо лишь немного подправить. Чтобы добраться до картриджей, естественно, снимается крышка. Если рассматривать аппарат M125RA, у него элемент находится в нижней части корпуса и придется потратить некоторое время, чтобы добраться до кармашка.
ВНИМАНИЕ! Когда рычажок вернулся на старую позицию, ошибка с дисплея исчезнет сразу или через некоторое время.
Если устройство в дальнейшем отказывается работать, придётся подумать над тем, как отнести его в сервисный центр. Как вариант, можно самостоятельно произвести диагностику, тогда первым делом на технике нажимается кнопка выкл. Далее важно отсоединить устройство от сети, под крышкой проверяется состояние сетевого фильтра, необходимо протереть его сухой тряпкой. Когда принтер выключен или находится в спящем режиме, пользователю ничего не угрожает.
Устранение ошибки 79
Если на дисплее появилась надпись 79 service error, рекомендуется не спешить нести принтер в сервисный центр. Зачастую проблему связывают с печатью поврежденного файла. На примере HP 2605 ошибка 79 означает попытку открытия документа в расширении pdf. Чтобы разобраться в ситуации, первым делом перезагружается персональный компьютер.
У принтеров HP ошибка 79 любит возвращаться, намекая на необходимость прошивки. Специалисты решают проблему путем сброса настроек. “Ошибка 79” принтер HP 400 показывает, если ПО несовместимо с техникой. Когда после сброса настроек печать не начинается, рекомендуется проверить обновление драйверов. “Ошибка 79” принтер HP 400 показывается, в случае использования пиратского программного обеспечения. В такой ситуации необходимо также переустановить систему, и проверить новые драйвера.
Если все сделано правильно, то с дисплея пропадёт надпись 79 service error.
Сброс ошибок на принтерах HP
У принтеров HP ошибка 49, или 60, 79, e3, е8 может быть устранена хитрым способом. В арсенале пользователя есть такой инструмент, как служба поддержки. Метод носит название «сброс принтера HP».
Без какого-либо разбора конструкции прямо во время печати рекомендуется произвести следующие действия:
- Вызов меню.
- Кнопка печать.
- Вызов техподдержки.
- Отправка отчета.
Когда принтер выключен или возникла другая ошибка, возможно придется обратиться в сервисный центр. Если проблема может быть устранена путем обновления программы, метод точно поможет. К примеру, ошибка 60 02 устраняется лишь специалистам сервисного центра, и нет смысла экспериментировать. Осуществляя сброс принтера HP, главное, убедиться в том, что установлены последние драйвера и в картридже имеются чернила.
Если долгое время сохраняется ошибка принтера рекомендуется перебрать все элементы оборудования, выяснить, в чем может быть загвоздка. На принтерах старой версии не редко вылетает головка. Через некоторое время пользователю будет известны все уязвимые места модели. Даже незначительная оплошность может потребовать серьезных финансовых вложений. У пользователей, естественно, нет желания платить за дорогую плату либо шлейф.
СПРАВКА. Если документ не отправляется на печать, первоначально следует убедиться в том, что горит кнопка вкл.
Рассматривая частные случаи, принтеры могут показывать проблему с сетью, это ошибка 1132. В качестве заключения стоит отметить, что принтеры HP являются надежными, однако, как любая техника, она выходит из строя и приходится предпринимать меры. Если нет желания вникать в тонкости оборудования, рекомендуется обратиться в сервисный центр.
Содержание
- Что делать, если принтер HP показывает «Ошибка памяти расходных материалов»
- Что делать, если принтер HP показывает «Ошибка памяти расходных материалов»
- Почему память картриджей иногда ошибается?
- Что вызывает ошибку памяти HP Supply:
- Как исправить ошибки памяти картриджа и вернуть принтер к работе
- Ошибка памяти расходных материалов принтера — как исправить
- Почему мой принтер отображает сообщение — «Ошибка памяти расходных материалов»?
- Что вызывает ошибку памяти HP Supply и как их исправить.
- Чтобы ваш принтер снова заработал, попробуйте следующие исправления:
- 10 1000 Ошибка памяти расходных материалов
- Почему мой принтер отображает сообщение – «Ошибка памяти расходных материалов»?
- Что вызывает ошибку памяти HP Supply и как их исправить.
- Чтобы ваш принтер снова заработал, попробуйте следующие исправления:
Что делать, если принтер HP показывает «Ошибка памяти расходных материалов»
Что делать, если принтер HP показывает «Ошибка памяти расходных материалов»
Обычно это — «Ошибка памяти 10.1000» или нечто подобное. Подобная проблема имеет место в ряде моделей HP линейки LaserJet Pro (например, использующих оригинальный картридж Hewlett-Packard HP CF400X 201X Black Original LaserJet Toner Cartridge (CF400X) увеличенной емкости, картридж Hewlett-Packard уменьшенной ёмкости и др. имеющиеся в продаже) и моделях многофункциональных принтеров некоторых модификаций. Как правило, проблема является следствием заправки пустого картриджа тонером. Чтобы вернуть устройство к работе, ошибку нужно устранить.
Почему память картриджей иногда ошибается?
- Когда металлические контакты микросхемы оригинального картриджа НР соединяются с контактами внутри принтера неправильно, устройство не может обнаружить картридж, поэтому возникает ошибка памяти расходных материалов.
- При использовании неисправного совместимого картриджа (с устаревшими данными микрочипа) тоже возникает ошибка памяти картриджа.
Что вызывает ошибку памяти HP Supply:
- не удаленные защитные полоски,
- замятая бумага,
- отсутствие соединения межу картриджем и устройством из-за раздавленных контактов,
- отломившиеся кусочки пластика, способствующие смещению расходного материала,
- устаревшее ПО или прошивка принтера.
Как исправить ошибки памяти картриджа и вернуть принтер к работе
- Когда вы устанавливаете новый картридж с тонером, то на нем должны быть защитные полоски оранжевого цвета и пластиковые зажимы. Они защищают картридж от повреждений при перевозке. Удалите и то, и другое перед установкой в принтер. Ели вы этого не сделаете, устройство печатать не будет.
- Все обрывки замятой упаковки выньте из картриджа.
- Для обнаружения картриджа у принтера и самого расходного материала есть металлические контакты, которые соединяются при установке картриджа на место. Цепь замыкается и устройство начинает работать. Если этого не происходит, значит, контакты не соприкасаются друг с другом. Принтер покажет, что расходник не установлен. Выньте его и проверьте, не сдавлены ли контакты (их два). Если это так, то потихоньку потяните их вперед, чтобы не сломать. После этой манипуляции картридж подключится к аппарату.
- При неаккуратной транспортировке у картриджа могут сломаться пластмассовые держатели. Хотя цена оригинальных картриджей НР LaserJet Pro довольно высокая, такое случается при тряске. По этой причине расходник займет неправильное положение в устройстве и цепь не соединится. В этом случае придется купить новый оригинальный картридж HP линейки LaserJet Pro.
- Производитель принтера Hewlett Packard Enterprise регулярно обновляет программное обеспечение своих принтеров. Если ПО вашего принтера устарело, то возникает ошибка памяти. Чтобы ее исправить, зайдите на официальный сайт компании и введите для поиска модель своего принтера и слово «прошивка», после чего загрузите последнюю версию ПО для своего устройства. Принтер заработает.
Вот и все, что нужно знать пользователю лазерного устройства НР об ошибке памяти расходного материала.
Источник
Ошибка памяти расходных материалов принтера — как исправить
Ошибка памяти расходных материалов в принтерах и МФУ HP — как исправить
Испытываете ли вы проблемы с принтером HP, и бывает так, что видите на экране сообщение «Ошибка памяти 10.1000», «10 .0002» или что-то подобное?
Если ответ «да», вы, вероятно, уже пытались выключить и снова включить принтер, вынуть и снова вставить тонер-картриджи, и вы просто не можете решить проблему с принтером, ничего не работает, и вы готовы сдаться!
Не волнуйтесь, мы поможем в решении данной проблемы. Вот что вы узнаете на этой странице:
- Почему на принтере HP отображается сообщение «Ошибка памяти картриджей»
- Какие распространенные вещи вызывают ошибки в Memory Supply?
- Как исправить ошибку в памяти расходных материалов и снова заставить принтер работать.
Почему мой принтер отображает сообщение — «Ошибка памяти расходных материалов»?
Ошибка памяти расходных материалов возникает, когда металлические контакты / микросхема картриджа с тонером неправильно соединяются с соответствующими контактами внутри принтера. После этого принтер не может обнаружить установленный картридж с тонером и отображает сообщение «Ошибка памяти расходных материалов» на панели дисплея принтера. Ошибка также может быть вызвана неисправными совместимыми картриджами, в которых данные микрочипа устарели.
Эта проблема затрагивает различные модели HP LaserJet Pro и модели многофункциональных принтеров, в частности, принтеры HP M1212nf и модели LaserJet Pro M277dw.
Этот тип проблемы иногда возникает после замены пустого картриджа новым тонером, и существует несколько возможных причин. Читайте дальше, чтобы узнать, что это может быть .
Что вызывает ошибку памяти HP Supply и как их исправить.
Есть 4 простых и распространенных вещи, которые могут вызвать проблему с принтером, не давая ему работать, и, к счастью, их очень легко исправить.
- Замятую бумагу или защитные полоски, которые не были удалены.
- Раздавленные металлические контакты, которые больше не соединяют тонер с принтером.
- Сломанные кусочки пластика приводят к тому, что тонер оказывается не на своем месте.
- Устаревшее программное обеспечение / прошивка принтера.
Чтобы ваш принтер снова заработал, попробуйте следующие исправления:
1. Защитные полоски
Когда вы собираетесь установить новый картридж с тонером, есть оранжевые защитные полоски и пластиковые зажимы, чтобы убедиться, что картридж не поврежден во время транспортировки. Каждый из этих зажимов и защитная полоса на барабане должны быть удалены перед установкой нового тонера, иначе они будут препятствовать печати вашего принтера.
Зажимы легко обнаружить, защитная полоса находится на стороне тонера и имеет оранжевое кольцо, которое нужно вынуть чтобы удалить полоску, или оно будет похоже на кусок целлофана, как на изображении ниже.
2. Раздавленные металлические контакты
Чтобы ваш принтер мог обнаружить установленный картридж с тонером, 2 крошечных металлических контакта соединяются с соответствующими контактами на картридже. Металлические контакты в принтере и те, что на тонере, замыкают цепь, и если контакты не соприкасаются. Ваш принтер будет считать, что тонер не установлен.
Извлеките картридж с тонером и найдите что-то похожее на микрочип или два металлических квадрата. Теперь представьте, где они будут подключаться к принтеру, и найдите соответствующие разъемы внутри принтера (убедитесь, что принтер выключен и отсоединен от сети).
Если два металлических разъема кажутся сдавленными, аккуратно (чтобы ничего не сломалось), потяните их вперед. Это должно позволить им правильно подключиться к тонеру после его повторной установки.
Также возможно, что потеря кусочков упаковочного материала или замятие бумаги могут вызвать проблемы, поэтому перед установкой нового тонера убедитесь, что принтер чист.
3. Сломанные пластиковые кусочки
Если картридж с тонером был поврежден одной из сторон, так что пластиковые прорези сломались, он может неправильно поместиться в принтере и по аналогии с предыдущей причиной проблемы с памятью расходных материалов, контакты не будут правильно соединяться, и Единственный способ решить эту проблему — заменить картридж с тонером на новый.
4. Устаревшая прошивка / программное обеспечение
Производитель вашего принтера будет регулярно обновлять ваш принтер новым программным обеспечением. Если это программное обеспечение устарело по какой-либо причине, вы можете получить ошибку. Посетите Google и введите «[ваш принтер модель] прошивки» в строке поиска и загрузите последнюю версию для вашего компьютера / принтера. После обновления это часто может исправить многие проблемы с принтером. Последние обновления прошивки вы можете найти на сайте HP.
Последняя возможная причина сообщения об ошибке памяти расходных материалов может быть вызвана тем, что при установке совместимого или восстановленного картриджа с тонером , данные хранящиеся на микрочипе картриджей, устарели.
Затем микропрограмма принтера может доставить сообщение об ошибке в памяти расходных материалов, и единственный способ решить эту проблему — это заставить компанию, у которой вы приобрели принтер, заменить его новым, а затем заменить его на своем принтере.
Вот, пожалуйста, эти советы были полезны, и ваш принтер снова работает сделайте репост статьи, чтобы как можно больше пользы она принесла вашим друзьям и близким, спасибо. А мы в свою очередь по вашим просьбам, будем и дальше изучать, писать и помогать вам в решении проблем связанных с принтерами и МФУ.
Источник
10 1000 Ошибка памяти расходных материалов
Оптовые цены на сумму от 5 т.р. Бесплатная доставка от 30 т.р.
Выезд мастера и курьера в Москве! Доставка товаров по всей России. Мы работаем: Пн-Пт 09:00-19:00
Принтер HP LaserJet 1522, 1536, 1212, 2055, 1120 выдал сообщение «10.1000 Ошибка расходных материалов»
Принтеры и МФУ торговой марки Hewlett-Packard после заправки картриджей могут работать с заклеиным чипом, либо без него. Но если все же аппарат HP LaserJet 1522, 1536, 1212, 2055, 1120 выдал сообщение «10.1000 Ошибка расходных материалов» выдал сообщение «10.1000 Ошибка расходных материалов», то данная проблема связана с чипами. Возможно, при заправке Вы поставили бракованный чип .
Чтоб избавиться от данного сообщения, Ваш картридж требует замены чипа. При появлении данного сообщения попробуйте поставить сменный картридж, а потом снова вернуть на место первый.
Если это не дало результатов, то при появлении ошибки «10.1000 Ошибка расходных материалов» выполните следующие действия:
- На панели принтера нажать кнопку «Меню»
- Выбрать пункт «Настройки»
- Кнопками вверх-вниз выбрать параметр «Продолжить печать» и нажать «ОК».
Примечание. Это Вас не избавит от сообщения об ошибке, но печать будет возможна. Также данные шаги придется выполнять при каждом включении принтера, и открытии/закрытии крышки.
Если у Вас возникли трудности с заправкой картриджей или заменой чипа, Вас бесплатно может проконсультировать менеджер, или вызовете специалиста. Для вызова мастера позвоните по телефону (495) 229 31 32
 Apple iPhone SE по супер низкой цене, всего 32000 рублей!
Доставка бесплатно
Отправка в регионы
Оригинал Евротест
8 (495) 229-31-32
посмотреть
Ошибка памяти расходных материалов в принтерах и МФУ HP – как исправить
Испытываете ли вы проблемы с принтером HP, и бывает так, что видите на экране сообщение «Ошибка памяти 10.1000», «10 .0002» или что-то подобное?
Если ответ «да», вы, вероятно, уже пытались выключить и снова включить принтер, вынуть и снова вставить тонер-картриджи, и вы просто не можете решить проблему с принтером, ничего не работает, и вы готовы сдаться!
Не волнуйтесь, мы поможем в решении данной проблемы. Вот что вы узнаете на этой странице:
- Почему на принтере HP отображается сообщение «Ошибка памяти картриджей»
- Какие распространенные вещи вызывают ошибки в Memory Supply?
- Как исправить ошибку в памяти расходных материалов и снова заставить принтер работать.
Почему мой принтер отображает сообщение – «Ошибка памяти расходных материалов»?
Ошибка памяти расходных материалов возникает, когда металлические контакты / микросхема картриджа с тонером неправильно соединяются с соответствующими контактами внутри принтера. После этого принтер не может обнаружить установленный картридж с тонером и отображает сообщение «Ошибка памяти расходных материалов» на панели дисплея принтера. Ошибка также может быть вызвана неисправными совместимыми картриджами, в которых данные микрочипа устарели.
Эта проблема затрагивает различные модели HP LaserJet Pro и модели многофункциональных принтеров, в частности, принтеры HP M1212nf и модели LaserJet Pro M277dw.
Этот тип проблемы иногда возникает после замены пустого картриджа новым тонером, и существует несколько возможных причин. Читайте дальше, чтобы узнать, что это может быть .
Что вызывает ошибку памяти HP Supply и как их исправить.
Есть 4 простых и распространенных вещи, которые могут вызвать проблему с принтером, не давая ему работать, и, к счастью, их очень легко исправить.
- Замятую бумагу или защитные полоски, которые не были удалены.
- Раздавленные металлические контакты, которые больше не соединяют тонер с принтером.
- Сломанные кусочки пластика приводят к тому, что тонер оказывается не на своем месте.
- Устаревшее программное обеспечение / прошивка принтера.
Чтобы ваш принтер снова заработал, попробуйте следующие исправления:
1. Защитные полоски
Когда вы собираетесь установить новый картридж с тонером, есть оранжевые защитные полоски и пластиковые зажимы, чтобы убедиться, что картридж не поврежден во время транспортировки. Каждый из этих зажимов и защитная полоса на барабане должны быть удалены перед установкой нового тонера, иначе они будут препятствовать печати вашего принтера.
Зажимы легко обнаружить, защитная полоса находится на стороне тонера и имеет оранжевое кольцо, которое нужно вынуть чтобы удалить полоску, или оно будет похоже на кусок целлофана, как на изображении ниже.
2. Раздавленные металлические контакты
Чтобы ваш принтер мог обнаружить установленный картридж с тонером, 2 крошечных металлических контакта соединяются с соответствующими контактами на картридже. Металлические контакты в принтере и те, что на тонере, замыкают цепь, и если контакты не соприкасаются. Ваш принтер будет считать, что тонер не установлен.
Извлеките картридж с тонером и найдите что-то похожее на микрочип или два металлических квадрата. Теперь представьте, где они будут подключаться к принтеру, и найдите соответствующие разъемы внутри принтера (убедитесь, что принтер выключен и отсоединен от сети).
Если два металлических разъема кажутся сдавленными, аккуратно (чтобы ничего не сломалось), потяните их вперед. Это должно позволить им правильно подключиться к тонеру после его повторной установки.
Также возможно, что потеря кусочков упаковочного материала или замятие бумаги могут вызвать проблемы, поэтому перед установкой нового тонера убедитесь, что принтер чист.
3. Сломанные пластиковые кусочки
Если картридж с тонером был поврежден одной из сторон, так что пластиковые прорези сломались, он может неправильно поместиться в принтере и по аналогии с предыдущей причиной проблемы с памятью расходных материалов, контакты не будут правильно соединяться, и Единственный способ решить эту проблему – заменить картридж с тонером на новый.
4. Устаревшая прошивка / программное обеспечение
Производитель вашего принтера будет регулярно обновлять ваш принтер новым программным обеспечением. Если это программное обеспечение устарело по какой-либо причине, вы можете получить ошибку. Посетите Google и введите «[ваш принтер модель] прошивки» в строке поиска и загрузите последнюю версию для вашего компьютера / принтера. После обновления это часто может исправить многие проблемы с принтером. Последние обновления прошивки вы можете найти на сайте HP.
Последняя возможная причина сообщения об ошибке памяти расходных материалов может быть вызвана тем, что при установке совместимого или восстановленного картриджа с тонером , данные хранящиеся на микрочипе картриджей, устарели.
Затем микропрограмма принтера может доставить сообщение об ошибке в памяти расходных материалов, и единственный способ решить эту проблему – это заставить компанию, у которой вы приобрели принтер, заменить его новым, а затем заменить его на своем принтере.
Вот, пожалуйста, эти советы были полезны, и ваш принтер снова работает сделайте репост статьи, чтобы как можно больше пользы она принесла вашим друзьям и близким, спасибо. А мы в свою очередь по вашим просьбам, будем и дальше изучать, писать и помогать вам в решении проблем связанных с принтерами и МФУ.

Для определения причины неисправности Вашего принтера требуется диагностика в нашем сервис центре. Возможно, потребуется заправка картриджа HP.
UPD: Печать станет возможна после нажатия на кнопку «Продолжить» (на некоторых моделях HP это кнопка «Отмена») на панели управления принтера. Данную операцию необходимо проводить после каждого включения принтера или открытия/закрытия крышек. Также будет присутствовать сообщение «Используется расходный материал не HP» или «Неразрешенный расходный материал»
Не забудьте сказать автору «Спасибо», «лайкнуть» или сделать перепост:
Источник
Содержание
- Возможные причины появления ошибки E8 на принтере HP LaserJet 1132
- Вероятные неисправности, требующие ремонта
- Неисправен таходатчик (тахогенератор) — от 2000 руб*
- Износ щёток мотора — от 1400 руб*
- Вышел из строя модуль управления (электронный контроллер) — от 1900 руб*
- Ошибка Е8 принтера M1132: что делать?
- Как устранить ошибку Е8
- Ошибка сканера E8 на МФУ HP LaserJet Pro M1132 MFP
Возможные причины появления ошибки E8 на принтере HP LaserJet 1132
Ошибка E8 на принтере HP LaserJet 1132 связана только со сканером и никак не влияет на печать. Существует четыре различные причины, по которым это может произойти, каждая из которых требует разного подхода к устранению, проверки определенных компонентов и их замены. Наиболее распространенным из них является заклинивание каретки сканера, которое происходит из-за повреждения или засорения шестеренок, поэтому их следует проверить в первую очередь. Об этом мы поговорим в следующей главе, а пока давайте вкратце рассмотрим три другие причины:
- Ошибка прошивки. Существует небольшая вероятность того, что появившаяся ошибка на самом деле ложная и вызвана неисправностью программного обеспечения МФД. Решить эту проблему можно с помощью перепрошивки, которая может быть выполнена либо с помощью специальных чипов, либо с помощью программного обеспечения сторонних производителей. Не пытайтесь сделать это самостоятельно, особенно если вы неопытны. Обратитесь в сервисный центр для дальнейшей диагностики и ремонта.
- Неисправный патрубок сканера. Если вы часто сканируете на HP LaserJet 1132, патрубок на верхней крышке сканера постоянно изгибается и изнашивается. Соответственно, это может привести к его поломке, но исправить ситуацию не так сложно: нужно сдать оборудование в сервисный центр, где за небольшую плату поменяют кабель на подходящую модель сканера, после чего можно возобновить полноценное взаимодействие с устройством.
- Неисправность платы форматера. Мы не будем вдаваться в подробности того, как работает плата форматера, а лишь поясним, что ее отказ на HP LaserJet 1132 вызывает ту же ошибку. Вы можете купить эту плату отдельно и заменить ее в любом сервисном центре, поэтому снова обратитесь к профессионалам.
Теперь перейдем к самой распространенной ошибке, упомянутой выше. Вы можете справиться с этим самостоятельно, следуя простым инструкциям, а если вы обнаружите, что проверяемый компонент работает исправно, вам придется обратиться в сервисный центр для диагностики и устранения указанных неисправностей.
Вероятные неисправности, требующие ремонта
Если после выключения и включения стиральная машина Candy по-прежнему пишет ошибку E08, это означает, что причина в неисправности. Обычному пользователю сложно самостоятельно проверить внутренние компоненты машины, поэтому лучше пригласить мастера. Вот основные неисправности, возникающие при этой ошибке.
Неисправен таходатчик (тахогенератор) — от 2000 руб*

Этот датчик в стиральной машине необходим для управления скоростью вращения электродвигателя. Без него модуль управления не может определить, с какой скоростью вращается вал двигателя, и прерывает выполнение программы. Если тахометр вышел из строя, Kandi не вращает барабан и выдает ошибку E8. Код ошибки отображается на любой программе после закачки воды в бак.
КАК ВОССТАНОВИТЬ.
Отказ тахогенератора является наиболее распространенной неисправностью с ошибкой E08. Это можно устранить, заменив датчик.
Износ щёток мотора — от 1400 руб*

Щетки генерируют электромагнитное поле и обеспечивают вращение ротора двигателя, передавая энергию от статора. Они изготавливаются из мягкого графита или смеси графита и других материалов. Со временем щетки трутся о ребра, и когда они выступают менее чем на 1 см из своих держателей, они теряют контакт с ротором. Двигатель начинает работать с перебоями, и стирально-сушильная машина не вращает барабан должным образом. Сначала отжим останавливается на цикле отжима, а затем на цикле стирки. В темноте видно, что двигатель искрит.
КАК УДАЛИТЬ
Щетки необходимо заменить.
Вышел из строя модуль управления (электронный контроллер) — от 1900 руб*

Модуль «управляет» узлами стирально-сушильной машины и обеспечивает их совместную работу. Без команд от контроллера стиральная машина не может «понять», какую часть программы она должна выполнить в любой момент времени.
Симптомы неисправности блока управления в Candy с ошибкой E08 различны:
- барабан вообще не вращается;
- прибор вращает барабан только в одном направлении; функция реверса не работает;
- Стиральная машина Candy быстро разгоняется после включения и останавливается с кодом ошибки 08.
Компоненты на печатной плате двигателя (симистор управления двигателем, резисторы, конденсаторы и другие компоненты) выходят из строя в модуле, дорожки сгорают или окисляются.
КАК УДАЛИТЬ
Специалист по обслуживанию находит неисправные компоненты на плате и заменяет их новыми. Сгоревшие или корродированные дорожки припаиваются. В тяжелых случаях производится замена всего модуля.
Ошибка Е8 принтера M1132: что делать?
Принтер HP может выдавать различные ошибки. Их код зависит от причины неисправности. В то же время они могут иметь разную степень сложности. Некоторые из них требуют помощи мастера, другие можно решить своими руками. Ошибка E8 является вторым типом. Это легко решить. В то же время вы сэкономите на оплате услуг разнорабочего.

Открутите винты.
Вам понадобится отвертка и навыки работы с ней. На самом деле, это обычная процедура, с которой могут справиться не только мужчины, но и женщины. Вам потребуется открутить два винта. Как только вы это сделаете, нажмите на двигатель как можно сильнее. Это следует делать слегка на одну сторону. Это давление сдвинет пьесу на несколько сантиметров. Этого достаточно, чтобы колесо вернулось в свое нормальное положение — в центр оптической пары.

Двигатель принтера HP P2035P2055
Как устранить ошибку Е8
На примере принтера m1132 ошибка E8 возникает часто, и пользователи теряются в догадках. Проблема кроется в сканере, и без разборки всей конструкции не обойтись.
Когда устройство подключено к персональному компьютеру, на экране появляется сообщение «used supply in use hp», поэтому следуйте инструкциям:
- Отсоедините крышку.
- Снимите тележку.
- Винты ослаблены.
- Двигатель сканера в принтере HP отключен.
- Грязь убирается.
- Сканер был заменен.
Ошибка E8 mfp HP Laserjet M1132 возникает по следующим причинам:
- Грязь на принтере.
- Проблемы с микропрограммой.
- Сбой карты.
Если вы замените сканер, вы сможете исправить ошибку, и тогда все будет работать идеально. При ремонте рекомендуется воздержаться от чистки платы, так как это может привести к потере сигнала. Ошибка E8 встречается даже в устройствах последнего поколения, и там трудности чаще всего связаны с прошивкой.
Что касается грязи, то она скапливается на шестернях. В любом случае, ошибка E8 не является критической и может быть устранена без обращения в сервисную службу. Из инструментов требуется только торцевой ключ для винтов.
Ошибка сканера E8 на МФУ HP LaserJet Pro M1132 MFP
Сегодня мы попытаемся исправить ошибку на HP LaserJet Pro M1132 MFP.
- Произошла ошибка E8. Это ошибка сканера, и мы постараемся ее исправить.

- Оказалось, что проблема возникла между колесом энкодера и парой opta. Колесо было смещено от центра, поэтому пара opta не всегда корректно работала с риской энкодера, вызывая ошибку E8. Я решил проблему, открутив два винта и сдвинув двигатель как можно дальше в одну сторону. Затем закрутите эти винты обратно. При этом пьеса сдвигается на миллиметр. Этого миллиметра было достаточно, чтобы колесо энкодера поместилось в центре оптической пары. Далее рассматриваются еще несколько вариантов, в которых может возникнуть эта ошибка.

- Снимите верхнюю крышку, устройство можно оставить включенным.

- Удалите линейку. И мы видим, что маленький вал вращается с сопротивлением, ему что-то мешает. Я ослабил верхнее крепление, и без крепления он вращается с меньшим усилием.

- Я оставил крепление свободным. Установите нашу линейку и крышку на место. Выключите и снова включите машину. Понаблюдайте за тем, что происходит сейчас.

- Линейка по-прежнему вибрирует и ходит неровно в интервалах, ослабление не помогло. Теперь попробуем снять эту звездочку. В одном из источников в Интернете говорится, что эта звездочка дает ненужную нагрузку, что, возможно, если ее перевернуть, она все равно будет оказывать давление. Но в другой теме говорится, что при снятии звездочки направляющая (эта большая звездочка) сломалась. Мы рискнули, потом он сказал, что причина оказалась в основании этой звездочки, пластик был полым, то есть там был воздушный пузырь. Поэтому он не мог выдержать той нагрузки, которую имел.

- Также установите линейку на место, включите машину и наблюдайте. Если линейка начинает вибрировать, я немедленно отключаю ее. Также остается ошибка E8, линейка не влияет на эту ошибку.

- Возможно, причиной ошибки является неисправный двигатель. Давайте проведем еще один тест. Выньте линейку, поверните ее, не ставьте малую звездочку и включите станок. Обратите внимание, насколько устойчиво будет вращаться шестерня от двигателя без нагрузки. При включении движение было равномерным, но машина по-прежнему выдавала ошибку E8. Установите обратно малую шестерню, которая должна прижать большую. Также включили принтер, и он сразу же выдал нам эту ошибку.
- Теперь давайте проверим, горит ли лампочка. Свет не горит.
- Таким образом, это, наконец, мотор или пара opta. Видно, что датчик находится близко к оптопаре, теоретически он должен быть на class=»aligncenter» width=»476″ height=»271″[/img].
- Откручиваем винты, снимаем крепление. Снимаем наш мотор, видим, что зазор составляет буквально треть миллиметра, но этого должно быть достаточно. Когда вы вставляете его, он входит внутрь, это немного помогло, и датчик opta сдвинулся с места. Колесо энкодера теперь находится внутри датчика opta.

- Соберите все в обратном порядке. Если редуктор тоже вращается неравномерно, значит, проблема в двигателе, он не способен выдавать достаточную мощность.


Источники
- https://Lumpics.ru/e8-error-on-hp-laserjet-1132-printer/
- https://rbamedia.ru/articles/oshibka-e8-v-mfu-hp-lj-m1132-i-sposoby-ee-ustraneniya/
- https://vseproprintery.ru/voprosi-i-otveti/oshibki-hp-m1132-mfp-problemy-s-rabotosposobnostyu-printera
- http://printergid.ru/neispravnosti/oshibki-e8
- https://zakupkiizkitaya.ru/digital_technic/ustranaem-kody-osibok-printerov-hp-e8-e3-79-a-takze-osibka-pecati.html
- https://univer-irk.ru/czvet/hp-laserjet-m1132-mfp-ne-pechataet-kody-oshibok-printera-a-takzhe-rekomendaczii-po-ih-ustraneniyu
- https://KTexnika.ru/elektronika/printer-hp-oshibka-e8.html
- https://uczn.ru/t-digital/oshibka-e9.html
-
#1
I have a Color LaserJet 3800DN that has two toner cartridges that the printer thinks are «out» but I have continued to use the printer fine with the Override At Out setting. All of my cartridges are genuine HP parts.
A few days ago, the formatter board started failing so I replaced it with another formatter board today. Upon starting the printer with the new board, it immediately complained about «Non HP Supply Installed» for the two toner cartridges that I had been using in override mode. I’ve made sure the new board has the same override settings enabled and can’t get rid of this error. What am I doing wrong?
-
#2
The new formatter needs to detect a new cartridge. The toner cartridge has a «busman» fuse. It gets busted only one time when the new cartridge is installed. This way, the printer detects new cartridge. An old one has its busman fuse already busted. You must look for the busman fuse of your old cartridge and replace it.
Want to reply to this thread or ask your own question?
You’ll need to choose a username for the site, which only take a couple of moments. After that, you can post your question and our members will help you out.
Ask a Question