
После того, как обнаружил, что перегорела одна лампочка подсветки номерного знака, было решено произвести замену на светодиодные. Ну и как оно это обычно происходит, покликал по страницам драйва, увидел эти плафоны 4H0 943 022, 4H0 943 021. Не долго думая купил и пошёл менять.
Ч А С Т Ь № 1
1. Быстро снял старые, поставил новые — «свет, мотор»… Ошибка, мать её! Number Plate Light! 5 коротких вспышек диода и всё. Ну само собой комментарии читать никто не любит и я в их числе. Вычитал причины её появления и стал вспоминать уроки физики, перед этим глянул, как владельцы авто устраняли эту проблему. Почему то ни одна из идей мне не понравилась, врезаться в проводку, ставить обманки или «накидывать доп.лампочки» в салон и прочее — мне не очень хотелось, поэтому стал изобретать велосипед.
Погуглил. Посчитал необходимое сопротивление резисторов. Было решено ставить его в сам плафон между лапок.
Приобрёл сначала такой резистор, только для эксперимента, т.к. во внутрь плафона он не залазил из за своих габаритов.
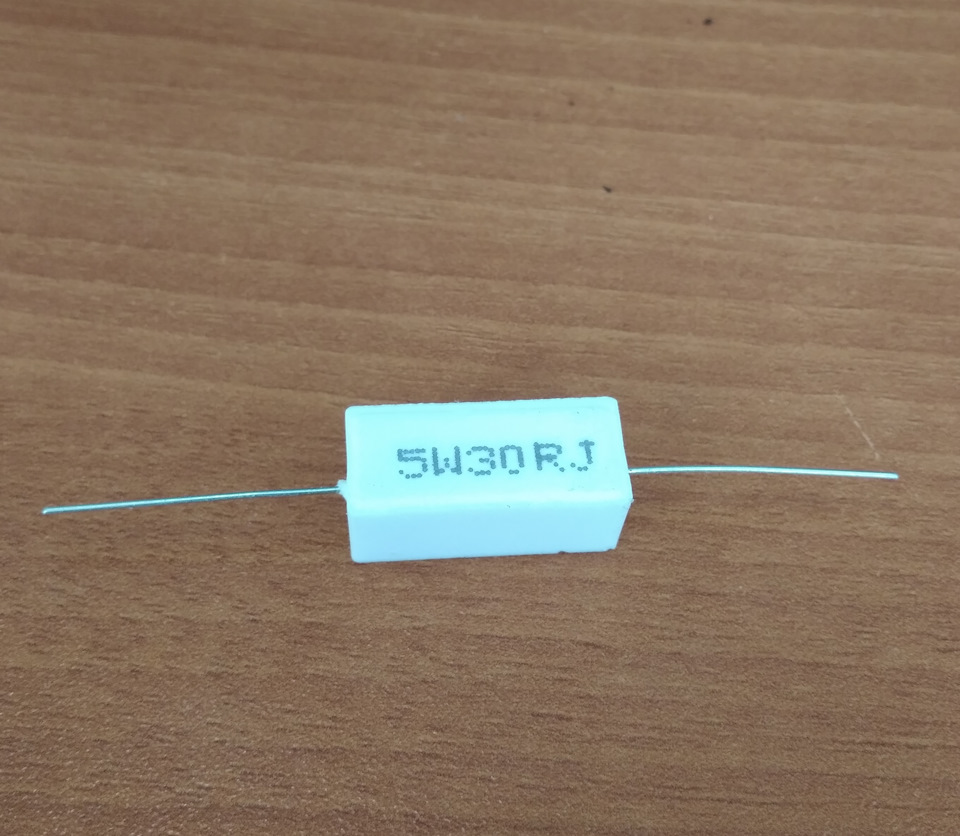
Полный размер
И два 2W15R (фото нет, потом объясню почему, да брал из того, что было, т.к. нужен был именно компактный резистор)
Перемкнул лапки плафона и пошел тестить.
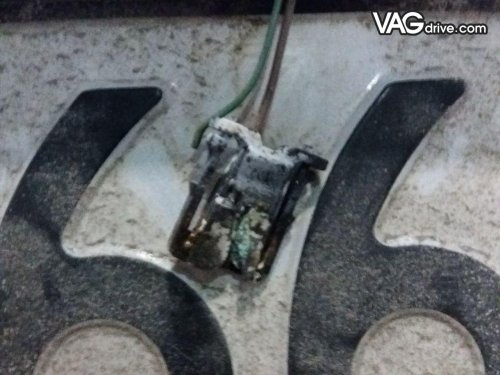
2. Быстро снял старые, поставил новые — «иии… Работает!». Ну думаю, вот и все дела, снять, аккуратно припаять контакты резисторов и плафона и вернуть на родное место… Сижу жду ошибки — ошибки нету! Рад безумно, счастлив, НО… тут начал ощущать запах дыма, посмотрел в зеркало заднего вида и охренел! Валит дым! Я мухой к плафонам, выкрутил и обнаружил, что эти резисторы оплавили плафон изнутри, а сами сгорели дотла. Я конечно немного охренел от такого результата.
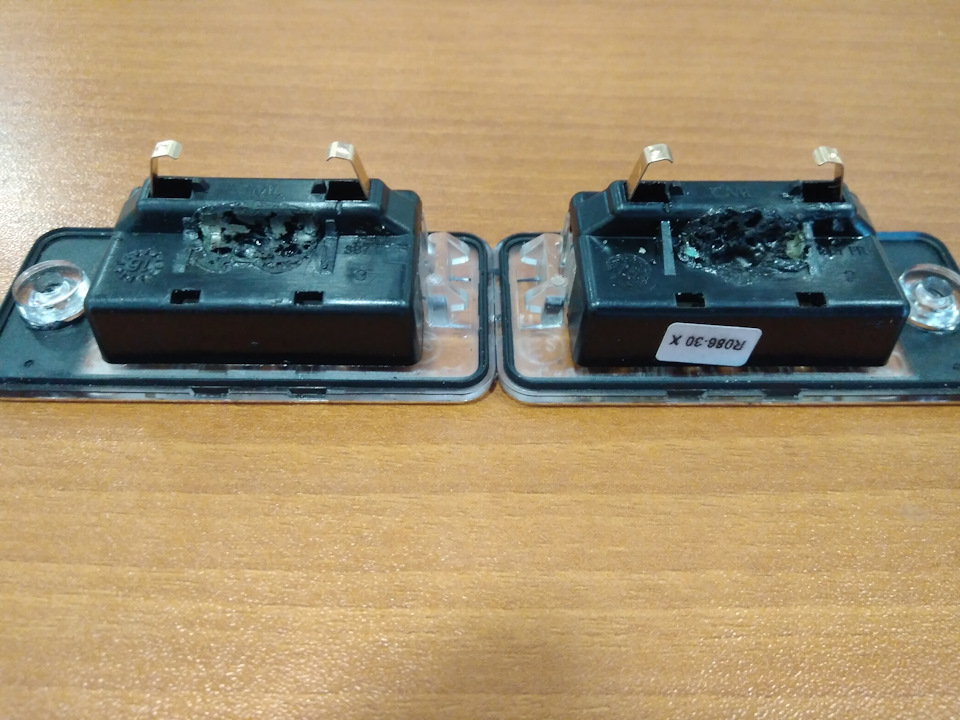
Полный размер
Понял, что, похоже, ничего хорошего из этого не выйдет. Купить штатные c5w, либо диодные с алиэкспресса, подождать немного, поставить и не делать мозг. Жалко конечно было денег за плафоны, но что ж поделаешь…
Спустя день упрямство взяло своё…
Ч А С Т Ь № 2
Достал обугленные плафоны и понял, что выбрасывать жаба душит, а отдать вроде некому… Переосмыслил ту хрень, которую я совершил днём ранее, и начал поиски решения. Голову начали посещать мысли: а может реально резануть проводку, «дать ей» лампочку и все дела… И тут понял, что нафига что-то резать, когда нужен просто источник сопротивления с необходимым номиналом… И о чудо! Я вспомнил про лампочки w5w…
По габаритам — самое то, в плафон влезет, единственное смущало, что при нагревании может оплавиться плафон изнутри, поэтому стал искать w5w 24V вместо 12V.
Купил лампочку, разложил всё на столе, достал паяльник, припой, блок питания для теста.
Хоть и напряжение лампочки 24 вольта, все равно хотел перестраховаться от риска нагрева. Пришлось немного поколхозить. Да чего скрывать, если честно, вся процедура и есть колхоз, да и простят меня истинные ценители, но нужен был результат любой ценой.
— Сделал один виток изоленты вокруг лампы, для того, что бы не отдавало желтизной при работе диодов, ну и перестраховаться от нагрева.

— Сделал небольшое углубление в плафоне под размеры лампы, пару капель припоя ну и сверху немного изоленты (делалось опять же для теста). Получилась примерно такая картина.
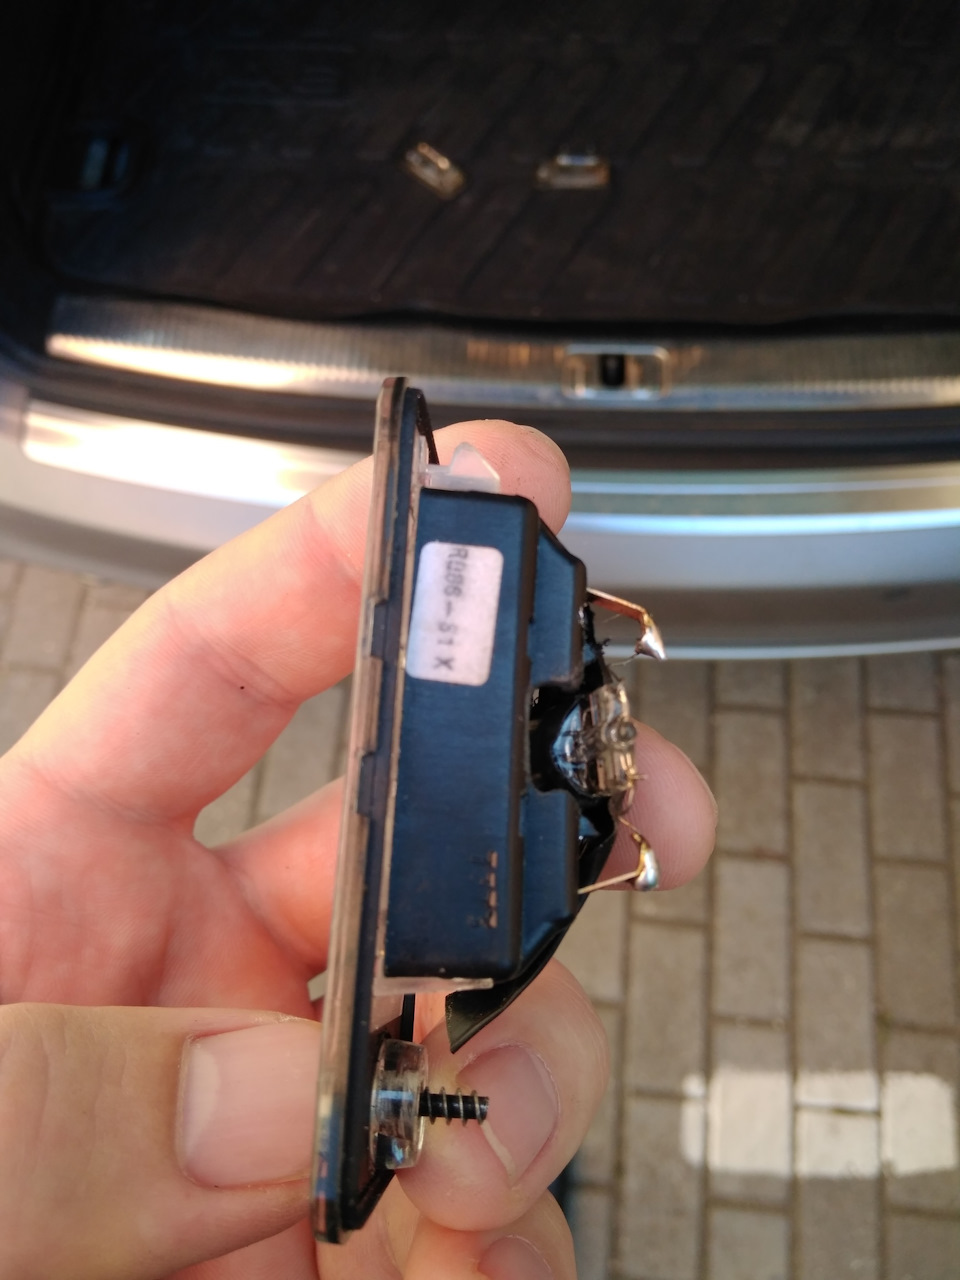
Полный размер
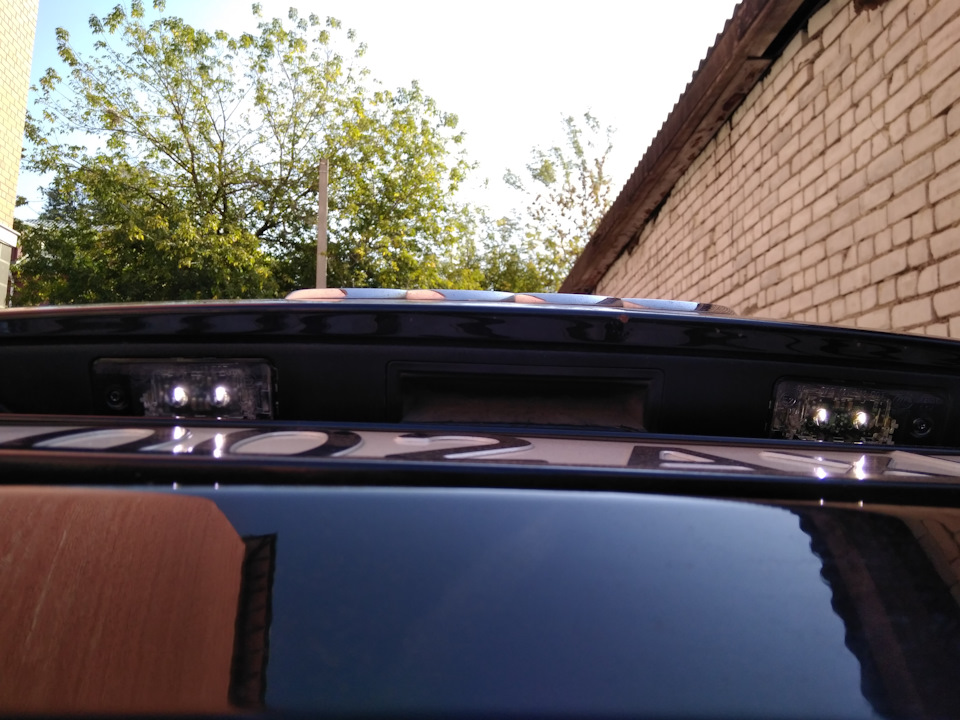
С третьего раза… Вобщем сейчас вся эта конструкция на тесте. Светит — ярко, плафон холодный, ошибок — нет. Покатаюсь недельку. Если никаких «косяков» не вылезет, то переделаю всё, уберу изоленту и забуду…
Всем спасибо за внимание! Удачи!
Полный размер
Полный размер
Опубликовано: 03.06.2023
Возможно, многие из вас, наверняка, задумывались над заменой подсветки с лампами накаливания вашего автомобиля на аналогичные светодиодные решения, но так, чтобы обошлось без особого вмешательства в проводку и конструкцию плафончиков.
Рассмотрим 2 примера, которые я реализовал на Шкоде:
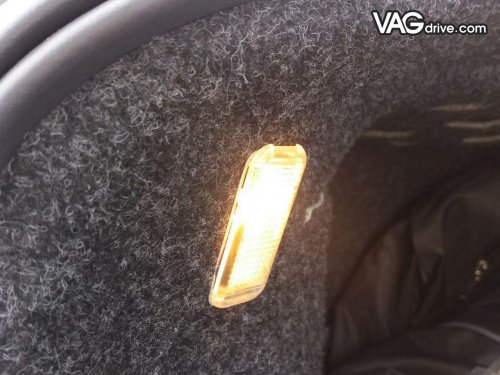
ПЕРВЫЙ СЛУЧАЙ — Подсветка ног в салоне или багажнике
Оригинальный плафончик подсветки багажника у меня разбился при перевозке груза, а новый плафон в EMEX стоил что-то около 700 руб (а это, я Вам напомню, такая маленькая прозрачная фигулька 50*20 мм и ей, на мой взгляд, красная цена — 100 руб.).
При таком раскладе будет проще сразу купить светодиодную от подсветку от Audi A8 (от Audi A8 дешевле, чем от других VAG, хотя визуально отличий не заметил).
Итак для тех, кто захочет пройти по пути джедая, расскажу по-порядку (расчёт на один плафончик):
1) Необходимо купить следующие детали:
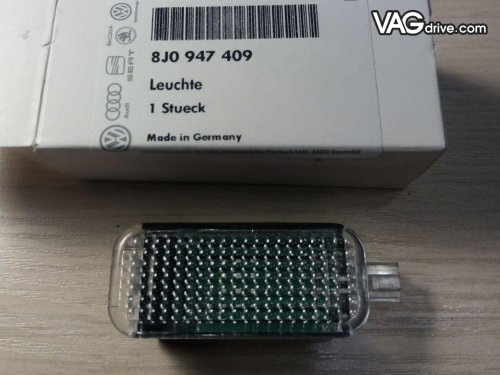
— светодиодный плафон 8J0 947 409 — цена 680 руб. (1 шт);
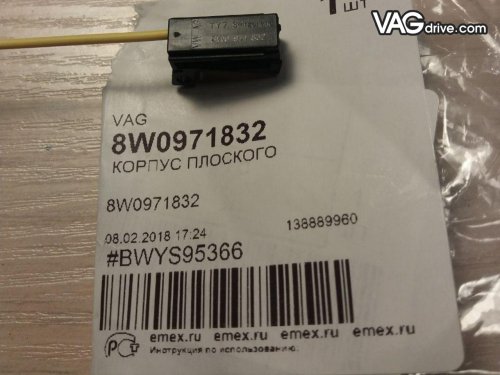
— пластиковый разъём 8W0 971 832 — цена 271 руб. (1 шт);
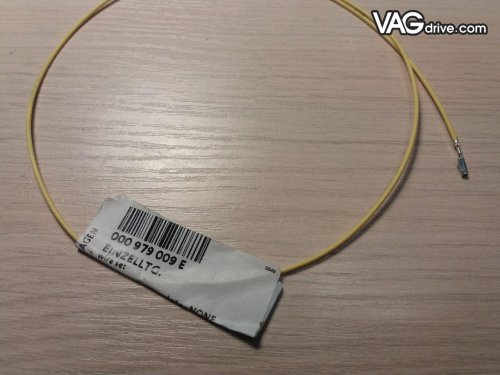
— провод с двумя пинами 000 979 009 E — цена 281 руб. (1 шт);
— пины для контактов в разъёме на косе проводки автомобиля N10 318 905 (2 шт).
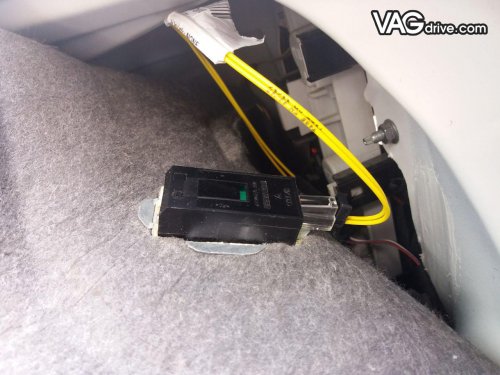
2) Вставляете оба конца провода в разъём, а потом разрезаете провод посередине:
3) Затем, чтобы не портить проводку автомобиля, мы установили два пина N10 318 905, которые закрепили на концах проводов и вставили в разъём автомобиля, предварительно обмотав их изолентой:
Вот что получилось в конечном итоге для подсветки багажника (но я уверен, что все подсветки: для ног, в бардачке и прочего можно заменить на такие плафоны):
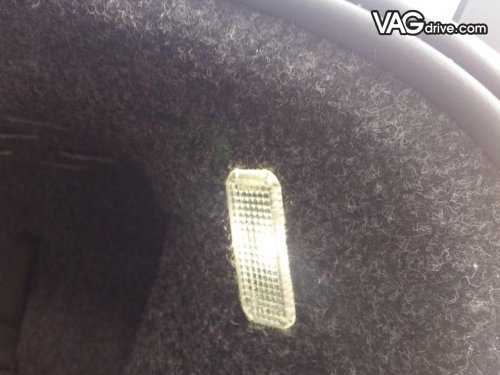
Света стало больше, но не намного, что хорошо, и это не бросается в глаза, как колхоз со светодиодной лентой из супермаркета или типа того. Вообщем результат отличный =)))))
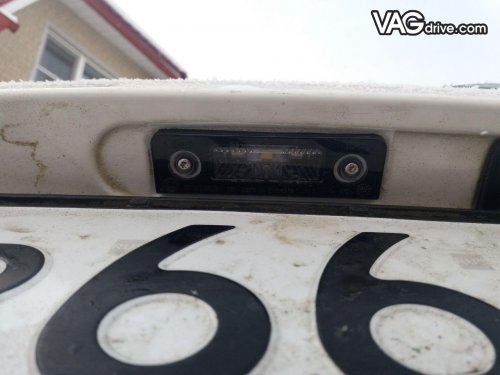
ВТОРОЙ СЛУЧАЙ — Подсветка номерного знака
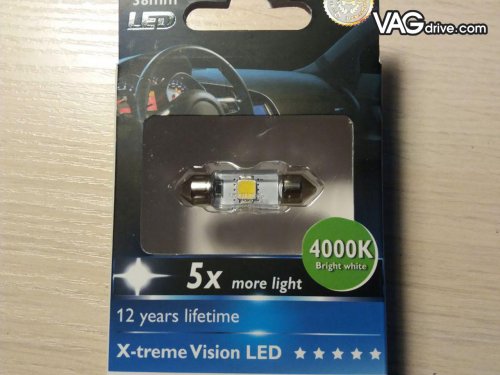
Из-за того, что из под лампочек подсветки номера полезла ржавчина и пришлось лезть и подкрашивать саму крышку багажника, я решил поменять лампочки на светодиодные и отремонтировать проводку: менять пришлось разъёмы, плафоны и штекеры (пины) — всё поржавело. Светодиодные лампы ставил от Philips.
Поэтапно (ржавчина может быть и не у всех, но тем не менее опишу):
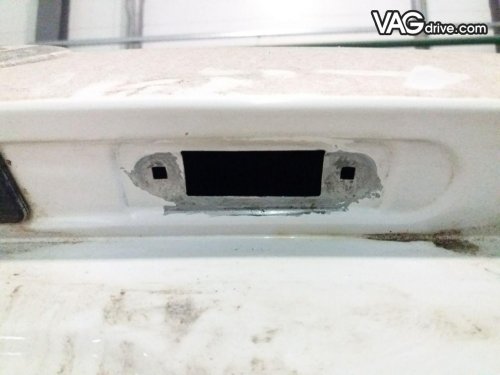
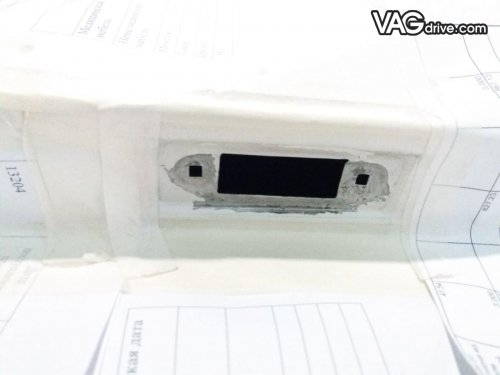
1) Снимаем плафоны, берём в руки Dremel мини дрель (или аналог) и конусной насадкой удаляем всю ржавчину и вспучившуюся краску. Отлетает краска легко и ржавчина удаляется очень хорошо, так как не проникает глубоко в металл (хорошее качество металла и оцинковки). Получаем такую картину:
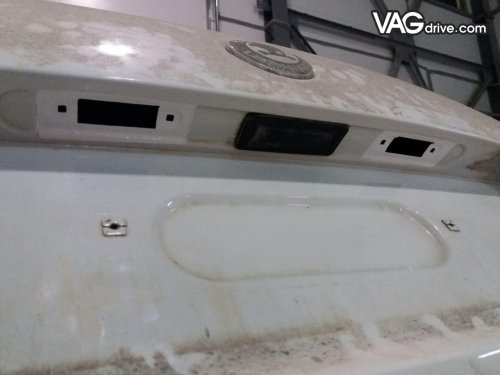
2) Далее обклеиваем малярным скотчем и бумагой вокруг того места, которое будет загрунтовано и окрашено, но без фанатизма, чтобы всё-таки окрашено было по-минимуму и эта зона закрывалась плафончиками (конечно, в идеале нужно купить родную краску в баллончике Skoda, но можно обойтись и любой другой краской, лишь бы была хорошей):
3) Обязательно нужно поставить новые втулки, так скорее всего старые уже пришли в негодность — N90 837 801 — 4 шт (23 — 25 руб. за шт)
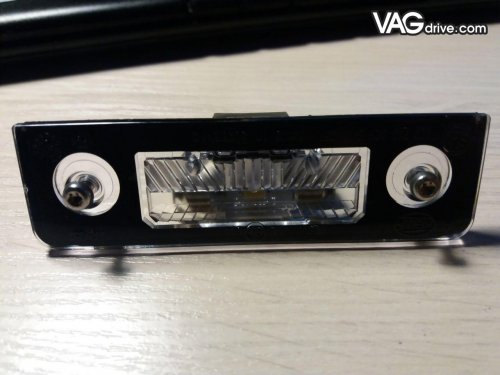
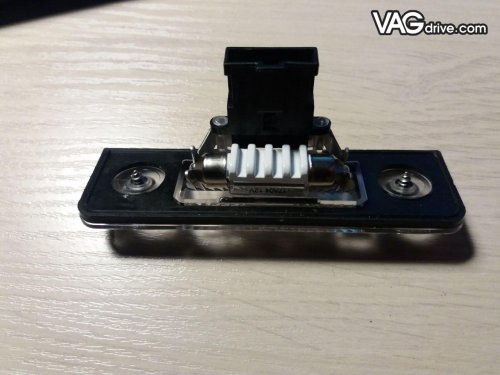
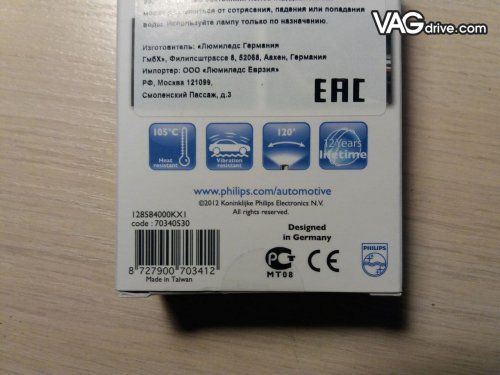
4) Приобретаем новый плафон или оба (по необходимости) — 1Z0 943 021 B (до 400 руб. за шт) и инсталлируем в них лампы Philips 128584000KX1 — продаются поштучно (360 — 400 руб. за шт):
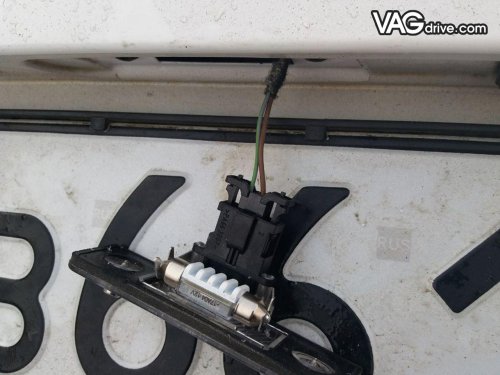
5) В нашем случае один плафон и разъём развалились при снятии, поэтому для ремонта были куплены пластиковый корпус разъёма 1J0 971 972(169 руб.) и штекеры (пины) N10 335 807 (34 руб. за шт — но нужно два) для него, чтобы восстановить первозданный вид проводки:
Теперь оба плафона светят превосходно, но, к сожалению, горит ошибка на приборной доске, что в системе есть перегоревшая лампа — будем разбираться и лечить это дело ВАСЕЙ:
Клиент заявляет рекламацию в отношении того, что в комбинации приборов загорается контрольная лампа системы адаптивного освещения Audi adaptive light/освещения.
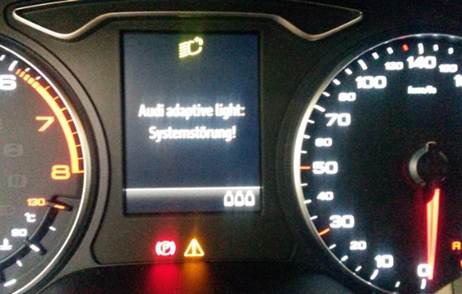
Илл. 01. Контрольная лампа в комбинации приборов
На сервисном предприятии установлено, что в блоке управления корректора фар (диагностический адрес 55) сохранено одно из событий ИЛИ оба события (статически ИЛИ спорадически):
C108231 Блок управления правой фары, нет сигнала
C1082F0 Блок управления правой фары, не закодирован
Отклонение, обусловленное аппаратным обеспечением
1. Проверить, зарегистрированы ли в регистраторах событий автомобиля указанные выше события.
2. Если события регистрируются статически, проверить, изменяется ли их статус после выключения и последующего включения зажигания на спорадический.
3. Если после выключения и последующего включения зажигания события становятся спорадическими, удалить их из регистратора событий. Если после неоднократного выполнения действий, описанных в пункте 2, события по-прежнему остаются статическими, эта сводка TPI неприменима. В этом случае продолжить ремонт самостоятельно.
4. Если события можно удалить из регистратора событий, заменить выключатель зажигания и стартера (номер детали 5Q0 905 849 C или с более высоким индексом ,предлагаемым электронным каталогом оригинальных запчастей).
При необоснованной замене деталей по гарантии расходы не возмещаются!
Выключатель зажигания и стартера: 5Q0 905 849 C (или с более высоким индексом ,предлагаемым электронным каталогом оригинальных запчастей)
Решение технических проблем
Если вы не нашли информацию по своему автомобилю — посмотрите ее на автомобили построенные на платформе вашего авто.
С большой долей вероятности информация по ремонту и обслуживанию подойдет и для Вашего авто.
После включения зажигания, электронная система управления проверяет все узлы и устройства автомобиля. Обнаруженные проблемы делятся на первостепенные и обозначаются красными пиктограммами, и второстепенные: обозначены желтыми пиктограммами.
При нарушениях первостепенной важности раздается три звуковых сигнала. Если нарушений несколько, разные пиктограммы появляются, сменяя друг друга каждые 2 секунды.
Нарушения второстепенной важности сопровождаются однократным звуковым сигналом.

Расшифровка сообщений
SERVISE — так режимный сервисный индикатор напоминает о плановом ТО. Надпись появляется за 3 000 км до срока ТО. Когда он наступает, владелец видит на приборной панели надпись SERVISE JETZT
AIRBAG FEHLER! — эта надпись говорит о неисправности в системе подушек безопасности. В норме, после включения зажигания несколько секунд горит контрольный индикатор, затем он должен погаснуть. Если подушки отключены, лампа мигает 12 секунд. Если лампочка загорается во время движения автомобиля, и вы видите надпись — система подушек неисправна
BEIM EINLEGEN EINER FAHRSTUFF IM STAND FUSSBREMSE BETATIGEN! — такая надпись появляется на автомобилях с автоматической коробкой передач. Это напоминание: перед выбором позиции селектора АКПП выжмите педаль тормоза
BREMSBELAG PRUFEN — надпись указывает на износ тормозных колодок и переводится как «Проверьте состояние тормозных колодок»
STOP! BREMSENFEHLER BETRIEBSANLEITUNG! — очень важная надпись. «Остановись! Тормозная система неисправна!». Лампочка ABS загорается в норме после включения зажигания, затем гаснет. Если она не загорелась вообще, или не погасла после запуска, или загорелась в движении — система ABS не в порядке. Если горит и ABS, и лампа тормозов — продолжать движение нельзя!
Еще STOP! BREMSENFEHLER BETRIEBSANLEITUNG может загореться, если уровень тормозной жидкости в системе упал
GENERATOR WERKSTATT! — переводится как «Батарея разряжена». В норме, сигнальная лампа заряда аккумулятора гаснет после запуска мотора. Продолжает гореть — значит, АКБ разряжается
MOTORSTORG WERKSTATT! — нарушения в работе двигателя. Переводится как «неполадки в двигателе». Часто сочетается с лампочкой EPC — сигнальной лампы системы управления двигателем. Продолжать движение нельзя
STOP! KUHLMITTEL PRUFEN BETRIBSANLEITUNG! — упал уровень антифриза в системе охлаждения двигателя. Переводится как «Остановись! Проверь охлаждающую жидкость»
STOP! OLDRUCK MOTOR AUS! — упало давление в системе смазывания двигателя. Переводится как «Остановить! Нет давления масла!». Если сопровождается горящим красным индикатором «масленки» и троекратным звуковым сигналом — движение продолжать нельзя
STOP! OLSTAND PRUFEN! — сигнал о том, что необходимо проверить уровень масла в двигателе. Сочетается с желтой «масленкой» на панели приборов. Ехать можно, но нужно долить масло в двигатель по щупу.
OLSENSOR WERKSTATT! — «Неисправен датчик уровня масла». Встречается вместе с мигающей желтым цветом «масленкой»
WASCHWASSER AUFFULLEN — сообщение о том, что жидкость омывателя в резервуаре заканчивается, и нужно ее долить
BITTE TANKEN — «Пожалуйста, заправьтесь»
Другие сообщения бортовой системы контроля
- Siehe Betriebsanleitung — Смотрите инструкцию
- Parkbremse losen- Отпустите стояночный тормоз
- Bremstlussigkeit prufen — Провеьте уровень тормозной жидкости в системе
- Kullwassertemperatur — высокая температура охлаждающей жидкости
- ASC — Включен автоконтролер стабилизации движения
- Bremslichtelektrik — световой сигнал торможения не работает
- Niveauregelung — Низкий уровень подкачки задних амортизаторов
- Kofferraum offen- Багажник открыт
- Tur-off — дверь открыта
- Check-Control — неисправность в контроллере ошибок (бортовой компьютер вышел из строя)
- Getribenotprogramm — отказ управления коробки передач
- Funkschlussel Batterie — сели батарейки ключа дистанционного управления
- Bremsdruck — низкое давление в тормозной системе
Prufen von — проверьте
- Bremslicht — сигналы торможения
- Abblendlicht — ближний свет
- Standlicht — стояночные огни
- Rucklicht — свет задних фонарей
- Nebellicht vorne / hinten — противотуманный свет спереди / сзади
- Kennzeichenlicht — освещение номерного знака
- Anhangerlicht — фонари прицепа
- Fernlicht — дальний свет
- Ruckfabrlicht- свет заднего хода
- Getriebe — электрику АКПП
- Sensor-Oilstand — датчик уровня моторного масла
- Oilstand Getriebe — уровень масла в АКПП
И ещё немного с форума VW
При включенном зажигании осуществляется автоматический контроль за работой систем и устройств автомобиля.
Нарушения и степень важности определенных действий разделены на первостепенные (красные пиктограммы) и второстепенные (желтые пиктограммы).
Кроме того — нарушения ПЕРВОСТЕПЕННОЙ важности — ТРИ ЗВУКОВЫХ СИГНАЛА.
если таких нарушений несколько — то пиктограммы по очереди появляются на 2 секунды каждое.
Нарушения ВТОРОСТЕПЕННОЙ важности — ОДИН ЗВУКОВОЙ СИГНАЛ.
..1 — Режимный сервисный индикатор: SERVISE -напоминание о необходимости планового ТО..надпись появляется за 3000 км и уменьшается по 100 км. Когда срок настанет — появится надпись servise jetzt
..2 — Система надувных подушек безопасности: после включения зажигания несколько секунд горит контрольная лампочка. Если подушки отключены — лампочка мигает около 12 секунд. Если в движении лампа загорится или замигает — система подушек неисправна. появится надпись — AIRBAG FEHLER — НЕИСПРАВНОСТЬ В СИСТЕМЕ ПОДУШЕК!
..3 — На машинах с АКПП может появиться надпись BEIM EINLEGEN EINER FAHRSTUFF IM STAND FUSSBREMSE BETATIGEN — ПЕРЕД ВЫБОРОМ ПОЗИЦИИ СЕЛЕКТОРА АКПП НАЖМИТЕ ПЕДАЛЬ ТОРМОЗА.
..4 — Указатель износа тормозных колодок: BREMSBELAG PRUFEN — ПРОВЕРЬТЕ СОСТОЯНИЕ ТОРМОЗНЫХ КОЛОДОК!
..5 — АБС — Антиблокировочная система: — контрольная лампа загорается на несколько секунд при включении зажигания. если лампа не загорается, или после запуска двигателя не гаснет или загорается в движении — АБС не в порядке. если горит только АБС — ехать МОЖНО. если горит АБС и лампа тормозов — ехать можно В СЕРВИС! аккуратно!
появляется надпись STOP! BREMSENFEHLER BETRIEBSANLEITUNG! — ОСТАНОВИТЕСЬ! НЕИСПРАВНОСТЬ ТОРМОЗНОЙ СИСТЕМЫ!
..6 — Тормозная система: —
HANDBREMSE ANGEZOGEN! — ЗАТЯНУТ РУЧНОЙ ТОРМОЗ!
при малом уровне ТЖ — STOP! BREMSENFEHLER BETRIEBSANLEITUNG — НЕИСПРАВНОСТЬ ТОРМОЗНОЙ СИСТЕМЫ!
..7 — Заряд аккумулятора: — сигнальная лампа гаснет после запуска двигателя! если не гаснет — значит идет разряд.
надпись — GENERATOR WERKSTATT! — РАЗРЯД БАТАРЕИ!
..8 — нарушения в работе дизельного двигателя: —
MOTORSTORG WERKSTATT! — НЕПОЛАДКИ В ДВИГАТЕЛЕ!
..9 — Знаменитая лампочка EPC: — сигнальная лампа системы управления двигателя — если горит — ехать в сервис! надпись —
MOTORSTORG WERKSTATT! — НЕПОЛАДКИ В ДВИГАТЕЛЕ!
..10 — Температура/уровень охлаждающей жидкости: — надпись
STOP! KUHLMITTEL PRUFEN BETRIBSANLEITUNG! — ПРОВЕРЬТЕ ОХЛАЖДАЮЩУЮ ЖИДКОСТЬ
..11 — Давление/ уровень масла в двигателе: — если лампа горит КРАСНЫМ цветом и три раза звучит сигнал — это сигнал ДАВЛЕНИЯ! ехать не надо — можно запороть мотор —
надпись STOP! OLDRUCK MOTOR AUS! — СТОП! НЕТ ДАВЛЕНИЯ МАСЛА.
если лампа горит ЖЕЛТЫМ цветом — это сигнал УРОВНЯ!! ехать можно, но масло нужно долить!!
надпись — STOP! OLSTAND PRUFEN. — СТОП! ПРОВЕРЬТЕ УРОВЕНЬ МАСЛА.
..12 — если лампа масла МИГАЕТ желтым цветом — это сигнал неисправности ДАТЧИКА!
надпись — OLSENSOR WERKSTATT! — НЕИСПРАВЕН ДАТЧИК УРОВНЯ МАСЛА!
..13 — Жидкость омывателя стекла: — если она кончается — появляется надпись: — WASCHWASSER AUFFULLEN — ДОЛЕЙТЕ ЖИДКОСТЬ В ОМЫВАТЕЛЬ/
..14 — BITTE TANKEN — Пожалуйста заправьтесь!
..15 — Лампочка CHECK — НАРУШЕНИЯ ТОКСИЧНОСТИ ВЫХЛОПА..Могут быть вызваны плохим топливом или неполадками в системах двигателя.
..16 Пртивозаносная система — ESP — ЛАМПОЧКА ЗАЖИГАЕТСЯ ПРИ ВКЛЮЧЕНИИ ЗАЖИГАНИЯ ( треугольник с восклицательным знаком в круге) и должна погаснуть через пару секунд. В движении лампочка МИГАЕТ когда система работает. если лампа горит постоянно — это неисправность. (если только вы сами систему не выключили — тогда тоже будет гореть постоянно).
Помогите понять суть ошибок и как их лечить, пожалуйста:
Sunday,22,February,2015,18:08:31:10074
VCDS Version: Beta 11.2.0
Data version: 20110305
Chassis Type: 1K0
Scan: 01 02 03 08 09 15 16 17 19 25 42 44 46 47 52 56 62 72 76
00-Steering Angle Sensor — Status: OK 0000
01-Engine — Status: Malfunction 0010
02-Auto Trans — Status: OK 0000
03-ABS Brakes — Status: OK 0000
08-Auto HVAC — Status: OK 0000
09-Cent. Elect. — Status: Malfunction 0010
15-Airbags — Status: Malfunction 0010
16-Steering wheel — Status: Malfunction 0010
17-Instruments — Status: OK 0000
19-CAN Gateway — Status: OK 0000
25-Immobilizer — Status: OK 0000
42-Door Elect, Driver — Status: OK 0000
44-Steering Assist — Status: OK 0000
46-Central Conv. — Status: Malfunction 0010
47-Sound System — Status: OK 0000
52-Door Elect, Pass. — Status: Malfunction 0010
56-Radio — Status: OK 0000
62-Door, Rear Left — Status: OK 0000
72-Door, Rear Right — Status: OK 0000
76-Park Assist — Status: OK 0000
Появилась после замены термостата в сервисе
1 Fault Found:
008825 — Leak in Air Intake System
P2279 — 008 — Implausible Signal
Freeze Frame:
Fault Status: 01101000
Fault Priority: 0
Fault Frequency: 2
Mileage: 0 km
Time Indication: 0
Freeze Frame:
RPM: 720 /min
Load: 33.7 %
Speed: 0.0 km/h
Temperature: 99.0°C
Readiness: 0000 0100
2 Faults Found:
01504 — Bulb for License-Plate Light (X)
012 — Electrical Fault in Circuit
Freeze Frame:
Fault Status: 01101100
Fault Priority: 2
Fault Frequency: 1
Reset counter: 109
Time Indication: 0
Date: 2015.02.07
Time: 11:03:00
Freeze Frame:
ON
Voltage: 13.60 V
ON
ON
OFF
OFF
OFF
01500 — Bulb for Fog-Lamps; Right (L23)
010 — Open or Short to Plus — Intermittent
Freeze Frame:
Fault Status: 00101010
Fault Priority: 4
Fault Frequency: 5
Reset counter: 131
Time Indication: 0
Date: 2015.02.07
Time: 16:03:00
Freeze Frame:
ON
Voltage: 13.75 V
ON
ON
OFF
OFF
OFF
Появилась после мойки, после сброса акума не ушла:(
1 Fault Found:
00589 — Airbag Igniter 1; Passenger Side (N131)
001 — Upper Limit Exceeded — MIL ON
Freeze Frame:
Fault Status: 11100001
Fault Priority: 1
Fault Frequency: 1
Time Indication: 0
Date: 2015.02.21
Time: 18:02:38
5 Faults Found:
00576 — Terminal 15
012 — Electrical Fault in Circuit — Intermittent
00883 — Ignition Switch (D) Terminal S
012 — Electrical Fault in Circuit — Intermittent
00884 — Ignition Switch (D) Terminal X
012 — Electrical Fault in Circuit — Intermittent
01744 — Ignition Switch Terminal P (D)
012 — Electrical Fault in Circuit — Intermittent
00885 — Ignition Switch (D) Terminal 50
012 — Electrical Fault in Circuit — Intermittent
Component: Sounder n.mounted
Component: NGS n.mounted
Component: IRUE n.mounted
1 Fault Found:
00849 — S-contact at Ignition/Starter Switch (D)
008 — Implausible Signal — Intermittent
1 Fault Found:
00933 — Electric Window Motor; Passenger Side (V148)
005 — No or Incorrect Basic Setting / Adaptation — Intermittent
Dron/9K » Вс, 01 апр 2007, 10:30
позаимствовано в конфе ФВ. хотя, что-то есть и в документации
Climatronic self-diagnostics
Press ECON and the UP ARROW button, the one that puts the air near the windscreen vents.Then the left temp display and panel show the channel + subchannel. The large number is the main channel, with the little number top right being the sub channel. The Left temp control twisty bit changes the MAIN channel, the central twisty bit (fan speed) changes the sub channel. Following are what they do, does anyone have this in english?
If you push ECON + rights button near recirculated air. You will show into each screen in the climatronic several interesting values. If you go to channel 19 you will show in the right screen the speed, rpm, motor temp. The are others interesting channels but by the moment there is no info. To go to another channel just move the left temp selector to move to another subchannel just move the right temp selector.
Remote Window Closure / Opening After
Leaving the car, press the ‘lock’ on the remote, and keep it held down (on). the windows and sunroof will close (only whilst you hold the remote button) Conversely, pressing the ‘unlock’ on the remote, and keeping it held down will open the windows (but not sunroof) Release the remote when they are at desired position!
Windscreen Wiper Access
The windscreen wipers are neatly tucked away when not in use for aerodynamics and safety. To clean under them or change the blades is easy! With the ignition key in ‘off’ position or removed, pull the wiper stalk down momentarily. The wipers will wipe to 12 o’clock position and remain in that position. After completing your task, simply repeat the wiper stalk action and the wipers will ‘park’ in the usual position.
Fuel Flap Release
The electric fuel flap release is inhibited if traveling at over 5mph (a guess)
Automatic Rear Screen Wipe
With your windscreen wipers activated in any mode, selecting reverse will cause the rear screen wiper to wipe once.
Headlamp Washers
Headlamp washers will only wash if your headlights are switched ‘on’ — at the first time you wash your windscreen, and then every fifth time your wash your windscreen (resets after ignition switched off)
Zone Climate Control Synchronization
If you hold down the AUTO button for three seconds, it will synchronize the temperature setting on both sides of the car to match that of the drivers side. When ever the driver changes his temp setting it will also change it on the passenger side, until a passenger changes their side.
DSG gearbox (with paddles)
If you’re in normal D mode on the gearbox, you can engage manual control by just flipping one of the paddles. You can then go up and down the gears with the paddles. It will automatically slip back into D mode if left alone in the same gear for a while, or when you come to a stop. Another way of changing back to auto is to pull one of the paddles and hold it for about 3 seconds. All of this is done without having to move the gear stick over to the + — setting.
Radio Trick
If you hold down the MENU button whilst on FM or AM, until the radio emits a ‘boop’ the display will then alter to show a signal meter for the station you are listening to and some other useless bumf.
Single-side parking light
When parking on a very dark street (for example — no street lightings), to prevent some one stupid hitting your car by accident, you can switch on one single side parking light. The single side paring light only lights on one side (either left or right) of front (small light only) and rear small light, the number plate light is not on, to use as less power as possible.
To switch on the «single side parking light»: Turn on either left or right indicator, then switch off the engine and lock the car. Once you locked the car, the direction indicator will no longer be flashing, and the «single side parking light» switched on instead.
Sunroof
If you leave your sunroof open and it starts raining it will close.
Speed Warning
set the speed warning:- With the ignition on, go to «SPEED WARNING» on the display, using the end «up/down» buttons on the right hand stalk end. You will see SPEED WARNING over dashes, pressing the reset button, on the bottom of the stalk changes the dashes to a highlighted 20. You can now select the desired speed, using the stalk end «up/down» buttons, in 5mph increments. Press the reset button again to accept it, which removes the highlighting.
While this is set, you will hear a chime every time you pass up through the set speed, with a reminder on the display.
To remove the warning, go to «SPEED WARNING» and press the reset button. this replaces the speed set with dashes.
Clean Air
When using the windscreen washers and whilst reversing, the Climatic air conditioning system automatically switches into recirculate mode to reduce nasty smells entering the cabin. The LED on the recirculate button does NOT illuminate but if you have the fan set to speed 2 or above you can hear it speed up. Recirculation continues for about 15 seconds after you finish using the windscreen washers.
Stop & no go.
Pressing the brake (sufficient to light the brake lights) at the same time as the accelerator causes the ECU to ignore the accelerator input. This demonstrates the Drive by Wire system
Locked
When locking your Mk V, pressing the lock button on the remote twice causes the doors to be locked but does not activate the deadlocks or alarm. This is useful say, if you want to lock someone inside the car. The key indicator on the interior central locking button will glow orange to indicate that the deadlocks are not engaged and the red LED on the driver’s door will not flash indicating that the alarm is not engaged
TallioN » Вс, 01 апр 2007, 18:13
Спасибо, как машина придет — обязательно изучу подробней
Но мне больше понравилось на сайте известного нам обоим англичанина инструкция по доработке Шкодовского климата до ФВшного. Отличие — у последнего есть кнопка OFF. Чтобы получить ее у Шкоды, надо вытащить среднюю верхнюю кнопку и отломитьь у нее кусочек пластика
вот ссыль на описание . button.htm
и фотки для сравнения:
AMP » Вс, 01 апр 2007, 19:36
SergDN » Вс, 01 апр 2007, 21:50
а ЕСОН тогда не проще нажать? или на фольце решили задублировать кнопку? вообще полное отключение климата более логично повесить на кнопку OFF
Бобёр » Пн, 02 апр 2007, 22:10
Отличие — у последнего есть кнопка OFF.
Немного не понял, какие примушества дает эта «махинация», как ей потом пользоваться и чем OFF от ECON отличаеться в принципе. Разясните «бестолковому». Заранее спасибо.
TallioN » Ср, 11 апр 2007, 8:40
Using the remote to roll up and down the power windows!
Disabling the DRL’s (Daytime Running Lights)
Disabling the seat belt chime
Modify alarm honk/flash when arming or disarming
Active Fog Light use with Highbeams
Activate the cabin heater (heat with a cold engine)
Adjust power steering assist (helps with straight freeway dead zone)
Adjust MFA display for instant and average MPG calculation
SergDN » Ср, 11 апр 2007, 8:59
не очень понятны ряд возможностей.
Using the remote to roll up and down the power windows!
это описано в инструкции
Disabling the DRL’s (Daytime Running Lights)
в инструкции, есть только при заказе coming home
Disabling the seat belt chime
сомнительная опция
Modify alarm honk/flash when arming or disarming
в инструкции
Active Fog Light use with Highbeams
а это что?
Activate the cabin heater (heat with a cold engine)
а это что?
Adjust power steering assist (helps with straight freeway dead zone)
а это что?
Adjust MFA display for instant and average MPG calculation
да он вроде и так показывает.
TallioN » Пн, 16 апр 2007, 7:39
Еще (может повтор с изложенным выше, тогда простите)
Some of this is well known, a lot is in the manual, but it is always asked so to save threads post any useful tips and tricks here.
This thread will be trimmed from time to time, with useful info added to the first post.
Remote Window Closure / Opening
When you lock/unlock the car, keep the button pressed on the fob and the window will raise/lower. take finger off button to stop
Windscreen Wiper Access
To get to the wiperblades, after having the ignition on, turn the ignition into the off position and pull down the wiper stalk. The wiper arms will move and stay in the full sweep position for you to clean/change the wipers. Putting the ignition back on and pushing the wiper switch down again sends the wipers back into their park position
Automatic Rear Screen Wipe
With the windscreen wipers on, selecting reverse will cause the rear screen wiper to wipe once.
Headlamp Washers (if fitted)
Headlamp washers only work with the lights on, and performs it’s action the firstime you clean the windscreen and then every 5th time the windscreen is cleaned. Turning off the headlamps or ignition resets the counter.
Duel Zone Climattronic Synchronization
After a passenger has played around with their temperature settings, press the AUTO button for 3 seconds to re-sychronise
Coming Home Lights
The headlights only stay on for the 30seconds or so if you have put just taken the key out of the ignition. If you dont want them to stay on when youve parked up then lock the car, unlock and lock again.
(Save that oh too familiar «you’ve left your lights on mate!»)
Duel zone climatronc switching between Celcius and Farenheit
Pressing and holding the Auto and Econ Buttons at the same time will swap the temperature from oC to oF and back again (can also be done on in trhe temperature settings if you have Maxidot.
maxidot
The MFD lights up when you open a door but will go out after about 30 seconds unless you do something. Just press briefly the trip button and the display will light back up.
Three blink indicator
IF you have maxi dot, this can be turned on and off in the options screen under ‘comfort coding’
Duel zone Climatronic settings
Like the previous version there are a ton of settings and information hidden in the climatronic computer.
To get this, press the ECON and the top right air direction button (next to recirc) simultaneously. To get back to temperature control press AUTO and ECON simultaneously
The passenger side temp control dial sets the section (1-30)
The fan speed dial sets the subsection and is shown in the passenger side LCD screen to the right of the main number.
The one that everyone wants is true speed, whis can be found in section 19.
Subsection 0 shows Kmh, subsection 1 shows Mph.
Subsection 3 shows the revs to the nearest 100 (tickover is about 870rpm and shows up as 08 on the display)
A little radio trick
If you hold down the MENU button whilst on FM or AM, until the radio emits a ‘beep’ the display will then alter to show a signal meter for the station you are listening to and some other useless stuff.
Auto shut off light
IF you forget to turn the lights off when you get out and lock the car, don’t worry as the lights will turn themselves off after about 1 minute of the door being locked.
VIN numbers
Hold the info button on the radio and a list of VIN numbers come up.
Climate control recirc
When the car is put into reverse gear, the climnate control goes into recirculation mode to prevent fumes from getting into the cabin.
Low oil light
If you get a low oil level warning and then top up the oil but not by a sufficient amount, the low oil level warning light will go out anyway and stay off for 100 miles before coming on again.
Disabling of motion sensors for leaving window open
there are 2 ways
1) If you are by the car, there is a button in by the ‘b’ pillar on the drivers side, press that before locking
2) Press lock on the remote twice. This will also disables the deadlocks.
__________________
jurkv » Ср, 02 июл 2008, 12:33
А в статье написано, что эта кнопка на Фольксвагене отключает и кондей, и вентилятор. На Октавии, насколько я знаю, для этого достаточно выкрутить регулятор вентилятора полностью влево, а потом еще раз влево, пока на индикаторах температуры не загорятся слова OFF.
KGB » Вт, 05 авг 2008, 21:52
sh@m@n » Вт, 05 авг 2008, 22:57
Burbot » Вс, 10 авг 2008, 11:45
KGB, а кнопочка вытаскивается простым «поддеванием» ножичком, или есть какие-либо тонкости.
KGB » Вс, 10 авг 2008, 23:25
Использовал пластиковую карту, как рекомендовванно по ссылке, ножом можно поцарапать.
To remove the button simply lever out the centre with something suitably thin and that won’t damage the plastic such as a credit card.
lazan » Пн, 23 мар 2009, 14:02
Geetler » Пн, 23 мар 2009, 14:21
Это нереально.
Можешь взять распечатку после диагностики.
В ней будут номера продиагностированных блоков. например блок центр.электроники. по нему находим *lbl файл ваг-кома
3C0-937-049-30-H.lbl
смотрим кодирование/адаптация и длинное кодирование, вот кусок длинного кодирования:
;
; long coding
;
;—————————————————
;
;
LC,00,0,Front Fog Lights installed
LC,00,1,Xenon Headlights with Shutter installed
LC,00,2,Footwell Lights installed
LC,00,3,Daytime Running Lights (Scandinavia) active
LC,00,4,Daytime Running Lights (North America)
LC,00,5,Assistance Driving Light & Leaving Home active
LC,00,6,Rain-/Light sensor installed
LC,00,7,Coming-Home active
LC,01,0,Rear Seat Recognition installed
LC,01,1,Headlight Washer installed
LC,01,2,Electronic Fuelpump Relay installed (Gasoline only)
LC,01,3,Rear Wiper installed
LC,01,7,Rear Wiper with Front Wiper continiously active
LC,02,0,Rear Wiper with Front Wiper intermittent active
LC,02,1,Comfort Turn Signals
LC,02,2,Cold Lamp Diagnosis active
LC,02,3,Load Management active
LC,02,4,Coming-Home Mode via (0 = Personalisation / 1 = Lightsensor)
LC,02,6,Side Turn Signal Lights installed
LC,02,7,Seat Heating installed
LC,03,0,Relay Terminal 15 installed
LC,03,1,Rear Fog Lights (0 = 2 Rear Fog Lights / 1 = 1 Rear Fog Light)
LC,03,2,Reverse Driving Lights (0 = 2 Reverse Driving Lights / 1 = 1 Reverse Driving Light)
LC,03,3,Reverse Driving Light off when Rear Lid open
LC,03,4,Xenon Headlights without Shutter installed (Bi-Xenon)
LC,03,5,Teardrop Wiping for Rear Window active
LC,03,6,2nd Battery installed
LC,04,0,Auxiliary Heater installed
LC,04,4,Activation of both Rear Fog Lights
LC,04,6,Rear Fog Lights deactivated
LC,04,7,Warp Relay installed
LC,05,0-7,50,Headlight Washer Delay
LC,05,0-7,50,Decimal Value (Resolution 50 ms) (Example: 20 is 20 x 50 = 1000 ms)
LC,06,0-7,50,Headlight Washer Activation Time
LC,06,0-7,50,Decimal Value (Resolution 50 ms) (Example: 16 is 16 x 50 = 800 ms)
LC,07,0-7,1,Turn Signal Front left/right as Parking Light Front left/right (USA and Canada)
LC,07,0-7,1,Decimal Value (Resolution: 1%)
LC,08,0,Seat Heating Deactivation with Transport Mode active
LC,08,1,Daytime Running Light (DRL) Deactivation with Transport Mode active
LC,08,2,Footwell Lighting Deactivation with Transport Mode active
LC,08,3,Interlock Display via CAN-Instruments active
LC,08,4,Interior Light via Rear Lid Notch active
LC,08,6,Rear Fog Light Deactivation with Trailer active
LC,08,7,Daytime Running Light (DRL) Deactivation while Blinking active
LC,09,0-7,1,Rear Brake Light as Parking Light
LC,09,0-7,1,Decimal Value (Resolution: 1%)
LC,10,0-7,1,Rear Fog Light as Parking Light
LC,10,0-7,1,Decimal Value (Resolution: 1%)
LC,11,0-7,1,Front Parking Light Dimming
LC,11,0-7,1,Decimal Value (Resolution: 1%)
LC,12,0-7,1,Rear Parking Light Dimming
LC,12,0-7,1,Decimal Value (Resolution: 1%)
LC,13,0-7,1,Backup Function: Rear Side Turn Signal as Parking/Brake Light
LC,13,0-7,1,Decimal Value (Resolution: 1%)
LC,14,0-7,1,Backup Function: Front Parking Light as Side Turn Signals
LC,14,0-7,1,Decimal Value (Resolution: 1%)
LC,15,0-7,1,Backup Function: Rear Parking Light as Side Turn Signals
LC,15,0-7,1,Decimal Value (Resolution: 1%)
LC,16,0-7,1,Backup Function: Front Fog Lights as Low Beam Headlight
LC,16,0-7,1,Decimal Value (Resolution: 1%)
LC,17,0,Emergency Brake Flash Light active
LC,17,1,Deactivation of Additional High Beam with Bi-Xenon
LC,17,2,Heated Front Window installed
LC,17,3,Diagnosis Terminal 50 active
LC,17,4,Daytime Running Light via Fog Lights
LC,17,5,Front Fog Lights deactivated with High Beam
LC,17,6,Parking Light Function inactive (USA/Canada)
LC,18,0,Cold Diagnosis License Plate Lights active
LC,18,1,Cold Diagnosis Brake Lights active
LC,18,2,Cold Diagnosis Front Fog Lights active
LC,18,3,Cold Diagnosis Rear Fog Lights active
LC,18,4,Cold Diagnosis High Beam active
LC,18,5,Cold Diagnosis Turn Signals active
LC,18,6,Cold Diagnosis Back-Up Light active
LC,18,7,Cold Diagnosis Side Turn Signals active
LC,19,0,Cold Diagnosis Low Beam active
LC,19,1,Cold Diagnosis Front Parking Lights active
LC,19,2,Cold Diagnosis Rear Parking Lights active
LC,19,3,Diagnosis Rear Parking Lights active
LC,19,6,Electric Parking Brake installed
LC,20,0-7,1,Daytime Running Lights Dimming
LC,20,0-7,1,Decimal Value (Resolution: 1%)
LC,21,4,Rear Fog Light as Brake Light
LC,21,6,Leaving-Home Variant (0 = LH in LDS / 1 = No LH in LDS)
LC,21,7,Low Beam always active
LC,22,0,Personalization (0 = Variant 1 / 1 = Variant 2)
LC,22,2,Brake Light Deactivation with Rear Fog Light active
LC,22,3,Rear/Brake Light Function active
LC,22,4,Speed dependant Trunk Locking active
LC,22,5,»Light && Sight» Menu inactive
LC,22,6,Rear Parking Lights as Blinker active (North America)
LC,22,7,Diagnosis Rear Brake Lights inactive (North America)
LC,23,0,Xenon Headlights repeated Ignition active
LC,23,1,CAN Data Exchange Format active
LC,23,2,Internal Turn Light Control Algorithm active
LC,23,3
4,00,Turn Lights not active
LC,23,3
4,08,Turn Lights via Fog Lights
LC,23,3
4,10,Turn Lights via High Beam
LC,23,3
4,18,Turn Lights via Xenon Shutter
LC,23,5,Coming-Home Logic (0 = Old / 1 = New)
LC,23,7,Engine Compartment Light via Right Side Blinker Output active
так что никто не будет выкладывать или делиться «всеми настройками»
Читайте также:
- Centre brake light ошибка на ауди
- Р0443 ошибка опель астра g
- Ошибка p0914 чери индис
- Bmw g11 ошибка комфорт движения временно ограничен
- Как узнать код ошибки на газели

-

- 4 ноя 2010
- 18
- Audi A48E 2.0
-
- 19 июн 2010
- 480
- audi A4/B5 1.6 96
Поставь те,которые нужно!
-
- 4 ноя 2010
- 18
- Audi A48E 2.0
-
у меня вообще тама светодиоды стоят, и комп не жу жу.
Stop hovering to collapse…
Click to collapse…
Hover to expand…
Нажмите, чтобы раскрыть…
-
- 4 ноя 2010
- 18
- Audi A48E 2.0
В светодиодных лампочках вмонтирована нагрузка нужного сопротивления. Поэтому ошибки и нет…
-
Лампочки целые контакты тоже но не горят в чем может быть причина, куда копать
-
- 15 дек 2003
- 13.434
- Санкт-Петербург
- A4/B6 AVANT 1.8T (AVJ+CVT) 2002
В проводах. В сторону перехода жгута от кузова к крышке багажника.
Stop hovering to collapse…
Click to collapse…
Hover to expand…
Нажмите, чтобы раскрыть…
-
- 4 апр 2006
- 11.754
- 8E-1,8TQ AVJ/0A3
Скоро еще и замок перестанет работать.
Stop hovering to collapse…
Click to collapse…
Hover to expand…
Нажмите, чтобы раскрыть…
-
Спасибо буду разбирать ,искать
-
В проводах от крышке багажника до крыши все целое
-
Garage.Inc
… отдает швартовый и проверяет шатку
- 19 дек 2006
- 16.628
- Москва
- cannondale sl2
ошибки читать не пробовал?
Stop hovering to collapse…
Click to collapse…
Hover to expand…
Нажмите, чтобы раскрыть…
-
Проводка до крыши целая ,что где ещё может быть зарыто
-
Ошибка 01504 обрыв или замыкание на массу
-
Есть ещё такие ошибки 01964 регулировка сидений ,удаляется и потом появляется рулева колонка не электрическая,и 01299
-
- 15 дек 2003
- 13.434
- Санкт-Петербург
- A4/B6 AVANT 1.8T (AVJ+CVT) 2002
схемы от авант и седан.
Вложения:
Stop hovering to collapse…
Click to collapse…
Hover to expand…
Нажмите, чтобы раскрыть…
-
- 15 дек 2003
- 13.434
- Санкт-Петербург
- A4/B6 AVANT 1.8T (AVJ+CVT) 2002
Чего не хватает на контактах ламп? Плюса или минуса?
Stop hovering to collapse…
Click to collapse…
Hover to expand…
Нажмите, чтобы раскрыть…
-
-
- 15 дек 2003
- 13.434
- Санкт-Петербург
- A4/B6 AVANT 1.8T (AVJ+CVT) 2002
У тебя авант?
Судя по схеме (стр.7), плюсовой провод от ламп идёт к разъёму в крышке, потом к разъёму слева под обшивкой в багажнике и оттуда в жгуте проводов прямиком на разъём блока центральной электроники j519.
Номера пинов в разъёмах, цвет провода и все,что нужно для прозвонки, есть.
Stop hovering to collapse…
Click to collapse…
Hover to expand…
Нажмите, чтобы раскрыть…
-
Ребята помогите разобраться может где что-то поставил не помню в Васе,перестала открываться с брелка через несколько минут, не горит индекатор,


Обновлено: 03.06.2023
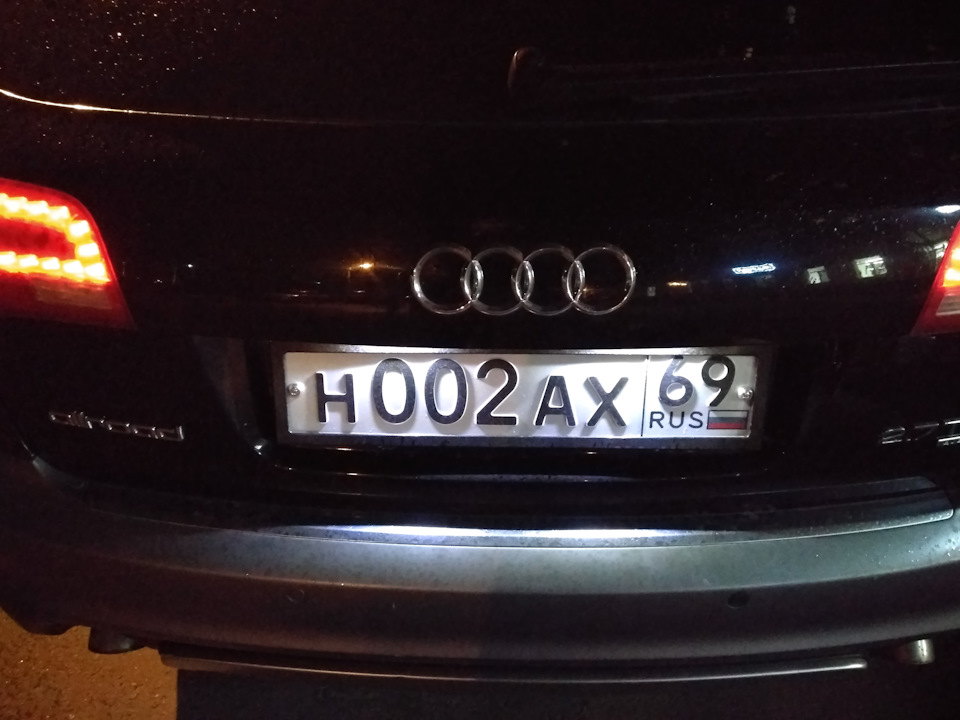
После 3-х недельного стояния машины в сервисе «Восток авто», не побоюсь этого слова, высветилась ошибка «Check number plate light», пересдее стекло отмывал долго и омыватели когда стою льют на половину стекла, а правый вообще в дворник, кто подскажет, что это за проблема и куда жаловаться?
P.S. Цифры в моём нике, это не возраст!
Avanturist 02 июн 2009, 23:57
Как человек, плохо знающий английский язык ,понимаю, что Лайт — это лампочка, намбер — номер ))) Следовательно — проверь лампочку подсветки номерного знака ))
Сколько депрессий нужно отдать
За каждую каплю полученных знаний
Здесь никто не простит не поймет
Твоих сугубо личных переживаний
Dmitry 242 03 июн 2009, 00:19
Avanturist писал(а): Как человек, плохо знающий английский язык ,понимаю, что Лайт — это лампочка, намбер — номер ))) Следовательно — проверь лампочку подсветки номерного знака ))
djek32 03 июн 2009, 07:18
Avanturist писал(а): Как человек, плохо знающий английский язык ,понимаю, что Лайт — это лампочка, намбер — номер ))) Следовательно — проверь лампочку подсветки номерного знака ))
Ого, думаете всё так просто?
P.S. Цифры в моём нике, это не возраст!
djfj 03 июн 2009, 08:04
Killer 03 июн 2009, 08:12
djek32 03 июн 2009, 11:58
Спасибо огромное, тему можно закрывать, всё так и есть!
Вот только омыватели низко льют. незнаю, стоит ли из-за этого на сервис сегодня ехать.
P.S. Цифры в моём нике, это не возраст!
Killer 03 июн 2009, 12:04
djek32 писал(а): Спасибо огромное, тему можно закрывать, всё так и есть!
Вот только омыватели низко льют. незнаю, стоит ли из-за этого на сервис сегодня ехать.
Берешь иголку или зубочистку, и настраиваешь как тебе надо.
Avanturist 03 июн 2009, 12:05
djek32 писал(а): Спасибо огромное, тему можно закрывать, всё так и есть!
Вот только омыватели низко льют. незнаю, стоит ли из-за этого на сервис сегодня ехать.
Причиной может быть — тупо от воды забились каналы или иголкой их немного приподнять.
Сколько депрессий нужно отдать
За каждую каплю полученных знаний
Здесь никто не простит не поймет
Твоих сугубо личных переживаний
djek32 03 июн 2009, 12:08
Ещё вопрос, тут обсуждалось где-нибудь. как менять лампочку освещения намера? Слоно это и какие там лампочки?
P.S. Цифры в моём нике, это не возраст!
Killer 03 июн 2009, 12:09
Такие же как в габаритах, безцокольные 5W, меняются очень просто, поддеваешь отверткой усик, отжимаешь его и все.
djek32 03 июн 2009, 12:30
Killer писал(а): Такие же как в габаритах, безцокольные 5W, меняются очень просто, поддеваешь отверткой усик, отжимаешь его и все.
Извини, не понял, а добраться до них не сложно?
P.S. Цифры в моём нике, это не возраст!
Killer 03 июн 2009, 12:32
совсем не сложно, если смотреть с низу на них, то эту защелку сразуже увидишь, вот ее отверткой плоской и отжимаешь.
djek32 03 июн 2009, 12:47
Killer писал(а): совсем не сложно, если смотреть с низу на них, то эту защелку сразуже увидишь, вот ее отверткой плоской и отжимаешь.
Теперь понял, огромное спасибо.
P.S. Цифры в моём нике, это не возраст!
PEP 03 июн 2009, 14:56
djek32 писал(а): Спасибо огромное, тему можно закрывать, всё так и есть!
Вот только омыватели низко льют. незнаю, стоит ли из-за этого на сервис сегодня ехать.
Берешь иголку или зубочистку, и настраиваешь как тебе надо.
Я кстати сколько не пытался и у меня что то не получается отрегулировать. Можешь поконкретнее рассказать/показать? Я помню в батиной 9-ке ваще без проблем настраивалось, там шарик видно и видно куда конкретно иголку втыкать.

In this article, we change the Audi A3 number plate bulbs to LED’s and get rid of the number plate light warning that follows.
Xenon in the front and 200-year-old filament technology in the back. Car’s incandescent number plate lights have annoyingly short life-span, they are frustrating to change and after a while impossible, when the soft mounting screws start to rust.
Disclaimer: Please note that everything you do to your car is your responsibility, not mine.
Info in this article is valid but people make mistakes.
Safety: Shorting the exposed wires might result in burnt fuses or a fried on-board supply control unit, disconnect the battery (negative lead first) before taking anything apart.
Legal: Car lights are highly standardized, using custom non E-approved parts might be illegal.
The car in this article is a 2010 Audi A3 Sportback 8PA 1.9 TDI, but the procedure and wiring should be applicable to most cars, especially other similar age Audis and Volkswagens.

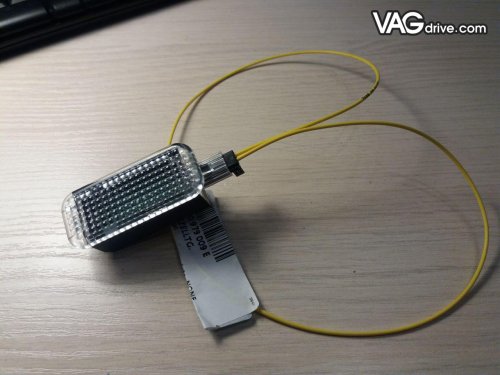
LED Number plate lights installed
Installing LED Number plate lights
Tools and materials needed
You will need basic mechanical and electrical tools. A trim-remover is handy to loosen the spring clips while removing the rear lid trim to get access to the cables.
LED Number plate bulbs
Installing LED-bulbs in the place of regular filament ones is pretty straightforward, it is like changing the bulbs normally with two key differences:
- Lights are directional, they have to be oriented right
- LED-bulbs have a polarity
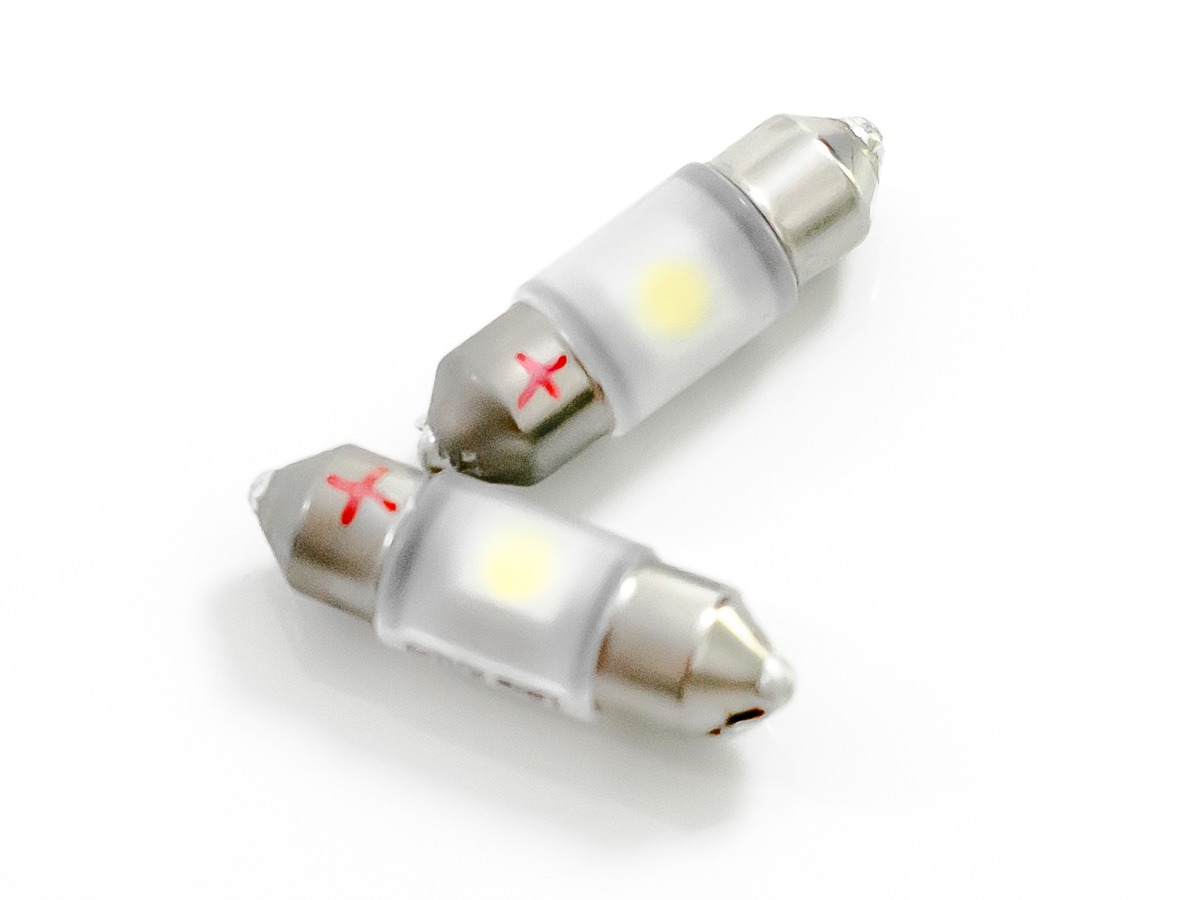
Polarity marked
After you take your shiny new LED-bulbs out of the package, hook them up to a 12 V voltage source and mark the positive end with a marker.
Install the bulbs to the covers, so that the positive end faces away from the screw hole.
In my car, I used 6000K OSRAM LED-bulbs that roughly match the front Xenon- and LED daylight running lights in color-temperature.
Audi bulb warning light
A warning is shown on the dashboard when the car thinks the number plate light has a broken filament.
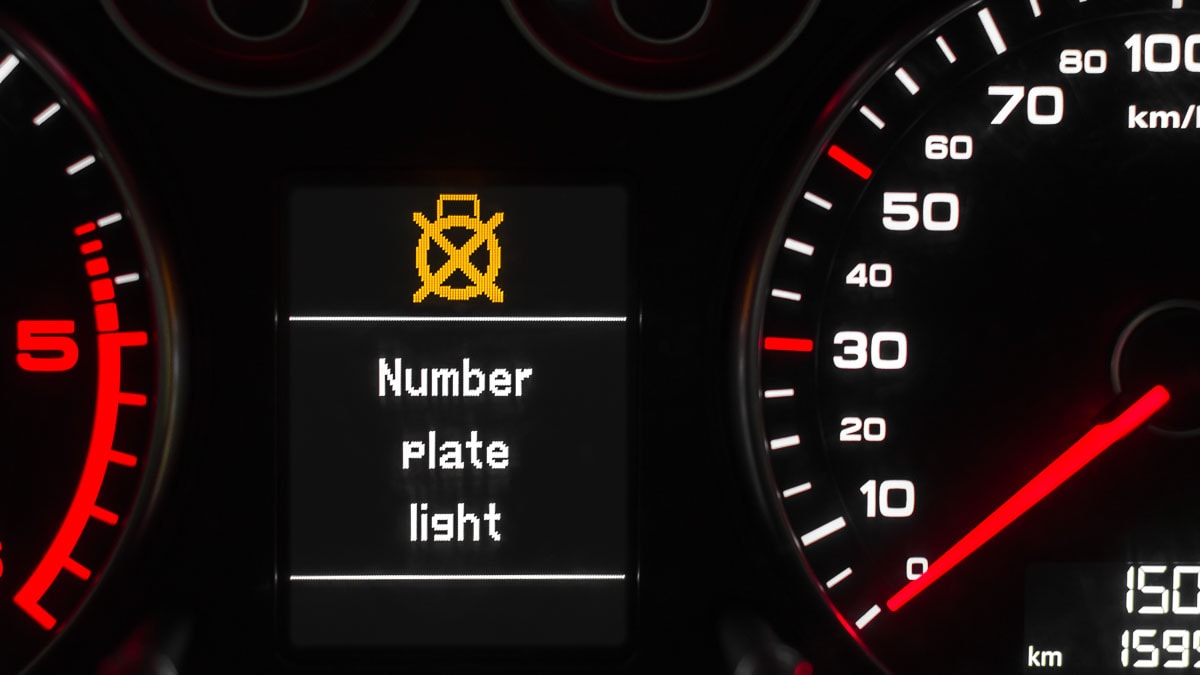
Audi A3 Number Plate Light Warning
The car’s computer measures the current going to the light bulbs, if the filament is broken, this current drops and the familiar bulb-warning appears on the dashboard. This is called light cold diagnostics.
Usually, this is awesome and keeps you from getting a ticket but this approach is problematic with LED-bulbs. They consume so little power that the computer thinks there is something wrong, even when the butt of your car is shining with light!
On some models, it’s possible to turn off the cold diagnostics from software by changing the electrical system’s long coding using VAG-COM cable and VCDS but on my selected vehicle this is not an option.
Getting rid of the number plate light warning
If modifying the car’s software is not an option, we can always make the car think there is a light bulb connected with a properly sized resistor.
I tried 100 Ω, 50 Ω, 33 Ω and 25 Ω, the last one being the only one that worked.
A 25 Ω resistor in a 12 V circuit will have about 480 mA going through, emulating about 6 W light bulb.

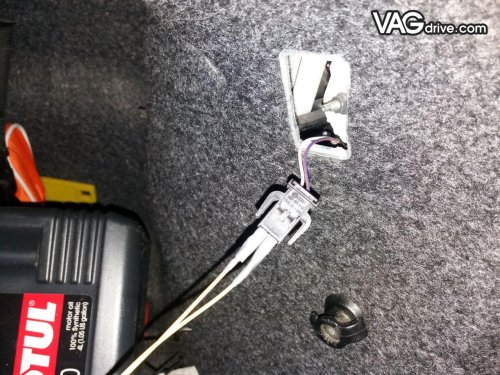
The load resistor installed in the wiring harness
Connecting a resistor in parallel with the LED-bulb makes more current run in the light circuit, making the computer think there is an intact filament.
Please note that when going this route you will have a heating component inside your trunk-lid (mount it properly) and you will never get another number plate bulb warning again.
Installing a load-resistor
The proper way to install the load-resistor would be to put it in the wiring harness just before the connector leading to the handle/lamp carrier. This provides easy access and good mounting options for the resistor.
Mount the resistor in the air so it can cool properly and make sure it’s not touching any plastics that could melt.
Use secure connection methods like soldering or crimping to connect the load resistor to the wires of the harness.
The load resistor needs to be connected between:
- Pin 3, number plate output from the J519 (gray with brown stripes)
- Pin 4, ground (brown).
The schematic above has been drawn based on the Audi A3 wiring schematic, which according to Audi is valid for 2006-2010 A3 models.
Problems
I first tried to solve the number plate warning problem by adding 100 Ω load resistors inside the lights, so I would not need to take apart the trunk lid.
It is tempting to make this kind of installation but its worth doing the right way. Installing the resistors this way you will be dumping a lot of energy into the small plastic enclosure, which in my case has lead to the softeners being vaporized away from the plastic and causing them to crack.
The resistors also took too much space, the LED-bulbs had to be installed off-axis of the lens and the lighting pattern to the number plate was off.
What did not help either was that I put a too high value of resistors in there that were not enough to trick the computer so I ended up driving with the warning light on for a year. Number plate bulb warning hides the car’s thermometer on the screen and that shit is important in the land of ice and snow so I decided to fix it.
Pro-tip: Do not close trunk if you have removed the switch to open it.
Taking apart the rear lid
Trim screw locations
The plastic trim of the rear lid is held in with two T-20 Torx-screws and 8 metal spring clips.
Carefully release spring clips from the rear lid on the right and left edges of the trim and carefully pull trim off. Reach between the trim and rear lid and disengage other spring clips.
Assembling the rear lid is the same but in reverse order, attach the center spring clips, then the sides and finally the screws.
LED-adapter cable
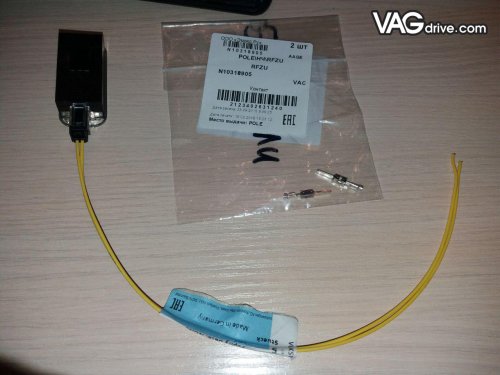
After messing with the lights enough, I decided to set everything back as it was and go ahead with the second method:
I ordered a ready-made adapter cable from Amazon that has the resistors built in between two suitable connectors.
This makes installing (and removing!) the load resistors accessible enough for any moderately trained monkey, without damaging the original wiring harness.

Schematic of the LED number plate light adapter
Side note: People keep selling these adapter-cables as “CAN-bus compatible” which I find funny as there is no CAN-bus going to the rear lid number plate light/switch assembly.
I just pity the fool who installs one of these in the CAN-bus!
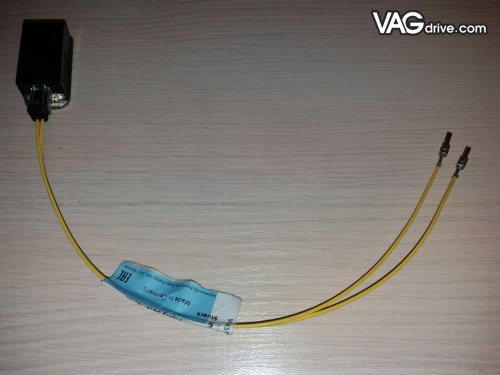
The adapter has three 100 Ω resistors connected in parallel to make up one 33 Ω power resistor. I still had problems with it but after some trial and error, I determined that it took 25 Ω resistor to trick the car computer.
I modified the adapter by adding one 100 ohm resistor more in parallel to drop its total resistance down to 25 Ω.
Lights and modified adapter ready to be installed Finished adapter cable installation
Bonus: Restoring the plastics
The screws keeping the light-covers in place were rusted so badly I could not take them off with a screwdriver anymore.
I had to cut the heads off with a small cutting-wheel and drill the rest. This damaged the plastics a little but this was nothing that a little epoxy would not solve. I guess European cars are not meant for heavily salted arctic/rainy Finnish climate.
The plastic covers had also gotten a bit cloudy so I decided to resurface them on the same go. This can be a simple fix:
- Fix any cracks and weirdly miss-drilled holes with 15 min epoxy
- Use emery-cloth on the glass to flatten the surfaces by sanding them
- Use spray clear-coat to transfer the matte-finish into translucent plastic again
- Let dry
- Use stainless steel screws in the future
Conclusion
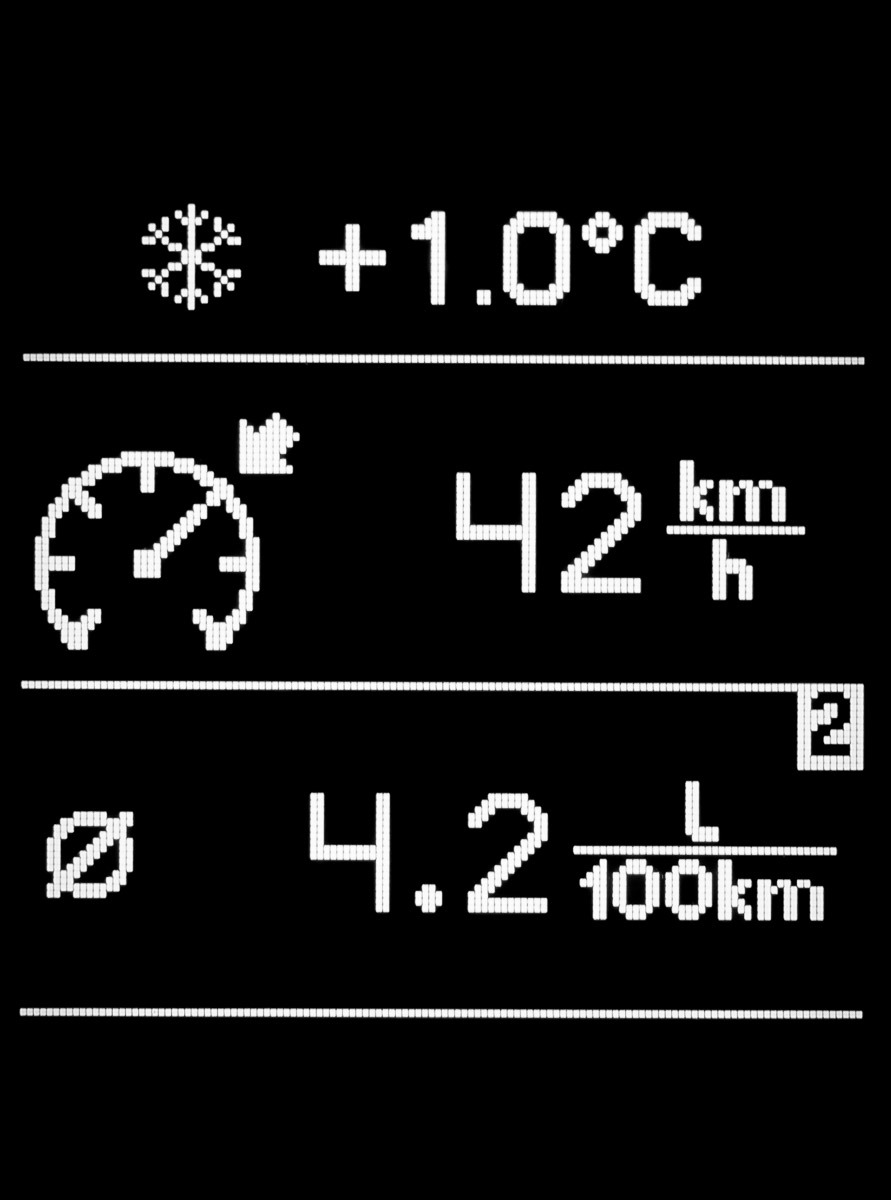
Thermometer visible again
This little mod was a fun afternoon build and took care of the problem for me. The car no longer complains about the “broken” number plate lights.
Читайте также:
- Схема предохранителей пежо 806
- Ситроен с2 схема электрооборудования
- Кузов форд фьюжн схема
- Спидометр газ 2410 схема
- Сборник русских народных схем узоров для вышивания крестом
Подскажите всю голову сломал. Хозяин сам менял лампочки в подсветке номера, после замены не одна не горит, хотя до горели.
В блоке комфорта ошибка 01504 — Bulb for License-Plate Light (X) 009 — Open or Short to Grou
Замерил напряжение его нет. Вернее оно мало 0,5 вольт
Масса есть.
Дошел до блока комфорта от него до плафонов все нормально, никуда не коротит.
Из блока так же 0,5 вольт.
Предохранителей на подсветку номера я не нашел.
Ошибку удаляю она появляется.
Изменено 13 февраля 2016 пользователем MITROFAN