
Ошибка 0x800f0989 обычно возникает тогда, когда пользователь Windows 10 пытается установить кумулятивные обновления для своей ОС. Поврежденные системные файлы, неисправный кэш, проблематичные установочники апдейтов, деактивированные службы Центра обновления — существует целая масса причин, из-за которых эта ошибка может появиться на компьютере пользователя.
В сегодняшней статье мы посмотрим с вами на ряд методов, предназначенных для устранения 0x800f0989 и других схожих ошибок в Центре обновления Windows 10. Рекомендуем выполнять их в том порядке, в котором они представлены ниже.
Содержание
- Решение ошибки 0x800f0989 при обновлении Windows 10
- Решение №1 Удаление недавно установленных обновлений
- Решение №2 Запуск средства устранения неполадок
- Решение №3 Перезапуск служб Центра обновления
- Решение №4 Удаление кэш-файлов Windows
- Решение №5 Установка обновления вручную
- Решение №6 Сброс компонентов Центра обновления
Решение ошибки 0x800f0989 при обновлении Windows 10
Решение №1 Удаление недавно установленных обновлений
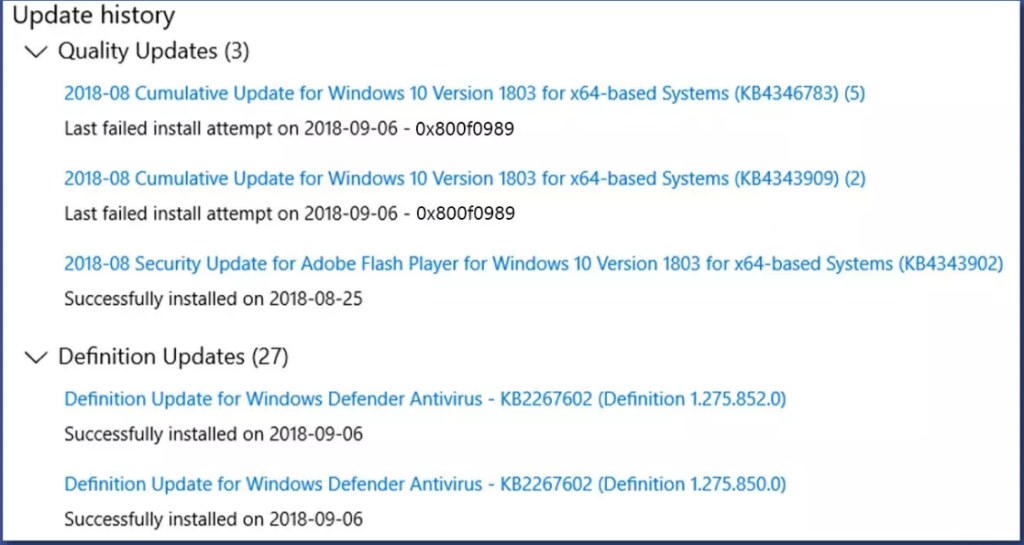
Немногие об этом знают, но проблемы с обновлением Windows могут начаться… из-за ранее установленных обновлений. По всей видимости, некоторые обновления могут становиться в систему «криво», что вызывает неполадки при установке последующих обновлений. Что же делать в таких случаях? Ответ — удалить несколько ранее установленных обновлений, после чего запустить обновления ОС еще раз.
Чтобы избавиться от последних обновлений, вам нужно сделать следующее:
- Нажмите на клавиатуре комбинацию WIN+I, чтобы открыть окошко «Параметры».
- Найдите и перейдите в раздел «Обновление и безопасность».
- Перейдите во вкладку (или подраздел) «Центр обновления Windows».
- Кликните на пункт «Просмотр журнала обновлений» (значок часов и стрелки).
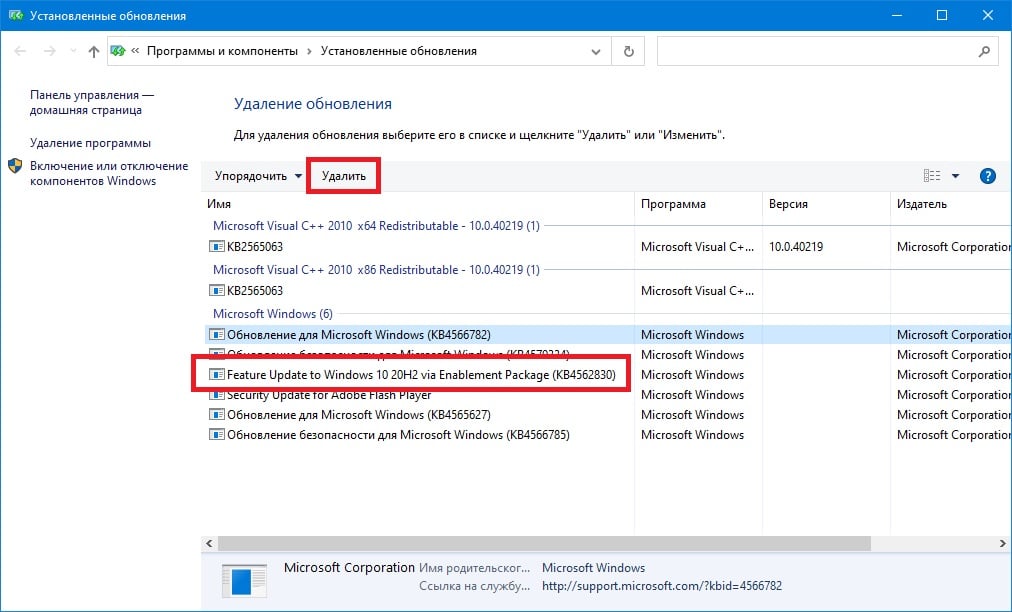
- В журнале обновлений нажмите на пункт «Удалить обновления».
- Выберите подходящее обновление, кликните на него ПКМ и выберите «Удалить».
- Следуйте инструкции на экране.
- Повторите вышеуказанные действия с еще несколькими последними обновлениями.
- Перезагрузите ПК.
Протестируйте Центр обновления. Возможно, на этот раз ошибка 0x800f0989 не появится.
Решение №2 Запуск средства устранения неполадок
Системное средство устранения неполадок способно решать разнообразные проблемы, возникающие в ОС Windows 10. Давайте попробуем воспользоваться этим средством и посмотрим, что из этого выйдет. Чтобы запустить средство устранения неполадок, вам необходимо сделать на своем ПК следующее:
- Нажмите на клавиатуре комбинацию WIN+I, чтобы открыть окошко «Параметры».
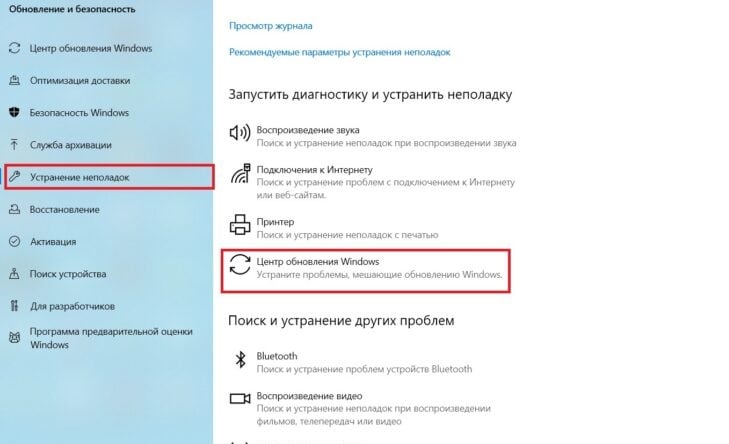
- Перейдите в раздел «Обновление и безопасность», после — в подраздел (или вкладку, если угодно) «Устранение неполадок».
- Опуститесь чуть ниже в окне и кликните на пункт «Дополнительные средства устранения неполадок».
- Найдите в списке компонент «Центр обновления Windows» и нажмите на него ЛКМ.
- Кликните на кнопку «Запустить средство устранения неполадок», после чего следуйте инструкциям от средства на своем экране.
Нет никакой гарантии, что данное средство поможет в решении ошибки 0x800f0989, по попробовать непременно стоит.
Решение №3 Перезапуск служб Центра обновления
Проблемы при обновлении Windows могут возникать в том случае, если одна или несколько служб Центра обновления перестали нормально функционировать. Фоновая интеллектуальная служба передачи, служба криптографии и служба Центра обновления — без этих служб апдейт Windows 10 фактически невозможен. Вот что вам нужно сделать:
- Нажмите на клавиатуре комбинацию WIN+R, что вызвать диалоговое окошко «Выполнить».
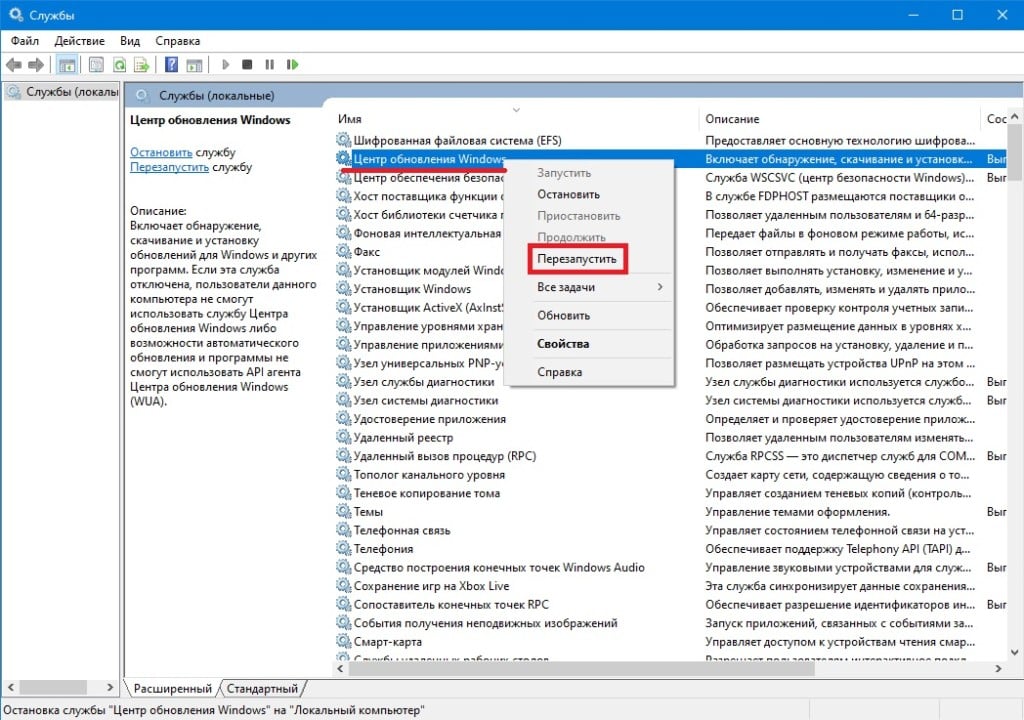
- Пропишите в пустую строку окошка «services.msc» и нажмите ENTER.
- Найдите в списке службу «Фоновая интеллектуальная служба передачи (BITS)», нажмите на нее ПКМ и выберите «Запустить».
Заметка: если служба работает, нажмите на кнопку «Перезапустить».
- Повторите эти действия для служб Криптографии и Центра обновления Windows.
Как только закончите проверку и перезапуск служб, проверьте наличие ошибки 0x800f0989.
Решение №4 Удаление кэш-файлов Windows
Центр обновления Windows активно использует для своей работы кэш-файлы. К сожалению, эти файлы могут вызывать всевозможные проблемы для системы, если они были повреждены или их стало попросту слишком много. Решение — удаление проблемного кэша. Чтобы сделать последнее, вам нужно выполнить следующие действия:
- Откройте окно «Службы», как это было продемонстрировано в решении выше.
- Нажмите ПКМ на «Фоновая интеллектуальная служба передачи (BITS)» и выберите «Остановить».
- Остановите работу служб Криптографии и Центра обновления Windows.
- Откройте Проводник Windows и перейдите в следующие директории:
- C:WindowsSoftwareDistribution
- C:WindowsSystem32catroot2
- Удалите содержимое вышеуказанных папок.
Заметка: как альтернатива, вместо удаления вы можете переименовать эти папки в «SoftwareDistribution.old» и «catroot2.old».
- Снова зайдите в окошко «Службы» и запустите ранее остановленные службы.
- Перезагрузите ПК.
Избавившись от кэш-файлов, зайдите в Центр обновления Windows и убедитесь, что ошибка 0x800f0989 исчезла.
Решение №5 Установка обновления вручную
Если вашей системе не удается установить кумулятивное обновление автоматически, то вы всегда можете сделать это самостоятельно, воспользовавшись каталогом Центром обновления Майкрософт. Все предельно просто:
- Скопируйте номер апдейта, возле которого появляется ошибка 0x800f0989.
- Перейдите по вышеуказанной ссылке и воспользуйтесь поисковой строкой справа, чтобы найти нужный апдейт.
- Выберите подходящую версию апдейта из списка и нажмите на кнопку «Загрузить» рядом с ним.
- Скачав MSI-файл, нажмите на него ПКМ и выберите «Запуск от имени администратора».
- Следуйте дальнейшим инструкциям на экране, чтобы установить апдейт.
- Перезагрузите ПК, если этого не будет сделано автоматически.
Разумеется, в таком случае ошибок вы увидеть не должны. Главное — выбрать корректную версию обновления в каталоге.
Решение №6 Сброс компонентов Центра обновления
К сожалению, бывают и такие случаи, когда не помогает ничего — пользователь впадает в самое настоящее уныние. Не сидеть же с вечно устаревшей ОС, верно? Сброс компонентов Центра обновления — крайне эффективное решение многих ошибок, возникающих во время загрузки и установки многих обновления для Windows 10.
Чтобы сбросить компоненты Центра обновления, вам нужно сделать на своем ПК следующее:
- Нажмите комбинацию WIN+X, после чего выберите пункт «Командная строка (администратор)».
- Поочередно выполните все нижеуказанные команды:
- net stop bits
- net stop wuauserv
- net stop cryptsvc
- Del “%ALLUSERSPROFILE%Application DataMicrosoftNetworkDownloaderqmgr*.dat”
- Ren %Systemroot%SoftwareDistributionDataStore DataStore.bak
- sc.exe sdset bits D:(A;;CCLCSWRPWPDTLOCRRC;;;SY)(A;;CCDCLCSWRPWPDTLOCRSDRCWDWO;;;BA)(A;;CCLCSWLOCRRC;;;AU)(A;;CCLCSWRPWPDTLOCRRC;;;PU)
- sc.exe sdset wuauserv D:(A;;CCLCSWRPWPDTLOCRRC;;;SY)(A;;CCDCLCSWRPWPDTLOCRSDRCWDWO;;;BA)(A;;CCLCSWLOCRRC;;;AU)(A;;CCLCSWRPWPDTLOCRRC;;;PU)
- cd /d %windir%system32
- regsvr32.exe atl.dll
- regsvr32.exe urlmon.dll
- regsvr32.exe mshtml.dll
- regsvr32.exe shdocvw.dll
- regsvr32.exe browseui.dll
- regsvr32.exe jscript.dll
- regsvr32.exe vbscript.dll
- regsvr32.exe scrrun.dll
- regsvr32.exe msxml.dll
- regsvr32.exe msxml3.dll
- regsvr32.exe msxml6.dll
- regsvr32.exe actxprxy.dll
- regsvr32.exe softpub.dll
- regsvr32.exe wintrust.dll
- regsvr32.exe dssenh.dll
- regsvr32.exe rsaenh.dll
- regsvr32.exe gpkcsp.dll
- regsvr32.exe sccbase.dll
- regsvr32.exe slbcsp.dll
- regsvr32.exe cryptdlg.dll
- regsvr32.exe oleaut32.dll
- regsvr32.exe ole32.dll
- regsvr32.exe shell32.dll
- regsvr32.exe initpki.dll
- regsvr32.exe wuapi.dll
- regsvr32.exe wuaueng.dll
- regsvr32.exe wuaueng1.dll
- regsvr32.exe wucltui.dll
- regsvr32.exe wups.dll
- regsvr32.exe wups2.dll
- regsvr32.exe wuweb.dll
- regsvr32.exe qmgr.dll
- regsvr32.exe qmgrprxy.dll
- regsvr32.exe wucltux.dll
- regsvr32.exe muweb.dll
- regsvr32.exe wuwebv.dll
- netsh winsock reset
- net start bits
- net start wuauserv
- net start cryptsvc
- Закройте Командную строку и перезагрузите ПК.
Не хотите вводить целую кучу команд? Тогда есть способ побыстрее: создание BAT-файла, который автоматически сделает все за вас. Все что вам нужно сделать — это создать текстовик, вставить в него особый скрипт, разработанный «головастыми» товарищами с просторов Интернета, и запустить его от имени администратора. На все про все у вас уйдет… минуты две-три. Вот что вам нужно сделать:
- Нажмите ПКМ на Рабочий стол и выберите пункты «Создать→Текстовый документ».
- Откройте созданный текстовик и вставьте в него следующий скрипт:
:: Run the reset Windows Update components.
:: void components();
:: /*************************************************************************************/
:components
:: —— Stopping the Windows Update services ——
call :print Stopping the Windows Update services.
net stop bitscall :print Stopping the Windows Update services.
net stop wuauservcall :print Stopping the Windows Update services.
net stop appidsvccall :print Stopping the Windows Update services.
net stop cryptsvccall :print Canceling the Windows Update process.
taskkill /im wuauclt.exe /f
:: —— Checking the services status ——
call :print Checking the services status.sc query bits | findstr /I /C:»STOPPED»
if %errorlevel% NEQ 0 (
echo. Failed to stop the BITS service.
echo.
echo.Press any key to continue . . .
pause>nul
goto :eof
)call :print Checking the services status.sc query wuauserv | findstr /I /C:»STOPPED»
if %errorlevel% NEQ 0 (
echo. Failed to stop the Windows Update service.
echo.
echo.Press any key to continue . . .
pause>nul
goto :eof
)call :print Checking the services status.
sc query appidsvc | findstr /I /C:»STOPPED»
if %errorlevel% NEQ 0 (
sc query appidsvc | findstr /I /C:»OpenService FAILED 1060″
if %errorlevel% NEQ 0 (
echo. Failed to stop the Application Identity service.
echo.
echo.Press any key to continue . . .
pause>nul
if %family% NEQ 6 goto :eof
)
)call :print Checking the services status.
sc query cryptsvc | findstr /I /C:»STOPPED»
if %errorlevel% NEQ 0 (
echo. Failed to stop the Cryptographic Services service.
echo.
echo.Press any key to continue . . .
pause>nul
goto :eof
):: —— Delete the qmgr*.dat files ——
call :print Deleting the qmgr*.dat files.del /s /q /f «%ALLUSERSPROFILE%Application DataMicrosoftNetworkDownloaderqmgr*.dat»
del /s /q /f «%ALLUSERSPROFILE%MicrosoftNetworkDownloaderqmgr*.dat»:: —— Renaming the softare distribution folders backup copies ——
call :print Deleting the old software distribution backup copies.cd /d %SYSTEMROOT%
if exist «%SYSTEMROOT%winsxspending.xml.bak» (
del /s /q /f «%SYSTEMROOT%winsxspending.xml.bak»
)
if exist «%SYSTEMROOT%SoftwareDistribution.bak» (
rmdir /s /q «%SYSTEMROOT%SoftwareDistribution.bak»
)
if exist «%SYSTEMROOT%system32Catroot2.bak» (
rmdir /s /q «%SYSTEMROOT%system32Catroot2.bak»
)
if exist «%SYSTEMROOT%WindowsUpdate.log.bak» (
del /s /q /f «%SYSTEMROOT%WindowsUpdate.log.bak»
)call :print Renaming the software distribution folders.
if exist «%SYSTEMROOT%winsxspending.xml» (
takeown /f «%SYSTEMROOT%winsxspending.xml»
attrib -r -s -h /s /d «%SYSTEMROOT%winsxspending.xml»
ren «%SYSTEMROOT%winsxspending.xml» pending.xml.bak
)
if exist «%SYSTEMROOT%SoftwareDistribution» (
attrib -r -s -h /s /d «%SYSTEMROOT%SoftwareDistribution»
ren «%SYSTEMROOT%SoftwareDistribution» SoftwareDistribution.bak
if exist «%SYSTEMROOT%SoftwareDistribution» (
echo.
echo. Failed to rename the SoftwareDistribution folder.
echo.
echo.Press any key to continue . . .
pause>nul
goto :eof
)
)
if exist «%SYSTEMROOT%system32Catroot2» (
attrib -r -s -h /s /d «%SYSTEMROOT%system32Catroot2»
ren «%SYSTEMROOT%system32Catroot2» Catroot2.bak
)
if exist «%SYSTEMROOT%WindowsUpdate.log» (
attrib -r -s -h /s /d «%SYSTEMROOT%WindowsUpdate.log»
ren «%SYSTEMROOT%WindowsUpdate.log» WindowsUpdate.log.bak
):: —— Reset the BITS service and the Windows Update service to the default security descriptor ——
call :print Reset the BITS service and the Windows Update service to the default security descriptor.sc.exe sdset wuauserv D:(A;;CCLCSWLOCRRC;;;AU)(A;;CCDCLCSWRPWPDTLOCRSDRCWDWO;;;BA)(A;;CCDCLCSWRPWPDTLCRSDRCWDWO;;;SO)(A;;CCLCSWRPWPDTLOCRRC;;;SY)S:(AU;FA;CCDCLCSWRPWPDTLOCRSDRCWDWO;;WD)
sc.exe sdset bits D:(A;;CCLCSWLOCRRC;;;AU)(A;;CCDCLCSWRPWPDTLOCRSDRCWDWO;;;BA)(A;;CCDCLCSWRPWPDTLCRSDRCWDWO;;;SO)(A;;CCLCSWRPWPDTLOCRRC;;;SY)S:(AU;FA;CCDCLCSWRPWPDTLOCRSDRCWDWO;;WD)
sc.exe sdset cryptsvc D:(A;;CCLCSWLOCRRC;;;AU)(A;;CCDCLCSWRPWPDTLOCRSDRCWDWO;;;BA)(A;;CCDCLCSWRPWPDTLCRSDRCWDWO;;;SO)(A;;CCLCSWRPWPDTLOCRRC;;;SY)S:(AU;FA;CCDCLCSWRPWPDTLOCRSDRCWDWO;;WD)
sc.exe sdset trustedinstaller D:(A;;CCLCSWLOCRRC;;;AU)(A;;CCDCLCSWRPWPDTLOCRSDRCWDWO;;;BA)(A;;CCDCLCSWRPWPDTLCRSDRCWDWO;;;SO)(A;;CCLCSWRPWPDTLOCRRC;;;SY)S:(AU;FA;CCDCLCSWRPWPDTLOCRSDRCWDWO;;WD):: —— Reregister the BITS files and the Windows Update files ——
call :print Reregister the BITS files and the Windows Update files.cd /d %SYSTEMROOT%system32
regsvr32.exe /s atl.dll
regsvr32.exe /s urlmon.dll
regsvr32.exe /s mshtml.dll
regsvr32.exe /s shdocvw.dll
regsvr32.exe /s browseui.dll
regsvr32.exe /s jscript.dll
regsvr32.exe /s vbscript.dll
regsvr32.exe /s scrrun.dll
regsvr32.exe /s msxml.dll
regsvr32.exe /s msxml3.dll
regsvr32.exe /s msxml6.dll
regsvr32.exe /s actxprxy.dll
regsvr32.exe /s softpub.dll
regsvr32.exe /s wintrust.dll
regsvr32.exe /s dssenh.dll
regsvr32.exe /s rsaenh.dll
regsvr32.exe /s gpkcsp.dll
regsvr32.exe /s sccbase.dll
regsvr32.exe /s slbcsp.dll
regsvr32.exe /s cryptdlg.dll
regsvr32.exe /s oleaut32.dll
regsvr32.exe /s ole32.dll
regsvr32.exe /s shell32.dll
regsvr32.exe /s initpki.dll
regsvr32.exe /s wuapi.dll
regsvr32.exe /s wuaueng.dll
regsvr32.exe /s wuaueng1.dll
regsvr32.exe /s wucltui.dll
regsvr32.exe /s wups.dll
regsvr32.exe /s wups2.dll
regsvr32.exe /s wuweb.dll
regsvr32.exe /s qmgr.dll
regsvr32.exe /s qmgrprxy.dll
regsvr32.exe /s wucltux.dll
regsvr32.exe /s muweb.dll
regsvr32.exe /s wuwebv.dll:: —— Resetting Winsock ——
call :print Resetting Winsock.
netsh winsock reset:: —— Resetting WinHTTP Proxy ——
call :print Resetting WinHTTP Proxy.if %family% EQU 5 (
proxycfg.exe -d
) else (
netsh winhttp reset proxy
):: —— Set the startup type as automatic ——
call :print Resetting the services as automatics.
sc.exe config wuauserv start= auto
sc.exe config bits start= delayed-auto
sc.exe config cryptsvc start= auto
sc.exe config TrustedInstaller start= demand
sc.exe config DcomLaunch start= auto:: —— Starting the Windows Update services ——
call :print Starting the Windows Update services.
net start bitscall :print Starting the Windows Update services.
net start wuauservcall :print Starting the Windows Update services.
net start appidsvccall :print Starting the Windows Update services.
net start cryptsvccall :print Starting the Windows Update services.
net start DcomLaunch:: —— End process ——
call :print The operation completed successfully.echo.Press any key to continue . . .
pause>nul
goto :eof
:: /*************************************************************************************/
- Нажмите на пункт «Файл» в строке меню окна и выберите «Сохранить как…».
- Выберите подходящее расположение для файла, задайте ему имя «Быстрый_Сброс_ЦО», измените его расширение на «.bat» и кликните на кнопку «Сохранить».
- Кликните на созданный «Быстрый_Сброс_ЦО.bat» и выберите «Запуск от имени администратора».
- Подождите окончания сброса Центра обновления, после чего перезагрузите свой ПК.
Такая вот несложная процедура хоть и не гарантирует, но имеет довольно высокие шансы на устранение неполадок с Центром обновления. Проверьте наличие ошибки 0x800f0989.
-
Partition Wizard
-
Partition Magic
- How to Fix Windows Update Error 0x800f0989 [Complete Guide]
By Alin | Follow |
Last Updated May 12, 2023
The error code 0x800f0989 is a common Windows update error that may occur when you try to install the latest cumulative update on your Windows PC. How to solve this Windows update issue? In this post, MiniTool Partition Wizard gives you some best fixes.
The Windows update error 0x800f0989 can be caused by various issues, such as corrupted system files, faulty update installation, disabled update services, or antivirus software. Fortunately, there are some possible solutions that you can try to fix this error and install the update successfully.
Method 1. Run the Windows Update Troubleshooter
The Windows Update troubleshooter is a built-in tool that can diagnose and fix common problems with Windows update. To run this troubleshooter, follow these steps:
Step 1. Go to Settings > Update & Security > Troubleshoot > Additional troubleshooters.
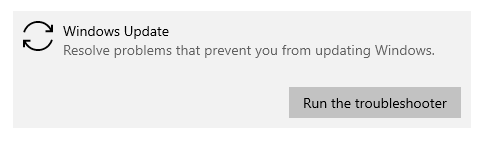
Step 2. Then find and click Windows Update, and then select Run the troubleshooter.
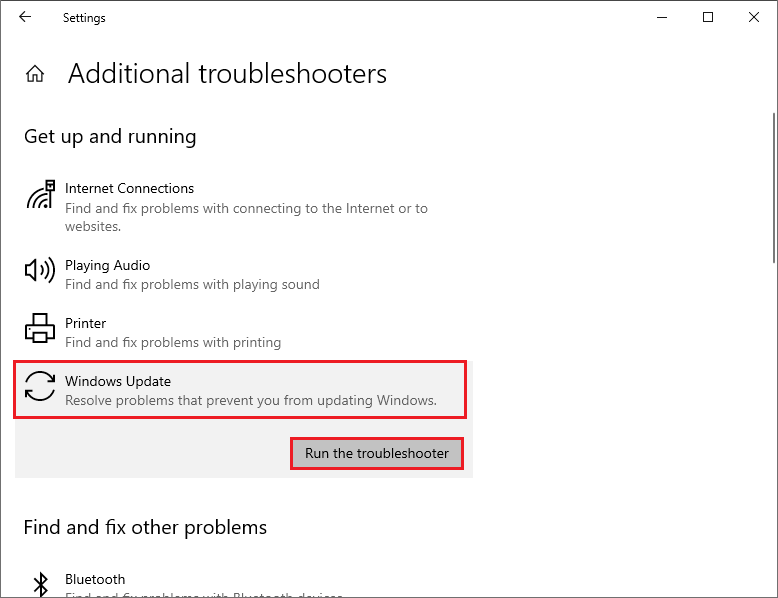
Step 3. Follow the on-screen instructions to complete the troubleshooting process. Once done, restart your PC and check if the issue is gone.
Method 2. Disable Third-party Antivirus
To fix the error code 0x800f0989, you can try disabling antivirus programs temporarily. If you have the third-party antivirus program installed on your PC, you can disable or remove it. Go to Settings > Apps > Apps & features. Then find your antivirus software from the list of installed apps and select Uninstall. Follow the wizard to remove it completely.
Method 3. Perform SFC and DISM Scan
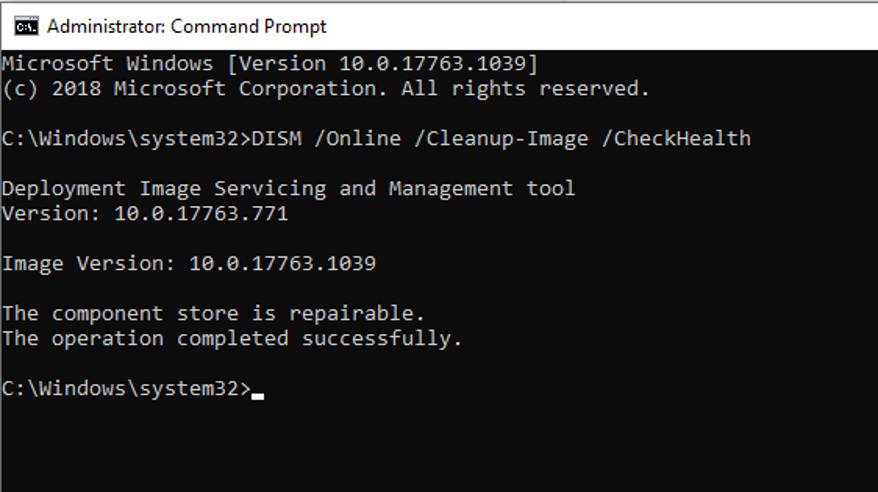
To get rid of the Windows update error 0x800f0989, you can use the Windows built-in command-line tools SFC (System File Checker) and DISM (Deployment Image Servicing and Management) to repair corrupted or damaged Windows system files. Follow the detailed steps below.
Step 1. Press Win + R to open the Run command box. In the Run box, type cmd and press Ctrl + Shift + Enter to run Command Prompt as administrator.
Tips:
It’d better back up your system files with MiniTool Partition Wizard in advance, so as to avoid some unexpected issues like data loss.
Step 2. In the prompted window, type sfc /scannow and press Enter.
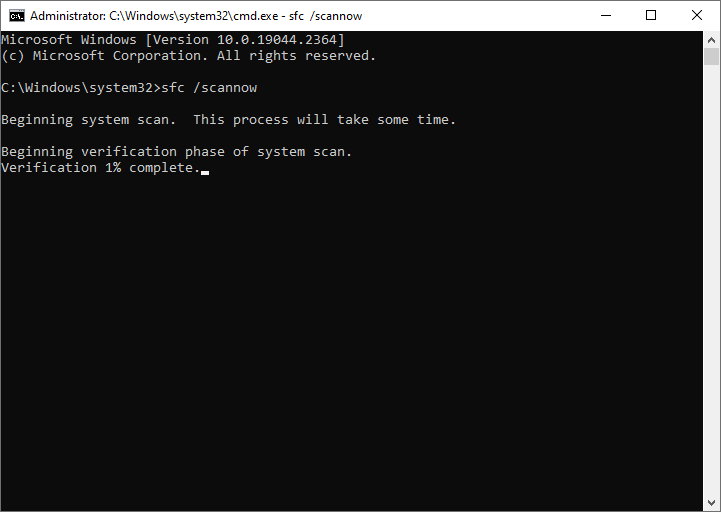
Step 3. Once done, reboot your system. If the issue still exists, run Command Prompt as administrator again.
Step 4. Then type the following commands to run DISM. Press Enter after each command.
DISM /Online /Cleanup-Image /CheckHealth
DISM /Online /Cleanup-Image /ScanHealth
DISM /Online /Cleanup-Image /RestoreHealth
Step 5. Once the process ends up, restart the computer and view if the error disappears.
Sometimes, there may be issues when you run SFC and DISM, like SFC scannow not working or DISM failed. You can also use MiniTool Partition Wizard to check file system errors and bad sectors. Launch MiniTool Partition Wizard, right-click the partition to be checked, and select Check File System or Surface Test. You can see the following guide.
Free Download
Method 4. Reset Windows Update Components
If the error 0x800f0989 still exists, you can follow the steps below to reset Windows update components.
Step 1. Run Command Prompt as administrator. In the pop-up window, type the following commands and press Enter after each one.
- net stop cryptsvc
- net stop bits
- net stop msiserver
- net stop wuauserv
- ren C:WindowsSoftwareDistribution SoftwareDistribution.old
- ren C:WindowsSystem32catroot2 Catroot2.old
- net stop cryptsvc
- net start bits
- net stop msiserver
- net start wuauserv
Step 2. Once done, reboot your computer and check if the issue is fixed.
Method 5. Manually Update Windows
In addition to the above methods, you can try to download and install the update manually from the Microsoft Update Catalog website or Media Creation Tool. You can follow this guide: [Tutorial] How to Download & Install Windows 10 Updates Manually.
Conclusion
Now, this post comes to an end. You can try the above methods one by one to solve your problem. Do you have other nice methods to fix the Windows update error 0x800f0989? You can feel free to share them with us in the following comment part.
About The Author

Position:
Alin is a new member of MiniTool. Her articles are mainly about disk & partition management, data recovery, and hard disk issues. She is enthusiastic about acquiring computer knowledge and helping users to solve problems with computers. To provide more useful and professional solutions, she will keep learning and know more computer knowledge.
Recently, a few users have reported about the Update Error Code 0x800f0989 on their Windows system while trying to install the latest updates. The primary cause of the same error is minor glitches in the system that prevented you from installing the latest updates. Anyway, this is a temporary error and you can fix it quickly using the solutions given in the section below.
If you are also struggling with Update Error 0x800f0989 on your Windows system, then you can follow this article to get all the possible solutions. Then let’s have a look.
Fix 1: Run Update Troubleshooter
The first attempt to resolve the Update Error 0x800f0989 on your Windows system is running the Windows Update troubleshooter. To do so,
- Firstly, open Settings-> Update & Security-> Troubleshooter-> Other troubleshooters-> click on Run the troubleshooter beside Windows update option.
- Once done, you can start again the updates process.
Fix 2: Restart Windows Update Service
Sometimes simply restarting the Windows Update service will allow you to resolve the same issue quickly. To do so,
- Firstly, type “Services” in your desktop search box and open the first result.

- Then locate and double-click on the Window update service and set Startup type as Automatic and Service Status as Running.
- Follow the same procedure to reset the Background Intelligent Transfer service as well.
- Once done, restart the system and install the update on your system.

Fix 3: Reset Windows Update Components
At times resetting the Windows Update components will allow you to resolve the Update Error 0x800f0989 on the Windows system. To do so,
- Firstly, open the Command Prompt screen by typing “cmd” in the system search box.
- Then type or paste the below-given commands and press Enter to reset Update components,
SC config trustedinstaller start=auto
net stop bits
net stop wuauserv
net stop msiserver
net stop cryptsvc
net stop appidsvc
Ren %Systemroot%SoftwareDistribution SoftwareDistribution.old
Ren %Systemroot%System32catroot2 catroot2.old
regsvr32.exe /s atl.dll
regsvr32.exe /s urlmon.dl
regsvr32.exe /s mshtml.dll
netsh winsock reset
netsh winsock reset proxy
rundll32.exe pnpclean.dll,RunDLL_PnpClean /DRIVERS /MAXCLEAN
dism /Online /Cleanup-image /ScanHealth
dism /Online /Cleanup-image /CheckHealth
dism /Online /Cleanup-image /RestoreHealth
dism /Online /Cleanup-image /StartComponentCleanup
Sfc /ScanNow
net start bits
net start wuauserv
net start msiserver
net start cryptsvc
net start appidsvc
- When done, restart the system and start to install the update on your system.
Fix 4: Install Windows Installation
In most cases installing the Windows Installation tool will help you to resolve the Update Error 0x800f0989 on Windows. To do so,
- Go to the Windows 10/11 Installation page and click on the Download now button under the Windows 10/11 Installation Assistant section.
- Once done, restart the system and try to install the updates.
Fix 5: Run SFC Scan
Sometimes running the SFC Scan might help you to resolve the Update Error 0x800f0989 on your Windows easily. To do so,
- Firstly, type ‘cmd’ in your desktop search box and open the Command Prompt screen from the search.
- Then copy or paste the following command on the screen and press Enter,
Sfc /scannow![]()
- Once done, you can again type or paste the following commands on the same screen and press Enter,
DISM /Online /Cleanup-Image /CheckHealth
DISM /Online /Cleanup-Image /ScanHealth
DISM /Online /Cleanup-Image /RestoreHealth
- Finally, retry to install the update on your system and see if the issue get resolved for you.
Fix 6: Disable Antivirus
Along with these solutions, you need to disable the antivirus application currently installed on your system and try again to install the updates. In some cases, the antivirus can interfere with the upgrade process and prevent you from installing the latest update. Once the updates installation process gets complete, you can enable the antivirus program.
These are all about the Update Error 0x800f0989 on Windows and its fixes. If you have any queries or concerns regarding this article, you can leave a comment in the comment box below.
Вопрос
Проблема: как исправить ошибку обновления Windows 0x800f0989?
Здравствуйте, я не могу установить последнее обновление Windows KB5004237, код ошибки: 0x800f0989: на вашем устройстве отсутствуют важные исправления безопасности и качества. Я пытался несколько раз, но возвращался с той же ошибкой. Что-нибудь, что можно сделать с этим, или мне просто подождать?
Решенный ответ
Microsoft выпускает обновления регулярно, а именно каждый второй вторник.[1] каждого месяца. Эти обновления включают важные исправления ошибок и уязвимостей, улучшения функций реализации, изменения пользовательского интерфейса и многое другое. Поскольку Windows работает как услуга, регулярно выходят и новые версии ОС — на данный момент их выпущено более 13.[2]
Однако не всегда все идет по плану. Известно, что обновления Windows сразу ломаются[3] некоторые функции для некоторых пользователей, поэтому неудивительно, что пострадавшие не решаются применять новые исправления. Несмотря на это, обновления особенно важны, и процент людей, которые получают ошибки или сталкиваются с другими проблемами, относительно невелик. Другими словами, не прекращайте обновлять Windows, так как большинство проблем, возникающих после этого, быстро решаются Microsoft.
Тем временем другие страдают от другой проблемы — они не могут обновить Windows и получают ошибку в процессе. На этот раз мы говорим об ошибке обновления Windows 0x800f0989, с которой пользователи сталкиваются уже несколько лет.
В ошибках обновления Windows нет ничего нового — о них сообщалось на официальных и других ИТ-форумах с момента выпуска последней версии ОС в 2015 году. Существуют сотни кодов ошибок, которые назначаются, когда обновление не загружается, например, 0x800f0984, 0x80070026, 0x80070541, и много других.
Некоторые из этих проблем исчезают сами по себе (или Microsoft решает их), хотя в большинстве случаев пользователи должны позаботиться о себе, чтобы исправить эти проблемы. Если вы столкнулись с 0x800f0989, и он не исчезнет, вам не стоит беспокоиться, так как есть несколько решений, которые вы можете попытаться сделать, чтобы обновление прошло успешно.

В большинстве случаев причина ошибки обновления кроется в поврежденных системных файлах, неактивной Windows Служба обновления / BITS, неудачные пакеты данных, сетевые проблемы, неправильно установленное предыдущее обновление, и Т. Д. Ниже вы найдете несколько способов исправить 0x800f0989 в Windows, хотя вы можете использовать несколько способов, прежде чем один из них сработает для вас.
Если вы хотите избежать утомительного устранения неполадок, попробуйте запустить сканирование с помощью ReimageСтиральная машина Mac X9 программное обеспечение для ремонта. Он может автоматически обнаруживать и заменять поврежденные компоненты Windows, исправляя BSOD, проблемы с реестром и многое другое.
Исправить 1. Запустите средство устранения неполадок Центра обновления Windows.
Исправить это сейчас!Исправить это сейчас!
Для восстановления поврежденной системы необходимо приобрести лицензионную версию Reimage Reimage.
Всегда следует начинать с основ. Использование встроенного средства устранения неполадок может помочь вам устранить эту ошибку, хотя это помогает не всем.
- Тип Устранение неполадок в поиске Windows
- Выбирать Дополнительные средства устранения неполадок
- Находить Центр обновления Windows из списка
- Щелкните по нему и выберите Запустите средство устранения неполадок

- Подождите, пока исправления не будут применены.

Исправить 2. Перезапустите службы обновления Windows.
Исправить это сейчас!Исправить это сейчас!
Для восстановления поврежденной системы необходимо приобрести лицензионную версию Reimage Reimage.
Исправить 3. Удалите сторонний антивирус
Исправить это сейчас!Исправить это сейчас!
Для восстановления поврежденной системы необходимо приобрести лицензионную версию Reimage Reimage.
Windows предоставляет собственное решение безопасности — Microsoft Defender. Вместо этого можно использовать множество сторонних решений, будь то из-за удобства использования или эффективности. Фактически, первого достаточно для блокировки наиболее опасных вредоносных программ, хотя, если вы захотите более обширные защиты (например, веб-экран может предупредить вас о веб-сайтах с высоким уровнем риска), стороннее приложение может быть лучше для ты.
К сожалению, некоторые программы безопасности могут конфликтовать с серверами Microsoft и пакетами данных, которые они отправляют в процессе обновления, ошибочно воспринимая эти серверы как небезопасные. Таким образом, известно, что удаление программного обеспечения AV помогло некоторым пользователям при попытке удалить ошибки обновления Windows.
В качестве альтернативы также может работать доступ к настройкам вашего приложения безопасности и попытка добавить исключение для серверов Microsoft. Вот список адресов серверов обновлений:
- http://windowsupdate.microsoft.com
- http://*.windowsupdate.microsoft.com
- https://*.windowsupdate.microsoft.com
- http://*.update.microsoft.com
- https://*.update.microsoft.com
- http://*.windowsupdate.com
- http://download.windowsupdate.com
- https://download.microsoft.com
- http://*.download.windowsupdate.com
- http://wustat.windows.com
- http://ntservicepack.microsoft.com
- http://go.microsoft.com
Исправить 4. Используйте команды в командной строке
Исправить это сейчас!Исправить это сейчас!
Для восстановления поврежденной системы необходимо приобрести лицензионную версию Reimage Reimage.
Если второй метод вам не подошел, вы можете попробовать использовать этот, так как он более комплексный. Он сбросит ваше интернет-соединение, удалит файлы остатков обновлений Windows, а также перезапустит и необходимые службы.
- Тип cmd в поиске Windows
- Щелкните правой кнопкой мыши на Командная строка и выберите Запустить от имени администратора
- Когда Контроль учетных записей пользователей появляется, нажмите да
- Выполните следующие команды, нажав Входить после каждого:
чистые стоповые биты
чистая остановка wuauserv
чистая остановка appidsvc
чистая остановка cryptsvc
Del «% ALLUSERSPROFILE% \ Application Data \ Microsoft \ Network \ Downloader \ *. *»
rmdir% systemroot% SoftwareDistribution / S / Q
rmdir% systemroot% system32 catroot2 / S / Q
regsvr32.exe / s atl.dll
regsvr32.exe / s urlmon.dll
regsvr32.exe / s mshtml.dll
сброс WinSock Netsh
netsh winsock сбросить прокси
чистые стартовые биты
чистый старт wuauserv
чистый старт appidsvc
чистый старт cryptsvc -
Начать сначала ваш компьютер.

Исправить 5. Запустите DISM и SFC
Исправить это сейчас!Исправить это сейчас!
Для восстановления поврежденной системы необходимо приобрести лицензионную версию Reimage Reimage.
Если вышеуказанный метод перезапустит ваше интернет-соединение и службы, этот позволит вам исправить поврежденные системные файлы Windows.
- Открытым Командная строка от имени администратора
- Вставьте следующую команду и нажмите Входить:
sfc / scannow
- Когда сканирование завершится и будет указано, что повреждение файла было исправлено, начать сначала ваша система. Если бы SFC был невозможно исправить при нарушении целостности файла используйте следующие команды:
DISM / Онлайн / Очистка-Образ / CheckHealth
DISM / Онлайн / Очистка-Изображение / ScanHealth
DISM / Онлайн / Очистка-Образ / RestoreHealth

Исправить 6. Установить обновление вручную
Исправить это сейчас!Исправить это сейчас!
Для восстановления поврежденной системы необходимо приобрести лицензионную версию Reimage Reimage.
Исправить 7. Используйте инструмент создания мультимедиа
Исправить это сейчас!Исправить это сейчас!
Для восстановления поврежденной системы необходимо приобрести лицензионную версию Reimage Reimage.
Прежде чем начать, убедитесь, что все внешние устройства отключены (например, принтер, камера и т. Д.), Кроме мыши, клавиатуры и кабеля для подключения к Интернету. Кроме того, удалите любое стороннее программное обеспечение безопасности и сделайте резервную копию ваших данных (Windows предоставляет возможность сохранить ваши файлы, но эта мера является лишь мерой предосторожности на случай, если что-то пойдет не так).
- Перейти к официальный сайт Microsoft и скачать Media Creation Tool
- Примите условия и нажмите Следующий
- Выбирать Обновите этот компьютер сейчас и выберите Следующий
- Следуйте инструкциям на экране
- Имейте в виду, что этот процесс может занять несколько часов, поэтому наберитесь терпения.

Исправляйте ошибки автоматически
Команда ugetfix.com делает все возможное, чтобы помочь пользователям найти лучшие решения для устранения их ошибок. Если вы не хотите бороться с методами ручного ремонта, используйте автоматическое программное обеспечение. Все рекомендованные продукты были протестированы и одобрены нашими профессионалами. Инструменты, которые можно использовать для исправления ошибки, перечислены ниже:
Предложение
сделай это сейчас!
Скачать Fix
Счастье
Гарантия
сделай это сейчас!
Скачать Fix
Счастье
Гарантия
Совместим с Майкрософт ВиндоусСовместим с OS X По-прежнему возникают проблемы?
Если вам не удалось исправить ошибку с помощью Reimage, обратитесь за помощью в нашу службу поддержки. Сообщите нам все подробности, которые, по вашему мнению, нам следует знать о вашей проблеме.
Reimage — запатентованная специализированная программа восстановления Windows. Он диагностирует ваш поврежденный компьютер. Он просканирует все системные файлы, библиотеки DLL и ключи реестра, которые были повреждены угрозами безопасности.Reimage — запатентованная специализированная программа восстановления Mac OS X. Он диагностирует ваш поврежденный компьютер. Он просканирует все системные файлы и ключи реестра, которые были повреждены угрозами безопасности.
Этот запатентованный процесс восстановления использует базу данных из 25 миллионов компонентов, которые могут заменить любой поврежденный или отсутствующий файл на компьютере пользователя.
Для восстановления поврежденной системы необходимо приобрести лицензионную версию Reimage инструмент для удаления вредоносных программ.

Нажмите
Условия использования Reimage | Политика конфиденциальности Reimage | Политика возврата денег за товар | Нажмите
Частный доступ в Интернет это VPN, которая может помешать вашему интернет-провайдеру правительство, и третьи стороны от отслеживания вашей онлайн-активности и позволяют вам оставаться полностью анонимным. Программное обеспечение предоставляет выделенные серверы для торрентов и потоковой передачи, обеспечивая оптимальную производительность и не замедляя вашу работу. Вы также можете обойти географические ограничения и без ограничений просматривать такие сервисы, как Netflix, BBC, Disney + и другие популярные потоковые сервисы, независимо от того, где вы находитесь.
Атаки вредоносных программ, особенно программ-вымогателей, на сегодняшний день представляют наибольшую опасность для ваших фотографий, видео, рабочих или школьных файлов. Поскольку киберпреступники используют надежный алгоритм шифрования для блокировки данных, его больше нельзя использовать, пока не будет выплачен выкуп в биткойнах. Вместо того, чтобы платить хакерам, вы должны сначала попробовать использовать альтернативный восстановление методы, которые могут помочь вам восстановить хотя бы часть потерянных данных. В противном случае вы также можете потерять свои деньги вместе с файлами. Один из лучших инструментов, который может восстановить хотя бы часть зашифрованных файлов — Восстановление данных Pro.
Reading time: 10 Minutes
Experiencing the Windows 10/11 install error 0x800f0989 while trying to upgrade to the latest version of Windows 11 using Windows Update? You’re not alone. Here’s what you need to know.
The error code 0x800f0989 is commonly encountered when attempting to install the most recent cumulative updates on your computer. Corrupted system files, accumulated cache, problematic update installation, or disabled update-related services are just a few of the causes of this error code in Windows 11/10.
As expected, the error would prevent you from installing Windows 11 on your computer. This would put you in a bind and force you to resort to other methods of upgrading.
But, before you do, read the sections below to learn about the underlying causes and the most effective fixes for the Windows 11 install error 0x800f0989.
What Is the Install Error 0x800f0989 on Windows 10/11?
Microsoft issues updates on a regular basis, specifically every second Tuesday of the month. These updates include critical bug and vulnerability fixes, feature enhancements, UI changes, and much more. Because Windows is a service, new versions of the operating system are released on a regular basis — there have been over 13 releases of Windows 10 so far.
However, things do not always go as planned. Windows updates are notorious for breaking some features for some users, so it is understandable that those affected are hesitant to apply new patches. Despite this, the updates are critical, and the percentage of people who experience errors or other problems is relatively low. In other words, don’t stop updating Windows because Microsoft will quickly fix the majority of the problems that arise.
Meanwhile, others are experiencing a different issue: they are unable to update Windows and receive an error message in the process. This time, we’re discussing the Windows update error 0x800f0989, which has been plaguing users for years.
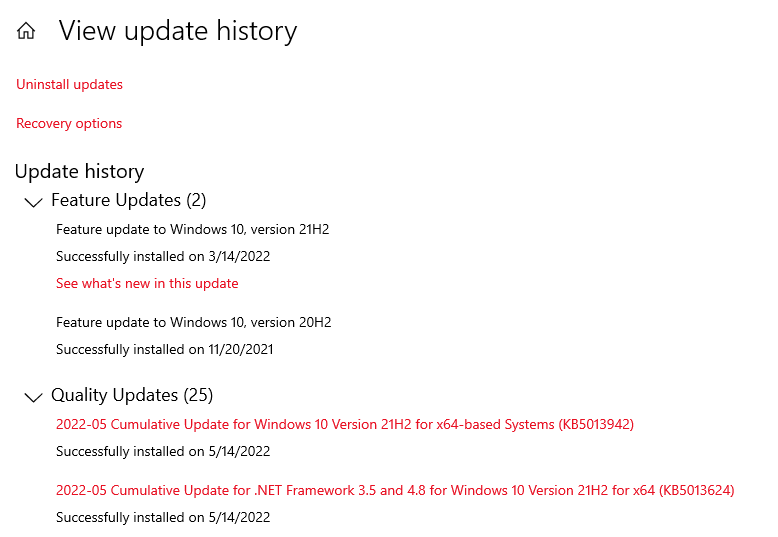
Microsoft recently released Windows update KB5013942 for devices running Windows 10 versions 21H2, 21H1, and 20H2. Installing KB5013942 updates the operating system to Windows 10 Build 19044.1645 and 19043.1645, which focus on security and non-security fixes. However, several Windows users report that the Windows update KB5013942 fails to install with various errors such as 0x800f0922, 0x8000ffff, and 0x800f0989. This guide focuses on fixing the error code 0x800f0989.
The error message reads:
There were problems installing some updates, but we’ll try again later. If you keep seeing this and want to search the web or contact support for information, this may help:
2022-05 Cumulative Update for Windows 10 Version 20H2 for x64-based Systems (KB5013942) – Error 0x800f0831, 0x800f0900 or 0x80070005
The same is true for Windows 10 November 2019 Update version 1909 devices. The KB5013945 update for Windows 10 Build 18363.2212 is either stuck or failed to install. This also happens to Windows users upgrading to Windows 11.
The symptoms are nearly identical in all cases. The update KB5013942 or KB5013945 either fails to install and returns users to the desktop before undoing changes, boots to a black screen, or appears to be installed successfully only to be re-offered to the same systems, requiring a machine restart to complete the process.
Windows update errors are nothing new; they have been reported on official and other IT forums since the release of the most recent operating system version in 2015. When an update fails to download, hundreds of error codes are assigned, such as 0x800f0984, 0x80070026, 0x80070541, and many others.
Some of these issues resolve themselves (or are resolved by Microsoft), but in most cases, users must fend for themselves in order to resolve these issues. If you encounter 0x800f0989 and it does not go away, you should not be concerned because there are several solutions you can try to ensure the update succeeds.
What Triggers the 0x800f0989 Windows 10/11 Error?
For Windows 10 users, there are numerous factors that can cause Windows Update to repeatedly fail. Corrupt or missing system files, outdated drivers, security software or VPN, problems with the Internet connection, or issues with the Windows update service are some of the most common. If Windows Update fails to install with various errors, updates do not download, or continue to fail, try the solutions listed below.
If you encountered this on a Windows 11 PC, it should not be due to your PC failing to meet the system requirements for Windows 11 since you are eligible for the upgrade via Windows Update.
The main reason for this is a minor bug in the operating system that prevents you from installing the update, which a simple restart should fix. Aside from that, you are likely to encounter problems if the critical services responsible for downloading updates are not running.
Furthermore, issues with Windows Update components may prevent you from installing the update and upgrading to Windows 11.
So, let’s go over how to fix Windows 11 install error 0x800f0989 and help you upgrade to the latest version.
How to Fix the Windows Update Error 0x800f0989
Now for the solution, what do you do when Windows updates do not install and you get the install error – 0x800f0989 Windows 11 error? The first step is to check your internet connection. You must have a stable internet connection to download and install Windows updates from the Microsoft server.
Try running a scan using a reliable PC Repair Tool, like Outbyte PC Repair, to get rid of bugs that might be causing the issue and clean up junk files as well.
You should also try to restart your PC. Go to the desktop, press Alt + F4 to open the Shut Down Windows box, and then choose Restart from the dropdown menu.
In the event that the error is caused by a bug in the operating system, a simple restart should resolve it. Check to see if you can install Windows 11 after restarting the computer. If these emergency steps did not work, proceed to the methods listed below.
Fix #1: Disconnect non-critical external devices.
In many cases, the Windows 11 install error 0x800f0989 was caused by a malfunctioning or incompatible external device connected to the PC. If this is the case, you can attempt to locate and remove the device.
To do so, turn off the system first, then disconnect all non-critical devices such as the printer, speaker, and headphones, leaving only the mouse, keyboard, and monitor connected. Check to see if you can install Windows 11.
If it works, reconnect the devices and update the drivers for each of them after upgrading to the most recent version.
Fix #2: Delete recently installed Windows updates.
If the error 0x800f0989 appears after a recent Windows upgrade, you must have installed a faulty patch update. To resolve the issue, locate the most recently installed security/non-security/optional update and remove it from your system.
Fix #3: Run the Windows Update Troubleshooter.
If you haven’t installed any updates on your computer recently and this error is occurring, you should check Windows Update for possible corruption. Here’s how to use the built-in tool:
- Open the Settings menu (Win + I).
- Select Update & Security > Troubleshooter from the menu.
- Select Additional troubleshooters from the right pane.
- Expand Windows Update and select Run the troubleshooter.
- Pay close attention to the on-screen instructions and do as instructed.
The troubleshooter will investigate the possible causes of the error code 0x800f0989 on your device. When it discovers the underlying causes, it automatically repairs them. In the event that it does not, this will tell you what to do next.
In many cases, this will report the problem and request your permission to apply a fix. Thus, click “Apply this fix.” Reboot Windows and check whether you can now install pending updates or not.
Fix #4: Clear the Windows Cache Folders.
Some cache is stored inside the Windows Update folders over time. When the cache stored exceeds the allowable limit, errors such as 0x800f0989 may occur. To resolve the issue, simply delete the folders.
Stop all update-related services on the computer before proceeding with the steps below. BITS, Windows Update, and Cryptographic are the services that must be disabled.
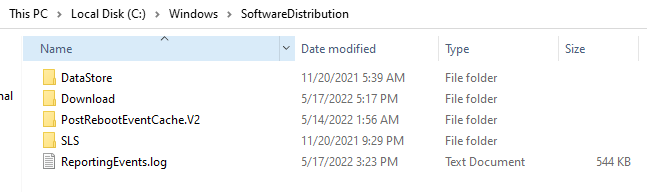
Now that the essential services have been disabled, navigate to the path provided below, locate the folders, and rename them “SD.old” and “Catroot2.old,” respectively.
- SoftwareDistribution – C:WindowsSoftwareDistribution
- Catroot2 – C:WindowsSystem32catroot2
After renaming the folders, restart any services that you had previously stopped. Next, restart your computer so that the changes you made take effect with the next logon.
Fix #5: Install the Windows update again.
Unplug any unnecessary devices, such as a USB flash drive or external HDD, headphones, or printers.
Again, there could be security software or a third-party antivirus interface on Windows Update that prevents it from installing. Disable or uninstall the antivirus software and, most importantly, disconnect from the VPN (if it is configured on your device) before checking for Windows updates.
Also, ensure that your Windows installation drive (basically, your C: drive) has enough disk space to download and install Windows updates.
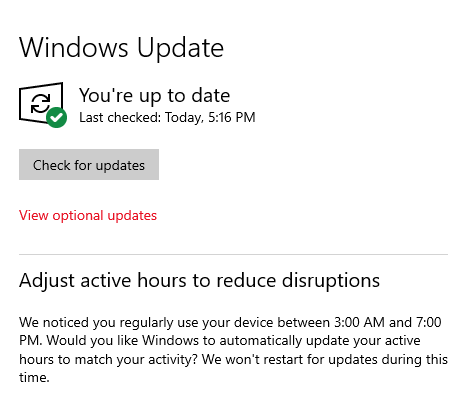
Manually check for Windows updates now:
- Open Settings by pressing Windows key + X.
- Click on Update & Security, then Check for updates.
- Also, under Optional updates, make sure to click on the Download and Install link (if available)
- This will begin the process of downloading and installing Windows updates from the Microsoft server.
- To apply Windows updates, simply restart your computer.
Fix #6: Manually install the updates.

Microsoft uploads standalone packages for each of its cumulative updates to the Microsoft Update Catalog. If you are unable to update Windows due to the error code 0x800f0989, you can go to the official site and manually download the update that you wish to download/install.
Fix #7: Reset Windows Update.
If the problem persists after running the troubleshooter, windows update is stuck downloading or fails to install, then follow the steps below to reset windows update components.
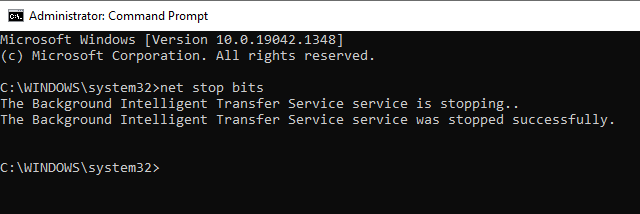
Open Command Prompt as administrator, and then enter the following commands, pressing Enter after each one:
- net stop wuauserv
- net stop cryptSvc
- net stop bits
- net stop msiserver
- Ren C:WindowsSoftwareDistribution SoftwareDistribution.old
- net start wuauserv
- net start cryptSvc
- net start bits
- net start msiserver
These commands will first terminate the Windows Update service and any associated services. Then, rename the SoftwareDistribution folder to SoftwareDistribution.old (where Windows stores update files; if any files in this folder become corrupted, Windows updates may fail to install.) Finally, restart Windows Update and its related services.
If you are not familiar with a command prompt, then do the following:
- Using services.msc, launch the Windows Services Console.
- Stop the Windows Update service and any associated services (BITS).
- Go to the following address: C:WindowsSoftwareDistributionDownload
- Delete everything in the folder, but leave the folder alone.
- To do so, press CTRL + A to select all files and then Delete to delete them.
Fix #8: Repair Corrupted Windows System Files.
Corrupted system files may prevent new Windows updates from being applied, resulting in a failed or stuck installation. Run the DISM (Deployment Image Servicing and Management) and SFC (System File Checker) utilities to automatically detect and repair missing system files.
- Launch the Command Prompt as an administrator.
- Next, execute the following commands:
- exe /Online /Cleanup-image /Restorehealth
- sfc /scannow
- Both commands check the health of the system image, look for corruption in system files, and replace them with the correct ones if any are found.
- Allow the scanning process to complete entirely before restarting your PC and attempting to install the Windows update again.
Fix #9: Use the Windows Installation Assistant.
If you’re upgrading to Windows 11 and encounter this issue, there is always the option to use the installation assistant to install Windows 11. Though not as simple as using Windows Update, this method will also install the most recent version on your computer.
Remember to download the PC Health Check app beforehand, and check to see if your system supports Windows 11, which shouldn’t be a problem since you’ve already received an update for it.
You can also create a bootable USB drive for Windows 11 and use it to upgrade. Furthermore, it may be useful if you need to repair critical issues that prevent the OS from booting.
Wrapping Up
The 0x800f0989 Windows Update error indicates a problem with installing the most recent cumulative update. This error code can be caused by a faulty installation, corrupted system files, or antivirus software, and it will prevent the update from being installed.
This error message may appear on Windows 10/11 if your system fails to verify the update. Although the Restart button resolves this issue in the majority of cases, you may need to run the Windows Update troubleshooter, delete contents from the Temporary folder, and so on to resolve this issue.
Did these solutions assist you in resolving the Windows update error 0x800f0989? Please let us know in the comments section below.
Give us some love and rate our post!

John Viszneveczky
John is a tech enthusiast who loves to explore and improve the latest technology. He shares his knowledge and opinions on the latest gadgets, apps, software, and games on Software Tested. With years of experience in writing about technology, John has a keen eye for identifying new and noteworthy products. His articles offer in-depth, opinionated insights for both tech enthusiasts and casual readers alike.