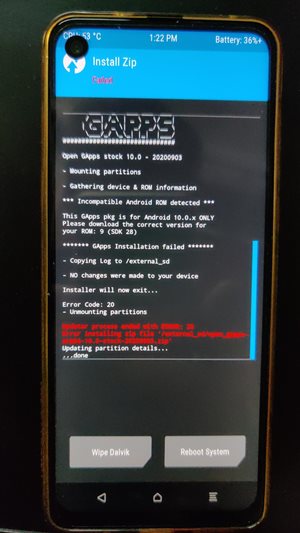
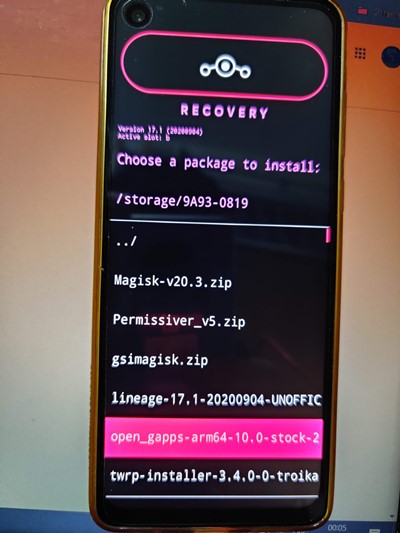
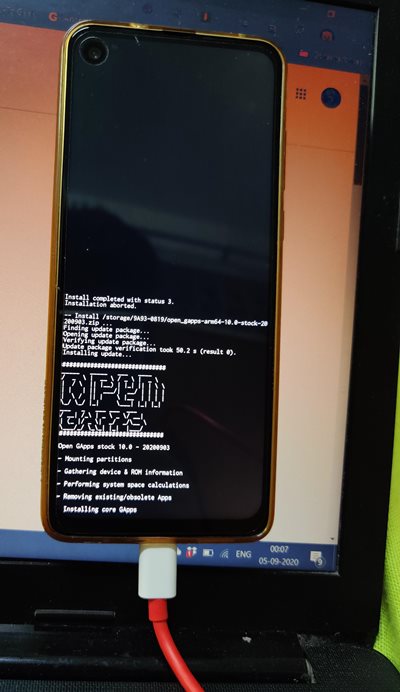
В этом руководстве мы покажем вам, как исправить ошибку TWRP 20, которая возникает при прошивке пакета GApps, в основном с пользовательским ПЗУ LineageOS. Вы также получите следующее сообщение об ошибке: Пакет GApp предназначен ТОЛЬКО для Android 10.0.x. Загрузите правильную версию для вашего ПЗУ: 9 (SDK 28). Дело в том, что вы загрузили правильный пакет GApps. Кроме того, ваше ПЗУ также основано на Android 10, а не на Android 9.0. Оба эти факта были неправильно упомянуты в сообщении об ошибке.
Точно так же, если вы прошивали LineageOS, ваш TWRP может быть заменен на Lineage Recovery. это еще больше усложняет все дело. Было несколько экземпляров этого сообщения об ошибке: от Разработчики XDA к Гитхаб к Реддит, многие пользователи высказали эту озабоченность. Но не волнуйтесь. В этом руководстве мы поможем вам понять причину этой ошибки, а также то, как вы можете легко ее исправить. Следуйте вместе.
Одним из самых больших преимуществ экосистемы с открытым исходным кодом, такой как Android, является множество настроек, которые она приносит с собой. К ним относятся возможность разблокировать загрузчик устройства, получить права администратора путем рутирования через Magisk, прошивать множество модулей, фреймворк, темы Syubstratum и другие. Точно так же многие пользователи также предпочитают устанавливать совершенно новую сборку ОС Android в виде пользовательских ПЗУ. Эта специализированная прошивка предлагает множество функций и настроек, которые не могла предложить стандартная ОС.
РУКОВОДСТВО ПО TWRP
Кроме того, вы также будете получать обновления Android сверх того, что обещал OEM-производитель. Что ж, такие устройства, как OnePlus One, выпущенный в 2014 году, по-прежнему являются довольно активным игроком в сообществе. Если говорить об этих пользовательских ПЗУ, то среди крупных игроков есть LineageOS, HavocOS, Pixel Experience и другие. Каждое из этих ПЗУ в основном отличается своими предложениями. В то время как LineageOS — это базовое ПЗУ, которое в основном ориентировано на стабильность без добавления многих функций.
С другой стороны, HavocOS включает в себя множество функций и возможностей настройки. Точно так же Pixel Experience, как следует из названия, дает вам самый чистый и чистый опыт Android, который могут предложить устройства Pixel. Кроме того, между этими ПЗУ есть еще один отличительный фактор — пакет Google Apps или GApps. ПЗУ, такие как LineageOS, не поставляются с Google Apps, поэтому вам придется устанавливать пакет Google Apps отдельно. Принимая во внимание, что Pixel Experience — это одно ПЗУ, в которое встроены все приложения, службы и платформы Google.
Настоящая проблема возникает, когда вы прошиваете Custom ROM, а затем собираетесь прошивать эти GApps. TWRP сразу выдаст ОШИБКУ: 20 с этим файлом GApps. Точно так же GApps скажет, что: «Pkg Gapp предназначен ТОЛЬКО для Android 10.0.x. Загрузите правильную версию для вашего ПЗУ: 9 (SDK 28)». Затем следует сообщение об ошибке установки Gapps. Так почему же это происходит в первую очередь? И что еще более важно, как исправить эту проблему TWRP Error 20. Что ж, в этом руководстве мы рассмотрим все эти вопросы, а также перечислим полные инструкции по устранению этой проблемы. Следуйте вместе.
Волшебные гиды
Начнем с того, что ошибка TWRP 20 возникает, когда вы не перезагружаетесь в TWRP после прошивки пользовательского ПЗУ, а сразу прошиваете пакет GApps. В результате загрузочный раздел (в случае устройств с разделами A/B) или загрузочный раздел (в устройствах, отличных от A/B) повреждается и не распознается.
Кроме того, в следующий раз, когда вы загрузите свое устройство, скорее всего, ваше восстановление TWRP будет заменено восстановлением LineageOS. Все это усложняет жизнь конечному пользователю. Но мы будем использовать эту проблему только для того, чтобы найти исправление. Звучит интересно, да, это определенно так! Вот что нужно сделать с вашей стороны.
Как исправить ошибку TWRP 20 с помощью GApps
Приведенные ниже инструкции перечислены с учетом LineageOS. Это связано с тем, что эта проблема возникает только с указанным пользовательским ПЗУ. С учетом сказанного, на данный момент вы, возможно, стерли разделы «Данные», «Система» и «Кэш», а также прошили пользовательское ПЗУ LineageOS. И тогда вы прошили пакет GApps, но получили TWRP Error 20.
Ниже приведены два разных метода. Первый относительно короче второго, но второй метод имеет более высокий уровень успеха. В любом случае, нет ничего плохого в том, чтобы дать шанс первому, возможно, вы окажетесь в числе счастливчиков, и эта проблема может быть решена в течение нескольких секунд. Если нет, всегда есть второй метод.
СПОСОБ 1: Из самого TWRP
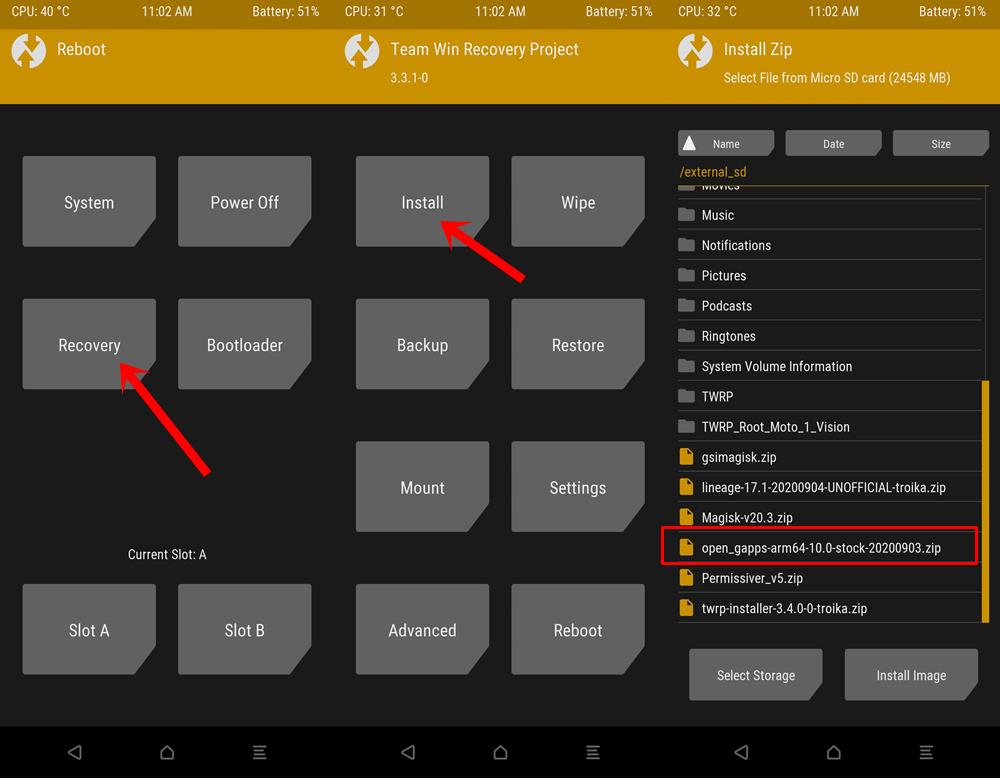
- Перейдите на главный экран TWPR и нажмите «Перезагрузить».
- Затем выберите вариант восстановления. Затем ваше устройство перезагрузится в TWRP.
- Теперь перейдите к «Установить» и выберите пакет GApps. Проведите пальцем вправо, чтобы прошить его, и на этот раз вы не столкнетесь с ошибкой TWRP 20 при прошивке GApps.
НЕ ПРОПУСТИТЕ: мы провели опрос среди широкой аудитории и получили потрясающие результаты. Обязательно ознакомьтесь с результатами нашего опроса по укоренению! <ЛИНИИ ДЛЯ ГОЛОСОВАНИЯ ЕЩЕ ОТКРЫТЫ!>
СПОСОБ 2: через восстановление LineageOS
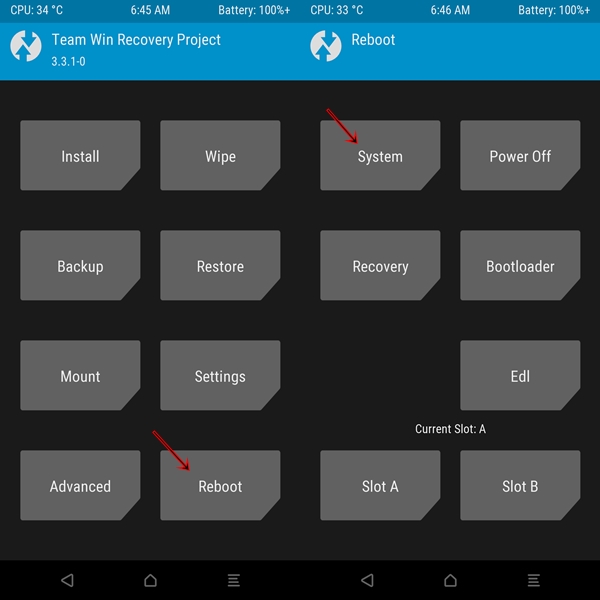
- Перейдите на главный экран TWRP, нажмите «Перезагрузить», а затем выберите «Система». Или, если вы застряли на экране TWRP Error 20, вы можете напрямую нажать кнопку «Перезагрузить систему», расположенную в правом нижнем углу.
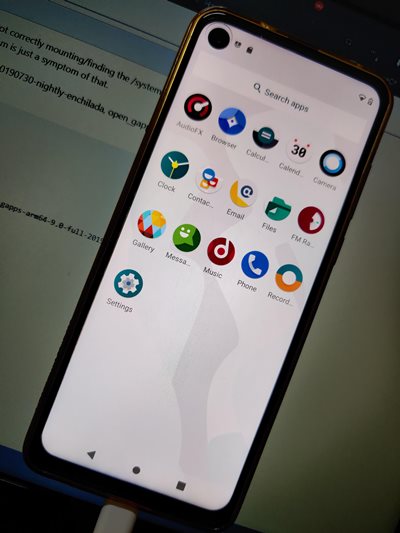
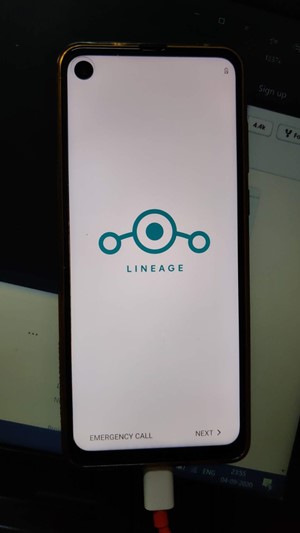
- Затем ваше устройство перезагрузится в LienageOS.
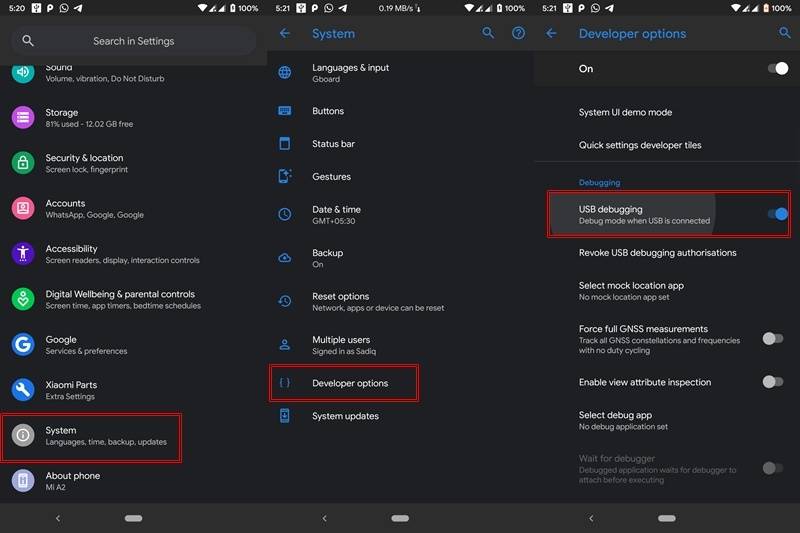
- Пропустите настройку, и когда вы дойдете до главного экрана, вам придется загрузить устройство для восстановления. Для этого существует три разных метода: с помощью комбинаций аппаратных клавиш, с помощью расширенной опции перезагрузки LineageOS или команд ADB. Мы будем использовать последнюю, то есть команду ADB. Итак, перейдите в «Настройки»> «О телефоне»> «Нажмите на номер сборки 7 раз»> вернитесь в «Настройки»> «Система»> «Дополнительно»> «Параметры разработчика»> «Включить отладку по USB».
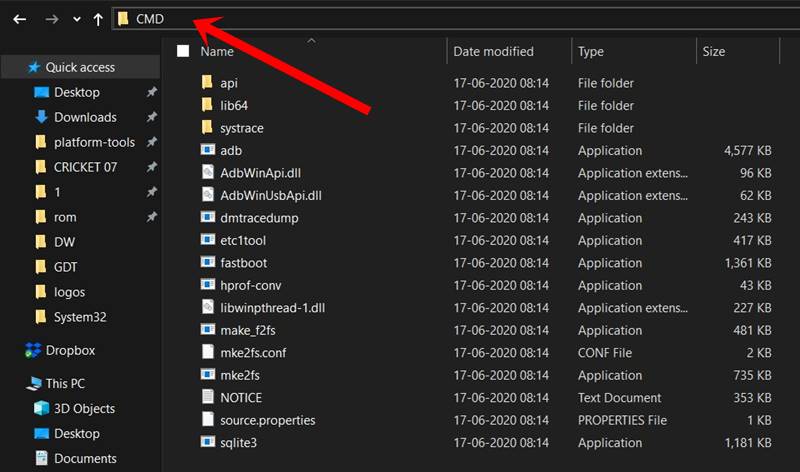
- Кроме того, вам также нужно будет загрузить и установить Android SDK Platform Tools. Когда это будет сделано, перейдите в папку инструментов платформы, введите CMD в адресной строке и нажмите Enter. Это запустит командную строку.
- Теперь подключите ваше устройство к ПК через USB-кабель. Убедитесь, что отладка включена. Затем введите приведенную ниже команду в окне командной строки, чтобы загрузить устройство в режим восстановления: adb reboot recovery.
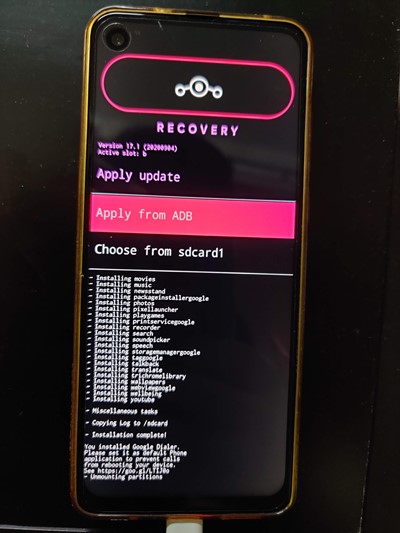
- Теперь ваше устройство должно перезагрузиться в Lineage Recovery. Используйте клавиши громкости, чтобы выбрать параметр «Применить обновление», и нажмите клавишу питания, чтобы подтвердить решение.
- Теперь, если файл GApps присутствует на SD-карте, с помощью клавиш громкости выделите параметр «Выбрать из SDCard1» и нажмите клавишу питания, чтобы подтвердить его. Затем перейдите к ZIP-файлу GApps с помощью клавиш громкости и выберите файл с помощью клавиши питания.
- Начнется процесс перепрошивки, который займет некоторое время, в зависимости от того, какой пакет вы прошиваете (Pico, Nano, Stock и т. д.).
- С другой стороны, если пакет GApps не хранится на вашей SD-карте, вам придется использовать «Применить» с маршрута ADB. Следовательно, выберите этот метод с помощью клавиши питания.
- Затем перейдите в папку инструментов платформы, введите CMD в адресной строке и нажмите Enter. Это запустит командную строку.
- В то же время перенесите загруженный пакет GApps в папку platform-tools. Рекомендуется переименовать его в gapps, чтобы полное имя было gapps.zip.
- Теперь подключите ваше устройство к ПК через USB-кабель. Убедитесь, что оно находится в режиме боковой загрузки ADB из Lineage Recovery. После этого выполните приведенную ниже команду в окне CMD: adb sideload gapps.zip
- Затем пакет GApps будет перенесен с вашего ПК и также автоматически установлен.
- Когда это будет сделано, вы можете перезагрузить устройство в ОС.
Вот и все. Это были шаги по исправлению ошибки TWRP 20 с помощью GApps. Теперь вы можете легко войти в свою учетную запись Google, восстановить все данные, попробовать свои любимые приложения Google и погрузиться в экосистему Google. В заключение, если у вас есть какие-либо вопросы относительно любого из вышеупомянутых шагов, сообщите нам об этом в разделе комментариев ниже. Мы обязательно вернемся к вам с решением.
ПРИМЕЧАНИЕ. ВСЕ ИЗОБРАЖЕНИЯ СДЕЛАНЫ АДМИНИСТРАТОРОМ DROIDWIN.COM. ВЫ НЕ МОЖЕТЕ ИСПОЛЬЗОВАТЬ ЭТО НА ВАШЕМ САЙТЕ ДЛЯ КАКИХ-ЛИБО ЦЕЛЕЙ, БЕЗ УТВЕРЖДЕНИЯ ЭТОГО САЙТА (DROIDWIN.COM)
Направляющие разделов A/B
In this tutorial, we will show you how to fix the TWRP 20 Error that happens while flashing the GApps package, mostly with LineageOS Custom ROM. You will also get the following error message: GApp’s pkg is for Android 10.0.x ONLY. Please download the correct version for your ROM: 9 (SDK 28). The thing is you have downloaded the correct GApps package. Furthermore, your ROM is also Android 10 based, and not Android 9.0. Both these facts have been incorrectly mentioned in the Error message.
Likewise, if you have flashed the LineageOS, then your TWRP might be replaced with Lineage Recovery. this further complicates the entire matter. There have been various instances of this error message: from XDA Developers to GitHub to Reddit, many users have voiced this concern. But fret not. In this guide, we will help you understand the reason behind this error and how you could easily fix it as well. Follow along.
One of the biggest perks of having an open-source ecosystem like Android is the plethora of tweaks that it brings with itself. These include the ability to unlock the device’s bootloader, gain administrative rights by rooting via Magisk, flashing tons of modules, framework, Syubstratum Themes among others. Likewise, many users also prefer to install an altogether new build of Android OS in the form of Custom ROMs. This customized firmware offers a plentitude of features and customizations that the stock OS could not offer.
TWRP GUIDES
- How to Install OTA Updates in Rooted Android Device
- How to Permanently Install TWRP without TWRP ZIP File (only using TWRP.img file)
- Root Android Devices Without TWRP Recovery
- How to Fix TWRP Error 7 (While Flashing Custom ROM via TWRP)
Apart from that, you will also be getting Android upgrades beyond what the OEM has promised. Well, devices like OnePlus One that was launched in 2014 is still quite an active player in the community. If we talk about these custom ROMs, then a few big players include LineageOS, HavocOS, Pixel Experience, among others. Each of these ROMs mainly differs in their offerings. While LineageOS is a basic ROM that mostly focuses on stability, without adding many features.
On the other hand, HavocOS has incorporated tons of features and customization opportunities. Likewise, Pixel Experience, as the name suggests, gives you the cleanest and purest stock Android experience, just what the Pixel devices have to offer. Apart from that, there is another differentiating factor between these ROMs- Google Apps Package or GApps. ROMs like LineageOS don’t come with Google Apps and hence you will have to flash the Google Apps package separately. Whereas Pixel Experience is one ROM that has all the Google Apps, Services and Frameworks baked in.
The real issue arises when you have flashed the Custom ROM and then are about to flash these GApps. TWRP would straightaway throw the ERROR: 20 with this GApps file. Likewise, GApps will say that: “Gapp’s pkg is for Android 10.0.x ONLY. Please download the correct version for your ROM: 9 (SDK 28)”. This is followed by the Gapps installation failed message. So why does this happen in the first place? And more importantly how to fix this TWRP Error 20 issue. Well in this guide we will be addressing all these queries and will list out complete instructions set to fix this issue as well. Follow along.
Magisk Guides
- [GUIDE] Flash ROMs/Magisk/TWRP/Kernels on A/B Partition Devices
- Everything About Magisk- Manager, Modules, and More
- Best Magisk Modules of 2020 [PART-1]
- [3 METHODS] Unroot any Android Device-Uninstall Magisk
Why TWRP Error 20 with GApps Occurs?
To begin with, the TWRP Error 20 happens when you don’t reboot to TWRP after flashing the Custom ROM, rather you directly flash the GApps package. As a result, the boot partition (in case of A/B Partition devices) or the boot partition (in non-A/B devices) gets corrupted and unrecognized.
Furthermore, the next time you boot your device, chances are your TWRP recovery will be replaced by the LineageOS Recovery. All this makes it more difficult for the end-user. But, we would be making use of this issue only to find the fix. Sounds interesting right, well it definitely is! Here is what needs to be done from your end.
The below instructions are listed out keeping the LineageOS in mind. This is because this issue seems to only with this said Custom ROM. With that said, as of now, you might have wiped the Data, System, and Cache partition and flashed the LineageOS custom ROM as well. And then you have flashed the GApps package but got the TWRP Error 20.
Given below, we have shared two different methods. The first one is relatively shorter than the second, but the second method comes with a higher success rate. Anyways, there is no harm in giving a shot to the first one, you might be among the lucky ones and this issue might be fixed within seconds. If not, the second method is always there.
METHOD 1: From TWRP Itself
- Head over to the TWPR Home screen and tap on Reboot.
- Then select the Recovery option. Your device will then reboot to TWRP.
- Now head over to Install and select the GApps package. Perform a right swipe to flash it, and this time you wouldn’t face TWRP Error 20 while flashing GApps.
DON’T MISS: We conducted a Rooting Poll involving the General Audiences and got some amazing results. Do check out our Rooting Survey Results! <VOTING LINES ARE STILL OPEN!>
METHOD 2: Via LineageOS Recovery
- Head over to the TWRP home screen, tap on Reboot, and then select System. Or if you are stuck on the TWRP Error 20 screen, then you could directly tap on the Reboot System button situated at the bottom right.
- Your device will then reboot to LienageOS.
- Skip through the setup and when you reach the home screen, you will have to boot your device to recovery. For that, there are three different methods: Via Hardware Key Combinations, From the Advanced Reboot Option of LineageOS, or the ADB Commands. We will be using the last one, i.e ADB command. So head over to Settings > About Phone > Tap on Build Number 7 times > Head back to Settings > System > Advanced > Developer Option > Enable USB Debugging.
- Likewise, you will also have to download and install the Android SDK Platform Tools. When that is done, head over to the platform-tools folder, type in CMD in the address bar and hit Enter. This will launch the Command Prompt.
- Now connect your device to PC via USB cable. Make sure Debugging has been enabled. Then type in the below command in the Command Prompt window to boot your device to the Recovery:
adb reboot recovery
- Your device should now reboot to the Lineage Recovery. Use the Volume keys to select the Apply Update option and hit the Power key to confirm the decision.
- Now if the GApps file is present in SD Card, use the Volume keys to highlight the Choose from the SDCard1 option and hit the Power key to confirm it. Then navigate to the GApps ZIP file using Volume keys and select the file using the Power key.
- The flashing process will now begin and should take some time, depending on which package you are flashing (Pico, Nano, Stock, etc).
- On the other hand, if the GApps package isn’t stored on your SD Card, then you will have to take the Apply from the ADB route. Hence select this method using the Power key.
- Then head over to the platform-tools folder, type in CMD in the address bar, and hit Enter. This will launch the Command Prompt.
- At the same time, transfer the downloaded GApps package to the platform-tools folder as well. It is recommended to rename it to gapps, so the complete name would then be gapps.zip.
- Now connect your device to the PC via USB cable, Make sure it is in ADB Sideload Mode from Lineage Recovery. With that done, now execute the below command in the CMD window:
adb sideload gapps.zip
- The GApps package will then be transferred from your PC and automatically be installed as well.
- When that is done, you may now reboot your device to the OS.
That is it. These were the steps to fix the TWRP Error 20 with GApps. Now you could easily sign in with your Google Account, restore all the data, try out your favorite Google Apps, and dive deep into the Google ecosystem. Rounding off, if you have any queries with respect to any of the aforementioned steps, do let us know in the comments section below. We would definitely get back to you with a solution.
NOTE: ALL IMAGES ARE TAKEN BY THE ADMIN OF DROIDWIN.COM. YOU MAY NOT USE IT ON YOUR SITE FOR ANY PURPOSE, WITHOUT CREDITING THIS SITE (DROIDWIN.COM)
A/B Partition Guides
- [GUIDE] Flash ROMs/Magisk/TWRP/Kernels on A/B Partition Devices
- How to Flash Various Files in A/B Partition Devices
- Install Custom ROMs on any Android Device- Includes A/B Partition
- How to Fix FAILED (remote: unknown command) Error
About Chief Editor
Sadique Hassan
administrator
A technical geek by birth, he always has a keen interest in the Android platform right since the birth of the HTC Dream. The open-source environment always seems to intrigue him with the plethora of options available at his fingertips. “MBA by profession, blogger by choice!”
I:operation_start: 'Sideload'
I:Unable to find a directory to store TWRP logs.Starting ADB sideload feature...
E:[MTP] request read returned -1, errno: 5, exiting MtpServer::run loop
I:Disabling MTP
Stopping adbd...
adbd pid 545 found, sending kill.
I:Setting active slot B
I:Lun file '/sys/class/android_usb/android0/f_mass_storage/lun0/file' does not exist, USB storage mode disabled
TW_INCLUDE_CRYPTO := true
I:Found brightness file at '/sys/class/leds/lcd-backlight/brightness'
I:Got max brightness 255 from '/sys/class/leds/lcd-backlight/max_brightness'
I:TWFunc::Set_Brightness: Setting brightness control to 80
I:LANG: en
I:AB_OTA_UPDATER := true
sideload-host file size 183567260 block size 65536
Installing zip file '/sideload/package.zip'
I:Update binary zip
Verifying package compatibility...
Package doesn't contain compatibility.zip entry
I:Extracting updater binary 'META-INF/com/google/android/update-binary'
I:Zip does not contain SELinux file_contexts file in its root.
I:Legacy property environment not used in updater.
Archive:  /sideload/package.zip
  inflating: app_densities.txt
Archive:  /sideload/package.zip
  inflating: app_sizes.txt
Archive:  /sideload/package.zip
  inflating: bkup_tail.sh
Archive:  /sideload/package.zip
  inflating: gapps-remove.txt
Archive:  /sideload/package.zip
  inflating: g.prop
Archive:  /sideload/package.zip
  inflating: installer.sh
Archive:  /sideload/package.zip
  inflating: busybox-arm
Archive:  /sideload/package.zip
  inflating: tar-arm
Archive:  /sideload/package.zip
  inflating: unzip-arm
Archive:  /sideload/package.zip
  inflating: zip-arm
libc: Fatal signal 11 (SIGSEGV), code 1, fault addr 0x0 in tid 569 (install), pid 569 (install)
Segmentation fault

##############################
  _____   _____   ___   ____
 /  _   |  __  / _  |  _
|  /   || |__) | |_| || |
| |   | ||  ___/|  __/ | | | |
|   /  || |     |__  | | | |
 _/ _/ |_|     ___| |_| |_|
       ___   _   ___ ___  ___
      / __| /_ | _  _ / __|
     | (_ |/ _ |  _/  _/__
      ___/_/ __| |_|  |___/
##############################

Open GApps nano 9.0 - 20191213

- Mounting  /vendor

find: /system/system: No such file or directory
ls: /system/system: No such file or directory
unknown fuse request opcode 17
df: /sideload: Function not implemented
- Gathering device & ROM information

*** Incompatible Android ROM detected ***

This GApps pkg is for Android 9.0.x ONLY
Please download the correct version for
your ROM: 16.1.0 (SDK 27)

******* GApps Installation failed *******

- Copying Log to /sideload

cp: can't create '/sideload/open_gapps_log.txt': Read-only file system
- NO changes were made to your device

Installer will now exit...

Error Code: 20
cp: can't stat '': No such file or directory
ls: /system/system: No such file or directory
unknown fuse request opcode 17
df: /sideload: Function not implemented
cp: can't stat '/sideload/open_gapps_log.txt': No such file or directory
cp: can't stat '/system/system/etc/g.prop': No such file or directory
cp: can't stat '/system/system/default.prop': No such file or directory
cp: can't stat '/system/system/build.prop': No such file or directory
cp: can't stat '/vendor/vendor/build.prop': No such file or directory
cp: can't stat '/data/local.prop': No such file or directory
cp: can't stat '/build.prop': No such file or directory
cp: can't stat '/system/system/addon.d/70-gapps.sh': No such file or directory
cp: can't stat '/cache/recovery/log': No such file or directory
/tmp/installer.sh: line 1: logcat: not found
tar: can't open '/sideload/open_gapps_debug_logs.tar.gz': Read-only file system
- Unmounting  /vendor

Updater process ended with ERROR: 20
I:Install took 8 second(s).
I:Signaling child sideload process to exit.
I:Waiting for child sideload process to exit.
sideload_host finished
I:[MTP] Starting MTP
I:sending message to add 65538 '/data/media' 'Internal Storage'
I:Message sent, add storage ID: 65538 '/data/media'
I:Set page: 'action_complete'
I:operation_end - status=1
I:[MTP] created new mtpserver object
I:[MTP] MtpServer::run fd: 20
I:[MTP] mtppipe add storage 65538 '/data/media'
I:[MTP] MtpStorage id: 65538 path: /data/media
When I try to flash GApps right after flashing LineageOS with TWRP I get,
Updater process ended with ERROR: 20
Error installing zip file '/sdcard/open_gapps-arm64-10.0-micro-20201114.zip
What is the cause of this problem, how can I fix it?
asked Nov 16, 2020 at 1:33
Evan CarrollEvan Carroll
4,00317 gold badges54 silver badges92 bronze badges
This is because you can’t flash Open GApps right after flashing LineageOS. You must reboot back into the recovery TWRP, and flash the application after that.
From the Official Instruction, which support only LineageOS Recovery
(Optionally): If you want to install any additional add-ons, click Advanced, then Reboot to Recovery, then when your device reboots, click Apply Update, then Apply from ADB, then
adb sideload filename.zipthose packages in sequence.
But this is no different for TWRP. You can find people here in the bug reports for Open GApps that have the same problem.
answered Nov 16, 2020 at 1:33
Evan CarrollEvan Carroll
4,00317 gold badges54 silver badges92 bronze badges
You must log in to answer this question.
Not the answer you’re looking for? Browse other questions tagged
.
Not the answer you’re looking for? Browse other questions tagged
.
You don’t
have to
install GAPPS, but many users may wish to do so in order to access Google Play store and some applications that depend on Google Play services. (If you install Google Application from Google Play, they installed on
/Data
partition and
/System
partition be free.)
Flashing GApps from Recovery, getting Error Code: 20
Question:
When I try to flash GApps right after flashing LineageOS with TWRP I get,
Updater process ended with ERROR: 20
Error installing zip file '/sdcard/open_gapps-arm64-10.0-micro-20201114.zip
What is the cause of this problem, how can I fix it?
Solution:
This is because you can’t flash Open GApps
right
after flashing LineageOS. You must reboot back into the recovery TWRP, and flash the application after that.
From the Official Instruction, which support only LineageOS Recovery
(Optionally): If you want to install any additional add-ons,
click Advanced, then Reboot to Recovery, then when your device reboots, click Apply Update, then Apply from ADB, then
adb sideload filename.zip
those packages in sequence.
But this is no different for TWRP. You can find people here in the bug reports for Open GApps that have the same problem.
Twrp — Bootloop after installing GApps in Lineage OS, I installed Lineage OS 16.0 on my Moto x4 using TWRP. I reboot and installed GApps. While installing there were no errors. But then after restart the …
How to fix Google Play Store Error Code -20 (2017)
See now, how to fix the Goolge Play Store
Error Code -20
in 2017 on Android! I hope my video can help you! More Google Play …
How To Fix Gameloop Error Code 20
| Hello Guys——Dsoto Agar Apke Bhi Gameloop Emulator Mai Installing Ke Time Par HTTP
Error Code 20
Aa Rha Hai Ya Fir Koi
Fix-Error 70 Problem on Gapps With Resurrection Remix
Hello dosto, es video ko andar hum dekhana wala ha kasa
error
70 fix karta ha resurrection remix Rom Ka sath
GApps
ka upor hota tha.Dolby Atmos on Any …
Installing Gapps (space problem)
Question:
I have installed the custom ROM from TeamWin recovery mode for android 8.1 (don’t judge 😋). Everything was installing fine with no errors but then I then installed Gapps, it then told me there is not enough free space on /system partition. How can I free up some space to install Gapps?
EDIT:
Check this log file!
Solution:
I guess you have two way.
-
Go to Custom Recovery and wipe
/System
partition Then, reinstall Custom ROM. (Maybe
/System
partition have problem and after doing this step that’s fixed. ) -
Download Nano Variant of gapps and install on your device. It’s very light. Go to
Play Store
and install other Google Application. (If you install Google Application from Google Play, they installed on
/Data
partition and
/System
partition be free.)
Google App Script — Error when Mapping, I then copied and pasted this code into my actual project. In an attempt to troubleshoot I even copied the exact Sheet from my test project into …
Bootloop after installing GApps in Lineage OS
Question:
I installed Lineage OS 16.0 on my Moto x4 using TWRP. I reboot and installed GApps. While installing there were no errors. But then after restart the Phone it stays in start sequence and after ca. 10 min it goes back to TWRP. When I only install Lineage OS it works fine, but without GApps.
So I tried a few variations of combine these versions:
TWRP: twrp-3.3.1-0-payton, twrp-3.3.0-1-payton
Lineage OS: lineage-16.0-20200219-nightly-payton-signed, lineage-16.0-20200223-nightly-payton-signed
GApps: open_gapps-arm64-9.0-pico-2020019, open_gapps-arm64-9.0-pico-2020028, open_gapps-arm64-9.0-pico-20191017
Can you please help me? Did someone know what I am missing or doing wrong?
Edit:
I found that I start in Slot A and installed Lineage there, but after reboot I am in Slot B but installing GApps works without shown error beside that main problem. When I go back to slot A and install GApps there it breaks with error code 64.
Solution:
Whenever I used LineageOS 16 I had to use the «other» recommended GApps package by LineageOS.
The so called »
MindTheGapps
» package.
See here: https://wiki.lineageos.org/gapps.html
MindTheGapps link: http://downloads.codefi.re/jdcteam/javelinanddart/gapps
Mirror: http://downloads.codefi.re/jdcteam/javelinanddart/gapps
I realize they list OpenGApps there as well but for me, only MindTheGapps worked fine.
Ps.: LOS 17 never had this issue on the other hand. The phone I was using is a OnePlus 7 Pro.
D/InstallAppProgress(): Installation error code: -25, I am trying to install my APK, which has been signed by my Production key (the same one I have always used for my app in the Play Store). When I try to …
What is Gapps (Google Apps)?
Question:
I have some questions regarding Gapps:
- What is Gapps? Is it a custom ROM?
- Do I have to install it on my Android 4.4 device?
Solution 1:
GAPPS is not a custom ROM. It means «Google Applications» and usually includes Play Store, Gmail, Google Calender, and more. If you have some of these applications, then you already have some GAPPS.
Most users will only need to install GAPPS if they have installed a custom ROM that did not have GAPPS included.
Solution 2:
«GApps» is an unofficial package distributed in several forms and places containing Google applications and frameworks,
not a ROM
. You don’t
have to
install GAPPS, but many users may wish to do so in order to access Google Play store and some applications that depend on Google Play services. Smart phone functions such as calling, SMS messages, internet, Wi-Fi and Bluetooth work without GApps.
There’s a replacement project MicroG in development and F-Droid is a comprehensive repository and «app store» for open source Android applications.
How to Fix Gameloop Error Code 20, Hello Guys In this Video You’ll find the solution of
Gameloop Pubg
Mobile Emulator Downloading
ErrorPlease
Don’t Forget to Like & Subscribe..——
What is error code 20 in GApps?
This is because you can’t flash Open GApps right after flashing LineageOS. You must reboot back into the recovery TWRP, and flash the application after that.
What does flash GApps mean?
In simple words , we flash gapps to get google apps . These google apps include play store , gmail , maps etc etc ,(depends on which package you have flashed). If you dont want all those apps like gmail , maps etc and you want only play store then you should flash the micro or pico package of gapps.
What is Android GApps?
GApps (short for Google Apps) packages are essential in the Android aftermarket development community. They are specially crafted optional add-ons for custom ROMs that can be used to get Google apps such as Google Play Services and the Play Store on your device.
Can I reflash GApps?
Yes definitely you can. Make sure you clean flash it. or else you will end up corrupting your OS. Flashing Gapps over preinstalled Gapps would just update those old Gapps lying on your phone. So Enjoy and Flash.
Способ 1: Сброс настроек Google Play Маркета
Сброс настроек сервиса довольно часто помогает решить проблему с различными ошибками. Делается он следующим образом:
- Заходим в меню настроек смартфона (планшета)
- Выбираем раздел «Приложения» или «Диспетчер приложений»:
- Находим в списке Google Play, выбираем его;
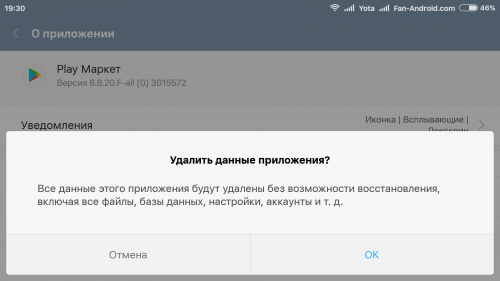
- В открывшемся окне управления приложением выбираем «Очистить кэш» или «Стереть данные», нажимаем на эту кнопку.
- Выполняем перезагрузку Android-устройства, чтобы система отреагировала на внесенные в настройки изменения.
Способ 2: Удаление обновлений Google Play
Всё делается так же, как в описанном выше способе 2, с той только разницей, что вместо «Очистить кэш» выбирается кнопка «Удалить обновления». Приложение вернется к первоначальному варианту, в котором до установки обновлений работало нормально. Если проблема, действительно, в новой версии софта, или Android-устройство в силу технического несовершенства эти обновления «не тянет», то сервис заработает в привычном для пользователя режиме. Без новых возможностей, но исправно.
Способ 3: Редактирование файла /etc/hosts
Данный системный файл в Android-устройствах находится по адресу /system/etc/hosts. Используется он для блокировки доступа к нежелательным ресурсам. Изначально файл содержит единственную запись localhost 127.0.0.1. Из-за действий злоумышленников, пожелавших заблокировать ваш Google-аккаунт и получить деньги за разблокировку, там может оказаться и адрес маркета. Удалите эту строку, вернув файл hosts в исходное состояние. Для таких действий может понадобиться получение root-прав. Как это делается на различных устройствах мы неоднократно рассказывали на нашем сайте
Способ 4: Перезагрузка устройства
Перезагрузка смартфона или планшета — это первое, что стоит попробовать, если вдруг Play Маркет отказался работать из-за ошибки «Код 20». Как вариант, причиной могло стать зависание системы (с этой ситуацией пользователи сталкиваются довольно часто). Самое интересное, что перезагрузка частенько помогает не только при сбоях в работе с Play Маркетом, но и при проблемах, возникающих с другими сервисами и приложениями. Случается и так, что устройство перезагрузилось, но маркет работать не хочет. Тогда можно попробовать применить другие способы.
Способ 5: Удаление аккаунта Google
Сразу предупреждаем: удалив аккаунт Google, вы можете лишиться нужной и важной информации, поэтому рекомендуется заблаговременно создать резервную копию (выполнить синхронизацию данных).
- Зайти в меню настроек;
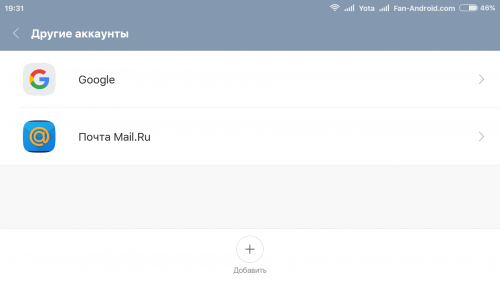
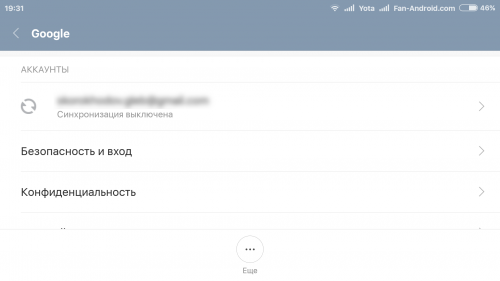
- Выбрать «Аккаунты» и найти свой в открывшемся меню, нажать;
- В открывшемся меню синхронизации нажать на свой почтовый ящик;
- Выбрать пункты для синхронизации (сохранения в резервной копии). Обычно это «Контакты» и прочая информация личного характера, имеющаяся в памяти устройства. Для выбора разделов достаточно клика на них. Если вам дорога вся информация, содержащаяся в Android-устройстве, кликните на «Опции», после чего выберите «Синхронизировать» — вы получите резервные копии всех имеющихся приложений.
Теперь вы готовы к удалению своего аккаунта Google. Когда вы вновь войдете с него на устройство, то получите предложение восстановить информацию с резервной копии.
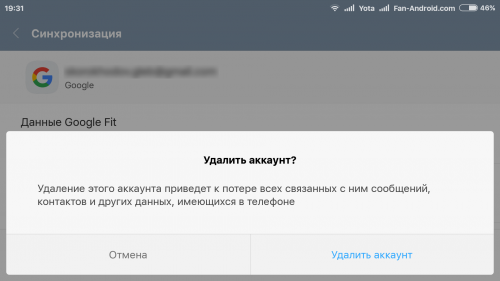
Но вернемся к процедуре удаления Google-аккаунта для нормализации работы маркета. После создания резервной копии нужно вернуться в предыдущее меню и на этот раз выбрать «Удалить», а не «Синхронизировать». Кликните на соответствующую кнопку, после чего выполните перезагрузку смартфона (планшета) и войдите в аккаунт заново. Обычно удаление аккаунта помогает избавиться от проблем, связанных с работой сервисов Google и кода ошибки 20. Если же этого не произошло, пробуйте другие методы.
Способ 6: Полный сброс всех настроек Android-устройства
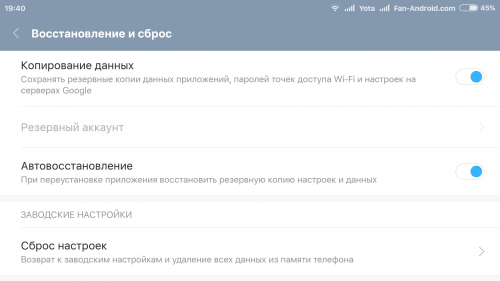
Полный сброс (возврат устройства к заводским настройкам) — метод радикальный и действенный, но к нему необходима подготовка. Иначе можно потерять ценную информацию. Выполните синхронизацию данных — создайте резервную копию, как показано выше в способе 5. Убедитесь в удачном завершении этой процедуры. Теперь можно перейти в «Настройки», найти раздел «Восстановление и сброс», где выполнить «Сброс настроек». Устройство после этого нужно перезапустить и восстановить информацию, воспользовавшись резервной копией.
Как видите, предлагаемые методы довольно тривиальны и не отличаются от мануалов для устранения проблем, связанных с другими ошибками при работе с Google Play. Если вы знаете более интересные и эффективные варианты исправления ошибки «Не удалось установить приложение в папку по умолчанию» (код ошибки: 20) , расскажите о них в комментариях. Возможно, именно ваш способ окажется единственным для кого-то из наших посетителей.

