
Here we are give you 403 page design example. 403 forbidden eroor page design usign html and css. this 403 page desing usign pure css. 403 forbidden eroor is single page design. you can easily implement in your project. 403 forbidden error in php project. you can also implement in your laravel project.
We allows to free snippets of 403 forbidden html template , you can download full code of access denied page html template layout. Here in this post i will give you example of bootstrap 403 page template snippet and you will get simple code of html, css and jquery. In bootstrap custom error page snippet i give you three tab with html, css and js, you can easily get code of free error page template layout.
<!DOCTYPE html>
<html>
<head>
<link href=»https://fonts.googleapis.com/css?family=Ropa+Sans» rel=»stylesheet»>
</head>
<body>
<div class=»error-main»>
<h1>Oops!</h1>
<div class=»error-heading»>403</div>
<p>You do not have permission to access the document or program that you requested.</p>
</div>
</body>
</html>
body{
font-family: ‘Ropa Sans’, sans-serif;
margin-top: 30px;
background-color: #F0CA00;
background-color: #F3661C;
text-align: center;
color: #fff;
}
.error-heading{
margin: 50px auto;
width: 250px;
border: 5px solid #fff;
font-size: 126px;
line-height: 126px;
border-radius: 30px;
text-shadow: 6px 6px 5px #000;
}
.error-heading img{
width: 100%;
}
.error-main h1{
font-size: 72px;
margin: 0px;
color: #F3661C;
text-shadow: 0px 0px 5px #fff;
}
Web designers have gotten used to turning errors into opportunities. It’s no secret that the common, most widely occurring (and surprisingly recognizable) HTTP status code 404, aka “Not Found,” was forced by developers to bring benefits to the project. In the past it scared away users, destroyed the overall impression and was a nightmare for developers. Everyone wanted it to disappear once and for all.
Today, it is an essential detail of a website. WordPress even has a specifically assigned template for it. The “404 page” is an integral element of user experience. In the majority of cases, it has not only a beautiful design but also a theme that is aimed to contribute to the entire aesthetic of a website.
Along with the well-thought-out design, interactions and even animations, it includes useful links and getaways that help lost users to get back on track. However, the “404” error in web design is like Hipsters in real-world: They still catch our eye with their dorky glasses, “vintage” shirts and beards but they are nothing new to us. As for the “403” error, that’s a different story. It’s not as popular as its next of kin, but still, it occurs and not once in a blue moon.
Just for background, HTTP status code 403, aka “403 Forbidden”, means that you do not have permission to access the page. Reasons can vary, starting with inappropriate folder permissions and ending with a banal requirement of login credentials. Nevertheless, the rule of thumb dictates that any error is an opportunity to effect improvements. So why not turn the dummy “403 page” into a place that will serve the same duty as the “404 page”?
Let’s consider a dozen splendid takes on this type of error. They not only serve as a source of inspiration but also a source of ready-to-use solutions.
You Shall Not Pass
“You shall not pass” – was said once by one of the most powerful white-bearded wizards in the fictional world (I hope all the fans of Dumbledore forgive me for this). The final phrase of Gandalf the Grey (note Grey, not White) perfectly fits into the context here. And Noah Rodenbeek, A van Hagen and Jhey show this in practice. Their code snippets are impregnated with a spirit and charm of “The Hobbit” novel. While the first two artists re-created Gandalf with his staff, the latter just hinted at the scene, yet quite successfully.
HODOR 403
If the motifs from fictional novels featured above are not enough for you, then you should set your eyes on this code snippet from Yasio. Surprise-surprise, he got his inspiration from George R. R. Martin’s series of fantasy novels. He has come up with a work called HODOR 403. I believe for the majority out there this solution is self-explanatory. For the rest, I recommend switching to HBO and seeing for yourself why this fictional character goes perfectly well with this type of an error.
Use of Illustration and Animation
Other solutions in our list were guided by the notion that “403” symbolizes a forbidden area so that animated and static CSS illustrations were recreated namely with this idea in mind.
Error 403 – Forbidden by Aimie depicts a classic scene from the fairy tale. The animated bats, witch’s house, bare trees and creepy typography that are featured in the hours of darkness certainly do the trick here.
403 Forbidden by Dylan and 403 Forbidden by Visual Composer have some unique medieval allure. “Close the Gates”: The projects evoke namely these associations. The first one features the classic wooden guard gate door that closes before your very eyes; the second one also goes for a guard gate topic and depicts a mechanism with cogs and chains that reveals the forbidden sign.
Arturo Wibawa’s vision of the forbidden area is presented via marvelous, highly-detailed and even partially animated CSS illustration of the famous Chinese ‘The Purple Forbidden City,’ aka Palace Museum nowadays.
It’s Watching You
403 Forbidden Page by Mariana is marked by a whimsical monster-like character that, thanks to direction-aware effect, follows your mouse cursor everywhere. It recreates a feeling of being watched all the time. It also imitates a fancy fairy guard that does not allow moving forward. The project feels fun in spite of the “menacing” look of the mascot.
Be Persistent
Gabriele Corti also offers a vision of a “403” error page. His “Persistence is a key” project depicts an entire process of initially denying access and granting it after the right user action. The right actions imply inserting a key into a keyhole Nevertheless, you can always use this concept as a base for some advanced actions like inputting login and password.
Keeping it Simple
403 by lsgrrd is an oversimplified take on a “403 Page” that certainly has a right to exist. It is minimal but straight to the point. It has a certain digital quality that oozes techno vibe inherent to the computer sphere. The blinking cursor at the end in tandem with the digital typography produces a fantastic effect. The solution is clean, elegant and straightforward.
Are You on the List?
We are going to end our collection with the project made by Cassidy Williams. Unlike the majority featured here, this solution is a metaphor from the real world that illustrates the typical situation in any popular nightclub. The bouncer is the heart and soul of this code snippet. The character was even partially animated to make everything look lifelike.
Another Opportunity to Engage Users
Truth be told, “403 Error” is not as widespread as “404 Error”, nor is it as popular and recognizable. Nevertheless, it still exists and occurs time after time. That creates a hole in a website that can break the entire user experience. So, seize the opportunity and turn it into a valid part of the project. It will undoubtedly win over some new visitors and will prevent you from losing the old ones.
Related Posts
- 8 CSS Snippets for Creative Hyperlink Hover Effects
- 8 CSS & JavaScript Snippets for Creating Paginated Navigations
- 8 CSS & JavaScript Snippets for Building Mega Menus
- 10 CSS, JavaScript & SVG Snippets for Creating Logos
- A Long Time Ago: Code Snippets Inspired by Star Wars
- 8 CSS & JavaScript Snippets for Creating Wild & Crazy Backgrounds
- Code Snippets That Demonstrate the Repelling Effect in Web Design
- 8 CSS & JavaScript Snippets for Creating Background Noise Effects
- 8 CSS & JavaScript Snippets for Creating Unique Cursor Effects
- 8 CSS & JavaScript Snippets for Creating Modern Blog Layouts
This page may contain affiliate links. At no extra cost to you, we may earn a commission from any purchase via the links on our site. You can read our Disclosure Policy at any time.
John Mwaniki / 23 Aug 2021
There will be some scenarios where web visitors will be served with error messages when trying to access certain pages or files on your website.
Such scenarios include:
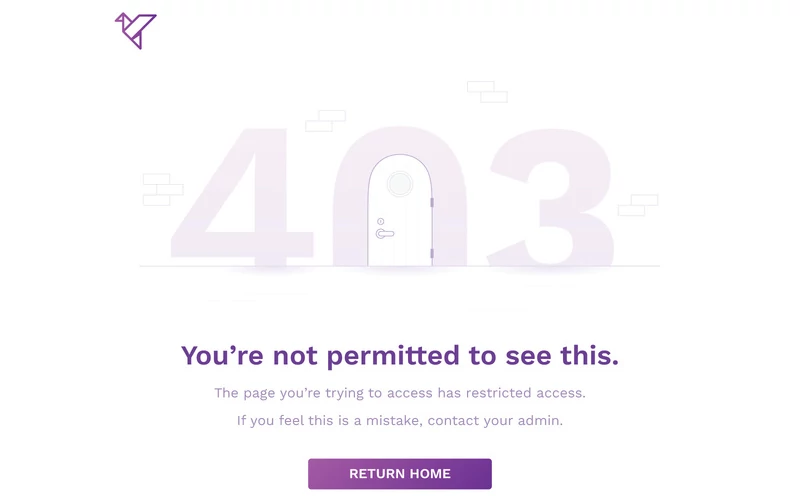
403 Forbidden
This response means the web visitor does not have the necessary permission to access the page they are trying to access, so the server is rejecting to give a proper response.

404 Page Not Found
This response is the most famous due to the frequency of its occurrence. It means that the requested page or resource could not be found on the server. This could be due to visitors trying to access a web page that doesn’t exist, using of incorrect page URL, or the change of page name.

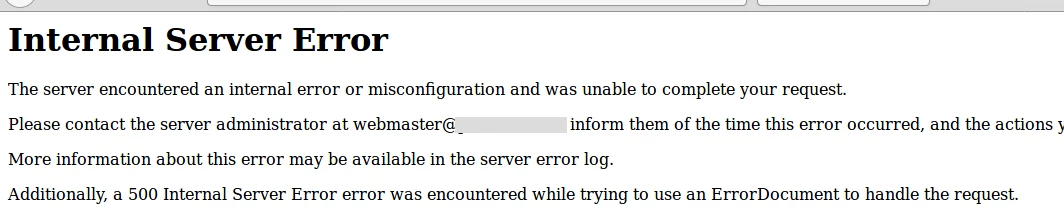
500 Internal Server Error
This occurs when the server has encountered an error it doesn’t know how to handle while trying to serve the user the requested page.
503 Service Unavailable
The server cannot handle the request (because it is overloaded or down for maintenance). Generally, this is a temporary state.
There are many other error responses that visitors may see but the above are the most common and all that you will need to create.
As you can see from all the above screenshots, the default pages are not attractive at all. They also do not give your web visitors any option but to leave your website.
I bet you don’t want to send your visitors away when they try accessing a page on your site and it isn’t available at the moment.
Examples of Great Error Pages
Below are examples of well-designed error pages, from which you can gain some inspiration while designing yours:
403 Forbidden
404 Page Not Found
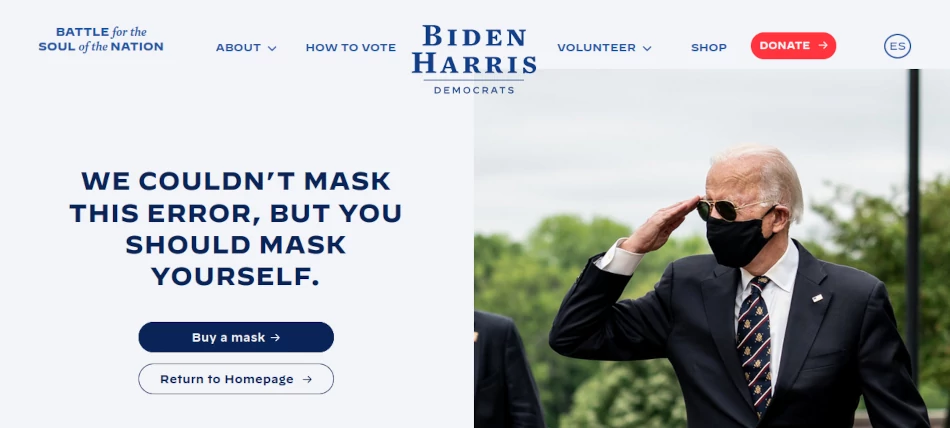
Example 1: Joe Bidens’ website
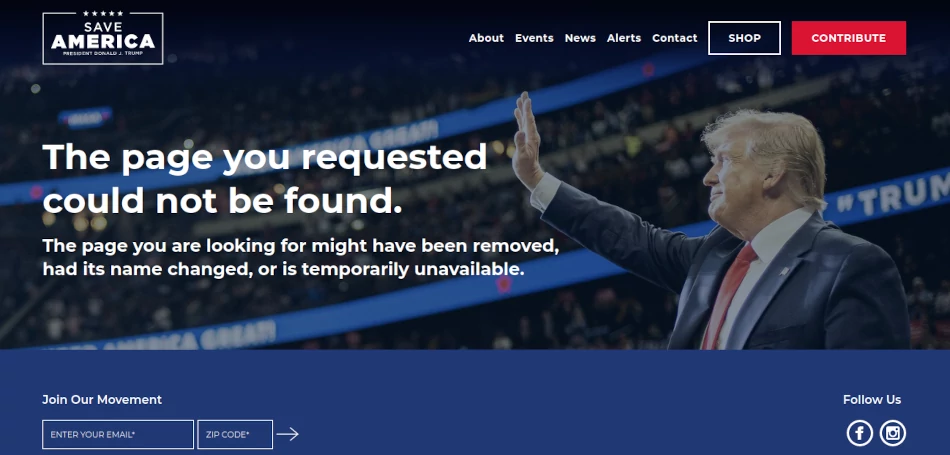
Example 2: Donald Trump’s Website
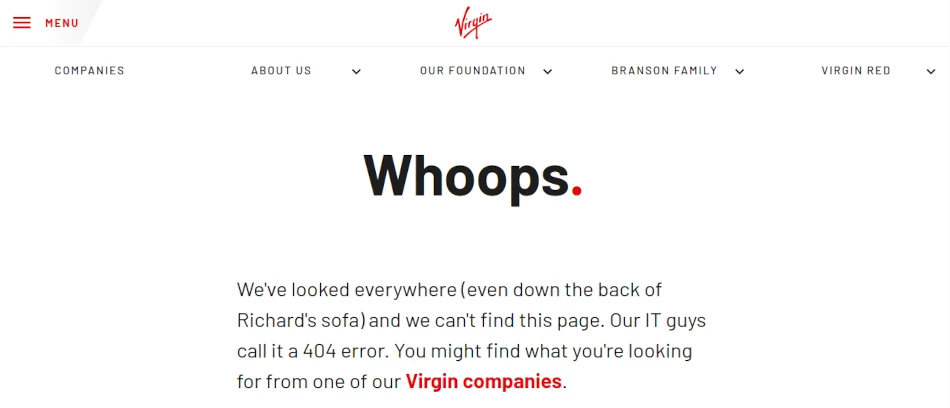
Example 3: Virgin Group Website
Example 4: Whitehouse.gov Website

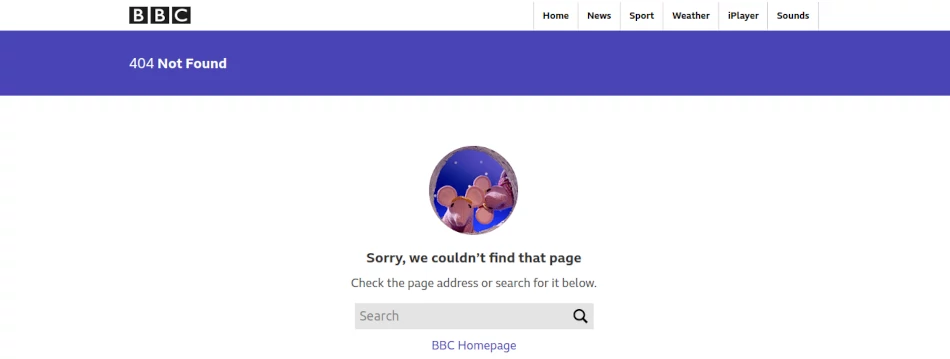
Example 5: BBC News Website
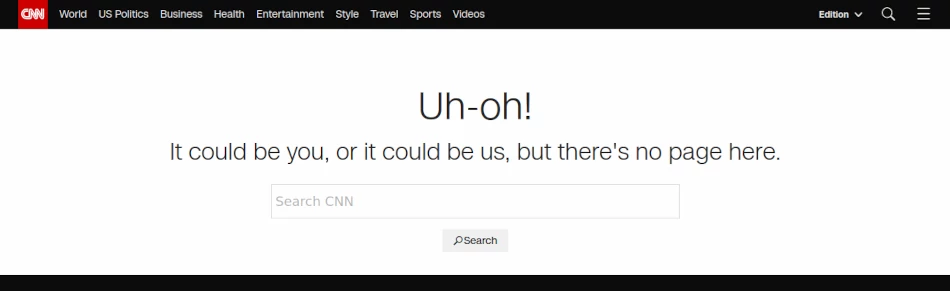
Example 6: CNN News Website
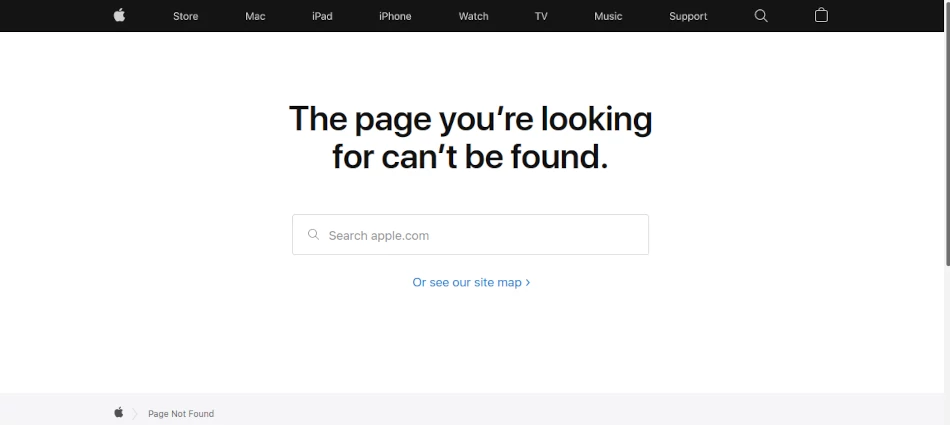
Example 7: Apple Website
Example 8: Microsoft Website
500 Internal Server Error
503 Service Unavailable
How to create your website custom error pages
It is a great idea to create your own well-designed error pages that are more user-friendly, conveys your brand identity, and gives your visitors more options just like in the above examples.
A good error page should be able to explain to the visitors what happened and give them the ability to navigate to other pages.
You design error pages just like any other page on your website and place the pages anywhere you would like, then instruct the server to load the respective page when a user gets an HTTP error.
To instruct the server you will just need to write some commands in the .htaccess file using the format below.
ErrorDocument errorCode /pagenameExample:
If your error pages are namely: error403.html, 404.php, error_500.html, 503error.html. You can name the error pages however you want.
You write these commands in .htaccess file:
ErrorDocument 403 /error403.html
ErrorDocument 404 /404.php
ErrorDocument 500 /error_500.html
ErrorDocument 503 /503error.html
Include the file paths if the error pages are not in the root directory(ie. public_html).
Eg. if your error page namely 404.html is located in public_html/error/404.html, use:
ErrorDocument 404 /error/404.html
Conclusion
Website visitors will occasionally be served with error responses when they try to access various resources on your website such as web pages or files. The default error pages are unfriendly and usually sends away visitors from your website.
It’s a good idea to have your own custom error pages.
In this article, you have learned how you can make your own error pages for your website.
This post about creating a 403 error page template is kind of a follow on from my recent post about how to disable directory listing in WordPress. In that guide I talk about locking down the potential security risk of leaving your directories visible. The result of following the guide means that your directory listings will be hidden and replaced by a 403 error.
The 403 error is an HTTP status code that occurs when you try to access a URL the hosting server does not allow. The server effectively acknowledges the URL exists, but doesn’t permit you to see it. In terms of disabling directory listings this is great. However, it’s perhaps not the most slick experience for anyone who accidentally hits a 403 error on your domain.
For example, a common default 403 error page often looks like this:

It doesn’t explain what has happened and neither does it give you a route back to your WordPress blog.
What follows then is a super-simple way to create a basic custom 403 error page template for your WordPress blog, so you can give visitors instead a little more detail about what to do next.
A Note on Your Host & 403 Errors
It may be that your hosting provider has configured a 403 error page out of the box. For example, I use SiteGround and the default 403 error page for me is this:

It provides basic information but no link back to my blog. My 403 template will also be basic, but you’ll be able to edit it as you’d like with your own HTML and CSS.
For me personally I am happy to have a basic page since most people trying to access a page that leads to a 403 error are probably not your average site visitor (i.e. they might be probing your site for a vulnerability).
I mentioned this is very simple… and it is: there are only two steps! However, you will need to be comfortable working in the control panel of your hosting server. SideGains is hosted on a SiteGround server and so I use cPanel for this example. You might use something else such as DirectAdmin or Plesk… it depends on who your host is. However, the steps should be very similar.
Step 1 – Creating Your 403 Template
The first step is to create a new error template file in which we’ll add the 403 message.
Click the File Manager tool in your cPanel dashboard to view all the files in your home directory.

Note: Your file manager may have a different name in DirectAdmin or Plesk.
You are now looking at the files on your server. Make sure you are in the home directory of your WordPress installation. If you’re unsure which is your home directory, you should see the WordPress directories wp-admin, wp-content, wp-uploads etc. For most people it will be /public_html.
We are going to create your 403 error page template so click on the new file icon to create your template file:

You’ll get a pop-up dialogue box in which you’ll input the name of the file you’re making. Call this file error.php as in the below image:

You should now see your error.php file in your File Manager listings. Right click on it and select “Edit” or “Code Edit” (they both do the same thing, but one of them gives you line numbers).
When the file editor opens you’ll see a blank page. You’re going to copy and paste the following code into your error.php file.
The 403 Error Page Code
<?php
$page_redirected_from = $_SERVER['REQUEST_URI'];
$server_url = "https://" . $_SERVER["SERVER_NAME"] . "/";
$redirect_url = $_SERVER["REDIRECT_URL"];
$redirect_url_array = parse_url($redirect_url);
$end_of_path = strrchr($redirect_url_array["path"], "/");
switch(getenv("REDIRECT_STATUS"))
{
	# "400 - Bad Request"
	case 400:
	$error_code = "400 - Bad Request";
	$explanation = "The syntax of the URL submitted by your browser could not be understood. Please verify the address and try again.";
	$redirect_to = "";
	break;
	# "401 - Unauthorized"
	case 401:
	$error_code = "401 - Unauthorized";
	$explanation = "This area requires a password or is otherwise protected. If you feel you have reached this page in error, please return to the homepage and try again, or contact the webmaster if you continue to have problems.";
	$redirect_to = "";
	break;
	# "403 - Forbidden"
	case 403:
	$error_code = "403 - Forbidden";
	$explanation = "This area requires a password or is otherwise protected. If you feel you have reached this page in error, please return to the homepage and try again, or contact the webmaster if you continue to have problems.";
	$redirect_to = "";
	break;
}
?>
<!DOCTYPE html PUBLIC "-//W3C//DTD XHTML 1.0 Transitional//EN"
	"http://www.w3.org/TR/xhtml1/DTD/xhtml1-transitional.dtd">
<html xmlns="http://www.w3.org/1999/xhtml">
<head>
	<link rel="Shortcut Icon" href="/favicon.ico" type="image/x-icon" />
<?php
	if ($redirect_to != "")
	{
?>
	<meta http-equiv="Refresh" content="5; url='<?php print($redirect_to); ?>'">
<?php
	}
?>
	<title>Page not found: <?php print ($redirect_to); ?></title>
</head>
<body>
<h1>Error Code <?php print ($error_code); ?></h1>
<p>The page you requested was not found. <?PHP echo($explanation); ?></p>

<p>You may want to try starting from the home page: <a href="<?php print ($server_url); ?>"><?php print ($server_url); ?></a></p>
<hr />
<p><i>A project of <a href="<?php print ($server_url); ?>"><?php print ($server_url); ?></a>.</i></p>
</body>
</html>
Click the “Save” button and then click “Close” and you’ll have just created the 403 error page template. Incidentally I’ve also added rules for 400 (Bad Request) and 401 (Unauthorized) into this to present messages for these errors too.
Now we have to instruct your server to refer these errors to your error.php page.
Step 2 – Editing Your .htaccess File for a 403 Redirect
If you haven’t come across .htaccess is, or don’t know where to look for it on your server, I’ve posted about it here: Can’t Find Your .htaccess File? Here’s What to Do.
The .htaccess file is a configuration file that instructs a server how to handle certain requests. We’re going to use it in this case to tell it how to handle a 403 error.
You can find .htaccess in your home directory using the cPanel File Manager. This is the directory where you installed WordPress… for most people it will be /public_html.
Because .htaccess is a “hidden” file you may not see it. If you can’t see it in your home directory, visit my “Can’t Find Your .htaccess File?” post for instructions on how to make it visible.
When you’ve located your .htaccess file, the first thing you’re going to do is make a back up copy. .htaccess is a VERY important file and if it somehow gets broken when you edit it, you’re going to need to be able to swap it with your back up copy.
So… when you’ve located .htaccess, right click on it and make a duplicate (call it something like BKUP.htaccess_BKUP so you know what it is). If you get into any trouble you can simply delete your corrupt .htacces and make a duplicate copy of your BKUP.htaccess_BKUP, but call it .htaccess to replace the one you deleted.
Once you have your back up copy, you can safely edit your .htaccess file. So right click on it and select either the “Edit” or “Code Edit” option.
You’re going to add 3 lines to .htaccess beneath the last entry in the file. These lines are:
ErrorDocument 400 /error.php
ErrorDocument 401 /error.php
ErrorDocument 403 /error.php
This tells your server to forward requests for 400, 401 and 403 errors to your error page template.
Be sure to leave a blank line at the end of the file (this is important) and click “Save”. When the file is saved, close the window.
Checking Your 403 Error Page Template is Working
The next step is to check that everything is working as it should be. You can do this simply by trying to visit your wp-content/uploads directory. For me I would visit:
https://www.sidegains.com/wp-content/uploads/
And this is the 403 error page template realized in a browser:

That’s it! You can of course modify error.php to customize it further, but this basic message is sufficient to give a brief explanation of why this page says what it says and provide people with a way back to your homepage.

Please leave me a comment below if you’ve implemented this or if you need further information about setting up a 403 error page template for your WordPress blog.
Contributing to the challenge of server errors. This week: 403 – FORBIDDEN. This was fun! And very educative. Developed using only css and HTML. Demo and download options available.
Very interesting ! A simple illustration, but well looking (look like an SVG illustration !) made entirely by CSS !
Demo Download
| Author | A van Hagen |
|---|---|
| Created | SEPTEMBER 17, 2018 |
| License | Open |
| Compatible browsers | Chrome, Firefox, Safari |
HTML Snippet
<div class="gandalf">
  <div class="fireball"></div>
  <div class="skirt"></div>
  <div class="sleeves"></div>
  <div class="shoulders">
    <div class="hand left"></div>
    <div class="hand right"></div>
  </div>
  <div class="head">
    <div class="hair"></div>
    <div class="beard"></div>
  </div>
</div>
<div class="message">
<h1>403 - You Shall Not Pass</h1>
<p>Uh oh, Gandalf is blocking the way!<br/>Maybe you have a typo in the url? Or you meant to go to a different location? Like...Hobbiton?</p>
</div>
SCSS Code
$black: #000;
$semi-black: #1a2130;
$white: #fff;
$dress: #ededed;
$dress-dark: darken($dress, 10%);
$sword: #e6e6e6;
$staff: #bf5507;
$skin: #ffd8ad;
$hair: #c2beb5;
$hair-dark: darken($hair, 10%);
$lips: pink;
$fire: black, #6C1305, #DE8531, #EFAC41;
$fire-reverse:#EFAC41, #DE8531, #6C1305, black;

@keyframes floating {
  to {
    top: 1.5rem;
  }
}

body {
  background-color: $black;
  color: $white;
  text-align: center;
  font-family: "Open Sans";
  font-size: 1.3rem;
  h1 {
    font-size: 2.5rem;
  }
}

.message {
  max-width: 700px;
  margin: 5rem auto 0 auto;
}

.gandalf {
  position: relative;
  width: 400px;
  height: 400px;
  margin: 0 auto;
  top: 1rem;
  animation: floating 1s infinite alternate ease-in-out;
  div {
    position: absolute;
  }

  &::before {
    content: "";
    position: absolute;
    top: 0;
    left: 0;
    width: 400px;
    height: 400px;
    background-color: $semi-black;
    border-radius: 50%;
  }
  .fireball {
    bottom: -10px;
    left: 50px;
    width: 300px;
    height: 100px;
    border-radius: 50%;
    background: radial-gradient($fire-reverse);
    border: 5px solid $black;
  }
  .skirt {
    bottom: 50px;
    left: 100px;
    border-bottom: 230px solid $dress;
    border-left: 100px solid transparent;
    border-right: 100px solid transparent;
    filter: drop-shadow(0 0 6px $dress-dark);

    &::before {
      content: "";
      position: absolute;
      background-color: $dress;
      width: 100px;
      height: 21px;
      top: 230px;
      left: 0px;
      border-bottom-right-radius: 180%;
      border-bottom-left-radius: 100%;
    }
    &::after {
      content: "";
      position: absolute;
      background-color: $dress;
      width: 100px;
      height: 28px;
      top: 230px;
      left: -100px;
      border-bottom-right-radius: 80%;
      border-bottom-left-radius: 180%;
    }
  }
  .sleeves {
    &::before,
    &::after {
      // sleeves
      content: "";
      position: absolute;
      border-bottom: 70px solid $dress;
      filter: drop-shadow(0 0 6px $dress-dark);
    }
    &::before {
      // sleeve left
      top: 130px;
      left: 191px;
      border-left: 100px solid transparent;
      border-right: 40px solid transparent;
      transform: rotate(-34deg);
    }
    &::after {
      // sleeve right
      top: 127px;
      left: 70px;
      border-left: 40px solid transparent;
      border-right: 100px solid transparent;
      transform: rotate(41deg);
    }
  }
  .shoulders {
    background-color: $dress;
    border-radius: 50%;
    width: 100px;
    height: 130px;
    left: 150px;
    top: 120px;
    .hand {
      width: 33px;
      height: 26px;
      border-radius: 50%;
      background-color: $skin;
      top: -6px;
    }
    .left {
      left: -70px;
      transform: rotate(-20deg);
      &::after {
        // sword
        content: "";
    position: absolute;
    background-color: #e6e6e6;
    width: 126px;
    height: 8px;
    border-radius: 4px;
    transform: rotate(-105deg);
    transform-origin: bottom;
    top: -48px;
    left: -56px;
      }
    }
    .right {
      right: -70px;
      transform: rotate(20deg);
      &::after {
        // staff
        content: "";
        position: absolute;
        background-color: $staff;
        width: 250px;
        height: 5px;
        border-radius: 2.5px;
        transform: rotate(-78deg);
        transform-origin: left;
        bottom: -100px;
        left: 0;
      }
    }
  }
  .head {
    width: 80px;
    height: 90px;
    top: 80px;
    left: 160px;
    background-color: #ffd8ad;
    border-radius: 50%;

    &::before, &::after {
      // eyes
      content: "";
      position: absolute;
      background-color: $black;
    }

    &::before {
      width: 13px;
    height: 5px;
    border-radius: 3px;
    top: 42px;
    left: 22px;
    transform: rotate(19deg);
    }
    &::after {
      width: 13px;
    height: 5px;
    border-radius: 3px;
    top: 42px;
    right: 22px;
    transform: rotate(-19deg);
    }


    .hair {
      width: 70px;
      height: 30px;
      background-color: $hair;
      border-radius: 50%;
      top: 0px;
      left: 5px;

      &::before,
      &::after {
        // hair sides
        content: "";
        position: absolute;
        background-color: $hair;
        filter: drop-shadow(2px 5px 0 $hair-dark);
      }

      &::before {
        // hair left
        top: 13px;
        left: -16px;
        width: 25px;
        height: 100px;
        border-top-left-radius: 34px;
        border-top-right-radius: 15px;
        border-bottom-left-radius: 100px;
        border-bottom-right-radius: 20px;
        transform: rotate(8deg);
      }
      &::after {
        // hair right
        top: 13px;
        right: -16px;
        width: 25px;
        height: 100px;
        border-top-left-radius: 15px;
        border-top-right-radius: 34px;
        border-bottom-left-radius: 20px;
        border-bottom-right-radius: 100px;
        transform: rotate(-10deg);
      }
    }
    .beard {
      top: 64px;
      left: 5px;
      border-top: 80px solid $hair;
      border-left: 35px solid transparent;
      border-right: 35px solid transparent;
      border-radius: 30px;
      filter: drop-shadow(2px 5px 0 $hair-dark);

      &::before {
        // mouth
        content: "";
    position: absolute;
    background-color: $lips;
    width: 20px;
    height: 5px;
    border-radius: 40%;
    top: -70px;
    left: -9px;
      }
    }
  }
}
Preview
