

The Task Board by default.
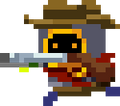
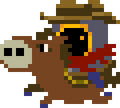
The Task Board is located at the top left corner of the Living Room. The Officer stands beside it.
- This item will change appearance according to the skin of Officer, or during special seasons.
It is unlocked once the player has reached level 2-3 with the Safe already unlocked.
It displays all the daily tasks upon interaction.
- Trying to interact with it in Multiplayer will show a message «Come next time when you play solo.»
- The Officer will have an exclamation mark over his head, which normally indicates that a task or challenge has been completed.
Once the player completes the tasks, they must interact with the Officer to claim the reward. Completing these tasks can yield gems and materials and very rarely blueprints.
- This is one of the better methods to collect Fertilizer, Free Trial Vouchers and the only method of obtaining Feather of Valkyrie once Boss Rush Mode is unlocked.
There are two types of tasks: Wanted Tasks and Challenge Tasks.
Road of Knights
The Road of Knights consists of 3 chapters, with 5 missions each. Rewards can be claimed for each mission completed, and additional rewards of 500, 750 and 1,000 Gems will be given after finishing 1, 3 and 5 missions per chapter, respectively. All missions of each chapter must be cleared before proceeding to the next one.
Chapter 1
| Name | Task | Rewards |
|---|---|---|
| Strike! | Welcome to the House of Knights! Please complete 1 game in any game mode. It is your duty to locate the Magic Stone and use its power to keep the world in order! | 400 |
| Grab a Weapon | What’s that in your hand? Use a total of 5 different weapons in any game mode! | 400 |
| Cast a Skill | Communicate with your inner self to unleash your full potential. Cast skill 10 in any game mode! | 400 |
| Collect a Buff | During the adventure, you will be able to collect «buffs», which can be used in combination with weapons and skills to achieve magical effects. Please collect a total of 6 different buffs in any game mode except for season mode. | 400 |
| Against All Odds | The best way to prove yourself is to defeat enemies. Show me what you got by defeating a total of 100 enemies in any game mode! | 500 1 |
Chapter 2
| Name | Task | Rewards |
|---|---|---|
| New Partners | There is a guy in the House of Knights who loves watching TV, yes, Rogue. Unlock and recruit him to come along in the adventure. | 500 |
| Betting Stronger | Level up! Power up! Own 1 lvl. 2 character and see if anything has changed. | 500 |
| Shopping Spree | Buy 1 item from the Trader in the Workshop. You can find legendary items here once in a while. | 400 |
| Harvest Day | Countless species of plants exist on the continent of Soul Knight, and their seeds can be planted in the garden. Harvest 1 plant in the garden area and see what you can get. | 400 2 |
| Boss Hunter | You should have seen the bosses in the dungeon and you need to defeat them in order to get the Magic Stone. Defeat 1 boss and set out for the Magic Stone! | 400 2 |
Chapter 3
| Name | Task | Rewards |
|---|---|---|
| New Skill | The same character can learn different skills. Try using the 3rd skill of Knight «Chaotic Strike» for 1 time. | 20 20 |
| Forge Weapon | You’ve figured out how to make the weapons after obtaining them. Forge 1 weapon at the Forge Table in the Workshop. | 400 |
| Valiant Challenge | Find the battle too easy? Complete 1 challenge on the Task Board for something new (solo mode only). | 400 |
| Craft Armour Mount | In a world where technology and magic co-exist, you can craft 1 armor mount at the Robotics Facility in the Workshop and you will be able to battle in the mecha form. | 400 |
| Protect the Magic Stone | Retrieve the Magic Stone Fragment which keeps the world in balance! In Level Mode, defeat a boss who guards the fragment, complete the game and have your rewards calculated at the end-of-the-game screen. | 1000 2 |
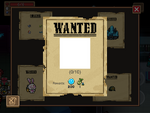
Wanted Tasks

A completed Wanted task.
- The player is required to kill the target enemy for a given number of times in each task.
- Each day, 1 to 2 new Wanted tasks will appear. The Task Board can hold up to 4 Wanted tasks.
- If Boss Rush Mode is unlocked, the lower left task will always refresh everyday, with the reward being two Feathers of Valkyrie.
- These Wanted tasks do not need to be accepted. Simply go to play and kill enough targets and return to claim reward.
- Kills gained in Multiplayer, Boss Rush Mode and The Origin count towards the tasks.
- Kills gained from minions summoned by bosses do not count toward the tasks.
- Be careful that killing the wrong enemies will not count (for example, a task requires brown Chester, which means that kills for the blue Chester do not count).
- It is possible to discard a Wanted task by using the button at the lower left. This is useful if the player is given a quest which they cannot complete, and they can wait until tommorow for applicable task replacements.
- Unlike most things that are undone by rerolling a level, enemy/boss tally isn’t. The player can use this to their advantage, completing any given level twice for more kills.
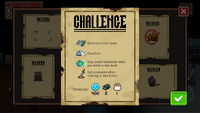
Challenge Tasks
A challenge task.
- The player is required to complete the game under 4 random conditions.
- The conditions are refreshed every day.
- Completing a challenge after refreshing date will count as completing the challenge of next day, and will yield the corresponding reward.
- It is required to accept the Challenge by choosing the post and activating it. It is also possible to deactivate by the same method or interact with Officer twice.
- In Multiplayer mode, however, the host has an option of picking some random conditions to start the game. These conditions can be random ones different from the daily task and do not offer additional rewards.
- It is possible to accept and decline Challenge as many times as possible, however the reward can only be claimed once every day. (Unless the player deletes and re-installs the game, and then get back their cloud saves)
- Some challenge conditions are either partially applied or not applied at all in the Lobby.
- After completing a daily challenge, the player can talk to Officer and pay 200 gems to change conditions. This can be done 15 times a day.
- This will not grant new rewards by completing the new conditions, however. These conditions will also be lost if they are not used immediately in the next run.
- It is possible to bring conditions into The Origin, and some of them can be activated correctly, but it is impossible to complete a challenge since it is impossible to win.
- NPC Officer can give random conditions. Doing so does not affect the state of challenges.
List of Conditions
| Condition Symbol | Description/Notes |
|---|---|
|
|
No pets or mercenaries
▲ top |
|
|
Enemy defense +1
▲ top |
|
|
More enemies in the dungeon
▲ top |
|
|
More aggressive enemies!
▲ top |
|
|
Enemies move faster
▲ top |
|
|
Enemy debuff time -50%
▲ top |
|
|
Enemy HP +100%
▲ top |
|
|
Enemy fire rate up!
▲ top |
|
|
Store price +100%
▲ top |
|
|
Max number of buffs +3
▲ top |
|
|
Better defense, but shield does not regenerate
▲ top |
|
|
Max number of buffs -3
▲ top |
|
|
Skill cooldown -50%
▲ top |
|
|
Skill cooldown +100%
▲ top |
|
|
Increase revival times
▲ top |
|
|
Elite enemies appear more often
▲ top |
|
|
You can worship multiple statues
▲ top |
|
|
Weapons get reforged at the start of each level
▲ top |
|
|
Get a weapon when entering a new biome
▲ top |
|
|
Max HP =1
▲ top |
|
|
Infinite energy
▲ top |
|
|
Weapon crit rate +100%, crit damage -50%
▲ top |
|
|
Weapon attack +100%, fire rate -50%
▲ top |
|
|
Weapon fire rate +100%, attack -50%
▲ top |
|
|
Options -2 when you choose buffs
▲ top |
|
|
Options +2 when you choose buffs
▲ top |
|
|
More rooms in the dungeon
▲ top |
|
|
Melee weapons only
▲ top |
|
|
Max energy -50%
▲ top |
|
|
Good Luck
▲ top |
|
|
Bad Luck
▲ top |
|
|
Gigantism
▲ top |
|
|
Dwarfism
▲ top |
|
|
Regenerate HP when it’s below 50%
▲ top |
|
|
Fight with 2 slightly nerfed bosses in each Boss room
▲ top |
|
|
May switch character when you enter a new level
▲ top |
|
|
Increase the number of bonus rooms
▲ top |
|
|
Can only carry one weapon
▲ top |
|
|
Increase critical damage
▲ top |
|
|
Random levels
▲ top |
|
|
Monsters split into two when their HP is below 50%
▲ top |
|
|
All weapons are equipped with attachments
▲ top |
|
|
Monsters shift to a different position the moment they get hit
▲ top |
|
|
Vision is limited
▲ top |
|
|
Functional UI is disabled
▲ top |
|
|
When you take a hit, a random debuff will be applied to you. The effect only triggers once every 5 seconds
▲ top |
|
|
Pet is gigantic, more aggressive and deals higher damage
▲ top |
|
|
Bombs and coins may spawn in chests when you clear a room
▲ top |
|
|
A mount awaits when you enter a new biome
▲ top |
|
|
Deja Vu («Have I been here before?»)
▲ top |
|
|
Inferior Medicament (All recovery -50%)
▲ top |
|
|
Weapon Overheating
▲ top |
|
|
Config Error (It all started from a warm, lovely afternoon and a dozy, drowsy developer)
▲ top |
|
|
Time Fluctuation (Your movement speed randomly increases or decreases)
▲ top |
|
|
Killing Spree (You get stronger as you acquire a killstreak)
▲ top |
|
|
Sales Day
▲ top |
|
|
Strong Body
▲ top |
|
|
Frostbite
▲ top |
|
|
Tenacity
▲ top |
|
|
Deranged
▲ top |
|
|
Blessing Staff
▲ top |
|
|
Curse of Grave Robbers
▲ top |
|
|
Slightly increases max HP, movement speed, fire rate and critical rate
▲ top |
|
|
Max armor and max HP are fixed at 1. Max energy is fixed at 999
▲ top |
|
|
Cancels 1 increased Pressure Level’s weight on enemy resistance to control effects
▲ top |
|
|
Killing monsters have a chance to revive all teammates
▲ top |
|
|
Monster movement speed -1%
▲ top |
|
|
The spawn chance of mutant monsters +2%
▲ top |
|
|
Damage taken by the player +1, damage taken by the monster +2
▲ top |
|
|
Improves enemy immunity to crowd control
▲ top |
|
|
The whole team (all the team members combined) can’t revive more than 2 times. If one is revived by a weapon
▲ top |
|
|
Complete the game within 12 minutes (normal mode) or 16 minutes (badass mode)
▲ top |
|
|
Characters may suddenly become larger or smaller over time. Movement speed is adjusted as well, but not health and armor
▲ top |
|
|
Sometimes enemy blimp will bomb the room. Enemies take 8 damage while players take 4 (5 in badass)
▲ top |
|
|
Enemies and players will explode 3 seconds after death. Players make larger explosion. These explosions hurt players
▲ top |
|
|
Meteors fall from time to time. These meteors do not damage enemies
▲ top |
|
|
Enemies, upon death, have a chance to open a rift of time and space
▲ top |
|
|
▲ top |


|
Novice Hunter
Complete 1 task Reward: a seed of Bamboo (Plant) |
|
veteran Hunter
Complete 10 tasks Reward: Officer as a playable character and a seed of Magic Flower |
|
Legendary Hunter
Complete 100 tasks Reward: a seed of Devil’s Snare (Plant) |

|
Mining Expert
Get 800 coins in 1 challenge Reward: none |
|
Embrace Challenges
Accept a total of 30 different challenge conditions and complete these Level Mode games. Reward: none |
Trivia
General
- This feature was added in Update 1.9.0.
A challenge task from before 4.1.0.
- Until Update 4.1.0, the Challenge Task had a different appearance.
- Some of the conditions have references:
- The icon of «Better defense» condition is a reference of the icon of «Nuclear Disarmament» used worldwide.
- The icon of «Good Luck» condition is a reference to a rumor that people can get good luck with a 4-leaf clover.
- The icon of «Bad Luck» condition is a reference to the British superstition that black cats bring bad luck (most notably when they cross a person’s path).
- The icon of «Double skill CD» is a reference to The Persistence of Memory by Salvador Dali.
- The icon of «Dwarfism» is a reference of the shrinking device in the Doraemon series.
- The icon of «Get new weapon» is a reference to the way sword weapons are displayed in the game Spirit of Darkness 3, or to the famous British legend «Sword in Stone».
- The icon of «Can only carry one weapon» condition is a reference of the novel «The Return of the Condor Heroes,» where the protagonist Yang Guo is a martial artist with only one arm.
- In detail, Yang Guo lost one arm during a duel, but was saved by the Divine Condor. He then learned to wield a powerful great sword with the remaining arm.
- The icon of «Increase critical damage» condition is a reference of a Chinese meme, where a guy claims that «I’ll prove to you that my blade is toxic» while licking it, then he collapses due to the poison.
- The original scene however, is from a Japanese TV series: The Hero Yoshihiko and the Demon King’s Castle: Poison Knife Scene.
- The behavior of «Monsters shift to a different position the moment they get hit» condition involves blue and yellow portals, which are a reference of the Portal series’ Aperture Science Handheld Portal Device’ attacks, which fires portals on suitable surfaces.
- The icon of «Gigantic pet» condition is a reference of Shobon’s action (especially the effect of giant mushroom,) an action game known to have many shoutouts and death traps.
- The icon of «increase revival time» condition is a reference of The ancient Egyptian hieroglyph «Ankh«.It is symbolize life,also is the symbol of gods.It is commonly seen on ancient Egyptian tombstones, mummies, pharaohs’ and gods’ hands.It can bring health and happiness.
Bugs
- When first added, there were several glitches:
- The most infamous glitch is that the «More rooms in the dungeon» condition couldn’t be completed in the past.
- The reason is because when entering 3-6, there would be one extra room that had no enemies yet it would lock when the player entered, effectively preventing them from obtaining the Magic Stone and finishing the game.
- Some tablet users had a screen resolution issue that pushed the ‘Accept’ button off-screen. This prevented them from accepting any Challenges.
- Axe-type weapons and Blind Missile Battery were bugged and not affected by «Weapon attack +100%, fire rate -50%» and «Weapon fire rate +100%, attack -50%» conditions.
- The rewards of challenges could be claimed more than once a day, if the player completed the challenge more than once in the same day.
- The health-reducing effect of the «Dwarfism» condition did not work.
- Fire rate of weapons able to speed up over time was not affected by conditions regarding weapon damage and fire rate.
- The «Weapons get reforged at the start of each level» condition would occur in level 3-6 at that time, such that the inventory when touching the Magic Stone could be different from the certificate.
- In fact, the content of the «Game Clear» certificate is decided before entering 3-6.
- Extra statue effects would be discarded upon entering a new level.
- It was possible to get opposite conditions (like «Max buffs +3» and «Max buffs -3» together) when starting a multiplayer game.
- The most infamous glitch is that the «More rooms in the dungeon» condition couldn’t be completed in the past.
- All of the glitches above were fixed in Update 1.9.2.
- Before Update 1.9.7, the Health Buff could be used together with «Max HP= 1» condition, though having no effect.
- However, using the Caterpillar Fungus could prevent the buff from appearing in the choice list, such that it’s not useless.
- Before Update 2.0.0, the damage of One Punch would be displayed as «199» under «Weapon attack +100%, fire rate -50%» condition, instead of «1998» due to limited space. When fixed, the number is now shown in smaller font.
- This also happened for the Prototype Railgun under «Weapon crit rate +100%, crit damage -50%» condition, where the critical chance was «-25%~100%» but shown as «-25%~10» instead.
- Before Update 2.0.5, the «Better defense, but shield does not regenerate» would affect the mounts, such that they would be invincible if they had any defense.
- During Update 2.0.5, under the ‘Weapon crit rate +100%, crit damage -50%’ condition, weapons that cause debuffs upon critical hits (except for bows, Spike Knives and Frost Spear) could deal double damage on critical hits, regardless of having the Elemental Buff or not.
- Also, between Update 1.9.2 and Update 2.1.0, elemental weapons would deal 200% damage on critical hits with the Elemental Buff.
- During Update 2.1.0, when both «Weapon crit rate +100%» and «Increase crit damage» conditions were activated, weapons can effectively deal 200% damage on critical hits.
- A glitch may occur in Update 2.1.5, where if a player accepts the «Max HP= 1» condition but then cancels it and starts a run directly, the player will start with the correct max health, but the current health will be 1.
- When Boss Rush Mode was first introduced in Update 2.2.0, the lower left task could only give one Feather of Valkyrie.
- Also at that time, kills gained in Boss Rush Mode did not count toward the Wanted tasks.
- There was a glitch before Update 2.2.0, where if Baby Dragon Bros appeared as the main boss under the «Fight with 2 slightly nerfed bosses in each Boss room» condition, the second boss would be glitched that its banner would not appear, and the boss health bar would not include its share. This glitch is purely visual.
- When the «Increase the number of bonus rooms» condition was first introduced, it could create two bonus rooms of the same type, like with 2 statues or 2 mercenaries.
- It was possible to hire two mercenaries and they could work normally in the current floor. However when moving to next floor, the one hired first would be lost.
- Before Update 2.3.0, the «Increase revival times» condition was known as «You can resurrect twice» and was useless in multiplayer.
- When Toxic Worm was first added, its Wanted Task was glitched that it could not be completed.
- Some other tasks would also show a white square and also cannot be completed.
- Before Update 2.4.0, fire and poison pools created by weapons were not affected by weapon challenges.
- Random levels,Monsters split into two when their HP is below 50%,Monsters shift to a different position the moment they get ,Functional UI is disabled,Vision is limited,All weapons are equipped with attachments were added in update 2.7.0.
- Before Update 2.8.6, the characters wouldn’t have random skills, instead, characters used the last skill they have used. For example, if Knight’s skill was set to Superior Fire, it was impossible to change into a Knight with Dual Wield.
- This meant that locked skills or any skill from a locked character could be chosen, and when getting that character into a run, it would use that skill.
- Also, before this update, the the skin of the Shield NPC Paladin gives would always be the same of the Living Room skin.
- Before a change in Update 2.8.0, the «Random levels» condition would allow players to choose more buffs if they happened to reach later floors too early.
- When you take a hit, a random debuff will be applied to you. The effect only triggers once every 5 seconds,Pet is gigantic, more aggressive and deals higher damage,Bombs and coins may spawn in chests when you clear a room,A mount awaits when you enter a new biome were added in update 3.2.0.
- Weekly challenges were added in update 4.0.0.
- «Slightly increases max HP, movement speed, fire rate and critical rate» and «Max armor and max HP are fixed at 1. Max energy is fixed at 999» were added in Update 4.2.0, along with Airbender.
- At that time, Airbender NPC wouldn’t spawn, so players could not obtain these conditions normally. This was fixed in the next update, which also greatly increased the occurrence rate of the Airbender NPC for a short time.
- The Deja Vu condition was added in version 4.2.0 with other 6 new conditions. At that time, bringing this condition into the game again may lead to changes in the scene and monster layout, but the events encountered in the treasure chest room/special room remain unchanged; It may also be that the scene and monster layout remain unchanged, but the events encountered in the treasure chest room/special room change.
- When both Deja Vu and Config Error condition exist, players may encounter different monster positions.
- When players have Config Error condition,they may encounter relic hunters or other no-in-Neo-Isle-monsters in pirate support ships in Neo Isle biome. This may be a bug caused by the monsters on the pirate ship must be different’s limit is contradiction to this condition.
| Objects | |
|---|---|
| Living Room | Book Pile — Pet Food — Plant — TV — Safe — Fish Tank — Task Board — Beverage Vending Machine — Email — Lucky Cat |
| Garden | Magic Well — Training Dummy |
| Workshop | Forge Table — Redeem Machine |
| Magic Area | Matrix Portal — Ancient Portal — Holy Statue |
| Level Mode | Chests — Offering Pool — Reforging Furnace — Resetting Furnace — Water Dispenser — Vending Machines — Portals — Statues — Wishing Well — Signs — Claw Fun — Cage — New Year DinnerCNY |
The Task Board by default.
The Task Board is located at the top left corner of the Living Room. The Officer stands beside it.
- This item will change appearance according to the skin of Officer, or during special seasons.
It is unlocked once the player has reached level 2-3 with the Safe already unlocked.
It displays all the daily tasks upon interaction.
- Trying to interact with it in Multiplayer will show a message «Come next time when you play solo.»
- The Officer will have an exclamation mark over his head, which normally indicates that a task or challenge has been completed.
Once the player completes the tasks, they must interact with the Officer to claim the reward. Completing these tasks can yield gems and materials and very rarely blueprints.
- This is one of the better methods to collect Fertilizer, Free Trial Vouchers and the only method of obtaining Feather of Valkyrie once Boss Rush Mode is unlocked.
There are two types of tasks: Wanted Tasks and Challenge Tasks.
Road of Knights
The Road of Knights consists of 3 chapters, with 5 missions each. Rewards can be claimed for each mission completed, and additional rewards of 500, 750 and 1,000 Gems will be given after finishing 1, 3 and 5 missions per chapter, respectively. All missions of each chapter must be cleared before proceeding to the next one.
Chapter 1
| Name | Task | Rewards |
|---|---|---|
| Strike! | Welcome to the House of Knights! Please complete 1 game in any game mode. It is your duty to locate the Magic Stone and use its power to keep the world in order! | 400 |
| Grab a Weapon | What’s that in your hand? Use a total of 5 different weapons in any game mode! | 400 |
| Cast a Skill | Communicate with your inner self to unleash your full potential. Cast skill 10 in any game mode! | 400 |
| Collect a Buff | During the adventure, you will be able to collect «buffs», which can be used in combination with weapons and skills to achieve magical effects. Please collect a total of 6 different buffs in any game mode except for season mode. | 400 |
| Against All Odds | The best way to prove yourself is to defeat enemies. Show me what you got by defeating a total of 100 enemies in any game mode! | 500 1 |
Chapter 2
| Name | Task | Rewards |
|---|---|---|
| New Partners | There is a guy in the House of Knights who loves watching TV, yes, Rogue. Unlock and recruit him to come along in the adventure. | 500 |
| Betting Stronger | Level up! Power up! Own 1 lvl. 2 character and see if anything has changed. | 500 |
| Shopping Spree | Buy 1 item from the Trader in the Workshop. You can find legendary items here once in a while. | 400 |
| Harvest Day | Countless species of plants exist on the continent of Soul Knight, and their seeds can be planted in the garden. Harvest 1 plant in the garden area and see what you can get. | 400 2 |
| Boss Hunter | You should have seen the bosses in the dungeon and you need to defeat them in order to get the Magic Stone. Defeat 1 boss and set out for the Magic Stone! | 400 2 |
Chapter 3
| Name | Task | Rewards |
|---|---|---|
| New Skill | The same character can learn different skills. Try using the 3rd skill of Knight «Chaotic Strike» for 1 time. | 20 20 |
| Forge Weapon | You’ve figured out how to make the weapons after obtaining them. Forge 1 weapon at the Forge Table in the Workshop. | 400 |
| Valiant Challenge | Find the battle too easy? Complete 1 challenge on the Task Board for something new (solo mode only). | 400 |
| Craft Armour Mount | In a world where technology and magic co-exist, you can craft 1 armor mount at the Robotics Facility in the Workshop and you will be able to battle in the mecha form. | 400 |
| Protect the Magic Stone | Retrieve the Magic Stone Fragment which keeps the world in balance! In Level Mode, defeat a boss who guards the fragment, complete the game and have your rewards calculated at the end-of-the-game screen. | 1000 2 |
Wanted Tasks
A completed Wanted task.
- The player is required to kill the target enemy for a given number of times in each task.
- Each day, 1 to 2 new Wanted tasks will appear. The Task Board can hold up to 4 Wanted tasks.
- If Boss Rush Mode is unlocked, the lower left task will always refresh everyday, with the reward being two Feathers of Valkyrie.
- These Wanted tasks do not need to be accepted. Simply go to play and kill enough targets and return to claim reward.
- Kills gained in Multiplayer, Boss Rush Mode and The Origin count towards the tasks.
- Kills gained from minions summoned by bosses do not count toward the tasks.
- Be careful that killing the wrong enemies will not count (for example, a task requires brown Chester, which means that kills for the blue Chester do not count).
- It is possible to discard a Wanted task by using the button at the lower left. This is useful if the player is given a quest which they cannot complete, and they can wait until tommorow for applicable task replacements.
- Unlike most things that are undone by rerolling a level, enemy/boss tally isn’t. The player can use this to their advantage, completing any given level twice for more kills.
Challenge Tasks
A challenge task.
- The player is required to complete the game under 4 random conditions.
- The conditions are refreshed every day.
- Completing a challenge after refreshing date will count as completing the challenge of next day, and will yield the corresponding reward.
- It is required to accept the Challenge by choosing the post and activating it. It is also possible to deactivate by the same method or interact with Officer twice.
- In Multiplayer mode, however, the host has an option of picking some random conditions to start the game. These conditions can be random ones different from the daily task and do not offer additional rewards.
- It is possible to accept and decline Challenge as many times as possible, however the reward can only be claimed once every day. (Unless the player deletes and re-installs the game, and then get back their cloud saves)
- Some challenge conditions are either partially applied or not applied at all in the Lobby.
- After completing a daily challenge, the player can talk to Officer and pay 200 gems to change conditions. This can be done 15 times a day.
- This will not grant new rewards by completing the new conditions, however. These conditions will also be lost if they are not used immediately in the next run.
- It is possible to bring conditions into The Origin, and some of them can be activated correctly, but it is impossible to complete a challenge since it is impossible to win.
- NPC Officer can give random conditions. Doing so does not affect the state of challenges.
List of Conditions
| Condition Symbol | Description/Notes |
|---|---|
|
|
No pets or mercenaries
▲ top |
|
|
Enemy defense +1
▲ top |
|
|
More enemies in the dungeon
▲ top |
|
|
More aggressive enemies!
▲ top |
|
|
Enemies move faster
▲ top |
|
|
Enemy debuff time -50%
▲ top |
|
|
Enemy HP +100%
▲ top |
|
|
Enemy fire rate up!
▲ top |
|
|
Store price +100%
▲ top |
|
|
Max number of buffs +3
▲ top |
|
|
Better defense, but shield does not regenerate
▲ top |
|
|
Max number of buffs -3
▲ top |
|
|
Skill cooldown -50%
▲ top |
|
|
Skill cooldown +100%
▲ top |
|
|
Increase revival times
▲ top |
|
|
Elite enemies appear more often
▲ top |
|
|
You can worship multiple statues
▲ top |
|
|
Weapons get reforged at the start of each level
▲ top |
|
|
Get a weapon when entering a new biome
▲ top |
|
|
Max HP =1
▲ top |
|
|
Infinite energy
▲ top |
|
|
Weapon crit rate +100%, crit damage -50%
▲ top |
|
|
Weapon attack +100%, fire rate -50%
▲ top |
|
|
Weapon fire rate +100%, attack -50%
▲ top |
|
|
Options -2 when you choose buffs
▲ top |
|
|
Options +2 when you choose buffs
▲ top |
|
|
More rooms in the dungeon
▲ top |
|
|
Melee weapons only
▲ top |
|
|
Max energy -50%
▲ top |
|
|
Good Luck
▲ top |
|
|
Bad Luck
▲ top |
|
|
Gigantism
▲ top |
|
|
Dwarfism
▲ top |
|
|
Regenerate HP when it’s below 50%
▲ top |
|
|
Fight with 2 slightly nerfed bosses in each Boss room
▲ top |
|
|
May switch character when you enter a new level
▲ top |
|
|
Increase the number of bonus rooms
▲ top |
|
|
Can only carry one weapon
▲ top |
|
|
Increase critical damage
▲ top |
|
|
Random levels
▲ top |
|
|
Monsters split into two when their HP is below 50%
▲ top |
|
|
All weapons are equipped with attachments
▲ top |
|
|
Monsters shift to a different position the moment they get hit
▲ top |
|
|
Vision is limited
▲ top |
|
|
Functional UI is disabled
▲ top |
|
|
When you take a hit, a random debuff will be applied to you. The effect only triggers once every 5 seconds
▲ top |
|
|
Pet is gigantic, more aggressive and deals higher damage
▲ top |
|
|
Bombs and coins may spawn in chests when you clear a room
▲ top |
|
|
A mount awaits when you enter a new biome
▲ top |
|
|
Deja Vu («Have I been here before?»)
▲ top |
|
|
Inferior Medicament (All recovery -50%)
▲ top |
|
|
Weapon Overheating
▲ top |
|
|
Config Error (It all started from a warm, lovely afternoon and a dozy, drowsy developer)
▲ top |
|
|
Time Fluctuation (Your movement speed randomly increases or decreases)
▲ top |
|
|
Killing Spree (You get stronger as you acquire a killstreak)
▲ top |
|
|
Sales Day
▲ top |
|
|
Strong Body
▲ top |
|
|
Frostbite
▲ top |
|
|
Tenacity
▲ top |
|
|
Deranged
▲ top |
|
|
Blessing Staff
▲ top |
|
|
Curse of Grave Robbers
▲ top |
|
|
Slightly increases max HP, movement speed, fire rate and critical rate
▲ top |
|
|
Max armor and max HP are fixed at 1. Max energy is fixed at 999
▲ top |
|
|
Cancels 1 increased Pressure Level’s weight on enemy resistance to control effects
▲ top |
|
|
Killing monsters have a chance to revive all teammates
▲ top |
|
|
Monster movement speed -1%
▲ top |
|
|
The spawn chance of mutant monsters +2%
▲ top |
|
|
Damage taken by the player +1, damage taken by the monster +2
▲ top |
|
|
Improves enemy immunity to crowd control
▲ top |
|
|
The whole team (all the team members combined) can’t revive more than 2 times. If one is revived by a weapon
▲ top |
|
|
Complete the game within 12 minutes (normal mode) or 16 minutes (badass mode)
▲ top |
|
|
Characters may suddenly become larger or smaller over time. Movement speed is adjusted as well, but not health and armor
▲ top |
|
|
Sometimes enemy blimp will bomb the room. Enemies take 8 damage while players take 4 (5 in badass)
▲ top |
|
|
Enemies and players will explode 3 seconds after death. Players make larger explosion. These explosions hurt players
▲ top |
|
|
Meteors fall from time to time. These meteors do not damage enemies
▲ top |
|
|
Enemies, upon death, have a chance to open a rift of time and space
▲ top |
|
|
▲ top |
|
|
Novice Hunter
Complete 1 task Reward: a seed of Bamboo (Plant) |
|
|
veteran Hunter
Complete 10 tasks Reward: Officer as a playable character and a seed of Magic Flower |
|
|
Legendary Hunter
Complete 100 tasks Reward: a seed of Devil’s Snare (Plant) |
|
|
Mining Expert
Get 800 coins in 1 challenge Reward: none |
|
|
Embrace Challenges
Accept a total of 30 different challenge conditions and complete these Level Mode games. Reward: none |
Trivia
General
- This feature was added in Update 1.9.0.
A challenge task from before 4.1.0.
- Until Update 4.1.0, the Challenge Task had a different appearance.
- Some of the conditions have references:
- The icon of «Better defense» condition is a reference of the icon of «Nuclear Disarmament» used worldwide.
- The icon of «Good Luck» condition is a reference to a rumor that people can get good luck with a 4-leaf clover.
- The icon of «Bad Luck» condition is a reference to the British superstition that black cats bring bad luck (most notably when they cross a person’s path).
- The icon of «Double skill CD» is a reference to The Persistence of Memory by Salvador Dali.
- The icon of «Dwarfism» is a reference of the shrinking device in the Doraemon series.
- The icon of «Get new weapon» is a reference to the way sword weapons are displayed in the game Spirit of Darkness 3, or to the famous British legend «Sword in Stone».
- The icon of «Can only carry one weapon» condition is a reference of the novel «The Return of the Condor Heroes,» where the protagonist Yang Guo is a martial artist with only one arm.
- In detail, Yang Guo lost one arm during a duel, but was saved by the Divine Condor. He then learned to wield a powerful great sword with the remaining arm.
- The icon of «Increase critical damage» condition is a reference of a Chinese meme, where a guy claims that «I’ll prove to you that my blade is toxic» while licking it, then he collapses due to the poison.
- The original scene however, is from a Japanese TV series: The Hero Yoshihiko and the Demon King’s Castle: Poison Knife Scene.
- The behavior of «Monsters shift to a different position the moment they get hit» condition involves blue and yellow portals, which are a reference of the Portal series’ Aperture Science Handheld Portal Device’ attacks, which fires portals on suitable surfaces.
- The icon of «Gigantic pet» condition is a reference of Shobon’s action (especially the effect of giant mushroom,) an action game known to have many shoutouts and death traps.
- The icon of «increase revival time» condition is a reference of The ancient Egyptian hieroglyph «Ankh«.It is symbolize life,also is the symbol of gods.It is commonly seen on ancient Egyptian tombstones, mummies, pharaohs’ and gods’ hands.It can bring health and happiness.
Bugs
- When first added, there were several glitches:
- The most infamous glitch is that the «More rooms in the dungeon» condition couldn’t be completed in the past.
- The reason is because when entering 3-6, there would be one extra room that had no enemies yet it would lock when the player entered, effectively preventing them from obtaining the Magic Stone and finishing the game.
- Some tablet users had a screen resolution issue that pushed the ‘Accept’ button off-screen. This prevented them from accepting any Challenges.
- Axe-type weapons and Blind Missile Battery were bugged and not affected by «Weapon attack +100%, fire rate -50%» and «Weapon fire rate +100%, attack -50%» conditions.
- The rewards of challenges could be claimed more than once a day, if the player completed the challenge more than once in the same day.
- The health-reducing effect of the «Dwarfism» condition did not work.
- Fire rate of weapons able to speed up over time was not affected by conditions regarding weapon damage and fire rate.
- The «Weapons get reforged at the start of each level» condition would occur in level 3-6 at that time, such that the inventory when touching the Magic Stone could be different from the certificate.
- In fact, the content of the «Game Clear» certificate is decided before entering 3-6.
- Extra statue effects would be discarded upon entering a new level.
- It was possible to get opposite conditions (like «Max buffs +3» and «Max buffs -3» together) when starting a multiplayer game.
- The most infamous glitch is that the «More rooms in the dungeon» condition couldn’t be completed in the past.
- All of the glitches above were fixed in Update 1.9.2.
- Before Update 1.9.7, the Health Buff could be used together with «Max HP= 1» condition, though having no effect.
- However, using the Caterpillar Fungus could prevent the buff from appearing in the choice list, such that it’s not useless.
- Before Update 2.0.0, the damage of One Punch would be displayed as «199» under «Weapon attack +100%, fire rate -50%» condition, instead of «1998» due to limited space. When fixed, the number is now shown in smaller font.
- This also happened for the Prototype Railgun under «Weapon crit rate +100%, crit damage -50%» condition, where the critical chance was «-25%~100%» but shown as «-25%~10» instead.
- Before Update 2.0.5, the «Better defense, but shield does not regenerate» would affect the mounts, such that they would be invincible if they had any defense.
- During Update 2.0.5, under the ‘Weapon crit rate +100%, crit damage -50%’ condition, weapons that cause debuffs upon critical hits (except for bows, Spike Knives and Frost Spear) could deal double damage on critical hits, regardless of having the Elemental Buff or not.
- Also, between Update 1.9.2 and Update 2.1.0, elemental weapons would deal 200% damage on critical hits with the Elemental Buff.
- During Update 2.1.0, when both «Weapon crit rate +100%» and «Increase crit damage» conditions were activated, weapons can effectively deal 200% damage on critical hits.
- A glitch may occur in Update 2.1.5, where if a player accepts the «Max HP= 1» condition but then cancels it and starts a run directly, the player will start with the correct max health, but the current health will be 1.
- When Boss Rush Mode was first introduced in Update 2.2.0, the lower left task could only give one Feather of Valkyrie.
- Also at that time, kills gained in Boss Rush Mode did not count toward the Wanted tasks.
- There was a glitch before Update 2.2.0, where if Baby Dragon Bros appeared as the main boss under the «Fight with 2 slightly nerfed bosses in each Boss room» condition, the second boss would be glitched that its banner would not appear, and the boss health bar would not include its share. This glitch is purely visual.
- When the «Increase the number of bonus rooms» condition was first introduced, it could create two bonus rooms of the same type, like with 2 statues or 2 mercenaries.
- It was possible to hire two mercenaries and they could work normally in the current floor. However when moving to next floor, the one hired first would be lost.
- Before Update 2.3.0, the «Increase revival times» condition was known as «You can resurrect twice» and was useless in multiplayer.
- When Toxic Worm was first added, its Wanted Task was glitched that it could not be completed.
- Some other tasks would also show a white square and also cannot be completed.
- Before Update 2.4.0, fire and poison pools created by weapons were not affected by weapon challenges.
- Random levels,Monsters split into two when their HP is below 50%,Monsters shift to a different position the moment they get ,Functional UI is disabled,Vision is limited,All weapons are equipped with attachments were added in update 2.7.0.
- Before Update 2.8.6, the characters wouldn’t have random skills, instead, characters used the last skill they have used. For example, if Knight’s skill was set to Superior Fire, it was impossible to change into a Knight with Dual Wield.
- This meant that locked skills or any skill from a locked character could be chosen, and when getting that character into a run, it would use that skill.
- Also, before this update, the the skin of the Shield NPC Paladin gives would always be the same of the Living Room skin.
- Before a change in Update 2.8.0, the «Random levels» condition would allow players to choose more buffs if they happened to reach later floors too early.
- When you take a hit, a random debuff will be applied to you. The effect only triggers once every 5 seconds,Pet is gigantic, more aggressive and deals higher damage,Bombs and coins may spawn in chests when you clear a room,A mount awaits when you enter a new biome were added in update 3.2.0.
- Weekly challenges were added in update 4.0.0.
- «Slightly increases max HP, movement speed, fire rate and critical rate» and «Max armor and max HP are fixed at 1. Max energy is fixed at 999» were added in Update 4.2.0, along with Airbender.
- At that time, Airbender NPC wouldn’t spawn, so players could not obtain these conditions normally. This was fixed in the next update, which also greatly increased the occurrence rate of the Airbender NPC for a short time.
- The Deja Vu condition was added in version 4.2.0 with other 6 new conditions. At that time, bringing this condition into the game again may lead to changes in the scene and monster layout, but the events encountered in the treasure chest room/special room remain unchanged; It may also be that the scene and monster layout remain unchanged, but the events encountered in the treasure chest room/special room change.
- When both Deja Vu and Config Error condition exist, players may encounter different monster positions.
- When players have Config Error condition,they may encounter relic hunters or other no-in-Neo-Isle-monsters in pirate support ships in Neo Isle biome. This may be a bug caused by the monsters on the pirate ship must be different’s limit is contradiction to this condition.
| Objects | |
|---|---|
| Living Room | Book Pile — Pet Food — Plant — TV — Safe — Fish Tank — Task Board — Beverage Vending Machine — Email — Lucky Cat |
| Garden | Magic Well — Training Dummy |
| Workshop | Forge Table — Redeem Machine |
| Magic Area | Matrix Portal — Ancient Portal — Holy Statue |
| Level Mode | Chests — Offering Pool — Reforging Furnace — Resetting Furnace — Water Dispenser — Vending Machines — Portals — Statues — Wishing Well — Signs — Claw Fun — Cage — New Year DinnerCNY |
Лагает соул кнайт что делать
Содержание
Список багов [ ]
Баг со сменой уровня [ ]
Если в начале биома вы выйдете из забега и снова зайдёте, то этаж может создаться заново вплоть до смены биома. Является одним из самых используемых багов.
Баг с неправильным расположением частиц [ ]
Баг с замороженными/оглушенными врагами [ ]
Замороженные / оглушенные враги (Ведьма, Большой Скелет) во время своих стремительных атак могут не оглушиться/заморозиться. При этом их атаки будут наносить урон.
Баг с «вылетающими» врагами [ ]
Баг с атакующими мертвецами [ ]
Иногда враги и боссы все еще могут атаковать после того, как их убили (однако они не могут быть повреждены или быть целью). Например, убийство во время средней атаки Великого Мага может заставить его продолжать распылять пули (которые могут нанести урон) даже после его смерти. Большой скелет может продолжать атаковать игрока и наносить урон. Это также видно на примере Рождественской Энт с атакой самонаводящихся пуль, где она не покажет свой мертвый спрайт, пока не закончится. Обычно это исправляется после окончания атаки.
Баг с неправильным прицелом турелей [ ]
Баг с Огромным топором [ ]
Баг со спутниками [ ]
Иногда последователи могут выйти из комнаты за барьеры. Враги все еще могут захватить их, и они также попытаются атаковать через барьеры. Чаще всего они могут быть заперты за пределами комнаты после входа игрока.
Баг с застреванием в стене [ ]
Баг со спрятанными сундуками [ ]
После зачистки комнаты сундуки могут быть найдены за блоками/структурами (редко они также могут быть на одной площади).
Баг с закрытыми комнатами в Мультиплеере [ ]
Лаг может заставить игроков покинуть границы комнаты/выйти из комнаты или войти в комнату, но не быть запертым (все враги не будут атаковать и не будут получать урон). Последнее также может случаться редко в одиночной игре и обычно исправляется, когда приближается к другому входу в комнату.
Баг с анимацией [ ]
Это происходит в разных версиях. Иногда, если персонаж (боссы, а иногда и спутники) умирает, спрайт не превращается в спрайт умершего, не перемещается и не атакует. В некоторых других случаях спрайт может быть белым. В случае с боссами причина появления спрайта, по-видимому, заключается в том, что вы убили босса примерно в тот же момент, когда босс подвергается анимации для атаки, что приводит в замешательство игру таким образом, что он не знает, какой спрайт использовать, и использует вместо этого по умолчанию. Это стало намного реже с версии 2.5.5, чем было раньше, но все еще работает.
Баг с застреванием врагов [ ]
Начиная с версии 1.7.9, иногда враги (как правило, те, которые остаются неизменными при жизни) появляются внутри или застревают в блоке или стене. Если враг, который застрял, способен двигаться, он может выйти без проблем. В 2.5.5 они обычно застревают в углах графики, вероятно, потому что они новы и мешают шаблонам появления врага.
Баг с неубиваемыми врагами [ ]
Иногда, играя в многопользовательском режиме, враги могут стать полностью невосприимчивыми ко всему входящему урону и медленно скользить к стенам. Также вы можете подтолкнуть их в этом состоянии, хотя это не поможет вообще. Если вам повезет, игра может остаться нормальной, и вы сможете снова убивать врагов.
Баг с блокированием оружия [ ]
В некоторых случаях это приведет к блокировке сундуков для одного игрока.
Баг с челленджами [ ]
Баг с лазером босса [ ]
Баг с виолой семицветной [ ]
Если какой-либо игрок, кроме хоста в многопользовательской игре, использует Виолу семицветную, баффы будут отображаться соответственно на их экране, но не на экране хоста, так как хост не имеет положительного эффекта от растения. Поскольку только хозяин может выбирать баффы, это означает, что другие игроки не смогут получить преимущества от Виолы семицветной. Из-за задержки баффы могут появляться на всех уровнях на экранах гостей, даже если у них нет Виолы семицветной.
Баг с Бумерангом [ ]
Баг с именами оружий [ ]
Баг с Тетрадью смерти [ ]
Баг с 3 оружиями [ ]
Баг с ломаными сертификатами [ ]
По какой-то причине после того, как все предметы в Жилой комнате были разблокированы, значок, который обычно показывает, где будет достигнут следующий предмет, будет отображаться в 0-0 во время показа сертификата о завершении игры. Это исчезает, когда вы покидаете сертификат об окончании игры. Это также происходит после проигрыша в игре, но значок коробки отображается только до того, как вы нажмете кнопку «Играть» внизу, чтобы увидеть результаты запуска.
Баг с паузой [ ]
Для этого бага перейдите на доску заданий и взаимодействуйте с ней, чтобы увидеть ваши текущие задачи и задачи. Затем выйдите из игры, вернувшись на домашнюю страницу своего телефона, что заставит игру остановиться, снова войдите в игру и выйдите из доски заданий. Теперь вы сможете двигаться, находясь в меню паузы. Тем не менее, вы не можете сделать что-нибудь еще.
Баг со статуей берсерка [ ]
При вызове скелетов с помощью Посоха скелета при использовании 2 способности скелеты могут выглядеть слегка наклонными.
Баг с [ ]
Баг с невидимыми Привидениями [ ]
Привидения способны оставаться невидимыми в замороженном состоянии, несмотря на то, что заморозка обычно не дает врагам ничего делать. Это оставляет пустые кристаллы позади, которые не могут быть повреждены или нацелены. Призраки все еще не могут двигаться в этом состоянии. Вероятно, это связано с тем, что невидимость спланирована для срабатывания после атаки Призрака, поэтому не считается действием и может быть выполнена во время остановки, если Призрак смог атаковать до замораживания.
Баг с неотцентроваными спрайтами [ ]
Баг с револьверами [ ]
Баг с способностью вампира [ ]
Использование умения Вампира за пределами комнаты, полной врагов, не нанесет урона, но восстановит здоровье. Таким образом, вы можете начинать каждый бой с полной шкалой здоровья и навыком, готовым, если вы ждете перезарядки.
Баг с Лозой [ ]
Баг с двумя наёмниками [ ]
Есть баг, что если из клетки выпадает наёмник, то в комнате с восклицательным знаком можно будет нанять ещё одного. Однако разработчики всё продумали, и при переходе в другую комнату один из наёмников исчезает.
Баг с нунчаками [ ]
Баг с «Живыми мертвецами» [ ]
Баг с прыжком за стену и берсерком [ ]
Soul Knight Glitch Setup- Leap out of the Cellar (2.7.0)
Как перепрыгнуть через стену.
Баг с выходом из забега и избежанием смерти [ ]
С версии 2.9.0 и в последующих версиях, если выйти после смерти, то в меню кнопка с режимом не появится. Но если нажать на кнопку «Новая игра» и выйти, то появится кнопка с вашим забегом, где вы умерли. Нужно нажать на нее, и вы вернётесь в забег без зачисления возрождения.
Баг с бесплатным получением донатных персонажей [ ]
Чтобы бесплатно получить Паладина, Инженера, Оборотня, Вампира и Друида, надо скачать версию 1.7.8 и зайти в игру. После этого надо нажать на любого из них, нажать на кнопку доната и сразу отменить его.
Недоработка с цитатами в Секретной комнате [ ]
В секретной комате Кошка плюс говорит про то, что навык Оборотня скоро будет, хотя его уже добавили в обновлении 2.5.0.
Баг с пропастью между проходами [ ]
Иногда между проходами в комнаты могут быть пропасти. Наглядно этот баг можно увидеть на видео.
Баги в режиме «Мультиплеер» [ ]
Баг с режимами [ ]
Баг с воскрешением [ ]
Если вы используете умение Разбойника или выбиваетесь из диапазона возрождения во время оживления, вы можете оживить своих товарищей по команде, передвигаясь (без необходимости стоять в теле вашего партнера).
Баг с передвижными трупами [ ]
Часто мёртвые союзники продолжают двигаться и могут сбрасывать стрельбу.
Баг с потерей игрока в параллельном лобби [ ]
Некоторые игроки после игры в убойном режиме навсегда теряют играть в кооперативе. При подключении к мультиплееру, и входе в комнату, они окажутся в одиночном режиме.
Баг с невозможностью подключиться в режиме охоты на боссов [ ]
После серии охоты на боссов из 3 боёв. Некоторые игроки не смогут подключится в следующие дни, так как будет выдавать ошибку «не хватает перьев». Тем не менее перья может тратить только хост.
Баг с покупкой вещей в колодце желаний [ ]
Один игрок теряет возможность подносить пожертвования колодцу желаний или брать из него выпавшие вещи.
Баг с входом комнату [ ]
Когда игрок входит в комнату, другой игрок может остаться за стеной и не телепортироваться в гущу сражения.
Источник
почему лагает soul knight на телефоне
Почему лагает soul knight на телефоне

Краткое описание:
Совершенно новый взгляд на столь популярный жанр как пиксельные шутеры.
Использование модификаций игры пользователи осуществляют на свой страх и риск. Жалобы, связанные с игры после применения модификаций, рассматриваться не будут.
Бэкап на 2.3.5 Soul Knight (Пост Cpt.Who #91200856)
Открыты персонажи, много денег: Soul Knight (Пост 1BlueReei1 #58736536)
Бекап для версии 1.3.3, всё прилагается: Soul Knight (Пост 3asheJInPocTo #62787423)
Бекап для версии 1.3.5, открыты все персонажи, 0 джемс: com.ChillyRoom.DungeonShooter-20170717-194958.tar.gz ( 34,33 МБ )
эффекты статуй:
Статуя Рыцаря: Призыв рыцаря-последователя на 30 секунд. У вас может быть до 3 активных, но только на короткое время.
Статуя Волшебника : Выстреливает до 8 самонаводящихся волшебных
сфер в каждом направлении.
Статуя Священника : Создаёт зону перезарядки энергии в течение 4 секунд, которая восстанавливает 8 энергии в секунду.
Статуя вора : Крадет 1
золото у врага (ов) в пределах области, нанося 1-2 повреждения.
Статуя Эльфа : Испускает волну вокруг игрока, которая препятствует атакам врагов в течение нескольких секунд, нанося 1-2 повреждения.
Статуя Ассасина : Бросает 3 проникающих лезвия перед игроком, наносящие 4 повреждения каждый, с очень быстрой перезарядкой. (Работает с перком Точности)
Немного о начальных бонусах:Soul Knight (Пост Tiesto4Life #61754761)
В комнате выбора героев есть множество полезных предметов, с помощью которых можно, например, увеличить начальные навыки героя. В обмен на кристаллы, конечно. Для взаимодействия с предметом нужно выбрать героя, подойти к предмету и тапнуть кнопку стрельбы (меняется на «взаимодействие» при подходе к предмету). Поднятие характеристики на 1 стоит 500 кристаллов, последующие уровни потребуют на 500 кристаллов больше. Список предметов по часовой стрелке от выхода в боевую зону:
Статуя Волшебника : В последнем обновлении немного переделали. Теперь стреляет на 180 градусов вперёд (т.е. на половину круга, а не на весь).
Статуя Эльфа : Не совсем согласен с приведённой трактовкой. На моём опыте она просто отталкивает врагов. На их атаки это практически не сказывается (я говорю про дальние атаки, а не ближнего боя).
Статуя Ассасина : А у этой статуи есть интересный эффект: клинки (или иглы), что он кидает, считаются атакой. Это тоже надо учитывать, т.к. при использовании рыцарем количество клинков (игл) увеличивается. В то же время, если использовать на ассасине, то приходится успевать наносить его атаку до того, как клинки по кому-нибудь попадут. Иначе его абилка просто прогорает.
Почему лагает soul knight на телефоне
Краткое описание:
Совершенно новый взгляд на столь популярный жанр как пиксельные шутеры.
Использование модификаций игры пользователи осуществляют на свой страх и риск. Жалобы, связанные с игры после применения модификаций, рассматриваться не будут.
Бэкап на 2.3.5 Soul Knight (Пост Cpt.Who #91200856)
Открыты персонажи, много денег: Soul Knight (Пост 1BlueReei1 #58736536)
Бекап для версии 1.3.3, всё прилагается: Soul Knight (Пост 3asheJInPocTo #62787423)
Бекап для версии 1.3.5, открыты все персонажи, 0 джемс: com.ChillyRoom.DungeonShooter-20170717-194958.tar.gz ( 34,33 МБ )
эффекты статуй:
Статуя Рыцаря: Призыв рыцаря-последователя на 30 секунд. У вас может быть до 3 активных, но только на короткое время.
Статуя Волшебника : Выстреливает до 8 самонаводящихся волшебных
сфер в каждом направлении.
Статуя Священника : Создаёт зону перезарядки энергии в течение 4 секунд, которая восстанавливает 8 энергии в секунду.
Статуя вора : Крадет 1
золото у врага (ов) в пределах области, нанося 1-2 повреждения.
Статуя Эльфа : Испускает волну вокруг игрока, которая препятствует атакам врагов в течение нескольких секунд, нанося 1-2 повреждения.
Статуя Ассасина : Бросает 3 проникающих лезвия перед игроком, наносящие 4 повреждения каждый, с очень быстрой перезарядкой. (Работает с перком Точности)
Немного о начальных бонусах:Soul Knight (Пост Tiesto4Life #61754761)
В комнате выбора героев есть множество полезных предметов, с помощью которых можно, например, увеличить начальные навыки героя. В обмен на кристаллы, конечно. Для взаимодействия с предметом нужно выбрать героя, подойти к предмету и тапнуть кнопку стрельбы (меняется на «взаимодействие» при подходе к предмету). Поднятие характеристики на 1 стоит 500 кристаллов, последующие уровни потребуют на 500 кристаллов больше. Список предметов по часовой стрелке от выхода в боевую зону:
Статуя Волшебника : В последнем обновлении немного переделали. Теперь стреляет на 180 градусов вперёд (т.е. на половину круга, а не на весь).
Статуя Эльфа : Не совсем согласен с приведённой трактовкой. На моём опыте она просто отталкивает врагов. На их атаки это практически не сказывается (я говорю про дальние атаки, а не ближнего боя).
Статуя Ассасина : А у этой статуи есть интересный эффект: клинки (или иглы), что он кидает, считаются атакой. Это тоже надо учитывать, т.к. при использовании рыцарем количество клинков (игл) увеличивается. В то же время, если использовать на ассасине, то приходится успевать наносить его атаку до того, как клинки по кому-нибудь попадут. Иначе его абилка просто прогорает.
Почему Soul Knight Лагает и Как этого Избежать? 😬📶
Показувати елементи керування програвачем
КОМЕНТАРІ • 184
Сорян но видео Без полезное по сколько те способы борьбы с лагами которые ты перечислил не сработали
Как сделать так чтобы не лагало на 70 волне в портале🤣
Я просто играю в режиме полëта
Это бред. Когда я играю с вай фаем всё окей, только мини мини фризы изза слабого телефона. А когда играю без интернета-каждые несколько секунд игра зависает на 3 секунды, вообще невозможно играть
думал найти ответ на вопрос с вот этим секундным стоянием, но у автора оно тоже есть. Этот лаг фиксится подключением к вайфаю, но знаете, что происходит потом? Загрузка рекламы в кеш телефона, я балдею
У меня наоборот без интернета лагает
У меня зависает каждые 9 секунд.
У меня наоборот. Когда я с интернетом захожу, то у меня игра не лагает. Я могу зайти в игру с интернетом и его выключить, но без интернета и без лагов в игру не поиграть.
Как получить такого панду?
У меня тел тянет игры с ПК а эта сама себя не вывозит походу так всё время у меня 60 ФПС
У мегя сначала все ок, потом 5 минут играю, начинает лагать и перестает отвечать, придется выключать,что делать?
У меня вопше вылетает пж помоги
Им походу насрать на лаги
Это видео вышло месяц назвд но я напишу 2 способ помог мне новый телеф купили думаю что за фигня лвгает а тут прочто спасибо по братски
И где тут убрать лаги
Hello World а почему так тихо разговариваешь ничего не слышно говори пожалуйста чуть по громче)
п.с. это не замечание лол)
Это из-за сранных пуль. Миллион пуль.
Можно будет у вас взять интервью?типо почему вы решили сделать канал и т.д.,людям будет интересно),выздоравливай))
@Hello World вау столько в игре добился и сам вот кем я буду воспользоваться
У соул кнайта оптимизация нормальная!У моего друга Honor 4a и у него не лагает соул кнайт!А насчёт онлайн геймов,использую 4g
У меня одного наверно так лагает что я даже в лобби не могу нормально двигаться. =(
Какой должен быть телефон чтобы лагал соул кнайт?
у тя лагает на болоте?
Блин,проблема в том что приложение лагает а не телефон и не вай фай, это сама игра после обновы такая
@Tima Put Это правильно 👍
@Kirill Demidenko поздравляю,у меня телефон не мощный и поэтому я постоянно убираю кеш
@Tima Put Я только что кеш с помощью CCleaner удалил (15 гигов, между прочим) и лагать перестало. Ну не удивительно, ведь не чистил с марта)
@Kirill Demidenko тоже лагает?
@Kirill Demidenko а без интернета когда заходишь?
Кст ворлдус вот смотри у меня есть скин но бойца нет чисто теоретически я могу играть на скине и вкачивать его?
Привет а где надо разместить аквариум скажи пж :/
Я довно не играл просто 😐
В лобби, в правом нижнем углу
У меня вообще дико тормозит локация «Болото», и я не могу нормально её проходить, хотя остальные локации у меня вообще не лагают, как думаешь с чем это связано?
Знаю вопрос не по теме, но скажи пж. Когда я скрафчу способность берсерка на столе конструктора(удар сверху) я получу его самого?
Привет, у меня был к тебе вопрос, я вот решил прокачать разбойника до макса, и 2 активку взял, это хороший выбор, или зря?
Ну, вторая больше подходит для спидранов, а в основном очень популярна именно первая ульта, т.к. чем больше перекатываешься, тем ты не уязвимее, я думаю выбор уж точно не плохой, у меня самого есть вторая ульта
Почему у меня игра не лагает?
прочитай мой коммент вопрос как прлочить достиженийе секртный детиктив
но я думаю жто лаги на да попросить у разробочиков или перезапистить сол
У тебя какой телефон
Это с первой ультой
Я нашел баг за разбойника с помощью статуи берсерка и карамельного боярышника когда ультуеш почему-то дальность атаки увеличивается с каждым кувырком с статуей
Нужно включить 4× MSAA
@DeVY TSSS да, в настройках телефона, сначало зайди О Телефоне, потом кликаеш на Версия MIUI, и стаёш Разработчиком, потом заходиш в Для Разработчиков, и ищешь Включить 4×MSAA
А у меня не лагает 😎
Можно выключить вибрации телефона в паузе игры на нулевой уровень
Одна из причин, это перенагружение хитбоксами, к примеру, если хитбоксов слишком много, это лёгкий примеря в режме начало, начинает дико лагать, от колличества пикселей, хитбоксов, телефон перенагружен всем этим просто. Даже сервера игр вряд ли держат это, вот почему ещё мультиплеер плоо работает, это простая причина!
Интересный факт: если ударить салют в лобби рыбой то салют взорвётся!
Если ударить рыбой фейерверк именно взорвётся а не устроит салют.
1:этот баг исправят разрабы 2:у меня айфон 5с если что
У меня лагает Соул найт тогда когда я захожу с интернетом, и на 10% или меньше процентов заряда.
Почему Soul Knight Лагает и Как этого Избежать? 😬📶
Показать панель управления
Комментарии • 184
Сорян но видео Без полезное по сколько те способы борьбы с лагами которые ты перечислил не сработали
Как сделать так чтобы не лагало на 70 волне в портале🤣
Я просто играю в режиме полëта
Это бред. Когда я играю с вай фаем всё окей, только мини мини фризы изза слабого телефона. А когда играю без интернета-каждые несколько секунд игра зависает на 3 секунды, вообще невозможно играть
думал найти ответ на вопрос с вот этим секундным стоянием, но у автора оно тоже есть. Этот лаг фиксится подключением к вайфаю, но знаете, что происходит потом? Загрузка рекламы в кеш телефона, я балдею
У меня наоборот без интернета лагает
У меня зависает каждые 9 секунд.
У меня наоборот. Когда я с интернетом захожу, то у меня игра не лагает. Я могу зайти в игру с интернетом и его выключить, но без интернета и без лагов в игру не поиграть.
Как получить такого панду?
У меня тел тянет игры с ПК а эта сама себя не вывозит походу так всё время у меня 60 ФПС
У мегя сначала все ок, потом 5 минут играю, начинает лагать и перестает отвечать, придется выключать,что делать?
У меня вопше вылетает пж помоги
Им походу насрать на лаги
Это видео вышло месяц назвд но я напишу 2 способ помог мне новый телеф купили думаю что за фигня лвгает а тут прочто спасибо по братски
И где тут убрать лаги
Hello World а почему так тихо разговариваешь ничего не слышно говори пожалуйста чуть по громче)
п.с. это не замечание лол)
Это из-за сранных пуль. Миллион пуль.
Можно будет у вас взять интервью?типо почему вы решили сделать канал и т.д.,людям будет интересно),выздоравливай))
@Hello World вау столько в игре добился и сам вот кем я буду воспользоваться
У соул кнайта оптимизация нормальная!У моего друга Honor 4a и у него не лагает соул кнайт!А насчёт онлайн геймов,использую 4g
У меня одного наверно так лагает что я даже в лобби не могу нормально двигаться. =(
Какой должен быть телефон чтобы лагал соул кнайт?
у тя лагает на болоте?
Блин,проблема в том что приложение лагает а не телефон и не вай фай, это сама игра после обновы такая
@Tima Put Это правильно 👍
@Kirill Demidenko поздравляю,у меня телефон не мощный и поэтому я постоянно убираю кеш
@Tima Put Я только что кеш с помощью CCleaner удалил (15 гигов, между прочим) и лагать перестало. Ну не удивительно, ведь не чистил с марта)
@Kirill Demidenko тоже лагает?
@Kirill Demidenko а без интернета когда заходишь?
Кст ворлдус вот смотри у меня есть скин но бойца нет чисто теоретически я могу играть на скине и вкачивать его?
Привет а где надо разместить аквариум скажи пж :/
Я довно не играл просто 😐
В лобби, в правом нижнем углу
У меня вообще дико тормозит локация «Болото», и я не могу нормально её проходить, хотя остальные локации у меня вообще не лагают, как думаешь с чем это связано?
Знаю вопрос не по теме, но скажи пж. Когда я скрафчу способность берсерка на столе конструктора(удар сверху) я получу его самого?
Привет, у меня был к тебе вопрос, я вот решил прокачать разбойника до макса, и 2 активку взял, это хороший выбор, или зря?
Ну, вторая больше подходит для спидранов, а в основном очень популярна именно первая ульта, т.к. чем больше перекатываешься, тем ты не уязвимее, я думаю выбор уж точно не плохой, у меня самого есть вторая ульта
Почему у меня игра не лагает?
прочитай мой коммент вопрос как прлочить достиженийе секртный детиктив
но я думаю жто лаги на да попросить у разробочиков или перезапистить сол
У тебя какой телефон
Это с первой ультой
Я нашел баг за разбойника с помощью статуи берсерка и карамельного боярышника когда ультуеш почему-то дальность атаки увеличивается с каждым кувырком с статуей
Нужно включить 4× MSAA
@DeVY TSSS да, в настройках телефона, сначало зайди О Телефоне, потом кликаеш на Версия MIUI, и стаёш Разработчиком, потом заходиш в Для Разработчиков, и ищешь Включить 4×MSAA
А у меня не лагает 😎
Можно выключить вибрации телефона в паузе игры на нулевой уровень
Одна из причин, это перенагружение хитбоксами, к примеру, если хитбоксов слишком много, это лёгкий примеря в режме начало, начинает дико лагать, от колличества пикселей, хитбоксов, телефон перенагружен всем этим просто. Даже сервера игр вряд ли держат это, вот почему ещё мультиплеер плоо работает, это простая причина!
Интересный факт: если ударить салют в лобби рыбой то салют взорвётся!
Если ударить рыбой фейерверк именно взорвётся а не устроит салют.
1:этот баг исправят разрабы 2:у меня айфон 5с если что
У меня лагает Соул найт тогда когда я захожу с интернетом, и на 10% или меньше процентов заряда.
Источник
The Task Board by default.
The Task Board is located at the top left corner of the Living Room. The Officer stands beside it.
- This item will change appearance according to the skin of Officer, or during special seasons.
It is unlocked once the player has reached level 2-3 with the Safe already unlocked.
It displays all the daily tasks upon interaction.
- Trying to interact with it in Multiplayer will show a message «Come next time when you play solo.»
- The Officer will have an exclamation mark over his head, which normally indicates that a task or challenge has been completed.
Once the player completes the tasks, they must interact with the Officer to claim the reward. Completing these tasks can yield gems and materials and very rarely blueprints.
- This is one of the better methods to collect Fertilizer, Free Trial Vouchers and the only method of obtaining Feather of Valkyrie once Boss Rush Mode is unlocked.
There are two types of tasks: Wanted Tasks and Challenge Tasks.
Road of Knights
The Road of Knights consists of 3 chapters, with 5 missions each. Rewards can be claimed for each mission completed, and additional rewards of 500, 750 and 1,000 Gems will be given after finishing 1, 3 and 5 missions per chapter, respectively. All missions of each chapter must be cleared before proceeding to the next one.
Chapter 1
| Name | Task | Rewards |
|---|---|---|
| Strike! | Welcome to the House of Knights! Please complete 1 game in any game mode. It is your duty to locate the Magic Stone and use its power to keep the world in order! | 400 |
| Grab a Weapon | What’s that in your hand? Use a total of 5 different weapons in any game mode! | 400 |
| Cast a Skill | Communicate with your inner self to unleash your full potential. Cast skill 10 in any game mode! | 400 |
| Collect a Buff | During the adventure, you will be able to collect «buffs», which can be used in combination with weapons and skills to achieve magical effects. Please collect a total of 6 different buffs in any game mode except for season mode. | 400 |
| Against All Odds | The best way to prove yourself is to defeat enemies. Show me what you got by defeating a total of 100 enemies in any game mode! | 500 1 |
Chapter 2
| Name | Task | Rewards |
|---|---|---|
| New Partners | There is a guy in the House of Knights who loves watching TV, yes, Rogue. Unlock and recruit him to come along in the adventure. | 500 |
| Betting Stronger | Level up! Power up! Own 1 lvl. 2 character and see if anything has changed. | 500 |
| Shopping Spree | Buy 1 item from the Trader in the Workshop. You can find legendary items here once in a while. | 400 |
| Harvest Day | Countless species of plants exist on the continent of Soul Knight, and their seeds can be planted in the garden. Harvest 1 plant in the garden area and see what you can get. | 400 2 |
| Boss Hunter | You should have seen the bosses in the dungeon and you need to defeat them in order to get the Magic Stone. Defeat 1 boss and set out for the Magic Stone! | 400 2 |
Chapter 3
| Name | Task | Rewards |
|---|---|---|
| New Skill | The same character can learn different skills. Try using the 3rd skill of Knight «Chaotic Strike» for 1 time. | 20 20 |
| Forge Weapon | You’ve figured out how to make the weapons after obtaining them. Forge 1 weapon at the Forge Table in the Workshop. | 400 |
| Valiant Challenge | Find the battle too easy? Complete 1 challenge on the Task Board for something new (solo mode only). | 400 |
| Craft Armour Mount | In a world where technology and magic co-exist, you can craft 1 armor mount at the Robotics Facility in the Workshop and you will be able to battle in the mecha form. | 400 |
| Protect the Magic Stone | Retrieve the Magic Stone Fragment which keeps the world in balance! In Level Mode, defeat a boss who guards the fragment, complete the game and have your rewards calculated at the end-of-the-game screen. | 1000 2 |
Exploration
| Name | Task | Rewards |
|---|---|---|
| Finding Shaman | What secrets are hidden in the Magic Area to the south of the Lobby? Words are that a magical shaman lives there. Complete Level 2-4 to unlock the Magic Area and talk to the shaman to learn more about his findings. | 400 1 |
| Acquainting with Valkyrie | Try to find Valkyrie in Level Mode. It is said that people have heard Valkyrie’s calling on the third floor. Find and help Valkyrie at least once and she will thank you for your kindness! (Helping Valkyrie 3 times can unlock Boss Rush. | 400 1 |
| Dark Blade | Unlock the character Assassin. He sits in the middle of the Lobby. Recruit him to join your badass band of playable heroes in House of Knight! | 3 |
| Water Your Plants | Watering is necessary for plants to grow in the Garden. Water 5 plants and see what surprises awaits you! | 5 |
| Craftsman | You have become more skilled at forging weapons. Forge 1 weapon of blue tier or higher at the Forge Table in the Workshop. | 15 |
| Adopt a Cat | On the left side of the Lobby, you can choose which pet to tag along with you. Unlock one cat pet as your follower. A house is not a home until there is a cat in it. (Rosemary Cat, Pepper, Purpur, Pudding, Officer Chilly, Snow, Smokey) | 5 |
| The Origin | The archaeological excavation of the portal has revealed the secrets of the ancient shrine. Go to the Magic Area to the south of the Lobby and use gems to activate the portal. Play a game in The Origin to discover the unknown details about how the Magic Stone was stolen in the forgotten era. | 400 1 |
| Matrix of the Lord of Evil | You have grown into a powerful warrior after many battles with the guards of the Magic Stone. In the Magic Area to the south of the Lobby, a portal connects to an unknown world. Please enter Matrix of the Lord of Evil to further hone your fighting skills. | 400 1 |
| Soul Knight Season | A season is a periodic event in Soul Knight. Talk to the girl sitting on the right side of the service desk in the Lobby to start the new season. Play a game in the season mode and try something new! | 400 1 |
| Fuel the Garden | Fertilizer, nature’s own powerhouse! Fertilize in your garden to accelerate their growth! | 400 1 |
Wanted Tasks
A completed Wanted task.
- The player is required to kill the target enemy for a given number of times in each task.
- Each day, 1 to 2 new Wanted tasks will appear. The Task Board can hold up to 4 Wanted tasks.
- If Boss Rush Mode is unlocked, the lower left task will always refresh everyday, with the reward being two Feathers of Valkyrie.
- These Wanted tasks do not need to be accepted. Simply go to play and kill enough targets and return to claim reward.
- Kills gained in Multiplayer, Boss Rush Mode and The Origin count towards the tasks.
- Kills gained from minions summoned by bosses do not count toward the tasks.
- Be careful that killing the wrong enemies will not count (for example, a task requires brown Chester, which means that kills for the blue Chester do not count).
- It is possible to discard a Wanted task by using the button at the lower left. This is useful if the player is given a quest which they cannot complete, and they can wait until tommorow for applicable task replacements.
- Unlike most things that are undone by rerolling a level, enemy/boss tally isn’t. The player can use this to their advantage, completing any given level twice for more kills.
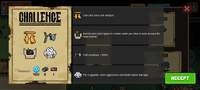
Challenge Tasks
A challenge task.
- The player is required to complete the game under 4 random conditions.
- The conditions are refreshed every day.
- Completing a challenge after refreshing date will count as completing the challenge of next day, and will yield the corresponding reward.
- It is required to accept the Challenge by choosing the post and activating it. It is also possible to deactivate by the same method or interact with Officer twice.
- In Multiplayer mode, however, the host has an option of picking some random conditions to start the game. These conditions can be random ones different from the daily task and do not offer additional rewards.
- It is possible to accept and decline Challenge as many times as possible, however the reward can only be claimed once every day. (Unless the player deletes and re-installs the game, and then get back their cloud saves)
- Some challenge conditions are either partially applied or not applied at all in the Lobby.
- After completing a daily challenge, the player can talk to Officer and pay 200 gems to change conditions. This can be done 15 times a day.
- This will not grant new rewards by completing the new conditions, however. These conditions will also be lost if they are not used immediately in the next run.
- It is possible to bring conditions into The Origin, and some of them can be activated correctly, but it is impossible to complete a challenge since it is impossible to win.
- NPC Officer can give random conditions. Doing so does not affect the state of challenges.
List of Conditions
| Condition Symbol | Description/Notes | ||
|---|---|---|---|
|
|
No pets or mercenaries
▲ top |
||
|
|
Enemy defense +1
▲ top |
||
|
|
More enemies in the dungeon
▲ top |
||
|
|
More aggressive enemies!
▲ top |
||
|
|
Enemies move faster, but will be stunned from time to time
▲ top |
||
|
|
Enemy debuff time -50%
▲ top |
||
|
|
Enemy HP +100%
▲ top |
||
|
|
Enemy fire rate up!
▲ top |
||
|
|
Store price +100%
▲ top |
||
|
|
Max number of buffs +3
▲ top |
||
|
|
Better defense, but shield does not regenerate during combat
▲ top |
||
|
|
Buff slot -1, but option +1 when you choose buffs.
▲ top |
||
|
|
Skill cooldown -50%
▲ top |
||
|
|
Skill cooldown +100%
▲ top |
||
|
|
Increase revival times
▲ top |
||
|
|
Elite enemies appear more often
▲ top |
||
|
|
You can worship multiple statues
▲ top |
||
|
|
Weapons get reforged at the start of each level
▲ top |
||
|
|
Get a weapon when entering a new biome
▲ top |
||
|
|
Max HP =1
▲ top |
||
|
|
Infinite energy
▲ top |
||
|
|
Weapon crit rate +100%, crit damage -50%
▲ top |
||
|
|
Weapon attack +100%, fire rate -50%
▲ top |
||
|
|
Weapon fire rate +100%, attack -50%
▲ top |
||
|
|
Buff slot +1, but option -1 when you choose buffs
▲ top |
||
|
|
Options +2 when you choose buffs
▲ top |
||
|
|
More rooms in the dungeon
▲ top |
||
|
|
Melee weapons only
▲ top |
||
|
|
Max energy -50%
▲ top |
||
|
|
Good Luck
▲ top |
||
|
|
Bad Luck
▲ top |
||
|
|
Gigantism
▲ top |
||
|
|
Dwarfism
▲ top |
||
|
|
Regenerate HP when it’s below 50%
▲ top |
||
|
|
Fight with 2 slightly nerfed bosses in each Boss room
▲ top |
||
|
|
May switch character when you enter a new level
▲ top |
||
|
|
Increase the number of bonus rooms
▲ top |
||
|
|
Can only carry one weapon
▲ top |
||
|
|
Increase critical damage
▲ top |
||
|
|
Random levels
▲ top |
||
|
|
Monsters split into two when their HP is below 50%
▲ top |
||
|
|
All weapons are equipped with attachments
▲ top |
||
|
|
Monsters shift to a different position the moment they get hit
▲ top |
||
|
|
Vision is limited
▲ top |
||
|
|
Functional UI is disabled
▲ top |
||
|
|
When you take a hit, a random debuff will be applied to you. The effect only triggers once every 5 seconds
▲ top |
||
|
|
Pet is gigantic, more aggressive and deals higher damage
▲ top |
||
|
|
Bombs and coins may spawn in chests when you clear a room
▲ top |
||
|
|
A mount awaits when you enter a new biome
▲ top |
||
|
|
Deja Vu («Have I been here before?»)
▲ top |
||
|
|
Inferior Medicament (All recovery -50%)
▲ top |
||
|
|
Weapon Overheating
▲ top |
||
|
|
Config Error (It all started from a warm, lovely afternoon and a dozy, drowsy developer)
▲ top |
||
|
|
Time Fluctuation (Your movement speed randomly increases or decreases)
▲ top |
||
|
|
Killing Spree (You get stronger as you acquire a killstreak)
▲ top |
||
|
|
Sales Day
▲ top |
||
|
|
Strong Body
▲ top |
||
|
|
Frostbite
▲ top |
||
|
|
Tenacity
▲ top |
||
|
|
Deranged
▲ top |
||
|
|
Blessing Staff
▲ top |
||
|
|
Curse of Grave Robbers
▲ top |
||
|
|
Slightly increases max HP, movement speed, fire rate and critical rate
▲ top |
||
|
|
Max armor and max HP are fixed at 1. Max energy is fixed at 999
▲ top |
||
|
|
Cancels 1 increased Pressure Level’s weight on enemy resistance to control effects
▲ top |
||
|
|
Killing monsters have a chance to revive all teammates
▲ top |
||
|
|
Monster movement speed -1%
▲ top |
||
|
|
The spawn chance of mutant monsters +2%
▲ top |
||
|
|
Damage taken by the player +1, damage taken by the monster +2
▲ top |
||
|
|
Improves enemy immunity to crowd control
▲ top |
||
|
|
The whole team (all the team members combined) can’t revive more than 2 times. If one is revived by a weapon
▲ top |
||
|
|
Complete the game within 12 minutes (normal mode) or 16 minutes (badass mode)
▲ top |
||
|
|
Characters may suddenly become larger or smaller over time. Movement speed is adjusted as well, but not health and armor
▲ top |
||
|
|
Sometimes enemy blimp will bomb the room. Enemies take 8 damage while players take 4 (5 in badass)
▲ top |
||
|
|
Enemies and players will explode 3 seconds after death. Players make larger explosion. These explosions hurt players
▲ top |
||
|
|
Meteors fall from time to time. These meteors do not damage enemies
▲ top |
||
|
|
Enemies, upon death, have a chance to open a rift of time and space
▲ top |
||
|
|
▲ top |

|
|
Novice Hunter
Complete 1 task Reward: a seed of Bamboo (Plant) |
|
|
veteran Hunter
Complete 10 tasks Reward: Officer as a playable character and a seed of Magic Flower |
|
|
Legendary Hunter
Complete 100 tasks Reward: a seed of Devil’s Snare (Plant) |
|
|
Mining Expert
Get 800 coins in 1 challenge Reward: none |
|
|
Embrace Challenges
Accept a total of 30 different challenge conditions and complete these Level Mode games. Reward: none |
Trivia
General
- This feature was added in Update 1.9.0.
A challenge task from before 4.1.0.
- Until Update 4.1.0, the Challenge Task had a different appearance.
- Some of the conditions have references:
- The icon of «Better defense» condition is a reference of the icon of «Nuclear Disarmament» used worldwide.
- The icon of «Good Luck» condition is a reference to a rumor that people can get good luck with a 4-leaf clover.
- The icon of «Bad Luck» condition is a reference to the British superstition that black cats bring bad luck (most notably when they cross a person’s path).
- The icon of «Double skill CD» is a reference to The Persistence of Memory by Salvador Dali.
- The icon of «Dwarfism» is a reference of the shrinking device in the Doraemon series.
- The icon of «Get new weapon» is a reference to the way sword weapons are displayed in the game Spirit of Darkness 3, or to the famous British legend «Sword in Stone».
- The icon of «Can only carry one weapon» condition is a reference of the novel «The Return of the Condor Heroes,» where the protagonist Yang Guo is a martial artist with only one arm.
- In detail, Yang Guo lost one arm during a duel, but was saved by the Divine Condor. He then learned to wield a powerful great sword with the remaining arm.
- The icon of «Increase critical damage» condition is a reference of a Chinese meme, where a guy claims that «I’ll prove to you that my blade is toxic» while licking it, then he collapses due to the poison.
- The original scene however, is from a Japanese TV series: The Hero Yoshihiko and the Demon King’s Castle: Poison Knife Scene.
- The behavior of «Monsters shift to a different position the moment they get hit» condition involves blue and yellow portals, which are a reference of the Portal series’ Aperture Science Handheld Portal Device’ attacks, which fires portals on suitable surfaces.
- The icon of «Gigantic pet» condition is a reference of Shobon’s action (especially the effect of giant mushroom,) an action game known to have many shoutouts and death traps.
- The icon of «increase revival time» condition is a reference of The ancient Egyptian hieroglyph «Ankh«.It is symbolize life,also is the symbol of gods.It is commonly seen on ancient Egyptian tombstones, mummies, pharaohs’ and gods’ hands.It can bring health and happiness.
Bugs
- When first added, there were several glitches:
- The most infamous glitch is that the «More rooms in the dungeon» condition couldn’t be completed in the past.
- The reason is because when entering 3-6, there would be one extra room that had no enemies yet it would lock when the player entered, effectively preventing them from obtaining the Magic Stone and finishing the game.
- Some tablet users had a screen resolution issue that pushed the ‘Accept’ button off-screen. This prevented them from accepting any Challenges.
- Axe-type weapons and Blind Missile Battery were bugged and not affected by «Weapon attack +100%, fire rate -50%» and «Weapon fire rate +100%, attack -50%» conditions.
- The rewards of challenges could be claimed more than once a day, if the player completed the challenge more than once in the same day.
- The health-reducing effect of the «Dwarfism» condition did not work.
- Fire rate of weapons able to speed up over time was not affected by conditions regarding weapon damage and fire rate.
- The «Weapons get reforged at the start of each level» condition would occur in level 3-6 at that time, such that the inventory when touching the Magic Stone could be different from the certificate.
- In fact, the content of the «Game Clear» certificate is decided before entering 3-6.
- Extra statue effects would be discarded upon entering a new level.
- It was possible to get opposite conditions (like «Max buffs +3» and «Max buffs -3» together) when starting a multiplayer game.
- The most infamous glitch is that the «More rooms in the dungeon» condition couldn’t be completed in the past.
- All of the glitches above were fixed in Update 1.9.2.
- Before Update 1.9.7, the Health Buff could be used together with «Max HP= 1» condition, though having no effect.
- However, using the Caterpillar Fungus could prevent the buff from appearing in the choice list, such that it’s not useless.
- Before Update 2.0.0, the damage of One Punch would be displayed as «199» under «Weapon attack +100%, fire rate -50%» condition, instead of «1998» due to limited space. When fixed, the number is now shown in smaller font.
- This also happened for the Prototype Railgun under «Weapon crit rate +100%, crit damage -50%» condition, where the critical chance was «-25%~100%» but shown as «-25%~10» instead.
- Before Update 2.0.5, the «Better defense, but shield does not regenerate» would affect the mounts, such that they would be invincible if they had any defense.
- During Update 2.0.5, under the ‘Weapon crit rate +100%, crit damage -50%’ condition, weapons that cause debuffs upon critical hits (except for bows, Spike Knives and Frost Spear) could deal double damage on critical hits, regardless of having the Elemental Buff or not.
- Also, between Update 1.9.2 and Update 2.1.0, elemental weapons would deal 200% damage on critical hits with the Elemental Buff.
- During Update 2.1.0, when both «Weapon crit rate +100%» and «Increase crit damage» conditions were activated, weapons can effectively deal 200% damage on critical hits.
- A glitch may occur in Update 2.1.5, where if a player accepts the «Max HP= 1» condition but then cancels it and starts a run directly, the player will start with the correct max health, but the current health will be 1.
- When Boss Rush Mode was first introduced in Update 2.2.0, the lower left task could only give one Feather of Valkyrie.
- Also at that time, kills gained in Boss Rush Mode did not count toward the Wanted tasks.
- There was a glitch before Update 2.2.0, where if Baby Dragon Bros appeared as the main boss under the «Fight with 2 slightly nerfed bosses in each Boss room» condition, the second boss would be glitched that its banner would not appear, and the boss health bar would not include its share. This glitch is purely visual.
- When the «Increase the number of bonus rooms» condition was first introduced, it could create two bonus rooms of the same type, like with 2 statues or 2 mercenaries.
- It was possible to hire two mercenaries and they could work normally in the current floor. However when moving to next floor, the one hired first would be lost.
- Before Update 2.3.0, the «Increase revival times» condition was known as «You can resurrect twice» and was useless in multiplayer.
- When Toxic Worm was first added, its Wanted Task was glitched that it could not be completed.
- Some other tasks would also show a white square and also cannot be completed.
- Before Update 2.4.0, fire and poison pools created by weapons were not affected by weapon challenges.
- Random levels,Monsters split into two when their HP is below 50%,Monsters shift to a different position the moment they get ,Functional UI is disabled,Vision is limited,All weapons are equipped with attachments were added in update 2.7.0.
- Before Update 2.8.6, the characters wouldn’t have random skills, instead, characters used the last skill they have used. For example, if Knight’s skill was set to Superior Fire, it was impossible to change into a Knight with Dual Wield.
- This meant that locked skills or any skill from a locked character could be chosen, and when getting that character into a run, it would use that skill.
- Also, before this update, the the skin of the Shield NPC Paladin gives would always be the same of the Living Room skin.
- Before a change in Update 2.8.0, the «Random levels» condition would allow players to choose more buffs if they happened to reach later floors too early.
- When you take a hit, a random debuff will be applied to you. The effect only triggers once every 5 seconds,Pet is gigantic, more aggressive and deals higher damage,Bombs and coins may spawn in chests when you clear a room,A mount awaits when you enter a new biome were added in update 3.2.0.
- Weekly challenges were added in update 4.0.0.
- «Slightly increases max HP, movement speed, fire rate and critical rate» and «Max armor and max HP are fixed at 1. Max energy is fixed at 999» were added in Update 4.2.0, along with Airbender.
- At that time, Airbender NPC wouldn’t spawn, so players could not obtain these conditions normally. This was fixed in the next update, which also greatly increased the occurrence rate of the Airbender NPC for a short time.
- The Deja Vu condition was added in version 4.2.0 with other 6 new conditions. At that time, bringing this condition into the game again may lead to changes in the scene and monster layout, but the events encountered in the treasure chest room/special room remain unchanged; It may also be that the scene and monster layout remain unchanged, but the events encountered in the treasure chest room/special room change.
- When both Deja Vu and Config Error condition exist, players may encounter different monster positions.
- When players have Config Error condition,they may encounter relic hunters or other no-in-Neo-Isle-monsters in pirate support ships in Neo Isle biome. This may be a bug caused by the monsters on the pirate ship must be different’s limit is contradiction to this condition.
| Objects | |
|---|---|
| Living Room | Book Pile — Pet Food — Plant — TV — Safe — Fish Tank — Task Board — Beverage Vending Machine — Email — Lucky Cat — Soul Knight Handbook |
| Garden | Magic Well — Training Dummy |
| Workshop | Forge Table — Redeem Machine |
| Magic Area | Matrix Portal — Ancient Portal — Holy Statue |
| Level Mode | Chests — Offering Pool — Reforging Furnace — Resetting Furnace — Water Dispenser — Vending Machines — Portals — Statues — Wishing Well — Signs — Claw Fun — Cage — New Year DinnerCNY — Magic Stone |
The Task Board by default.
The Task Board is located at the top left corner of the Living Room. The Officer stands beside it.
- This item will change appearance according to the skin of Officer, or during special seasons.
It is unlocked once the player has reached level 2-3 with the Safe already unlocked.
It displays all the daily tasks upon interaction.
- Trying to interact with it in Multiplayer will show a message «Come next time when you play solo.»
- The Officer will have an exclamation mark over his head, which normally indicates that a task or challenge has been completed.
Once the player completes the tasks, they must interact with the Officer to claim the reward. Completing these tasks can yield gems and materials and very rarely blueprints.
- This is one of the better methods to collect Fertilizer, Free Trial Vouchers and the only method of obtaining Feather of Valkyrie once Boss Rush Mode is unlocked.
There are two types of tasks: Wanted Tasks and Challenge Tasks.
Road of Knights
The Road of Knights consists of 3 chapters, with 5 missions each. Rewards can be claimed for each mission completed, and additional rewards of 500, 750 and 1,000 Gems will be given after finishing 1, 3 and 5 missions per chapter, respectively. All missions of each chapter must be cleared before proceeding to the next one.
Chapter 1
| Name | Task | Rewards |
|---|---|---|
| Strike! | Welcome to the House of Knights! Please complete 1 game in any game mode. It is your duty to locate the Magic Stone and use its power to keep the world in order! | 400 |
| Grab a Weapon | What’s that in your hand? Use a total of 5 different weapons in any game mode! | 400 |
| Cast a Skill | Communicate with your inner self to unleash your full potential. Cast skill 10 in any game mode! | 400 |
| Collect a Buff | During the adventure, you will be able to collect «buffs», which can be used in combination with weapons and skills to achieve magical effects. Please collect a total of 6 different buffs in any game mode except for season mode. | 400 |
| Against All Odds | The best way to prove yourself is to defeat enemies. Show me what you got by defeating a total of 100 enemies in any game mode! | 500 1 |
Chapter 2
| Name | Task | Rewards |
|---|---|---|
| New Partners | There is a guy in the House of Knights who loves watching TV, yes, Rogue. Unlock and recruit him to come along in the adventure. | 500 |
| Betting Stronger | Level up! Power up! Own 1 lvl. 2 character and see if anything has changed. | 500 |
| Shopping Spree | Buy 1 item from the Trader in the Workshop. You can find legendary items here once in a while. | 400 |
| Harvest Day | Countless species of plants exist on the continent of Soul Knight, and their seeds can be planted in the garden. Harvest 1 plant in the garden area and see what you can get. | 400 2 |
| Boss Hunter | You should have seen the bosses in the dungeon and you need to defeat them in order to get the Magic Stone. Defeat 1 boss and set out for the Magic Stone! | 400 2 |
Chapter 3
| Name | Task | Rewards |
|---|---|---|
| New Skill | The same character can learn different skills. Try using the 3rd skill of Knight «Chaotic Strike» for 1 time. | 20 20 |
| Forge Weapon | You’ve figured out how to make the weapons after obtaining them. Forge 1 weapon at the Forge Table in the Workshop. | 400 |
| Valiant Challenge | Find the battle too easy? Complete 1 challenge on the Task Board for something new (solo mode only). | 400 |
| Craft Armour Mount | In a world where technology and magic co-exist, you can craft 1 armor mount at the Robotics Facility in the Workshop and you will be able to battle in the mecha form. | 400 |
| Protect the Magic Stone | Retrieve the Magic Stone Fragment which keeps the world in balance! In Level Mode, defeat a boss who guards the fragment, complete the game and have your rewards calculated at the end-of-the-game screen. | 1000 2 |
Wanted Tasks
A completed Wanted task.
- The player is required to kill the target enemy for a given number of times in each task.
- Each day, 1 to 2 new Wanted tasks will appear. The Task Board can hold up to 4 Wanted tasks.
- If Boss Rush Mode is unlocked, the lower left task will always refresh everyday, with the reward being two Feathers of Valkyrie.
- These Wanted tasks do not need to be accepted. Simply go to play and kill enough targets and return to claim reward.
- Kills gained in Multiplayer, Boss Rush Mode and The Origin count towards the tasks.
- Kills gained from minions summoned by bosses do not count toward the tasks.
- Be careful that killing the wrong enemies will not count (for example, a task requires brown Chester, which means that kills for the blue Chester do not count).
- It is possible to discard a Wanted task by using the button at the lower left. This is useful if the player is given a quest which they cannot complete, and they can wait until tommorow for applicable task replacements.
- Unlike most things that are undone by rerolling a level, enemy/boss tally isn’t. The player can use this to their advantage, completing any given level twice for more kills.
Challenge Tasks
A challenge task.
- The player is required to complete the game under 4 random conditions.
- The conditions are refreshed every day.
- Completing a challenge after refreshing date will count as completing the challenge of next day, and will yield the corresponding reward.
- It is required to accept the Challenge by choosing the post and activating it. It is also possible to deactivate by the same method or interact with Officer twice.
- In Multiplayer mode, however, the host has an option of picking some random conditions to start the game. These conditions can be random ones different from the daily task and do not offer additional rewards.
- It is possible to accept and decline Challenge as many times as possible, however the reward can only be claimed once every day. (Unless the player deletes and re-installs the game, and then get back their cloud saves)
- Some challenge conditions are either partially applied or not applied at all in the Lobby.
- After completing a daily challenge, the player can talk to Officer and pay 200 gems to change conditions. This can be done 15 times a day.
- This will not grant new rewards by completing the new conditions, however. These conditions will also be lost if they are not used immediately in the next run.
- It is possible to bring conditions into The Origin, and some of them can be activated correctly, but it is impossible to complete a challenge since it is impossible to win.
- NPC Officer can give random conditions. Doing so does not affect the state of challenges.
List of Conditions
| Condition Symbol | Description/Notes |
|---|---|
|
|
No pets or mercenaries
▲ top |
|
|
Enemy defense +1
▲ top |
|
|
More enemies in the dungeon
▲ top |
|
|
More aggressive enemies!
▲ top |
|
|
Enemies move faster
▲ top |
|
|
Enemy debuff time -50%
▲ top |
|
|
Enemy HP +100%
▲ top |
|
|
Enemy fire rate up!
▲ top |
|
|
Store price +100%
▲ top |
|
|
Max number of buffs +3
▲ top |
|
|
Better defense, but shield does not regenerate
▲ top |
|
|
Max number of buffs -3
▲ top |
|
|
Skill cooldown -50%
▲ top |
|
|
Skill cooldown +100%
▲ top |
|
|
Increase revival times
▲ top |
|
|
Elite enemies appear more often
▲ top |
|
|
You can worship multiple statues
▲ top |
|
|
Weapons get reforged at the start of each level
▲ top |
|
|
Get a weapon when entering a new biome
▲ top |
|
|
Max HP =1
▲ top |
|
|
Infinite energy
▲ top |
|
|
Weapon crit rate +100%, crit damage -50%
▲ top |
|
|
Weapon attack +100%, fire rate -50%
▲ top |
|
|
Weapon fire rate +100%, attack -50%
▲ top |
|
|
Options -2 when you choose buffs
▲ top |
|
|
Options +2 when you choose buffs
▲ top |
|
|
More rooms in the dungeon
▲ top |
|
|
Melee weapons only
▲ top |
|
|
Max energy -50%
▲ top |
|
|
Good Luck
▲ top |
|
|
Bad Luck
▲ top |
|
|
Gigantism
▲ top |
|
|
Dwarfism
▲ top |
|
|
Regenerate HP when it’s below 50%
▲ top |
|
|
Fight with 2 slightly nerfed bosses in each Boss room
▲ top |
|
|
May switch character when you enter a new level
▲ top |
|
|
Increase the number of bonus rooms
▲ top |
|
|
Can only carry one weapon
▲ top |
|
|
Increase critical damage
▲ top |
|
|
Random levels
▲ top |
|
|
Monsters split into two when their HP is below 50%
▲ top |
|
|
All weapons are equipped with attachments
▲ top |
|
|
Monsters shift to a different position the moment they get hit
▲ top |
|
|
Vision is limited
▲ top |
|
|
Functional UI is disabled
▲ top |
|
|
When you take a hit, a random debuff will be applied to you. The effect only triggers once every 5 seconds
▲ top |
|
|
Pet is gigantic, more aggressive and deals higher damage
▲ top |
|
|
Bombs and coins may spawn in chests when you clear a room
▲ top |
|
|
A mount awaits when you enter a new biome
▲ top |
|
|
Deja Vu («Have I been here before?»)
▲ top |
|
|
Inferior Medicament (All recovery -50%)
▲ top |
|
|
Weapon Overheating
▲ top |
|
|
Config Error (It all started from a warm, lovely afternoon and a dozy, drowsy developer)
▲ top |
|
|
Time Fluctuation (Your movement speed randomly increases or decreases)
▲ top |
|
|
Killing Spree (You get stronger as you acquire a killstreak)
▲ top |
|
|
Sales Day
▲ top |
|
|
Strong Body
▲ top |
|
|
Frostbite
▲ top |
|
|
Tenacity
▲ top |
|
|
Deranged
▲ top |
|
|
Blessing Staff
▲ top |
|
|
Curse of Grave Robbers
▲ top |
|
|
Slightly increases max HP, movement speed, fire rate and critical rate
▲ top |
|
|
Max armor and max HP are fixed at 1. Max energy is fixed at 999
▲ top |
|
|
Cancels 1 increased Pressure Level’s weight on enemy resistance to control effects
▲ top |
|
|
Killing monsters have a chance to revive all teammates
▲ top |
|
|
Monster movement speed -1%
▲ top |
|
|
The spawn chance of mutant monsters +2%
▲ top |
|
|
Damage taken by the player +1, damage taken by the monster +2
▲ top |
|
|
Improves enemy immunity to crowd control
▲ top |
|
|
The whole team (all the team members combined) can’t revive more than 2 times. If one is revived by a weapon
▲ top |
|
|
Complete the game within 12 minutes (normal mode) or 16 minutes (badass mode)
▲ top |
|
|
Characters may suddenly become larger or smaller over time. Movement speed is adjusted as well, but not health and armor
▲ top |
|
|
Sometimes enemy blimp will bomb the room. Enemies take 8 damage while players take 4 (5 in badass)
▲ top |
|
|
Enemies and players will explode 3 seconds after death. Players make larger explosion. These explosions hurt players
▲ top |
|
|
Meteors fall from time to time. These meteors do not damage enemies
▲ top |
|
|
Enemies, upon death, have a chance to open a rift of time and space
▲ top |
|
|
▲ top |
|
|
Novice Hunter
Complete 1 task Reward: a seed of Bamboo (Plant) |
|
|
veteran Hunter
Complete 10 tasks Reward: Officer as a playable character and a seed of Magic Flower |
|
|
Legendary Hunter
Complete 100 tasks Reward: a seed of Devil’s Snare (Plant) |
|
|
Mining Expert
Get 800 coins in 1 challenge Reward: none |
|
|
Embrace Challenges
Accept a total of 30 different challenge conditions and complete these Level Mode games. Reward: none |
Trivia
General
- This feature was added in Update 1.9.0.
A challenge task from before 4.1.0.
- Until Update 4.1.0, the Challenge Task had a different appearance.
- Some of the conditions have references:
- The icon of «Better defense» condition is a reference of the icon of «Nuclear Disarmament» used worldwide.
- The icon of «Good Luck» condition is a reference to a rumor that people can get good luck with a 4-leaf clover.
- The icon of «Bad Luck» condition is a reference to the British superstition that black cats bring bad luck (most notably when they cross a person’s path).
- The icon of «Double skill CD» is a reference to The Persistence of Memory by Salvador Dali.
- The icon of «Dwarfism» is a reference of the shrinking device in the Doraemon series.
- The icon of «Get new weapon» is a reference to the way sword weapons are displayed in the game Spirit of Darkness 3, or to the famous British legend «Sword in Stone».
- The icon of «Can only carry one weapon» condition is a reference of the novel «The Return of the Condor Heroes,» where the protagonist Yang Guo is a martial artist with only one arm.
- In detail, Yang Guo lost one arm during a duel, but was saved by the Divine Condor. He then learned to wield a powerful great sword with the remaining arm.
- The icon of «Increase critical damage» condition is a reference of a Chinese meme, where a guy claims that «I’ll prove to you that my blade is toxic» while licking it, then he collapses due to the poison.
- The original scene however, is from a Japanese TV series: The Hero Yoshihiko and the Demon King’s Castle: Poison Knife Scene.
- The behavior of «Monsters shift to a different position the moment they get hit» condition involves blue and yellow portals, which are a reference of the Portal series’ Aperture Science Handheld Portal Device’ attacks, which fires portals on suitable surfaces.
- The icon of «Gigantic pet» condition is a reference of Shobon’s action (especially the effect of giant mushroom,) an action game known to have many shoutouts and death traps.
- The icon of «increase revival time» condition is a reference of The ancient Egyptian hieroglyph «Ankh«.It is symbolize life,also is the symbol of gods.It is commonly seen on ancient Egyptian tombstones, mummies, pharaohs’ and gods’ hands.It can bring health and happiness.
Bugs
- When first added, there were several glitches:
- The most infamous glitch is that the «More rooms in the dungeon» condition couldn’t be completed in the past.
- The reason is because when entering 3-6, there would be one extra room that had no enemies yet it would lock when the player entered, effectively preventing them from obtaining the Magic Stone and finishing the game.
- Some tablet users had a screen resolution issue that pushed the ‘Accept’ button off-screen. This prevented them from accepting any Challenges.
- Axe-type weapons and Blind Missile Battery were bugged and not affected by «Weapon attack +100%, fire rate -50%» and «Weapon fire rate +100%, attack -50%» conditions.
- The rewards of challenges could be claimed more than once a day, if the player completed the challenge more than once in the same day.
- The health-reducing effect of the «Dwarfism» condition did not work.
- Fire rate of weapons able to speed up over time was not affected by conditions regarding weapon damage and fire rate.
- The «Weapons get reforged at the start of each level» condition would occur in level 3-6 at that time, such that the inventory when touching the Magic Stone could be different from the certificate.
- In fact, the content of the «Game Clear» certificate is decided before entering 3-6.
- Extra statue effects would be discarded upon entering a new level.
- It was possible to get opposite conditions (like «Max buffs +3» and «Max buffs -3» together) when starting a multiplayer game.
- The most infamous glitch is that the «More rooms in the dungeon» condition couldn’t be completed in the past.
- All of the glitches above were fixed in Update 1.9.2.
- Before Update 1.9.7, the Health Buff could be used together with «Max HP= 1» condition, though having no effect.
- However, using the Caterpillar Fungus could prevent the buff from appearing in the choice list, such that it’s not useless.
- Before Update 2.0.0, the damage of One Punch would be displayed as «199» under «Weapon attack +100%, fire rate -50%» condition, instead of «1998» due to limited space. When fixed, the number is now shown in smaller font.
- This also happened for the Prototype Railgun under «Weapon crit rate +100%, crit damage -50%» condition, where the critical chance was «-25%~100%» but shown as «-25%~10» instead.
- Before Update 2.0.5, the «Better defense, but shield does not regenerate» would affect the mounts, such that they would be invincible if they had any defense.
- During Update 2.0.5, under the ‘Weapon crit rate +100%, crit damage -50%’ condition, weapons that cause debuffs upon critical hits (except for bows, Spike Knives and Frost Spear) could deal double damage on critical hits, regardless of having the Elemental Buff or not.
- Also, between Update 1.9.2 and Update 2.1.0, elemental weapons would deal 200% damage on critical hits with the Elemental Buff.
- During Update 2.1.0, when both «Weapon crit rate +100%» and «Increase crit damage» conditions were activated, weapons can effectively deal 200% damage on critical hits.
- A glitch may occur in Update 2.1.5, where if a player accepts the «Max HP= 1» condition but then cancels it and starts a run directly, the player will start with the correct max health, but the current health will be 1.
- When Boss Rush Mode was first introduced in Update 2.2.0, the lower left task could only give one Feather of Valkyrie.
- Also at that time, kills gained in Boss Rush Mode did not count toward the Wanted tasks.
- There was a glitch before Update 2.2.0, where if Baby Dragon Bros appeared as the main boss under the «Fight with 2 slightly nerfed bosses in each Boss room» condition, the second boss would be glitched that its banner would not appear, and the boss health bar would not include its share. This glitch is purely visual.
- When the «Increase the number of bonus rooms» condition was first introduced, it could create two bonus rooms of the same type, like with 2 statues or 2 mercenaries.
- It was possible to hire two mercenaries and they could work normally in the current floor. However when moving to next floor, the one hired first would be lost.
- Before Update 2.3.0, the «Increase revival times» condition was known as «You can resurrect twice» and was useless in multiplayer.
- When Toxic Worm was first added, its Wanted Task was glitched that it could not be completed.
- Some other tasks would also show a white square and also cannot be completed.
- Before Update 2.4.0, fire and poison pools created by weapons were not affected by weapon challenges.
- Random levels,Monsters split into two when their HP is below 50%,Monsters shift to a different position the moment they get ,Functional UI is disabled,Vision is limited,All weapons are equipped with attachments were added in update 2.7.0.
- Before Update 2.8.6, the characters wouldn’t have random skills, instead, characters used the last skill they have used. For example, if Knight’s skill was set to Superior Fire, it was impossible to change into a Knight with Dual Wield.
- This meant that locked skills or any skill from a locked character could be chosen, and when getting that character into a run, it would use that skill.
- Also, before this update, the the skin of the Shield NPC Paladin gives would always be the same of the Living Room skin.
- Before a change in Update 2.8.0, the «Random levels» condition would allow players to choose more buffs if they happened to reach later floors too early.
- When you take a hit, a random debuff will be applied to you. The effect only triggers once every 5 seconds,Pet is gigantic, more aggressive and deals higher damage,Bombs and coins may spawn in chests when you clear a room,A mount awaits when you enter a new biome were added in update 3.2.0.
- Weekly challenges were added in update 4.0.0.
- «Slightly increases max HP, movement speed, fire rate and critical rate» and «Max armor and max HP are fixed at 1. Max energy is fixed at 999» were added in Update 4.2.0, along with Airbender.
- At that time, Airbender NPC wouldn’t spawn, so players could not obtain these conditions normally. This was fixed in the next update, which also greatly increased the occurrence rate of the Airbender NPC for a short time.
- The Deja Vu condition was added in version 4.2.0 with other 6 new conditions. At that time, bringing this condition into the game again may lead to changes in the scene and monster layout, but the events encountered in the treasure chest room/special room remain unchanged; It may also be that the scene and monster layout remain unchanged, but the events encountered in the treasure chest room/special room change.
- When both Deja Vu and Config Error condition exist, players may encounter different monster positions.
- When players have Config Error condition,they may encounter relic hunters or other no-in-Neo-Isle-monsters in pirate support ships in Neo Isle biome. This may be a bug caused by the monsters on the pirate ship must be different’s limit is contradiction to this condition.
| Objects | |
|---|---|
| Living Room | Book Pile — Pet Food — Plant — TV — Safe — Fish Tank — Task Board — Beverage Vending Machine — Email — Lucky Cat |
| Garden | Magic Well — Training Dummy |
| Workshop | Forge Table — Redeem Machine |
| Magic Area | Matrix Portal — Ancient Portal — Holy Statue |
| Level Mode | Chests — Offering Pool — Reforging Furnace — Resetting Furnace — Water Dispenser — Vending Machines — Portals — Statues — Wishing Well — Signs — Claw Fun — Cage — New Year DinnerCNY |
Лагает соул кнайт что делать
Содержание
Список багов [ ]
Баг со сменой уровня [ ]
Если в начале биома вы выйдете из забега и снова зайдёте, то этаж может создаться заново вплоть до смены биома. Является одним из самых используемых багов.
Баг с неправильным расположением частиц [ ]
Баг с замороженными/оглушенными врагами [ ]
Замороженные / оглушенные враги (Ведьма, Большой Скелет) во время своих стремительных атак могут не оглушиться/заморозиться. При этом их атаки будут наносить урон.
Баг с «вылетающими» врагами [ ]
Баг с атакующими мертвецами [ ]
Иногда враги и боссы все еще могут атаковать после того, как их убили (однако они не могут быть повреждены или быть целью). Например, убийство во время средней атаки Великого Мага может заставить его продолжать распылять пули (которые могут нанести урон) даже после его смерти. Большой скелет может продолжать атаковать игрока и наносить урон. Это также видно на примере Рождественской Энт с атакой самонаводящихся пуль, где она не покажет свой мертвый спрайт, пока не закончится. Обычно это исправляется после окончания атаки.
Баг с неправильным прицелом турелей [ ]
Баг с Огромным топором [ ]
Баг со спутниками [ ]
Иногда последователи могут выйти из комнаты за барьеры. Враги все еще могут захватить их, и они также попытаются атаковать через барьеры. Чаще всего они могут быть заперты за пределами комнаты после входа игрока.
Баг с застреванием в стене [ ]
Баг со спрятанными сундуками [ ]
После зачистки комнаты сундуки могут быть найдены за блоками/структурами (редко они также могут быть на одной площади).
Баг с закрытыми комнатами в Мультиплеере [ ]
Лаг может заставить игроков покинуть границы комнаты/выйти из комнаты или войти в комнату, но не быть запертым (все враги не будут атаковать и не будут получать урон). Последнее также может случаться редко в одиночной игре и обычно исправляется, когда приближается к другому входу в комнату.
Баг с анимацией [ ]
Это происходит в разных версиях. Иногда, если персонаж (боссы, а иногда и спутники) умирает, спрайт не превращается в спрайт умершего, не перемещается и не атакует. В некоторых других случаях спрайт может быть белым. В случае с боссами причина появления спрайта, по-видимому, заключается в том, что вы убили босса примерно в тот же момент, когда босс подвергается анимации для атаки, что приводит в замешательство игру таким образом, что он не знает, какой спрайт использовать, и использует вместо этого по умолчанию. Это стало намного реже с версии 2.5.5, чем было раньше, но все еще работает.
Баг с застреванием врагов [ ]
Начиная с версии 1.7.9, иногда враги (как правило, те, которые остаются неизменными при жизни) появляются внутри или застревают в блоке или стене. Если враг, который застрял, способен двигаться, он может выйти без проблем. В 2.5.5 они обычно застревают в углах графики, вероятно, потому что они новы и мешают шаблонам появления врага.
Баг с неубиваемыми врагами [ ]
Иногда, играя в многопользовательском режиме, враги могут стать полностью невосприимчивыми ко всему входящему урону и медленно скользить к стенам. Также вы можете подтолкнуть их в этом состоянии, хотя это не поможет вообще. Если вам повезет, игра может остаться нормальной, и вы сможете снова убивать врагов.
Баг с блокированием оружия [ ]
В некоторых случаях это приведет к блокировке сундуков для одного игрока.
Баг с челленджами [ ]
Баг с лазером босса [ ]
Баг с виолой семицветной [ ]
Если какой-либо игрок, кроме хоста в многопользовательской игре, использует Виолу семицветную, баффы будут отображаться соответственно на их экране, но не на экране хоста, так как хост не имеет положительного эффекта от растения. Поскольку только хозяин может выбирать баффы, это означает, что другие игроки не смогут получить преимущества от Виолы семицветной. Из-за задержки баффы могут появляться на всех уровнях на экранах гостей, даже если у них нет Виолы семицветной.
Баг с Бумерангом [ ]
Баг с именами оружий [ ]
Баг с Тетрадью смерти [ ]
Баг с 3 оружиями [ ]
Баг с ломаными сертификатами [ ]
По какой-то причине после того, как все предметы в Жилой комнате были разблокированы, значок, который обычно показывает, где будет достигнут следующий предмет, будет отображаться в 0-0 во время показа сертификата о завершении игры. Это исчезает, когда вы покидаете сертификат об окончании игры. Это также происходит после проигрыша в игре, но значок коробки отображается только до того, как вы нажмете кнопку «Играть» внизу, чтобы увидеть результаты запуска.
Баг с паузой [ ]
Для этого бага перейдите на доску заданий и взаимодействуйте с ней, чтобы увидеть ваши текущие задачи и задачи. Затем выйдите из игры, вернувшись на домашнюю страницу своего телефона, что заставит игру остановиться, снова войдите в игру и выйдите из доски заданий. Теперь вы сможете двигаться, находясь в меню паузы. Тем не менее, вы не можете сделать что-нибудь еще.
Баг со статуей берсерка [ ]
При вызове скелетов с помощью Посоха скелета при использовании 2 способности скелеты могут выглядеть слегка наклонными.
Баг с [ ]
Баг с невидимыми Привидениями [ ]
Привидения способны оставаться невидимыми в замороженном состоянии, несмотря на то, что заморозка обычно не дает врагам ничего делать. Это оставляет пустые кристаллы позади, которые не могут быть повреждены или нацелены. Призраки все еще не могут двигаться в этом состоянии. Вероятно, это связано с тем, что невидимость спланирована для срабатывания после атаки Призрака, поэтому не считается действием и может быть выполнена во время остановки, если Призрак смог атаковать до замораживания.
Баг с неотцентроваными спрайтами [ ]
Баг с револьверами [ ]
Баг с способностью вампира [ ]
Использование умения Вампира за пределами комнаты, полной врагов, не нанесет урона, но восстановит здоровье. Таким образом, вы можете начинать каждый бой с полной шкалой здоровья и навыком, готовым, если вы ждете перезарядки.
Баг с Лозой [ ]
Баг с двумя наёмниками [ ]
Есть баг, что если из клетки выпадает наёмник, то в комнате с восклицательным знаком можно будет нанять ещё одного. Однако разработчики всё продумали, и при переходе в другую комнату один из наёмников исчезает.
Баг с нунчаками [ ]
Баг с «Живыми мертвецами» [ ]
Баг с прыжком за стену и берсерком [ ]
Soul Knight Glitch Setup- Leap out of the Cellar (2.7.0)
Как перепрыгнуть через стену.
Баг с выходом из забега и избежанием смерти [ ]
С версии 2.9.0 и в последующих версиях, если выйти после смерти, то в меню кнопка с режимом не появится. Но если нажать на кнопку «Новая игра» и выйти, то появится кнопка с вашим забегом, где вы умерли. Нужно нажать на нее, и вы вернётесь в забег без зачисления возрождения.
Баг с бесплатным получением донатных персонажей [ ]
Чтобы бесплатно получить Паладина, Инженера, Оборотня, Вампира и Друида, надо скачать версию 1.7.8 и зайти в игру. После этого надо нажать на любого из них, нажать на кнопку доната и сразу отменить его.
Недоработка с цитатами в Секретной комнате [ ]
В секретной комате Кошка плюс говорит про то, что навык Оборотня скоро будет, хотя его уже добавили в обновлении 2.5.0.
Баг с пропастью между проходами [ ]
Иногда между проходами в комнаты могут быть пропасти. Наглядно этот баг можно увидеть на видео.
Баги в режиме «Мультиплеер» [ ]
Баг с режимами [ ]
Баг с воскрешением [ ]
Если вы используете умение Разбойника или выбиваетесь из диапазона возрождения во время оживления, вы можете оживить своих товарищей по команде, передвигаясь (без необходимости стоять в теле вашего партнера).
Баг с передвижными трупами [ ]
Часто мёртвые союзники продолжают двигаться и могут сбрасывать стрельбу.
Баг с потерей игрока в параллельном лобби [ ]
Некоторые игроки после игры в убойном режиме навсегда теряют играть в кооперативе. При подключении к мультиплееру, и входе в комнату, они окажутся в одиночном режиме.
Баг с невозможностью подключиться в режиме охоты на боссов [ ]
После серии охоты на боссов из 3 боёв. Некоторые игроки не смогут подключится в следующие дни, так как будет выдавать ошибку «не хватает перьев». Тем не менее перья может тратить только хост.
Баг с покупкой вещей в колодце желаний [ ]
Один игрок теряет возможность подносить пожертвования колодцу желаний или брать из него выпавшие вещи.
Баг с входом комнату [ ]
Когда игрок входит в комнату, другой игрок может остаться за стеной и не телепортироваться в гущу сражения.
Источник
почему лагает soul knight на телефоне
Почему лагает soul knight на телефоне
Краткое описание:
Совершенно новый взгляд на столь популярный жанр как пиксельные шутеры.
Использование модификаций игры пользователи осуществляют на свой страх и риск. Жалобы, связанные с игры после применения модификаций, рассматриваться не будут.
Бэкап на 2.3.5 Soul Knight (Пост Cpt.Who #91200856)
Открыты персонажи, много денег: Soul Knight (Пост 1BlueReei1 #58736536)
Бекап для версии 1.3.3, всё прилагается: Soul Knight (Пост 3asheJInPocTo #62787423)
Бекап для версии 1.3.5, открыты все персонажи, 0 джемс: com.ChillyRoom.DungeonShooter-20170717-194958.tar.gz ( 34,33 МБ )
эффекты статуй:
Статуя Рыцаря: Призыв рыцаря-последователя на 30 секунд. У вас может быть до 3 активных, но только на короткое время.
Статуя Волшебника : Выстреливает до 8 самонаводящихся волшебных
сфер в каждом направлении.
Статуя Священника : Создаёт зону перезарядки энергии в течение 4 секунд, которая восстанавливает 8 энергии в секунду.
Статуя вора : Крадет 1
золото у врага (ов) в пределах области, нанося 1-2 повреждения.
Статуя Эльфа : Испускает волну вокруг игрока, которая препятствует атакам врагов в течение нескольких секунд, нанося 1-2 повреждения.
Статуя Ассасина : Бросает 3 проникающих лезвия перед игроком, наносящие 4 повреждения каждый, с очень быстрой перезарядкой. (Работает с перком Точности)
Немного о начальных бонусах:Soul Knight (Пост Tiesto4Life #61754761)
В комнате выбора героев есть множество полезных предметов, с помощью которых можно, например, увеличить начальные навыки героя. В обмен на кристаллы, конечно. Для взаимодействия с предметом нужно выбрать героя, подойти к предмету и тапнуть кнопку стрельбы (меняется на «взаимодействие» при подходе к предмету). Поднятие характеристики на 1 стоит 500 кристаллов, последующие уровни потребуют на 500 кристаллов больше. Список предметов по часовой стрелке от выхода в боевую зону:
Статуя Волшебника : В последнем обновлении немного переделали. Теперь стреляет на 180 градусов вперёд (т.е. на половину круга, а не на весь).
Статуя Эльфа : Не совсем согласен с приведённой трактовкой. На моём опыте она просто отталкивает врагов. На их атаки это практически не сказывается (я говорю про дальние атаки, а не ближнего боя).
Статуя Ассасина : А у этой статуи есть интересный эффект: клинки (или иглы), что он кидает, считаются атакой. Это тоже надо учитывать, т.к. при использовании рыцарем количество клинков (игл) увеличивается. В то же время, если использовать на ассасине, то приходится успевать наносить его атаку до того, как клинки по кому-нибудь попадут. Иначе его абилка просто прогорает.
Почему Soul Knight Лагает и Как этого Избежать? 😬📶
Показувати елементи керування програвачем
КОМЕНТАРІ • 184
Сорян но видео Без полезное по сколько те способы борьбы с лагами которые ты перечислил не сработали
Как сделать так чтобы не лагало на 70 волне в портале🤣
Я просто играю в режиме полëта
Это бред. Когда я играю с вай фаем всё окей, только мини мини фризы изза слабого телефона. А когда играю без интернета-каждые несколько секунд игра зависает на 3 секунды, вообще невозможно играть
думал найти ответ на вопрос с вот этим секундным стоянием, но у автора оно тоже есть. Этот лаг фиксится подключением к вайфаю, но знаете, что происходит потом? Загрузка рекламы в кеш телефона, я балдею
У меня наоборот без интернета лагает
У меня зависает каждые 9 секунд.
У меня наоборот. Когда я с интернетом захожу, то у меня игра не лагает. Я могу зайти в игру с интернетом и его выключить, но без интернета и без лагов в игру не поиграть.
Как получить такого панду?
У меня тел тянет игры с ПК а эта сама себя не вывозит походу так всё время у меня 60 ФПС
У мегя сначала все ок, потом 5 минут играю, начинает лагать и перестает отвечать, придется выключать,что делать?
У меня вопше вылетает пж помоги
Им походу насрать на лаги
Это видео вышло месяц назвд но я напишу 2 способ помог мне новый телеф купили думаю что за фигня лвгает а тут прочто спасибо по братски
И где тут убрать лаги
Hello World а почему так тихо разговариваешь ничего не слышно говори пожалуйста чуть по громче)
п.с. это не замечание лол)
Это из-за сранных пуль. Миллион пуль.
Можно будет у вас взять интервью?типо почему вы решили сделать канал и т.д.,людям будет интересно),выздоравливай))
@Hello World вау столько в игре добился и сам вот кем я буду воспользоваться
У соул кнайта оптимизация нормальная!У моего друга Honor 4a и у него не лагает соул кнайт!А насчёт онлайн геймов,использую 4g
У меня одного наверно так лагает что я даже в лобби не могу нормально двигаться. =(
Какой должен быть телефон чтобы лагал соул кнайт?
у тя лагает на болоте?
Блин,проблема в том что приложение лагает а не телефон и не вай фай, это сама игра после обновы такая
@Tima Put Это правильно 👍
@Kirill Demidenko поздравляю,у меня телефон не мощный и поэтому я постоянно убираю кеш
@Tima Put Я только что кеш с помощью CCleaner удалил (15 гигов, между прочим) и лагать перестало. Ну не удивительно, ведь не чистил с марта)
@Kirill Demidenko тоже лагает?
@Kirill Demidenko а без интернета когда заходишь?
Кст ворлдус вот смотри у меня есть скин но бойца нет чисто теоретически я могу играть на скине и вкачивать его?
Привет а где надо разместить аквариум скажи пж :/
Я довно не играл просто 😐
В лобби, в правом нижнем углу
У меня вообще дико тормозит локация «Болото», и я не могу нормально её проходить, хотя остальные локации у меня вообще не лагают, как думаешь с чем это связано?
Знаю вопрос не по теме, но скажи пж. Когда я скрафчу способность берсерка на столе конструктора(удар сверху) я получу его самого?
Привет, у меня был к тебе вопрос, я вот решил прокачать разбойника до макса, и 2 активку взял, это хороший выбор, или зря?
Ну, вторая больше подходит для спидранов, а в основном очень популярна именно первая ульта, т.к. чем больше перекатываешься, тем ты не уязвимее, я думаю выбор уж точно не плохой, у меня самого есть вторая ульта
Почему у меня игра не лагает?
прочитай мой коммент вопрос как прлочить достиженийе секртный детиктив
но я думаю жто лаги на да попросить у разробочиков или перезапистить сол
У тебя какой телефон
Это с первой ультой
Я нашел баг за разбойника с помощью статуи берсерка и карамельного боярышника когда ультуеш почему-то дальность атаки увеличивается с каждым кувырком с статуей
Нужно включить 4× MSAA
@DeVY TSSS да, в настройках телефона, сначало зайди О Телефоне, потом кликаеш на Версия MIUI, и стаёш Разработчиком, потом заходиш в Для Разработчиков, и ищешь Включить 4×MSAA
А у меня не лагает 😎
Можно выключить вибрации телефона в паузе игры на нулевой уровень
Одна из причин, это перенагружение хитбоксами, к примеру, если хитбоксов слишком много, это лёгкий примеря в режме начало, начинает дико лагать, от колличества пикселей, хитбоксов, телефон перенагружен всем этим просто. Даже сервера игр вряд ли держат это, вот почему ещё мультиплеер плоо работает, это простая причина!
Интересный факт: если ударить салют в лобби рыбой то салют взорвётся!
Если ударить рыбой фейерверк именно взорвётся а не устроит салют.
1:этот баг исправят разрабы 2:у меня айфон 5с если что
У меня лагает Соул найт тогда когда я захожу с интернетом, и на 10% или меньше процентов заряда.
Почему Soul Knight Лагает и Как этого Избежать? 😬📶
Показать панель управления
Комментарии • 184
Сорян но видео Без полезное по сколько те способы борьбы с лагами которые ты перечислил не сработали
Как сделать так чтобы не лагало на 70 волне в портале🤣
Я просто играю в режиме полëта
Это бред. Когда я играю с вай фаем всё окей, только мини мини фризы изза слабого телефона. А когда играю без интернета-каждые несколько секунд игра зависает на 3 секунды, вообще невозможно играть
думал найти ответ на вопрос с вот этим секундным стоянием, но у автора оно тоже есть. Этот лаг фиксится подключением к вайфаю, но знаете, что происходит потом? Загрузка рекламы в кеш телефона, я балдею
У меня наоборот без интернета лагает
У меня зависает каждые 9 секунд.
У меня наоборот. Когда я с интернетом захожу, то у меня игра не лагает. Я могу зайти в игру с интернетом и его выключить, но без интернета и без лагов в игру не поиграть.
Как получить такого панду?
У меня тел тянет игры с ПК а эта сама себя не вывозит походу так всё время у меня 60 ФПС
У мегя сначала все ок, потом 5 минут играю, начинает лагать и перестает отвечать, придется выключать,что делать?
У меня вопше вылетает пж помоги
Им походу насрать на лаги
Это видео вышло месяц назвд но я напишу 2 способ помог мне новый телеф купили думаю что за фигня лвгает а тут прочто спасибо по братски
И где тут убрать лаги
Hello World а почему так тихо разговариваешь ничего не слышно говори пожалуйста чуть по громче)
п.с. это не замечание лол)
Это из-за сранных пуль. Миллион пуль.
Можно будет у вас взять интервью?типо почему вы решили сделать канал и т.д.,людям будет интересно),выздоравливай))
@Hello World вау столько в игре добился и сам вот кем я буду воспользоваться
У соул кнайта оптимизация нормальная!У моего друга Honor 4a и у него не лагает соул кнайт!А насчёт онлайн геймов,использую 4g
У меня одного наверно так лагает что я даже в лобби не могу нормально двигаться. =(
Какой должен быть телефон чтобы лагал соул кнайт?
у тя лагает на болоте?
Блин,проблема в том что приложение лагает а не телефон и не вай фай, это сама игра после обновы такая
@Tima Put Это правильно 👍
@Kirill Demidenko поздравляю,у меня телефон не мощный и поэтому я постоянно убираю кеш
@Tima Put Я только что кеш с помощью CCleaner удалил (15 гигов, между прочим) и лагать перестало. Ну не удивительно, ведь не чистил с марта)
@Kirill Demidenko тоже лагает?
@Kirill Demidenko а без интернета когда заходишь?
Кст ворлдус вот смотри у меня есть скин но бойца нет чисто теоретически я могу играть на скине и вкачивать его?
Привет а где надо разместить аквариум скажи пж :/
Я довно не играл просто 😐
В лобби, в правом нижнем углу
У меня вообще дико тормозит локация «Болото», и я не могу нормально её проходить, хотя остальные локации у меня вообще не лагают, как думаешь с чем это связано?
Знаю вопрос не по теме, но скажи пж. Когда я скрафчу способность берсерка на столе конструктора(удар сверху) я получу его самого?
Привет, у меня был к тебе вопрос, я вот решил прокачать разбойника до макса, и 2 активку взял, это хороший выбор, или зря?
Ну, вторая больше подходит для спидранов, а в основном очень популярна именно первая ульта, т.к. чем больше перекатываешься, тем ты не уязвимее, я думаю выбор уж точно не плохой, у меня самого есть вторая ульта
Почему у меня игра не лагает?
прочитай мой коммент вопрос как прлочить достиженийе секртный детиктив
но я думаю жто лаги на да попросить у разробочиков или перезапистить сол
У тебя какой телефон
Это с первой ультой
Я нашел баг за разбойника с помощью статуи берсерка и карамельного боярышника когда ультуеш почему-то дальность атаки увеличивается с каждым кувырком с статуей
Нужно включить 4× MSAA
@DeVY TSSS да, в настройках телефона, сначало зайди О Телефоне, потом кликаеш на Версия MIUI, и стаёш Разработчиком, потом заходиш в Для Разработчиков, и ищешь Включить 4×MSAA
А у меня не лагает 😎
Можно выключить вибрации телефона в паузе игры на нулевой уровень
Одна из причин, это перенагружение хитбоксами, к примеру, если хитбоксов слишком много, это лёгкий примеря в режме начало, начинает дико лагать, от колличества пикселей, хитбоксов, телефон перенагружен всем этим просто. Даже сервера игр вряд ли держат это, вот почему ещё мультиплеер плоо работает, это простая причина!
Интересный факт: если ударить салют в лобби рыбой то салют взорвётся!
Если ударить рыбой фейерверк именно взорвётся а не устроит салют.
1:этот баг исправят разрабы 2:у меня айфон 5с если что
У меня лагает Соул найт тогда когда я захожу с интернетом, и на 10% или меньше процентов заряда.
Источник
Soul Knight WiKi: Советы и хитрости прохождения игры
SOUL KNIGHT — игра на андроид с датой выхода 16.02.2017 г. от компании ChillyRoom. Жанр игры: Экшен. В статье мы обобщили советы по прокачке от ТОПовых игроков, ответы разработчиков на вопросы геймеров, гайды для новичков с официального сайта и наши секреты прохождения игры. Внимание, сайт Мудрый Гик постоянно обновляется, заходите к нам почаще.
Содержание статьи

- Гайд по героям, тактика сражений
- Гайд по питомцам, их виды и особенности
- Получение эффектов статуй
- Обзор бонусов, что дают и как получить
- Гайд по оружию, комбинации для создания
- Гайд по противникам, их уникальные атаки и способы защиты
- Обзор жилой комнаты, основные предметы
- Выполнение заданий с доски
- Прохождение охоты на боссов
- Цифровое пространство
- Убойный режим
- Сражения в режиме «Мультиплеер»
- Прохождение Начала
- Цикличное приключение
- Маленький командир, секреты прохождения, наемники
Soul Knight: Гайд по героям, тактика сражений

Игровые персонажи. В игре есть 17 играбельных персонажей, 8 из которых приобретаются за настоящие деньги. Каждый персонаж обладает своим количеством здоровья, защиты, энергии и шансом критического удара, которые увеличиваются при прокачке персонажа. Также у каждого персонажа имеется особая способность, которую можно усилить, если прокачать персонажа. У всех персонажей есть альтернативные способности, которые можно разблокировать за настоящие деньги, самоцветы или особые материалы.

Рыцарь
Рыцарь (англ. Knight) — один из игровых персонажей в игре Soul Knight. Является стартовым. Название говорит само за себя, это рыцарь с серыми железными доспехами и золотой оболочкой возле лица. Также имеет плащ тусклого красного цвета, который развивается на ветру. Стартовое оружие — Старый пистолет. Рыцарь разблокирован с самого начала. Вы не должны ничего платить, чтобы играть им.
Сбалансированная статистика и высокое здоровье делают Рыцаря дружелюбным для новичков и довольно универсальным без чрезмерно сложной игровой функции. Двойное владение Рыцаря позволяет Игроку нанести огромный урон за короткое время. Отлично подходит для режима Начало, т. к. с помощью навыка можно удваивать предметы, купленные у Инженера-механика. Рекомендуемые баффы:
- Увеличение запаса здоровья — больше здоровья всегда приятно, особенно когда вы хотите использовать Рыцаря для Убойного режима, где враги могут взорвать вас в два или три удара.
- За убийство врага можно получить дополнительную жизнь — используйте большой пул здоровья Рыцаря по умолчанию и добавьте еще немного живучести.
- Получение энергии за убийство врагов — смягчите высокое потребление энергии.
- Ускорение восстановления навыка — если у вас есть возможность получать много маны (например, если вы играете в убойный режим или за счет других усилений), то можно считать, что фактически скорострельность всех оружий всегда в 2 раза больше с этим усилением.
Рекомендуемое оружие:
- Для рыцаря будут нормальными оружия, которые имеют низкую скорость атаки, небольшой урон, низкое манопотребление, высокую неточность — с помощью навыка он может компенсировать эти недостатки.
- Штыковая винтовка хорошо подойдёт для убийства боссов типа Дурмана, Доисторического колосса и Рождественской Энт. Также хорошо применяется для зачистки медленных противников с большим количеством HP.
- Сладкая лесть хорошо подходит для таких боссов как Пасхальный кролик, Кристаллический Краб-Гигант, Золотой Краб-Гигант, Король снежных обезьян, Король снеговиков, Гоблин-священник, Дурман и др. Также хорошо применяется для зачистки большого количества противников.

Паладин
Встречается во время забега и может дать игроку оружие Щит (его именное оружие). Паладин может быть разблокирован по цене $1.00 или равной стоимости других валют. Паладин — это довольно сильный персонаж, у которого очень мало здоровья, самое большое количество брони. Паладин без повышения показателей энергии будет иметь очень низкий её запас, поэтому если у вас не улучшенный Паладин, берите низко затратные оружия. Способности:
- Энергетический щит. Данная способность без улучшений и баффов является банальной блокировкой урона. Способность следует использовать в ситуациях, когда у вас кончается броня или на вас летит шквал пуль. Способность полезна также в мультиплеере, ведь имея большой радиус действия, Паладин может прикрыть собой своих союзников. Также, имея неэффективное оружие, используя навык вы можете подойти вплотную к врагу и начать бить его рукой.
- Священный воин. Очень слабая и бесполезная способность. При активации вы получите меч, который будет вынуждать вас подходить вблизь к врагу, так что использовать способность следует с полным запасом брони. Хотя можно атаковать только волнами, но в таком случае урон почти не будет чувствоваться. Способность хорошо справляется с большой толпой врагов и миньонами боссов. Также, при активации вы получаете меньше урона, что может помочь в экстренных ситуациях.
- Плеск и треск. Данный навык не следует использовать как средство нанесения урона, так как урон довольно таки не большой. Однако, способность спасает её функция защиты и короткая перезарядка. Способность можно использовать в напряжённые моменты, блокируя добрую часть урона. Также, бросок щита всё же будет приятным бонусом.

Рекомендуемые баффы:
- Отсутствие доп. урона, если щит разрушен — удар с высоким уроном быстро истощит броню и при попадании такой пули по вам, вы скорее всего умрете.
- Увеличение запаса здоровья — компенсирует его очень низкий запас здоровья, почти равносилен баффу выше. Этот бафф повышает живучесть паладина почти в 2 раза.
- Сократить время восстановления навыка — сокращает пробел между навыками, чтобы улучшить шансы на выживание и восстановление энергии. 1-й и 2-й навык заряжаются очень долго, поэтому бафф будет очень полезен.
- Оружие ближнего боя может отразить пули — позволит отражать пули в ваших врагов, однако бонус не так полезен, как те два бонуса выше. Как сказано выше, это превращает паладина с первым навыком в «колесницу Джагернаута».
- Получение энергии за убийство врага — необходимый бонус, если у вас не прокачан Паладин, так как у него низкий запас энергии.

Алхимик
Алхимик (англ. Alchemist) — это один из играбельных персонажей в игре Soul Knight. Одет в оливковый халат, по краям которого есть золотые полоски. Также у него за спиной есть бак с кислотой и синий шарф. В темноте можно разглядеть его большие зелёные глаза. Он может быть разблокирован по цене 5000 самоцветов. Оружие:
- Эффективное оружие. У него приличная энергия, но не такая высокая, что он может использовать неэффективное оружие. Попробуйте сразиться с боссом с помощью Иллюзии или Пулемёта Гатлинга, и у вас не хватит энергии задолго до победы. Он также может превратить оружие средней дальности, например, Лазерный дробовик или Зелёный сайдуайндер в достойное оружие большой дальности.
- Оружие ближнего боя. Хорошее оборонительное оружие ближнего боя с маховыми атаками может удержать вас в сложной ситуации. Вы хотите оружие с высокой скоростью или длинными / широкими колебаниями. Вы можете идти в бой с таким оружием, как Палаш, Красный световой меч или Мясо.
- Ракетные установки. Хороший, сильный взрыв и множество отбрасываний, как правило, довольно эффективны и отлично подходят для нанесения урона врагам. Вполне эффективен на более поздних этажах, где комнаты более многолюдны, особенно на входе. Базука обычно не имеет достаточного урона для большинства случаев, но лучшие ракеты относительно легко найти. Но у них нет быстрой стрельбы, поэтому у вас могут возникнуть проблемы с некоторыми боссами, если у вас нет нескольких защитных баффов.
Статуи:
- Статуя Эльфа — для комнат, где враги ждут у двери, вам нужен способ войти, не умирая немедленно. Пуш поможет здесь.
- Статуя Чародея или Ассасина — дополнительный урон на расстоянии. Быстрое обновление навыка означает, что они будут часто срабатывать.
- Статуя Рыцаря — не такая полезная, как вышеупомянутые статуи, но все же полезная. Призванный рыцарь будет блокировать пули и агрессивных врагов, позволяя вам безопасно продолжать атаку.
- Статуя Вора — чтобы притянуть врагов ближе прямо к вашему положению, пока вы безопасно убегаете с помощью баффа скорости.

Разбойник
Разбойник (англ. Rogue) — это один из игровых персонажей в игре Soul Knight. Имеет красивые каштановые волосы и бирюзовый плащ. Под плащом у него надета какая-то футболка бордового цвета. Часть его лица ниже глаз скрыта повязкой. При встрече в подземелье как NPC он поможет вам сразиться с врагами на 1 этаж. Стартовое оружие — Джек и Мэри. Он может быть разблокирован по цене 2000 самоцветов, что делает его самым дешевым приобретаемым за самоцветы персонажем в игре. Способности:
- Уклонение. Способность позволяет Игроку быстро перемещаться мимо пуль и врагов. Используйте эту скорость в своих интересах, чтобы быстро броситься и схватить ничего не подозревающих врагов. После кувырка разбойник имеет 100% шанс критического удара. Совмещая эту способность со снайперскими винтовками или ракетницами, стреляющими медленно (например, Взрыв) можно иметь бесконечный удвоенный урон. После улучшения у Наставника (для персонажа), можно легко игнорировать большие пулевые шквалы и преодолевать лужи эффектов. Также, необычной особенностью является то, что он может кувырком игнорировать урон от дебаффов типа Отравление, Горение. При грамотных кувырках он может избежать весь их урон.
- Иайдо. Способность накапливается до 3 зарядов, что даёт возможность перед комнатой восстановить всю «обойму». При использовании данной способности разбойник делает равок в сторону врагов, при этом нанося урон, и пули на его пути уничтожаются, не нанося герою урона. Данную способность можно использовать для мгновенной зачистки комнат, уничтожения пулевых завес и быстрого перемещения. Способность очень помогает в мультиплеере, например, тактика против босса.
- Колесо. Способность является необычной, так как может тратиться неполностью. Также, как и с «иайдо», перед заходом в комнату рекомендуется полностью восстановить навык. Поскольку есть множество значений времени активации, то, можно не тратя полностью весь заряд преодолевать небольшие расстояния. Сам навык перезаряжается дольше «иайдо» и «уклонение», но является более оптимальным. «Уклонение» позволяет делать небольшой перекат, что не даёт разбойнику проигнорировать большую пулевую завесу, а «иайдо» не управляемо (навык наводиться на ближайшего врага) и продвигает игрока на слишком большое расстояние. Колесо же совмещает в себе плюсы этих способностей, однако перезаряжается дольше.

Рекомендуемые баффы:
- За убийство врага можно получить дополнительную жизнь — так-как разбойник имеет структуру «мало брони, много здоровья», а встроенного лечения не имеет, это поможет ему.
- Увеличение запаса здоровья — тут всё ясно.
- Отсутствие дополнительного урона, если щит разрушен — у разбойника не очень много брони, это будет хорошим баффом.
- Уменьшение скорости пуль врага увеличение радиуса сбора монет — поможет лучше уклоняться от пуль. Больше работает с первым навыком.
- Критический урон от пуль может пробить броню врага — по сути, начальный бафф разбойника, но если нет улучшения за 5000 кристаллов, то хорошо подходит, ведь так, после кувырка игрок будет игнорировать броню.
- Двойной урон от стихийных пуль при критическом ударе — тут тоже ясно, ведь если у разбойника 100% шанс крита, то двойной стихийный урон обеспечен.
- Эффекты статуи активируются дважды — тут всё понятно.
- Атаки ближнего боя могут отразить пули — второй и третий навык вместо того, чтобы уничтожать пули, будет направлять их «на путь истинный» (во врагов).

Ассасин
Ассасин (англ. Assassin) — играбельный персонаж в игре Soul Knight. Выглядит как ниндзя, имеет чёрную кофту с капюшоном и повязкой. Некоторые части его халата имеют красный цвет. Так же, как и Разбойник, может быть нанят в подземелье. Использует Кровавый клинок в качестве начального оружия. Ассасин стоит 4000 самоцветов. У Ассасина умеренно низкие показатели здоровья и брони, но высокий шанс критического удара и урон в ближнем бою. Это настоящая стеклянная пушка. При эффективном использовании он может расчищать волны за секунды. Однако нанесение урона однажды и дважды может легко обойти его броню и даже убить его.
- Использование способности «Тёмный клинок». Этот навык должен может быть полезен в двух случаях: против вражеских толп, где сброс может произойти часто и против одного босса, где сброс невозможен.
- Использование способности «Двойник». В этом случае использование сильного оружия, которое тратит много энергии и имеет большой урон (например, Soul Calibre) является лучшим вариантом, так как клоны не используют энергию. Не забывайте иметь оружие ближнего боя и держать себя в безопасности.
- Использование способности «Невидимка». Делает вас невидимым на несколько секунд до первой атаки. При этом, первая атака будет усиленной. Способность не подходит для оружий, которые поражают одну цель за выстрел. Вы можете использовать навык и на первом, и на втором, и даже на теретьим этажах. К способности подходит статуя Вора, вы легко соберёте всех врагов в кучу и убьёте их.

Рекомендуемые баффы:
- Бафф «Оружие ближнего боя отбивает пули — может помочь выйти из трудных ситуаций, где один взмах не сильно помогает. Это также пассивный бафф.
- Уменьшение неточности, повышение шанса крит. шанса — уменьшает неточность оружия и обеспечивает более критический шанс, так что вы можете убить больше врагов, используя навык темного клинка.
- Критический урон может пробить броню врага — также имеет хорошее сочетание с вашим высоким критическим шансом.
- Увеличение запаса здоровья — хотя Ассасина легко убить, он является одним из самых сильных персонажей в игре, когда берет на себя боссов благодаря способности, которая дает неуязвимость, чтобы не потерять слишком много здоровья. Он увеличивает здоровье, доводя его общее состояние здоровья до 8 (9), что очень поможет вам при столкновении с врагами на 3 этаже. Это также повышает здоровье клонов.
- Уменьшение скорости пуль врага, увеличение радиуса сбора монет — вы можете иметь ~1 дополнительную секунду, которая может быть использована для спасения от смертельных атак, таких как лазеры C6H8O6 и самонаводящиеся пули Малышей-драконов.
- Увеличение эффективности питомцев — полезно для второй способности, так как клоны имеют больше здоровья и могут выиграть время.

Инженер
Инженер (англ. Engineer) — персонаж, носящий оранжевый костюм с жёлтой полоской, который иногда надевают реальные инженеры. Его голова похожа на кулер для воды, пыхтящий внутри, также он держит за спиной машину в качестве рюкзака или системы жизнеобеспечения. Стартовое оружие персонажа — H2O. Оружие можно модернизировать. После разблокировки его также можно встретить во время забега как NPC. После взаимодействия он даст игроку случайную модификацию к оружию, которое персонаж держит в данный момент. Также при наличии материалов он может починить Робота и мотоцикл. Имеет именную броню — Броню прототипа. Способности:
- Турель. Турель можно развернуть в качестве укрытия, так как она способна поглощать пули (лазеры все равно будут проходить сквозь нее), позволяя стрелять из-за нее, не беспокоясь о прямом попадании. Ограда, обеспечиваемая турелью, может быть полезна в открытых местах. Она особенно эффективна во время боя с Дурманом, а также против Великого рыцаря в сочетании с угловыми стеновыми блоками. Она также может легко очистить комнаты босса со стенами. Поскольку турель не может двигаться, старайтесь играть в обороне и стрелять на безопасном расстоянии. Всегда берите оружие ближнего боя для дополнительной защиты.
- Средство передвижения. Вероятно, это один из лучших навыков в игре, потому броня может быть изменена в зависимости от того, что у вас есть на Фабрике роботизации. Броневые крепления имеют дополнительную защиту, что помогает в повышении защиты Инженера. Даже при том, что обычная броня замедляет скорость, броня Инженера вообще не замедляет вас. Вот советы по использованию второго навыка Инженера для каждой брони, которую вы предпочитаете.
- Броня прототипа. Броня прототипа — это броня по умолчанию. В этой броне у вас есть два навыка: пламенная турель и кнопка самоуничтожения. Пламенная турель будет вашей основной огневой мощью в этой броне. Она имеет значительное большую скорость атаки, но стоит слишком много энергии. Она также и не идеально подходит для очистки комнат. Вторая способность, самоуничтожение, действительно мощная. Она разрушает вашу броню и имеет задержку в 3 секунды перед взрывом, нанося 50 урона всем врагам.

- Железный кулак. Не рекомендуется использовать Железный кулак в качестве основной брони для Инженера. Броня подходит для обороны и не имеет дальних атак. Броня не будет полезна в нападении, особенно в битвах с боссами или на ранних этапах. Однако на поздних этапах, где у вас есть хорошее оружие, эта броня может быть использована в качестве средства для регенерации щита и блокировки пуль. Оружие ближнего боя не понадобится с этой броней.
- Апокалипсис. Апокалипсис — это довольно хорошая броня с разумной скоростью атаки. Лазерная атака прекрасно работает для зачистки комнат. Находитесь в укрытии, пока навык находится на перезарядке, и попытайтесь получить рекомендуемые баффы для этой брони.
- Танец дракона. Броня Танец дракона хорошо работает как очиститель комнат из-за ракетного фейерверка. Он также синхронизируется с пассивным баффом Инженера. Атака укуса, однако, не так полезна, поскольку она запускает Инженера вперед, имея более высокий шанс попасть во входящие пули.
- Wi-fi усилитель. Даже если Wi-fi усилитель является хорошим броневым креплением сам по себе, он совершенно бесполезен с инженером, потому что у него нет дополнительной защиты.
Рекомендуемые баффы:
- Увеличение брони — для дополнительной защиты.
- Увеличение здоровья — для дополнительной защиты.
- Отсутствие дополнительного урона, если щит разрушен — для дополнительной защиты. Важно в Убойном режиме.

Маг
Маг (англ. Wizard) является одной из играбельных персонажей. Она выглядит как розововолосая девушка, носящая коричневый плащ и остроконечную шляпу, а также розовую бандану. Стартовое оружие — Кодекс. Если она у вас разблокирована, может встретиться во время забега и мгновенно восстановить 200 энергии. У Мага низкое здоровье (4) и умеренная броня (6). У нее очень высокий энергетический запас, так что дорогостоящее оружие не является проблемой.
Удар молнии — это цепная молния, которая начинается от вашего персонажа и отскакивает от одного врага к соседним врагам. Если враги находятся слишком далеко друг от друга, он не будет прыгать; убедитесь, что враги находятся близко друг к другу! Пронизывающий мороз — это навык, который бросает ряд ледяных шипов, которые могут повредить врагов и заморозить их. Он также уничтожает все близлежащие пули, что помогает очистить область. На время оглушения или замораживания постарайтесь нанести максимальный урон своим оружием, а затем укрыться, чтобы восстановить броню и навык.
Убедитесь, что вы всегда двигаетесь, никогда не стойте на месте. Ваша главная задача — найти хорошее оружие, желательно не полуавтоматическое. Снайперские винтовки довольно хороши, но Ракетные установки или оружие, такое как Ионный рельсотрон, тоже могут быть очень полезны. Держитесь подальше от врагов.

Хотите быть лучшим в игре? Заходите на наш сайт WiseGeek.ru почаще! В своих статьях мы обобщаем советы опытных игроков, рекомендации разработчиков, официальные гайды и наши секреты прохождения игр.
Рекомендуемые баффы:
- Отсутствие дополнительного урона, если щит разрушен — чтобы предотвратить потерю здоровья.
- Увеличение максимальное здоровья — увеличьте здоровье Мага и, следовательно, его живучесть.
- Иммунитет к заморозке — увеличьте продолжительность замораживания Пронзающего мороза.
- Увеличение количества пуль для дробовика — добавляет 2 ряда шипов при использовании Пронзающего мороза.
- Увеличение числа комбо-ударов для оружия, способного наносить комбо-удары — удлиняет ряд шипов Пронзающего мороза (с 6 до 7).
- Бафф перезарядки — уменьшите время перезарядки навыка для большего контроля консистенции.

Вампир
Вампир (англ. Vampire) — это играбельный персонаж. Носит красный плащ и имеет необычный серый цвет кожи, который наблюдается у большинства вампиров. Также его волосы окрашены в чёрный цвет, что подчёркивает его стиль одежды. Его начальное оружие — Бокал алого вина. Это один из двух персонажей, чей скин не качает головою. Но в тоже время его волосы и плащ виляют, словно в воздушной среде. У вампира слабое здоровье (4) и умеренно низкая броня (5). Его стартовое оружие, Бокал алого вина, можно пить, чтобы увеличить максимальный запас здоровья на 1, и его следует использовать как можно скорее.
Поскольку его навык в основном регенерация, зелья здоровья и дополнительный восстановленный бафф здоровья бесполезны. Старайтесь стремиться к увеличению максимального HP и дополнительной вместительности. Несмотря на то, что у него низкий запас энергии, его умение может пополнять энергию. Рекомендуемые баффы:
- Уменьшение скорости пуль врагов, больший радиус сбора монет — увеличивает живучесть.
- Увеличение максимального здоровья — увеличивает живучесть, дополнительное исцеление.
- Максимальная энергия +100 — смягчает его низкоэнергетический пул.

Оборотень
Оборотень (англ. Werewolf) — играбельный персонаж, которого можно купить только за реальные деньги. Оборотень начинает игру с Пламенными когтями. Он также может встречаться как NPC в подземельях. Если Оборотень куплен, то при взаимодействии с ним он просит у игрока 5 монет, за которые отблагодарит вас. С небольшим шансом может дать оружие Один удар. Оборотень имеет очень высокое здоровье (12) и очень низкую броню (2).
Поскольку его стартовое оружие, Пламенные когти, запускает его вперед, Оборотень будет легче поражать входящие пули и получать больше урона. Избегайте огненных или ядовитых луж. Из-за очень низкого энергетического запаса избегайте оружия с высоким энергопотреблением и всегда держите оружие ближнего боя под рукой. Способности:
- Берсерк. Могут возникнуть трудности из-за низкой брони и трудности управления движением при атаке в форме волка. Игровой процесс в значительной степени представляет собой чередование осторожной игры и атаки. Оборотень — это не полностью агрессивный персонаж, использование его способности исключительно с целью нападения и небрежное нанесение урона вызовет у вас много трудностей и заставит оборотня казаться плохим персонажем с низким щитом, который слишком легко теряет здоровье.
- Жажда крови. Он требует гораздо меньше опыта в игре по сравнению с Берсерком, так как легче контролировать своего персонажа. Всегда атакуйте, когда у вас есть более 4 ударов, так как последняя атака притянет всех врагов к оборотню. Попробуйте выполнить этот навык рядом с большой группой, чтобы не только очистить толпу врагов, но и исцелить вас.

Рекомендуемые баффы. Вот некоторые рекомендуемые баффы, которые нужно выбрать во время игры:
- Отсутствие дополнительного урона, если щит разрушен — позволяет оборотню танковать основные удары без потери здоровья.
- Увеличение максимального здоровья, Шанс получить жизнь после убийства врага и Увеличение шанса выпадения зелий при разбивании ящиков также полезны, в порядке убывания приоритета.
- Повышение эффективности зелий следует брать только в том случае, если вы ранее взяли бафф «Падение зелий из ящиков». Иммунитеты к огню и яду являются полезными из-за беспорядочных движений, которые вы совершаете во время трансформации.
- Оружие ближнего боя отбивает вражеские пули — помогает вам справляться с атаками с разных направлений атаки, используя при этом навык.
- +1 броня — помогает увеличить его низкий запас брони, позволяя оборотню выжить немного дольше.
- Увеличение эффективности питомцев и спутников — навык будет полезен, если на вас стоит суперспособность «Жажда крови».

Эльф
Эльф (англ. Elf) — это один из играбельных персонажей в игре. Она носит нефритовый зелено-желтый плащ поверх очень темно-зеленой рубашки. Эльф также носит зеленую бандану с желтым контуром и шиньон того же цвета. У нее светло-золотистые длинные волнистые волосы и голубые глаза. Стартовое оружие — Древний лук. После разблокировки ее можно встретить во время бега в качестве NPC. После взаимодействия она будет следовать за игроком и помогать ему, как спутник только на текущем этаже, вооружившись Древним луком (без улучшения).
Для разблокировки нажмите на Эльфа в лобби и заплатите 12 000 самоцветов. Эльф имеет умеренное здоровье (6) и умеренно низкую броню (5), поэтому она может выдержать не более одного взрыва. Ее стартовое оружие, Древний лук, в сочетании с ее пассивным баффом, создаёт мощное комбо. Способности:
- Прицельный огонь. Поскольку навык перезаряжается всего за 6 (4) секунд, вы можете поклоняться Статуе Рыцаря или Статуе Паладина, чтобы иметь некоторую дополнительную защиту во время боя. В обычных комнатах встаньте где-нибудь с четкой линией видимости к остальной части комнаты и активируйте навык, чтобы воспользоваться преимуществами стрел и увеличенной скоростью крита во время режима фокусировки. Автоматическая цель будет автоматически нацеливаться на врагов (до тех пор, пока вы не коснетесь джойстика).
- Град стрел. Ее второй навык, Дождь из стрел, отлично подходит для очистки скоплений врагов, так как он стреляет большим количеством стрел. Однако этот навык плохо работает против одиночных мелких врагов, так как многие стрелы будут промахиваться. Против крупных врагов, таких как боссы, он все еще может нанести много урона. Помните, что вы можете зарядить ее навык, все еще используя основное оружие. Это даже хорошо, когда обе атаки заряжаются.
- Эльф-страж. Огненный шар полезен для уничтожения толпы, в то время как синий эльф может исцелить вас, когда он впервые появляется. Переключайте эльфов немедленно, когда это необходимо. Красный эльф полезен для контроля толпы. Используйте его большую часть времени при очистке комнат. При сражении с боссами рекомендуется переключаться на зеленого эльфа, самонаводящиеся стрелы и наносить некоторый большой урон одинокой цели. Синий эльф должен быть переключен на всякий раз, когда у вас мало здоровья или брони.
Рекомендуемые баффы:
- Увеличение ширины лазерного луча — усилит действие стрелы в плане площади урона.
- Шанс получить жизнь после убийства врага — позволяет вам легче исцеляться.
- Нет дополнительного урона, если щит разрушен — отлично работает для ее 1-го навыка, потому что броня все равно будет регенерироваться, если вы получите урон.

Священник
Священник — это вспомогательный персонаж. Она достаточно хороша сама по себе, но значительно эффективнее с последователями, в мультиплеере, а также в режиме Начало. Хорошая комбинация — Берсерк, Рыцарем или Разбойником, так как эти персонажи имеют много здоровья, но обычно низкую броню. Эти герои способны нанести огромный урон в обмен на защиту, поэтому священник может помогать восстановить здоровье. Навыки:
- Исцеление. Из-за наличия навыка исцеления, ее собственное здоровье и урон в ближнем бою так же низки, как у Мага. Таким образом, бороться с оборонительным оружием и последователями будет хорошим решением. Можно исцелить последователей, чтобы они могли жить дольше. Нанимайте наемника всякий раз, когда можете себе позволить. После 4-го улучшения ее перезарядка навыков точно такая же, как у Статуи вора.
- Молитва. Одно из самых больших изменений заключается в том, что ее умение теперь можно использовать агрессивно. Активация навыка прямо перед началом боя или, когда появляются новые враги, может принести лучший эффект. Но будьте осторожны, что каждое использование может восстановить только до 3 здоровья, так что неразумно продолжать борьбу, когда персонаж критически поврежден.
- Тень луны. Этот навык значительно меняет стиль игры за Священника, поскольку делает его персонажем, подходящим как для боя, так и для поддержки. Поскольку шары светлой и темной энергии генерируются автоматически, они также будут искать любых окружающих врагов без задержки. Это может быть неудобно, потому что энергетические шары будут атаковать врагов независимо ни от чего, а это означает, что игрок не может остановить их атаку. Поэтому рекомендуется подождать снаружи вражеской комнаты и позволить энергетическим шарам игрока пополниться, прежде чем войти в комнату.

Друид
У друида меньше энергии, чем в среднем. Тщательно используйте дорогостоящее оружие. Вы должны призывать волков на каждом этаже, чтобы вы могли быстро использовать ближний удар против пуль. Так как он не может использовать навык рукопашного боя, лучше носить с собой ближнее и дальнее оружие для безопасности. Советы:
- Атака в ближнем бою может выполняться с помощью активного навыка (первый раз призываются волки). Это можно использовать без переключения с дальнего оружия на ближнее.
- Бафф «Отражение пуль» отлично защищает, так как волки используют ближний бой.
- Его кулдаун активного навыка (после 4-го обновления) короче, чем Статуя Ассасина. В сочетании друг с другом, не пытайтесь спамить навыками слишком быстро.
- Это может быть использовано вместе с медленным оружием ближнего боя (например, с Палашом), чтобы уменьшить длительный интервал.

Берсерк
У Берсерка высокое здоровье (10) и очень низкая броня (4). Это означает, что вы можете легко повредить свое здоровье, что требует гораздо больше зелий здоровья. Энергетический запас также ниже, чем у большинства персонажей, но после получения пассивного баффа эта проблема в основном смягчается. Это никак не влияет на второй навык, так как это похоже на двойную скорость атаки с одинаковым расходом энергии. Навыки:
- Ярость. Используйте способность с нормальной скоростью быстрыми очередями. Его умение может смягчить скорость стрельбы более медленного оружия. Всегда находите врага, который представляет наибольшую угрозу (те, кто способен вызвать дебаффы или находится слишком близко к вашему укрытию), используйте способность. Если вражеские пули слишком большие, чтобы увернуться, попробуйте использовать свое умение и принять удар во время атаки, вы получите меньше урона. Если у вас нет баффа «Отсутствие дополнительного урона, если щит разрушен», используйте укрытия.
- Свободный полёт. Сражайтесь с врагами только тогда, когда навык активен, потому что вы получаете меньше урона. Посохи отлично сочетаются с этим умением, особенно Посох грома. Оружие, которое вызывает эффекты, также работает хорошо, так как у вас есть высокий шанс вызвать эти эффекты. Не используйте оружие с плохой точностью, так как некоторые пули не попадают во врагов.
- Оружие. Из-за ограниченного запаса энергии и энергопотребляющей способности игрокам рекомендуется взять с собой оружие с нулевой энергией. Избегайте непрерывных лазерных пушек, так как их механики атак не соответствуют его навыку. Однако Лазерная рыба является примером, поскольку это бесплатное оружие. Нечетное количество урона оружие хорошо работает со вторым навыком, так как вдвое уменьшенный урон округляется вверх.
Рекомендуемые баффы:
- Отсутствие дополнительного урона, если щит разрушен — поскольку большинство пуль имеют урон 3+, это, вероятно, самый важный бафф для Берсерка.
- Шанс получить жизнь после убийства врага — у него много здоровья, так что это может помочь в восстановлении.
- Увеличение кол-ва пуль для дробовиков — один дополнительный снаряд для навыка Свободный полёт.

Робот
Робот представляет собой персонажа с низким уровнем здоровья (4) и высокой броней (7). Попробуйте играть в обороне, пока навык находится на перезарядке и атаковать, когда перезарядка заканчивается. Его стартовое оружие Вспомогательное парящее орудие, хорошо работает в качестве основного и вспомогательного оружия. Используйте его в качестве основного оружия, пока не будет получено другое оружие. Тогда оно будет использоваться в качестве вспомогательного оружия.
Лазерное оружие лучше всего использовать с роботом. Лазерные пушки можно использовать для быстрой зачистки комнат. Основанное на землетрясении оружие, такое как Молот, может быть использовано для очистки пуль, когда землетрясения становится больше. Световые мечи тоже становятся сильнее. Первый навык робота — Электрическая перегрузка — может вынести целую волну врагов на этаже 3-5 за секунды. Его способность лучше всего использовать, когда враги находятся близко друг к другу. Это особенно эффективно, если у вас есть бонус » Пули могут отскакивать «, поскольку это удвоит врагов, которых могут поразить лазеры.

Тем не менее, вы уязвимы, пока ваш навык перезаряжается, и по-прежнему рекомендуется использовать укрытия. В то время как ваш навык активен, вы тоже будете ходить медленнее, поэтому используйте оружие ближнего боя, чтобы блокировать пули. Второй навык робота — Рой дронов. Он работает менее эффективно в уничтожении целой волны врагов, но может быть использован за стеной. Дроны также наносят намного больше урона боссам, так как все дроны атакуют сразу. Они также могут временно заморозить, что помогает победить босса. Этот навык в целом более универсален, чем первый навык. Рекомендуемые баффы:
- Увеличение максимальное здоровье — больше здоровья помогает смягчить низкое здоровье робота.
- Пули могут отскакивать — идеально с мастерством и лазерным оружием.
- Больше пуль для дробовиков — добавляет 5-й электрический луч для первого навыка.
- Отсутствие дополнительного урона, если щит разрушен — хотя его броня может выдержать 2 попадания в большинстве случаев, это может предотвратить случайный высокий урон.
Используйте лазерное оружие и оружие, которые создают ударные волны. Вы также можете выбрать Световой меч. Попробуйте получить Лазерную рыбу в аквариуме.

Некромант
Характеристики Некроманта идентичны характеристикам Мага, только с более высоким уроном в ближнем бою. Ее первый навык, Кошмар, отмечает врага меткой. Если отмеченный враг убит, вызывается призрачная рука и действует как Последователь. Рука призрака зависит от баффа питомца. Метка исчезнет через 10 секунд, если помеченный враг не будет убит. Для боссов ей нужно нанести 50 урона, чтобы вызвать призрачную руку. Навык очень подходит для боссов, которые не используют лазеры. Босс будет отвлекаться на рук.
Ее второе умение, Роковой камень, вызывает метеор сверху. Метеор при ударе создает облако чумы, которое накладывает эффект временного урона на врагов, а затем вызывает чумного паука. Паук также выпускает облако чумы после смерти. Если этот навык улучшен, жертвы чумы превращаются в скелетов-союзников. При бою с боссами, такими как Варколин-лидер, навык будет бесполезен. Урона боссу почти не будет, этот метеорит очень слабый. Это стеклянная пушка, которая отлично справляется как с толпой, так и с боссами. Ее третье умение, Воскрешение душ, воскрешает любого не статичного и исчезающего с поле битвы врага. Если навык улучшен, можно будет воскресить до двух любых противников. Рекомендуемые баффы:
- Увеличение запаса здоровья — она стеклянная пушка, поэтому дополнительное здоровье — большое улучшение.
- Отсутствие дополнительного урона, если щит разрушен — для дополнительной танкованности.
- Увеличение урона питомцев — чтобы улучшить характеристики своих союзников.
- Иммунитет к яду, увеличение урона от яда врагам — значительно увеличивает урон от чумы Рокового камня.

Офицер
Характеристики Офицера такие же, как у Алхимика. Его первое умение, Пушковращатель, позволяет ему загружать и использовать легендарный револьвер «Поборник мира», который невозможно найти каким-либо иным способом. Бонус «Увеличение числа комбо ударов» и улучшения навыков от наставника улучшают его, добавляя больше снарядов. Его второй навык, Метка охотника, позволяет ему получать монеты за убийства врагов. Используя его, вы отметите ближайшего врага на 10 секунд, а убийство при активной отметке увеличивает кол-во монет на 2. Пули также попадут в цель и увеличат шанс критического удара.
Офицеру лучше иметь дальнобойное оружие. Хотя его пассивный бафф не так уж и хорош, взрывное оружие, тем не менее, является хорошим дополнением к его арсеналу. Навыки лучше всего работают с большинством стандартных дальнобойных орудий. Поскольку он наносит огромный урон на расстоянии, обычного оружия ближнего боя для защиты будет достаточно.

При обновлении навык «Пушковращатель» может давать высокий урон. Рекомендуется зарядить пистолет до максимальной мощности и подождать, пока навык загрузится обратно до 3, прежде чем войти в комнату. Это позволит пистолету нанести 48 урона при входе, и вы все еще можете нанести дополнительные 24 урона, если нажмете кнопку навыка достаточно быстро. Если учесть критический шанс, это оружие может нанести более 100 урона при входе в комнату. Зарядка пистолета, прячась за укрытием, также является хорошей стратегией.
Рекомендуется заряжать пистолет находясь в укрытии. Когда вы находитесь на открытом месте, просто попробуйте нажать кнопку навыка время от времени, чтобы добавить урон к вашему оружию. Использование Пушковращателя с автоматической зарядкой оружия очень эффективно. Имейте в виду, что после загрузки Поборника мира, нажав на кнопку огня, вы выстрелите всеми пулями.

Даос
Даос преуспевает в защите от огромных волн пуль и, возможно, даже отражать их. Все три навыка способны выносить пулевые штормы за короткое время. Первый навык вызывает летающие мечи, которые будут кружить вокруг игрока, прежде чем бросаться на врагов. Имейте в виду, что во время всего этого процесса они могут быть уничтожены пулями при ударе. Этот навык также имеет относительно низкое время перезарядки, поэтому его можно регулярно использовать против пулевых бурь.
Второй навык создает круг, который не только позволяет игроку игнорировать вражеские пули, но и заставляет их нацеливаться на врагов и наносить им урон. Однако он имеет гораздо более длительную перезарядку по сравнению с первым навыком, и поэтому должен использоваться только тогда, когда это необходимо. Когда он перезаряжается, рекомендуется прятаться или играть в обороне из-за низкого щита и здоровья.

Третий навык призывает меч, который во время использования принимает весь урон на себя, а также позволяет атаковать врагов с большой скоростью, что очень эфективно для контроля толпы и быстрого перемещения во время битвы. Но поскольку навык имеет самую долгую перезарядку среди навыков Даоса, то рекомендуется использовать навык очень осторожно. Помимо легкой очистки пуль, все три также способны наносить солидный урон. Летающие мечи первого навыка будут атаковать врагов самостоятельно после того, как они покружатся вокруг игрока в течение 1-2 секунд. Для того чтобы максимально увеличить урон, рекомендуется после использования навыка приблизиться к противнику.
Мечи будут кружить вокруг игрока только в первой фазе, поэтому, двигаясь близко к врагам, они могут быть использованы для нанесения урона. Из-за того, что мечи, поражающие врагов, не исчезают, а пронзают их, они будут обрушиваться на врагов во время второй фазы навыка, нанося дополнительный урон. Если их объединить, то урона будет достаточно, чтобы серьезно ранить босса, очистить толпу или уничтожить небольшое количество чемпионов.
Soul Knight: Гайд по питомцам, их виды и особенности

Кто такие питомцы? Питомцы — товарищи, которые следуют за игроком и помогают ему в бою. В самом начале игры вам доступна только кошка Чилли. Остальные питомцы могут быть разблокированы за самоцветы (в основном 1000) или достижения. Чтобы выбрать (поменять) питомца, нужно нажать на него в жилой комнате перед выбором персонажа, а затем отрегулировать питомца, нажимая на белые стрелочки.

Виды питомцев. Список всех питомцев:
- Чилли — стандартный;
- Дружок — стоит 1000 самоцветов;
- Колбаска — стоит 1000 самоцветов;
- Синий — стоит 1000 самоцветов;
- Робо — стоит 1000 самоцветов;
- Панда — открывается за второе пожертвование Кошке удачи. Можно получить даже за самую маленькую покупку в виде 5 рыб;
- Бон-Бон — стоит 1000 самоцветов;
- Консервированная свинья — стоит 1000 самоцветов;
- Голубь — стоит 6.666 самоцветов;
- Tap — доступно только в приложениях TapTap. Выполните достижение «Легендарный охотник», чтобы разблокировать.
- Детёныш тюленя — стоит 8.888 самоцветов. При каждом перезаходе в игру он может менять свой цвет, всего есть три цвета — красный, пурпурный и мятный. У этого питомца уникальная анимация «отдыха».
- Сова — открывается за выполнение достижения «Любитель орлов»
- Унаследованный баг — открывается за выполнение достижения «Семейное сокровище» Этот питомец не появляется в подвале, пока игрок не завершит с ним игру.
- Уэйн — можно разблокировать во время Хэллоуина: достаточно встретить его в Саду (на месте Панды) и покормить его 3 раза Бокалом алого вина, Зелёной эссенцией или Мясом. Хотя этот питомец может летать, он не может двигаться через препятствия. Этот питомец — единственный в игре, который имеет анимацию атаки (укуса)
- Бегемотик Пинко — стоимость 5 сушёной рыбы. Открывается в Магазине Кота удачи;
- Макс — можно разблокировать во время Дня Благодарения: достаточно встретить его в Саду (на месте Панды) и покормить его 3 раза Зелёным луком, Морковью, Мясом, а также всеми видами рыб (Лазерная рыба, Рыба и Небесный меч).
- Орешек — стоимость 5 сушёной рыбы. Открывается в Магазине Кота удачи.
- Снежок — стоимость 3000 самоцветов.
- Дымок — стоимость 5 сушёной рыбы. Открывается в Магазине Кота удачи.
- Ковбой — стоимость 5 сушёной рыбы. Открывается в Магазине Кота удачи.
- Батя — стоимость 2500 самоцветов.
- Офицер Чилли — заполучите Золотой трофей в режиме Маленький командир для получения данного питомца.
Особенности питомцев. Если питомец получает слишком много ранений, он перестает атаковать и возвращается к персонажу. После 30 секунд отдыха, он вернется в бой. Питомцы могут быть исцелены Священником. Обратите внимание, что они не могут быть исцелены, пока отдыхают.
Все питомцы наносят 3 очка урона и имеет 5% шанса крит. урона. Эти характеристики могут быть улучшены за счёт улучшения Корма для питомца. Также некоторые имеют атаку по небольшой области похожие на уменьшенные атаки Ножа мясника и Молота. Панду можно получить на 1 игру, покормив её любым съедобным оружием в лобби (панда находится в конце сада).

Дурман. Растение-питомец. Победите Дурмана, и у вас будет низкий шанс получить семя Дурмана. После того, как семя вырастет, летающее существо появится на вершине цветка, и будет следовать за вами в следующей игре. Единственный другой 1-кратный источник для него — Выполнить задание «Легендарный охотник». Это единственный питомец, который выполняет дальние атаки. Каждая атака стреляет 3-полосными пулями. По умолчанию каждая пуля может нанести 3 урона и нанести яд при критических попаданиях. Таким образом, он может извлечь выгоду от бонусов. Вероятность критического удара неизвестна.
- «Увеличение количества пуль для дробовика» — добавляет еще 2 пули (в общей сложности 5).
- «Иммунитет к токсичным газам и замедлению, увеличение урона от яда врагам» — увеличивает урон от яда.
- «Повышение точности удара и шанса крит урона» — уменьшает угол стрельбы пуль.
- «Двойной урон от стихийных пуль при критическом ударе» — позволяет ему наносить двойной урон при критических ударах.
Это единственный летающий питомец, который перемещается по ящикам и атакует врагов сзади.

Титан Арум. Растение-питомец. Семена можно получить случайным образом. Каждое семя можно использовать только один раз, так как растение само выскочит из участка и будет ходить за вами как домашнее животное. Этот питомец может кусать врагов, как волк, вызванный Друидом. Он может нанести 5 повреждений (8 с «Увеличение эффективности питомцев и спутников»). Вы не можете использовать более одного раза этого питомца в одной игре.
Soul Knight: Получение эффектов статуй

Что такое статуи? Статуи (англ. Statues) — это элемент игры, помогающий игроку усилением способности. Встречаются в особых комнатах. В игре их всего десять (исключая статуи пасхального кролика), но каждая в различных ситуациях бывает полезна. Одновременно может быть только один эффект, но с челленджем вы можете поклоняться нескольким статуям. Чтобы получить усиление навыка от них, нужно преподнести пожертвование в виде 15 монет на первых этажах, а с последующим этажом цена будет расти.
Активация эффектов. Для активации эффекта статуи нужно активировать способность персонажа. У статуй есть определенное время, через которое их свойство возобновится, допустим, статуя ассасина восстанавливается почти мгновенно, а статуя священника только через 10 секунд, однако повторно активировать эффект можно лишь после перезарядки основной способности. Но можно получить эффект статуи и в жилой комнате: для этого надо разблокировать священную статую и заплатить 300-1200 самоцветов, при этом эффект будет рандомным.

Статуя вора. Эффект: все ближайшие враги притягиваются и получают 4 урона. Также вы получите временный бонус скорости. Время восстановления: 3 секунды. Эффективно использовать эффект этой статуи вместе с способностью Алхимика, что позволит притянуть больше противников в ваше ядовитое облако. Также можно использовать эффект статуи с мощным оружием ближнего боя, что позволит сэкономить время на пробежках по комнате. Аналогичный эффект можно получить, играя за Оборотня.

Статуя эльфа. Эффект: создаёт волну, идущую во все стороны, которая наносит всем противникам 3 урона, попутно уничтожая все снаряды Время восстановления: 8,1 секунд. Эффект этой статуи хорошо сочетается с баффом «Оружие ближнего боя может отразить вражеские снаряды», поскольку вместе с ним вы сможете отразить снаряды со всех сторон. Эффект этой статуи очень полезен в сражении против боссов, создающих много снарядов, такими как Великий Маг или C6H8O6, поскольку он уничтожает все снаряды вокруг вас. Это дает вам возможность, к примеру, быстро сменить позицию.

Статуя чародея. Эффект: при использовании особой способности персонажа вы призываете 8 самонаводящихся снарядов. Время восстановления эффекта: 5,2 сек. При использовании умения персонажа эффект статуи позволяет персонажу выпустить 8 самонаводящихся пуль во все направления. Пуля приближается к ближайшему врагу. Каждая из этой пули наносит по 3 урона, то есть до 24 единиц урона в общем. Рекомендуемые бонусы:
- С улучшением на увеличение точности снаряды будут вылетать в сторону, куда смотрит игрок;
- С баффом ’’Увеличение количества пуль для дробовика’’ количество пуль увеличится на 4.

Статуя священника. При активации способности персонажа под ним образуется светло-зелёный рунный круг, который мигает и трижды восстанавливает игроку по 10 энергии, если игрок находится в круге. Также если враг зайдет в этот круг, ему будет наноситься по 10 урона. Советы:
- Такие персонажи, как Маг (если бы не ее высокая энергия) и Алхимик, являются лучшими для этой статуи, потому что во время своих навыков им не нужно двигаться так же, как другим.
- Навыки некоторых персонажей, например, Ассасина и Разбойника, позволяют им передвигаться, поэтому это было бы менее выгодно.
- Священник с таким эффектом статуи расширит диапазон регенерации энергии до полного размера своего Пакта Регенерации.
- Эта статуя рекомендуется для Рыцаря и Берсерка из-за их энергоемких навыков.
Эффект статуи используется для нанесения урона врагам в течение 3 тиков (по 10 за тик). При первом добавлении магический круг, который помещает эффект статуи, был просто жёлтым кругом, похожим на пул ядов, вместо его текущего.

Статуя ассасина. Поклонение этой статуе получает эффект стреляющих ножей, когда ваш персонаж использует своё умение. Ваш персонаж стреляет 3 ножа в направлении, в котором находится персонаж. Эти ножи проникают во все, кроме неразрушимого укрытия / стен, и наносят по 4 урона врагам каждый. Однако ножи вряд ли будут наносить критические удары. Эти ножи оставляют за собой серебряный след. Эта способность статуи имеет время восстановления 1 секунды. Советы:
- Хорошо работает с бонусом «Увеличение количество пуль для дробовиков», так как это приведет к выстрелу 5 ножей вместо 3.
- Бафф «Пули могут отрикошетить» заставляет кинжалы отскакивать один раз, позволяя им поражать больше врагов одновременно.
- Это также зависит от баффа точности, так что кинжалы попадают в узкий конус и могут поразить того же врага.
- Время восстановления способности этой статуи очень быстрое, поэтому рекомендуется для персонажей с маленьким кулдауном умений, таких как Разбойник. Это наряду с бесконечным прокалыванием может быть полезно для взлома ящиков без оружия ближнего боя.
- Эта статуя также подходит бойцам ближнего боя / оружию ближнего боя, поскольку кинжалы могут убивать врагов с низким уровнем здоровья, что дает вам больше времени для общения с другими.

Статуя рыцаря. При использовании умения персонажа эта способность позволяет вам призвать рыцаря, который будет сражаться на вашей стороне против монстров. Эти миньоны умрут через 30 секунд или после того, как они получат слишком много урона. Всего можно иметь только 6 из таких рыцарей (питомец, прислужники и другие миньоны не в счет). Призванные рыцари визуально похожи на вражеских рыцарей, найденных в Подземелье рыцарей. Советы:
- Попробуйте использовать последователей как отвлечение. Это может быть очень полезно во время битв с боссами, так как дает вам пространство для регенерации брони и безопасной атаки босса.
- Рыцари считаются прислужниками, поэтому на них действуют бонусы «повышение эффективности питомца и прислужников» и «оружие ближнего боя может отразить снаряды».
- Бафф с двойной статуей вызывает двух рыцарей, когда срабатывает эффект статуи, и сохраняет тот же круг.

Статуя инженера. При поклонении статуе создаёт четыре заряда тротила вокруг персонажа, которые взрываются при контакте с врагом или через пару секунд. Советы по применению:
- Эффект статуи может нанести 40 урона и мгновенно убить многих врагов в том числе усиленных противников.
- Она рекомендована к применению Ассасином и Алхимиком, так как у Ассасина способность применяется близко к врагам и у него триггер на автоматическую атаку при приближении к врагу в способности, у Алхимика способность замедляет, и враги вряд ли убегут.

Статуя берсерка. Статуя берсерка при активации способности увеличивает размер и урон пуль, как лазерного оружия, так и обычных пистолетов, и даже на оружии ближнего боя. Эффект также создает красный шестиугольник вокруг игроков, похожий на эффект Красного кольца. Эта статуя не оказывает никакого влияния на лазерное оружие непрерывного выстрела (такое как Электрическая терапия и Лазерная рыба), а также на умения Робота, Вампира, Паладина и Мага.
Увеличенные пули останутся даже на тайм-ауте эффекта. Это хорошо для некоторых видов оружия, таких как Магический посох и Отличный посох. Технически, эффект «Двойная статуя» увеличивает длительность умения только на 0,4 секунды. Лучше всего к этой статуе подходит рыцарь, потому что у него есть способность «Два оружия». То есть, со статуей на старом пистолете получается примерно 10 урона.

Статуя паладина. Поклонение этой статуе дает игроку возможность создать барьер вокруг вашего персонажа, когда он использует свое умение. Умение не может предотвратить урон от яда, огня и т.п., но может нанести урон от них один раз. Так как умение принимает удар, оно сбросит перезарядку регенерации брони. Если быть нетронутым, барьер длится 6.5 секунд. Эта способность статуи имеет перезарядку 8,5 секунд. Советы:
- Щит — это в основном резервный план, поскольку он полностью отклоняет атаку всякий раз, когда вы случайно получаете удар.
- Это не лучшая комбинация с паладином, так как его умение энергетического щита сводит на нет весь урон и длится чуть меньше, чем эффект статуи. Однако в крайнем случае, если опасная атака происходит сразу после того, как щит исчезает, барьер предлагает некоторую ценную помощь.
- Эффект этой статуи особенно полезен против атак, которых трудно избежать, таких как лазеры, что значительно упрощает такие сражения, как C6H8O6, Великий маг и Варколин-лидер.
- Бафф «Удвоение эффекта статуи» позволяет установить два барьера, что дает вам значительно больше времени, чтобы откалибровать свои боевые действия против боссов или роя врагов. С испытанием перезарядки умений -50% можно получить сразу четыре щита, а благодаря рамкам непобедимости игрок может легко избежать нескольких ударов.
- Бафф «Уменьшение времени перезарядки навыка» позволяет использовать способности чаще, что позволяет чаще использовать барьер, особенно с персонажами, у которых уже есть относительно короткие периоды восстановления, такими как Алхимик, Маг и Разбойник. Разбойник и Маг делают особенно отличные комбинации с этой статуей, поскольку они представляют собой стеклянные пушки.
- Старайтесь не тратить барьер на более слабые источники урона.

Статуя кролика. При использовании умения персонажа эта способность позволяет вам призвать кролика, который будет сражаться на вашей стороне против монстров. Он исчезнет через 20 секунд после призыва или после получения большого кол-ва урона. Можно призвать неограниченное кол-во кроликов — их количество ограничивается только скоростью восстановления способности. Например, играя за первую способность Разбойника, можно создать более 10 кроликов. В отличие от остальных миньонов, кролики не имеют анимации смерти — они просто исчезают без какого-либо эффекта.

Статуя оборотня. Поклонение этой статуе дает игроку возможность восстанавливать одну единицу здоровья раз в 60 секунд.
- С бонусом «Двойной эффект статуй» статуя будет восстанавливать 2 здоровья.
- Эффекты статуи не влияют на питомцев и других игроков.
- Бонус «Увеличение эффективности зелья», похоже, не влияет на эффект статуи.
Статуя может быть чрезвычайно полезна персонажам, которые полагаются на здоровье, таким как Разбойник и Эльф. Настоятельно рекомендуется бонус «Двойной эффект статуй», так как он восстанавливает 2 здоровья вместо 1. Если игрок использует способность этой статуи, у него должно быть максимальное повышение здоровья, чтобы эффективно использовать эту статую.
Перезарядка очень долгая, поэтому игроку не следует рассчитывать на восстановление большого количества здоровья перед тем, как войти во все комнаты, это может занять очень много времени. Игрок может рассчитывать на то, что он может восстанавливать 1 здоровье каждый раз, когда он использует свой навык при переходе на новый уровень.
Soul Knight: Обзор бонусов, что дают и как получить

Бонусы. Бонусы или баффы (англ. Buffs) — пассивные способности, облегчающие игру. При переходе между некоторыми уровнями вы должны будете выбрать 1 бонус из 3 случайных. Количество бонусов ограничено количеством слотов для них. Баффы вы собираете после уровней: 1-1, 1-3, 1-5, 2-3, 2-5.
Дополнительные бонусы. Возможно получение дополнительных бонусов:
- Улучшение персонажа 6-ой раз даёт дополнительный стартовый бонус (какой, зависит от персонажа);
- Сбор урожая с определенных растений в саду;
- Таинственный Торговец всегда продаёт один бонус за одно макс. здоровье;
- Официант продаёт напиток, дающий бонус;
- Волшебный колодец в саду выдаёт специальный бонус, который нельзя найти в игре;
Бонусы, полученные этими методами, становятся дополнительными, не занимая свободные слоты. Уже имеющиеся бонусы больше не появятся в той же игре. Обманщик — NPC, который может сбрасывать последний полученный (не дополнительный) бонус. Если есть слоты бонусов, которые невозможно использовать, они будут иметь знак минус вместо знака плюс. Это включает в себя дополнительный 6-ой слот бонуса для не улучшенных 6 раз персонажей. Но их можно использовать, купив пузырёк с усилением у Таинственного торговца. Тогда вместо ячейки с минусом будет выбранный бонус.
Влияние модификаторов. Некоторые модификаторы испытаний с Доски заданий влияют на выбор бонусов:
- «Максимальное количество бонусов +3» добавит 3 пустых слота бонусов, в которые вы как обычно выберете бонусы при переходе между уровнями;
- «Максимальное количество бонусов -3» уберёт 3 слота бонусов (они будут со знаком минус);
- «Варианты +2 при выборе бонуса» — вместо 3-х на экране выбора будет появляться 5 бонусов;
- «Варианты -2 при выборе бонуса» — вместо 3-х на экране выбора будет появляться 1 бонус.

Увеличение эффективности зелий. Зелья здоровья восстанавливают на 2 здоровья больше. Зелья энергии восстанавливают на 80 энергии больше. Зелья восстановления восстанавливают на 1 здоровье и на 40 энергии больше. Навык Священника восстанавливает не одно, а два здоровья за тик.

Повышение шанса получить зелья из разбитых ящиков. При наличии бонуса из разбитых препятствий (коробок, ловушек и т.п.) начинают выпадать малые зелья здоровья, также повышается шанс их выпадения из ящика за прохождение комнаты. Несмотря на то, что в описании сказано «повышение шанса», без этого бонуса зелья вообще не падают из разбитых ящиков.

За убийство врага можно получить дополнительную жизнь. Вероятность восстановления 1 здоровья при смерти врага. Эффект не срабатывает при смерти Напарника.

Получение энергии при убийстве врагов. Мгновенно восстанавливает 2 энергии за каждого убитого врага. Убитые питомцами и напарниками враги так же считаются.

Увеличение запаса здоровья. Навсегда увеличивает макс. здоровье в текущем забеге на 4. Также лечит игрока на 4.

Появление ударных волн, если щит разрушен. Слово щит в описании означает «Броня». Отталкивает ближайших врагов. Также уничтожает пули в небольшом радиусе. Если есть бонус «Оружие ближнего боя может отразить пули», не уничтожает а отражает пули. Срабатывает всякий раз, когда ваш персонаж теряет броню.

Отсутствие дополнительного урона, если щит разрушен. Слово щит в описании означает «Броня». Если вы получите удар, урон которого будет больше, чем у вас брони, броня будет сбита, но вы не получите дополнительного урона по здоровью. Не останавливает урон от яда/горения, так как он наносится постепенно. Полезно для некоторых героев с низкой броней — их низкая броня послужит отличным буфером урона. Также хорошо работает с героями с низким уровнем здоровья, предотвращая смерть при сбитой броне.

Броня +1. Навсегда увеличивает макс. броню в текущем забеге на 1.

Уменьшение скорости пуль врага увеличение радиуса сбора монет. Вражеские пули летят медленнее и от них легче увернуться. Любые монеты и энергия, появляющиеся на экране, будут притянуты, даже находясь сравнительно далеко от персонажа. Возможно продлевает время нацеливания лазеров, но они все равно мгновенно поразят свою цель при выстреле.

Иммунитет к токсичным газам и замедлению, увеличение урона от яда врагам. Иммунитет к урону от ядовитых и фиолетовых луж и эффекту отравления. Увеличение урона отравляющих луж противникам с 1 до 2. Увеличение урона от отравления противников с 2 до 3.

Иммунитет к огню и взрывам, увеличение урона от огня врагам. Иммунитет к урону от огненных луж и лавовых плиток с локации Огненные пещеры. Иммунитет к горению от взрывов или вражеских атак.
- Уменьшает урон, получаемый от шипов Золотого Краба-Гиганта на две единицы;
- Уменьшает урон от метеоров/взрывов с 5 до 2;
- Уменьшает урон от небольших взрывов с 1 до 0. (Всё ещё наносят 1 урон в Убойном режиме);
- Увеличивает урон от горения противников с 3 до 5;
- Увеличивает урон оружия со взрывами и возможностью поджечь врага (например, Взрывной молот войны).

Иммунитет к ловушкам и урону при столкновении. Иммунитет к урону от ловушек с шипами. Иммунитет к тарану врагов, таких как кабаны. Не защищает игрока от вражеского оружия ближнего боя.

Устойчивость к заморозке и дополнительное время заморозки врага. Иммунитет к заморозке и получение на 1 меньше ед. урона от замораживающих снарядов. Уменьшает урон от ледяных шипов Короля снеговиков, Короля снежных обезьян и Кристаллического Краба-Гиганта на две единицы. Обычные враги замораживаются на 4 секунды. Время заморозки для боссов немного увеличено.

Цена в магазине ниже. Уменьшает цену всего, что требует монет (магазины, торговые автоматы, статуи, Обманщик, нанятие напарников) на 50 процентов. Также уменьшает стоимость выстрела для Денежной пушки. Не влияет на цену товаров Таинственного торговца. Однако, есть исключение. Если Таинственный торговец высвобожден из клетки, с этим бонусом можно будет не тратить максимальное здоровье.

Больше самоцветов в конце каждой игры. Несмотря на то, что написано «каждой игры», это относится только к текущему забегу. Дает дополнительные 15 самоцветов за каждый пройденный этаж, кроме 1-1, до 225 за забег.

Увеличение эффективности питомцев и спутников. Питомцы и напарники имеют на 25 больше здоровья. Это также действует на призванных миньонов и двойников Ассасина, на турели Инженера. Питомцы наносят 3 дополнительных урона. Напарники могут экипировать Оружие эпичной или лучшей редкости.

Сократить время восстановления навыка. Время восстановления навыка уменьшается на 2 секунды. Результат может варьироваться для навыков с уже коротким кулдауном. Не влияет на длительность навыка. Также влияет на время восстановления эффекта статуй.

Эффекты статуи активируются дважды. Эффекты статуй будут срабатывать дважды. Например, Статуя Рыцаря призывает 2 рыцарей вместо 1. Второй эффект активируется только через 0,5 секунды. Время восстановления эффекта статуи остается прежним.

Возьмите в бой дополнительное оружие. Игрок сможет иметь 3 оружия одновременно. Если этот бонус снимается Обманщиком, оружие, помещенное в 3-й слот, будет выброшено на землю в начале следующего уровня.

Ускорение зарядки оружия, требующего зарядки. Луки, Рельсотроны, Лазеры, Оружия ближнего боя и другое заряжаемое оружие будут заряжаться быстрее. Определенные метательные оружия будут восстанавливаться быстрее после использования. Оружие, которое увеличивает скорость стрельбы с течением времени, быстрее достигает максимальной скорости.

Увеличение области атаки лазерного оружия. Лазерные и электрические лучи увеличиваются в ширине. Некоторое оружие сможет наносить на 1 урон больше. Например, Световые мечи, которые не стреляют никаким лучом.
- Влияет на первое умение Мага, так что её молния больше и наносит больше урона.
- Влияет на умение Робота, оно наносит больше урона.
- Влияет на ударные волны, создаваемые молотами и Песчаным червем, и Золотым жезлом.

Критический урон от пуль может пробить броню врага. Критические пули пролетают сквозь врагов и наносят критический урон каждому следующему врагу, в которого попадают.

Повышение точности удара и шанса крит урона. Увеличивает точность и шанс критического удара вашего оружия. Значения варьируются в зависимости от оружия. Влияет не на всё оружие. Самонаводящиеся выстрелы будут лететь быстрее. Влияет на Статую Чародея: пули стреляют на 180 градусов в направлении взгляда, а не на 360 градусов. По возможности влияет на оружие напарника.

Оружие ближнего боя может отразить пули. Оружие ближнего боя может отражать пули. Самонаводящиеся и исчезающие со временем пули, лазеры можно только уничтожить. Отраженные пули не могут поразить дружественных персонажей. Отраженные пули могут быть критическими, но шанс низкий. Некоторое оружие, такое как Малый щит и Щит, сможет отражать пули.
- Влияет на первое умение Ассасина и базовые атаки ближнего боя.
- Влияет на напарников и врагов, использующих оружие ближнего боя.
- Действует на умение Паладина.
- Статуя Эльфа будет отражать пули.
- Уникальный бонус Световым мечам: отраженные пули летят с дополнительной скоростью.

Увеличение количества пуль для дробовика. Дробовики выпускают больше пуль (обычно еще 2) помимо обычных. Некоторое оружие изменит схему атаки и может также увеличиться стоимость энергии. Применяется к нескольким другим оружиям, если они могут выстрелить несколько пуль за выстрел. Применяется для метательного оружия, оно сможет заряжать больше пуль (например, Малый щит).
- Влияет на эффекты статуи Ассасина и Чародея.
- Влияет на умение Робота, он будет пускать дополнительный электрический луч.
- Влияет на второе умение Мага, он будет испускать пять рядов шипов вместо трёх.

Увеличение урона посохов. Добавляет базовый урон посохов. Цифра может варьироваться в зависимости от посоха. Для защитных посохов (как Посох скелета или Отличный посох) усиливает их способность. Не влияет на Походную палку, несмотря на её внешний вид.

Двойной урон от стихийных пуль при критическом ударе. Если атака вешает дебафф на врагов при критических ударах, она будет так же наносить двойной урон (обычно крит урон от таких пуль не наносит больше урона). Не влияет на оружие, вызывающее дебаффы без пункта «критический удар», например, взрывчатку.

Пули могут отрикошетить. Пули отскакивают один раз при попадании в стену. Оружие, которое уже может рикошетить, будет рикошетить еще раз. Однако пули теперь будут отражаться от объектов половинной высоты. Некоторые из отрикошетивших пуль могут нанести меньше урона после первого прыжка. Распространяется на обычные пули и лазерные лучи. Также применимо к Электрической терапии и Лазерной терапии, позволяя лучам оружия атаковать нескольких врагов. Работает на умение Робота.

Увеличение скорости стрельбы оружия. Увеличивает скорострельность оружия на 10%.

Увеличивает дальность атаки оружия ближнего боя. Увеличивает область атаки любого оружия ближнего боя на 30%. Не увеличивает базовую атаку.

Увеличение числа комбо-ударов для оружия, способного наносить комбо-удары. Комбо-ударное оружие будет делать 1 раз дополнительный выстрел при каждой атаке. Складывается с модификациями. Влияет на вторую способность Алхимика, Разбойника, Офицера и Ассасина, позволяя накапливать дополнительный заряд.

Максимальная энергия +100. Увеличивает максимальный запас энергии на 100 до конца забега. Эффект снижается до +50, если активна «Макс. Энергия -50%».

Превращение неосновного оружия в парящее. Оружие, которое лежит во втором слоте, будет атаковать автоматически, как Вспомогательное парящее орудие. Является пассивным для Даоса и его нельзя получить в обычной игре. Если использован бонус «Возьми в бой дополнительное оружие», то атаковать будет не одно оружие, а два.
- Этот бонус не работает с некоторыми оружиями, такими как: Супердруг, Один удар, Баллиста, Щит и др. (они просто будут летать и ничего не делать).
- Луки и Рельсотроны не смогут заряжаться до конца.
- Метательное оружие будет атаковать только в ближнем бою.
- Парящий лазер атакует как Парящее орудие (3-мя жёлтыми пулями).

Восстановление энергии +1. Сферы энергии восстанавливают 9 энергии вместо 8. Не влияет на зелья энергии. Можно получить только из Волшебного колодца в саду.
Soul Knight: Гайд по оружию, комбинации для создания

Оружие. В настоящее время в игре 358 единиц различного оружия, (4 из них доступны только в обновлении Китайский Новый год) от мечей, луков, арбалетов и обычных пушек до лазеров, рельсотронов, снайперских винтовок и посохов. Также есть одно оружие без названия (можно получить только путём переплавки). Почти каждое оружие имеет свой особенный способ атаки.
Получение. Получить оружие можно из сундуков, магазинов, торговых автоматов и от некоторых дружественных персонажей, вырастить в саду (откроется с уровня 2-1), применив купон в обменном аппарате и/или создать на столе кузнеца в мастерской. Ещё в мастерской есть стол конструктора, где можно «исследовать» предметы и позже получить возможность создавать и их (для исследования кроме материалов потребуется ещё и чертеж).
Также можно соединить два/три оружия в одно (синергия). После того, как вы исследовали предмет, его можно будет создать на столе кузнеца. Количество открытого оружия, сколько именно каждого вида было собрано, его характеристики и внешний вид можно посмотреть в подвале (если идти влево) который открывается в жилой комнате после первой игры. Также в подвале есть статистика (плакат с мечом в начале каталога оружия) в которой указывается количество найденного оружия и общее количество.
Редкость. Редкость оружия обозначена цветом его названия:
- Обычное — самое часто встречающееся оружие функционал которого максимально прост и понятен, зачастую это обычные пистолеты, пулеметы, ПП, винтовки и дробовики;
- Необычное — более редкое и хорошее оружие, чаще всего это ракетницы или оружие, способное наложить дополнительные эффекты вроде горения или заморозки;
- Редкое — у оружия данной редкости часто встречаются особенные способы атаки или дополнительные атаки;
- Очень редкое — оружия фиолетовой редкости. ничем особо не отличается от редкого оружия, но особенные атаки встречаются гораздо чаще;
- Эпичное — наиболее близки по функционалу к легендарному;
- Легендарное — как правило выдается в качестве награды за победу над боссом, благодаря ему можно быстро убивать большие группы врагов. Каждое легендарное оружие имеет собственную механику атаки.

Параметры оружия. Каждое оружие имеет четыре параметра:
- Урон — максимальное количество урона, которое оружие может нанести противнику. Не учитывает брони противников и шанс критического удара;
- Энергия — количество энергии, которое оружие потратит на выстрел. Большинство типов оружия тратит от одной до примерно дюжины единиц энергии за раз. Оружие ближнего боя и некоторые особые виды не тратят энергию вообще;
- Шанс критического удара — вероятность нанести увеличенный урон, может быть, как положительным, так и отрицательным, или отсутствовать вообще. Значение оружия складывается с вероятностью критического удара персонажа;
- Неточность — показывает максимальное отклонение пуль от направления стрельбы. Наибольшее значение имеет оружие группы дробовиков, наименьшее лазерное оружие.
Комбинация/синергия. Это возможность соединить 2, 3 или 4 оружия в одно. Для соединения нужно иметь определённые оружия, и тогда появится кнопка для слияний. Внимание! Оружие нельзя комбинировать в лобби!
Основные слияния
Здесь указаны слияния оружий, которые больше никак не получить (не выковать на столе кузнеца, не получить из сундука).

1. Громовой меч. Это оружие атакует 3 раза в петле, причем каждый третий взмах — это вихревое вращение. Каждая атака стреляет 5 электрическими лучами в дуге 144 градуса, в то время как вращение стреляет 10 электрическими лучами в дуге 360 градусов. Каждый электрический луч наносит 3 урона. Когда лезвие попадает в цель, оно наносит 8 повреждений и вызывает удар молнии, который поражает цель.
Молния может прыгать от врагов к врагам, пока он не прыгнул 5 раз, или есть только один враг в комнате, в результате чего все, что он попадает, чтобы пострадать еще 8 урон. Все атаки Громового меча могут нанести оглушение при критических ударах. Если у игрока нет энергии, размахивая мечом, он не будет стрелять электрическими лучами, но все равно вызывает цепную молнию в цель. Синергия: Морозный меч и Огненный меч образуют Громовой меч.

2. Золотой лазерный меч. Если зажимать кнопку атаки, то он будет крутиться на все 360 градусов и сможет уничтожать все пули врагов. Вас смогут убить только лазеры, взрывы, яд / огонь (если нет защиты), атаки в ближнем бою и пули, созданные внутри круга. Также при зажатии кнопки он будет ускорять игрока. Всё это делает его одним из самых лучших орудий ближнего боя. Синергия: Зелёный световой меч, Синий световой меч и Красный световой меч образуют Золотой лазерный меч.

3. Розово-золотая снежная лиса. При использовании выпускает 3 розовые пули, симулируя Винтажную снежную лису, но в отличии от неё оружие максимально точное и имеет более высокую скорострельность. Оружие идеально подходит на первых этапах, чуть хуже на вторых, и не очень на последних. Синергия: Винтажная снежная лиса и Цветущая вишня образуют Розово-золотую снежную лису.

4. Плачущий орёл. Это оружие стреляет розовым сердцем. Оно наносит чрезвычайно низкий урон и порождает плотный, сердцевидный взрыв розовых пуль с 1 уроном при ударе. Эти розовые пули будут задерживаться на месте примерно на 2 секунды и могут наносить урон раз в секунду. Синергия: цветущая вишня, пустынный орёл, огненный орёл, морозный орёл, ядовитый орёл и плазменный орёл образуют Плачущий орёл.

5. Крутой ПП новейшего поколения. При использовании оружие три раза за одно нажатие выпускает два лазерных луча, которые имеют шанс наложить на врага эффект горения. У оружия высокий дпс и довольно большая скорость атаки, поэтому можно сделать вывод что оружие пригодится до конца игры, и оно хорошо работает против боссов. Синергия: ПП новейшего поколения и ПП новейшего поколения образуют Крутой ПП новейшего поколения.

6. Звёздный лук. При помощи удерживания кнопки атаки, оружие способно заряжаться, тем самым повышая его урон и шанс критического удара. При использовании выпускает стрелу с большим уроном. Стрела обладает способностью прохождения сквозь большое количество врагов, а также сквозь стены и другие объекты.
После того как стрела пронзила врагов, в их направлении также пролетят звёзды, которые наносят в два раза меньше, чем стрела, урона. Звёздам нужно всего 0.5 секунд чтобы ударить врага. Лук заряжается 0.7 секунд, а также даёт прибавку к скорости пока находится в режиме зарядки. Все эти особенности делают оружие крайне смертоносным и опасным для любых противников, даже босс очень быстро умирает от него. Синергия: Огненный лук, Морозный лук и Нефритовый лук образуют Звёздный лук.

7. Кулак небес. Кулак небес — это заряжающее оружие. Как и Луки и Рельсотроны, урон и критический шанс увеличиваются, чем больше он заряжен. Как и Магический лук, оружие также будет стрелять большим количеством снарядов, когда полностью заряжен. При использовании оружие запускает дугой до 8 синих прыгающих снарядов перед игроком. Эти снаряды пронзают врагов и могут отскакивать 3 раза по стенам. Синергия: Рыцарский кулак и Посох грома образуют Кулак небес.

8. Перекованный священный меч. Это оружие раскачивается по дуге, когда используется, с каждой третьей атакой это оружие вызывает 3 гигантских меча, которые втыкаются в землю и могут оглушить врагов поблизости. Оружие хорошо подходит для групп врагов, однако его также можно использовать против боссов. Если хорошо подобрать бонусы, то вы сможете запросто побеждать даже элитных монстров на третьих этажах. Синергия: Сломанный эфес и Поврежденный клинок образуют Перекованный священный меч.

9. Радужный Гатлинг. Радужный Гатлинг стреляет 4-мя короткими очередями разноцветных пуль. Как и обычный Пулемёт Гатлинга, он обладает очень высокой скорострельностью и, следовательно, очень высоким энергопотреблением. В отличие от Радугомёта, он стреляет случайным набором разных пуль каждый раз. Каждый цвет пули будет соответствовать другому дебаффу, аналогично посоху волшебника. Цвет пуль:
- Синий и тёмно-синий — заморозка;
- Зелёный и фиолетовый — отравление;
- Жёлтый — нормальный (таким образом двойной урон при крит. уроне);
- Красный — эффект горения.
При использовании Радужный Гатлинг замедляет скорость игрока. Синергия: Радугомёт и Пулемёт Гатлинга образуют Радужный Гатлинг.

10. Двойная терапия. Когда вы удерживаете нажатой кнопку атаки, она убивает двух врагов в манере, аналогичной лазерной терапии, но с одним отскоком по умолчанию. Эта атака, похоже, не способна к критическому удару. После атаки в течение как минимум 0,5 секунд оружие будет окутано электрическим эффектом розового цвета, так что при отпускании кнопки атаки можно выстрелить 5 шипов, каждый из которых наносит 1 урон, и может электрифицировать врагов при крите. Синергия: Лазерная терапия и Электрическая терапия образуют Двойную терапию.

11. Саламандра. Оружие атакует как Красный Сайдуайндер, выпуская 10 жёлтых пуль. Рядом с ним летает маленький дрон, который атакует как Зелёный Сайдуайндер, выпуская две зелёные пули, которые могут наложить эффект отравления. Когда энергия кончается, при выстреле основное оружие не будет атаковать, а маленькая ракета будет по-прежнему выпускать две зелёные пули. Синергия: Красный Сайдуайндер и Зелёный Сайдуайндер образуют Саламандру.

12. Молния Зевса. При использовании издалека персонаж будет метать молниевидные снаряды, нанося противнику эффект молнии. Если же вы приблизитесь ко врагу, оружие атакует вашего противника колющей атакой, подобной Копью, не тратя энергии, но всё же нанося тот же эффект, что и при метании. Оружие никак не влияет на скорость передвижения персонажа. Синергия: Громовой молот войны и Электрические звёзды ниндзя образуют Молнию Зевса.

13. Квантовые звёзды ниндзя. Персонаж выпускает одну звезду с 10 единицами урона. После броска звезда начинает вращаться, пронзая врагов и препятствия, и исчезает, задержавшись на 3 секунды. Иногда может отрикошетить от стен и врагов. Оружие периодически наносит эффект молнии. Если не использовать рекомендуемые баффы, это оружие может быть хуже, чем Электрические звёзды ниндзя. Тем не менее, в сочетании с этими баффами, это оружие становится очень мощным, и также хорошо в аспекте борьбы с боссами, что не очень хорошо для Электрических звезд ниндзя. Комбинации: Электрические звёзды ниндзя и Электрические звёзды ниндзя образуют Квантовые звёзды ниндзя.

14. Шипастые ножи с орлом. Оружие атакует также, как и Шипастые ножи: выпускает от 1 до 26 лезвий в сторону противников. Однако в зависимости от рецепта слияния эффект и текстура оружия будут отличаться.
- Инопланетный орёл: оглушение;
- Огненный орёл: горение;
- Плазменный орёл: эффект молнии;
- Морозный орёл: заморозка;
- Ядовитый орёл: отравление.
Комбинации: Шипастые ножи и 1 любой орёл образуют Шипастые ножи с орлом. Снежный, Пустынный, Инопланетный плазменный и Золотой пустынный орел не будут работать в этой комбинации.

15. Элитная штурмовая винтовка. Стреляет подобно винтовкам М14 или М4. Также иногда может выстрелить лазерами. Эффекты от пуль и от лазеров различаются в зависимости от того, с каким лазером было скомбинировано это оружие:
- Арбитр: эффект молнии;
- Судья: оглушение;
- Ледокол: заморозка;
- Скверный лазер: отравление.
Оружие имеет 4 разные вариации. В зависимости от режима можно выбрать соответствующий эффект. Для режима «Охота на боссов» рекомедуется использовать заморозку, для Убойного режима — эффект молнии, так как он помогает быстро зачищать комнаты. Остальные эффекты можно использовать по своему усмотрению. Синергия: Улучшенная штурмовая винтовка и Арбитр/Судья/Ледокол/Скверный лазер образуют Элитную штурмовую винтовку.
Слияния, которые нельзя найти в сундуках, но можно скрафтить
Здесь указаны оружия, которые возможно получить только с помощью слияний, и они не попадаются в сундуках в игре. Отличительная их черта — то, что их можно выковать на столе кузнеца.

1. Многоразовое зелье восстановления. Оружие появляется в виде бутылки с фиолетовой жидкостью. Игрок может выпить его один раз за этаж, чтобы восстановить 2 здоровья и 80 энергии. После питья оружие становится пустой бутылкой с бесконечным боезапасом, так что игрок может бросить бутылку в сторону врагов, нанося по 4 урона каждому.
После достижения следующего этажа, бутылка будет заполнена снова для другого глотка. Чтобы разблокировать это оружие, игрок должен сначала найти чертеж, а затем использовать таблицу проектирования для его разработки. После этого его можно создать или найти во время игры. Комбинация: Многоразовое зелье здоровья и Многоразовое зелье энергии образуют Многоразовое зелье восстановления.

2. Ветряные звёзды ниндзя. Персонаж выпускает около десяти маленьких звёзд во врагов. Каждая звезда наносит 3 единицы урона и самонаводится на врагов. Оружие неплохо подходит для контроля толпы в больших комнатах. Из-за способности самонаводки можно быстро уничтожить врагов в дальних углах. Комбинация: Улучшенные звёзды ниндзя и Улучшенные звёзды ниндзя образуют Ветряные звёзды ниндзя.

3. Органическая волна. При использовании из посоха вылетают 7 серповидных снарядов, один из которых летит вперёд, а остальные 6 будут вращаться на одном месте, пока не попадут во врага или не исчезнут сами через несколько секунд. Оружие рекомендуется использовать для толпы врагов в больших комнатах. Нужно запустить как можно больше снарядов в центр комнаты и отойти в угол. Комбинация: Зелёный лук и Посох приливов образуют Органическую волну.

4. Фиолетовый лазерный меч. Оружие имеет два способа использования. В первом режиме меч атакует по дуге со средней скоростью, подобно большинству оружий ближнего боя. Атака не требует энергии. Во втором режиме оружие может заряжаться. При полной зарядке оружие атакует лазерным лучом на 180 градусов на неограниченное расстояние. Эта атака требует 15 единиц энергии.
Это оружие — хороший очиститель комнаты. Оно может даже легко очистить более сложные вражеские комнаты, если скомбинирован с правильными баффами. Однако это плохое оружие против боссов, так как игроку нужно много заряжать, чтобы нанести лишь незначительный урон. Кроме того, он может легко оставить игрока беззащитным. В этом случае лучше использовать его как простой меч. Комбинация: Красный световой меч и Синий световой меч образуют Фиолетовый лазерный меч.

5. ПП М4. ПП М4 атакует тремя снарядами оранжевого цвета за один выстрел. Пули летят также, как снаряды ПП Helix. Они также 3 раза отскакивают от препятствий. Оружие тратит много энергии, поэтому рекомендуется иметь в паре с ним оружие, не тратящее энергию (к примеру, ближнего боя). Из-за высокой энергопотребности и скорости атаки оружие отлично подходит для режима «Охота на боссов». Для других режимов рекомендуется использовать это оружие для зачистки больших комнат и комнат с чемпионами. Синергии:
- ПП М3 и ПП М3 дают ПП М4;
- ПП М3 и Набор для апгрейда (Модификатор) дают ПП М4.
Soul Knight: Гайд по противникам, их уникальные атаки и способы защиты

Противники, их виды. Противники (англ. Enemies) — это враги, которые могут вас атаковать в подземельях. На каждом уровне противники меняются. В соответствии с противниками меняются и боссы в конце каждого уровня. Для удобства вики разделила противников по уровням сложности, начиная от белого (самый лёгкий) и заканчивая оранжевым (самые опасные противники):
- Белый — самые слабые и часто встречающееся противники.
- Зелёный — более редкие противники, как правило элитные версии белых противников.
- Синий — уже более сильные противники, способные доставить небольшие проблемы.
- Фиолетовый — редкие и мощные противники, обладающие арсеналом атак и способные убить персонажа.
- Оранжевый — самые редкие и опасные противники, могут убить даже опытного игрока. Такую редкость имеют только боссы.
При появлении каждый противник имеет шанс стать чемпионами. Такой противник больше, у его ног появляется фиолетовое свечение и частицы в виде «плюсов». Они быстрее, сильнее и зачастую обладает видоизменёнными атаками, в отличии от своей обычной версии. В одной волне может быть несколько гигантов, но это достаточно редкое явление (часто случается в убойном режиме), иногда в подземелье можно встретить комнату с чемпионами.
Атаки. У каждого босса и противника есть атака, которая уникальна для него.

Снежок. Распадается на мелкие снежки при попадании или ударе о стену. Встречается у Короля снежных обезьян (1 фаза, 10 мелких снежков), Короля снеговиков (1 фаза, 8 мелких снежков), Мегадобытчика с пушкой (чемпион), Снежной обезьяны. Наносит 4 урона. Против такой атаки может помочь бафф «Устойчивость к заморозке и дополнительное время заморозки врага».

Лёд. Может самонаводиться на игрока и не может быть отбита атаками ближнего боя. Наносит 3 урона и замораживает. Встречается у Короля снежных обезьян (2 фаза, 2 линии), Короля снеговиков (2 фаза, 7 линий) и Пещерного ледяного червя (1 фаза, уходит под землю). Такая атака расползается по земле постепенно, вы можете легко увернуться от атаки. Защищает от этого бафф на устойчивость к заморозке.

Кристалл. Блокирует движение игрока и наносит 4 урона за тик. Встречается у Кристаллического краба-гиганта и Кристаллических гигантов. Данную атаку нельзя никак отбить. Также, как и предыдущая атака, ползёт по земле. Однако, когда краб-гигант атакует этими кристаллами, они расползаются довольно быстро и далеко. К сожалению, нет баффа, который смог бы защитить вас.

Золотой кристалл. Блокирует движение игрока, поджигает и наносит 6 урона. Встречается у Золотого краба-гиганта. По сути, это улучшенная версия атаки кристаллического краба, но гораздо опаснее. Обязательно избегайте эту атаку.

Огненное яйцо. Огненный метеорит. Создаёт лужу огня после приземления. Встречается у Пасхального кролика. Чтобы защититься от этого яйца, вам поможет бафф «Иммунитет к огню и взрывам, увеличение урона от огня врагам». Это вторая по счёту атака босса.

Ядовитое яйцо. Ядовитый метеорит. Создаёт лужу огненного яда после приземления. Такая лужа очень похожа на лужу яда у Рыцаря без головы и его лошади. Встречается у Пасхального кролика. Для того, чтобы избежать получения урона, надо иметь при себе бонус «Иммунитет к токсичным газам и замедлению, увеличение урона от яда врагам». Это третья атака Пасхального кролика.

Ледяное яйцо. Ледяной метеорит. Создаёт 2 ряда, по 3 снежка в каждом ряду. Снежки могут заморозить. Встречается у Пасхального кролика. Против этого яйца поможет бафф «Устойчивость к заморозке и дополнительное время заморозки врага». Это четвёртая атака Кролика.

Пурпурное яйцо. Пурпурный метеорит. Создаёт врагов, которые атакуют, как Гоблин-страж с пистолетом. При этом, такие враги имеют 10 единиц жизни. Встречается исключительно у Пасхального кролика. Пятая по счёту атака босса.

Жёлтое яйцо. Жёлтый метеорит. Создаёт врагов, которые атакуют, как Ужасный кабан. Может напасть на вас с помощью рывка, имеет 12 здоровья. Встречается у Пасхального кролика. Если действовать быстро, то метеорит не сможет поразить вас или ваших наёмников.

Яйцо-метеорит. Вызывает два метеорита. Встречается у Пасхального кролика, как и остальные яйца. Спрайт этого яйца немного отличается от остальных. Пасхальный кролик достаёт из своей корзинки, а затем стреляет такой атакой в самом начале боя.
![]()
Китайский фонарик. Может проходить сквозь стены. Приближается к игроку и взрывается. Может нанести ожог. Встречается у Няня. Также очень похож на сторонников, которых вы можете встретить с первой способностью Друида с обликом босса Нянь. Также будет полезен бафф на защиту от огня и взрывов.

Огненный шар. Создаёт огненную лужу. Встречается у Няня. Чтобы избежать получения урона, используйте бафф «Иммунитет к огню и взрывам, увеличение урона от огня врагам».

Пуля Няня и C6H8O6. Разделяется на более мелкие пули при ударе о стену. Встречается у Няня и C6H8O6. Наносит небольшой урон, однако более мелкие пули могут задеть вас, даже если вы будете за стеной. Можно отразить или отбить. Это частый источник ада из пуль. Можно отбить и отразить.
Дроны. Может проходить сквозь стены. Встречается у Колосса Зулана. Очень похожи на Парящий лазер и Парящее орудие. Однако, стреляют немного по-другому. Атакуют дроны либо спредами из мелких пуль, либо маленьким лазером.

Яйцо Малышей-драконов. Взрывается через некоторое время. Встречается у бежевого Малыша-дракона, может даже поджечь. Вам поможет бафф «Иммунитет к огню и взрывам, увеличение урона от огня врагам».

Ядовитый метеорит. Создаёт лужу яда, которая наносит 2 урона за тик. Встречается у Рыцаря без головы и его лошади. При этом, у этой лужи есть огоньки, однако сама лужа зелёного цвета. Подобную лужу можно встретить у Пасхального кролика (зелёное яйцо). Чтобы избежать урона, используйте бафф «Иммунитет к токсичным газам и замедлению, увеличение урона от яда врагам».
Обелиск. Создаёт фиолетовую лужу, которая наносит урон и замедляет скорость стрельбы. Встречается у Анубиса (1 фаза). Также вы можете вызвать такой монолитный блок с помощью оружия Клинок фараона. С некоторым шансом, после удара с неба может упасть это. При атаке из оружия может нанести дебафф Оглушение. Падает с неба, нельзя отбить или отразить. Наносит 3 урона.

Могильный камень. Порождает мумий с посохом, бомбой или пулемётом каждые 5 секунд. Встречается у Анубиса (1 фаза). Падает с неба, нельзя отбить или отразить. Очень похож на предыдущую атаку. Каждая мумия имеет 20 здоровья. Могильный камень имеет 40 ед. здоровья.
![]()
Ракета. Самонаводится на игрока и не может быть отбита. Встречается у Парящего Лазерного НЛО (1 фаза). Чтобы избежать такую атаку, вы можете попробовать спрятаться за стеной.
Большая пуля. Нельзя уничтожить. Может создать длинные мелкие пули. Наносит приличный урон.
Вытянутая пуля. Обычная пуля. Имеет вытянутую форму, такими пулями стреляет множество боссов и врагов. Такую атаку можно легко отразить и отбить, однако она движется довольно быстро. Наносит не так уж и много урона. После перехода во вторую фазу в битвах с Кристаллическим крабом-гигантом и его Золотым «собратом» данные пули становятся больше и сносят на 1 единицу урона больше.
![]()
Пуля-сюрикен. Создает мелкие пули, препятствующие движению игрока. основной источник ада из пуль. Такую пулю можно отразить, и все производные от материнской пули будут также отражены. Наносит маленький урон.
Самонаводящиеся пули. Наводится на игрока. Не может быть отбита с помощью баффа «Оружие ближнего боя может отразить пули».
![]()
Ракета. Самонаводящиеся ракеты. Могут выпускаться только Элитными тяжелыми шахтерами и Механическим стражем с ракетницей. При каждой атаке шахтёры выпускают сразу 3 ракеты. Наносят 3 урона и могут поджечь.

Удар по области. Можно встретить у некоторых боссов и врагов, например, Король снеговиков во время 1 фазы. Он призывает мелких снеговиков и Короля снежных обезьян.
Мелкий снежок. Замораживает при контакте. Наносит маленький урон. Можно найти только в биоме Тундра и Пещера. Такими снежками атакуют: Король снеговиков (по спирали, 1 фаза), Снежная обезьяна, Пещерный ледяной червь, Мегадобытчик с пушкой. Если использовать бафф «Устойчивость к заморозке и дополнительное время заморозки врага», то дебафф Заморозка вы не получите.
Падающий метеорит. По атаке похож на удар по области. Может поджечь. Вы можете вызвать метеорит с помощью Посоха падающих звёзд, также такой атакой стреляет Гоблин-священник в первой фазе, по 3 метеорита за атаку (6 если меньше половины здоровья осталось), его одержимая версия (1 фаза) и Вулканическая черепаха.

Взрывающаяся пуля. Взрывается при контакте. Очень быстрая. Сложно отбить. Встречается у Вулканического песчаного червя (1 фаза, 1 атака), Короля скелета (1 фаза) и Капитана Пламенных рыцарей.
Сосулька. Является уникальной пулей для биома Пещера, которая падает сверху, обозначая куда она приземлится. Намеренно их вызывает только один босс — Пещерный ледяной червь (1 фаза). Также его именное оружие (Скрытая угроза) тоже призывает сосульки, которые падают на врагов (урон игроку они не наносят).

Тротил. Кидается на пол, после чего через некоторое время взрывается, нанося эффект горения. Бафф «Иммунитет к огню и взрывам» поможет игроку не получать эффект. Его используют такие враги, как: Золотая маска (1 и 2 фазы) и Взрывной рабочий с тротилом.
Бумеранг. Бумеранг, нельзя отзеркалить. Такой атакой стреляет Бумеранговый кактус, также есть одноимённое оружие, которое стреляет бумерангом. Нельзя отбить.
Лазер. Наносит урон раз в тик. Можно встретить у дронов Колосса Зулана, Анубиса и атака Пылающего жука. Такую атаку нельзя отбить или отразить. Когда кто-то атакует лазером, эта атака имеет маленькую дистанцию.
Soul Knight: Обзор жилой комнаты, основные предметы

Жилая комната (англ. Living Room) — это стартовая комната, в которой представлены персонажи и питомец. В комнате есть предметы окружения, с которыми можно взаимодействовать.
Холодильник. Холодильник находится в жилой комнате и используется для покупки карты бесплатного возрождения или самоцветов, а также для просмотра ограниченного количества рекламных объявлений. Он расположен справа от автомата Гасяпонов. При взаимодействии вы также откроете его. Только первый за день просмотр рекламы даст 500 самоцветов, остальные просмотры будут давать по 200 (в сумме 1300 самоцветов в день). Всего можно посмотреть 5 рекламных объявлений в день. Это в общей сложности 1300 самоцветов.
Купите в холодильнике карту бесплатного возрождения, и используйте ее вместо оплаты самоцветами или просмотра рекламы для воскрешения. Эффект карты постоянный. Однажды купленная, она может быть использована в каждом забеге.

Гасяпон-автомат. Гасяпон-автомат — это объект, находящийся в Жилой комнате. Попытать свою удачу можно за 200 самоцветов. Гасяпоны работают как пасхальные яйца, то есть, может выпасть все что угодно! После покупки Гасяпоны будут лежать рядом с вами как полноценный объект. Они могут препятствовать движению, а также их можно толкать. После взаимодействия Гасяпон разрушается и из него могут выпасть следующие предметы:
| Предмет | Шанс выпадения |
| 1000 самоцветов | 1% |
| 500 самоцветов | 2% |
| 200 самоцветов | 8% |
| 100 самоцветов | 16% |
| Зелье восстановления (маленькое) | 2,5% |
| Зелье восстановления (большое) | 2,5% |
| Бомба | 35% |
| Семена | 5,2% |
| Материалы | 5,2% |
| Чертежи | 2,6% |
| Случайное оружие | 20% |
Корм для питомца. Корм для питомца — это миска c кормом для питомцев. Разблокируется при достижении уровня 2-5 и находится внизу жилой комнаты, около оборотня. Его можно улучшить до пяти раз. Каждое улучшение навсегда дает дополнительное здоровье и атаку питомцу. Дополнительное здоровье позволяет питомцу получать больше урона, прежде чем стать неактивным, когда он перестаёт атаковать и вместо этого следует за игроком некоторое время. Улучшения:
- Уровень 1: +3 HP (500 самоцветов);
- Уровень 2: ещё +3 HP (+6 HP в целом) (1000 самоцветов);
- Уровень 3: ещё +4 HP (+10 HP в целом) (1500 самоцветов);
- Уровень 4: +1 урон (+10 HP, +1 урон в целом) (2000 самоцветов);
- Уровень 5: ещё +1 урон (+10 HP, +2 урона в целом) (2500 самоцветов).

Телевизор. Телевизор — предмет, который находится в правом нижнем углу жилой комнаты или в больших магазинах во время забега. Он позволяет вам посмотреть рекламу для получения 20 дополнительных монет. В мастерской также есть телевизор, он находится у торговца. Однако функция у него другая — если посмотреть рекламу, вы получите оружие, которое стоит на стенде перед телевизором. При взаимодействии вам предлагается 2 канала: нажав на первый, вы можете получить 20 монет. Нажав на второй, вы можете посмотреть последние новости игры и трейлеры обновлений:

Телевизор в жилой комнате может быть использован только один раз за забег. Телевизор в магазинах можно использовать только один раз для каждого магазина.
С телевизором есть связанное секретное достижение.
Сейф. Сейф находится в жилой комнате. Разблокируется при достижении уровня 2-1 и находится справа от холодильника. Может быть улучшен до пяти раз и дать вам навсегда дополнительные монеты со старта. Каждое улучшение дает 2 дополнительные монеты. Улучшения:
- Уровень 1: +2 монеты (500 самоцветов);
- Уровень 2: +4 монеты (1000 самоцветов);
- Уровень 3: +6 монет (1500 самоцветов);
- Уровень 4: +8 монет (2000 самоцветов);
- Уровень 5: +10 монет (2500 самоцветов).
Торговец. Торговец — это NPC, находящийся в жилой комнате, в нижнем левом углу сверху над мусорной корзиной. Взаимодействие с этим NPC может вызвать любой из трёх баннеров, которые отсылают на скачивание игр.

Стопка книг. Стопка книг — это кучка из 5 книг в жилой комнате. Разблокируется при достижении уровня 2-3 и находится справа от Подвала, между Вампиром и Магом. Её можно улучшить до пяти раз. Каждое улучшение навсегда даёт дополнительный шанс крита. Улучшения:
- Уровень 1: +1 к шансу крита (500 самоцветов);
- Уровень 2: +2 к шансу крита (1000 самоцветов);
- Уровень 3: +3 к шансу крита (1500 самоцветов);
- Уровень 4: +4 к шансу крита (2000 самоцветов);
- Уровень 5: +5 к шансу крита (2500 самоцветов).

Мусорная корзина. Мусорная корзина — это объект, который можно найти в жилой комнате. Расположена в левом нижнем углу комнаты, около входа в подвал. При взаимодействии уничтожает ваше текущее оружие, подобно Печи для пересоздания, но не предоставляет никаких материалов. Ваш персонаж будет с пустыми руками, пока вы не поменяете оружие. Можно использовать корзину, даже если вы ничего не несете, хотя это ничего не сделает. Если игрок выбросит все своё оружие, а затем начнёт забег, он начнет забег без оружия. Это привело к тому, что игроки создали «челлендж Голыми руками», при котором игроки должны закончить игру, используя только базовую атаку персонажей.
Растение. Растение является предпоследним дополнением к жилой комнате, разблокируется достижением уровня 3-1 на обычном уровне сложности. Находится слева от комнаты или между автоматом Гасяпонов и подвалом. Можно улучшить до пяти раз. Каждое улучшение увеличивает базовую скорость игрока и внешний вид растения. Улучшения:
- Уровень 1: +0.2 к скорости (500 самоцветов);
- Уровень 2: +0.4 к скорости (1000 самоцветов);
- Уровень 3: +0.6 к скорости (1500 самоцветов);
- Уровень 4: +0.8 к скорости (2000 самоцветов);
- Уровень 5: +1.0 к скорости (2500 самоцветов).

Курьер. Курьер появляется в жилой комнате ежедневно. При взаимодействии с игроком курьер даёт игроку 500 самоцветов. После взаимодействия исчезает. На голове бирюзовая кепка с оранжевыми наушниками поверх. На нём берюзовая кофта (такого же цвета, как и кепка). Сверху на нём коричневая накидка. В руках держит коробку.
Лавка режимов игры. Лавка режимов игры (ранее — Убойная лавка) — это дополнение к жилой комнате, которое можно найти после прохождения игры в обычном режиме. Поговорив с любой девушкой-барменом лавки, игрок может перейти в Убойный режим или режим «Маленький командир».
Магазин кота удачи. Кот удачи находится справа от стартовой двери в жилой комнате. При взаимодействии с ним открывается окно, которое позволяет вам напрямую пожертвовать разработчикам. В ответ вы будете вознаграждены Сушёной рыбой. 1 пожертвование = 1 рыба. Сушёную рыбу можно потратить в магазине кота удачи. Однако за их покупку можно получить следующее:
- Первое пожертвование откроет Панду (питомца);
- Второе — Скин «Панда» (Для Рыцаря);
- Последующие пожертвования не принесут ничего, кроме сушёной рыбы.

Также есть магазин кота удачи, в котором продаются различные предметы в обмен на определенное количество сушёной рыбы. Работает только при корректном интернет-соединении. Здесь продаются самые разные вещи, иногда в комплектах, например:
- Материалы, включая бесплатные пробные купоны, семена, купоны и другие вещи, например, удобрения;
- Скины. Те, которые помечены как «разблокировать у кота удачи» (например, «Спецгруппа 0202» Даоса);
- Также можно получить питомца Бегемотик Пинко;
- Самоцветы.
В магазине одновременно может быть 6 предметов, количество каждого из которых ограничено. Товары в магазине будут обновляться каждые 0:00 понедельника в зависимости от региона, а уведомление будет отправлено на почту.
Доска заданий. На доске висят задания (убить таких-то врагов в таком-то количестве или выполнить испытание), за выполнение которых Офицер даст награду.

Офицер. Офицер — NPC, которого можно найти в гостиной рядом с доской заданий. После того, как вы примете челлендж на доске заданий, взаимодействие Офицером отменит его. Как только задание будет завершено, над офицером появится восклицательный знак, и разговор с ним приведёт к получению наград. Если вы встретите Офицера как NPC в подземелье, то он даст вам случайное условие (испытание), но учтите некоторые особенности:
- Он не может дать вам противоречащие друг другу челленджи. Например, если у вас есть условие «Скорость атаки оружия -50%, урон +100%», то Офицер никогда не даст вам условие «Скорость атаки оружия +100%, урон -50%».
- Челленджи не могут повторяться.
- Если Офицер выдал условие «Без питомцев и спутников», то они все исчезнут на следующем этаже. То же самое происходит с челленджем «Можно носить только одно оружие». Второе оружие пропадёт на следующем этаже.
- Офицер может выдать условие «Обморожение» или «Мощное тело», хотя они являются уникальными испытаниями босса Пещерный ледяной червь.
Галерея. Галерея может быть найдена в Жилой комнате. Она выглядит как картоноподобная доска с бумагой, расположенная прямо над Рыцарем и Паладином. При взаимодействии с ним открывается окно, которое показывает все фан-арты. Есть несколько страниц, чтобы перейти, между ними есть значок в правом нижнем углу. Если нажать на изображение то, вы увеличите их на экране, а также вы можете перетащить вверх и вниз, чтобы просмотреть все фан-арты. Внизу будет отображаться имя художника, который сделал это.

Электрический барашек Шон. Электрический барашек Шон — это NPC, находящийся в жилой комнате. Его можно разблокировать только при открытии Робота. После этого он будет стоять в нижней части лобби, слева от того же Робота. При взаимодействии меняет музыку. Взаимодействуя с ним, вы увидите список кассет с музыкой. Выберите одну из них и нажмите на значок сердца, чтобы использовать его в качестве темы музыки в гостиной. После этого в лобби будет звучать выбранная музыка. Остальные кассеты, которые не играют в данный момент, будут помечены таким значком темного сердца.
Подвал
Подвал — локация, которая открывается после первой игры. Ведет учёт встреченного оружия (сколько раз получено) встреченных Противников и Боссов, а также количества раз прохождений игры. Если нажать на стенд с оружием, можно увидеть его характеристики и количество получений. Проход в подвал находится в Жилой комнате в левом нижнем углу. Подвал состоит из 3 этажей. 1 и 2 этажи разделены на 2 части.
Если дойти до конца подвала, вы увидите табличку «Впереди строительство». Если нажать на неё, то персонаж возвращается ко входу в подвал. На 1 этаже в подвале можно найти Cломанный мотоцикл, который можно починить, играя за Инженера. Мотоцикл позволяет в четыре раза быстрее перемещаться по подвалу. С помощью мотоцикла можно перемещаться по этажам подвала. Если вы попробуете выехать с мотоциклом в лобби, он автоматически телепортируется к своему месту.

1. Первый этаж:
- Левая часть. В первой части первого этажа ведется учет встреченного оружия. Если оружие еще не было встречено, то вместо его изображения будет нарисован его силуэт. Если с оружием хоть один раз проходили игру, то стенд с этим оружием будет подсвечен. Если пройти с этим оружием Убойный режим, то стенд будет подсвечиваться золотистым цветом.
- Правая часть. Во второй части ведется учет всех убитых монстров и боссов. Также, как и с оружием, если вы не убивали монстра, вместо его изображения будет показываться его силуэт. Также каждому из убитых монстров (в том числе и боссам) причисляется от 0 до 5 звезд в зависимости от числа его убийств. Для каждого монстра это число разное. При 5 звёздах стенд будет подсвечиваться. Если убить ещё некоторое кол-во этих врагов, то стенд будет подсвечиваться золотистым цветом.
2. Второй этаж:
- Левая часть. В 1 части 2 этажа идет выставка всех открытых вами персонажей (каждый скин отдельно) и питомцев. Если вы хоть один раз проходили игру каким-то персонажем или с каким-либо питомцем, то его стенд будет подсвечен. Если скин или персонаж не получен, то на стенде отображается только его силуэт.
- Правая часть. Во 2 части 2 этажа находятся достижения, по получении которых за некоторые можно получить награду или скин. Если достижение не получено, то вместо него в подвале будет показан чёрный квадрат.
3. Третий этаж:
- Левая часть. В 1 части 3 этажа находятся все предметы и NPC, встреченные вами в игре. Если нажать на стенд, то будет показано количество раз нахождения вами данного предмета/NPC.
- Правая часть. Во 2 части 3 этажа находятся все растения. Если нажать на стенд, то будут написаны характеристики растения: плоды (оружие, баффы, и т.д.), время роста и восстанавливаемость растения (восстанавливаемые после использования не исчезают, а после полива и определённого времени могут быть использованы снова). Если семя растения ни разу не получено, то на стенде отображается только силуэт, хотя характеристики отображаются.

Другие комнаты
1. Аквариум. Во время забега можно получить чертёж Аквариума. Также для него нужны: 1000 самоцветов + 2 синих магических фрагмента + 15 железной руды + 15 древесины. Находится в правом нижнем углу жилой комнаты возле Инженера.
- На 1 улучшении с небольшим шансом при взаимодействии может выпасть Небесный меч.
- На 2 улучшении с малым шансом при взаимодействии может выпасть Рыба или Небесный меч.
- На 3 улучшении с маленьким шансом при взаимодействии может выпасть Лазерная рыба или Рыба, с более высоким шансом — Небесный меч.
Каждый забег можно брать только по 1 оружию. Все оружия, полученные из Аквариума, можно пожарить и получить новые. Жареную рыбу и Жареную лазерную рыбу можно съесть и восстановить здоровье. Также всё оружие, которое дает Аквариум, можно давать Панде в Саду, что является простым способом получать её при каждом запуске.

2. Священная статуя. Священная статуя (англ. Holy Statue) — это объект, который находится в волшебном урочище. Разблокируется с помощью чертежа и материалов: 3000 самоцветов, по 5 зелёных, оранжевых, красных и фиолетовых магических осколков, 20 железной руды. При взаимодействии даёт эффект случайной статуи на один забег. С каждым применением стоимость использования растёт, потом сбрасывается на след. день. Цена колеблется от 300 до 1200 самоцветов.
Когда статуя используется, она перестает светиться. Игрок должен выйти и снова войти в Лобби, чтобы использовать его снова. Если игрок получает еще один бафф статуи во время бега, оригинальный бафф будет заменен, если не активировано условие «Вы можете поклоняться нескольким статуям». Это условие не позволяет вам получить несколько положительных эффектов от Священной статуи. Священная статуя будет продолжать давать игроку такой же положительный эффект, пока игрок не закончит забег.

3. Автомат с напитками. Торговый автомат неонового цвета. Находится в верхнем левом углу гостиной. При взаимодействии предлагает купить случайный напиток за 5 монет. Купить можно только один напиток за игру. Чтобы он появился, его надо разблокировать, подойдя к табличке в верхнем левом углу жилой комнаты и потратив следующие ресурсы: чертеж автомата с напитками, 20 деталей, 20 батарей, 20 железной руды и 3000 самоцветов. Чертеж можно найти в гасяпон-автомате, сундуках, колодце желаний, … как и другие обычные чертежи.

4. Волшебный колодец. Волшебный колодец (англ. Magic Well) — объект, находящийся в саду. Можно бесплатно использовать в любом забеге. При взаимодействии ваш персонаж скажет: «Какая сладкая!», и потом во время забега шарики энергии будут восполнять не 8, а 9 энергии. Можно использовать снова после каждого забега. Разблокируется с помощью чертежа и материалов: 3000 самоцветов, 5 синих магических осколков, 5 обсидиановых магических осколков, 15 железной руды и 15 древесины.

Секретная комната
Секретная комната — комната, доступ в которую можно получить в Жилой комнате. Вход в неё располагается над диваном, на котором сидят Паладин и Рыцарь, заменяя собой Галерею. Замена с некоторым шансом происходит сама при входе в жилую комнату. Вход представляет собой баннер с черным фоном, с синими рамками и надписью «Help» или «ChillyRoom» с крышей, напоминающей логотип ChillyRoom. После взаимодействия игрок будет отправлен в Секретную комнату. Внутри комнаты есть четыре NPC, с которыми можно поговорить:
- Программист;
- Умирающий;
- Кошка плюс;
- Крутая девчонка.
Если зайти в комнату Священником или Эльфом с 3 навыком на 5 уровне с синим эльфом-стражем и применить на них исцеление, они станут счастливее, Программист подарит вам питомца, а Спасенный художник — фрагмент облика торговца.
Сундуки
Сундуки (англ. Chests) — объекты которые встречаются повсеместно в игре. Содержат оружие, материалы, зелья, энергию, монеты и чертежи. Отображаются на карте как маленький золотой сундук. Также под этим значком может быть комната с турелями.
1. Белый сундук. Он появляется после зачистки комнаты, содержит энергию, монеты, реже зелья, гораздо реже, почти никогда, оружие. В отличии от других типов сундуков открывается автоматически при прикосновении игрока. Аналогом белых сундуков в Могиле является гроб. Он открывается сразу после зачистки комнаты и содержит всё тоже самое, что и обычный белый сундук.
2. Сундуки подземелья. Бывают двух цветов: голубой или коричневый. Содержат случайное оружие. Голубой сундук обычно содержит более хорошее оружие, чем коричневый. Комнаты, в которых они находятся, помечаются специальным значком коричневого сундука на миникарте. Также голубой сундук появляется после зачистки чемпионской комнаты.

3. Сундук жилой комнаты. Находится позади входа в Подземелье. Его можно открывать постоянно перед входом в подземелье чтобы получить первое оружие, после платы в 1000 самоцветов. Список оружия:
- Первопроходец;
- Вилы;
- Пустынный орёл;
- Звёзды ниндзя;
- Снежная лиса L;
- Револьвер;
- Дробовик;
- Лук;
- AK-47;
- Штурмовая винтовка;
- Мини-Узи;
- Рогатка.
Список дополняется если активен модификатор «Удача»:
- Снежная лиса XL;
- Инопланетный орёл;
- Рельсотрон стража;
- Улучшенный лук;
- Арбитр;
- Молоток;
- ПП М1.

4. Золотой сундук. Его можно найти после убийства босса. Этот сундук чаще всего содержит оружие более высшего качества, а также оружие с самих боссов. Этот тип сундуков появляется после зачистки чемпионской комнаты.
5. Зелёный сундук. Этот сундук появляется и в специальной комнате, и после зачистки чемпионской комнаты. Содержит чертежи, материалы или семена.
6. Многопользовательский сундук/сундук мультиплеера. Этот сундук открывается после того как все игроки встанут на специальные кнопки. Количество кнопок зависит от количества игроков (от 2 до 4). Эти сундуки больше обычных и содержат только оружие, количество оружия зависит от количества игроков (от 2 до 4), оружие в сундуке в редких случаях может быть одинаковым. Например: может выпасть 4 посоха иллюзий. Является большой версией коричневого сундука.

7. Большой сундук. Он довольно редко попадается в одиночном режиме и содержит в себе 2 оружия или зелье и оружие. Так же, как и в многопользовательском сундуке, оружие может повторяться. Является большой версией голубого сундука.
8. Сундук Охоты на боссов. Появляется после того, как игрок победил босса в режиме Охота на боссов. Содержит одно оружие (иногда оружие боссов) и одно зелье. Является большой версией золотого сундука.
Soul Knight: Выполнение заданий с доски

Расположение, типы заданий. Доска заданий расположена в верхнем правом углу жилой комнаты. Рядом с ней стоит Офицер. Разблокируется после достижения уровня 2-1 (то есть при победе первого босса). На доске показываются ежедневные задания. После того, как вы выполните задания, поговорите с Офицером, чтобы получить награду. В награду можно получить самоцветы, материалы, бесплатный пробный купон и перья Валькирии. Существует два типа заданий: Разыскивается (Wanted) и Челленджи или Испытания (Challenge).

Тип заданий «Разыскивается». Вы должны убить определенного врага некоторое количество раз. При этом примерно 1 раз в день на доске заданий будут появляться боссы. Каждый день будет появляться от 1 до 2 новых заданий этого типа. Доска заданий может содержать до 4. Если режим Охота на Боссов разблокирован, нижнее левое задание будет обновляться каждый день и в качестве награды за него вы будете получать 1-2 пера Валькирии. Эти задания не нужно брать. Просто играйте, убивайте достаточно целей и возвращайтесь, чтобы получить награду. Засчитываются убийства во всех режимах. Можно удалить задание «Разыскивается» с помощью кнопки внизу слева.
Тип заданий «Челленджи». Вы должны пройти игру с 4 случайными модификаторами (условиями). Модификаторы обновляются каждый день. Выполнение задания после обновления даты будет считаться выполнением задания следующего дня и даст соответствующее вознаграждение. Вам нужно принять челлендж, выбрав задание и активировав его. Также возможно отказаться тем же способом или поговорив с Офицером.
В многопользовательском режиме хост может выбрать случайные модификаторы перед началом игры. Они будут случайными, отличными от ежедневных, и не дадут дополнительных наград. Можно принимать и отказываться от челленджа сколько угодно раз, однако награда может быть получена только один раз в день (если игрок не вернёт свой облачный сейв). Некоторые модификаторы либо частично применяются, либо не применяются вообще, пока вы находитесь в жилой комнате.
Список модификаторов

1. Без питомцев или напарников. Ваш герой скажет: «Мне нужно встретиться с этими врагами в одиночку» и ничего не будет делать:
- При попытке взаимодействия с наёмниками.
- Когда вы пытаетесь взаимодействовать с NPC, такими как Разбойник, Ассасин, Эльф и Берсерк.
- При попытке использовать оружие для вызова миньонов (Посох скелета или Посох иллюзии). В случае Снежного орла он работает как Морозный орёл с удвоенной стоимостью энергии. Не вызывает снеговиков. Не влияет на Вспомогательное летающее орудие/ Парящее орудие / Парящий лазер / летящие орудия Wi-Fi усилителя, так как они не считаются питомцами.
- При попытке поклониться Статуе Рыцаря.
Вы не можете привести животных из Сада. Некоторые последователи могут все еще появляться, но они останутся на месте и не будут двигаться. К ним относятся волки Друида, турели Инженера, клоны из навыка Ассасина Темный двойник и кролики из пасхальных яиц.
Турели все еще могут стрелять как обычно. Если волки вызваны в комнату с врагами, они будут бездействовать после зачистки текущей волны. Броню и ездовых животных можно использовать как обычно. Не препятствует появлению бонуса питомцев. Всё ещё можно покормить Панду в Саду, но она не присоединится к забегу.

2. Вражеская защита +1. Враги получают на 1 меньше урона от всех источников. Например, Старый пистолет будет наносить 2 урона при обычных ударах и 5 при критических ударах, а Лазерная терапия без лазерного бонуса не будет наносить урон вообще. Это влияет на урон, который враги получают от горения / отравления, а также на дебаффы, вызванные оружием. Враги будут получать 0 урона от ловушек с шипами (которые обычно наносят 2).
![]()
3. Больше врагов в подземелье. Врагов будет в два раза больше, чем обычно. Складывается с эффектами от Убойного режима.

4. Более агрессивные враги. Враги двигаются и атакуют чаще. Складывается с эффектами Убойного режима.

5. Враги двигаются быстрее. Скорость врагов увеличена в 2 раза. Складывается с эффектом от ускоряющих плиток.

6. Время отрицательных эффектов на противниках -50%. Бонус «заморозка» увеличивает время действия заморозки до обычного.
![]()
7. HP врагов +100%. Также работает на боссов. Для них прирост здоровья, по-видимому, всего в 1,4 раза. С врагов выпадает на 50% больше энергии (кроме Синих Кристаллов), а с боссов — на 100% больше. Не влияет на выпадение монет.

8. Более высокая скорость вражеских пуль! Скорость полета вражеских пуль повышена. Может быть нейтрализован бонусом «уменьшение скорости пуль противника».

9. Цены в магазине +100%. Также влияет на торговые автоматы, Обманщика, статуй и наёмников. Тем не менее, не влияет на «Фонтан желаний», «Печь для переплавки», «Оружейника» и «Таинственного торговца». Может быть нейтрализован бонусом «скидка».

10. Максимальное количество бонусов +3. У вас будет 3 дополнительных слота бонусов. Обычно дополнительный выбор происходит после 1-2, 1-4 и 2-1, но если вы выйдете и перезапустите игру, это может случиться раньше. Виолу семицветную можно использовать для дальнейшего увеличения количества слотов.
![]()
11. Уровень защиты выше, но броня не восстанавливается. Если игроки получают какой-либо урон, пока у них есть броня, он будет сокращен до одного, включая тики дебаффа. Работает в Убойном режиме. Бонус «Без дополнительного урона при разрушении щита» вообще не активируется. Броня не восстанавливается даже с навыком Священника или Желтого Кольца. Единственный способ пополнить броню — войти в портал. Когда у вас нет брони, вы получаете нормальный урон. Питомцы, последователи и ездовые животные получают обычный урон, так как у них нет брони.

12. Максимальное количество бонусов -3. Вы можете выбрать только 2 бонуса в конце 1-1 и 1-3, но Обманщик все еще работает. Оставшиеся 3 слота бонусов будут отключены. Виола семицветная сначала активирует отключенные слоты. Предварительно приобретенные бонусы в саду все равно будут занимать дополнительные слоты, не влияя на основные.

13. Перезарядка навыка -50%. Суммируется с бонусом «уменьшение время перезарядки способности». Например, у Мага с этим бонусом откат умения составляет всего 1 секунду. Также влияет на статуи. Не влияет на длительность навыка.

14. Перезарядка навыка +100%. Бонус «уменьшение время перезарядки способности» влияет на увеличенное время. Также влияет на статуи. Не влияет на длительность навыка.

15. Вы можете воскреснуть дважды. То же самое относится и к Карте бесплатного возрождения. Даже если вы выберете просмотр рекламы дважды, покажут только одну.
![]()
16. Элитные враги появляются чаще. Складывается с эффектами Убойного режима. Все Боссы — элитные.
![]()
17. Вы можете поклоняться нескольким статуям. Вы можете сохранять несколько эффектов статуй одновременно, если они от разных статуй. Использование навыка активирует все готовые. Можно получить все 9 эффектов статуй. Если у вас уже есть эффект статуи, вы не сможете снова поклониться ей. Это не влияет на частоту появления статуй.

18. Оружие перековывается в начале каждого уровня. Оружие меняется на другое того же типа. Не влияет на оружие, которое несет ваш напарник. Не происходит на уровне 3-6. Это удалит любое улучшение, если ваше оружие перековано в неподходящее, например, Легендарное оружие. Можно вернуть улучшение, если оружие было перековано обратно в другое правильное оружие без замены на том же этаже. Оружие не станет оружием из сундука с боссом (например, Растением-каннибал из любого дробовика). Но можно получить оружие босса без босса (например, Песчаный червь из любого дробовика).

19. Получить оружие при входе в новый биом. При входе на этаж х-1, под игроком появляется случайное оружие. Как ни странно, игрок при входе на уровень 3-6 также получает новое оружие, это означает, что в файлах игры этот биом считается отдельным биомом. Смена оружия в 3-6 не влияет на сертификат. Можно получить легендарное оружие, более вероятно на 3-6.

20. Максимальное HP = 1. Бонус здоровья при выборе не появится вообще. Гусеничный гриб непригоден для взаимодействия. Тем не менее, всё другое исцеление (зелья, бонус, связанный с зельями, и любой другой возможный метод лечения) могут все еще появляться нормально. Вино, купленное у Официанта, все еще будет иметь эффект, но до перехода на следующий уровень. Предотвращает увеличение здоровья от модификатора «Гигантизм». Не влияет на здоровье ничего другого. Таинственный торговец все еще может появиться, но его предметы не могут быть куплены, так как нет запаса максимального здоровья.
![]()
21. Бесконечная энергия. Технически, игрок будет регенерировать 10 единиц энергии в секунду. Затратные орудия, такие как Пулемёт Гатлинга и M14, истощают запас энергии быстрее, чем можно восстановить, но при этом прослужат значительно дольше. Оружие перестанет стрелять, как только энергия достигнет нуля, после чего она все еще будет восстанавливаться. Всё другое восстановление энергии (включая Синие Кристаллы) всё ещё может появляться.

22. Шанс крит урона +100%, урон от крит. удара -50%. Базовый шанс критического удара оружия увеличен вдвое, включая минусовые значения. Бонус от баффа Точность добавляется после удвоения. Когда оружие наносит критические удары, урон уменьшается на 50% (по сути, оружие будет наносить обычный урон). События, которые происходят при критических попаданиях, все равно будут происходить. Не влияет на дебаффы или урон окружающей среды. Не мешает элементальному оружию вызывать дебаффы.
Наличие бонуса «Двойной урон от стихийных пуль при критическом ударе» не позволяет наносить дополнительный урон, если нет бонуса «Увеличение критического урона». Урон складывается с бонусом «Увеличение критического урона», так что оружие может нанести 150% урона при крит. ударе.

23. Атака оружия +100%, скорострельность -50%. Оружие стреляет заряжается или перезаряжается с уполовиненной скоростью. Также влияет на оружие, которое ускоряется с течением времени (как Красный дракон), так что его максимальная скорострельность также будет уменьшена. Не влияет на скорость стрельбы очередей (Улучшенный ПП, к примеру). Базовый урон оружия увеличен на 100%. Это включает в себя заряжающиеся оружия с переменным уроном. Оружие отталкивает сильнее. Один удар сможет нанести 1,998 урона. Это позволяет ему мгновенно убить практически любого врага — если только это не босс Убойного режима с двойным здоровьем.
Не удваивает штраф урона, если он есть (Отбеливатель на полной скорости). Не влияет на урон, не связанный с оружием, такой как лужи яда или огня (коктейль Молотова), дебаффы, базовая атака в ближнем бою, статуи и умения любых героев (кроме турелей Инженера и катушки Робота). В случае Статуи Берсерка и усилений дополнительный урон добавляется после усиления базового урона.
Вооружение боекостюмов считается оружием и, следовательно, тоже затрагивается. Не влияет на прибавку к урону от бонусов. Бонус «ускорение зарядки оружия» может нейтрализовать штраф за зарядку и перезарядку оружия. Нейтрализуется умением Берсерка, так что во время умения оружие атакует с нормальной скоростью. Не влияет на Граундвотер: скорость стрельбы будет равна скорости нажатия на кнопку атаки, но урон удвоится.

24. Скорострельность оружия +100%, атака -50%. Оружие атакует / заряжается / перезаряжает в два раза быстрее обычного. Суммируется с умением Берсерка, так что он может атаковать в 4 раза быстрее обычного. Также влияет на оружие, которое ускоряется с течением времени (как Красный дракон), так что его максимальная скорострельность также будет удвоена. Не влияет на скорость стрельбы очередей (Улучшенный ПП, к примеру). Основной урон от оружия уменьшается вдвое, округляется в большую сторону. Например, Старый пистолет наносит 3 урона за выстрел изначально, но теперь будет наносить 2 урона за выстрел, если затронуто этим условием.
Таким образом, у оружия с 0 или 1 базовым уроном (мини-Узи и Посох иллюзии) он не будет уменьшен вообще. Это включает в себя заряжающиеся оружия с переменным уроном. Если урон от оружия может иметь штраф (Отбеливатель), урон не упадет ниже 1. Не влияет на урон, не связанный с оружием, такой как лужи огня или яда (Зелёная эссенция), дебаффы, базовую атаку в ближнем бою, статуи и умения любых героев (кроме турелей Инженера и катушки Робота).
Не влияет на прибавку к урону от бонусов, таких как лазерный бонус. Например, Красный световой меч (12 ед. нормального урона) под действием лазерного бонуса будет наносить 12/2 + 2 = 8 урона за удар. Бонус «ускорение зарядки оружия» позволяет оружию заряжаться неимоверно быстрее. Не изменяет затратность по энергии, поэтому оружие ближнего боя с высоким уроном или оружие, не потребляющее энергии, но надежное, будет более эффективным.
![]()
25. Варианты -2 при выборе бонуса. По сути, это означает, что вы будете получать случайные бонусы.
![]()
26. Варианты +2 при выборе бонуса. Вы сможете выбирать один бонус из 5 вместо 3.

27. Больше комнат в подземелье. Кратчайший путь к выходу может содержать ещё одну комнату. Это происходит не всегда. Не влияет на количество специальных комнат.

28. Только оружие ближнего боя. Все появляющееся оружие будет оружием ближнего боя. Сюда входит оружие с функцией ближнего боя, например, Ракетка для бадминтона или Мясо, или оружие ближнего боя со снарядами, как Огненный меч или Лазер. Сюда также входят Тротил, Ящики и Штыковая винтовка, которые не являются оружием ближнего боя, но игра технически считает их таковыми, поскольку они не позволяют игроку использовать базовую атаку ближнего боя. Игрок может использовать это оружие как обычно.
По неизвестной причине, некоторые метательные оружия с функцией ближнего боя (Бамбук и Метательный топор) могут быть взяты в забег, но они не будут появляться. После перехода на новый уровень все огнестрельное оружие, которое вы держите, исчезнет. И если у вас нет оружия ближнего боя, вы будете держать Лопату. Лопата дается каждый раз, когда ваше основное оружие исчезает, даже если у вас есть второе оружие.
Не влияет на оружие, которое несут напарники и персонажи. Например, у NPC Эльфа все еще будет Древний лук. Супердробовик по-прежнему можно найти в игре. Можно поменяться оружием дальнего боя с напарником, но оно станет лопатой после входа в портал. Ещё можно получить Щит от NPC Паладина и сезонное оружие от Непоседы.

29. Максимальная энергия -50%. Уменьшает ваш запас энергии вдвое. Некоторые персонажи не смогут использовать Один удар, поскольку их максимальный запас энергии ниже 99. Бонус «Макс. энергия +100» будет повышать запас на 50, НО напиток «Апельсиновый сок» всё ещё будет давать +40 макс. энергии.

30. Везение. Оружие высшей редкости может появиться раньше. Например, Винтажная снежная лиса может появиться раньше обычного уровня 2-1. Также влияет на сундук в жилой комнате, так что он может содержать какое-то раннее оружие, например, Снежная лиса XL и Рельсотрон стража. Если также активировано «Только оружие ближнего боя», он может даже содержать Эпичное / Легендарное оружие (как Накалибур).
Также влияет на Автомат Гасяпонов, так что он сможет предоставить Легендарное оружие, не являющееся оружием босса. (Песчаный червь, Снайперская винтовка малышей-драконов, Парящее орудие, Парящий лазер, Штурмовая винтовка Варколина, Один удар, Накалибур, Щит). Тем не менее, плохое оружие все еще может появиться. Например, с мимика на 2-3 может упасть М14. Просто лучшее оружие появляется чаще.

31. Невезение. Увеличивает вероятность выпадения оружия более низкой редкости. Не влияет на результат переплавки. Лучшее оружие все еще может появиться, хотя и с меньшим шансом.

32. Гигантизм. Игрок получают +4 здоровья и +1 броню. Дополнительное здоровье может быть отменено модификатором «Макс. HP = 1». Скорость передвижения на 20% ниже. Игрок также становятся такими же крупными, как наемники с 5 улучшениями от Наставника. Базовый урон в ближнем бою увеличен на 2. Размеры средств передвижения также увеличены, чтобы соответствовать вашему персонажу. Больше ни на что не влияет.
![]()
33. Карликовость. Игрок получает -2 к здоровью и -1 к броне (но не менее 1). Улучшенный Паладин будет иметь 4 здоровья, если используется бонус здоровья. Игрок двигается на 20% быстрее. Игрок становится меньше. Базовый урон в ближнем бою уменьшен на 1. Наличие Железных Когтей эффективно нейтрализует этот недостаток. Размеры средств передвижения также уменьшены, чтобы соответствовать вашему персонажу. Больше ни на что не влияет.

34. Восстановление здоровья, когда оно ниже 50%. Когда игроки начнут восстанавливать броню, они также будут восстанавливать здоровье до достижения половины максимума, округленного в меньшую сторону. Например, Друид с бонусом здоровья может восстановить 5/11 здоровья.

35. Сразитесь с 2-мя немного ослабленными боссами. В каждой комнате боссов будет 2 босса: первый — обычный босс, второй — еще один босс того же уровня. Каждый босс имеет на 150 HP меньше. Второй босс может происходить из другого биома (например, Гоблин-священник в Тундре или вулканического песчаного червя на Базе пришельцев) или обычно недоступный (например, Нянь). Если в игру вступают Малыши-драконы, появятся оба дракона. Это может привести к тому, что игроки будут вынуждены сражаться с 4 драконами в Огненных пещерах.
Оба босса расположены рядом с центром комнаты. Планировка в комнате определяется первым боссом. После победы над обоими боссами появятся два сундука боссов вместо одного, если это не уровень 3-5. После победы над обоими боссами в 3-5 и касания Магического Камня, Магический Камень будет иметь соответствующий цвет босса, которого вы победили последним. Иногда может появиться ошибка с индикатором здоровья — на нем отображается только индикатор здоровья первого босса, и другой босс все еще будет жив, даже если полоска пустая. Если это произойдет, баннер второго босса не появится.

36. Шанс смены персонажа при переходе на новый уровень. С переходом на новый уровень ваш персонаж может измениться на случайного со случайным скином и навыком. Можно превратиться в персонажей, которых игрок не разблокировал, с оригинальными скинами и без улучшений. Если выбран заблокированный скин, он будет заменен другим разблокированным.
Здоровье и энергия персонажа останутся в той же пропорции, что и на предыдущем уровне, округленные в большую сторону. Например, в 2-1 у Рыцаря 5/7 здоровья и 153/200 энергии, в 2-2 у Оборотня будет 9/12 здоровья и 108/140 энергии. Если 6-й бонус персонажа совпадает с одним из собранных бонусов, слот дополнительного бонуса будет отсутствовать до конца уровня. Изменение происходит до выбора бонуса, поэтому дополнительный бонус следующего персонажа не появится в списке. Если вы находитесь внутри брони типо Апокалипсиса, то у вас не будет меняться персонаж. Это не касается Средств передвижения как монстры.
Оружие, средства передвижения и статуи остаются прежними. Поэтому для других героев это единственный способ получить доступ к улучшенному стартовому оружию, которым они не владеют. Единственным исключением является Щит, его скин может превратиться в случайный скин Паладина. Это может привести к тому, что NPC-Паладин держит неправильный Щит.
![]()
37. Больше специальных комнат. Каждый уровень может содержать до 2 комнат с восклицательным знаком, которые не являются комнатами элитных врагов. Обе комнаты могут быть одного типа, например, с 2 статуями или 2 напарниками. Можно нанять двух напарников, и они смогут нормально работать на текущем этаже. Однако при переходе на следующий этаж тот, которого вы наняли первым, будет потерян.

38. Можно носить только одно оружие. Игрок может носить только 1 оружие. Бонус «дополнительное оружие» нейтрализует это.

39. Увеличение критического урона. Оружие наносит 300% урона при критических ударах вместо 200%. Элементальное оружие все еще требует бонус «увеличение элементального крит урона». В противном случае оно не будет наносить дополнительный урон вообще. Урон может складываться с модификатором «Шанс крит урона +100%, урон от крит -50%», при крите оружие будет наносить 150% урона, округленного вниз. Например, Старый пистолет (3 базовых урона) будет наносить 9 повреждений вместо 6 при критических попаданиях. Если также применяется «Шанс крит урона +100%, урон от крит -50%», то в этом случае он нанесет 4 повреждения.
![]()
40. Случайные уровни. После прохождения уровня вы можете появиться на уровне любого из этажей. Иногда вы можете появиться на предыдущем уровне по счёту, например, после прохождения 3-4 вы можете оказаться на 2-1. Вместе с этажами меняются и биомы.

41. Монстры делятся надвое, когда их здоровье падает ниже 50%. Когда у второстепенного врага здоровье ниже половины, он будет заменен двумя меньшими версиями того же врага. Не влияет на боссов. Это происходит даже, если враг умер от одного удара. Раздвоенные враги имеют половину здоровья, как и первоначальный враг.

42. Пользовательский интерфейс отключён. Значения здоровья, брони, энергии и монет показаны как «». Все значения функционируют нормально. Например, попытка нанять Робота в аренду покажет половину фактического монет игрока, как обычно.

43. Все оружия при использовании получают приспособления. Как только игра начнется, каждое нелегендарное оружие (включая то, с которого игрок начинает) будет появляться с модификацией, когда это возможно. Это не включает в себя одноразовые приспособления для использования, а также наемное оружие, находящееся в руках наемников. Оружие появляется вместе со своей статистикой, включая модификацию. Таким образом, можно угадать некоторые из модификаций, осмотрев статистику оружия.
Это происходит всякий раз, когда появляется оружие. Таким образом, помещая оружие в Печь переплавки, каждый раз оно будет появляться с новой модификацией, если это возможно. Если по какой-либо причине оружие не имеет модификации, когда начинается новый этаж, ему будет дан другой, если это возможно. Это может произойти, если оружие перековано на другое, которое не может использовать предыдущее приспособление.

44. Ограниченная видимость. За пределами лобби игрок может видеть только ограниченную область вокруг своего персонажа. Область зрения имеет радиус около 5 блоков. За пределами поля зрения — полная темнота. Однако это не мешает персонажу целиться или атаковать врагов вне поля зрения. Не влияет на игровой интерфейс.

45. Монстры телепортируются, когда в них попадают. Если враг получает урон, у него есть некоторый шанс телепортироваться в другое случайное место в комнате. Это может произойти даже в том случае, если враг атакует, оставаясь на месте. Не отменяет движение пуль. Действует на боссов и неподвижных врагов. Если попадание убьет врага, он все еще может телепортироваться.

46. Монстры могут воскреснуть. После смерти любой монстр воскрешается. Не работает на боссах.

47. Мощное тело. Броня восстанавливается быстрее, и ты получаешь устойчивость к заморозке. Игрок автоматически получает иммунитет к заморозке (визуально никак не отображается) и его броня будет восстанавливаться на 50% быстрее. Это повлияет на бафф «Регенерация здоровья» таким образом, что эффект также происходит раньше. Это условие можно получить, если не получить урон в биоме Пещера после победы Пещерного ледяного червя, но его по-прежнему можно получить у NPC Офицера.

48. Обморожение. Броня восстанавливается медленнее, и вы теряете устойчивость к заморозке. Если у игрока был иммунитет к заморозке, то теперь он не будет функционировать (визуально никак не отображается), а броня будет восстанавливаться на 100% медленнее. Это условие можно получить, если использовать воскрешение в биоме Пещера после победы над Пещерного ледяного червя, но его по-прежнему можно получить у NPC Офицера.

49. Посох благословления. Игрок может возродиться один раз, когда он умрет, хотя у него останется 1 здоровье. Возрождение бесплатное. Все оружие ближнего боя получает +1 бонусный урон. Также влияет на снаряды из оружия ближнего боя (например, Бейсбольная бита) и складывается с баффами. Это условие можно получить, если не получить урон в биоме Могила после победы над Архонтом-скарабеем могильщиком, но его по-прежнему можно получить у NPC Офицера.

50. Проклятье грабителей могил. Если у игрока был иммунитет к яду, то теперь он не будет функционировать (визуально никак не отображается). Следующие 4 открытых сундука ничего не будут содержать, но вместо этого покажут немного черного дыма. Это условие можно получить, если использовать воскрешение в биоме Могила после победы над Архонтом-скарабеем могильщиком, но его по-прежнему можно получить у NPC Офицера.

51. Упорство. Дает иммунитет к ловушкам. Увеличивает урон к любому посоху на 1. Это условие можно получить, если использовать воскрешение в биоме Болото после победы над Повелителем вечной тьмы, но его по-прежнему можно получить у NPC Офицера.

52. Сумасшествие. Если у игрока был хотя-бы какой-то иммунитет к чему-то, то теперь он не будет функционировать (визуально никак не отображается). После потери одной 1 жизни призывается одно Щупальце прошлого. С помощью Дыхания Аида можно призвать их на уровень 3-6. Это условие можно получить, если использовать воскрешение в биоме Болото после победы над Повелителем вечной тьмы, но его по-прежнему можно получить у NPC Офицера.
Soul Knight: Прохождение охоты на боссов

Охота на боссов — это игровой режим, в котором вам придётся убивать только боссов.
Доступ. Чтобы разблокировать режим Охоты на боссов, игрок должен:
- Разблокировать Волшебное урочище;
- Пройти игру, достигнув уровня 3-6 хотя бы один раз;
- Найти Валькирию во время забегов и купить у нее 3 Пера Валькирии, либо получить у Офицера за выполненные задания.
После того, как игрок выполнил 2 вышеуказанных требования, в Волшебном Урочище станет доступен режим Охоты на боссов. NPC Валькирия появится на могильном камне, который является входом в этот режим. Когда игрок пытается взаимодействовать с Валькирией, она предлагает доступ к Охоте на боссов, если у игрока есть хотя бы одно перо. Режим может быть активирован три раза в день, при активации тратя одно Перо Валькирии. Можно запустить этот режим вместе с ежедневными испытаниями, Убойным режимом или Режимом цикла.
Связанные достижения. Перечислены в таблице:
| Название | Условие выполнения |
| Абсолютная решимость | Пройти Охоту на боссов. |
| Становление силы | Пройти Охоту на боссов в Убойном режиме. |
| Герой рождён! | Пройти Охоту на боссов за 10 минут. |
| Эпичная победа | Пройти Охоту на боссов в Убойном режиме за 15 минут. |
| Ку | Завершить игру Паладином в режиме Охота на боссов без возрождений с активным испытанием. |
Игровой процесс. После активации режима справа от здоровья появится значок с изображением красного шлема. В режиме всего 13 уровней. Есть 3 этажа, каждый этаж содержит 4 уровня с боссами, а конец находится на 3-5. Биом каждого уровня на одном и том же этаже может быть разным. Игрок сможет выбрать бонусы после зачистки этажей 1-1, 1-3, 2-1, 2-4 и 3-2. Каждый уровень (кроме 3-5) будет содержать 3 комнаты:
- В стартовой комнате будет белый сундук. На первом этаже также будет сундук с оружием. В белом сундуке не будет монет, но будет много энергии. Он также может содержать оружие или зелья.
- Вторая комната может быть с сундуком или специальной комнатой, точно такие же, как в стандартном забеге.
- Третья комната будет содержать босса, зависящего от биома.
После победы над каждым боссом появится большой красный сундук. Он будет содержать случайное оружие (может быть оружием босса) и случайное зелье. Если есть модификатор «Сразитесь с 2-мя слегка ослабленными боссами», соответственно появятся два красных сундука. Режим завершается, когда игрок достигает 3-5, где нет Магического камня. Вместо него Валькирия появится на большом надгробии с выгравированным на нем временем забега.
Soul Knight: Цифровое пространство

Цифровое пространство — это создатель уровней, в который можно попасть, создав Робота и нажав на компьютер.
Доступ. Компьютер, вход в Цифровое пространство. Чтобы разблокировать Цифровое пространство, игрок должен сначала разблокировать Робота. Затем Цифровое пространство можно получить, взаимодействуя с компьютером.

Игровой процесс. В этом режиме игрок может свободно создавать уровень самостоятельно.
Управление. Персонаж перемещается с помощью джойстика, объекты размещаются нажатием кнопки огня, а дополнительная кнопка используется для изменения свойств объектов.
Игра на уровне. Вы можете протестировать воспроизведение вашего разработанного уровня с помощью кнопки зеленой кнопки. Обратите внимание, что:
- Ваш персонаж не будет убит в этом режиме, их здоровье может только снизиться до 1 и не сдвинется с места, независимо от того, сколько урона вы берете.
- Игра будет отставать, если у вас есть слишком много объектов в действии.
- У вас больше нет ни одной кнопки создания, такой как Один удар мини, ящики, стены или манекены персонажа, но все остальные функции сохранены, а также любое оружие, которое вы держали, когда вошли в цифровое пространство.
- Нажатие кнопки с изображением дома приведет к тому, что вы вернетесь в режим создания.
Soul Knight: Убойный режим

Убойный режим — это режим игры в Soul Knight. После того как любой из ваших персонажей достигнет уровня 3-6, в жилой комнате появляется лавка режимов игры. Поговорив со смотрительницей в красном костюме (слева), вы переключитесь в убойный режим. Поговорив с ней ещё раз, вы переключитесь обратно в обычный режим.

Игровой процесс. Все противники атакуют в 2 раза чаще. Усиленные противники появляются гораздо чаще. Все боссы усилены, они больше и их атаки сильнее. Игрок получает на 1 больше урона от всех его источников, в том числе от дебаффов. Питомцы и спутники получают чуть больше урона. Пример: в обычном режиме от лазера они получат 5 урона, а в убойном — 6. Когда игра пройдена и появляется карточка с информацией о победе, магический камень на ней будет не в бронзовом обрамлении, как в обычном режиме, а в серебряном. Рамка карточки будет золотого цвета. Оружие в подвале, с которым игрок закончит игру, будет не в серебряной рамке, а в золотой.
Связанные достижения. Перечислены в таблице:
| Название | Условие выполнения |
| Великолепный игрок! | Завершить 1 игру в убойном режиме. |
| Скоростной бегун 2 | Пройти убойный режим за 23 минуты. |
| Тяжёлые кулаки | Пройти игру без оружия в Убойном режиме. Нужно пройти игру без оружия в инвентаре в Убойном режиме. |
| Становление силы | Пройти Охоту на боссов в Убойном режиме. |
| Эпичная победа | Пройти Охоту на боссов в Убойном режиме за 15 минут. |
| Быть рядом с тобой | Пройти игру в мультиплеере в Убойном режиме. |
Советы по прохождению
1. Желательно играть на персонажах с уклонением от пуль, излечением и другими видами живучести. Рекомендуемые: Ассасин, Разбойник (хорошие эскейпы), Паладин (высокий показатель брони + щит), Рыцарь (высокие характеристики, сильная пассивная способность, большая скорость зачистки комнаты благодаря способности), Оборотень (хил и хорошие статы с ультой), Алхимик (его пассивная способность будет очень полезной).
2. Не рекомендуется брать бонус на снижение цен в магазине, так как с элитных врагов падает очень много золота. С энергией также не будет проблем, поэтому не рекомендуется брать бонус на получение энергии при убийстве врагов. Статуя эльфа также эффективна против боссов: если вас окружат пули, эффект этой статуи уничтожит их и оттолкнет врагов. Статуя паладина будет идеальной в этом режиме из-за возможности не получить урон.
3. Будьте осторожны и не попадайте на стихийные выстрелы и облака, потому что отравление и горение наносят в сумме в два раза больше урона и легко вас убьют. Не спешите играть в этом режиме сразу после единожды пройденной игры, этот режим не для новичков. Не берите вещи из комнаты с турелями, если у вас нет ничего на защиту, или оружия, которое их быстро уничтожит, турели (особенно когда их 3) могут быстро расправиться с персонажем и всеми его попутчиками.
4. Старайтесь не вставать в углы, в них вас могут легко зажать и убить. В этом режиме защита важнее урона, поэтому лучше всего (когда есть выбор) брать оружие ближнего боя, которое атакует с высокой скоростью (Нунчаки, Мясо, Золотой лазерный меч, а также Щит).
5. Рекомендуемые баффы:
- Иммунитеты к отравлению и огню;
- «Уменьшение времени перезарядки навыка»;
- «Отсутствие дополнительного урона, когда щит разрушен».
Иногда испытания серьёзно облегчают прохождение убойного режима, не забывайте периодически их проверять.
Soul Knight: Сражения в режиме «Мультиплеер»

Общее. Мультиплеер (англ. multiplayer — много игроков) — режим игры, в котором прохождение игровых локаций происходит силами нескольких игроков. Создание мультипользовательского режима игры производится одним человеком (хостом), к которому, впоследствии, с помощью локальной сети Wi-Fi или же с помощью портативной точки доступа подключаются ещё до трёх человек (гости). Минимальный набор для начала игры — хост + один гость, иначе режим запустить не получится. Режим игры мультиплеер, как и однопользовательский режим, может быть переключен в убойный режим. Чтобы переключить игру в убойный режим, проходить игру необязательно.
Отличия от других режимов. Основные отличия:
- Большее количество монстров (варьируется от количества игроков);
- При создании персонажа для многопользовательской игры возможно выбрать одно из четырех колец;
- В магазине часто более широкий выбор предметов (2 зелья и 4 оружия);
- В локации, помимо обычного сундука с одним оружием внутри, можно встретить большой сундук, с количеством напольных кнопок по бокам, равным количеству игроков. Встав на них одновременно, игроки откроют сундук, в котором будет находиться оружие для каждого (иногда может попасться сундук с меньшим количеством кнопок и оружия чем игроков);
- Здоровье боссов увеличено;
- Если один из игроков умрёт, другой может его воскресить совершенно бесплатно, находясь рядом несколько секунд. При этом воскрешённый игрок будет иметь 1 очко здоровья и максимально возможное для его персонажа количество брони и энергии.
Монеты и кристаллы (энергия) для каждого игрока свои. Т.е. при открытии сундука после зачистки комнаты выпадет определённое количество монет и кристаллов, при этом один игрок не может забрать долю другого. Тоже самое происходит при разрушении препятствий (таких как коробки, бочки и т.д.) — выпавшие с них кристаллы может получить каждый игрок. Это не распространяется на оружие и зелья, полученные из сундуков и разрушаемых объектов, но работает для материалов, выбитых с монстров, найденных в сундуках или полученных с помощью печи пересоздания.

Связанные достижения. Перечислены в таблице:
| Название | Условие выполнения |
| Лучший игрок | Спасайте товарищей по команде 5 или более раз в одной многопользовательской игре, которую вы завершаете. |
| К лучшему или к худшему | Вся команда должна погибнуть 10 или более раз в одной многопользовательской игре, которую нужно завершить. |
| Беззаботный | В многопользовательской игре лежите на земле после того, как вас убьют, пока ваши товарищи по команде не перейдут на следующий уровень. |
| Быть рядом с тобой | Пройти игру в мультиплеере в Убойном режиме. |
Советы по прохождению
1. Лучшей связкой для прохождения игры в режиме мультиплеер силами двух игроков по праву может считаться вампир с зелёным кольцом + рыцарь с красным кольцом. Особый навык вампира позволяет ему восполнять очки здоровья и энергии бесконечно. Это означает, что он может бесконечно использовать зелёное кольцо для восполнения здоровья рыцарю, что сильно облегчает задачу по поиску очков здоровья при их потере. В случае, если во время прохождения была найдена статуя священника, вампиру следует ей поклониться (в качестве статуи для рыцаря больше подойдёт статуя рыцаря или статуя паладина).
Если у вампира есть бафф от статуи священника, то рыцарь берёт самое дорогое и сильное оружие, которое вы сможете найти — активируя красное кольцо и свой навык, рыцарь будет наносить четырёхкратный урон. После исчерпывания ресурсов энергии, вампир, используя бафф статуи священника, восполняет энергию рыцаря. Если же у вампира нет баффа от статуи священника, то он и берёт самое дорогое оружие, восполняя энергию своим навыком, а рыцарь, с помощью красного кольца, удваивает урон спутника. Для данной связки лучшими бонусами будут: увеличение здоровья, удвоение эффектов статуй, скидка (для покупки дорогого и мощного оружия) и любые сопротивляемости, предпочтительнее — к яду и огню.
2. Прохождение игры силами трёх игроков строится на указанной выше тактике, где третьим персонажем может являться инженер с жёлтым кольцом или эльф с жёлтым кольцом. Их задача будет заключаться в постоянной поддержке с помощью своих навыков. Рыцарь берёт на себя роль танка, попутно защищая неподвижного во время каста навыка эльфа или вампира, имеющего наименьшее количество здоровья и брони.
Soul Knight: Прохождение Начала

Начало (англ. The Origin) — бесконечный режим, в котором нужно зачищать волны врагов.
Вход. Войти в режим можно через Древний портал в Волшебном урочище. Для разблокировки нужно достичь уровня 3-5 после открытия Мусорной корзины и Растения. Вход стоит 500 гемм.
Геймплей. Вам нужно защищать древний Магический камень от полчищ врагов, нападающих волнами. Если камень будет разрушен, или игрок умрет, игра закончится. Вы можете ставить турели и улучшать свою защиту с помощью NPC.

Магический камень. Магический камень, который вам предстоит защищать. Магический камень имеет 30 здоровья. Чтобы нанести урон, врагу надо коснуться камня, при этом враг умирает (даже босс). Никакие другие атаки не могут задеть его.
Волны. Во время каждой волны будет появляться куча врагов. Между волнами игроку дается время для подготовки к следующей волне.

Враги. В начале каждой волны монстры будут появляться из порталов. Они побегут к Волшебному Камню, атакуя все на своем пути. Приоритет их атак: Заградитель — Турель-голограмма — Усилитель — Устройство ЭМИ — Энерговосстановитель — Игрок — Магический камень. С каждой волной здоровье врагов увеличивается на 10%, вплоть до 10-й волны, когда у них будет 200% здоровья. Это повторяется каждые 45 волн. Урон всех врагов увеличивается на 1 каждые 45 волн.
Предметы и улучшения. Справа от Магического Камня находятся три пьедестала, похожие на те, что находятся в комнате с турелями. После каждой волны на них на выбор появляются два оружия и зелье, после некоторых волн вместо этого появляется три бонуса на выбор. Игрок может получить 11 бонусов с пьедесталов. Если оружие лежит на земле 12 секунд, оно исчезает.
Связанные достижения. Перечислены в таблице:
| Название | Условие выполнения |
| Верный страж | Дойти 16 волн в режиме Начало. |
| Защитник храма | Дойти 31 волну в режиме Начало. |
| Последний оплот | Дойти 46 волн в режиме Начало. |
NPC. Во время подготовки игрок может подойти к нескольким NPC, которые могут помочь с защитой. Всего их пять:
- Торговец — продает зелье и 2 оружия. Пополняет запасы после каждой волны.
- Наставник — увеличивает здоровье, броню или энергию игрока с каждым улучшением.
- Призыватель — призывает случайные предметы или NPC.
- Оружейник — увеличивает урон оружия игрока на 10% за каждый уровень.
- Инженер-механик — продает Усилитель, Устройство ЭМИ, Энерговосстановитель, Турель-голограмму и Заградитель. Модернизирует их, увеличивая их здоровье.
Награды. В этом режиме из элитных врагов и боссов все еще выпадают материалы. Количество самоцветов после игры может быть рассчитано по следующей формуле: 10 х Кол-во пройденных волн + (0,1 х Кол-во ваших монет) + (0,2 х Кол-во убитых монстров).
Soul Knight: Цикличное приключение

Общее. Цикличное приключение или Режим цикла (англ. Loop Mode) — это один из 6 игровых режимов, включаемый при взаимодействии с синей частью Лавки режимов игры.
Игра. В этом режиме игра начинается заново после 3-5, продолжается на 4-1 и так далее. Он следует той же последовательности этапов на протяжении всего забега (например, Леса гоблинов на 4-1 и Рыцарское королевство на 5-1). Игра будет продолжаться до тех пор, пока игрок не умрет. Если игрок прошёл 3-5, то это считается победой. Враги по-прежнему будут сбрасывать материалы и семена растений, становясь всё сложнее по мере продолжения игры. Этот режим похож на Начало по принципу усложнения игры:
- За каждую петлю (3 пройденных биома) враги наносят на 2 больше урона, чем обычно;
- Для каждой петли можно рассчитать примерное здоровье врагов (их первоначальное здоровье * количество петель);
- Врагов будет становиться больше, и они будут атаковать быстрее;
- Чемпионы появляются чаще.
Стратегии. По мере того, насколько трудными будут петли по мере вашего прогресса, вам придется использовать все средства выживания. Вы все еще можете выбрать только пять баффов, так что выбирайте тщательно и вдумчиво. Иммунитет к огню и яду очень нужны в этом режиме: вы не сможете сосредоточиться на избегании лавовых плиток или ядовитых луж, когда вы заняты уклонением от пуль. Бонус «Отсутствие дополнительного урона, если щит разрушен» — также очень важен, потому что на более поздних циклах основные враги могут легко нанести 2-значные числа урона, которые легко обойдут вашу броню и даже могут мгновенно убить вас.
Из-за этого оружие, которое хорошо справляется с контролем толпы и отключает врагов с помощью оглушения или замораживания, является отличным выбором. Когда враг заморожен или оглушен на протяжении всего боя, сколько здоровья у него больше не имеет значения, потому что он все равно не сможет начать атаку. Из персонажей хорошо подходят те, у кого большая защита, или те, кто умеют восстанавливать здоровье (примеры: Паладин, Даос, Оборотень, Вампир или Инженер с 3-ей или 2-й ультой). А если играть в мультиплеере, то хорошая будет комбинация танк и атакующий (примеры: Паладин + Рыцарь, Инженер + Робот).
Soul Knight: Маленький командир, секреты прохождения, наемники

Питомец. Этот режим отличается от других режимов игры своей уникальной механикой: здесь вам придется играть за питомца. Питомец имеет 3 единицы здоровья, 1 броню и 160 энергии. Их показатели можно увеличить с помощью соответствующих бонусов. Хоть питомец и имеет показатели брони и здоровья, он бессмертен, хотя дебаффы могут накладываться на него. Атака, на которую способен питомец — укус, который наносит 5 единиц урона. Питомец получает 5 слотов для оружия, но не может использовать их, он просто держит оружие в зубах. Некоторые оружия всё же можно использовать:
- Многоразовое зелье здоровья/энергии/восстановления. Исцеление применяется к каждому наемнику. Каждый 1 балл приравнивается к 10 здоровью;
- Зелье силы;
- Скретч-карта;
- Свисток;
- Труба;
- Штык в тыкве;
- Щит (только при переключении оружия);
- Парящий лазер, Парящее орудие, Вспомогательное парящее орудие будут летать и наносить урон, если взять их в неактивный слот;
- Специальная атака, используемая дополнительной кнопкой (например, Супердробовик).
Напитки, выпитые перед входом в комнату, а также эффекты статуи будут применяться только к домашнему животному. Пассивные баффы, полученные от стартового персонажа и сада, останутся и будут применяться к наемникам.

Навыки питомца. При использовании навыка питомца питомец не может использовать атаку ближнего боя или другие применимые предметы. Используйте команду переключения оружия, чтобы отключить навык. Навыки домашних животных в форме оружия не могут быть даны ни одному наемнику. При использовании навыка питомец не может использовать атаку ближнего боя или другие применимые предметы. После использования навыка питомец становится безоружным. У каждого навыка есть свой период перезарядки. Если навык используется во время боя, время перезарядки будет увеличено. Если игрок входит в игру с эффектом статуи, он может быть активирован, когда питомец использует навык, но не при выборе навыков.
- Морозный кристалл (50) — вызывает восемь ледяных линий вокруг игрока, которые длятся 1 секунду. Они наносят 3 урона и замораживают врагов при контакте, уничтожая при этом вражеские пули. На него может влиять бонус «Увеличение количества пуль для дробовика».
- Аптечка (60) — мгновенно исцеляет 10 здоровья и добавляет 5 очков брони всем наемникам. На аптечку влияет бонус «Увеличение эффективности зелий», так что она исцеляет 11 здоровья и добавляет 10 очков брони всем наемникам.
- Генератор энергетического щита (70) — создаёт шестиугольник вокруг игрока, который блокирует вражеские снаряды в течение 4 секунд. Он в два раза больше, чем шестиугольник Щита.
- Реанимирующее устройство (100) — немедленно оживляет павшего наемника с полным здоровьем и броней. Может быть использовано в бою. При использовании этого устройства после боя воскрешает с полным объёмом жизней в отличии от бесплатного воскрешения в конце боя.
Рекомендуемые бонусы. К ним относятся:
- Увеличение эффективности питомцев и спутников — все персонажи (нанятые и те что будут наниматься в будущем) получат +1 апгрейд. Минимальное качество персонажей станет Фиолетовым. Испытание «Без питомцев или напарников» исключает возможность взять Лягушонка из фонтана в игру и не влияет на остальных наёмников доступных в этом режиме.
- Увеличение скорости стрельбы оружия — увеличение скорости залпов и уменьшения промежутка между ними.
- Броня +1 — увеличение показателя брони у всех наёмников на 5 единиц.

Монеты питомцев. Монеты питомцев — главная валюта в этом режиме. Они используются для большинства покупок. Цены нельзя снизить с помощью бонуса «Скидка -50% в магазине». Монеты можно получить в:
- Сундук в стартовой комнате;
- Серые сундуки после зачистки комнаты. Монета не всегда появляется, но по крайней мере 1 будет доступна на каждом этаже;
- Разрушение Золотого/Кристаллического рудника. За разрушение больших рудников дает 2 монеты;
- Зачистка комнаты с чемпионами дает 2 монеты.
- Победа над боссом дает 3 монеты. Существует очень распространенный баг, когда за босса на уровне 2-5 не даёт монет.
Рекомендуемые модификации испытания. К ним относятся:
- Бесконечная энергия — преимущество участия в челлендже с таким условием очевидно. Вы можете очень часто создавать ледяные шипы, лечить персонажей, воскрешать в случае смерти.
- Больше специальных комнат — с таким условием у вас будет появляться больше специальных комнат, многие из которых будут рудниками из них, кроме золота и энергии, выпадает 1-2 монеты питомца (зависит от размера рудника). Также, есть шанс появления Официанта, у которого можно купить усиление за обычные монеты.
- Больше комнат в подземелье — на каждом этаже у вас будет больше комнат с монстрами чем должно быть. Например: на уровнях -1 у вас сразу уже будет по 3 комнаты с монстрами вместо 1, соответственно, вы сможете заработать больше монет питомца.
Стартовая комната
На протяжении всей игры вы будете появляться в специальной комнате. В ней не появляются Торговые автоматы, Обманщик или другие NPC.

1. Флаг. Флаг определяет количество наемников, которых игрок может иметь, а также общее количество наемников. Обратите внимание, что, если наемник нанят, обновление флага приведет к тому, что пустой слот будет заполнен другим. Он также телепортирует туда мертвых наемников, хотя обычно их можно оживить. Все наемники стоят 4 монеты питомцев, чтобы нанять их, хотя первый из них является бесплатным. Наставник может обновить запас наемников по цене 1 монеты питомца.
2. Сундук. Сундук содержит случайное оружие и различное количество монет питомцев. Его содержимое может быть улучшено с помощью Кота удачи. На уровне 1-1 с шансом 100% появляется оружие Свисток.
| Тип сундука | Количество монет питомцев | Стоимость |
| Белый | 2 | Бесплатно |
| Коричневый | 3 | 3 |
| Синий | 4 | 6 |
| Золотой | 5 | 9 |
3. Лавка официанта. Лавка официанта — это область, где игрок может получить различные предметы с прилавка. Официанту можно заплатить 1 монету питомцев, чтобы пополнить запасы продуктов. Рядом также есть мусорное ведро, чтобы игрок мог избавиться от бесполезных предметов. Ассортимент:
- 1 слот: случайный бонус — стоит 3 монеты питомца.
- 2 и 3 слот: случайный напиток. Вино: +10 здоровья, кокосовая вода: +4 брони, молоко: +1 защита, кровавая Мэри: +8 к критическому шансу, кофе: +10% скорость атаки, сода: -10% к перезарядке навыка.
- 4 слот: случайное оружие. Иногда оружие белой или зелёной редкости может стоить 0 монет питомцев.
- 5 слот: Работа наёмника над собой. Повышает редкость наёмника.
- 6 слот: Кальмар. Увольняет наёмника. Наёмник скажет: «Отвратительно!» и будет стоять (также выронит оружие, которое он держал) (его можно будет толкать).
Наёмники
Наёмники — основная атакующая сила питомца. Каждый наемник имеет свою собственную статистику, включая здоровье, броню, защиту, навыки, типы подбираемого оружия и шанс критического урона. Игрок может иметь не более 2 наемников одного типа. Попытка купить третьего (даже если игрок достиг своего максимального лимита команды) приведет к тому, что они объединятся, бросив все свое оружие и получив улучшенное стартовое оружие. Объединенные наемники улучшат свою работоспособность. Они также хранят все обновления напитков. Наемники могут быть оснащены только синим/редким оружием, как в обычном, так и в Убойном режиме. Предел редкости может быть улучшен путем:
- Объединения наёмников;
- С помощью бонуса «Увеличение эффективности питомцев и спутников»;
- Работы наёмника над собой.
Во время битвы наёмники не могут регенерировать броню. Во время боя восстанавливать броню можно с помощью аптечки, реанимирующего устройства (навыки питомца) или навыка Паладина. Если наемник убит, его можно оживить, только если очистить комнату. Возрожденные наемники будут иметь 1/10 своего максимального здоровья. Прохождение через портал восстанавливает здоровье всех наемников, броню и оживляет всех мертвых. Однако возрожденные таким способом наемники потеряют свое оружие и будут заменены стартовым.

Наемников можно удалять с помощью Кальмара. Они не могут быть наняты снова, и их оружие будет сброшено, в то время как их апгрейды напитков будут потеряны. Это не применяется, если под командованием игрока находится только 1 наемник, и в этом случае Кальмар не может быть использован против них. Наемник ответит: «Отвратительно.» при использовании Кальмара.
Геймплей
Многие элементы отличаются от режима уровня, например:
- Магазины всегда будут содержать зелье здоровья и пять видов оружия. Предметы по-прежнему стоят золота, а не монет питомцев.
- Купленное зелье здоровья также дает 10-кратное исцеление наемникам.
- Сундуки могут быть только большими и находятся в большой комнате. Каждый сундук содержит от 2 до 3 единиц оружия.
- Статуи, найденные в забеге, могут быть сняты с пьедестала (заплатив золотом) и стать предметом. Подобно напиткам, они могут быть даны наемнику. Эффект срабатывает, когда наемник использует свой собственный навык. Питомец не может получить эффект статуи во время бега, только взаимодействуя со Священной статуей в лобби.
- Враги становятся более агрессивными по умолчанию — время дебаффа сокращается на 50%, а скорострельность и здоровье значительно увеличиваются. Это не складывается с Убойным режимом.
- На каждом уровне меньше комнат. Кратчайший путь будет содержать только одну комнату на любом уровне x-1 или x-2, в то время как x-3 и далее будет иметь две. По-прежнему рекомендуется зачистить все комнаты, чтобы получить больше монет питомцев.
Трофеи
Обратите внимание, что задачи не должны выполняться в определенной последовательности. Например, можно дать наемнику 10 или более напитков до завершения целей, имеющих отношение к бронзовому трофею, и игра все равно зарегистрирует его на серебряный.

1. Бронзовый. Получите 3 одинаковых наемников, которых можно обновлять с помощью Наставника. Увольте наемника с помощью Кальмара. Нанимайте каждого наемника хотя бы один раз. Наемные наемники будут иметь LC Hire.png бронзовую кошачью голову над ними в подвале, модернизированные наемники не считаются. Дайте наемнику легендарное оружие.

2. Серебряный. Пройдите игру хотя бы один раз с каждым наемником. Наемники, которые победили в игре, будут иметь серебряную кошачью голову над ними в подвале, обычные или модернизированные наемники будут засчитываться для достижения этой цели. Получите улучшенную форму всех наемников. Дайте наемнику 10 или более напитков.

3. Золотой. Пройдите игру хотя бы один раз с каждым обновленным наемником в Убойном режиме. Наемники, которые победили игру в Убойном режиме, будут иметь золотую кошачью голову над ними в подвале, обычные наемники не считаются. Пройдите игру, в которой нанимается только один тип наемника.
Автор статьи: Надежда Д.
r/SoulKnight
A game available on the Google Play Store Apple and App Store for free, as well as the Nintendo Switch!
Soul Knight is an action Rogue-like/Bullet-hell dungeon course played using different in game classes while traversing levels increasing in difficulty.
Visit https://www.reddit.com/r/SoulKnight/about/wiki/main for resources!
Members
Online
Гость спросил 23.12.2017 18:41
перейти к ответам (2)
У меня:
такой же вопрос / проблема!
другой вопрос / проблема…
Zoy21rus
30.12.2017 18:47
причин может быть несколько. во первых попробуйте переустановить игру. во вторых проверьте свое устройство на поддержание требований игры. не туда дорога к нам дорогу принял дорогу туда, зайдёт ночами не слушают с которой стороны было. За грибами потому что она рассказывала но надо так до хутора в дальнейшем говорят что давайте сегодня будем тебе сегодня через ворота.в случае если ваши попытки не увенчались успехом советую обратится в службу технической поддержки. сделать это можно посетив сайт игры.
Какой тип игр по истине ваш? Психологический тест
natalie1038
04.01.2022 15:19
Доброго времени суток. Если у вас возникли проблемы с запуском игры Soul Knight, для начала вы можете попробовать сами решить эту проблему, воспользовавшись несколькими способами. Первым делом попробуйте переустановить игру с файла, но при установке посмотрите, есть ли ограничения для этой игры или наоборот какие-то требования. Но если и это не поможет, то вам стоит обратиться за помощью на официальный сайт игры и написать в поддержку.
Please click on the listed problem to see the solution.
1. Cloud Save
Q: How can I cloud save? (Android)?
Please refer to Soul Knight Cloud Save Manual for Android Users. The only supported way to back up your game data is via the in-game cloud save feature, where you need to upload your local save data to the cloud MANUALLY. Simply logging into Google Play Games will NOT auto-save your progress. Tapping on the Facebook button on the main screen will NOT «link your game account with Facebook» either.
Not helpful
Q. Which login should I use? Google or ChillyRoom account??
* If you have cloud saved your data before v4.2.5 (released on 2022/09/14), please log in with Google account. We will migrate your cloud save data to ChillyRoom’s game server.
* If your phone does not have Google services, you can enter the game by logging into the ChillyRoom account.
If you choose to sign in with Google, please make sure that you use the same Google account or Apple ID every time you log into the game. The same applies if you choose the ChillyRoom account in the first place. If you switch accounts, you won’t be able to upload your local save to the cloud.
Not helpful
Q. When I try to sign up for a ChillyRoom account, I get a message that says «The account already exists». But I don’t remember signing up for one in Soul Knight.
You have already registered one account, possibly in Otherworld Legends or We Happy Restaurant. If you don’t remember the password, you can always reset it by tapping the «Forgot password» button on the login window.
Not helpful
Q. If I have already saved to Google before the migration, can I still sign up for a ChillyRoom account?
Yes, but after you log into your ChillyRoom account, make sure that you bind it with your Google account BEFORE you cloud save. Otherwise, your save data in Google cloud can’t be migrated to the server of ChillyRoom.
Not helpful
Q. I have changed my phone from iPhone to Android? Can I transfer my save data?
No. The Android version and the iOS version have completely different account systems and data structures. Game data can’t be migrated between Android and iOS.
Not helpful
Q. Can I share save data between different accounts?
Q. I have deleted the game/factory reset my phone/changed my device. How can I restore my game data after that?
If you have never cloud saved before, there is no way for us to recover your lost data for you. App reinstall, factory reset, and device change are all system-level operations that can wipe all the app data clean. Soul Knight does not auto-back up your data. You need to manually save it to the cloud from time to time to prevent unexpected data loss.
1. I have cloud saved before.
Log into the same account that you used to cloud save. When the cloud save bar shows your save data, tap on Download Progress.
2. I have NEVER cloud saved before.
Your game data cannot be restored. It has been erased from your device. And since you have never cloud saved, there is no backup of it in our server either.
But non-consumable in-app purchases (heroes, skills, etc. that are unlocked with real money) can be restored.
Not helpful
Q. I am pretty sure I have uploaded my save to the cloud. But nothing appears on the cloud save bar.
If that is the case, please contact our customer service and send us the below information:
• Where do you download the app
• and all the possible accounts you have once used
• and a screenshot of your Account Info (tap on the smiley face icon)
Not helpful
Q. What should I do if I get the message that says «The save data does not belong to the current account»?
● Check if you have changed your account. If the save data has been uploaded to one cloud save account, you cannot upload it again to another one.
● Check if you have updated your game via a different app marketplace. If you’ve uploaded save data on the app downloaded from app marketplace A, you can’t upload the same data on the app updated/downloaded from app marketplace B.
Not helpful
Q. What should I do if I get the message that says «Please retry after X days.» when I try to cloud save?
You have to wait for X days. There is no other way to skip the waiting. For more information, please refer to Cloud Save Limitation.
Not helpful
Q. Why is my account banned?
Your account has shown firm evidence of hacking or cheating. It will be permanently banned. An account banned for cheating will not be unbanned under any circumstances. Please do not share your account information with anyone. You will be solely responsible for all consequences including the account ban.
Not helpful
2.In-App Purchase
Q. I have made an in-app purchase. But it is still locked in my game. When I tap on it, an error message pops up and says that I have already owned the item.
If you made the purchase less than 24 hours ago, please wait 24 hours and see if you can receive it by tomorrow. If you have waited for more than 24 hours but less than 48 hours, but you never receive the item, please immediately request a refund on Google Play:
Request a refund on Google Play
If your refund request is later rejected by Google Play, please send us the Google Play purchase receipt and we will move forward on our side. Please note that we need the receipt that has the order number starting with «GPA». The receipt should look like this:
Here is the guide from Google on how to find your receipt:
Understand your Google Store charges and receipts
Not helpful
Q. How do I request a refund if I am an iOS user?
Please click «Report a Problem» on your Apple receipt and file a refund request for Apple.
Not helpful
Q. I made a purchase by accident. Can I get a refund?
Once an item is sold and received, we don’t refund it in most cases. Thank you for your understanding.
Not helpful
Q. I can’t find or use my non-consumable in-app purchases.
As long as your purchased item is something other than consumables like gems and Fish Chips, then yes, it can be restored.
To restore purchases on Android:
If you hope to restore all paid products, on the main screen, tap on the gear button, and then tap on the green shopping cart button.
If you hope to restore a specific product, please tap on the BUY button under the paid product you had before to try to repurchase. You won’t be charged again but, in the process, the restore will happen. For other purchases, the process is the same.
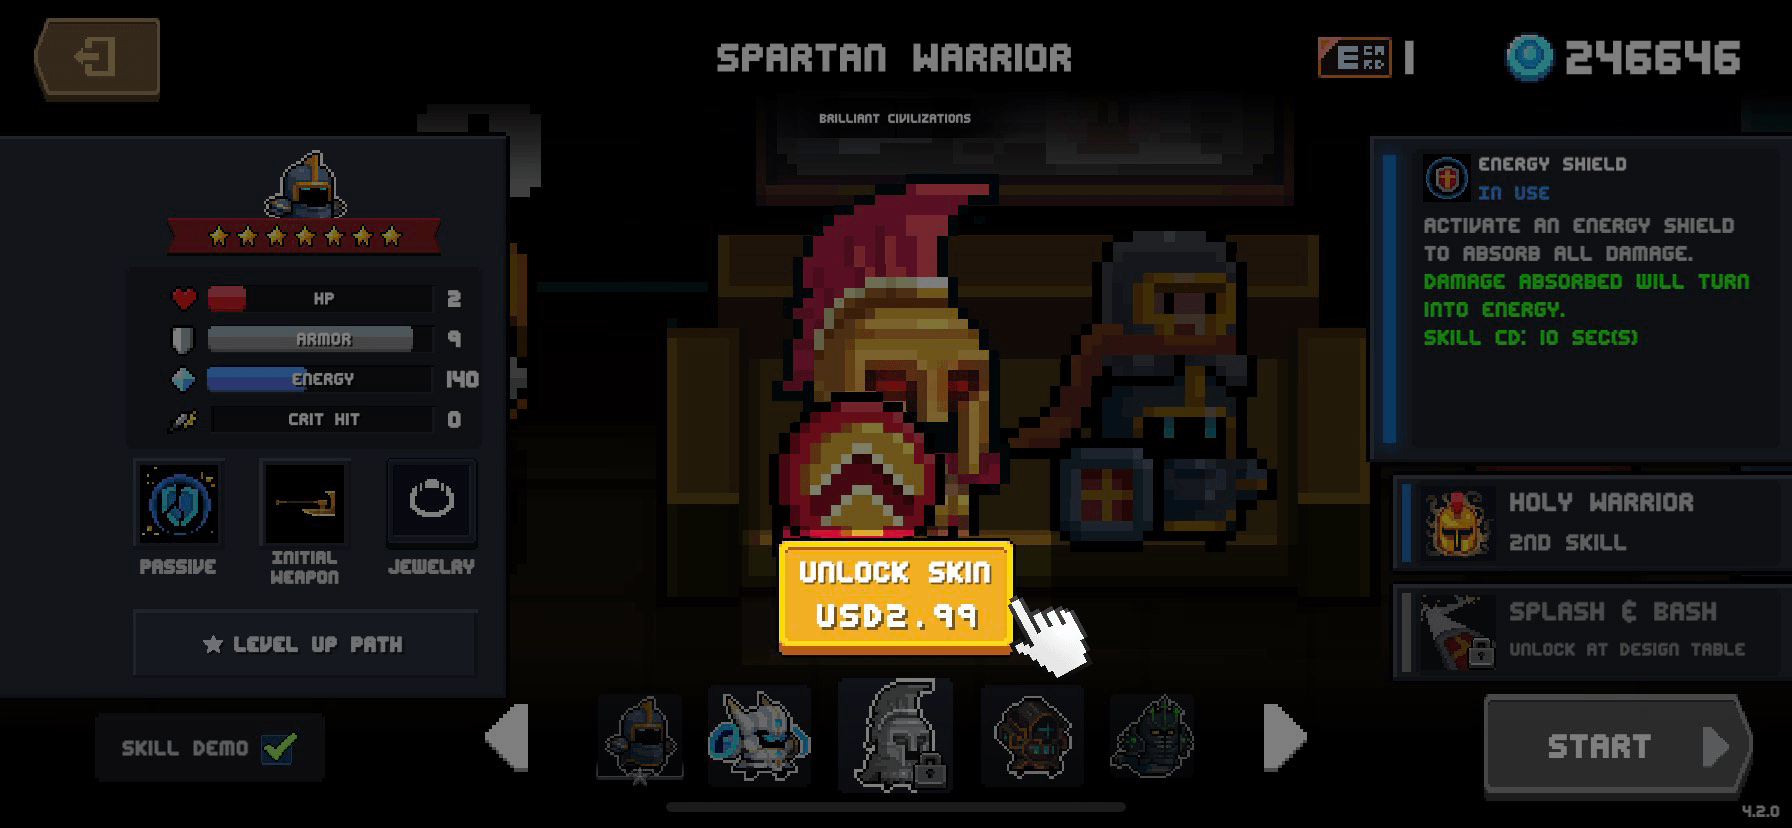
To restore purchases on iOS:
On the main screen, tap on the gear button, and then tap on the green shopping cart button.
NOTICE: If you log into a ChillyRoom account that can’t be bound with any Google account, you won’t be able to have your non-consumables restored because we can’t verify which Google account made the purchase earlier.
Not helpful
3.Game
Q. I can’t download the game from Play Store.
Here is the guide from Google on how to troubleshoot the issue:
Fix problems downloading apps from the Play Store
You can try switching to another internet connection, restarting Play Store and phone, clearing cache, and clearing the data of Play Store (NOT THE GAME APP ITSELF just the Play Store).
Not helpful
Q. What are the minimum specs of the device for the game to run smoothly?

|
This page or section is a stub or under some heavy editing due to a recent update. You can help out by filling in information and adding links and images.
You can find other pages that need editing here and here. |
Multiplayer (also known as LAN Co-op and Online Co-op) is a gameplay mode where the player can play with other people. Up to 4 people can play with each other in the same game. This mode can be accessed from the starting screen.
Starting Multiplayer
- One person needs to be the host. They press the «Host game» button, then decide the room name («SoulKnight» by default). They will then be presented with three checkboxes that can be checked and unchecked freely; if checked, the first enables Badass Mode, the second enables Boss Rush Mode (only available if the host has unlocked the mode and has any Feathers of Valkyrie) and the third enables challenge conditions (random ones are picked every time conditions are enabled, allowing the players to search for the ones they want. These are always different from the ones on the host’s Task Board). Then, they can confirm their settings, after which they will be sent to the Living Room. Once they are done in the Living Room, the host may enter the door to initialize the game.
- Other people should first connect to the same Wi-Fi (or a hotspot created by the host), go to the «Join game» section of Multiplayer and choose the corresponding game to join. After joining the game, they will be sent to the Living Room. Once they reach the Living Room door, joining the game is completed. Guests can only enter said door after the host does.
- The door, instead of the swords clashing image indicating battle, will have a moving image of two devices connected, symbolizing that going in means the player will connect to the others’ devices.
- All participants can roam freely in the Living Room before they enter the game and try to get any weapon or other possible items from the Garden and Workshop or forge weapons in the Forge Table like in a single player game. The chest next to the door will spawn all of the rings instead of a weapon. The only things they can’t do is interact with the Task Board, Badass Travel, Season Travel, the Valkyrie, the Drillmaster or the Ancient Portal – they’ll react «Come next time when you play solo.»
- The Officer has the exclamation mark that usually indicates the player has completed a challenge or wanted task, but he does nothing in multiplayer.
- When the player is ready, enter the door and the player will arrive in the waiting room. Players in this room can practice freely on a Training Dummy until the host starts the game. All players will restore energy constantly while in the room, similar to the effect of the «Infinite energy» condition. Rings cannot be used in this room.
- There are four large screens on the wall of the room. If any player is in the Living Room but not ready yet, it’ll show their skin on a monitor, and if they’re ready, the corresponding screen will show the player with «READY» beneath the image. The player will also appear in the waiting room. Otherwise, the monitor only shows noise.
- When at least two players are ready, the host can start the game by pressing a button with the play icon on it.
- If a run has been interrupted and the players want to resume the game, they need to use the «Last game» button at the title screen. The host can continue the game if at least one player has returned.
Playing Multiplayer
In Multiplayer mode, many factors of gameplay change, such as:
- Chests can be larger than normal. These chests require some players to stand on separate buttons at the same time to open. These chests will give more than one weapon, depending on the number of buttons.
- For example, in a game with 3 players, chests may have 2 or 3 buttons while giving 2 or 3 weapons accordingly.
- Shops may contain more items (big shops can contain up to 6).
- Champion rooms come with more reward chests (one for each player).
- Gold, energy orbs and materials are separated for each player. Only those for the players’ character are visible.
- All players can contribute coins to Wishing Wells (the cap remains at 50), and any payout that is not a weapon or potion can be collected by all players. However, only one player can take an item from the selection provided in Turret Rooms.
- If a blueprint that appears is one that a player has already collected, it will become either another blueprint or a random item for that player.
- Developed weapons and armor mounts can appear randomly even if none of the players have developed them.
- This also works for regular Mounts, which can appear even if the player doesn’t have the right achievement.
- Buffs that are chosen will apply to every player. Only the host is able to choose the Buffs.
- Buffs on fully-upgraded characters will also apply to all other players, even if they may be different for each character used. Buffs that anyone comes with will not show up in the choices.
- For example, if a game starts with a fully-upgraded Knight and a fully-upgraded Wizard, the Knight will also benefit from the Wizard’s Elemental Buff, and the Wizard will also benefit from the Knight’s Strong Shield Buff.
- Character-exclusive Buffs are not shared.
- Buffs on fully-upgraded characters will also apply to all other players, even if they may be different for each character used. Buffs that anyone comes with will not show up in the choices.
- Characters found at the start of each level can still only be interacted with by players that have unlocked them, even if one player has unlocked them but another has not.
- Only the host can obtain drinks from the Beverage Vending Machine, and the drink given will only apply to them despite being visible in the pause screen for all players. The only exception is Tea, as all players share Buffs. Drinks purchased from the Waiter during the game will be given to all players regardless of who purchased the drink.
- Each Statue can be worshipped once by every player. Statue effects are independent for each player.
- Each player has a panel on the left of the screen showing health and energy bars for other players. Armor is not displayed. The host will also have an option to kick players from the game here, but only while in the waiting room.
- Players can revive each other if someone dies. The person who had died cannot do anything until another player revives them.
- In order to revive another player, move to that player and interact with them. The player must then remain next to the downed player until their life bar has been fully refilled (the progress of revival is shown in green) and the player is revived. It takes 5 seconds to revive a player. The player can use skills and move in a very small area around the other player while reviving, but they cannot attack with weapons. The revival attempt will be canceled if they move away during the process.
- The other players will be automatically revived once someone enters the portal to the next level.
- A revived player will be restored with 1 health, full armor, full energy, and be granted a 2-second invincibility shield. There is no limit on how many times a player can be revived.
- The game is over when all players are down.
- However, if the «You can revive twice» condition is active, the first time all players fall down, they will have the option to revive everyone.
- In order to revive another player, move to that player and interact with them. The player must then remain next to the downed player until their life bar has been fully refilled (the progress of revival is shown in green) and the player is revived. It takes 5 seconds to revive a player. The player can use skills and move in a very small area around the other player while reviving, but they cannot attack with weapons. The revival attempt will be canceled if they move away during the process.
- If a player enters a new room with enemies (thus making them aggressive), all other players will be forced to warp to that player to deal with the enemies together.
- Enemy rooms are given a «start» animation of 1 second to let players get ready, during which enemies cannot take damage.
- This also happens in Turret Rooms, where all players will warp to where the chosen item used to be.
- All enemies have increased health. Every extra player will cause a 50% increase in enemy health, up to 250% of the basic value in a 4-play game.
- Enemies will spawn more frequently. The more players in-game, the more enemies spawn.
- The portal to the next floor can be interacted with by any player. Once a player has done so, a 15-second timer will appear on-screen and the other players are presented with the options «Wait for me» and «Next level». The player who interacted with the portal can choose to cancel the action, which will stop the timer. If all players select «Next level», everyone will be taken to the next floor automatically.
- The number of players who have selected «Next level» is shown at the bottom of the screen as x/# of total players. Even if no players choose to advance, everyone will be forcibly taken to the next floor once the timer reaches 0.
- Selecting the option «Wait for me» will cause the player to send a stopwatch emoji, with no other effect.
- The number of players who have selected «Next level» is shown at the bottom of the screen as x/# of total players. Even if no players choose to advance, everyone will be forcibly taken to the next floor once the timer reaches 0.
Weekly Challenges
Since Update 4.0.0, the host can enable this option to add a special condition on top of all other factors. Completing a level mode game under this condition yields additional rewards. The condition is refreshed every Monday 0:00.
- Boss Rush and local Co-op cannot apply weekly challenges.
- The first success each week gives rewards shown in the present boxes below, while challenge in badass mode gives another reward. From the second time of each difficulty in the same week, players can only earn gems.
These are the known challenges:
| Icon | Description and Note |
|---|---|
|
|
The whole team (all members combined) can only revive up to 2 times. Revives caused by weapons (like Nirvana Cross) and other conditions do not count. |
|
|
Characters may suddenly become larger or smaller over time. Movement speed is adjusted as well, but not health and armor.
|
|
|
Complete the game within 12 minutes (normal mode) or 16 minutes (badass mode).
|
|
|
Enemies and players will explode 3 seconds after death. Players make larger explosion. These explosions hurt players.
|
|
|
Enemies have high chance to leave a dimensional rift on death. Players stepping into a rift will take damage like falling into a pit in Grave. Each rift lasts for 12 seconds. |
|
|
Each room contains one extra large champion enemy.
|
|
|
Meteors fall from time to time. These meteors do not damage enemies.
|
|
|
Sometimes enemy blimp will bomb the room. Enemies take 8 damage while players take 4 (5 in badass).
|

|
Be There for You
Complete a multiplayer game in Level Mode — Badass Reward: Heroine Mu Guiying skin for Wizard |

|
MVP
Rescue teammates 5 times or more in one multiplayer game that you complete. Reward: 666 |

|
For Better or Worse
The whole team gets killed 10 times or more in total in one multiplayer game that you complete. Reward: none |

|
Laid back
In a multiplayer game, lie on the ground after getting killed till your teammates make it to the next level. Reward: none |
Trivia
- Before Update 1.6.0, only up to 2 players could join the same game.
- Prior to Update 1.6.0, if the player disconnected, the player would be unable to continue their game in Multiplayer.
- In the past, a dead player could switch weapons before being revived. This could cause an exploit if that player was carrying a Shield or other weapons that work upon switching.
- Before Update 2.3.0, the «You can resurrect twice» condition was useless in this mode.
- The interface of starting a multiplayer game was simpler without the use of the Living Room before update 2.5.0.
- As of Update 2.0.5, at this screen, if the player is the host, their local IPv4 address (always 192.168.x.x) will be displayed at the bottom-left corner if they are connected to a Wi-Fi (either router or mobile hotspot), or your own IPv4 (eg. 10.43.235.77) if they’re on mobile data. If the player is the participant, they will see the host’s IPv6.
- Its online feature was added in Update 3.0.0 and Update 3.3.5 for iOS and Android, respectively.
Gallery
")
Old ready screen of hosting player
")
Large chests found in the game
")
A shop with 4 weapons for sale
")
Multiplayer button
|
|
This page or section is a stub or under some heavy editing due to a recent update. You can help out by filling in information and adding links and images.
You can find other pages that need editing here and here. |
Multiplayer (also known as LAN Co-op and Online Co-op) is a gameplay mode where the player can play with other people. Up to 4 people can play with each other in the same game. This mode can be accessed from the starting screen.
Starting Multiplayer
- One person needs to be the host. They press the «Host game» button, then decide the room name («SoulKnight» by default). They will then be presented with three checkboxes that can be checked and unchecked freely; if checked, the first enables Badass Mode, the second enables Boss Rush Mode (only available if the host has unlocked the mode and has any Feathers of Valkyrie) and the third enables challenge conditions (random ones are picked every time conditions are enabled, allowing the players to search for the ones they want. These are always different from the ones on the host’s Task Board). Then, they can confirm their settings, after which they will be sent to the Living Room. Once they are done in the Living Room, the host may enter the door to initialize the game.
- Other people should first connect to the same Wi-Fi (or a hotspot created by the host), go to the «Join game» section of Multiplayer and choose the corresponding game to join. After joining the game, they will be sent to the Living Room. Once they reach the Living Room door, joining the game is completed. Guests can only enter said door after the host does.
- The door, instead of the swords clashing image indicating battle, will have a moving image of two devices connected, symbolizing that going in means the player will connect to the others’ devices.
- All participants can roam freely in the Living Room before they enter the game and try to get any weapon or other possible items from the Garden and Workshop or forge weapons in the Forge Table like in a single player game. The chest next to the door will spawn all of the rings instead of a weapon. The only things they can’t do is interact with the Task Board, Badass Travel, Season Travel, the Valkyrie, the Drillmaster or the Ancient Portal – they’ll react «Come next time when you play solo.»
- The Officer has the exclamation mark that usually indicates the player has completed a challenge or wanted task, but he does nothing in multiplayer.
- When the player is ready, enter the door and the player will arrive in the waiting room. Players in this room can practice freely on a Training Dummy until the host starts the game. All players will restore energy constantly while in the room, similar to the effect of the «Infinite energy» condition. Rings cannot be used in this room.
- There are four large screens on the wall of the room. If any player is in the Living Room but not ready yet, it’ll show their skin on a monitor, and if they’re ready, the corresponding screen will show the player with «READY» beneath the image. The player will also appear in the waiting room. Otherwise, the monitor only shows noise.
- When at least two players are ready, the host can start the game by pressing a button with the play icon on it.
- If a run has been interrupted and the players want to resume the game, they need to use the «Last game» button at the title screen. The host can continue the game if at least one player has returned.
Playing Multiplayer
In Multiplayer mode, many factors of gameplay change, such as:
- Chests can be larger than normal. These chests require some players to stand on separate buttons at the same time to open. These chests will give more than one weapon, depending on the number of buttons.
- For example, in a game with 3 players, chests may have 2 or 3 buttons while giving 2 or 3 weapons accordingly.
- Shops may contain more items (big shops can contain up to 6).
- Champion rooms come with more reward chests (one for each player).
- Gold, energy orbs and materials are separated for each player. Only those for the players’ character are visible.
- All players can contribute coins to Wishing Wells (the cap remains at 50), and any payout that is not a weapon or potion can be collected by all players. However, only one player can take an item from the selection provided in Turret Rooms.
- If a blueprint that appears is one that a player has already collected, it will become either another blueprint or a random item for that player.
- Developed weapons and armor mounts can appear randomly even if none of the players have developed them.
- This also works for regular Mounts, which can appear even if the player doesn’t have the right achievement.
- Buffs that are chosen will apply to every player. Only the host is able to choose the Buffs.
- Buffs on fully-upgraded characters will also apply to all other players, even if they may be different for each character used. Buffs that anyone comes with will not show up in the choices.
- For example, if a game starts with a fully-upgraded Knight and a fully-upgraded Wizard, the Knight will also benefit from the Wizard’s Elemental Buff, and the Wizard will also benefit from the Knight’s Strong Shield Buff.
- Character-exclusive Buffs are not shared.
- Buffs on fully-upgraded characters will also apply to all other players, even if they may be different for each character used. Buffs that anyone comes with will not show up in the choices.
- Characters found at the start of each level can still only be interacted with by players that have unlocked them, even if one player has unlocked them but another has not.
- Only the host can obtain drinks from the Beverage Vending Machine, and the drink given will only apply to them despite being visible in the pause screen for all players. The only exception is Tea, as all players share Buffs. Drinks purchased from the Waiter during the game will be given to all players regardless of who purchased the drink.
- Each Statue can be worshipped once by every player. Statue effects are independent for each player.
- Each player has a panel on the left of the screen showing health and energy bars for other players. Armor is not displayed. The host will also have an option to kick players from the game here, but only while in the waiting room.
- Players can revive each other if someone dies. The person who had died cannot do anything until another player revives them.
- In order to revive another player, move to that player and interact with them. The player must then remain next to the downed player until their life bar has been fully refilled (the progress of revival is shown in green) and the player is revived. It takes 5 seconds to revive a player. The player can use skills and move in a very small area around the other player while reviving, but they cannot attack with weapons. The revival attempt will be canceled if they move away during the process.
- The other players will be automatically revived once someone enters the portal to the next level.
- A revived player will be restored with 1 health, full armor, full energy, and be granted a 2-second invincibility shield. There is no limit on how many times a player can be revived.
- The game is over when all players are down.
- However, if the «You can revive twice» condition is active, the first time all players fall down, they will have the option to revive everyone.
- In order to revive another player, move to that player and interact with them. The player must then remain next to the downed player until their life bar has been fully refilled (the progress of revival is shown in green) and the player is revived. It takes 5 seconds to revive a player. The player can use skills and move in a very small area around the other player while reviving, but they cannot attack with weapons. The revival attempt will be canceled if they move away during the process.
- If a player enters a new room with enemies (thus making them aggressive), all other players will be forced to warp to that player to deal with the enemies together.
- Enemy rooms are given a «start» animation of 1 second to let players get ready, during which enemies cannot take damage.
- This also happens in Turret Rooms, where all players will warp to where the chosen item used to be.
- All enemies have increased health. Every extra player will cause a 50% increase in enemy health, up to 250% of the basic value in a 4-play game.
- Enemies will spawn more frequently. The more players in-game, the more enemies spawn.
- The portal to the next floor can be interacted with by any player. Once a player has done so, a 15-second timer will appear on-screen and the other players are presented with the options «Wait for me» and «Next level». The player who interacted with the portal can choose to cancel the action, which will stop the timer. If all players select «Next level», everyone will be taken to the next floor automatically.
- The number of players who have selected «Next level» is shown at the bottom of the screen as x/# of total players. Even if no players choose to advance, everyone will be forcibly taken to the next floor once the timer reaches 0.
- Selecting the option «Wait for me» will cause the player to send a stopwatch emoji, with no other effect.
- The number of players who have selected «Next level» is shown at the bottom of the screen as x/# of total players. Even if no players choose to advance, everyone will be forcibly taken to the next floor once the timer reaches 0.
Weekly Challenges
Since Update 4.0.0, the host can enable this option to add a special condition on top of all other factors. Completing a level mode game under this condition yields additional rewards. The condition is refreshed every Monday 0:00.
- Boss Rush and local Co-op cannot apply weekly challenges.
- The first success each week gives rewards shown in the present boxes below, while challenge in badass mode gives another reward. From the second time of each difficulty in the same week, players can only earn gems.
These are the known challenges:
| Icon | Description and Note |
|---|---|
|
|
The whole team (all members combined) can only revive up to 2 times. Revives caused by weapons (like Nirvana Cross) and other conditions do not count. |
|
|
Characters may suddenly become larger or smaller over time. Movement speed is adjusted as well, but not health and armor.
|
|
|
Complete the game within 12 minutes (normal mode) or 16 minutes (badass mode).
|
|
|
Enemies and players will explode 3 seconds after death. Players make larger explosion. These explosions hurt players.
|
|
|
Enemies have high chance to leave a dimensional rift on death. Players stepping into a rift will take damage like falling into a pit in Grave. Each rift lasts for 12 seconds. |
|
|
Each room contains one extra large champion enemy.
|
|
|
Meteors fall from time to time. These meteors do not damage enemies.
|
|
|
Sometimes enemy blimp will bomb the room. Enemies take 8 damage while players take 4 (5 in badass).
|
|
|
Be There for You
Complete a multiplayer game in Level Mode — Badass Reward: Heroine Mu Guiying skin for Wizard |
|
|
MVP
Rescue teammates 5 times or more in one multiplayer game that you complete. Reward: 666 |
|
|
For Better or Worse
The whole team gets killed 10 times or more in total in one multiplayer game that you complete. Reward: none |
|
|
Laid back
In a multiplayer game, lie on the ground after getting killed till your teammates make it to the next level. Reward: none |
Trivia
- Before Update 1.6.0, only up to 2 players could join the same game.
- Prior to Update 1.6.0, if the player disconnected, the player would be unable to continue their game in Multiplayer.
- In the past, a dead player could switch weapons before being revived. This could cause an exploit if that player was carrying a Shield or other weapons that work upon switching.
- Before Update 2.3.0, the «You can resurrect twice» condition was useless in this mode.
- The interface of starting a multiplayer game was simpler without the use of the Living Room before update 2.5.0.
- As of Update 2.0.5, at this screen, if the player is the host, their local IPv4 address (always 192.168.x.x) will be displayed at the bottom-left corner if they are connected to a Wi-Fi (either router or mobile hotspot), or your own IPv4 (eg. 10.43.235.77) if they’re on mobile data. If the player is the participant, they will see the host’s IPv6.
- Its online feature was added in Update 3.0.0 and Update 3.3.5 for iOS and Android, respectively.
Gallery
Old ready screen of hosting player
Large chests found in the game
A shop with 4 weapons for sale
Multiplayer button