
My phone was dead so I plugged it in to charge. I attempted to turn it on and saw:
“Firmware Update
Do not unplug the USB connection until the process is complete.”
This was all it showed and now it’s frozen. It does not power on or off. It’s been stuck at 6% for 8 hrs now. I have no battery to take out. What can I do?
If your phone suddenly stuck at the firmware update screen, then you’re not alone. This issue is fairly common among Android users. Even worse is you often cannot understand the reasons that might have caused this issue. But thankfully, this issue can easily be resolved by following simple methods.
We have gathered various solutions to help users troubleshoot the android phone stuck on firmware update screen error. So, stick to reading!
- Part 1: Fix Samsung Android Stuck on Firmware Update
- Part 2: Fix Other Android Firmware Update Stuck
Part 1: Fix Samsung Android Stuck on Firmware Update
Android phone stuck on firmware update is a temporary issue and can be fixed without any technical complications. Below are the two easiest ways to troubleshoot this problem once and for all.
#1 Samsung Phone Stuck? Fix with ReiBoot for Android
You don’t need to fret if your Samsung mobile is stuck at firmware update screen for apparently no reason. You can find a wide range of third-party tools online to fix this issue, but no one is better than ReiBoot for Android, both inn terms of efficiency and reliability.
Tenorshare ReiBoot for Android diagnoses the root causes of Samsung stuck issues and fixes them automatically.


-
Connect your Samsung phone to the computer, and open ReiBoot for Android. On the main interface, hit on Repair Android System.

-
Click on Fix Now to continue.
-
Fill in the information of your Samsung device. Use the drop-down arrow to enter the details.
-
Click Download. Downloading the latest firmware package corresponding to your Samsung mobile. Don’t disconnect the phone during the downloading process.
-
Once the firmware package is downloaded, click on Repair Now to start repairing your Samsung mobile.
-
A pop-up window will appear. Read the instructions carefully and hit on Continue.
-
Then you need to enter into download mode by following the instructions on the screen corresponding to your Samsung mobile version i.e., is it with or without home button.
-
The software will take a few minutes to completely repair your mobile phone. Once it is completed, click on Done and your mobile will restart and function normally.

#2 Update Samsung with Smart Switch on Computer
Samsung Smart Switch is an official desktop app of Samsung that allows users to transfer contents from one Samsung device to another easily. It can move nearly everything between Samsung devices using a computer. Also, it helps users to update Samsung device.
- Download Samsung Smart Switch from the official website.
- Install and launch it on your computer and connect Samsung mobile via original cable.
- Once your mobile is recognized, the software will automatically check the current software details of your Samsung mobile. If your phone needs any update, Smart Switch will display it on the screen.
- If it’s available, hit on Update to install the software. The program will first save it in the computer and then install it on the phone.
- Your phone will reboot once the software is installed.
Part 2: Fix Other Android Firmware Update Stuck
In the below paragraphs, we have outlined various alternative ways to fix Android firmware stuck issues.
#1: Try to Soft Reset
Soft reset is basically restarting your mobile. This method removes any temporary glitches in the mobile OS and fixes android stuck in firmware update issue.
Since, Android comes in many mobile versions, I can’t explain the method for all of them. Below is the most common method of soft reset an Android device.
- Press and hold Volume down and Power buttons for a few seconds until the device logo appears on the screen.
- Then, wait for a few seconds and again press and hold power button to switch it on.
#2: Wipe Android Cache Partition with ReiBoot for Android
Every Android mobile stores temporary files in the form of cache partition. These files are too many to stuck on the screen, and they are prone to get malware or virus attack. That’s why it is necessary to clear these temporary files.
Even though you can delete cache partition manually, but Tenorshare ReiBoot for Android provides one-click option to clear them permanently. This third-party tool is its ability to penetrate deep in the Android OS and delete every single cache file with just one click.
-
Open ReiBoot for Android. Then double click on ReiBoot icon to launch it and connect your stuck Android mobile via original cable.
-
Now follow the onscreen instructions to enable USB debugging on your Android device.
-
Once USB debugging is enabled, hit on «One-Click to Clear System Cache» on the main interface.
-
ReiBoot will take some time to clear cache partition. Don’t disconnect the mobile during the process.
Conclusion
To sum it all, this article has outlined various methods to troubleshoot the android stuck on firmware update issue. All above methods prove to be helpful in restoring your mobile phone back to the normal, but Tenorshare ReiBoot for Android is the quickest and the easiest way to fix this issue. It doesn’t cause any damage to your mobile or data stored in it and you can use it with 100% confidence.
This may or may not be off-topic; feel free to point me to a better place to ask this.
My father brought home a cell phone he found in the woods, and I thought I’d charge it and turn it on to see if I can find out anything about the owner. (Needless to say I got no further than the lock screen.)
The phone is now turned off and plugged in via USB (not connected to the computer, but directly to the electrical outlet). However, the screen now reads «Firmware Update — do not unplug the USB connection until the process is complete«, with a progress bar stuck at zero. It also refuses to be turned on again.
What’s the best course of action? That is, can I safely unplug the device? I would assume so since it’s only connected to the electrical outlet, but who knows what’s going on behind the scenes, and unplugging it may leave it in an inconsistent state. I’d also like to avoid connecting it directly to my computer.
I’m probably being overly cautious, but I have no experience with LG devices and it’s someone else’s to boot, so I’d like to make sure I’m not making any of the stupid mistakes I’m prone to making. Better safe than sorry.
I can post a picture of the phone if needed — from the looks of it, it’s some kind of LG G Flex.

-
#1
Предыстория такова, что телефон падал на шнурок при каждом обновлении по воздуху. после чего клиент его воскрешал через itunes и восстанавливал из резервной копии. телефон не разбирался, воды не было, не реф. вчера опять обновился, та же ситуация. подкинул к itunes в итоге завис на полосе, она даже не начала двигаться и так всю ночь. принес мне, я решил прошить через 3u tools, на 20 процентах показал ошибку (-1). замеры показали что нет ни одного питания модема. заменил кп бб, безрезультатно. перекатал модем, безрезультатно. другого модема нет от 6s чтобы подкинуть. и еще падения напряжений в прозвонке все в норме, только вот pp_0v9_smps1 странно всего 60мв. в то время как на других линиях в районе 425мв. какие мысли есть по этому поводу?


-
#2
ой ой, питания модема не будет ни в рекавери ни при прошивке. только в конце прошивки появляется питание модема. а у вас мертвый нанд, меняйте. -1 в 3utools вообще не означает модем.
-
#3
про питания спасибо) а вот у меня никогда не было проблем с нандом при -1. прикрепляю лог прошивки. но в itunes прошивка никогда не доходит до ошибки, а висит постоянно на Проверка восстановления iphone (вроде он уже прошился и восстановился, то есть прошивка завершилась).
Лог на гугл диск
купить чтобы получить доступ к скрытому контенту.
-
#4
интересная строка в логе есть
[08:20:13.0343] amai: AMAuthInstallBundleCopyBuildIdentityForVariant: No baseband chipid reported. Will match Build Identity based on ap chipid and boardid only.
значит система не видит модем и идентифицирует устройство только по борд ид и чип ид?
-
#5
пробую прошить без модема, показывает 4013.
кусочек лога
[10:23:41.0567] Finished Recovery Restore Phase: Successful
[10:23:42.0688] Recovery mode device disconnected
[10:23:42.0688] Device removed when in state Restoring, moving device to transition state
[10:23:42.0688] Changing state from ‘Restoring’ to ‘Transitioning’
[10:23:42.0688] Creating timer to monitor transition
[10:23:42.0688] Creating a timer for 10 minutes
[10:23:53.0283] Recovery mode device connected
[10:23:53.0283] Transitioning device returned, continuing restore.
[10:23:53.0283] Canceling timer
[10:23:53.0283] Changing state from ‘Transitioning’ to ‘Restoring’
[10:23:53.0283] State Machine Dump, status:ERROR — [state:Recovery remaining-cycles:0] -> [state:RestoreOS remaining-cycles:1 (current state)]
[10:23:53.0283] Unexpected device state ‘Recovery’ expected ‘RestoreOS’
[10:23:53.0283] Restore completed, status:4013
[10:23:53.0283] Failure Description:
[10:23:53.0283] Depth:0 Code:4013 Error:Unexpected device state ‘Recovery’ expected ‘RestoreOS’
[10:23:53.0283] Changing state from ‘Restoring’ to ‘Error’
[10:23:53.0283] State is now set to error

-
#6
vsem privet umenya byla takaya oshibka problema byla v modeme posle perekatki proshilsa
-
#7
я перекатывал модем, не помогает
с модемом -1, без него 4013

-
#8
Есть такой и 6s и 7 . На 7ке пробовал катать/подкидывать другой нанд/КПРФ не помогло
Так и висел на подготовке восстановления ПО , но потом начал бить 4013 . куда смотреть… может быть все что угодно, и трансивер такое давал, или модем же:icq10:
![]()
-
#9
Такая же картина у меня с iPhone 6. Менял 3 раза NAND. Перекатывал прц, модем, питальник модема, еепром — результата нет. Буду поднимать audio codack, компас и акселерометор. Все по шине i2c.
Moderators: Lily Lee, jc_3u, Moderators
-
suvtje
- Posts: 2
- Joined: 08 Nov 2017 18:21
- like: 0
 Stuck on 19% restoring
what can be the problem i wantet to flash mine iphone 6 becaust he had a boot loop and itunes give error 4013 have read some that 3utools can restore it, but one problem he stuck on itunes logo and wil not go more than 19%
i hope some come whit solution.
-
suvtje
- Posts: 2
- Joined: 08 Nov 2017 18:21
- like: 0
Re: Stuck on 19% restoring
Postby suvtje » 08 Nov 2017 20:25
have tried some other usb cables and changed the usb port and battery nothing its the same problem come back to the itunes logo on the phone
-
Grace Liu
- Posts: 537
- Joined: 20 Oct 2016 09:33
- like: 65
Re: Stuck on 19% restoring
Postby Grace Liu » 09 Nov 2017 08:53
suvtje wrote:have tried some other usb cables and changed the usb port and battery nothing its the same problem come back to the itunes logo on the phone
Hello, when it is stuck at 19%, what is the error code on 3uTools?
-
miasma
- Posts: 2
- Joined: 12 Nov 2017 06:39
- like: 0
Re: Stuck on 19% restoring
Postby miasma » 12 Nov 2017 06:43
I have the same problem and get Error: Unable to restore iDevice(-2)
This is on iPhone 6
Please help
-
miasma
- Posts: 2
- Joined: 12 Nov 2017 06:39
- like: 0
Re: Stuck on 19% restoring
Postby miasma » 12 Nov 2017 20:53
Just an update on this. I should have mentioned that I got into an Apple logo boot loop having fitted a new screen on an iPhone 6, tried everything through iTunes (update, restore from DFU and Recovery mode) likewise with 3uTools but kept getting either error 4013 in iTunes or -2 in 3uTools.
As the original screen is cracked but functional I decided to refit it and was able to update and restore fine with iTunes. I switched off and refitted the replacement screen but was back to the Apple logo loop.
So I assume it’s a faulty screen that causes this problem unless the original poster got this error another way ?
-
Grace Liu
- Posts: 537
- Joined: 20 Oct 2016 09:33
- like: 65
Re: Stuck on 19% restoring
Postby Grace Liu » 13 Nov 2017 08:50
miasma wrote:I have the same problem and get Error: Unable to restore iDevice(-2)
This is on iPhone 6
Please help
Hello, if error -2 still exists after you try many times, it could be the hardware problem. You are suggested to check your device.
-
Formingus
- Posts: 3
- Joined: 21 Dec 2017 18:56
- Contact:
- like: 0
Re: Stuck on 19% restoring
Postby Formingus » 21 Dec 2017 19:09
There can be a lot of issues, but if you try everything like
New Port — Cable — Last Firmware update — Flash with detached LCD ect
then its Compass IC or NAND IC 99% — Hardware
br Formingus
-
Formingus
- Posts: 3
- Joined: 21 Dec 2017 18:56
- Contact:
- like: 0
Re: Stuck on 19% restoring
Postby Formingus » 13 Mar 2019 19:55
Its not always hardware , those days mine 3u tools stop flashing all iphones at 20% , whille iTunes will flash OK
3u Tools had some bug or some possible conflict with some PC Software
-
sourabhd2
- Posts: 1
- Joined: 28 May 2019 23:00
- like: 0
Re: Stuck on 19% restoring
Postby sourabhd2 » 28 May 2019 23:04
Hello, if your iPhone 6 is stucked on 19% in 3u tools and getting error 4013 in itunes.
Its hardware issue, i.e NAND CHIP(hard drive )
Remove Logic Board, then Remove Hard Drive from the board and get it programmed.
Replace Hard Drive back to logic Board and flash your iPhone 6.
done.
-
azlan
- Posts: 2
- Joined: 25 Jun 2019 22:09
- like: 0
Re: Stuck on 19% restoring
Postby azlan » 25 Jun 2019 22:14
Hi,
I have tried itunes as well as 3U and it always gets stuck on both. Dont know where 3U stores the error log so I could share please.
In 3U tools it remain stuck at 20% Sending FDRTrustData.
If its a NAND issue then would the existing NAND work after being reprogrammed or a new NAND is needed please?
Can it be any other issue apart from NAND please?
Thank you
Return to “Help & Support”
MacBook Pro
Found device in Recovery mode
Identified device as j680ap, iBridge2,3
Extracting BuildManifest from IPSW
Product Version: 5.3
Product Build: 18P4556 Major: 18
INFO: device serial number is
Device supports Image4: true
Variant: Customer Upgrade Install (IPSW)
This restore will update your device without erasing user data.
Checking IPSW for required components…
All required components found in IPSW
Using cached filesystem from ‘/Users/macbookpro/Desktop/iBridge2,1,iBridge2,10,iBridge2,12,iBridge2,14,iBridge2,15,iBridge2,16,iBridge2,19,iBridge2,20,iBridge2,21,iBridge2,22,iBridge2,3,iBridge2,4,iBridge2,5,iBridge2,6,iBridge2,7,iBridge2,8_5.3_18P4556_Restore/038-69925-193.dmg’
Found ECID 5928812160352294
Getting ApNonce in recovery mode… 69 18 92 4d e1 13 f2 14 51 64 44 b9 c9 b8 92 a4 57 ac d6 62 54 3c 62 ef e8 b4 42 1b a6 c6 21 25
Trying to fetch new SHSH blob
Getting SepNonce in recovery mode… 4a 77 13 e1 3d a6 01 62 ae 37 e5 7d 0d 38 f4 2d d1 a0 77 05
Request URL set to https://gs.apple.com/TSS/controller?action=2
Sending TSS request attempt 1… response successfully received
Received SHSH blobs
Extracting iBEC.j680.RELEASE.im4p…
Personalizing IMG4 component iBEC…
Sending iBEC (1189528 bytes)…
Recovery Mode Environment:
iBoot build-version=iBoot-6723.101.4
iBoot build-style=RELEASE
Extracting 038-69900-193.dmg.trustcache…
Personalizing IMG4 component RestoreTrustCache…
Sending RestoreTrustCache (10182 bytes)…
ramdisk-size=0x8000000
Extracting 038-69900-193.dmg…
Personalizing IMG4 component RestoreRamDisk…
Sending RestoreRamDisk (98285100 bytes)…
Extracting DeviceTree.j680ap.im4p…
Personalizing IMG4 component RestoreDeviceTree…
Sending RestoreDeviceTree (35665 bytes)…
Extracting sep-firmware.j680.RELEASE.im4p…
Personalizing IMG4 component RestoreSEP…
Sending RestoreSEP (4114154 bytes)…
Extracting kernelcache.release.ibridge2p…
Personalizing IMG4 component RestoreKernelCache…
Sending RestoreKernelCache (10026706 bytes)…
Waiting for device to enter restore mode…
About to restore device…
Connecting now…
Connected to com.apple.mobile.restored, version 15
Device 00008012-0015103926C20026 has successfully entered restore mode
Hardware Information:
BoardID: 11
ChipID: 32786
UniqueChipID: 5928812160352294
ProductionMode: true
Previous restore exit status: 0x100
Starting FDR listener thread
About to send RootTicket…
Sending RootTicket now…
Done sending RootTicket
Waiting for NAND (28)
Updating NAND Firmware (58)
Got status message
Status: Disk Failure
Log is available:
[01:21:23.0095-GMT]{3>8} CHECKPOINT NOTICE: Image4 device: AP nonce clearable
entering ramrod_clear_ap_nonce
[01:21:23.0348-GMT]{3>8} CHECKPOINT NOTICE: AP nonce consumed
[01:21:23.0348-GMT]{3>8} CHECKPOINT NOTICE: Pre-existing NVRAM variable: auto-boot=false
[01:21:23.0348-GMT]{3>8} CHECKPOINT NOTICE: Pre-existing NVRAM variable: restore-outcome=initial_monitor_no_return
[01:21:23.0349-GMT]{3>8} CHECKPOINT PROGRESS: START (unknown) -> (initial_engine_no_return)
[01:21:23.0349-GMT]{3>8} CHECKPOINT NOTICE: NVRAM access available on initial check
restore-outcome = initial_engine_no_return
executing /usr/sbin/nvram restore-outcome=initial_engine_no_return
[01:21:23.0598-GMT]{3>8} CHECKPOINT BEGIN: MAIN:[0x0400] umask
restore-step-ids = {0x11030400:1}
restore-step-names = {0x11030400:umask}
restore-step-uptime = 1
restore-step-user-progress = -1
[01:21:23.0598-GMT]{3>8} CHECKPOINT END: MAIN:[0x0400] umask
restore-step-ids = {}
restore-step-names = {}
restore-step-uptime = 1
restore-step-user-progress = -1
[01:21:23.0598-GMT]{3>8} CHECKPOINT BEGIN: MAIN:[0x0402] setvbuf
restore-step-ids = {0x11030402:2}
restore-step-names = {0x11030402:setvbuf}
restore-step-uptime = 1
restore-step-user-progress = -1
[01:21:23.0599-GMT]{3>8} CHECKPOINT END: MAIN:[0x0402] setvbuf
restore-step-ids = {}
restore-step-names = {}
restore-step-uptime = 1
restore-step-user-progress = -1
[01:21:23.0599-GMT]{3>8} CHECKPOINT BEGIN: MAIN:[0x0403] kernel_logger_thread
restore-step-ids = {0x11030403:3}
restore-step-names = {0x11030403:kernel_logger_thread}
restore-step-uptime = 1
restore-step-user-progress = -1
[01:21:23.0599-GMT]{3>8} CHECKPOINT END: MAIN:[0x0403] kernel_logger_thread
restore-step-ids = {}
restore-step-names = {}
restore-step-uptime = 1
restore-step-user-progress = -1
[01:21:23.0599-GMT]{3>8} CHECKPOINT BEGIN: MAIN:[0x0406] set_progress_0
restore-step-ids = {0x11030406:4}
restore-step-names = {0x11030406:set_progress_0}
restore-step-uptime = 1
restore-step-user-progress = -1
[01:21:23.0599-GMT]{3>8} CHECKPOINT END: MAIN:[0x0406] set_progress_0
restore-step-ids = {}
restore-step-names = {}
restore-step-uptime = 1
restore-step-user-progress = 0
[01:21:23.0599-GMT]{3>8} CHECKPOINT BEGIN: MAIN:[0x0408] listen_for_log_client
restore-step-ids = {0x11030408:5}
restore-step-names = {0x11030408:listen_for_log_client}
restore-step-uptime = 1
restore-step-user-progress = 0
[01:21:23.0600-GMT]{3>8} CHECKPOINT END: MAIN:[0x0408] listen_for_log_client
restore-step-ids = {}
restore-step-names = {}
restore-step-uptime = 1
restore-step-user-progress = 0
[01:21:23.0600-GMT]{3>8} CHECKPOINT BEGIN: MAIN:[0x040D] create_listen_socket
restore-step-ids = {0x1103040D:6}
restore-step-names = {0x1103040D:create_listen_socket}
restore-step-uptime = 1
restore-step-user-progress = 0
[01:21:23.0600-GMT]{3>8} CHECKPOINT END: MAIN:[0x040D] create_listen_socket
restore-step-ids = {}
restore-step-names = {}
restore-step-uptime = 1
restore-step-user-progress = 0
[01:21:23.0600-GMT]{3>8} CHECKPOINT BEGIN: MAIN:[0x0404] update_root_mount
restore-step-ids = {0x11030404:7}
restore-step-names = {0x11030404:update_root_mount}
restore-step-uptime = 1
restore-step-user-progress = 0
[01:21:23.0602-GMT]{3>8} CHECKPOINT END: MAIN:[0x0404] update_root_mount
restore-step-ids = {}
restore-step-names = {}
restore-step-uptime = 1
restore-step-user-progress = 0
[01:21:23.0602-GMT]{3>8} CHECKPOINT BEGIN: MAIN:[0x0405] disable_watchdog
restore-step-ids = {0x11030405:8}
restore-step-names = {0x11030405:disable_watchdog}
restore-step-uptime = 1
restore-step-user-progress = 0
[01:21:23.0602-GMT]{3>8} CHECKPOINT END: MAIN:[0x0405] disable_watchdog
restore-step-ids = {}
restore-step-names = {}
restore-step-uptime = 1
restore-step-user-progress = 0
[01:21:23.0602-GMT]{3>8} CHECKPOINT BEGIN: MAIN:[0x040E] enable_usb
restore-step-ids = {0x1103040E:9}
restore-step-names = {0x1103040E:enable_usb}
restore-step-uptime = 1
restore-step-user-progress = 0
waiting for matching IOKit service: {
IOProviderClass = AppleUSBDeviceMux;
}
[01:21:26.0612-GMT]{3>8} CHECKPOINT END: MAIN:[0x040E] enable_usb
restore-step-ids = {}
restore-step-names = {}
restore-step-uptime = 4
restore-step-user-progress = 0
waiting for host to trigger start of restore [timeout of 120 seconds]
recv(9, 4) failed: connection closed
unable to read message size: -1
could not receive message
recv(10, 4) failed: connection closed
unable to read message size: -1
could not receive message
recv(11, 4) failed: connection closed
unable to read message size: -1
could not receive message
recv(13, 4) failed: connection closed
unable to read message size: -1
could not receive message
recv(10, 4) failed: connection closed
unable to read message size: -1
could not receive message
recv(14, 4) failed: connection closed
unable to read message size: -1
could not receive message
recv(11, 4) failed: connection closed
unable to read message size: -1
could not receive message
recv(13, 4) failed: connection closed
unable to read message size: -1
could not receive message
recv(14, 4) failed: connection closed
unable to read message size: -1
could not receive message
recv(12, 4) failed: connection closed
unable to read message size: -1
could not receive message
recv(13, 4) failed: connection closed
unable to read message size: -1
could not receive message
recv(12, 4) failed: connection closed
unable to read message size: -1
could not receive message
recv(13, 4) failed: connection closed
unable to read message size: -1
could not receive message
recv(12, 4) failed: connection closed
unable to read message size: -1
could not receive message
recv(15, 4) failed: connection closed
unable to read message size: -1
could not receive message
recv(12, 4) failed: connection closed
unable to read message size: -1
could not receive message
recv(13, 4) failed: connection closed
unable to read message size: -1
could not receive message
recv(12, 4) failed: connection closed
unable to read message size: -1
could not receive message
recv(13, 4) failed: connection closed
unable to read message size: -1
could not receive message
recv(12, 4) failed: connection closed
unable to read message size: -1
could not receive message
recv(12, 4) failed: connection closed
unable to read message size: -1
could not receive message
recv(13, 4) failed: connection closed
unable to read message size: -1
could not receive message
recv(13, 4) failed: connection closed
recv(12, 4) failed: connection closed
unable to read message size: -1
could not receive message
unable to read message size: -1
could not receive message
recv(13, 4) failed: connection closed
unable to read message size: -1
could not receive message
recv(12, 4) failed: connection closed
unable to read message size: -1
could not receive message
recv(12, 4) failed: connection closed
unable to read message size: -1
could not receive message
recv(13, 4) failed: connection closed
unable to read message size: -1
could not receive message
recv(12, 4) failed: connection closed
unable to read message size: -1
could not receive message
recv(13, 4) failed: connection closed
unable to read message size: -1
could not receive message
recv(12, 4) failed: connection closed
unable to read message size: -1
could not receive message
[01:21:26.0659-GMT]{3>8} CHECKPOINT BEGIN: RESTORED:[0x0600] client_protocol_version
restore-step-ids = {0x11030600:10}
restore-step-names = {0x11030600:client_protocol_version}
restore-step-uptime = 4
restore-step-user-progress = 0
client protocol version 15
[01:21:26.0659-GMT]{3>8} CHECKPOINT END: RESTORED:[0x0600] client_protocol_version
restore-step-ids = {}
restore-step-names = {}
restore-step-uptime = 4
restore-step-user-progress = 0
[01:21:26.0659-GMT]{3>8} CHECKPOINT BEGIN: RESTORED:[0x0601] copy_restore_options
restore-step-ids = {0x11030601:11}
restore-step-names = {0x11030601:copy_restore_options}
restore-step-uptime = 4
restore-step-user-progress = 0
unable to open /usr/local/share/restore//options.j680.plist: No such file or directory
0: NSPOSIXErrorDomain/2: create_dictionary_from_plist: unable to open plist
unable to open /usr/local/share/restore//options.plist: No such file or directory
0: NSPOSIXErrorDomain/2: create_dictionary_from_plist: unable to open plist
*** UUID 2D277D58-E482-D53B-28BD-FDB56123C6FD ***
Restore options:
PersonalizedDuringPreflight => <CFBoolean 0x10621a038 [0x106051a10]>{value = true}
CreateFilesystemPartitions => <CFBoolean 0x10621a050 [0x106051a10]>{value = false}
UUID => <CFString 0x108d11390 [0x106051a10]>{contents = «2D277D58-E482-D53B-28BD-FDB56123C6FD»}
[01:21:26.0660-GMT]{3>8} CHECKPOINT END: RESTORED:[0x0601] copy_restore_options
restore-step-ids = {}
restore-step-names = {}
restore-step-uptime = 4
restore-step-user-progress = 0
[01:21:26.0660-GMT]{3>8} CHECKPOINT BEGIN: RESTORED:[0x0655] is_host_compatible
restore-step-ids = {0x11030655:12}
restore-step-names = {0x11030655:is_host_compatible}
restore-step-uptime = 4
restore-step-user-progress = 0
Checkpoint engine recorder path set to /mnt5
[01:21:26.0661-GMT]{3>8} CHECKPOINT END: RESTORED:[0x0655] is_host_compatible
restore-step-ids = {}
restore-step-names = {}
restore-step-uptime = 4
restore-step-user-progress = 0
[01:21:26.0661-GMT]{3>8} CHECKPOINT BEGIN: RESTORED:[0x0604] set_weight_from_options
restore-step-ids = {0x11030604:13}
restore-step-names = {0x11030604:set_weight_from_options}
restore-step-uptime = 4
restore-step-user-progress = 0
[01:21:26.0661-GMT]{3>8} CHECKPOINT END: RESTORED:[0x0604] set_weight_from_options
restore-step-ids = {}
restore-step-names = {}
restore-step-uptime = 4
restore-step-user-progress = 0
[01:21:26.0661-GMT]{3>8} CHECKPOINT BEGIN: RESTORED:[0x068F] libauthinstall_callback
restore-step-ids = {0x1103068F:14}
restore-step-names = {0x1103068F:libauthinstall_callback}
restore-step-uptime = 4
restore-step-user-progress = 0
[01:21:26.0662-GMT]{3>8} CHECKPOINT END: RESTORED:[0x068F] libauthinstall_callback
restore-step-ids = {}
restore-step-names = {}
restore-step-uptime = 4
restore-step-user-progress = 0
[01:21:26.0662-GMT]{3>8} CHECKPOINT BEGIN: RESTORED:[0x060B] update_ticket
restore-step-ids = {0x1103060B:15}
restore-step-names = {0x1103060B:update_ticket}
restore-step-uptime = 4
restore-step-user-progress = 0
entering ramrod_ticket_update_verify
looking up boot manifest hash
device tree ticket_hash: 7212DD6C4CA7FAB3C806C5EB30A5A0D2DFCE3C9F92BDC089120B6F2E419654A50CAC9B8E75F286929C5542FCCCD19C4A
crypto-hash-method found. Using SHA2-384
computed ticket_hash : 7212DD6C4CA7FAB3C806C5EB30A5A0D2DFCE3C9F92BDC089120B6F2E419654A50CAC9B8E75F286929C5542FCCCD19C4A
received valid ticket (5633 bytes)
[01:21:26.0664-GMT]{3>8} CHECKPOINT END: RESTORED:[0x060B] update_ticket
restore-step-ids = {}
restore-step-names = {}
restore-step-uptime = 4
restore-step-user-progress = 0
[01:21:26.0664-GMT]{3>8} CHECKPOINT BEGIN: RESTORED:[0x060D] wait_for_storage
restore-step-ids = {0x1103060D:16}
restore-step-names = {0x1103060D:wait_for_storage}
restore-step-uptime = 4
restore-step-user-progress = 0
entering wait_for_storage_device
entering ramrod_nudge_SMC_progress
Nudging SMC progress percentage by 6
Read (0x7) for key EFBP
Searching for NAND service
Searching for NAND service
Found NAND service: AppleANS2NVMeController
NAND initialized. Waiting for devnode.
entering wait_for_device: ‘EmbeddedDeviceTypeRoot’
Using device path /dev/disk0 for EmbeddedDeviceTypeRoot
entering ramrod_probe_media_internal
entering wait_for_device: ‘EmbeddedDeviceTypeRoot’
Using device path /dev/disk0 for EmbeddedDeviceTypeRoot
[01:21:26.0669-GMT]{3>8} CHECKPOINT END: RESTORED:[0x060D] wait_for_storage
restore-step-ids = {}
restore-step-names = {}
restore-step-uptime = 4
restore-step-user-progress = 0
[01:21:26.0669-GMT]{3>8} CHECKPOINT BEGIN: RESTORED:[0x060E] update_NAND_firmware
restore-step-ids = {0x1103060E:17}
restore-step-names = {0x1103060E:update_NAND_firmware}
restore-step-uptime = 4
restore-step-user-progress = 0
entering ramrod_nudge_SMC_progress
Nudging SMC progress percentage by 6
Read (0xD) for key EFBP
entering update_NAND
executing /usr/bin/nvmefwupdater —query
recv(15, 4) failed: connection closed
unable to read message size: -1
could not receive message
recv(15, 4) failed: connection closed
unable to read message size: -1
could not receive message
recv(15, 4) failed: connection closed
unable to read message size: -1
could not receive message
S4E/0000001602019395.pak
NAND update file: «/usr/standalone/firmware/S4E/0000001602019395.pak»
executing /usr/bin/nvmefwupdater —validate /usr/standalone/firmware/S4E/0000001602019395.pak
s4e-bfh-params: 50555746 00040001 004880E6 00060002 100008A8
Performing BFH OFW stage…
set_pci_port_state: result=0
set_pci_port_state: result=0
returning Regular Update Required
executing /usr/bin/nvmefwupdater —update /usr/standalone/firmware/S4E/0000001602019395.pak
Downloading FW…
Activating FW…
Successfully updated FW…
Clog Mismatch found…
Update NAND — FTL version mismatch. Erase install required
failed to update NAND
0: RamrodErrorDomain/7: update_NAND: Update NAND — FTL version mismatch. Erase install required
unable to convert ramrod error 7
[01:21:32.0601-GMT]{3>8} CHECKPOINT FAILURE:(FAILURE:6) RESTORED:[0x060E] update_NAND_firmware [0]D(failed to update NAND firmware)[1]D(update_NAND: Update NAND — FTL version mismatch. Erase install required)
restore-step-results = {0x1107060E:{0:6}}
restore-step-codes = {0x1107060E:{0:6}}
restore-step-domains = {0x1107060E:{0:»AMRestoreErrorDomain»}}
restore-step-error = {0x1107060E:»[0]D(failed to update NAND firmware)[1]D(update_NAND: Update NAND — FTL version mismatch. Erase install required)»}
restore-step-uptime = 10
restore-step-user-progress = 0
[01:21:32.0601-GMT]{3>8} CHECKPOINT NOTICE: (NVRAM set) restore-step-user-progress=0 [sync=true] (first failure)
[01:21:32.0601-GMT]{3>8} CHECKPOINT BEGIN: RESTORED:[0x067C] cleanup_boot_command
restore-step-ids = {0x1103060E:17;0x1103067C:18}
restore-step-names = {0x1103060E:update_NAND_firmware;0x1103067C:cleanup_boot_command}
restore-step-uptime = 10
restore-step-user-progress = 0
entering reset_boot_command_if_value
executing /usr/sbin/nvram -d recovery-boot-mode
Successfully deleted recovery-boot-moderecovery-boot-mode
executing /usr/sbin/nvram -d iboot-failure-reason
Successfully deleted iboot-failure-reasoniboot-failure-reason
[01:21:32.0617-GMT]{3>8} CHECKPOINT END: RESTORED:[0x067C] cleanup_boot_command
restore-step-ids = {0x1103060E:17}
restore-step-names = {0x1103060E:update_NAND_firmware}
restore-step-uptime = 10
restore-step-user-progress = 0
[01:21:32.0617-GMT]{3>8} CHECKPOINT BEGIN: RESTORED:[0x1613] cleanup_recovery_os_volume
restore-step-ids = {0x1103060E:17;0x11031613:19}
restore-step-names = {0x1103060E:update_NAND_firmware;0x11031613:cleanup_recovery_os_volume}
restore-step-uptime = 10
restore-step-user-progress = 0
[01:21:32.0617-GMT]{3>8} CHECKPOINT END: RESTORED:[0x1613] cleanup_recovery_os_volume
restore-step-ids = {0x1103060E:17}
restore-step-names = {0x1103060E:update_NAND_firmware}
restore-step-uptime = 10
restore-step-user-progress = 0
[01:21:32.0617-GMT]{3>8} CHECKPOINT BEGIN: RESTORED:[0x0647] cleanup_check_result
restore-step-ids = {0x1103060E:17;0x11030647:20}
restore-step-names = {0x1103060E:update_NAND_firmware;0x11030647:cleanup_check_result}
restore-step-uptime = 10
restore-step-user-progress = 0
[01:21:32.0618-GMT]{3>8} CHECKPOINT END: RESTORED:[0x0647] cleanup_check_result
restore-step-ids = {0x1103060E:17}
restore-step-names = {0x1103060E:update_NAND_firmware}
restore-step-uptime = 10
restore-step-user-progress = 0
[01:21:32.0618-GMT]{3>8} CHECKPOINT BEGIN: RESTORED:[0x0648] cleanup_send_final_status
restore-step-ids = {0x1103060E:17;0x11030648:21}
restore-step-names = {0x1103060E:update_NAND_firmware;0x11030648:cleanup_send_final_status}
restore-step-uptime = 10
restore-step-user-progress = 0
ERROR: Unable to successfully restore device
ERROR: Unable to restore device
macbookpro@MacBook-Pro-2 ~ %
Перейти к содержанию
На чтение 2 мин Просмотров 3.1к. Опубликовано 25.08.2022
У каждого человека сейчас есть несколько разных устройств, которые он использует для связи или для развлечения. Обычно для первого случая используется что-то крупное, вроде компьютеров или ноутбуков. Потому что они могут поддерживать более сложные программы и работают быстрее.
Для программ, которые служат для развлечения или для связи с другими людьми есть смартфоны и планшеты. Вот только ошибки одинаково часто встречаются на всех типах устройств, так что нужно знать, как решать возможные проблемы.
3utools
3utools – это одна из программ для айфонов. Она может выполнять достаточно большой спектр функций, среди которых есть следующие опции:
- Полное и выборочное резервное копирование.
- Восстановление из резервной копии устройства.
- Прошивка, Активация, Понижение версии iOS и получение Jailbreak устройства.
- Загрузка, Создание, Импорт и Экспорт рингтонов. Сжатие фото на устройстве.
- Конвертер Аудио, Видео и HEIC изображений.
- Редактор Аудио-файлов.
- Удаление мусора.
- Перенос данных с одного устройства на другое.
- Управление значками устройства.
- Открытие терминала SSH.
- Удаление нерабочих значков с устройства.
- Отключение уведомлений о доступности новой версии iOS.
- Полное функционирование без наличия установленной программы iTunes.
По сути, это программа может полностью управлять вашим устройств, в чем-то она справится с этим даже лучше, чем iTunes. Так что многие люди устанавливают эту программу для того, чтобы она стала основной на айфоне или другом подобно устройстве.

Ошибка
После установки программы, вам нужно подключить ей к Apple ID. Это делается в настройках, там нужно открыть раздел параметров, а потом перейти к разделу «Настройки Apple». Здесь нужно ввести данные о своем аккаунте, а именно, логин и пароль.
После этого следует нажать на кнопку «Привязать». Именно в этот момент и выскочит сообщение об ошибке. Код ошибки 7 при запуске 3utools значит, что вход с данного девайса не был подтвержден. Возьмите один из своих девайсов, которые имеют на борту тот же аккаунт.

Там должно высветится предупреждение о том, что кто-то пытался совершить вход. Для подтверждения вам прислали код, запишите его куда-нибудь. Снова перейдите в настройки программы и вернитесь к привязке. Допишите код после своего пароля. Выглядеть это будет так: ПарольШестьЦифрКода.
Это должно решить все проблемы с кодом. После первого подключения, если будут возникать проблемы, то код из пароля можно будет удалить, хотя обычно он не мешает.
С этой ошибкой сталкиваются обладатели Android-смартфонов. Так как, данная ОС весьма проблемная, некоторые ее компоненты постепенно выходят из строя, и пользователь замечает вначале некорректную загрузку виджетов, а потом они и вовсе пропадают. Когда попытки сбросить систему до настроек по умолчанию и очистить кэш не увенчаются успехом, принимается решение перепрошить смартфон. Но и это не удается, потому что при подключении загрузочного носителя и запуске специальной программы, вдруг выскакивает сообщение: «Error: NAND flash was not detected». Почему оно возникает и как с ним бороться, вы узнаете далее.

Решение проблемы NAND Flash was not detected.
Что такое «Error: NAND flash was not detected»
Флэш-память смартфонов и планшетов поделена на две части: для самой ОС и исполняемых файлов и для хранения данных (наверное, вы знаете, что такой же подход практикуется и создателями компьютерных операционных систем). Так вот, NAND – это как раз и есть накопительная память, и сообщение об ошибке гласит, что она не обнаружена, словно ее и нет. Конечно, все дальнейшие действия становятся невозможными, и прошивка аннулируется.
Причины ошибки
Причин этому может быть несколько:
- NAND-флэш повреждена – например, телефон падал, лежал на чем-то мокром, был обтянут пластиковым чехлом и подвергся воздействию конденсата и т.п.;
- некачественная прошивка (не хватает важных элементов);
- уже неактуальна версия утилиты, которой производится прошивка;
- смартфон защищен от попыток замены ПО.

Как исправить ошибку Error: NAND flash was not detected
Сначала нужно уточнить, в чем именно причина ошибки «NAND flash was not detected», чтобы решить, что делать. Припомните все «несчастные случаи», происходившие с вашим смартфоном: падения, удары, попадание осадков и т. п. Если что-то такое было, то, скорее всего, придется покупать новый гаджет или идти в сервисный центр. Попробуйте приобрести/скачать другую прошивку, может быть, причина в ее несовместимости с устройством или отсутствии нужных разделов в Scatter-файле. Прочитайте также требования к условиям прошивки: из некоторых смартфонов перед процедурой нужно вынимать батарейку.
Начиная с «Android» 5.1, смартфоны защищены функцией Factory reset protection, которая исключает любые программные изменения. Она задумана как средство защиты от воров, но может создать немало проблем пользователю, забывшему пароль от аккаунта «Гугл» и попытавшемуся решить вопрос с помощью перепрошивки. Загрузчик в таких аппаратах заблокирован, и даже неофициальное «пиратское» ПО не поможет – будет либо выскакивать окошко с уведомлением о том, что память не найдена, либо смартфон настойчиво потребует залогиниться. Если вы не помните свои данные, под которыми регистрировались в Google, то лучше не пробуйте перепрошивать – по крайней мере, самостоятельно.

Проверьте также работоспособность утилиты для прошивки: не устарела ли текущая версия, взаимодействует ли она со смартфонами определенной фирмы. При необходимости обновите ее до последней модификации. Можно также попробовать другие программы той же тематики – вероятно, они будут эффективнее. Их мини-рейтинг выглядит примерно так:
- SP FlashTool – примите во внимание, что для Windows и Linux существуют отдельные выпуски;
- Adb RUN – имеет довольно сложную структуру и не русифицирована: любая ошибка может превратить телефон в абсолютно нефункциональный предмет;
- BootLoader – для прошивки телефонов фирмы Sony и некоторых других понадобится дополнительное ПО — Adb Run;
- KDZ Updater;
- FastBoot;
- Odin;
- Sony PC Companion – только для фирменных смартфонов «Samsung».
Перед началом работы с любой из них прочтите инструкцию, чтобы знать, в какой последовательности выполнять все действия и не навредить смартфону. Никогда не прерывайте начавшийся процесс прошивки, иначе результат может быть непредсказуем.
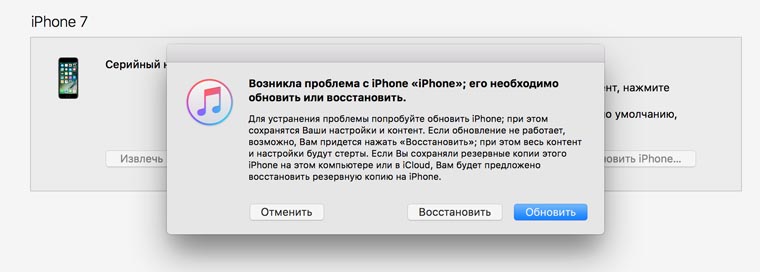
Для прошивки iPhone посредством ПО 3uTools используется 2 метода. Один из них стандартный — с помощью программы iTunes в режимах на выбор DFU Mode либо Recovery Mode. Другой способ осуществляется с помощью ПО 3uTools.
Причины для прошивки устройства
Есть обширный список причин, из-за которых может потребоваться прошить iPhone. Вот перечень самых частых:
- вы забыли пароль для опции разблокировки iPhone (не спутайте этот параметр с Aplle ID);
- если требуется полная очистка телефона, например, в рамках предпродажной подготовки;
- в случае, если устройство не запускается и выдаёт черный экран;
- когда iPhone виснет на стадии ярлычка с логотипом Apple;
- после попытки коррекции сбоев в процессе обновления iPhone.
А также процедура требуется при попытке застраивания в цикл в момент запуска.
Как прошить iPhone с помощью iTunes
Вначале попробуйте отключить опцию Найти iPhone, так как эта функция может стать причиной ошибки. Инсталлируйте iTunes в последней версии, затем загрузите прошивку для вашей модели iPhone.
Прошивка посредством RecoveryMode представляет собой программный режим, который схож с откатом Виндовс на ранее назначенную точку восстановления. При этом важные системные файлы не меняются, осуществляется приостановка ранее действовавших параметров и настроек. Когда вы активируете этот режим, на экране дисплея появится картинка из ярлычка iTunes и провода.
- далее, выключите мобильное устройство, подождите пока экран полностью не погаснет;
- теперь, для более старых моделей до 7 версии нажмите Домой;
- для новых телефонов удерживайте кнопку Уменьшение громкости. В таком положении подключите устройство к ПК;
- iTunes перейдёт в режим восстановления, самостоятельно распознает iPhone и предложит либо восстановление, либо обновление.
В процессе вам инсталлируется последняя актуальная версия iOS.
При обновлении все ранее внесённые данные не будут утрачены.
Если вы против установки текущей версии устройства, сбросьте всплывающее окошко на стадии подключения телефона. Заем зажмите клавиатурную кнопку Shift и скомандуйте Восстановить iPhone. Менеджер файлов отобразит выбор варианта прошивки. Укажите на тот, что был скачан и подтвердите действие. Процесс восстановления стартует автоматически. По завершению телефон сам выполнит перезагрузку и выведет окошко для активации.
Прошивка через DFU Mode
Прошивка iPhone с помощью DFU Mode происходит скрытым образом — при этом режиме на экране ничего не отображается. Отследить активность можно только посредством iTunes.
Особый режим DFU/device firmware update нацелен на полную переустановку прошивки телефона. В процессе выполняются следующие действия:
- прошивается загрузчик, затем он стартует;
- прошиваются все допмодули;
- формируются разделы файловой системы;
- прошиваются разделы системных данных.
Перед началом процедуры телефон нужно ввести в режим DFU соответственно актуальной версии. В каждом отдельном случае это делается по определённому сценарию.
Пример показан на версии iPhone 7:
- включите телефон, подсоедините к ПК;
- зажмите на 3-4 секунды клавишу питания;
- не отпуская кнопку нажмите на клавишу Домой или на ту, что регулирует громкость;
- удерживайте клавиши в таком положении не менее 10 секунд, затем отпустите кнопку питания, а вторую держите ещё 5 секунд.
После правильно выполненной процедуры iTunes оповестит вас об обнаружении телефона в режиме восстановления и спросит надо ли запустить процесс.
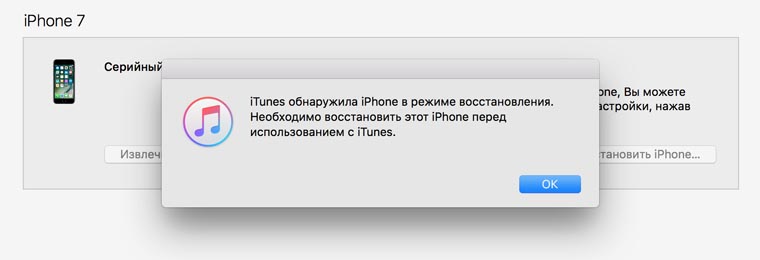
Теперь вы можете воспользоваться шагами для восстановления в режиме Recovery, нажав клавишу Восстановить iPhone. Система запустит текущую версию. Обновления при этом сценарии недоступны.
Кроме этого, вы можете закрыть окошко, перейти в меню управления и найти пункт Восстановления. Далее, нажав на кнопку Shift/ALT для Виндовс/MAC соответственно. Найдите здесь нужный файл и дождитесь окончания прошивки. Выбирайте для процесса более удобный или знакомый способ.
Прошивка устройства через 3uTools
Начните с закачки 3uTools, потом стартуйте установочный файл. Убедитесь, что драйверы ПК работают в последней версии и имеется iTunes.
Теперь подключите телефон к ПК, запустите программу 3uTools. Ваше устройство определится автоматически. Будет запрошен доступ, согласитесь, подтвердив, что доверяете источнику.
Откройте вкладку Прошивки и JB, далее найдите Прошивку и назначьте нужную версию. Чтобы на вашем устройстве сохранились необходимые данные, установите галочку рядом с Quick Flash Mode. Потом кликните на зелёную клавишу Прошивки.
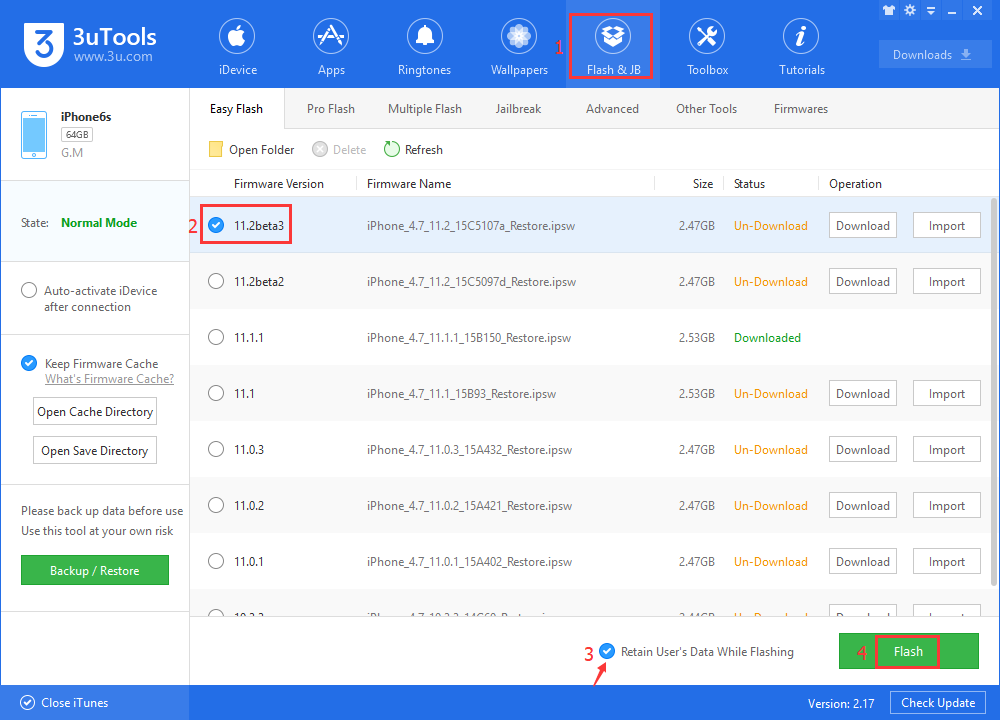
Ваш телефон автоматически будет обслужен 3uTools. Процесс длится от 5 до 10 минут.

После завершения телефон самостоятельно перезагрузится. Откройте меню, найдите рубрику Прошивка и JB-Расширенная прошивка- Activate iDevice и активируйте ваше устройство.