
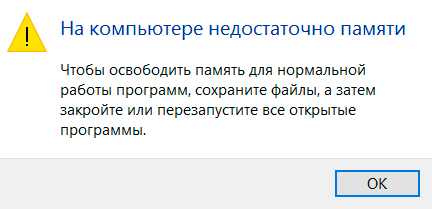
Согласитесь, мало что может начать раздражать сильнее, чем возникающее во время игры или работы сообщение о нехватке оперативной памяти. Данная ошибка происходит в ситуации, когда в Windows больше не остается свободного пространства для хранения данных и система вынуждена отключить процесс приложения до тех пор, пока память не будет восстановлена.

В этой статье мы расскажем вам о 4 эффективных способах исправления ошибки Windows 10 “На компьютере недостаточно памяти”.
Содержание статьи:
- Способ №1. Обслуживание системы
- Способ №2. Увеличение файла подкачки
- Способ №3. Восстановление реестра
- Способ №4. Очистка временных файлов
- Способ №5. Закройте “тяжелые” программы
Способ №1. Обслуживание системы
Чтобы исправить возникшую неполадку, воспользуйтесь приведенной ниже инструкцией:
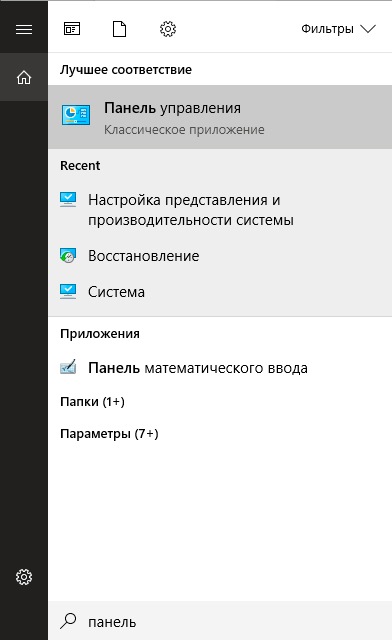
1. Запустите Панель управления. Вы можете быстро найти данную утилиту просто начав писать ее название в меню Пуск.
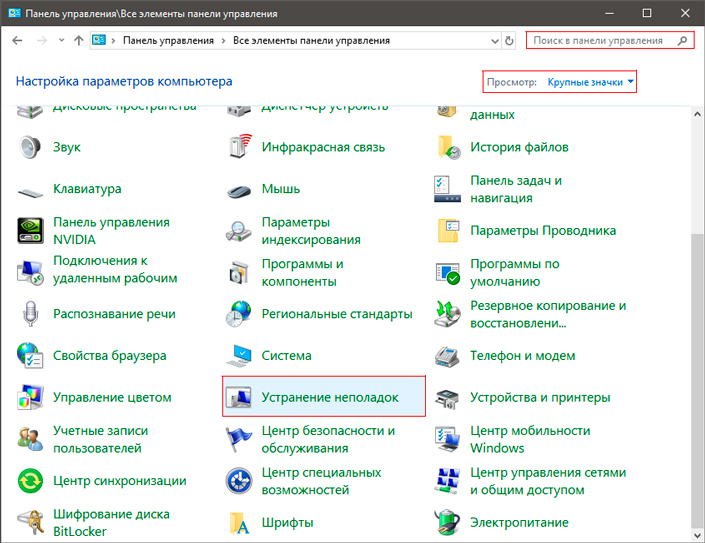
2. Переключите вид отображения параметров на Крупные значки и найдите меню Устранение неполадок. Для более быстрого доступа к нему вы можете ввести название утилиты в диалоговом окне Поиск в панели управления.
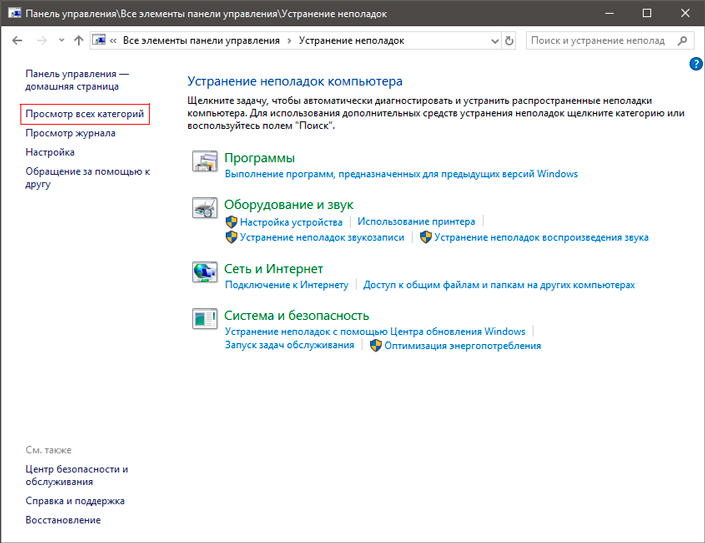
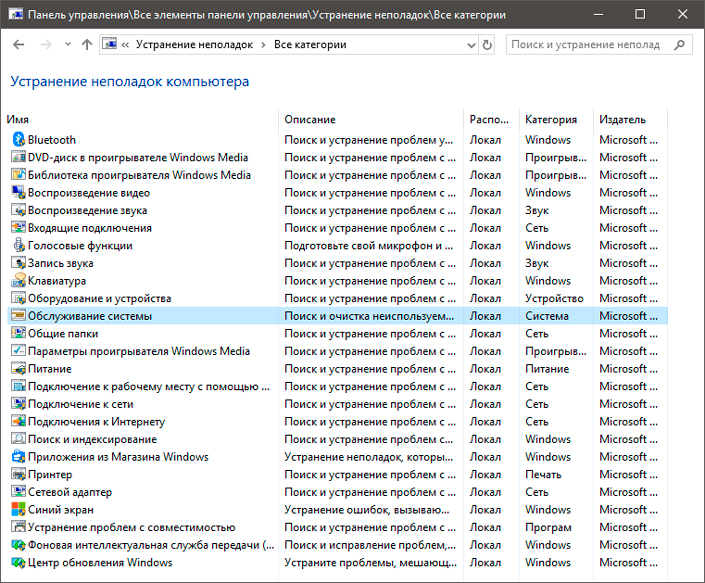
3. В левом углу вы увидите список расширенных возможностей открытого окна. Выберите параметр Просмотр всех категорий.
4. Перед вами появится список всех доступных служб. Найдите в нем параметр Обслуживание системы и откройте его.
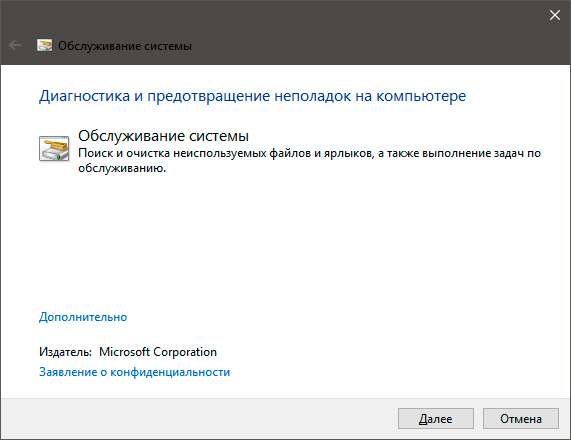
5. В появившемся окне диагностики неполадок нажмите Далее и устраните все возникшие на компьютере ошибки.
Способ №2. Увеличение файла подкачки
Иногда ответ на вопрос нехватки памяти может крыться в размере файла подкачки. Давайте разберем как его правильно настроить.
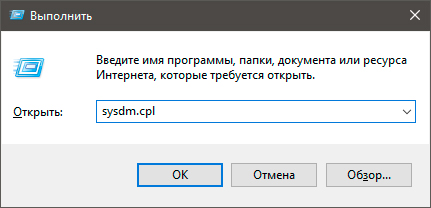
1. Откройте утилиту Выполнить при помощи клавиш Win + R.
2. В появившемся окне введите sysdm.cpl и нажмите ОК.
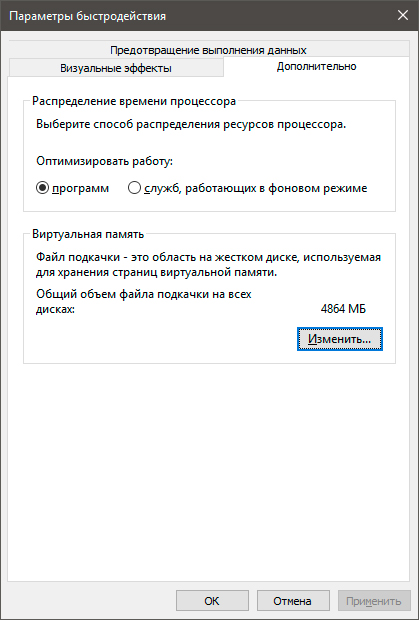
3. Откройте вкладку Дополнительно и в меню Быстродействие кликните по клавише Параметры.
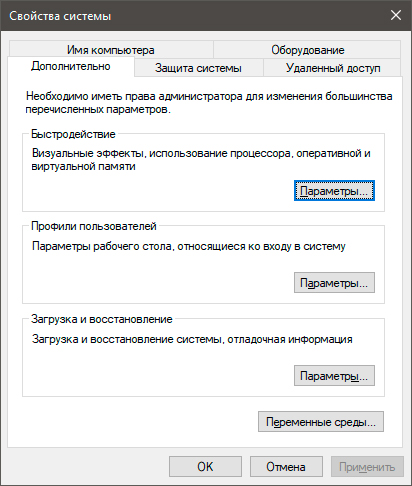
4. В открывшемся окне откройте вкладку Дополнительно и в меню Виртуальная память кликните по клавише Изменить.
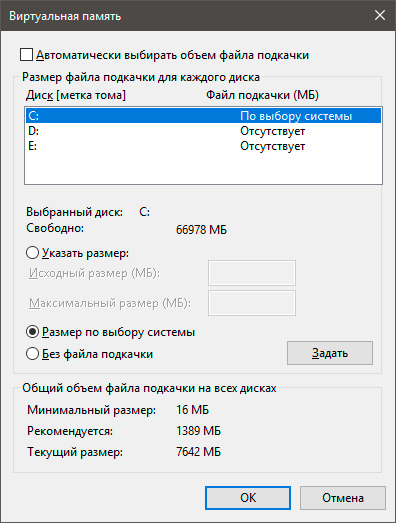
5. Снимите галочку с параметра Автоматически выбирать объем файла подкачки для всех дисков.
6. Укажите для системного диска (обычно это диск С:) Размер по выбору системы, нажмите Задать, ОК и перезапустите компьютер.
Обычно перезагрузка требуется только при уменьшении размера файла подкачки. Поэтому если вы его увеличивали, нет необходимости перезагружать компьютер.
Способ №3. Восстановление реестра
Иногда причиной возникшей неполадки может стать ошибка внутри реестра, которая может повлечь за собой повреждение и других системных функций. Ниже мы рассмотрим способ исправления повреждений реестра.
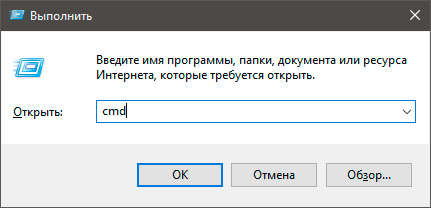
1. Воспользуйтесь комбинацией клавиш Win + R, чтобы открыть утилиту Выполнить. В диалоговом окне введите cmd и нажмите ОК.
Альтернативным способом запуска cmd является поиск утилиты при помощи меню Пуск и ее запуск от имени администратора.
2. В открывшемся окне командной строки введите команду sfc /scannow. Она проведет полное сканирование вашей системы, процесс которого может отнять некоторое время.
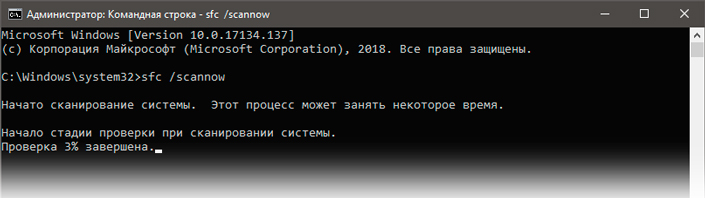
3. Дождитесь завершения проверки системы и перезапустите компьютер. Таким образом все поврежденные файлы будут удалены или исправлены.
Способ №4. Очистка временных файлов
Мы часто недооцениваем влияние временных файлов на загруженность нашей системы и очень зря, ведь они могут существенно повлиять на быстродействие наших компьютеров. Поэтому настоятельно рекомендуем вам проводить периодическую очистку таких документов.
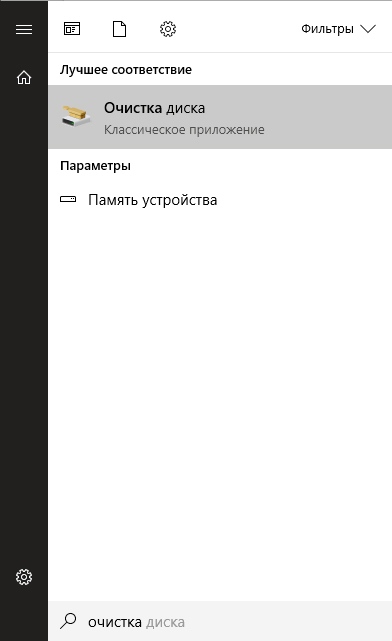
1. Откройте меню Пуск.
2. В диалоговом окне введите команду Очистка диска и запустите найденную утилиту.
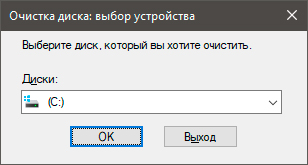
3. Выберите диск, который вы хотите очистить.
4. Кликните по клавише Очистить системные файлы и подтвердите корректность выбранного диска.
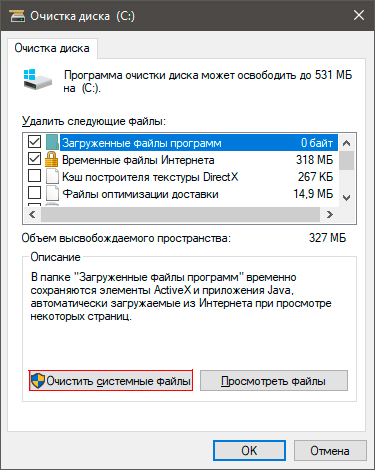
5. После того как вы ознакомитесь с данными о размере пространства, которое будет освобождено с помощью очистки, нажмите ОК и подтвердите запрос об удалении.
6. По завершению процесса перезапустите компьютер.
Способ №5. Закройте “тяжелые” программы
Нередко причиной нехватки памяти становятся грузные приложения, которые отнимают большое количество ресурсов компьютера, из-за чего он не может полноценно функционировать. В таком случае единственным доступным способом исправления неполадки является их отключение или же приобретение большего количества оперативной памяти.
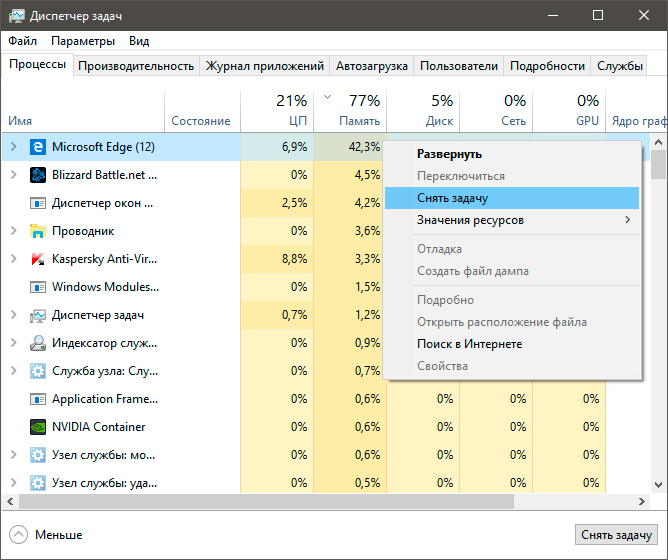
1. Откройте приложение Диспетчер задач при помощи комбинации клавиш Ctrl + Alt + Del. Альтернативным и не менее удобным способом его запуска является щелчок правой кнопкой мыши по Панели задач и выбор Диспетчера из списка доступных вариантов.
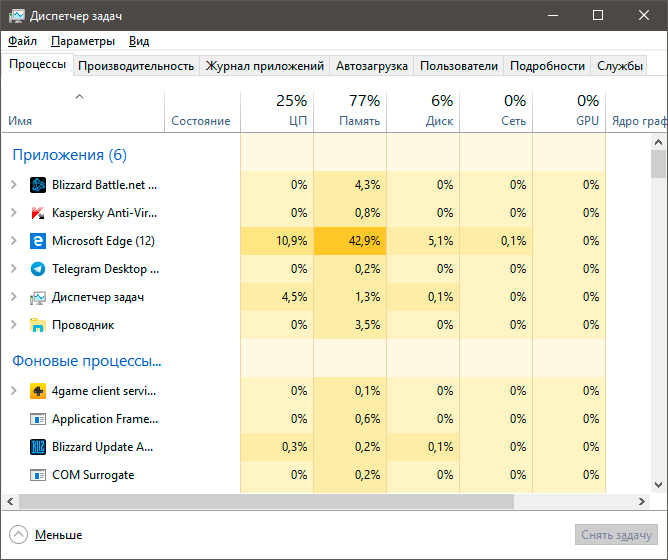
2. Во вкладке Процессы отсортируйте приложения по графе Память. Это действие поможет расположить в топе списка самые “тяжелые” приложения, отнимающие большое количество ОЗУ. Завершите их процессы.
Возьмите назаметку!
Если потребуется восстановление любых типов информации с жесткого диска , вам помогут инструменты Starus Recovery. Cкачать и опробовать программы для восстановления удаленных данных можно совершенно бесплатно!
Похожие статьи про восстановление данных:
Дата: 12/07/2018
Теги: Карта памяти, Носитель информации, Ошибка, Процесс восстановления
If you see Not enough memory to run Microsoft Excel error while launching Excel, then the solutions provided in this article may help you fix it. This error prevents users from working in Microsoft Excel because they can’t open any spreadsheet. Some users have seen this error while attaching an Excel file in Microsoft Outlook or while opening an Excel file from Outlook and from another email client.

The complete error message is as follows:
Not enough memory to run Microsoft Excel. Please close other applications and try again.
The following fixes will help you get rid of this problem. Before you proceed, close other running applications and see if you can open Microsoft Excel. If not, restart your computer and check if the issue is fixed.
- Run Excel as an administrator
- Make the Excel folder empty
- Change your default printer
- Troubleshoot Excel in Safe Mode
- Troubleshoot your computer in a Clean Boot state
- Change the Trust Center settings
- Toggle the Dynamic Data Exchange (DDE) mode
- Check the status of the Windows Defender Firewall service
- Unblock the Excel file
- Turn off Preview Pane in File Explorer
- Delete temporary files and folders
- Repair Office
Below, we have explained all these fixes in detail.
1] Run Excel as an administrator
Sometimes the problem occurs due to administrative privileges. To check this, launch Microsoft Excel as administrator and then see if you get the same error message. To do that, right-click on the Microsoft Excel shortcut and select Run as administrator.
If this fixes your problem, you can make Excel always run as administrator.
2] Make the Excel folder empty
When you create a new spreadsheet or edit the existing one, Microsoft Excel creates its unsaved copy in the Excel folder. This is how Excel recovers your unsaved document when your computer or Excel crashes suddenly. These files remain in that folder until you save your spreadsheet. By default, these temporary files are located in the Roaming folder. Apart from that, some temporary cache files may also be created in that folder.
Make the Excel folder empty and check if this fixes your problem. To do that, follow the steps below:
- Open the Run command box by pressing the Win + R keys.
- Type %appdata% and click OK. This command will directly open the Roaming folder on your C drive.
- Now, open the Microsoft folder and then open the Excel folder. You may see some temporary files and folders there.
- Move all the files and folders to another location in order to make the Excel folder empty.
- Open Microsoft Excel and see if the problem disappears.
If the problem still occurs, you can move the files back to the Excel folder.
3] Change your default printer

Sometimes, the problem occurs when Excel is not able to access the default printer. To check this, change your default printer. You can also make a virtual printer as your default printer, like Microsoft Print to PDF or Microsoft XPS Document Writer. After performing this step, check if the problem occurs.
4] Troubleshoot Excel in Safe Mode
There might be some problematic add-ins in Excel that are causing the problem. To check this, you have to troubleshoot Excel in Safe Mode. Check if you are able to launch Excel in Safe Mode. If yes, some of your Add-ins are the culprit.
To launch Excel in Safe Mode, open the Run command box and type excel /safe. After that, click OK. This will open Excel in Safe Mode. Now follow the steps below:
- Go to “File > Options.”
- Select Add-Ins from the left side.
- Click on the Manage drop-down and select COM Add-ins. Click Go.
- Deselect anyone add-in to disable it and click OK.
- Close Excel in Safe Mode and launch Excel in normal mode. See if the issue appears. If yes, repeat the above steps to disable another add-in and then launch Excel in normal mode again.
The above steps will help you find the problematic add-in. Once you find it, remove it from Excel.
5] Troubleshoot in a Clean Boot state
If there is no problematic add-in in Excel, the issue might occur due to a conflicting background or startup app. You can easily identify that program by starting your computer in a Clean Boot state. After starting your computer in a Clean Boot state, launch Microsoft Excel and see if the “Not enough memory to run Microsoft Excel” message appears. If not, there is a program that is conflicting with Microsoft Excel due to which Excel is displaying this error.
To identify that program, enable some of the disabled programs in the Clean Boot state, and then start your computer in a normal state. Launch Excel after starting your computer in the normal state and see if the error occurs. If yes, some of the programs you have just enabled are causing the problem. To identify those programs, disable the enabled programs one by one and launch Excel each time you disable a program. This will help you identify the problematic startup application.
Related: Excel is slow to respond or stops working
6] Change the Trust Center settings
If you are unable to attach an Excel in Outlook or if you are getting the error message after opening the Excel file from Outlook or another email client, change the Trust Center settings and see if it works.

- Open Microsoft Excel.
- Go to “File > Options.”
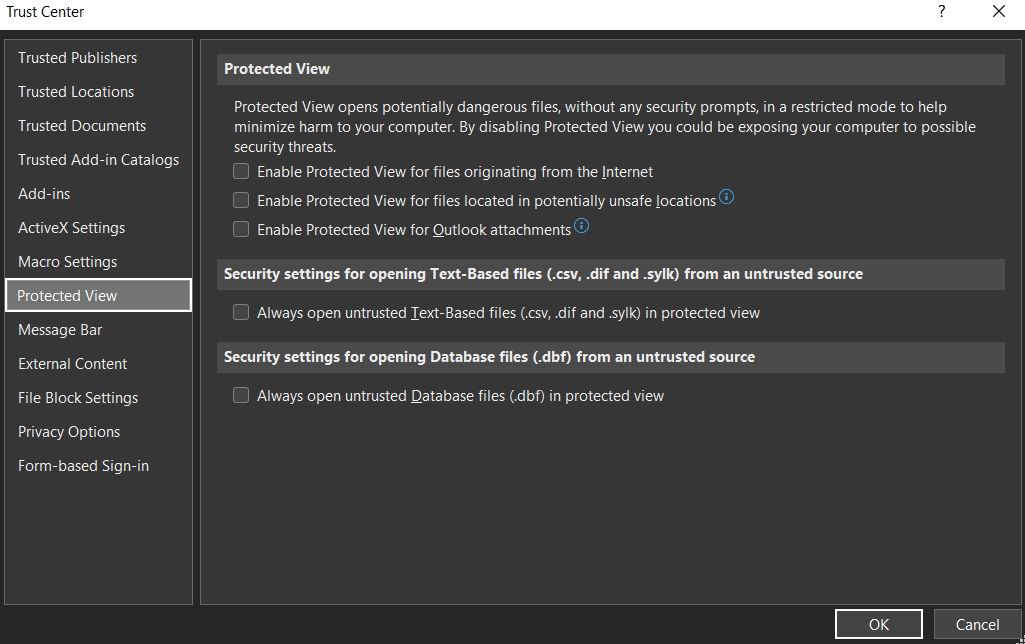
- Now, go to “Trust Center > Trust Center Settings” and select Protected View from the left side.
- Uncheck all the options and click OK.
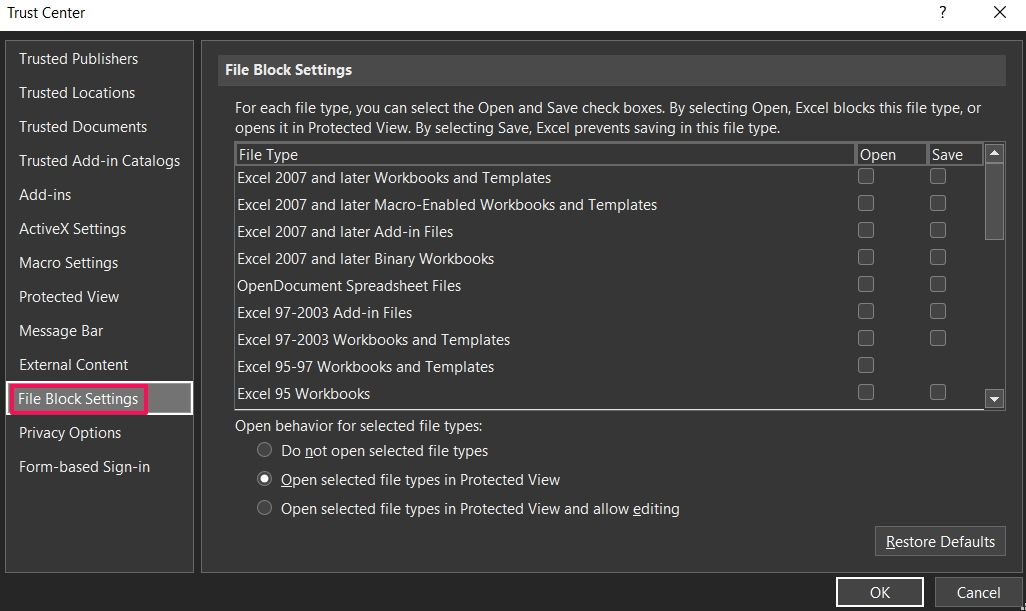
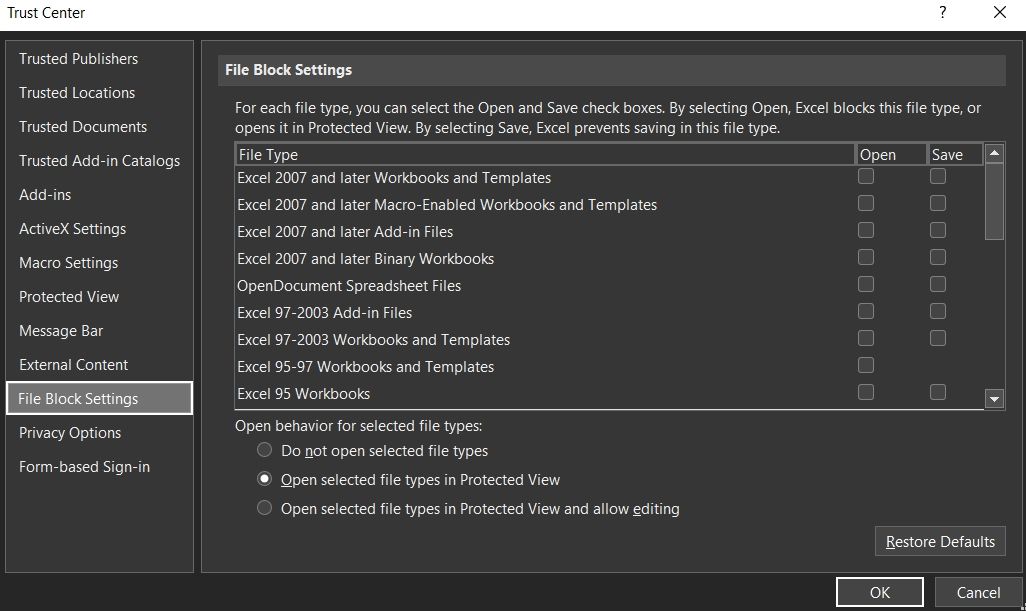
- Now, open the Trust Center Settings again and select File Block Settings from the left side.
- Uncheck all the options and click OK.
7] Toggle the Dynamic Data Exchange (DDE) mode
This solution is also for the users who are receiving the error message “Not enough memory to run Microsoft Excel” while attaching an Excel file to Outlook or while opening certain Excel files.

- Launch Microsoft Excel.
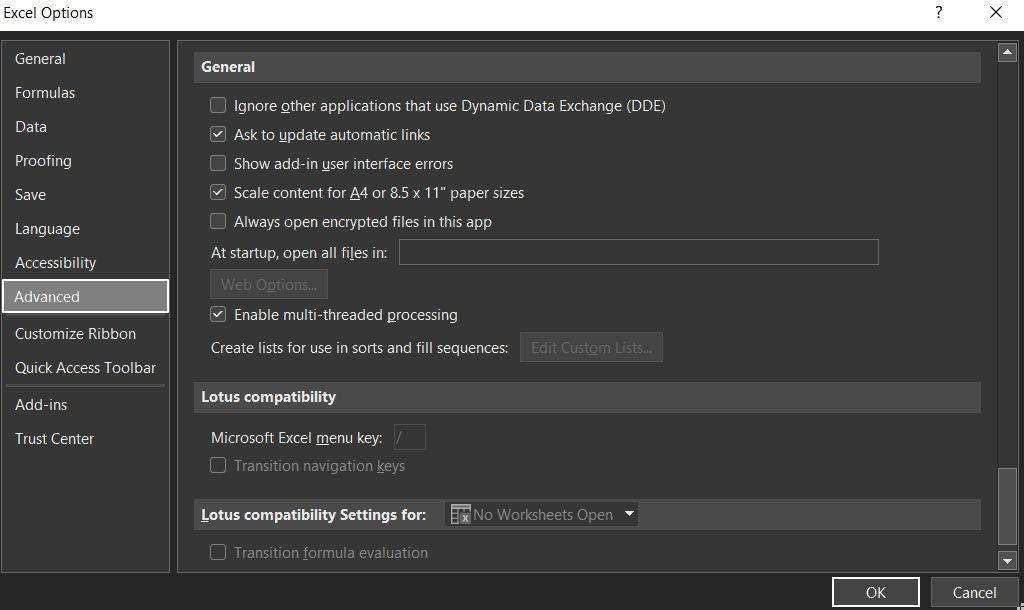
- Go to “File > Options > Advanced.”
- Scroll down until you find the General section.
- Enable the “Ignore other applications that use Dynamic Data Exchange (DDE)” option.
- Click OK and close Microsoft Excel.
- Wait for a few seconds and launch Excel again.
- Now, disable the “Ignore other applications that use Dynamic Data Exchange (DDE)” option.
- Click OK and close Excel.
This should help. If not, try the next solution.
8] Check the status of the Windows Defender Firewall service
For some users, starting the Windows Defender Firewall service fixed the issue. You should also try this. Open the Services app and check the status of the WIndows Defender Firewall service. If it is stopped, start it. The steps for the same are written below:

- Open the Run command box and type
services.msc. - When the Services app appears on your screen, locate the Windows Defender Firewall service.
- Its status should show Running. If it is stopped, double-click on it to open its properties.
- Click on the Startup type drop-down and select Automatic.
- Now, click Start to start the service.
- Click Apply and then click OK.
9] Unblock the Excel file
If you are getting the error message while opening some specific Excel files, you can try this fix. This method is also useful for users who are not able to open the Excel file from Outlook or another email client.

The steps to unblock an Excel file are written below:
- Right-click on the Excel file which is giving you the error.
- Select Properties.
- Select the General tab.
- Enable the Unblock option.
- Click Apply and then click OK.
Read: Fix VBA Run-time error Class not registered in Excel.
10] Turn off Preview Pane in File Explorer
Sometimes, the File Explorer’s Preview Pane causes problems on a Windows computer. The Preview Pane shows the preview of the files that you select. If it is enabled on your system, disable it and then check if you can open Microsoft Excel.
To disable the Preview Pane in Windows 10, open File Explorer and click on the View tab. Now, select the Preview Pane option to enable or disable it. In Windows 11, open File Explorer, then go to “View > Show” and uncheck the Preview Pane option.
If this works for you, you can permanently disable the Preview Pane in File Explorer via the Group Policy Editor and the Registry Editor.
11] Delete temporary files and folders
Another effective and easy solution that you can try is to delete the temporary files and folders. To do so, go through the following steps:

- Open the Run command box and type %temp%. Click OK.
- This command will open the folder containing temporary files and folders.
- Delete all the files and folders inside the Temp folder.
Now, open Microsoft Excel and see if the error message appears again.
12] Repair Office
If some of your Microsoft Office files get corrupted, you may experience several issues in different Office applications. If the problem that you are currently facing is occurring due to this, repairing the Office application can help. First, run the Quick Repair. If this does not help, run an Online Repair.
Read: Excel not scrolling smoothly or properly? Enable Excel smooth scrolling.
How do you fix There isn’t enough memory to complete this action in Microsoft Excel?
If you see the There isn’t enough memory to complete this action error in Microsoft Excel, first try to install the latest Windows Updates (if available). If this does not work, check if there is any add-in causing the problem. To do so, you have to troubleshoot Excel in Safe Mode.
Sometimes, problems occur when Excel is not able to access the default printer. Hence, another solution to fix this problem is to change the default printer. You can also try to launch Excel after disabling your antivirus.
How do I fix There is not enough memory or disk space to run in Excel?
Launch Excel as administrator and see if the issue appears. If yes, you have to try some other fixes, like troubleshooting Excel in the Safe Mode to identify the problematic add-in (if any), troubleshooting your computer in a Clean Boot state to find the conflicting application (if any), turning off the Preview Pane in File Explorer, etc. If nothing works, run an online repair or uninstall and reinstall Microsoft Office.
Hope this helps.
Read next: Cannot print from Excel? Fix Excel printing problems in Windows 11/10.
When using Mac, you may get an error message saying that the system has run out of application memory and asking you to force quit apps that you are not using.
It’s one of the common problems for Mac, but sometimes it’s also confusing. You don’t know why this happens because you just open a few programs. Or, after upgrading to macOS Catalina, Mojave, High Sierra, or the latest Monterey, you find that the computer runs more slowly than before and keep saying that it has run out of application memory.
This out-of-memory problem on Mac may make you panic. In this post, you can learn what application memory is and various methods to fix the problem. Read on.
What Does System Has Run Out of Application Memory Mean?
When your Mac says system has run out of application memory, it means that your computer doesn’t have enough memory required by applications to run. There are four possible reasons account for the problem:
Reason 1: Too many apps run simultaneously
It’s a common practice to run several apps on your Mac at the same time; however, accumulation of excessive apps on the background will take up more and more space and finally leads to the problem of “system has run out of application memory”.
If that’s the cause, to quit or force quit the program may simply solve it.
Reason 2: Your boot disk has little free space for running apps
When running an app on Mac, if all physical RAM are used, macOS will create swap files, which takes up disk space. So, it takes up more and more memory until your hard drive is full and there is no room for the swap files, the system will report that it has run out of application memory. Or that you have lots of free disk space, but the currently running apps need such a large amount of virtual memory address space that macOS fails to provide.
To deal with this trouble, you can try some instant methods to get rid of it, but it’s recommended to manage your disk space for the long run.
Reason 3: Excessive browser extensions
We may install extensions and allow plugins in order to have a better browsing experience. But once opened, these extensions are running together with the browser even if not used, which take up a lot of space on Mac.
If you have installed too many extensions, it’s time to manage them and delete some rarely used ones.
Reason 4: Memory leak
When a program is using more and more space over time as it runs and fails to release memory, you can recognize it as a memory leak. It will keep asking your Mac for more space but never gives it back, which makes the system run out of application memory. And thus, the error message pops up.
Many Mac users encounter this problem after they upgraded the macOS to the latest Monterey version, and find the warning appears frequently even though they do nothing that eats so much system memory, for example, the Mail or Firefox app takes up gigabytes of the memory usage.
This is regarded as a macOS bug, especially when you customize the mouse cursor color or size. You can first try to reset the mouse pointer at the Accessibility feature, if it isn’t the matter, there are still some attempts that may work for you.
How to Check Application Memory on Mac
You can check the application memory on Mac at Activity Monitor. The habit of checking Activity Monitor constantly for memory usage enables you to take control of the applications running on your Mac.
When your Mac slows down or reports that it has run out of application memory, the first thing you should do is to head to Activity Monitor to see what is using memory. It can show you how much memory is used and helps to identify which app is using more than its fair share of space. To check Activity Monitor, simply click the Application folder > Utilities > Activity Monitor > Memory.
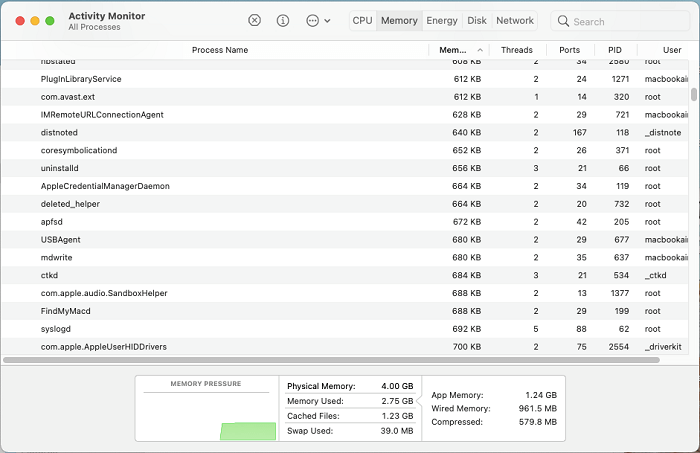
Under Memory, you can see the memory pressure box, in which you can see details about memory usage. There is a graph giving an overview of your system’s memory pressure.
If the graph is green, it means that you have enough disk space, if yellow or red, you are short of memory. Checking memory usage of your computer constantly can help you figure out which apps are using more memory than they should have.
If your Mac is running painfully slow or you often get the dreaded error message, it is possible that your system has run out of all your application memory on Mac. Here are 8 methods on how to check and free up memory on Mac. Go through the following article to find the one that works for you.
1. Force Quit Unused Applications
When you have used up all the application memory on Mac, the Force Quit Applications window will open. You can select the unused apps and click Force Quit to quit the processes that hog memory. Or you can force quit more than one application in Activity Monitor.
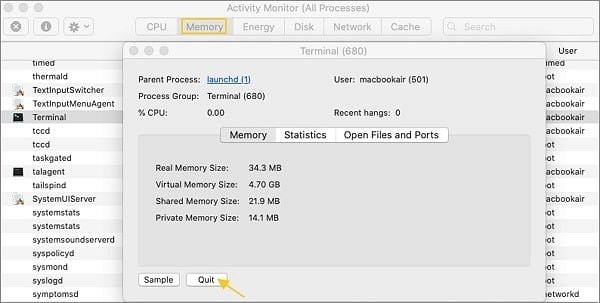
Step 1. Open Finder in the Mac dock.
Step 2. Find Activity Monitor, and then double-click the icon.
Step 3. Under the Memory pane, select the program that you want to force quit, click the Force Quit or Quit button.
Tip: How to Restore Paused Application
If the system has run out of application memory when you are using Adobe Premiere or Final Cut Pro, the system may pause Premier Pro, Final Cut Pro, which makes you unable to save the project you are working on with this application. Here is a tip to restore the paused application after you have quit all the other applications and get memory space.
You can use the Terminal and enter the ps command. All the running process will be present with its PID (Process ID). Get the process ID of the paused application.
In the Terminal window, enter the command: kill-CONT process ID. For example, if the process ID of the paused app is 2650, enter: kill-CONT 2650 and hit the Enter key, which will tell the paused app to restore and run.
2. Restart Your Mac
Besides quitting the programs, restarting your Mac is probably the easiest way to free up space on your Mac. If you don’t regularly reboot your Mac, the computer will store many data such as cookies and caches, which take up more and more application memory on Mac. When you restart the computer, it will empty the RAM and caches so that your Mac can run more smoothly.
This is also a temporary but workable solution to mitigate the memory leak problem.
3. Clean Disk Space on Your Mac [Free Tool Included]
It’s more likely that the “your system has run out of application memory” alert is not an instant problem but long-term trouble. If that’s the case, you have to consider cleaning up the Mac disk space, since enough free disk space is necessary for application running.
There are different methods to free up space on Mac, but usually, it’s a time-consuming task because you need to find out the unwanted files for free space one by one. If you would like to use a simple way rather than manual operation, you can choose Macube Cleaner to help you clean up your Mac’s disk space with simple clicks. Though it’s a paid program for long-term use, it offers a 7-day free trial with full functions, so that you can just utilize it without pay and solve the tricky problem within minutes.
As a professional Mac cleaner, Macube Cleaner provides user-friendly solutions to optimize your Mac memory. The program automatically scans out the junk files that can be safely removed, or sort the files by size and date so that users can have a clear picture of what to delete. It’s also a powerful tool to deal with the terrible “system storage” or “other storage” that eats up large proportion of storage on your Mac.
Here’s a quick tutorial of using Macube Cleaner to clean up your Mac:
Free Download
Free Download
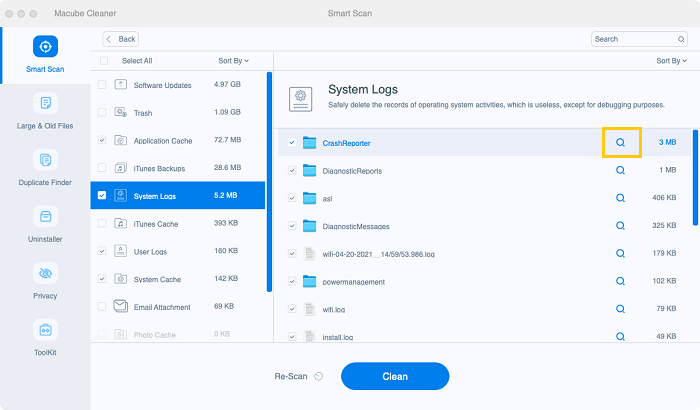
Step 1. Download and launch Macube Cleaner on your Mac.
Step 2. Select features in the left-side menu according to your needs, such as Smart Scan, Large & Old Files, and Duplicate Files.
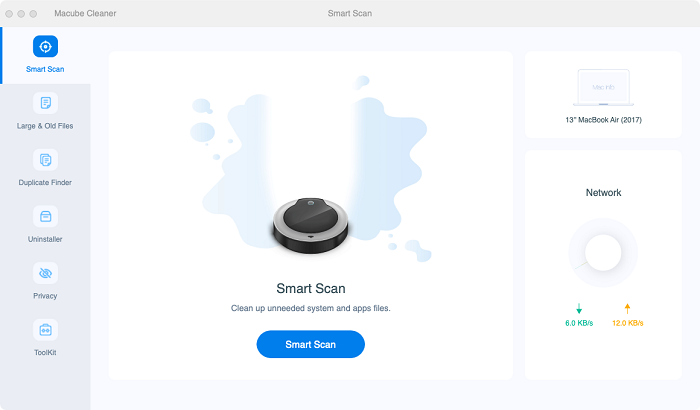
Step 3. Click Scan to find out the files.
Step 4. Choose the unwanted files and click Clean to remove them.
Not only clearing the Mac disk space, but Macube is also good at uninstalling programs, managing extensions, removing duplicates, etc. You may see more in the latter parts. Just get this one-stop solution free and stay away from the short-of-memory problem!
4. Uninstall Useless Applications
Another way to reduce Mac memory usage is uninstalling applications. We all download applications from the Internet unknowingly sometimes. These apps often automatically launch themselves and take up much application memory on Mac. You can try to find and delete them one by one manually, but they usually hide themselves in the folders you cannot easily discover and clear all the related files.
So how to free up ram on Mac by uninstalling unwanted applications? Luckily, Macube Cleaner also provides Uninstaller feature, which enables you to delete useless and unwanted applications on Mac with one click. Scroll down to learn how.
Free Download
Free Download
Step 1. Download and launch Macube Cleaner.
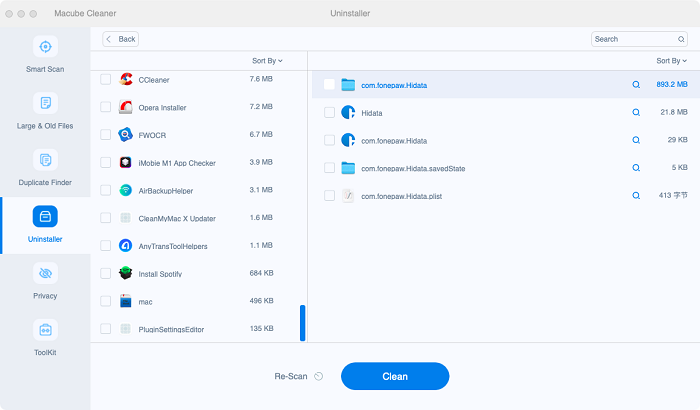
Step 2. Choose Uninstaller > Scan to scan our all the applications on your mac.
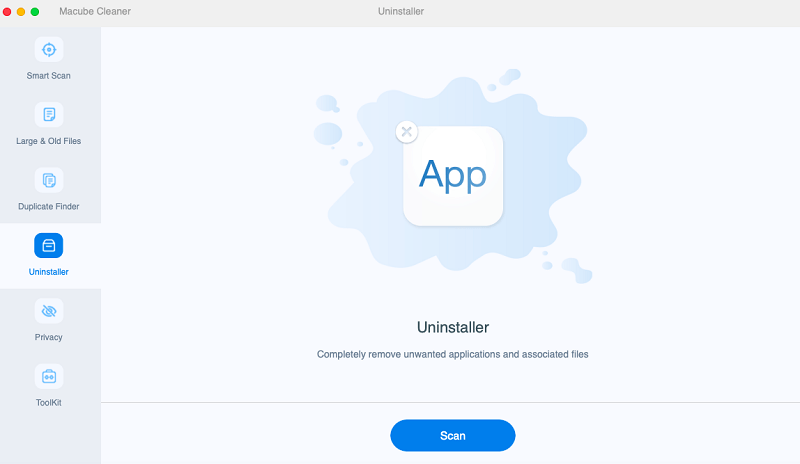
Step 3. Tick the applications or their parts you want to uninstall. Hit Clean to delete them with one click.

Tip:
- You can use Sort By to sort out your target applications.
5. Manage Browser Extensions
Apart from too many applications, excessive browser extensions may also be the reason. Browser extensions serve as helpful assistants when we are browsing; however, on the other hand, too many useless or outdated extensions could also lead to the error of “your system has run out of application memory” on Mac.
To find and manage extensions manually, from one browser to another, can be a painstaking task. Therefore, it is recommended to use a Mac cleaner which can manage extensions. Macube Cleaner can help. Beside the two functions mentioned above, the program offers a foolproof solution to manage all the extensions on your Mac.
Free Download
Free Download
Step 1. Download and launch Macube Cleaner.
Step 2. Choose ToolKit > Extensions.
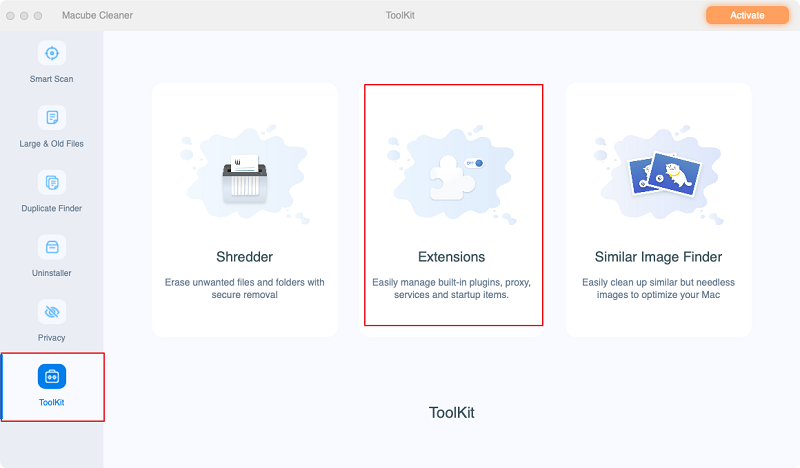
Step 3. Click Scan/View to scan for extensions.
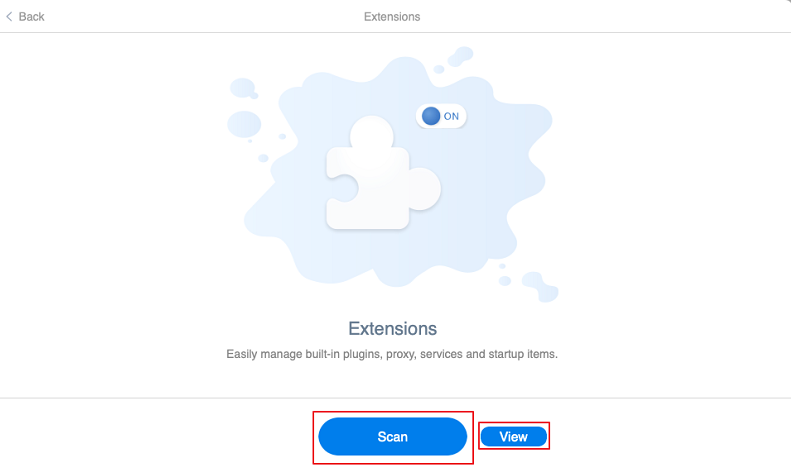
Step 4. Manage the extensions by clicking the bars on the right to turn them on or off.

Tip:
- You can also use Sort By to find target extensions.
6. Organize Your Desktop
In addition to fixing the problem after it occurs, you can also grow good habits while using your Mac to prevent the notice from recurring.
Some of you may prefer to save files and images on your desktop. However, this act will also slow your Mac. Every desktop icon on macOS is considered as an active window. More desktop icons and more used memory can cause Mac easier to run out of application memory. So, organizing your desktop and removing unneeded files help to clean up your Mac and reduce the «your system has run out of application memory» alert.
To organize your desktop, you can create a new folder on your desktop, and drag the documents, images, music or other files into the folder.
7. Limit the Memory Used by Finder
Another good habit is limiting the memory used by Finder, your Mac’s file manager.
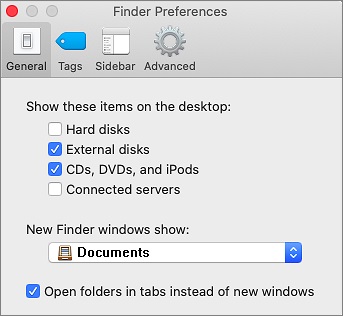
When opening Finder, you will see the default option All My Files. It is set to search all your files when you browse files and it also stores the path of all your files in RAM, which would consume a huge amount of memory, leaving fewer memory for applications to use.
To reduce the memory used by Finder, you should avoid loading all your files when the Finder opens. To do this, you need to:
Step 1. Click Finder on the top-left of the screen. Select Preferences.

Step 2. Under General, click the drop-down list to select a folder. (Don’t select All my files or Recents as the location).
Step 3. Hold down the Control key, then right-click the Finder icon in Mac dock. Select Relaunch.
8. Update MacOS
Finally, it’s always recommended to check for MacOS updates. Normally an update of MacOS can fix most bugs on Mac. If that’s some trouble caused by upgrading, Apple will commonly provide fixes soon.
Step 1. Click on the Apple menu. Choose About this Mac > Software Update.
Step 2. Follow the instructions to update MacOS.
Conclusion
Here we provide 8 methods to help you solve and prevent the problem of “system has run out of application memory” on Mac.
The first recommendation is to force quit applications or restart your Mac, but they are mostly temporary solution because the problem can recur after rebooting. To avoid the trouble, it’s better to check and clear your disk space, for example, use Macube Cleaner to clean up your Mac by deleting junk files, uninstalling applications, and managing extensions.
Prevention is also important. Good habits can prevent the problem from occurring. While using Mac, remember to limit the memory used by finder, organize the desktop, and check memory usage and MacOS update constantly.
The above solutions help you reduce Mac memory usage and prevent the problem of “your system has run out of application memory” from reoccurring. If you have any questions or suggestions, welcome to share with us in the comments.
Free Download
Free Download
Not enough memory to run application
Close Steam and then go to Programs>Run Command, select the Skyrim bottle, enter «regedit» in the Command: field and press Run.
Within regedit, browse to HKEY_CURRENT_USER/Software/Wine/Direct3D
in here, add a new string value called «VideoMemorySize» and set it to «512».
If this has no effect, you might try going to back and setting «VideoMemorySize» to «1024».
Please Wait…
eyJjb3VudHJ5IjoiUlUiLCJsYW5nIjpudWxsLCJjYXJ0IjowLCJ0enMiOi01LCJjZG4iOiJodHRwczpcL1wvbWVkaWEuY29kZXdlYXZlcnMuY29tXC9wdWJcL2Nyb3Nzb3Zlclwvd2Vic2l0ZSIsImNkbnRzIjoxNjg0ODczOTEzLCJjc3JmX3Rva2VuIjoiNlN1Z3hOQWhtSnAyc3lLNiIsImdkcHIiOjB9
Is Microsoft Excel struggling to use enough memory to run? Here’s how to fix this error message on Windows.
Microsoft Excel is an excellent program for managing data in a spreadsheet. But this doesn’t mean the program is free from problems. One of the issues that have been in the talk lately is the low memory prompt that appears on opening, saving, and editing Excel documents.
The error isn’t version specific, i.e., it can appear on all the Microsoft Excel versions. Fortunately, it’s a cakewalk to get rid of this problem. Just try the below solutions to eliminate the issue for good.
What Causes the «Not Enough Memory To Run Microsoft Excel» Error?
Microsoft Excel mainly throws the low memory prompt when you try to open a file larger than two gigabytes. But unfortunately, this isn’t the only cause. The problem can also appear due to the following reasons.
- If background applications consume a large amount of system memory, there won’t be enough memory for Excel to run.
- Similarly, add-ons installed onto Microsoft Excel can take up too much space.
- Third-party antivirus programs can block certain Excel services and cause the problem at hand.
Now that you know the primary culprits behind the error, let’s check out all the working fixes.
1. Close Any Non-Essential Background Applications
Let’s start with the most obvious solution by doing as the error prompt asks you to do. When Microsoft Excel runs out of memory, the error message appears with this message: «Not enough memory to run Microsoft Excel. Please close other applications and try again.»
As per the error message, try closing other background running applications that aren’t necessary for your PC to run. You can do it by following the below steps.
- Open the Task Manager using Ctrl + Shift + Enter hotkeys.
- In the Process tab, right-click on all the non-essential applications and choose End task.
Try to open Microsoft Excel again and check if the problem continues.
2. Run Microsoft Excel With Administrative Rights
The error can appear if you are running Microsoft Excel without administrative rights. As a solution, always run the program as an administrator. Here’s how to do it.
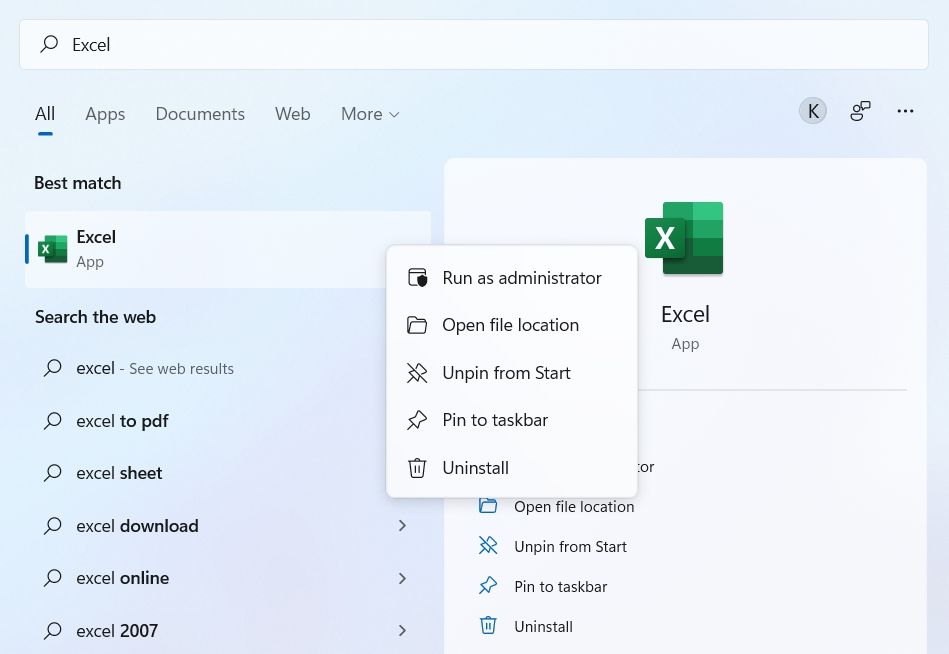
- Open the Start Menu by pressing the Win key.
- Search for Microsoft Excel.
- Right-click on the Excel app from the result and choose Run as administrator.

- If UAC pops up, click on Yes.
Check if you are still facing the problem.
3. Download the Latest Windows Update
The outdated Windows version is another prime reason behind the problem at hand. Each Windows update comes along with new features and bug fixes.
So, consider downloading the latest Windows update to fix the Excel low memory issue. Here’s how.
- Open Settings using one of the many ways to open the settings menu.
- Choose Windows Update from the left pane.
- Click on Check for Updates.
Windows will search for and download the available update. Once the update process is complete, reboot the system and check for the problem.
4. Update Microsoft Office
The next solution on the list is downloading the latest Microsoft Office update. You can do that by following the below steps.
- Open Microsoft Excel.
- Choose Account at the bottom left pane.
- Click on Update Options before Office Updates.
- From the context menu, choose Update Now.


Microsoft Office will look for any available update. If any update is found, save and close any pending task to begin the update process.
5 . Repair Microsoft Office
The problem can result from a temporary glitch or minor bug in Microsoft Office. You can get rid of this bug by using the repair feature. Here’s what you need to do.
- Open Settings and choose Apps from the left panel.
- Choose Apps & features.
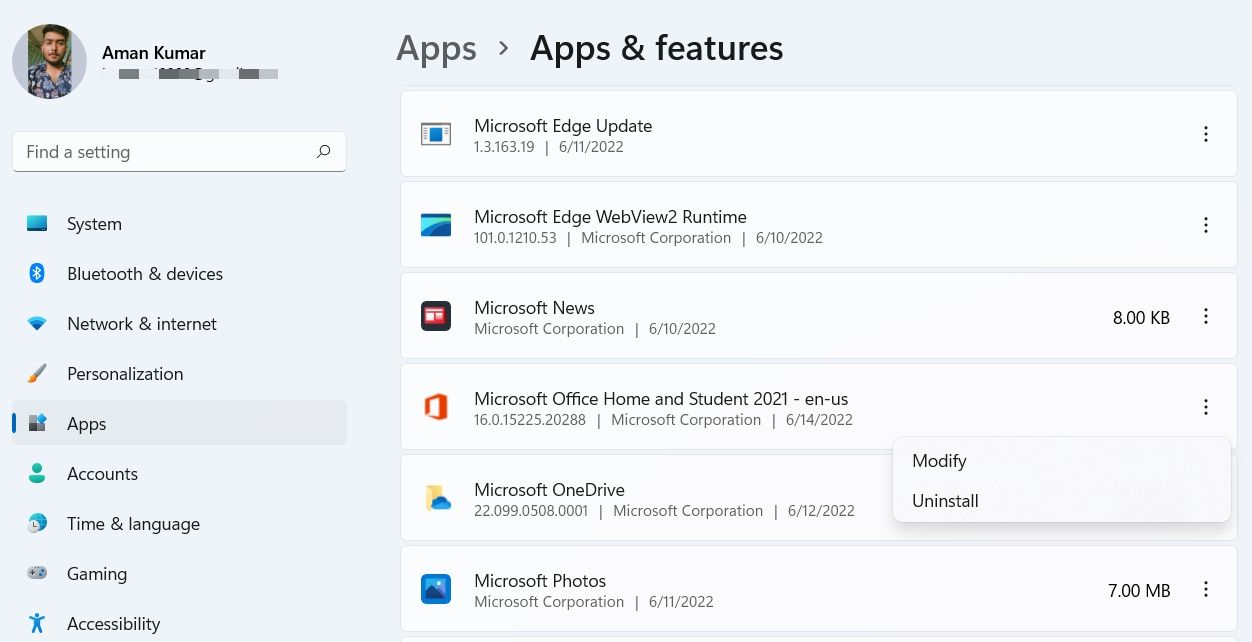
- Locate and click on three dots next to Microsoft Office.
- Choose Modify from the context menu.

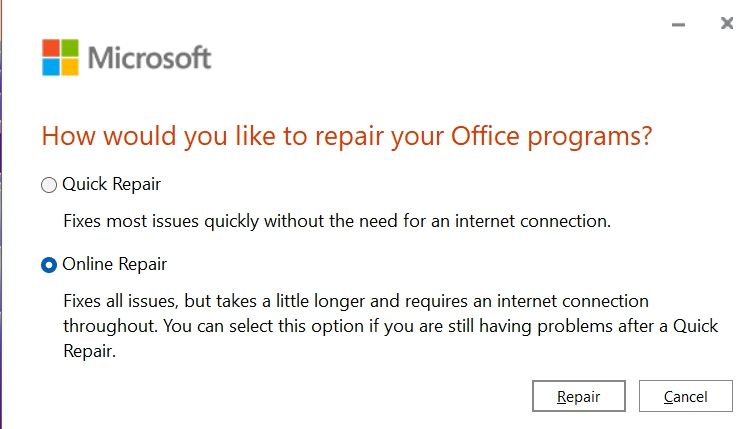
- The Repair window will pop up.
- Choose Online Repair.

- Click on Repair, then Repair again to begin the process.
6. Disable Cortana
Windows official digital assistant Cortana is another significant reason why you are facing the problem. As a solution, you’ll have to disable Cortana.
Below are the steps to turn off Cortana on Windows 11.
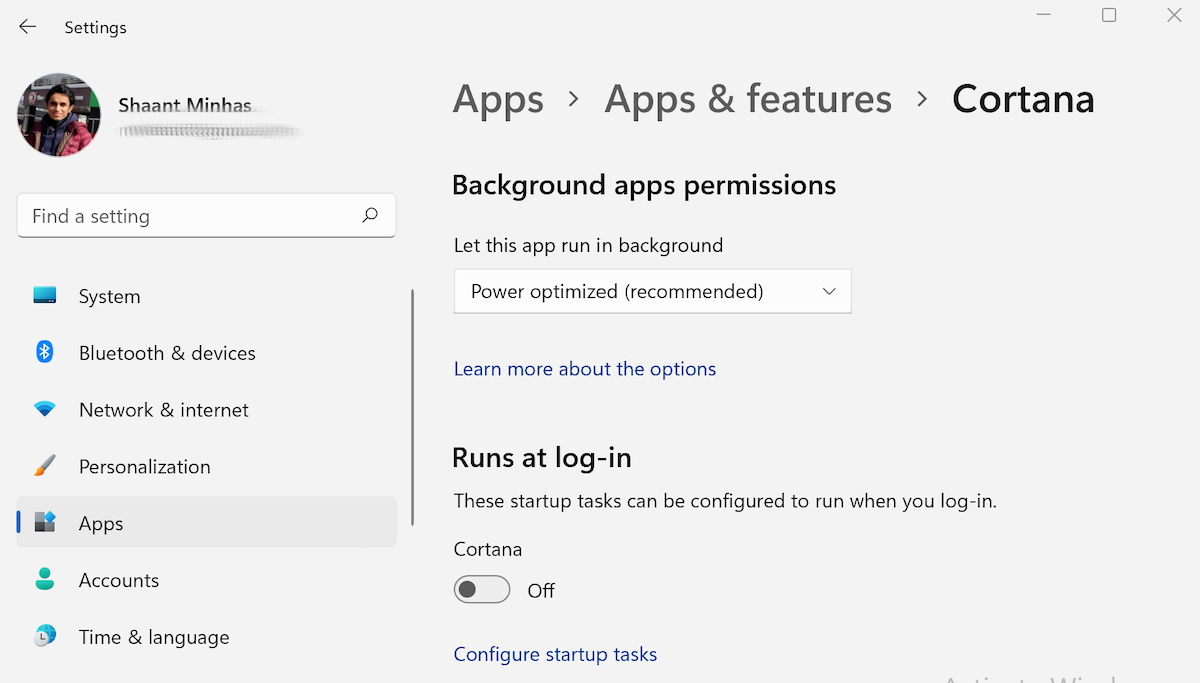
- Go to Settings > Apps > Apps & features.
- Locate and click on three dots next to Cortana.
- Choose Advanced options from the context menu.
- Disable the toggle under Runs at log-in.

Reboot the system, launch Excel and check if the problem persists.
7. Open Excel in Safe Mode
Different add-ins installed on Microsoft Excel can be the culprit behind the problem. To find out which particular add-in is causing the issue, launch Excel in Safe mode and check if the problem is fixed or not. If yes, relaunch Excel and disable each add-in one by one until the problem goes away. Once that happens, the add-in you just disabled is highly likely to be the cause of the error.
Here are the exact steps you need to follow.
- Hold the Ctrl key and click on the Excel app to open it in Safe Mode.
- If the problem gets fixed, relaunch Excel in normal mode.
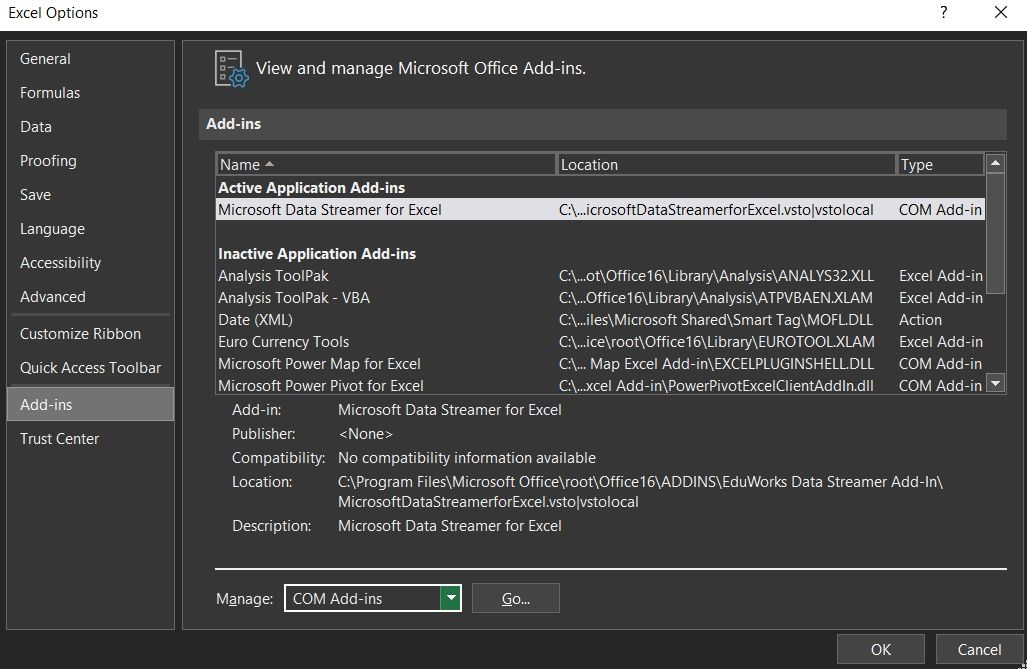
- Choose Options.
- Click on Add-ins from the left pane.
- Change Manage to COM Add-ins and click on Go.

- Select the add-in and click on OK to disable it.
Repeat the steps with each add-in. Once you find the culprit, remove it from Microsoft Excel.
8. Change the Trust Center Settings
If the problem in the question appears on opening an excel file from an email client, the Trust Centre setting is probably behind the problem. You’ll have to change the Trust Center to resolve the issue. Here’s how.
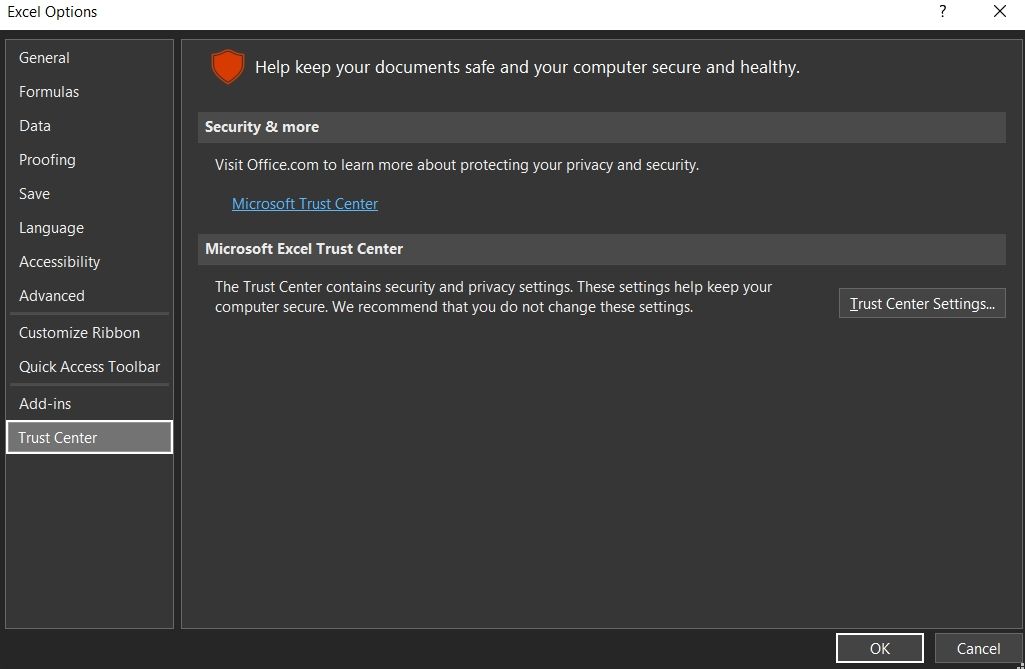
- Open Excel > Options.
- Choose the Trust Center option from the left pane.
- Click on Trust Center Settings.

- Choose Protected View.
- Uncheck all the options and click on OK.

- Come one step back and choose File Block Settings in the Trust Center.

- Uncheck all the boxes and click on OK.
Check if the problem is fixed or not.
9. Change the Dynamic Data Exchange Settings
If you still face the problem, consider changing the Dynamic Data Exchange (DDE) settings in Microsoft Excel. Here’s how.
- Open Excel > Options > Advanced.
- In the General section, uncheck the Ignore other application that use Dynamic Data Exchange (DDE) box.

- Click OK to save the changes.
Manage Excel Files With Ease
Hopefully, the above solutions helped resolve the issue. But if you still face the problem, consider reinstalling Microsoft Office.