HP MFP M438N ошибка #C3-1312
Сообщение
nicksun » 31 янв 2022, 10:59
Code: C3-1312, C3-1411, C3-1414
Display:
C3-1312, C3-1411, C3-1414 Imaging unit errors
Description:
– C3-1312, Error: #C3-1312 / Imaging Unit Failure: #C3-1312. Install IMG. Unit – C3-1411, IMG. Not Installed / Imaging unit is not installed. Install the unit – C3-1414, Error: #C3-1414 / Imaging Unit Failure: #C3-1414. Install imaging unit again
The imaging unit is not installed or not detected.
Remedy:
1. Open the front cover. Check if the imaging unit is installed. 2. Remove and reinstall the imaging unit. 3. If the error persists, check if the Imaging Unit connector is contaminated or deformed. £ If the connector is damaged, replace the Imaging Unit (HP Part #: CF257.67901). 4. If the error persists, replace the Imaging Unit (HP Part #: CF257.67901).
Модератор: vetal
-
-
Taskalfa 180 ошибка «Е» и «Встряхните картр. с тонером»
manik.76 в форуме Принтеры, МФУ, копиры формата A3
- 3
- 9657
dviz
Пн фев 20, 2017 1:35 pm
-
Taskalfa 180 ошибка «Е» и «Встряхните картр. с тонером»
-
-
«ошибка принтера HSYNC»
Sunat в форуме Xerox 3100 и иже с ним…
- 10
- 29024
Sunat
Сб май 10, 2014 6:19 am
-
«ошибка принтера HSYNC»
-
-
Samsung SCX 4300 V 1.15. Ошибка «Нет картриджа»
PrintFree в форуме Картриджи, их заправка и дефекты.
- 9
- 10375
С.Н.Н.
Пт авг 19, 2011 7:16 pm
-
Samsung SCX 4300 V 1.15. Ошибка «Нет картриджа»
-
-
Canon mf635cx ошибка «замятие»
belocarsk в форуме Принтеры, МФУ, факсы, копиры формата A4
- 8
- 5233
belocarsk
Пн мар 04, 2019 12:23 pm
-
Canon mf635cx ошибка «замятие»
-
-
BROTHER DCP-1512R ошибка «Фотобарабан !»
VIRT в форуме Принтеры, МФУ, факсы, копиры формата A4
- 1
- 3901
kvg
Чт сен 05, 2019 1:35 pm
-
BROTHER DCP-1512R ошибка «Фотобарабан !»
Вернуться в Принтеры, МФУ, факсы, копиры формата A4
Кто сейчас на форуме
Сейчас этот форум просматривают: нет зарегистрированных пользователей и гости: 124
hp-concentra-wrapper-portlet
Actions
This document provides error-code troubleshooting information
Legal information
Copyright and License
© Copyright 2022 HP Development Company, L.P.
Reproduction, adaptation, or translation without prior written permission is prohibited, except as allowed under the copyright
laws.
The information contained herein is subject to change without notice.
The only warranties for HP products and services are set forth in the express warranty statements accompanying such products
and services. Nothing herein should be construed as constituting an additional warranty. HP shall not be liable for technical
or editorial errors or omissions contained herein.
Edition 1.3, 11/2022
Trademark Credits
Adobe®, Adobe Photoshop®, Acrobat®, and PostScript® are trademarks of Adobe Systems Incorporated.
Apple and the Apple logo are trademarks of Apple Inc., registered in the U.S. and other countries.
macOS is a trademark of Apple Inc., registered in the U.S. and other countries.
AirPrint is a trademark of Apple Inc., registered in the U.S. and other countries.
Google™ is a trademark of Google Inc.
Microsoft®, Windows®, and Windows Server® are U.S. registered trademarks of Microsoft Corporation.
UNIX® is a registered trademark of The Open Group.
Document last updated
The following is the last time this document was updated:
Last update: November 11, 2022
About this document
This document provides error-code troubleshooting information. Procedures and part numbers change. For current information,
use the browser-based format.
Choose the format that best meets your needs.
|
Format |
Document title example |
Recommended use |
|---|---|---|
|
Browser-based |
[Product] — Control Panel Message Document (CPMD) |
|
|
|
[Product] — Control Panel Message Document (CPMD) PDF |
Note: Refer to the printer service manual for removal and replacement procedures. Note: For current information, use the browser-based format. |
Control-panel message types
The control-panel messages and error code entries indicate the current product status or situations that might require action.
Note:
The Error Information Report provides more detailed information on the error and does not appear on the control-panel display.
To print and view the Error Information Report perform the following:
-
Enter Tech Mode.
-
Select Information T
-
Select Report
-
Select Error Information
-
Select Print?
-
Then touchYes
A control-panel message displays temporarily and might require the user to acknowledge the message by touching the OK button to resume printing or by touching the Stop button to cancel the job. With certain messages, the job might not finish printing or the print quality might be affected.
If the message is related to printing and the auto-continue feature is on, the product will attempt to resume printing after
the message has appeared for 10 seconds without acknowledgment.
For some messages, restarting the product might fix the problem. If a critical error persists, the product might require service.
Error -code and control-panel-message troubleshooting overview
Learn how to troubleshoot error messages.
Error codes
Error codes and control-panel messages display on the printer control panel to indicate the current printer status or situations
that might require action. Error codes are numerical, or alphanumerical, and have a set structure with six characters (example:
A1-xxxx).
-
The first two characters are numeric and represent the system component that is causing the error. For example, in error code
A1-1211, A1 = Motor for these printers. -
The remaining four digits further define the error.
The CPMD is a comprehensive list of error codes, diagnostic and troubleshooting steps to clear or resolve the error, and other
helpful information such as service mode pins and part numbers.
The CPMD is continually updated and republished with the latest information for the following error codes.
|
Error code |
System Component |
System Error Description |
|---|---|---|
|
11-2Txx |
Tray- Paper |
Tray X paper mismatch |
|
A1-xxxx |
Motors |
Motor failure |
|
A2-xxxx |
Fans |
Fan rotation error |
|
A3-xxxx |
Sensors (non-paper path) |
Temp or humidity sensor error |
|
C1-xxxx |
Toner cartridge |
Toner cartridge relate error |
|
C3-xxxx |
Drum unit |
Drum unit related error |
|
C5-xxxx |
ITB Unit (Color printer) or Transfer roller (Mono printers) |
ITB Unit or Transfer roller life message |
|
C6-xxxx |
Fuser unit |
Fuser unit either not installed, wrong fuser or has been replaced |
|
C7-xxxx |
Waste toner |
Waste toner container error |
|
C8-xxxx |
Developer |
Developer unit error |
|
C9-xxxx |
Transfer roller |
Transfer roller error |
|
H1-xxxx |
Optional tray |
Optional paper tray error |
|
H2-xxxx |
Inner finisher |
Miscellaneous error including general and misprint or mismatch errors typically involving (but not limited to) the fuser, |
|
Mx-xxxx |
Paper Path/Paper Tray |
Paper path or paper tray sensor error (This includes tray empty, tray not installed and bin full |
|
Sx-xxxx |
System |
System error, Clock, Video, HDD MSOK, Supply checking |
|
U1-xxxx |
Fuser error |
Fuser error (Temp, voltage, or pressure control) |
|
U2-xxxx |
Laser/Scanner |
Laser/scanner error |
|
U3-xxxx |
Document feeder |
Document feeder error (Jams, loading or open) |
How to search for printer documentation
The CPMD, error codes, and other support documentation for each printer is found on the internal HP portals.
These portals are on WISE for Channel (please see Accessing WISE for HP channel partners (HP Partner Portal) below for instructions on how to navigate to the site) and WISE. WISE for Channel is available to HP channel partners and WISE is available to call agents, service technicians, and other
HP internal users. The level of detail available will depend on your access credentials. To learn how to find support content
in WISE, watch the video here.
WISE — How to access and use
Learn how to access and use Web-based Interactive Search Engines (WISE) to locate available support information. WISE is a
repository of technical support documentation including service manuals, user guides, videos, and general support information.
Accessing WISE
Learn how to access Web-based Interactive Search Engines (WISE) if you are an HP channel partner or an internal HP user.
Accessing WISE for HP channel partners (HP Partner Portal)
Learn how to access WISE by accessing the HP Partner Portal if you are an HP Channel Partner.
Note:
If this is your first visit to the HP Partner Portal, you will be asked to create an account. Follow the setup directions
using your HP Partner credentials.
-
-
Select the Services & Support tab, and then select Technical Support.
-
Select Technical Documentation.
-
You will be taken to the WISE portal.
Play the video:
Accessing WISE for internal HP users
Using WISE to search for error codes
Learn how to use WISE to look up error codes.
Note:
The model used in the instructional videos is an example. The same steps apply to all printer models.
You will need the printer type (e.g. HP LaserJet), model number (e.g. M607), and bundle option (e.g. dn, dh, z).
Search for error codes using the lookup widget
Learn how to search for a specific error code using the WISE Error Code Lookup widget.
-
Select Products in the navigation bar of the WISE portal home page.
-
Using the type, model number and bundle option of the printer to be repaired, select HP Printers
> Type of Printer >
Model Group > Model Number >
Bundle Option >
Product Number, and then select Launch Product Detail Page. The PDP page will open. -
Enter the error code in the widget in the Error Code Lookup area at the bottom-right of the screen and click the search icon or press the Enter button.
-
Select the desired topic from the search results.
Search for error codes from the WISE home page
Learn how to search for a specific error code from the WISE home page.
-
Enter the model number in the search field on the WISE home page. The search is predictive, and a drop-down menu will appear
with available selections.Note:
Selecting the series item from the drop-down list is recommended for the most accurate search return.
-
Enter the error code in the search field.
-
Select the desired topic from the search results.
Using WISE to access repair and replace videos for FRUs
Learn how to use WISE to access repair and replace videos for FRUs.
Note:
The model used in the instructional videos is an example. The same steps apply to all printer models.
You will need the printer type (e.g. HP LaserJet), model number (e.g. M607), and bundle option (e.g. dn, dh, z).
Search for a printer’s Product Detail Page (PDP)
Learn how to search WISE for product specific information. Quickly review the steps and then play the video.
-
Select Products in the navigation bar of the WISE portal home page.
-
Using the type, model number and bundle option of the printer to be repaired, select HP Printers > Type of Printer > Model Group > Model Number > Bundle Option > Product Number, and then select Launch Product Detail Page. The PDP page will open.
-
Select the link to Videos in the Other Content menu at the bottom-right of the screen.
-
Select the desired video from the list of videos.
Play the video:
Perform a model number search using the search function
Learn how to search WISE using the model number. Quickly review the steps and then play the video.
-
Enter the model number in the search field on the WISE home page. The search is predictive, and a drop-down menu will appear
with available selections.Note:
Selecting the series item from the drop-down list is recommended for the most accurate search return.
-
Click the search icon to the right.
-
To refine the search results, select the radio button labeled video in the upper-right portion of the screen.
Tip:
To refine video search results, append a part name to the model detail shown in the search bar. For example, adding the word
fuser to the detail in the search bar will return videos related to repair and replacement of the fuser.
Play the video:
Printer service information
Last update: November 11, 2022
Service mode PIN numbers:
-
M433, M436
: 10043616 -
M437, M438, M439, M440, M442, M443, M42523, M42623
: 10043616
To enter tech mode:
-
Touch the following in sequence:
-
When Tech Menu is displayed, touch OK.
Numerical control panel messages
Use the following numerical error message troubleshooting to resolve your issue.
11-XXXX error messages
A1-XXXX error messages
A2-XXXX error messages
A3-XXXX error messages
C1-XXXX error messages
C3-XXXX error messages
C9-XXXX error messages
H1-XXXX error messages
M1-XXXX error messages
M2-XXXX error messages
M3-XXXX error messages
S2-XXXX error messages
S3-XXXX error messages
S6-XXXX error messages
U1-XXXX error messages
U2-XXXX error messages
U3-XXXX error messages
11-2Txx Paper mismatch Tray X
Mismatch paper size in tray X.
Paper in tray is not matched to the printer paper setting.
-
11-2T11 — Tray 2 paper mismatch
-
11-2T21 — Tray 3 paper mismatch
Recommended action for customers
-
If you want to print on the current paper, press «OK«. If not, select «X» and change the paper.
-
Ensure that the tray width guides are set to the correct paper size being installed into the tray. The arrow on the guide
should line up exactly with the line connected to the paper size designation. Ensure that the tray is not filled above the
fill mark on the tray. -
If the error persists, contact your HP-authorized service or support provider, or contact customer support at www.hp.com/go/contactHP.
11-2T61 Paper mismatch Tray 1 Load [A4] [Plain] Continue ⊙ Cancel X or Load tray 1 with [Letter], [Plain] paper
Paper mismatch error in the MP Tray 1.
Paper in tray is not matched to the machine paper setting.
Recommended action for customers
-
If you want to print on the current paper, press «OK«. If not, select «X» and change the paper.
-
Ensure that the tray guides on the MP Tray are set correctly.
-
Ensure the paper type and size is set correctly for the multipurpose tray 1.
To change the menu options, press the Menu
button. On the display screen, select .
-
If the error persists, contact your HP-authorized service or support provider, or contact customer support at www.hp.com/go/contactHP.
A1-1110 Motor Failure
Main Motor Failure: #A1-1110. Turn off and then on. Call for service if the problem persists.
Harness or main BLDC motor or main board is defective.
Recommended action for customers
Follow these troubleshooting steps in the order presented.
-
Turn the printer off, and then on.
-
If the error persists, contact your HP-authorized service or support provider, or contact customer support at www.hp.com/go/contactHP.
A1-5513 Motor Failure
Supply Motor Failure: #A1-5513. Turn off then on.
The motor related to toner supply has experienced a problem.
Recommended action for customers
Follow these troubleshooting steps in the order presented.
-
Turn the printer off, and then on.
-
If the error persists, contact your HP-authorized service or support provider, or contact customer support at www.hp.com/go/contactHP.
A2-1210 Error: #A2-1210 / Fan Failure
Fan Failure: #A2-1210. Turn off then on. Call for service if the problem persists.
Switching mode power supply (SMPS) fan error.
The fan does not operate or the fan signal is abnormal.
Recommended action for customers
Follow these troubleshooting steps in the order presented.
-
Turn the printer off, and then on.
-
If the error persists, contact your HP-authorized service or support provider, or contact customer support at www.hp.com/go/contactHP.
A2-2110 Error: #A2-2110 / Fan Failure
Fuser Fan Failure: Error: #A2-2110 / Fan Failure: #A2-2110. Turn off then on. Call for service if the problem persists
Fuser fan does not operate.
Recommended action for customers
Follow these troubleshooting steps in the order presented.
-
Turn the printer off, and then on.
-
If the error persists, contact your HP-authorized service or support provider, or contact customer support at www.hp.com/go/contactHP.
A3-3311, A3-3312, A3-3320, A3-3411, A3-3412 Sensor error
Temperature/Humidity sensor is defective.
-
A3-3311, Error: #A3-3311 / Sensor Failure: #A3-3311. Turn off then on. Call for service if the problem persists
-
A3-3312, Error: #A3-3312 / Sensor Failure: #A3-3312. Turn off then on. Call for service if the problem persists
-
A3-3320, Not proper Room Temp / The room temperature is not suitable for this set use. Please adjust room temperature
-
A3-3411, Error: #A3-3411 / Sensor Failure: #A3-3411. Turn off then on. Call for service if the problem persists
-
A3-3412, Error: #A3-3412 / Sensor Failure: #A3-3412. Turn off then on. Call for service if the problem persists
Recommended action for customers
Follow these troubleshooting steps in the order presented.
-
Turn the printer off, and then on.
-
If the error persists, contact your HP-authorized service or support provider, or contact customer support at www.hp.com/go/contactHP.
C1-1110 / C1-111A
Toner remaining is 5 ~ 30% of its life.
The printer indicates when the toner supply level is low. Actual cartridge life might vary. You do not need to replace the
cartridge at this time unless print quality is no longer acceptable. The toner is expected to run short soon because the remaining
toner is reaching 0%.This error occurs every time that you try to use the printer.
-
C1-1110, Prepare new toner / Prepare new toner cartridge
-
C1-111A, Shake toner cart. / Shake toner cartridge and then install. Replace toner cartridge if the problem persists
Recommended action for customers
-
Check the life remaining of the toner cartridge.
-
Select on the control panel.
-
Select the option you want and press OK.
-
Press the Stop button to return to ready mode.
-
-
To shake the toner cartridge and redistribute the toner.
-
Open front door
-
Remove toner cartridge
-
Shake the toner cartridge horizontally to distribute the toner evenly inside the cartridge.
-
Reinstall the toner cartridge.
-
Close the front door.
-
If the toner cartridge yield is expired, replace the toner cartridge.
Note:
After an HP supply has reached the very low threshold, the HP Premium Protection Warranty ends and the customer is responsible
for replacing the supply.Part numbers
Item Description
Cartridge number
Part Number
Black Original LaserJet Toner Cartridge
China (IT Channel)
HP 333A
W1333A
High Yield Black Original LaserJet Toner Cartridge
China (IT Channel)
HP 333X
W1333X
Black Original LaserJet Toner Cartridge
China (OA Channel)
HP 334A
W1334A
High Yield Black Original LaserJet Toner Cartridge
China (OA Channel)
HP 334X
W1334X
Black Original LaserJet Toner Cartridge
Rest of AP and EMEA (IT Channel)
HP 335A
W1335A
High Yield Black Original LaserJet Toner Cartridge
Rest of AP and EMEA (IT Channel)
HP 335X
W1335X
Black Original LaserJet Toner Cartridge
Rest of APJ (OA Channel)
HP 336A
W1336A
High Yield Black Original LaserJet Toner Cartridge
Rest of APJ (OA Channel)
HP 336X
W1336X
C1-1140 / C1-1160 / C1-1160 Toner error
The toner cartridge is at the end of its life.
The black toner cartridge is empty. The printer cannot draw toner from the toner cartridge.
The remaining volume is 0% (cartridge lifespan surpassed). This error occurs every time that you try to use the printer.
-
C1-1140, Replace new toner / End of life, Replace with new toner cartridge
-
C1-1160, Replace new toner / Replace with new toner cartridge
-
C1-1170, Replace new toner / End of life, Replace with new toner cartridge
Recommended action for customers
-
Replace the toner cartridge.
-
Open the front cover.
-
Remove the toner cartridge.
-
Install the new toner cartridge.
-
Close the front cover.
Note:
After an HP supply has reached the very low threshold, the HP Premium Protection Warranty ends and the customer is responsible
for replacing the supply.Part numbers
Item Description
Cartridge number
Part Number
Black Original LaserJet Toner Cartridge
China (IT Channel)
HP 333A
W1333A
High Yield Black Original LaserJet Toner Cartridge
China (IT Channel)
HP 333X
W1333X
Black Original LaserJet Toner Cartridge
China (OA Channel)
HP 334A
W1334A
High Yield Black Original LaserJet Toner Cartridge
China (OA Channel)
HP 334X
W1334X
Black Original LaserJet Toner Cartridge
Rest of AP and EMEA (IT Channel)
HP 335A
W1335A
High Yield Black Original LaserJet Toner Cartridge
Rest of AP and EMEA (IT Channel)
HP 335X
W1335X
Black Original LaserJet Toner Cartridge
Rest of APJ (OA Channel)
HP 336A
W1336A
High Yield Black Original LaserJet Toner Cartridge
Rest of APJ (OA Channel)
HP 336X
W1336X
-
-
If the error persists, please contact customer support.
C1-1313 / C1-1314 Toner error
Shake toner cartridge and then install.
Toner supply is inefficient or abnormal.
The toner supply in the toner cartridge is malfunctioning. The toner sensor indicates that the toner in the development unit
is insufficient.
The toner sensor indicates that the toner in the development unit is insufficient. There is no toner in the toner cartridge
or the toner supply line is blocked. A circuit fault such as a fault in the toner supply motor or the toner sensor occurs.
-
C1-1313, Shake toner cart. / Shake toner cartridge and then install. Call for service if the problem persists
-
C1-1314, Remove seal tape / Did not supply enough toner. Remove seal tape of toner cartridge or shake it. Call for service if the
problem persists
Recommended action for customers
-
To shake the toner cartridge and redistribute the toner.
-
Open front door
-
Remove toner cartridge
-
Shake the toner cartridge horizontally to distribute the toner evenly inside the cartridge.
-
Check if the seal tape is removed. If not, remove it.
-
Reinstall the toner cartridge.
-
Close the front door.
-
If the error persists, contact your HP-authorized service or support provider, or contact customer support at www.hp.com/go/contactHP.
C1–1411 Toner Not Installed / Toner cartridge is not installed. Install it
The toner cartridge is not installed or is installed incorrectly.
The toner cartridge is not installed. / The CRUM data is not detected.
Recommended action for customers
-
Open the front cover. Check if the toner cartridge is installed.
-
Remove and reinstall the toner cartridge.
-
If the error persists, check if the toner cartridge modular jack is contaminated or deformed.
-
Remove the toner cartridge.
-
Check the module jack on the toner cartridge.
-
If it is damaged or deformed, replace the toner cartridge.
Part numbers
Item Description
Cartridge number
Part Number
Black Original LaserJet Toner Cartridge
China (IT Channel)
HP 333A
W1333A
High Yield Black Original LaserJet Toner Cartridge
China (IT Channel)
HP 333X
W1333X
Black Original LaserJet Toner Cartridge
China (OA Channel)
HP 334A
W1334A
High Yield Black Original LaserJet Toner Cartridge
China (OA Channel)
HP 334X
W1334X
Black Original LaserJet Toner Cartridge
Rest of AP and EMEA (IT Channel)
HP 335A
W1335A
High Yield Black Original LaserJet Toner Cartridge
Rest of AP and EMEA (IT Channel)
HP 335X
W1335X
Black Original LaserJet Toner Cartridge
Rest of APJ (OA Channel)
HP 336A
W1336A
High Yield Black Original LaserJet Toner Cartridge
Rest of APJ (OA Channel)
HP 336X
W1336X
-
-
If the error persists, contact your HP-authorized service or support provider, or contact customer support at www.hp.com/go/contactHP.
C1–1512 Toner Not Compatible / Toner cartridge is not compatible. Check guide
The toner cartridge is not compatible with the printer.
Recommended action for customers
-
Open the front cover. Remove the toner cartridge.
-
Replace the toner cartridge with the correct toner cartridge for the printer.
-
If a genuine HP supply is not installed, replace it with a new HP supply.
Part numbers
Item Description
Cartridge number
Part Number
Black Original LaserJet Toner Cartridge
China (IT Channel)
HP 333A
W1333A
High Yield Black Original LaserJet Toner Cartridge
China (IT Channel)
HP 333X
W1333X
Black Original LaserJet Toner Cartridge
China (OA Channel)
HP 334A
W1334A
High Yield Black Original LaserJet Toner Cartridge
China (OA Channel)
HP 334X
W1334X
Black Original LaserJet Toner Cartridge
Rest of AP and EMEA (IT Channel)
HP 335A
W1335A
High Yield Black Original LaserJet Toner Cartridge
Rest of AP and EMEA (IT Channel)
HP 335X
W1335X
Black Original LaserJet Toner Cartridge
Rest of APJ (OA Channel)
HP 336A
W1336A
High Yield Black Original LaserJet Toner Cartridge
Rest of APJ (OA Channel)
HP 336X
W1336X
-
If the toner cartridge is a genuine HP supply and the error persists, contact your HP-authorized service or support provider,
or contact customer support at www.hp.com/go/contactHP. support.
C1-1711 or C1-1712 Error
The toner cartridge is not installed. / The CRUM data is not detected.
-
C1-1711, Error: #C1-1711 / Toner Cart Failure: #C1-1711. Call for service
-
C1-1712, Error: #C1-1712 / Toner Cart Failure: #C1-1712. Call for service
Recommended action for customers
-
Open the front cover. Check if the toner cartridge is installed.
-
Remove and reinstall the toner cartridge.
-
If the error persists, check if the toner cartridge modular jack is contaminated or deformed.
-
Remove the toner cartridge.
-
Check the module jack on the toner cartridge.
-
If it is damaged or deformed, replace the toner cartridge.
Part numbers
Item Description
Cartridge number
Part Number
Black Original LaserJet Toner Cartridge
China (IT Channel)
HP 333A
W1333A
High Yield Black Original LaserJet Toner Cartridge
China (IT Channel)
HP 333X
W1333X
Black Original LaserJet Toner Cartridge
China (OA Channel)
HP 334A
W1334A
High Yield Black Original LaserJet Toner Cartridge
China (OA Channel)
HP 334X
W1334X
Black Original LaserJet Toner Cartridge
Rest of AP and EMEA (IT Channel)
HP 335A
W1335A
High Yield Black Original LaserJet Toner Cartridge
Rest of AP and EMEA (IT Channel)
HP 335X
W1335X
Black Original LaserJet Toner Cartridge
Rest of APJ (OA Channel)
HP 336A
W1336A
High Yield Black Original LaserJet Toner Cartridge
Rest of APJ (OA Channel)
HP 336X
W1336X
-
-
If the error persists, contact your HP-authorized service or support provider, or contact customer support at www.hp.com/go/contactHP.
C3-1110 Prepare IMG. Unit / Prepare new imaging unit
The drum unit is approaching the end of its lifespan.
Imaging unit remained is 5 ~ 30% of its life.
Recommended action for call-center agents and onsite technicians
-
The life of the drum unit will be or is expired. prepare a new drum unit.
Note:
The life of the Imaging Unit is approximately 80k pages.
-
If the print quality is no longer acceptable replace the imaging drum unit.
Part number: CF257A
-
Remove imaging drum unit from shipping bag and place it on a clean flat surface.
-
Loosen shipping tape from the bottom and both sides.
-
Remove orange shipping locks from imaging drum unit.
Note:
There shipping locks on each side of the imaging drum unit.
-
Remove remaining shipping tape and pull protective sheet from imaging drum unit.
CAUTION:
Do not touch exposed drum roller surface.
Note:
Do not expose the imaging unit to light for more than a few minutes.
-
Remove orange plug on back of imaging drum unit.
CAUTION:
Once the plug is removed, the imaging drum unit must remain level. Contents may spill out if the imaging drum unit is tipped.
-
Open the front and right doors.
CAUTION:
Leave front and right door open until all installation steps are complete.
-
With right and front doors fully open, carefully lift imaging unit into position, so the bottom of imaging drum unit aligns
with the raised alignment rails inside printer cabinet as shownCAUTION:
Do not touch exposed drum roller surface.
-
Install imaging drum unit and ensure it is fully seated.
Note:
If imaging unit binds or does not slide easily into cabinet, verify the right door is fully open, realign imaging drum unit,
and install. -
Route the electrical cable into holder as shown and plug in the connector.
CAUTION:
Make sure the connector is fully seated in the socket.
-
Install two screws as shown.
-
Ensure electrical connector is plugged in and fully seated. Ensure the two screws are securely installed.
-
Close the front and right doors.
C3-1140 or C3-1170 Imaging unit error
The imaging unit has almost reached the end of life.
The drum/imaging unit is past its usable life and needs to be replaced. Replace with new imaging unit
-
C3-1140, Replace IMG. Unit / End of life, Replace with new imaging unit
-
C3-1170, Replace IMG. Unit / End of life, Replace with new imaging unit
Recommended action for call-center agents and onsite technicians
-
Check the life remaining of the imaging drum unit.
Note:
The life of the Imaging Unit is approximately 80k pages.
-
If its life is at the end, have the customer purchase a new imaging drum unit
Part number: CF257A, CF257-67902
-
Remove imaging drum unit from shipping bag and place it on a clean flat surface.
-
Loosen shipping tape from the bottom and both sides.
-
Remove orange shipping locks from imaging drum unit.
Note:
There shipping locks on each side of the imaging drum unit.
-
Remove remaining shipping tape and pull protective sheet from imaging drum unit.
CAUTION:
Do not touch exposed drum roller surface.
Note:
Do not expose the imaging unit to light for more than a few minutes.
-
Remove orange plug on back of imaging drum unit.
CAUTION:
Once the plug is removed, the imaging drum unit must remain level. Contents may spill out if the imaging drum unit is tipped.
-
Open the front and right doors.
CAUTION:
Leave front and right door open until all installation steps are complete.
-
With right and front doors fully open, carefully lift imaging unit into position, so the bottom of imaging drum unit aligns
with the raised alignment rails inside printer cabinet as shownCAUTION:
Do not touch exposed drum roller surface.
-
Install imaging drum unit and ensure it is fully seated.
Note:
If imaging unit binds or does not slide easily into cabinet, verify the right door is fully open, realign imaging drum unit,
and install. -
Route the electrical cable into holder as shown and plug in the connector.
CAUTION:
Make sure the connector is fully seated in the socket.
-
Install two screws as shown.
-
Ensure electrical connector is plugged in and fully seated. Ensure the two screws are securely installed.
-
Close the front and right doors.
C3-1312, C3-1411, C3-1414
The imaging unit is not installed. / The CRUM data is not detected.
-
C3-1312, Error: #C3-1312 / Imaging Unit Failure: #C3-1312. Install IMG. Unit
-
C3-1411, IMG. Not Installed / Imaging unit is not installed. Install the unit
-
C3-1414, Error: #C3-1414 / Imaging Unit Failure: #C3-1414. Install imaging unit again
C3-1512 IMG. Not compatible / Imaging unit is not compatible. Check guide
Imaging unit is not installed. Install the unit.
The imaging unit has an invalid CRUM.
Recommended action
-
Open the front cover. Remove the toner cartridge.
-
Remove the imaging drum unit.
-
Check the part number of the installed imaging drum unit. (HP part numbers are and
Part numbers: CF257A, CF257-67902
For instructions:
-
If the imaging drum unit is not an HP genuine supply, the customer must purchase a new imaging drum unit.
Part number: CF257A
For instructions:
C3-1711, C3-1712 Imaging unit errors
Imaging unit is not installed. Install the unit.
The imaging/drum unit is not installed. / The data of CRUM is not detected.
-
C3-1711, Error: #C3-1711 / Imaging Unit Failure: #C3-1711. Call for service
-
C3-1712, Error: #C3-1712 / Imaging Unit Failure: #C3-1712. Call for service
C9-2210, C9-2120 Prepare TR. Roller / Prepare with new transfer roller
Transfer roller is at the end of its life.
Replace with new transfer roller
Recommended action for customers
-
Replace the transfer roller.
-
Open the side cover.
-
Replace the transfer roller with a new one.
Part number: W7U01-67901
Note:
After an HP supply has reached the very low threshold, the HP Premium Protection Warranty ends and the customer is responsible
for replacing the supply. -
Close the side cover.
-
C9-2220 Error: #C9-2220 / TR Failure: #C9-2220. Install TR roller again
Transfer roller is at the end of its life.
Recommended action for customers
-
Replace the transfer roller.
-
Open the side cover.
-
Replace the transfer roller with a new one.
Part number: W7U01-67901
Note:
After an HP supply has reached the very low threshold, the HP Premium Protection Warranty ends and the customer is responsible
for replacing the supply. -
Close the side cover.
-
H1-1210 Jam in Tray 3
A paper jam occurred in tray 3.
Paper jam has occurred in tray 3. (Pickup roller is worn out.)
Recommended action for customers
-
Open the lower-right jam cover.
-
Gently pull out any jammed paper.
-
Close the lower-right jam cover.
-
Pull the tray completely out of the printer by pulling and lifting it up slightly.
-
Remove any jammed or damaged sheets of paper. Verify that the tray is not overfilled and that the paper guides are adjusted
correctly. -
With the tray out, check if the paper pickup roller is worn or contaminated. Clean the roller the a water dampened lint free
cloth. -
Open the right door.
-
Gently pull out any jammed paper.
-
Close the right door.
-
If the error persists, contact your HP-authorized service or support provider, or contact customer support at www.hp.com/go/contactHP.
H1-1220
Tray 3 cassette is pulled out.
Tray 3 is open. Close it
Recommended action for customers
-
Remove and insert tray 3 correctly.
-
Turn the printer off, and then on.
-
If the error persists, contact your HP-authorized service or support provider, or contact customer support at www.hp.com/go/contactHP.
H1-1230 Input System Failure: #H1-1230. Check tray 3 connection
Communication error has occurred between the copier and SCF.
Recommended action for customers
Follow these troubleshooting steps in the order presented.
-
Turn the printer off, and then on.
-
If the error persists, contact your HP-authorized service or support provider, or contact customer support at www.hp.com/go/contactHP.
H1-1352 / H1-1354 Paper empty in tray 3 / Paper is empty in tray 3. Load paper
Paper is low in Tray 3. Load paper.
Paper in the tray is less than 10% of specification. / The photo sensor is not functioning correctly.
Recommended action for customers
-
Load the correct size paper in the tray.
-
Ensure that the tray is loaded and installed correctly.
-
If the error persists, contact your HP-authorized service or support provider, or contact customer support at www.hp.com/go/contactHP.
M1-1110 Paper jam in tray 2
Paper jam in Tray 2. Please remove the paper
A paper jam has occurred in Tray 2.
Recommended action for customers
-
Pull the tray completely out of the printer by pulling and lifting it up slightly.
-
Remove any jammed or damaged sheets of paper. Verify that the tray is not overfilled and that the paper guides are adjusted
correctly. -
Gently remove any paper from the feed rollers inside the printer. First pull the paper to the left to release it, and then
pull it forward to remove it. -
With the tray out, check and clean the paper rollers in the tray with a damp lint free cloth.
-
Install and close the tray.
-
Open the right door.
-
Gently pull out any jammed paper.
-
Close the right door.
-
If the error persists, contact your HP-authorized service or support provider, or contact customer support at www.hp.com/go/contactHP.
M1–1610 Paper jam in MP tray 1
Paper jam in MP tray 1. Please remove the paper
A paper jam has occurred in tray 1.
Recommended action for customers
-
If jammed paper is visible in Tray 1, clear the jam by gently pulling the paper straight out.
-
Open the right door.
-
Gently pull out any jammed paper.
-
Close the right door.
-
If the error persists, contact your HP-authorized service or support provider, or contact customer support at www.hp.com/go/contactHP.
M1-5112, M1-5113 Paper empty in tray 2 / Paper is empty in tray 2. Load paper
Paper is low in Tray 2. Load paper. Paper is empty in Tray 2. Load paper.
Paper in the tray 2 is less than 10%. / The photo sensor is defective.
Recommended action for customers
-
Load the correct size paper in the tray.
-
Ensure that the tray is loaded and installed correctly.
-
If the error persists, contact your HP-authorized service or support provider, or contact customer support at www.hp.com/go/contactHP.
M1–5120 All Trays Empty / Paper is empty in all trays. Load paper
Paper in the all tray is less than 10% of specification. / The photo sensor is defective.
Recommended action for customers
-
Load the correct size paper in the tray.
-
Ensure that the tray is loaded and installed correctly.
-
If the error persists, contact your HP-authorized service or support provider, or contact customer support at www.hp.com/go/contactHP.
M1-5610, Paper Normal in tray 1
Paper on MP tray 1 is normal.
M1-5612 Paper empty in tray 1 / Paper is empty in tray 1. Load paper
Paper is empty in tray 1. Load paper.
Paper in the MP tray is empty. The photo sensor is defective.
Recommended action for customers
-
Load the correct size paper in the tray.
-
Ensure that the tray is loaded and installed correctly.
-
If the error persists, contact your HP-authorized service or support provider, or contact customer support at www.hp.com/go/contactHP.
M2-1110, M2-2210 Paper jam inside of machine.
Paper jam inside of machine. Please remove the paper
-
M2-1110, Jam inside machine
-
M2-2210, Jam inside of duplex
Recommended action for customers
-
Open the right side cover.
-
Open the jam guide and remove the jammed paper.
-
Open the fuser jam cover and remove the jammed paper.
CAUTION:
The fuser area is hot. Take care when removing paper from the printer.
-
Close the right door.
-
If the error persists, contact your HP-authorized service or support provider, or contact customer support at www.hp.com/go/contactHP.
M3–1110 Jam in exit area
Paper jam in exit area. Please remove the paper; Paper jam inside of machine. Please remove the paper
Recommended action for customers
-
Open the right side cover.
-
Open the jam guide and remove the jammed paper.
-
Open the fuser jam cover and remove the jammed paper.
CAUTION:
The fuser area is hot. Take care when removing paper from the printer.
-
Close the right door.
-
If the error persists, contact your HP-authorized service or support provider, or contact customer support at www.hp.com/go/contactHP.
S2-3110 Waiting for low temp / Waiting delay time for lower fixing temperature…
The printer is stopped because the temperature of the fuser unit is in abnormal status.
Recommended action
-
Please wait. This error will disappear.
S2-3321 Supplying Toner / Supplying and mixing toner to developer unit. Please wait…
Toner is being supplied to the developer unit.
Recommended action
-
No action needed. Wait until error disappears.
S2-3421 Calibrating density / Calibrating image density. Please wait…
The printer is calibrating.
Recommended action
-
No action needed. Wait until error disappears.
S2–4210 Front door is open. Close it
Front door is open. Close it.
Front cover is open or the cover open sensor is defective.
Recommended action for customers
-
Close the cover.
-
If the error persists, open and close the cover and ensure it is correctly closed.
-
If the error persists, contact your HP-authorized service or support provider, or contact customer support at www.hp.com/go/contactHP.
S2–4410 Right door is open. Close it
Right door is open. Close it.
Side cover is open or the cover open sensor is defective.
Recommended action for customers
-
Close the cover.
-
If the error persists, open and close the cover and ensure it is correctly closed.
-
If the error persists, contact your HP-authorized service or support provider, or contact customer support at www.hp.com/go/contactHP.
S3-3211
Automatic document feeder communication error.
Communication error occurred between the automatic document feeder and the PBA.
Recommended action for customers
Follow these troubleshooting steps in the order presented.
-
Turn the printer off, and then on.
-
If the error persists, contact your HP-authorized service or support provider, or contact customer support at www.hp.com/go/contactHP.
S3-3122 Scanner Locked / Scanner is locked. Press Stop button
Scanner lock error has occurred. scanner image bar does not move.
Recommended action for customers
Follow these troubleshooting steps in the order presented.
-
Turn the printer off, and then on.
-
If the error persists, contact your HP-authorized service or support provider, or contact customer support at www.hp.com/go/contactHP.
S6-3123 IP Conflict / This IP address conflicts with that of other system
IP address conflicts with that of other system. / There is no response when checking the ping test.
Recommended action
-
Change the printer’s IP address.
-
Set-up the IP address in this order, Network -> TCP/IP (IPv4) -> STATIC.
-
In case of DHCP or Bootp, reboot the printer to receive a new IP address.
-
-
Check the setting-up for 802.1x confirmation server.
U1-2132, U1-2315, U1-2320, U1-2330, U1-2334, U1-2340, U1-234H Fuser unit failure errors
Fuser Unit Failure: #U1-2xxx Turn off then on.
The thermistor can’t measure temperature. The hear-roller will not heat-up. / Temperature of the fuser increases abnormally.
-
U1-2132, Error: #U1-2132 / Fuser Unit Failure: #U1-2132. Turn off then on. Call for service if the problem persists
-
U1-2315, Error: #U1-2315 / Fuser Unit Failure: #U1-2315. Turn off then on. Call for service if the problem persists
-
U1-2320, Error: #U1-2320 / Fuser Unit Failure: #U1-2320. Turn off then on. Call for service if the problem persists
-
U1-2330, Error: #U1-2330 / Fuser Unit Failure: #U1-2330. Turn off then on. Call for service if the problem persists
-
U1-2334, Error: #U1-2334 / Fuser Unit Failure: #U1-2334. Turn off then on. Call for service if the problem persists
-
U1-2340, Error: #U1-2340 / Fuser Unit Failure: #U1-2340. Turn off then on. Call for service if the problem persists
-
U1-234H, Error: #U1-234H / Fuser Unit Failure: #U1-234H. Turn off then on. Call for service if the problem persists
Recommended action for customers
Follow these troubleshooting steps in the order presented.
-
Turn the printer off, and then on.
-
If the error persists, contact your HP-authorized service or support provider, or contact customer support at www.hp.com/go/contactHP.
U2-1111, U2-1112, U2-1113, U2-1114 LSU failure errors
LSU Failure: #U2-111x Turn off then on. Call for service if the problem persists
Hsync signal of the LSU is abnormal.
-
U2-1111, Error: #U2-1111 / LSU Failure: #U2-1111.Turn off then on. Call for service if the problem persists
-
U2-1112, Error: #U2-1112 / LSU Failure: #U2-1112.Turn off then on. Call for service if the problem persists
-
U2-1113, Error: #U2-1113 / LSU Failure: #U2-1113.Turn off then on. Call for service if the problem persists
-
U2-1114, Error: #U2-1114 / LSU Failure: #U2-1114.Turn off then on. Call for service if the problem persists
Recommended action for customers
Follow these troubleshooting steps in the order presented.
-
Turn the printer off, and then on.
-
If the error persists, contact your HP-authorized service or support provider, or contact customer support at www.hp.com/go/contactHP.
U3-3211, U3-3213, U3-3214, U3-3311, U3-3313, U3-3314 Original paper jam / Original paper jam inside of scanner. Remove jam
Original paper jam inside of automatic document feeder.
Jam has occurred inside the automatic document feeder unit.
Recommended action for customers
-
Open the document-feeder cover.
-
Gently remove any jammed paper.
-
Open the duplex/exit access cover and remove any paper present.
-
Lift the input tray and remove any paper found in the exit area.
-
Use a moist, lint-free cloth to wipe both pickup rollers and the separation pad to remove dirt.
CAUTION:
Do not use abrasives, acetone, benzene, ammonia, ethyl alcohol, or carbon tetrachloride on any part of the printer; these
can damage the printer. Do not place liquids directly on the glass or platen. They might seep and damage the printer. -
Close the document-feeder cover.
-
If the error persists, contact your HP-authorized service or support provider, or contact customer support at www.hp.com/go/contactHP.
U3-3411, U3-3413, U3-3414 Original paper jam / Original paper jam inside of scanner. Remove jam
Original paper jam inside of automatic document feeder.
Jam has occurred inside the automatic document feeder unit.
Recommended action for customers
-
Open the document-feeder cover.
-
Gently remove any jammed paper.
-
Open the duplex/exit access cover and remove any paper present.
-
Lift the input tray and remove any paper found in the exit area.
-
Use a moist, lint-free cloth to wipe both pickup rollers and the separation pad to remove dirt.
CAUTION:
Do not use abrasives, acetone, benzene, ammonia, ethyl alcohol, or carbon tetrachloride on any part of the printer; these
can damage the printer. Do not place liquids directly on the glass or platen. They might seep and damage the printer. -
Close the document-feeder cover.
-
If the error persists, contact your HP-authorized service or support provider, or contact customer support at www.hp.com/go/contactHP.
U3-3511, U3-3513, U3-3514 Original paper jam / Original paper jam inside of scanner. Remove jam
Original paper jam inside of scanner.
Jam has occurred inside the automatic document feeder unit.
Recommended action for customers
-
Open the document-feeder cover.
-
Gently remove any jammed paper.
-
Open the duplex/exit access cover and remove any paper present.
-
Lift the input tray and remove any paper found in the exit area.
-
Use a moist, lint-free cloth to wipe both pickup rollers and the separation pad to remove dirt.
CAUTION:
Do not use abrasives, acetone, benzene, ammonia, ethyl alcohol, or carbon tetrachloride on any part of the printer; these
can damage the printer. Do not place liquids directly on the glass or platen. They might seep and damage the printer. -
Close the document-feeder cover.
-
If the error persists, contact your HP-authorized service or support provider, or contact customer support at www.hp.com/go/contactHP.
U3-3711, U3-3713, U3-3714 Original paper jam / Original paper jam inside of scanner. Remove jam
Original paper jam / Original paper jam inside of automatic document feeder. Remove jam
Jam has occurred inside the automatic document feeder unit.
Recommended action for customers
-
Open the document-feeder cover.
-
Gently remove any jammed paper.
-
Open the duplex/exit access cover and remove any paper present.
-
Lift the input tray and remove any paper found in the exit area.
-
Use a moist, lint-free cloth to wipe both pickup rollers and the separation pad to remove dirt.
CAUTION:
Do not use abrasives, acetone, benzene, ammonia, ethyl alcohol, or carbon tetrachloride on any part of the printer; these
can damage the printer. Do not place liquids directly on the glass or platen. They might seep and damage the printer. -
Close the document-feeder cover.
-
If the error persists, contact your HP-authorized service or support provider, or contact customer support at www.hp.com/go/contactHP.
U3–4210 Scanner door open / Top door of scanner is open. Close the door
Automatic document feeder cover is open.
Recommended action for customers
-
Ensure the document-feeder cover is closed correctly.
-
If the error persists, contact your HP-authorized service or support provider, or contact customer support at www.hp.com/go/contactHP.
МФУ HP LaserJet MFP M433, M436, M437, M438, M439, M440, M442, M443, M42523, M42525, M42623, M42625 — Общие сведения об отображаемых сообщениях
На дисплее панели управления отображаются сообщения, указывающие состояние или ошибки устройства. В приведенной ниже таблице приведены общие сведения о сообщениях и их значения, а также действия по устранению проблемы, при необходимости.
Примечание.
Можно устранить ошибку, следуя инструкциям в окне состояния печати на компьютере.
Если сообщение отсутствует в таблице, перезагрузите питание и повторно попробуйте выполнить задание печати. Если устранить проблему не удалось, обратитесь к специалисту службы поддержки.
При обращении в службу поддержки сообщите специалисту содержимое отображаемого сообщения.
Некоторые сообщения могут не отображаться на дисплее, в зависимости от модели или дополнительных принадлежностей.
[номер ошибки] указывает номер ошибки.
[тип лотка] указывает номер лотка.
[тип материала для печати] указывает тип материала для печати.
[формат материала для печати] указывает формат материала для печати.
[тип узла] указывает тип узла.
Сообщения, связанных с замятием бумаги
Рекомендуемые решения
Замятие оригинала
Замятие загруженного оригинала в устройстве подачи документов.
Устраните замятие.
Замятие бумаги в лотке 2
Замятие бумаги в лотке.
Устраните замятие.
Как исправить ошибку unarc.dll ошибка 11
Замятие бумаги в лотке 3
Произошло замятие бумаги в дополнительном лотке.
Устраните замятие.
Замятие бумаги в универсальном лотке 1
Замятие бумаги в универсальном лотке.
Устраните замятие.
Замятие внутри устройства
Замятие бумаги внутри устройства.
Устраните замятие.
Замятие внутри модуля двусторонней подачи
Замятие бумаги внутри модуля двусторонней печати.
Устраните замятие.
Замятие в области вывода
Произошло замятие бумаги в области приемного лотка.
Устраните замятие.
Сообщения, связанные с тонером
Рекомендуемые решения
Ошибка: № C1-1711 или C1-1712
Сбой картриджа с тонером: № C1-1711 или C1-1712
Требуется обслуживание
Картридж не установлен
Картридж с тонером не установлен.
Установите его.
Картридж с тонером не установлен.
Установите картридж с тонером на место.
Картридж с тонером не обнаружен.
Переустановите картридж с тонером два или три раза, чтобы убедиться, что он фиксируется надлежащим образом. Если устранить проблему не удалось, обратитесь к специалисту службы поддержки.
Защитная пленка не удалена с картриджа с тонером.
Снимите защитную пленку с картриджа с тонером.
Несовместимый блок формирования изображения
Несовместимый блок формирования изображения. См. руководство
Установленный блок формирования изображения не предназначен для вашего устройства.
Установите подлинный блок формирования изображения HP, предназначенный для вашего устройства.
Блок формирования изображения не установлен
Блок формирования изображения не установлен. Установите блок.
Блок формирования изображения не установлен.
Переустановите блок формирования изображения два или три раза. Если устранить проблему не удалось, обратитесь в службу поддержки.
Подготовьте блок формирования изображения
Подготовьте новый блок формирования изображения
Истекает расчетный срок службы блока формирования изображения.
Подготовьте новый блок формирования изображения для замены.
Замените блок формирования изображения
Установите новый блок формирования изображения
Расчетный срок службы указанного блока формирования изображения почти истек.
Можно выбрать «Стоп» или «Продолжить» на дисплее панели управления, как показано. При выборе «Стоп» принтер прекращает печать, и она становится невозможна до замены блока формирования изображения. При выборе «Продолжить» принтер продолжает печать, но гарантировать ее качество невозможно. При выводе этого сообщения замените блок формирования изображения, чтобы обеспечить наилучшее качество печати. Продолжение использования блока формирования изображения может привести к проблемам с качеством печати.
Если устройство прекращает печать, замените блок формирования изображения.
Несовместимый картридж с тонером
Несовместимый картридж с тонером. См. руководство
Указанный картридж с тонером не предназначен для вашего устройства.
Установите соответствующий картридж с тонером HP.
Подготовьте новый картридж с тонером
Подготовьте новый картридж с тонером
В указанном картридже осталось мало тонера. Истекает расчетный срок службы a картриджа с тонером.
Подготовьте новый картридж для замены. Можно временно повысить качество печати, перераспределив оставшийся тонер в картридже.
Замените картридж с тонером
Установите новый картридж с тонером
Расчетный срок службы указанного картриджа с тонером почти истек.
Можно выбрать «Стоп» или «Продолжить» на дисплее панели управления, как показано. При выборе «Стоп» принтер прекращает печать. При выборе «Продолжить» принтер продолжает печать, но гарантировать ее качество невозможно.
При выводе этого сообщения замените картридж с тонером, чтобы обеспечить наилучшее качество печати. Продолжение использования картриджа может привести к проблемам с качеством печати.
Расчетный срок службы указанного картриджа с тонером истек
Замените картридж с тонером.
a На принтере отображается сообщение о низком уровне тонера в картридже. Оставшийся срок службы картриджа может быть различным. Подготовьте новые расходные материалы для замены, когда качество печати станет неприемлемым. Картридж нужно заменить тогда, когда качество печати перестанет быть приемлемым.
Использование в принтерах HP картриджей с тонером сторонних производителей или повторно заправленных картриджей с тонером не влияет на гарантийные обязательства перед клиентом или заключенный с ним контракт на предоставление поддержки HP. При этом, если сбой или повреждение устройства связаны с использованием картриджа с тонером стороннего производителя или повторно заправленного картриджа с тонером, компания HP взимает стандартную плату за работу и материалы при обслуживании устройства для устранения соответствующего сбоя или повреждения.
Источник: support.hp.com
testcopy.tech
Правила форума
Картинки и фотографии (если они нужны в сообщении) надо загружать только как вложения к своему сообщению (через кнопку Добавить файлы). Тогда картинки будут автоматически отображаться в сообщении.
Сообщений: 6 • Страница 1 из 1
Автор темы
wdanetw Сообщения: 4 Стаж: 10 месяцев Репутация:
HP MFP M438N ошибка #C3-1312
Сообщение wdanetw » 31 янв 2022, 10:24
Ребята выручайте кто сталкивался?. Купили аппарат начали открывать Блок переноса изо и случайно перевернули. Соответственно высыпали процентов 80 девелопера. Попробовали напечатать лист изо смазывается. Заказал девелопер сасыпал в блок . Теперь когда включаю аппарат выдает ошибку по Блоку переноса изо.
Что делать?
wdanetw
nicksun Сообщения: 116 Стаж: 11 месяцев Откуда: Ставрополь Благодарил (а): 3 раза Поблагодарили: 21 раз Репутация:
HP MFP M438N ошибка #C3-1312
Сообщение nicksun » 31 янв 2022, 10:59
Code: C3-1312, C3-1411, C3-1414
Display:
C3-1312, C3-1411, C3-1414 Imaging unit errors
Description:
– C3-1312, Error: #C3-1312 / Imaging Unit Failure: #C3-1312. Install IMG. Unit – C3-1411, IMG. Not Installed / Imaging unit is not installed. Install the unit – C3-1414, Error: #C3-1414 / Imaging Unit Failure: #C3-1414. Install imaging unit again
The imaging unit is not installed or not detected.
Remedy:
1. Open the front cover. Check if the imaging unit is installed. 2. Remove and reinstall the imaging unit. 3. If the error persists, check if the Imaging Unit connector is contaminated or deformed. £ If the connector is damaged, replace the Imaging Unit (HP Part #: CF257.67901). 4. If the error persists, replace the Imaging Unit (HP Part #: CF257.67901).
Источник: testcopy.tech
КОНФЕРЕНЦИЯ СТАРТКОПИ
Принтеры, копировальные аппараты, МФУ, факсы и другая офисная техника:
вопросы ремонта, обслуживания, заправки, выбора
0. CondrSerg 21.08.19 20:02
Добрый вечер уважаемые гуру, собственно принесли в ремонт аппарат с полосами на листе при печати. При разборе БПИ был найдет виновник — фотобарабан. Заказал и поменял фотик и сразу вылезла ошибка #C3-1213 Сбой БПИ, установите БПИ. Печать не возможна, поэтому не могу сказать сколько отпечатал аппарат, со слов клиента 4 тубы с тонером, это примерно 40000 стр. БПИ рассчитан на 80000.
Пробовал через сервисного меню аппарата сбрасывать все счетчики, и всё оказалось счетно. Собственно в блоке кроме фотобарабана ничего не менялось. Прошу помощи, если кто сталкивался
1. fmX 21.08.19 20:13
Прошу извинить, а как расшифровывается БПИ и что это?
2. CondrSerg 21.08.19 20:27
Блок переноса изображения, он отдельно от тубы с тонером идет, Драм-юнит MLT-R707 Фотобарабан
Отредактировано 20:33 21.08.19 CondrSerg
3. _MAVR_ 21.08.19 21:27
Подозреваю вопрошающий перед сборкой очистил БПИ от «старого» тонера.
4. Suhov 21.08.19 22:14
fmX (1): БПИ и что это Блок Питания Импульсный. Применялся в телевизорах 3УСЦТ и более поздних. Кто и зачем его впихнул в современный аппарат- неизвестно)))
5. Scuzzy 21.08.19 23:10
CondrSerg (0): Заказал и поменял фотик
Колитесь подробно, что делали еще. Подробность — в ваших же интересах.
CondrSerg (0): Пробовал через сервисного меню аппарата сбрасывать все счетчики
Ох ручки-то шальные да бензопилкой бы. Теперь, даже при новой расходке, для получения нормальной печати вам предстоит как минимум односуточный секас с тем же самым сервис-меню.
CondrSerg (0): не могу сказать сколько отпечатал аппарат
Подключаетесь по LAN, заходите на вебморду и начинаете знать пробег. Без инфы вопрос просто не имеет смысла.
6. staler 22.08.19 00:57
(0) в (3) намек Вам на двухкомпонентность аппарата. со всеми вытекающими. И где указанный Вами же код ошибки явно на это указывает. Просите камасутру у бывалых.
Отредактировано 01:01 22.08.19 staler
7. CondrSerg 22.08.19 09:14
(5) Извините если что не так написал, расказываю:
1 Разобрал драм, почитстил, поменял фотовал.
2 Вставил в принтер, вылезла ошибка, на просторах инета нашел немного инфы и через сервичное меню сбросил все стчетчики
3 подключился, 48801 страниц отпечатанно.
Срок службы термофиксатора:
0/100000 (Впечатления/Срок службы)
Срок службы ролика переноса:
0/100000 (Впечатления/Срок службы)
Срок службы ролика лотка 1:
0/100000 (Впечатления/Срок службы)
Срок службы фрикционной подложки лотка 1:
0/50000 (Впечатления/Срок службы)
Срок службы ролика МЦ лотка:
0/100000 (Впечатления/Срок службы)
Срок фрикц. подкладки МЦ:
0/50000 (Впечатления/Срок службы)
8. CondrSerg 22.08.19 09:16
(3)(6) Я не понял на счет тонера, можно поподробнее
9. CondrSerg 22.08.19 09:22
Ошибка через сеть паказывает что C3-1312 Обнаружена внутренняя ошибка с блоком формирования изображения
10. staler 22.08.19 09:25
(8)Вы знаете, что такое девелопер? C3-1312 ошибка датчика ТС (где ТС не топикстартер)))
P.s. впечатления. гыыыы
Отредактировано 09:27 22.08.19 staler
11. CondrSerg 22.08.19 09:30
(10) пла плак, я почистил не то что нужно
12. CondrSerg 22.08.19 09:45
Я почистил блок проявки от «тонера», даже не поргнув глазом, теперь понимаю что туда не стоило лесть, скажите какой девелопер туда подойдет, сколько сыпать?
13. staler 22.08.19 09:51
(12). и опыт, сын ошибок трудных.
У меня нет инфы не по марке не по разграммовке. Может кто, что подскажет.
14. CondrSerg 22.08.19 09:57
(13) Плохой опыт, тоже опыт, признателен в поиске проблемы. Проблема найдена, нужно решение, в инете пока ничего не могу найти
15. staler 22.08.19 10:01
16. CondrSerg 22.08.19 10:06
(15) первую ссылку уже читал, спасибо, по второй ясно что 265 г , попробую поискать по России.
Отредактировано 10:06 22.08.19 CondrSerg
17. CondrSerg 20.09.19 15:30
Заказал с китая девелопер, принтер завелся и отлично печатает. Разграмовка 200гр. Всем спасибо.
Отредактировано 15:32 20.09.19 CondrSerg
Принтеры, копировальные аппараты, МФУ, факсы и другая офисная техника:
вопросы ремонта, обслуживания, заправки, выбора
Переход в графическую версию
Источник: www.startcopy.su
Код ошибки 11 1312
Скачанный клиент уже практически инсталлирован, геймер застыл в предвкушении получения удовольствия от нового компьютерного развлечения, но вместо желаемого результата, возникает сбой. Но не стоит спешить делать выводы, и отказываться от скачанного программного продукта, неисправность можно исправить, и предотвратить ее появление в будущем.
Примечание: Неисправность может иметь и иной код. Так, распространены варианты, когда на дисплее появляются коды 6,7,1,2,3, однако суть бага не меняется.
Если возникает ошибка 11 при установке игры, значит, поврежден инсталлятор. Как правило, эта неисправность возникает у скачанных пиратских версий игрового продукта. Помимо проблем с установкой, инсталляция взломанной видеоигры, сулит заражение ПК вирусами, изменение поисковой страницы в браузере, инсталляцию на персональный компьютер рекламных программ, которые «пропишутся» в автозапуске, и будут существенно замедлять работу машины. Скачать антивирус Avast Вы можете на нашем сайте.
Примечание: При скачивании приложения, важно обращать внимание на интернет-ресурс, откуда берется компонент. Нельзя вводить номер сотового телефона. В противном случае, велик риск получения платной подписки на мобильник или же единовременное крупное списание денежных средств.
Как исправить ошибку 11 при установке игры
Если появляется код ошибки 11 при установке игры, то следует постараться устранить неисправность. Проблема может крыться как в неисправных системных компонентах, так и в элементах инсталлятора. Кроме того, при устранении сбоя, нужно учитывать такие нюансы, как путь к игровому файлу, наличие дополнительных файлов, необходимых для корректного запуска игрового продукта.
Для того чтобы узнать как исправить ошибку 11 при установке игры, нужно поочередно предпринимать действия по устранению бага, и следить за результатом выполненных операций.
Переустановка Microsoft Visual C++ 2010
При возникновении такого бага, как ошибка номер 11 при установке игры, первым делом переустанавливают компонент Microsoft Visual C++ 2010. Для этого, инсталлятор программного продукта необходимо скачать с официального сайта, произвести инсталляцию и перезагрузить персональный компьютер. Как правило, этого шага достаточно для решения задачи по устранению неисправности.
Уберите русские буквы с пути
Однако предыдущий шаг может оказаться бесполезным. В этом случае, проверяют путь установки игрового продукта. Важно, чтобы папки и разделы винчестера не имели в своем названии кириллических символов. Иначе, будет возникать неисправность.
Восстановление системных файлов Windows
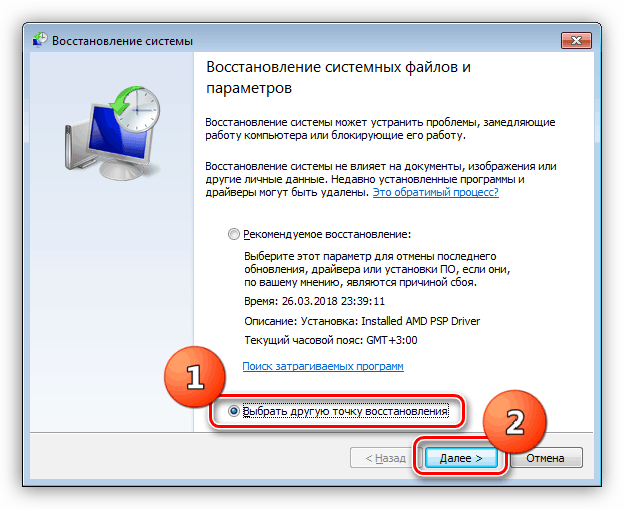
В некоторых случаях, чтобы узнать, что означает ошибка 11 при установке игры, нужно проверить системные файлы на наличие битых компонентов. Эта операция выполняется с помощью специальных утилит. После проверки ПК перезагружают, и запускают восстановление системы (либо откатывают ОС до последней точки восстановления). Вновь перезагружают ПК, и пробуют инсталлировать программный продукт.
Примечание: Необходимо регулярно создавать точки восстановления операционной системы. Этот шаг дает возможность без удаления файлов и инсталляции новой Виндовс, вернуть работоспособное состояние компьютера.
Как исправить Unarc. dll вернул код ошибки 1, 2, 3, 6, 7
Как отмечалось ранее, баг появляется и под другим кодом. На деле, он оповещает о проблемах с компонентами установщика или с системными элементами. Для решения задачи по устранению бага, проводят те же операции, которые выполняются и при избавлении от сбоя с иным кодом.
Как исправить ошибку 11 при распаковке
Итак, как устранить ошибку 11 при установке игры? Первым делом потребуется отключить антивирусную программу, далее проводят распаковку необходимого документа, и проводят его инсталляцию. При выполнении операции, важно учитывать то, что установщик может быть заражен или содержать в себе рекламные и прочие вредоносные программные продукты. Поэтому, нужно быть осторожным при инсталляции без включенного антивируса.
Если после проведения вышеописанных манипуляций, баг не удается устранить, тогда стоит скачать новый инсталлятор или приобрести лицензионную версию нужного приложения. Зачастую, для того чтобы узнать, что значит ошибка 11 при установке игры, достаточно выявить, используется лицензионный или пиратский установщик.
Примечание: Использование лицензионного программного продукта, позволяет не только избавиться от вышеописанных проблем и появления сбоев, но и довольно удобно. Инсталлятор хранится в цифровом сервисе, при необходимости его ставят на разные персональные компьютеры.
Видео: код ошибки 11 при установке игры
Для наиболее эффективного выявления причины неисправности и способов ее устранения, следует посмотреть видео, в котором будет показано устранения сбоя с кодом 11 при запуске приложения. Подобные ролики можно без особых трудностей отыскать на видеосервисе YouTube.
В подведение итогов, стоит сказать о том, что баг не ставит крест на перспективах запустить видеоигру. При наличии некоторых знаний и навыков, неисправность достаточно легко устранить. При проведении операций по восстановлению, следует сделать контрольную точку состояния ОС. Данный шаг, при возникновении непредвиденных обстоятельств, обезопасит от краха операционной системы, и сохранит важные файлы пользователя на персональном компьютере.
Произошла ошибка при распаковке Unarc. dll вернул код ошибки 11
У многих пользователи после скачивания игры и её последующей установки происходит ошибка при распаковке ISDone. dll: “Unarc. dll вернул код ошибки 11”. Помимо номера ошибки 11 и описания к нему “Невозможно записать данные на диск”, имеются и другие коды сбоя (1, 6, 5, 7, 8, 12, 14) которые, несмотря на разное описание, имеют общую причину и одинаковое решение.
Основная причина всех ошибок, связанных с ISDone. dll и Unarc. dll – это некачественно архивированные установщики игр (пиратки), которые вы качаете из сети. Чаще всего именно с репаками возникает проблема из-за того, что их создатели стараются по максимуму сжать вложенные файлы. Менее часто проблема возникает из-за проблем с местом на компьютере или из-за сбитых настроек.
Ошибка при распаковке Unarc. dll вернул код ошибки 11
Решать ошибку при распаковке нужно поэтапно – начиная с более простых методов и постепенно перейдя к более сложным.
Первичная настройка системы
Активируем DEP функцию для решения ошибки Unarc. dll
Если все указанные выше советы оказались лишь полумерами – советуем активировать функцию защиты DEP и внести в его исключения установочный exe-файл игры. Делается это так:
Этот метод хорошо работает, когда основная причина сбоя “Unarc. dll вернул код ошибки 11” лежит в плоскости неправильной обработки памяти.
Заключение – важно!
Если все указанное выше не работает, а сбой выскакивает практически на каждой устанавливаемой игре или программке – проверьте утилитой MemTest вашу оперативную память. Если есть две отдельные планки – поменяйте их местами. Возможно ваше железо уже свое отслужила.
Напоследок замечу: пиратки и репаки, которые чаще всего сбоят с указанием на ISDone. dll и Unarc. dll, не всегда оптимизированы под различные показатели Windows. Пробуйте и ищите другие файлообменники с этой игрой и смотрите на рейтинг этих файлов раздачи.
В случае с Windows 7, которую вы конкретно запустили и не работаете с KB-обновлениями, необходимо загрузить последние кумулятивные KB-обновления. Если Service Pack 1 отсутствует – обязательно перейдите на него.
Являюсь администратором и постоянным автором данного интернет-ресурса. Мой сайт запущен с целью поиска оптимальных решений по тем или иным проблемам, с которыми сталкиваются пользователи интернета. Являюсь экспертом в области it-технологий, мобильных приложений и функционирования онлайн-сервисов. Достаточно сильно углублен в тематику банковских переводов и защиты платежей.
Произошла ошибка при распаковке unarc. dll вернул код ошибки-11 (1, 7, 12, 6, 14, 
Геймеры часто встречают сообщение «Произошла ошибка при распаковке unarc. dll». Она встречается на разных операционных системах Windows и говорит о том, что не удается открыть архив с игрой или другими приложениями. Часто ошибка сопровождается дополнительной информацией. Рассмотрим основные случаи, причины ошибки, а также определим, как ее устранить далее в этой статье.
Причины ошибки при распаковке
Если в ошибке значится причина «failed CRC Check», то это значит, что файл архива поврежден. В этом случае остается только искать рабочий файл. Дополнение к ошибке «decompression failed» говорит о причинах, связанных с компьютером пользователя. Возможно, что на компьютере отсутствует архиватор, который работает с этим форматом.
Тем более, что создатели «репаков» игр и программ часто используют для архива особые форматы и программы. Чаще всего это RAR, со способностью распаковывать при помощи SFX, 7-ZIP со специальными алгоритмами архивации ppmd, dcj2, delta, lzma2, FreeArc с распаковкой через SFX и другие.
Устранение ошибки unarc. dll
В первую очередь пользователю необходимо скачать и установить на свой компьютер универсальный архиватор — 7-ZIP. Это можно сделать на официальном сайте программы https://www.7-zip. org/download. html. Здесь вам нужно будет выбрать свою операционную систему и ее архитектуру. Он работает практически со всеми типами архивов.
При установке проблемной игры или приложения, необходимо внимательно выбрать путь установки. В нем не должно быть кириллицы, то есть русских букв. Путь весь должен состоять только из латинских символов или цифр. Например, при установке DotA2 в папку «Игры» возникнет ошибка. Попробуйте отменить установку, переименуйте папку в «Game» или что-то подобное на английском языке и снова запустите установку.
Замена файла unarc. dll
При возникновении «Ошибки в процессе распаковки архива unarc. dll вернул код ошибки-11 (1, 7, 12, 6, 14, 8)» необходимо попытаться заменить файл динамической библиотеки и зарегистрировать его в системном реестре. Для этого необходимо скачать другой файл unarc. dll по ссылке https://www. dll. ru/files/search/unarc. dll.
Попробуйте снова запустить приложение, с которым у вас возникала ошибка.
Причина ошибки — оперативная память
Ошибки при установке и в других случаях возникают не только по программным причинам. Если вышел из строя один из модулей оперативной памяти (или единственный), то вы будете наблюдать различные ошибки при запуске или установке программ. Поэтому ее нужно проверить. Это можно сделать вручную.
В том случае, если все планки оказались рабочими, перейдем к другому методу. Он заключается в проверке наличия драйверов устройств компьютера. Для этого нам нужно запустить «Диспетчер устройств». Можно ввести запрос в строке поиска, нажав кнопку «Пуск». Откройте список устройств и просмотрите все пункты.
Если с драйвером устройства будут какие-нибудь неполадки или драйвер будет нуждаться в обновлении, то возле него можно увидеть восклицательный знак в желтой рамке. В случае обнаружения такого значка, нажмите по нему правой кнопкой мыши и выберите пункт контекстного меню «Обновить драйверы».
Другие методы устранения ошибки unarc. dll
Процессу установке может мешать системный Защитник Windows и Брандмауэр. Поэтому их нужно отключить, можно на время.
Если установлено дополнительное антивирусное программное обеспечение, то его также необходимо отключить. Практически во всех программах есть специальные функции отключения экранов реального времени на некоторое время. Их можно найти через панель быстрого доступа (возле регулятора звука и часов). Отключите всю систему защиты вашего компьютера на время и попытайтесь снова установить приложение. Ошибка при разархивировании файла unarc. dll должна исчезнуть.
Источник: kodyoshibok03.ru
| Текущее время: 12 фев 2023, 08:14 |
Сообщения без ответов | Активные темы
| Страница 1 из 1 [ Сообщений: 6 ] |
Показать сообщения за: Поле сортировки |
|||||||||||||||||||||||||||||||||||||||||||||||||||||||||||||||||||
| Страница 1 из 1 [ Сообщений: 6 ] |
|
||||||||||||||||||||||||||||||||||||||
| Вы не можете начинать темы Вы не можете отвечать на сообщения Вы не можете редактировать свои сообщения Вы не можете удалять свои сообщения Вы не можете добавлять вложения |
- Sign up
- Sign in
- HP Community
- Printers
- Printing Errors or Lights & Stuck Print Jobs
- Hp laserjet MFPM433a error code #c3-1312
Options
- Mark Topic as New
- Mark Topic as Read
- Float this Topic for Current User
- Bookmark
- Subscribe
- Mute
- Printer Friendly Page
Create an account on the HP Community to personalize your profile and ask a question
Your account also allows you to connect with HP support faster, access a personal dashboard to manage all of your devices in one place, view warranty information, case status and more.
09-26-2021
02:03 AM
HP Recommended
- Mark as New
- Bookmark
- Subscribe
- Permalink
- Flag Post
Product: MFPM433a
Operating System: Other
Be alert for scammers posting fake support phone numbers and/or email addresses on the community.
If you think you have received a fake HP Support message, please report it to us by clicking on «Flag Post».
† The opinions expressed above are the personal opinions of the authors, not of HP. By using this site, you accept the Terms of Use and Rules of Participation.
-
English
Open Menu

† The opinions expressed above are the personal opinions of the authors, not of HP. By using this site, you accept the <a href=»https://www8.hp.com/us/en/terms-of-use.html» class=»udrlinesmall»>Terms of Use</a> and <a href=»/t5/custom/page/page-id/hp.rulespage» class=»udrlinesmall»> Rules of Participation</a>.
- Sign up
- Sign in
- HP Community
- Printers
- Printing Errors or Lights & Stuck Print Jobs
- Hp laserjet MFPM433a error code #c3-1312
Options
- Mark Topic as New
- Mark Topic as Read
- Float this Topic for Current User
- Bookmark
- Subscribe
- Mute
- Printer Friendly Page
Create an account on the HP Community to personalize your profile and ask a question
Your account also allows you to connect with HP support faster, access a personal dashboard to manage all of your devices in one place, view warranty information, case status and more.
09-26-2021
02:03 AM
HP Recommended
- Mark as New
- Bookmark
- Subscribe
- Permalink
- Flag Post
Product: MFPM433a
Operating System: Other
Be alert for scammers posting fake support phone numbers and/or email addresses on the community.
If you think you have received a fake HP Support message, please report it to us by clicking on «Flag Post».
† The opinions expressed above are the personal opinions of the authors, not of HP. By using this site, you accept the Terms of Use and Rules of Participation.
-
English
Open Menu

† The opinions expressed above are the personal opinions of the authors, not of HP. By using this site, you accept the <a href=»https://www8.hp.com/us/en/terms-of-use.html» class=»udrlinesmall»>Terms of Use</a> and <a href=»/t5/custom/page/page-id/hp.rulespage» class=»udrlinesmall»> Rules of Participation</a>.
Введение
На дисплее панели управления отображаются сообщения, указывающие состояние или ошибки устройства. В приведенной ниже таблице приведены общие сведения о сообщениях и их значения, а также действия по устранению проблемы, при необходимости.
Примечание.
Можно устранить ошибку, следуя инструкциям в окне состояния печати на компьютере.
Если сообщение отсутствует в таблице, перезагрузите питание и повторно попробуйте выполнить задание печати. Если устранить проблему не удалось, обратитесь к специалисту службы поддержки.
При обращении в службу поддержки сообщите специалисту содержимое отображаемого сообщения.
Некоторые сообщения могут не отображаться на дисплее, в зависимости от модели или дополнительных принадлежностей.
[номер ошибки] указывает номер ошибки.
[тип лотка] указывает номер лотка.
[тип материала для печати] указывает тип материала для печати.
[формат материала для печати] указывает формат материала для печати.
[тип узла] указывает тип узла.
Сообщения, связанных с замятием бумаги
|
Сообщение |
Значение |
Рекомендуемые решения |
|
Замятие оригинала |
Замятие загруженного оригинала в устройстве подачи документов. |
Устраните замятие. |
|
Замятие бумаги в лотке 2 |
Замятие бумаги в лотке. |
Устраните замятие. |
|
Замятие бумаги в лотке 3 |
Произошло замятие бумаги в дополнительном лотке. |
Устраните замятие. |
|
Замятие бумаги в универсальном лотке 1 |
Замятие бумаги в универсальном лотке. |
Устраните замятие. |
|
Замятие внутри устройства |
Замятие бумаги внутри устройства. |
Устраните замятие. |
|
Замятие внутри модуля двусторонней подачи |
Замятие бумаги внутри модуля двусторонней печати. |
Устраните замятие. |
|
Замятие в области вывода |
Произошло замятие бумаги в области приемного лотка. |
Устраните замятие. |
Сообщения, связанные с тонером
|
Сообщение |
Значение |
Рекомендуемые решения |
|
Картридж с тонером не установлен. |
Установите картридж с тонером на место. |
|
Картридж с тонером не обнаружен. |
Переустановите картридж с тонером два или три раза, чтобы убедиться, что он фиксируется надлежащим образом. Если устранить проблему не удалось, обратитесь к специалисту службы поддержки. |
|
|
Защитная пленка не удалена с картриджа с тонером. |
Снимите защитную пленку с картриджа с тонером. |
|
|
Установленный блок формирования изображения не предназначен для вашего устройства. |
Установите подлинный блок формирования изображения HP, предназначенный для вашего устройства. |
|
Блок формирования изображения не установлен. |
Переустановите блок формирования изображения два или три раза. Если устранить проблему не удалось, обратитесь в службу поддержки. |
|
Истекает расчетный срок службы блока формирования изображения. |
Подготовьте новый блок формирования изображения для замены. |
|
Расчетный срок службы указанного блока формирования изображения почти истек. |
|
|
Указанный картридж с тонером не предназначен для вашего устройства. |
Установите соответствующий картридж с тонером HP. |
|
В указанном картридже осталось мало тонера. Истекает расчетный срок службыa картриджа с тонером. |
Подготовьте новый картридж для замены. Можно временно повысить качество печати, перераспределив оставшийся тонер в картридже. |
|
Расчетный срок службы указанного картриджа с тонером почти истек. |
|
|
Расчетный срок службы указанного картриджа с тонером истек |
Замените картридж с тонером. |
aНа принтере отображается сообщение о низком уровне тонера в картридже. Оставшийся срок службы картриджа может быть различным. Подготовьте новые расходные материалы для замены, когда качество печати станет неприемлемым. Картридж нужно заменить тогда, когда качество печати перестанет быть приемлемым.
Внимание!Использование в принтерах HP картриджей с тонером сторонних производителей или повторно заправленных картриджей с тонером не влияет на гарантийные обязательства перед клиентом или заключенный с ним контракт на предоставление поддержки HP. При этом, если сбой или повреждение устройства связаны с использованием картриджа с тонером стороннего производителя или повторно заправленного картриджа с тонером, компания HP взимает стандартную плату за работу и материалы при обслуживании устройства для устранения соответствующего сбоя или повреждения.
Сообщения, связанные с лотком
|
Сообщение |
Значение |
Рекомендуемые решения |
|
Во всех лотках закончилась бумага. |
Загрузите бумагу в лоток. |
|
Нет бумаги в лотке. |
Загрузите бумагу в лоток. |
|
Нет бумаги в универсальном лотке. |
Загрузите бумагу в универсальный лоток. |
|
Лоток 3 закрыт неплотно. |
Закройте лоток 3 до щелчка. |
Сообщения, связанные с сетью
|
Сообщение |
Значение |
Рекомендуемые решения |
|
Конфликт IP-адресов Данный IP-адрес конфликтует с IP-адресом другой системы. |
Указанный IP-адрес сети используется кем-то еще. |
Проверьте IP-адрес и выполните его сброс, если необходимо. |
Прочие сообщения
|
Сообщение |
Значение |
Рекомендуемые решения |
|
Передняя или задняя крышка закрыта неплотно. |
Закройте крышку до фиксации с щелчком. |
|
Крышка устройства подачи документов открыта или не зафиксирована. |
Закройте крышку до фиксации с щелчком. |
|
Устройство находится в помещении с несоответствующей комнатной температурой. |
Переместите устройство в помещение с соответствующей комнатной температурой |
|
Истек срок службы реверсивного ролика лотка. |
Замените реверсивный ролик лотка на новый. Обратитесь к специалисту службы поддержки. |
|
Истек срок службы ролика захвата в лотке. |
Замените ролик захвата на новый. Обратитесь к специалисту службы поддержки. |
|
Истекает срок службы ролика захвата лотка 2, лотка 3 или универсального лотка 1. |
Замените ролик захвата на новый. Обратитесь к специалисту службы поддержки. |
|
Сканер заблокирован. |
Перезагрузите питание. Если устранить проблему не удалось, обратитесь в службу поддержки. |
|
Крышка устройства подачи документов открыта или не зафиксирована. |
Закройте крышку до фиксации с щелчком. |
|
Возникла проблема в блоке термофиксатора. |
Перезагрузите питание. Если устранить проблему не удалось, обратитесь в службу поддержки. |
|
Проблема в системе мотора. |
Перезагрузите питание. Если устранить проблему не удалось, обратитесь в службу поддержки. |
|
Возникла проблема в блоке лазерного сканирования. |
Перезагрузите питание. Если устранить проблему не удалось, обратитесь в службу поддержки. |
|
Проблема в лотке 3. |
Проверьте подключение лотка 3. |
|
Возникла проблема в видеосистеме. |
Перезагрузите питание. Если устранить проблему не удалось, обратитесь в службу поддержки. |
Содержание
- Исправляем ошибку печати на принтере HP
- Способ 1: Проверка принтера
- Способ 2: Разблокирование процедуры печати
- Способ 3: Отключение брандмауэра Windows
- Способ 4: Переключение учетной записи пользователя
- Способ 5: Восстановление Windows
- Способ 6: Переустановка драйвера
- Вопросы и ответы
Обладатели печатной продукции от компании HP иногда сталкиваются с тем, что на экране появляется уведомление «Ошибка печати». Причин возникновения этой неполадки может быть несколько и каждая из них решается по-разному. Сегодня мы подготовили для вас разбор основных способов исправления рассматриваемой проблемы.
Каждый приведенный ниже метод имеет разную эффективность и будет наиболее подходящим в определенной ситуации. Мы по порядку рассмотрим все варианты, начиная от самого простого и действенного, а вы, следуя инструкциям, решите поставленную задачу. Однако сначала мы рекомендуем обратить внимание на эти советы:
- Перезапустите компьютер и переподключите устройство печати. Желательно, чтобы перед следующим подключением принтер находится в выключенном состоянии не менее одной минуты.
- Проверьте картридж. Иногда ошибка появляется в тех случаях, когда в чернильнице закончилась краска. О том, как заменить картридж вы можете прочитать в статье по ссылке ниже.
- Осмотрите провода на наличие физических повреждений. Кабель выполняет передачу данных между компьютером и принтером, поэтому важно, чтобы он не только был подключен, но и находился полностью в исправном состоянии.
- Кроме этого советуем проверить, не закончилась ли бумага или не зажевало ли ее внутри механизма оборудования. Вытащить лист А4 вам поможет инструкция, которая прилагается в комплекте с продукцией.
Подробнее: Замена картриджа в принтере
Если приведенные советы ничем не помогли, переходите к осуществлению следующих методов решения «Ошибка печати» при использовании периферии компании HP.
Способ 1: Проверка принтера
В первую очередь советуем проверить отображение и конфигурацию оборудования в меню «Устройства и принтеры». От вас потребуется произвести всего несколько действий:
- Через меню «Панель управления» и переместитесь в «Устройства и принтеры».
- Убедитесь, что устройство не подсвечивается серым цветом, после чего нажмите на нем ПКМ и кликните на пункт «Использовать по умолчанию».
- Кроме этого рекомендуется проверить параметры передачи данных. Зайдите в меню «Свойства принтера».
- Здесь вас интересует вкладка «Порты».
- Отметьте галочкой пункт «Разрешить двусторонний обмен данными» и не забудьте применить изменения.
По окончании процесса рекомендуется перезагрузить ПК и переподключить оборудование, чтобы все изменения точно стали активными.
Способ 2: Разблокирование процедуры печати
Иногда происходят скачки напряжения или различные системные сбои, вследствие чего периферия и ПК перестают нормально выполнять определенные функции. По таким причинам и может возникать ошибка печати. В таком случае вам следует проделать следующие манипуляции:
- Снова перейдите в «Устройства и принтеры», где правым кликом мыши на активном оборудовании выберите пункт «Просмотр очереди печати».
- Нажмите ПКМ на документ и укажите «Отменить». Повторите это со всеми присутствующими файлами. Если процесс по каким-либо причинам не отменяется, советуем ознакомиться с материалом по ссылке ниже, чтобы осуществить эту процедуру одним из других доступных методов.
- Вернитесь в «Панель управления».
- В ней откройте категорию «Администрирование».
- Здесь вас интересует строка «Службы».
- В списке отыщите «Диспетчер печати» и дважды нажмите на нем ЛКМ.
- В «Свойства» обратите внимание на вкладку «Общие», где убедитесь, что тип запуска стоит «Автоматический», после чего следует остановить службу и применить настройки.
- Закройте окно, запустите «Мой компьютер», переместитесь по следующему адресу:
C:WindowsSystem32SpoolPRINTERS - Удалите все присутствующие файлы в папке.
Подробнее: Как очистить очередь печати на принтере HP
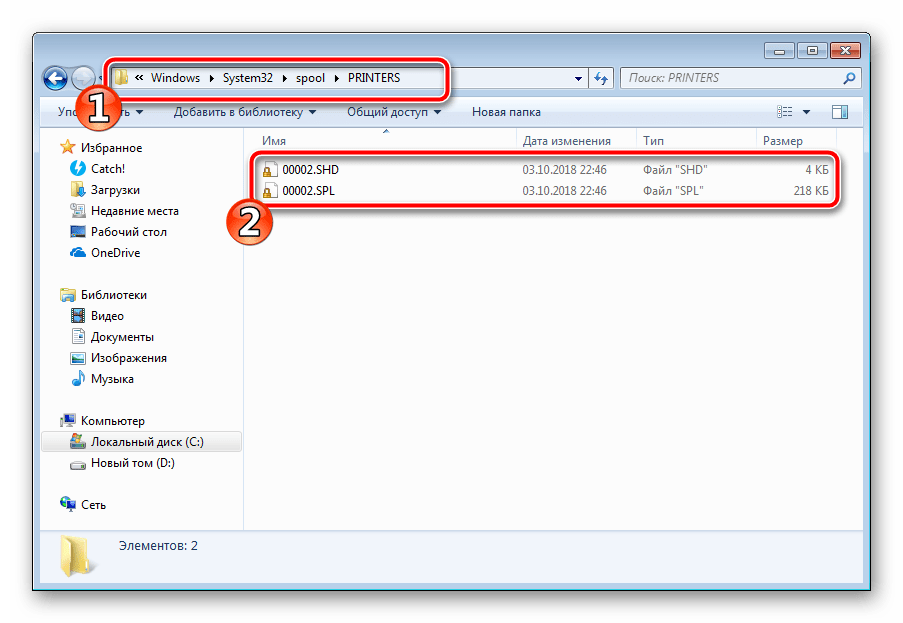
Осталось только выключить продукт компании HP, отключить его от питания, дать так постоять примерно минуту. После этого перезагрузите ПК, соедините оборудование и повторите процесс печати.
Способ 3: Отключение брандмауэра Windows
Иногда защитник Windows блокирует отправленные данных с компьютера на устройство. Связано это может быть с некорректной работой брандмауэра или различными системными сбоями. Мы советуем на время отключить защитник Виндовс и повторить попытку печати. Детальнее о деактивации этого инструмента читайте в другом нашем материале по следующим ссылкам:
Подробнее: Отключение брандмауэра в Windows XP, Windows 7, Windows 8
Способ 4: Переключение учетной записи пользователя
Рассматриваемая проблема порой возникает тогда, когда попытка отправки в печать производится не с той учетной записи пользователя Windows, с которой происходило добавление периферии. Дело в том, что каждый профиль имеет свои привилегии и ограничения, что приводит к появлению подобного рода неполадок. В таком случае нужно попробовать сменить запись юзера, если у вас их конечно добавлено больше, чем одна. Развернуто о том, как это сделать в разных версиях Виндовс читайте в статьях ниже.
Подробнее: Как сменить учетную запись пользователя в Windows 7, Windows 8, Windows 10
Способ 5: Восстановление Windows
Часто случается, что ошибки печати связаны с определенными изменениями в операционной системе. Самостоятельно обнаружить их достаточно сложно, однако состояние ОС можно вернуть, откатив все изменения. Осуществляется данная процедура с помощью встроенного компонента Виндовс, а детальное руководство по этой теме вы найдете в другом материале от нашего автора.
Подробнее: Варианты восстановления ОС Windows
Способ 6: Переустановка драйвера
Мы поставили этот способ последним, поскольку он требует от пользователя выполнения большого количества различных манипуляций, а также является достаточно сложным для новичков. Если никакие приведенные выше инструкции вам не помогли, значит остается только переустановить драйвер устройства. Для начала следует избавиться от старого. О том, как это сделать, читайте далее:
Читайте также: Удаление старого драйвера принтера
По завершении процедуры удаления задействуйте один из методов инсталляции программного обеспечения для периферии. Всего существует пять доступных способов. Развернуто с каждыми из них знакомьтесь в другой нашей статье.
Подробнее: Установка драйверов для принтера
Как видите, методов исправления ошибки печати принтера HP существует достаточно большое количество, и каждый из них будет полезен в разных ситуациях. Надеемся, приведенные выше инструкции помогли вам без труда решить возникшую проблему, а продукт компании снова функционирует корректно.


