
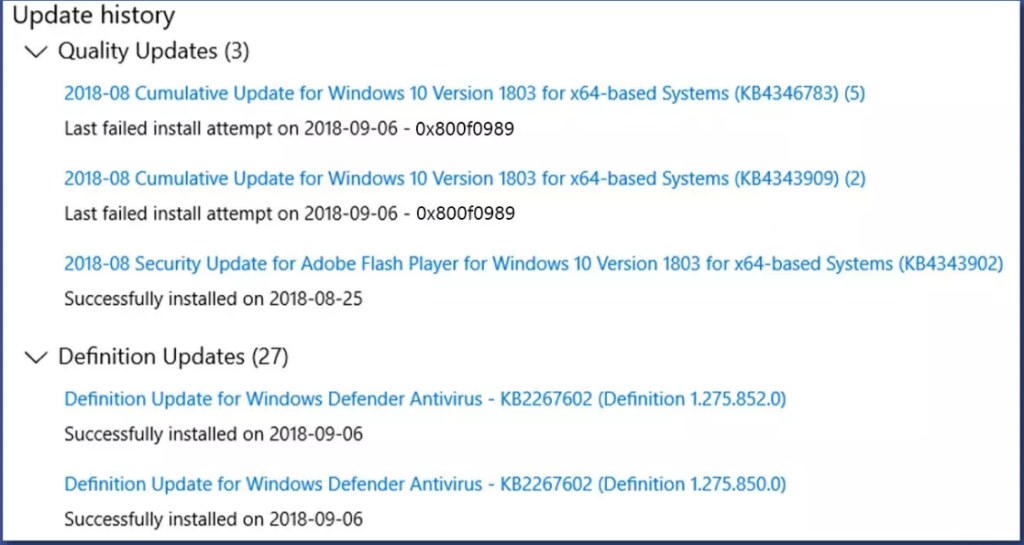
Код ошибки 0x800f0989 обычно возникает при попытке установить последние накопительные обновления на свой компьютер. Поврежденные системные файлы, накопленный кеш, проблемная установка обновлений или отключенные службы, связанные с обновлениями, — вот несколько причин, которые могут вызвать этот код ошибки в Windows 11/10.
В этом посте мы рассмотрим все вышеупомянутые причины, включая способы их устранения. Давайте подробно рассмотрим решения —

Чтобы решить проблему с кодом ошибки обновления 0x800f0989 в Windows 11/10, просмотрите приведенные ниже предложения и проверьте, помогают ли они решить эту проблему —
1]Удалите недавно установленные обновления Windows.
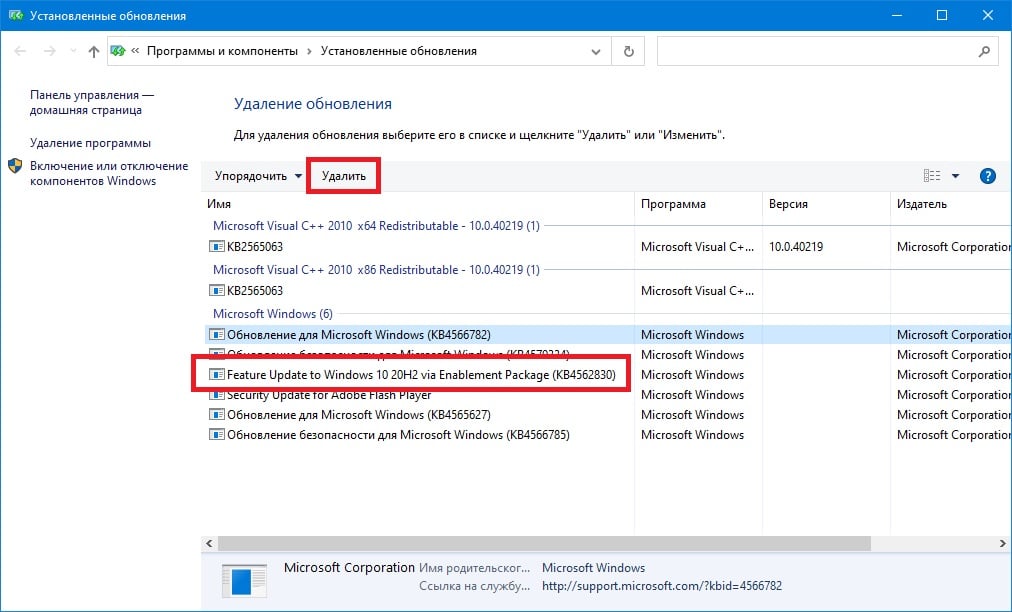
Если ошибка 0x800f0989 начинает появляться после недавнего обновления Windows, вы, должно быть, установили ошибочное обновление патча. Чтобы исправить это, вы должны найти недавно установленное обновление безопасности / не связанное с безопасностью / необязательное обновление и удалить его из вашей системы.
2]Запустите средство устранения неполадок Центра обновления Windows.
Если вы в последнее время не устанавливали никаких обновлений на свой компьютер, но эта ошибка появляется, вы можете пойти и устранить неполадки Центра обновления Windows на предмет возможных повреждений. Вот как использовать этот встроенный инструмент —
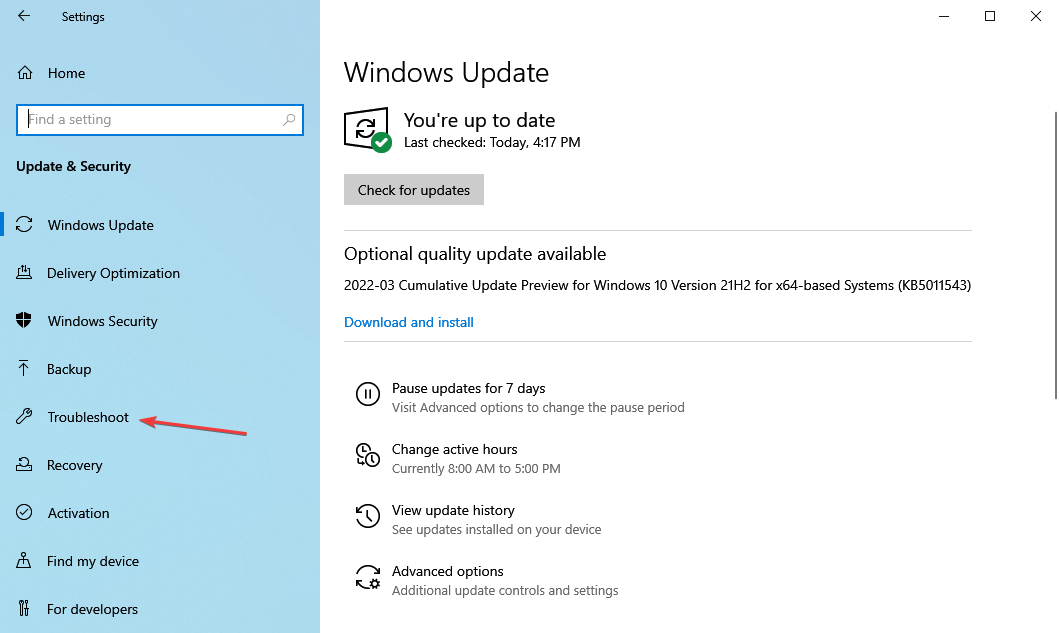
- Откройте настройки (Win + I).
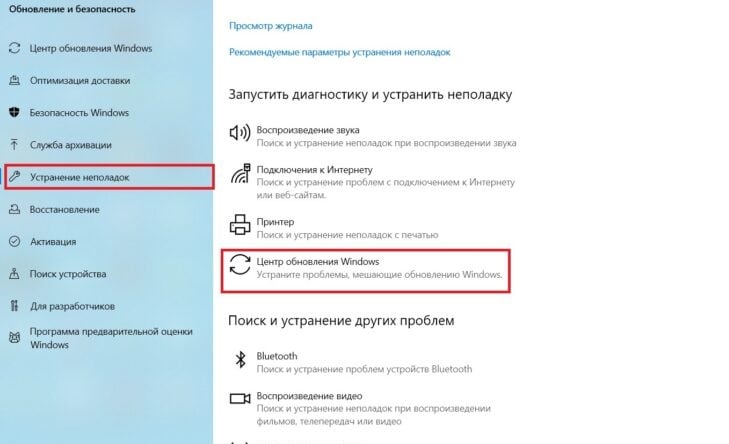
- Выберите Обновление и безопасность> Средство устранения неполадок.
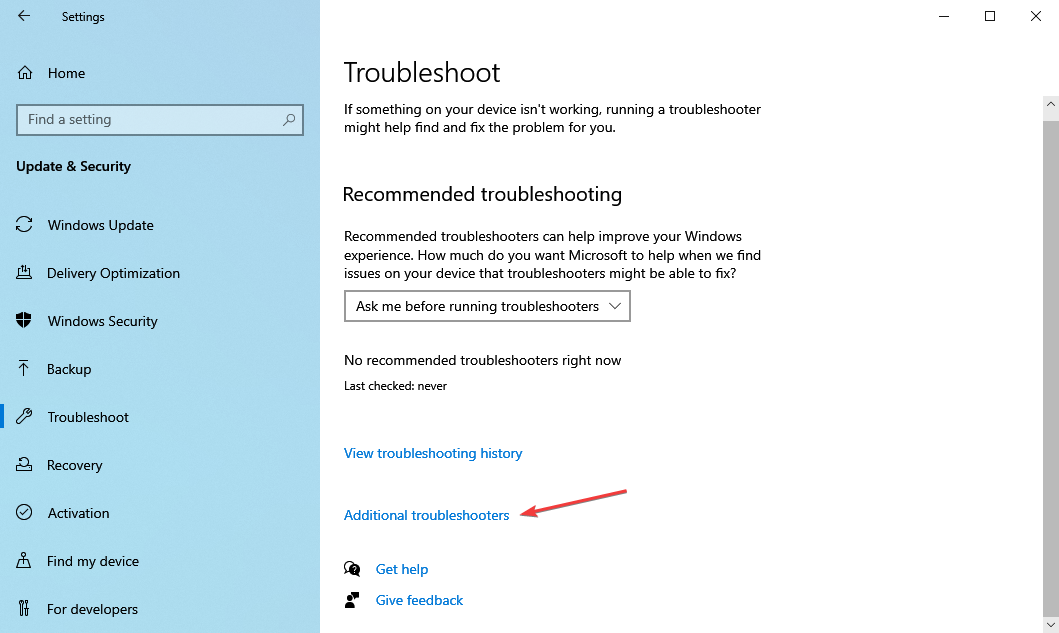
- Перейдите на правую панель и нажмите Дополнительные средства устранения неполадок.
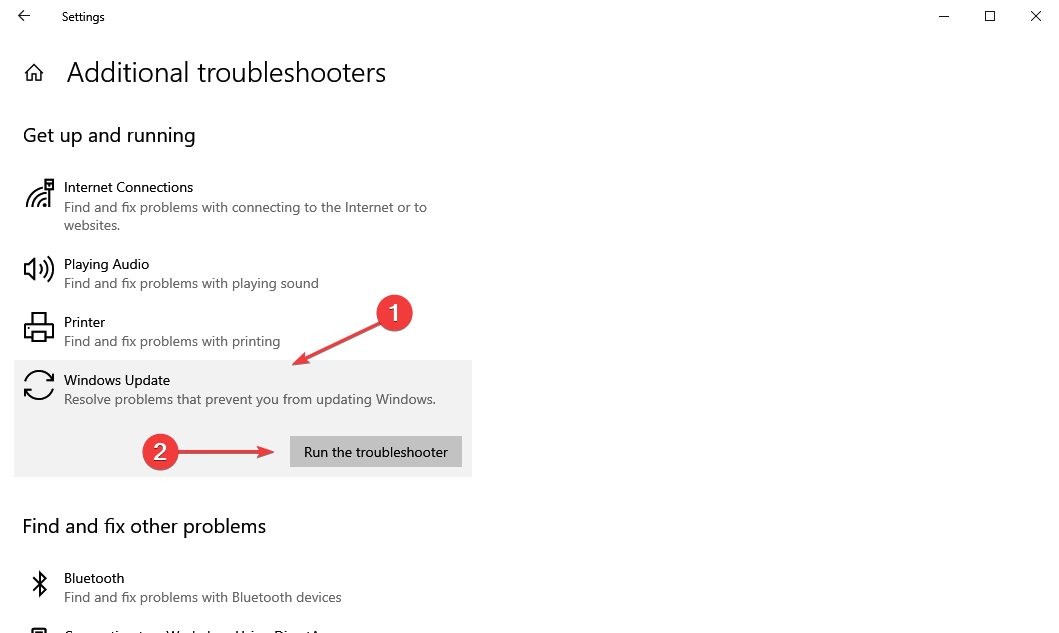
- Щелкните, чтобы развернуть Центр обновления Windows, и нажмите Запустите средство устранения неполадок.

- Внимательно следуйте инструкциям на экране и делайте то, о чем вас просят.
Средство устранения неполадок будет искать возможные причины, которые могли вызвать код ошибки 0x800f0989 на вашем устройстве. Как только он обнаруживает основные причины, он также автоматически устраняется. Если это не так, это подскажет вам, что делать дальше.
В некоторых случаях он сообщит о проблеме и попросит вашего согласия на применение исправления. Хорошо, нажмите «Применить это исправление«.
- Перезагрузите Windows и, когда она перезагрузится, проверьте, можете ли вы теперь установить ожидающие обновления или все еще нет.
3]Остановить и перезапустить службы обновления
Часто такие ошибки, как 0x800f0989, возникают просто потому, что некоторые службы обновления не работают или устарели. Чтобы исправить это, примените шаги, описанные ниже —
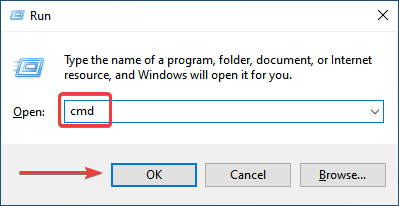
- Нажмите WinKey + R для запуска диалогового окна «Выполнить».
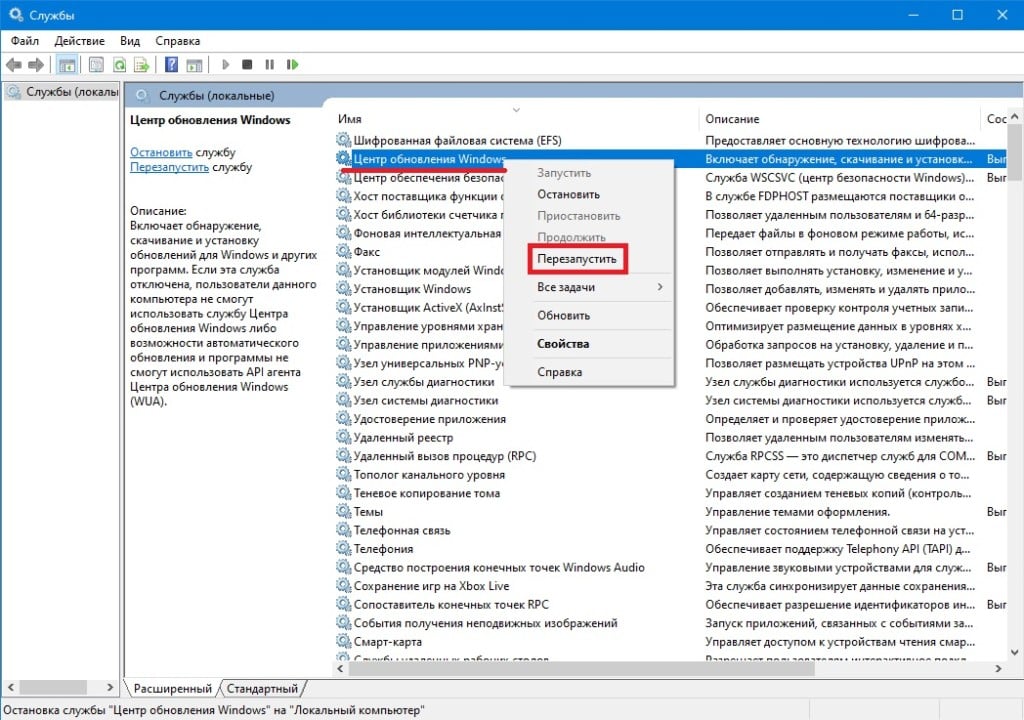
- Введите «services.msc» в текстовое поле и нажмите «ОК».
- Когда откроется окно служб, найдите службы ниже и посмотрите их текущий статус.
Фоновая интеллектуальная служба передачи
Криптографические услуги
Центр обновления Windows

- Если вы обнаружите, что какая-либо из вышеперечисленных служб отключена, щелкните ее правой кнопкой мыши и выберите параметр — Пуск.

- Если все службы уже были запущены, щелкните каждую из них правой кнопкой мыши и выберите вариант — Рестарт.
- Затем перезагрузите компьютер и посмотрите, сможете ли вы теперь обновить Windows, не вводя код ошибки 0x800f0989.
4]Очистить папки кэша Windows
Через некоторое время некоторый кеш сохраняется в папках Центра обновления Windows. Когда объем сохраненного кеша превышает допустимый предел, это также может привести к ошибкам, например 0x800f0989. Чтобы решить эту проблему, все, что вам нужно, это очистить эти две папки —
Совет: Прежде чем идти и следовать приведенным ниже инструкциям, остановите на компьютере все службы, связанные с обновлениями. Вы должны отключить следующие службы: BITS, Центр обновления Windows и Cryptographic.
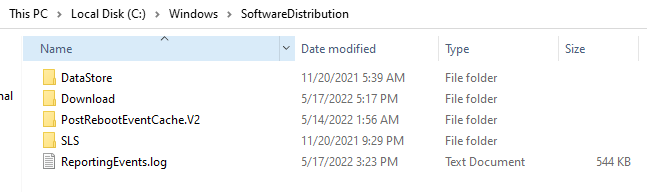
- Теперь, когда вы остановили основные службы, перейдите по указанному ниже пути, найдите папки и переименуйте их во что-то «SD.old» и «Catroot2.old» соответственно.
Распространение программного обеспечения: C: Windows SoftwareDistribution
Catroot2: C: Windows System32 catroot2

- После переименования папок обязательно перезапустите все те службы, которые вы остановили ранее.
- Затем перезагрузите компьютер, чтобы внесенные изменения вступили в силу при следующем входе в систему.
5]Вручную установить ожидающие обновления
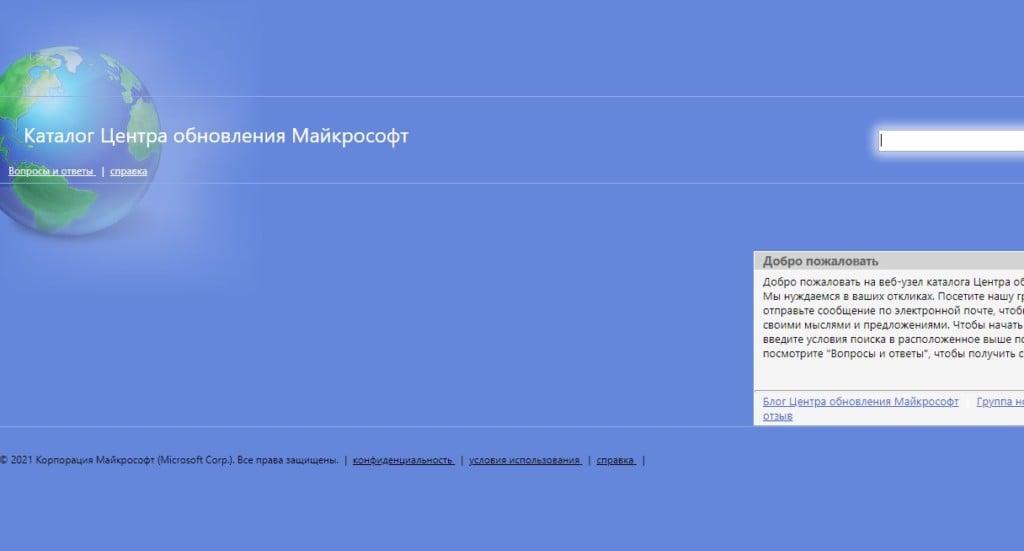
Microsoft загружает отдельные пакеты, соответствующие каждому из своих накопительных обновлений, по адресу Обновить каталог. Итак, если вы не можете обновить Windows из-за кода ошибки 0x800f0989, вы можете посетить официальный сайт и вручную загрузить обновление, которое вы собираетесь загрузить / установить.
Если вы не знаете, как выполнить эту задачу, узнайте, как ее выполнить.
Post Views: 734
Ошибка 0x800f0989 обычно возникает тогда, когда пользователь Windows 10 пытается установить кумулятивные обновления для своей ОС. Поврежденные системные файлы, неисправный кэш, проблематичные установочники апдейтов, деактивированные службы Центра обновления — существует целая масса причин, из-за которых эта ошибка может появиться на компьютере пользователя.
В сегодняшней статье мы посмотрим с вами на ряд методов, предназначенных для устранения 0x800f0989 и других схожих ошибок в Центре обновления Windows 10. Рекомендуем выполнять их в том порядке, в котором они представлены ниже.
Содержание
- Решение ошибки 0x800f0989 при обновлении Windows 10
- Решение №1 Удаление недавно установленных обновлений
- Решение №2 Запуск средства устранения неполадок
- Решение №3 Перезапуск служб Центра обновления
- Решение №4 Удаление кэш-файлов Windows
- Решение №5 Установка обновления вручную
- Решение №6 Сброс компонентов Центра обновления
Решение ошибки 0x800f0989 при обновлении Windows 10
Решение №1 Удаление недавно установленных обновлений
Немногие об этом знают, но проблемы с обновлением Windows могут начаться… из-за ранее установленных обновлений. По всей видимости, некоторые обновления могут становиться в систему «криво», что вызывает неполадки при установке последующих обновлений. Что же делать в таких случаях? Ответ — удалить несколько ранее установленных обновлений, после чего запустить обновления ОС еще раз.
Чтобы избавиться от последних обновлений, вам нужно сделать следующее:
- Нажмите на клавиатуре комбинацию WIN+I, чтобы открыть окошко «Параметры».
- Найдите и перейдите в раздел «Обновление и безопасность».
- Перейдите во вкладку (или подраздел) «Центр обновления Windows».
- Кликните на пункт «Просмотр журнала обновлений» (значок часов и стрелки).
- В журнале обновлений нажмите на пункт «Удалить обновления».
- Выберите подходящее обновление, кликните на него ПКМ и выберите «Удалить».
- Следуйте инструкции на экране.
- Повторите вышеуказанные действия с еще несколькими последними обновлениями.
- Перезагрузите ПК.
Протестируйте Центр обновления. Возможно, на этот раз ошибка 0x800f0989 не появится.
Решение №2 Запуск средства устранения неполадок
Системное средство устранения неполадок способно решать разнообразные проблемы, возникающие в ОС Windows 10. Давайте попробуем воспользоваться этим средством и посмотрим, что из этого выйдет. Чтобы запустить средство устранения неполадок, вам необходимо сделать на своем ПК следующее:
- Нажмите на клавиатуре комбинацию WIN+I, чтобы открыть окошко «Параметры».
- Перейдите в раздел «Обновление и безопасность», после — в подраздел (или вкладку, если угодно) «Устранение неполадок».
- Опуститесь чуть ниже в окне и кликните на пункт «Дополнительные средства устранения неполадок».
- Найдите в списке компонент «Центр обновления Windows» и нажмите на него ЛКМ.
- Кликните на кнопку «Запустить средство устранения неполадок», после чего следуйте инструкциям от средства на своем экране.
Нет никакой гарантии, что данное средство поможет в решении ошибки 0x800f0989, по попробовать непременно стоит.
Решение №3 Перезапуск служб Центра обновления
Проблемы при обновлении Windows могут возникать в том случае, если одна или несколько служб Центра обновления перестали нормально функционировать. Фоновая интеллектуальная служба передачи, служба криптографии и служба Центра обновления — без этих служб апдейт Windows 10 фактически невозможен. Вот что вам нужно сделать:
- Нажмите на клавиатуре комбинацию WIN+R, что вызвать диалоговое окошко «Выполнить».
- Пропишите в пустую строку окошка «services.msc» и нажмите ENTER.
- Найдите в списке службу «Фоновая интеллектуальная служба передачи (BITS)», нажмите на нее ПКМ и выберите «Запустить».
Заметка: если служба работает, нажмите на кнопку «Перезапустить».
- Повторите эти действия для служб Криптографии и Центра обновления Windows.
Как только закончите проверку и перезапуск служб, проверьте наличие ошибки 0x800f0989.
Решение №4 Удаление кэш-файлов Windows
Центр обновления Windows активно использует для своей работы кэш-файлы. К сожалению, эти файлы могут вызывать всевозможные проблемы для системы, если они были повреждены или их стало попросту слишком много. Решение — удаление проблемного кэша. Чтобы сделать последнее, вам нужно выполнить следующие действия:
- Откройте окно «Службы», как это было продемонстрировано в решении выше.
- Нажмите ПКМ на «Фоновая интеллектуальная служба передачи (BITS)» и выберите «Остановить».
- Остановите работу служб Криптографии и Центра обновления Windows.
- Откройте Проводник Windows и перейдите в следующие директории:
- C:WindowsSoftwareDistribution
- C:WindowsSystem32catroot2
- Удалите содержимое вышеуказанных папок.
Заметка: как альтернатива, вместо удаления вы можете переименовать эти папки в «SoftwareDistribution.old» и «catroot2.old».
- Снова зайдите в окошко «Службы» и запустите ранее остановленные службы.
- Перезагрузите ПК.
Избавившись от кэш-файлов, зайдите в Центр обновления Windows и убедитесь, что ошибка 0x800f0989 исчезла.
Решение №5 Установка обновления вручную
Если вашей системе не удается установить кумулятивное обновление автоматически, то вы всегда можете сделать это самостоятельно, воспользовавшись каталогом Центром обновления Майкрософт. Все предельно просто:
- Скопируйте номер апдейта, возле которого появляется ошибка 0x800f0989.
- Перейдите по вышеуказанной ссылке и воспользуйтесь поисковой строкой справа, чтобы найти нужный апдейт.
- Выберите подходящую версию апдейта из списка и нажмите на кнопку «Загрузить» рядом с ним.
- Скачав MSI-файл, нажмите на него ПКМ и выберите «Запуск от имени администратора».
- Следуйте дальнейшим инструкциям на экране, чтобы установить апдейт.
- Перезагрузите ПК, если этого не будет сделано автоматически.
Разумеется, в таком случае ошибок вы увидеть не должны. Главное — выбрать корректную версию обновления в каталоге.
Решение №6 Сброс компонентов Центра обновления
К сожалению, бывают и такие случаи, когда не помогает ничего — пользователь впадает в самое настоящее уныние. Не сидеть же с вечно устаревшей ОС, верно? Сброс компонентов Центра обновления — крайне эффективное решение многих ошибок, возникающих во время загрузки и установки многих обновления для Windows 10.
Чтобы сбросить компоненты Центра обновления, вам нужно сделать на своем ПК следующее:
- Нажмите комбинацию WIN+X, после чего выберите пункт «Командная строка (администратор)».
- Поочередно выполните все нижеуказанные команды:
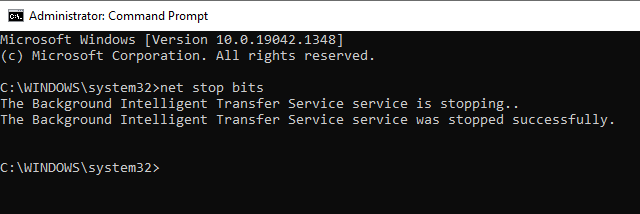
- net stop bits
- net stop wuauserv
- net stop cryptsvc
- Del “%ALLUSERSPROFILE%Application DataMicrosoftNetworkDownloaderqmgr*.dat”
- Ren %Systemroot%SoftwareDistributionDataStore DataStore.bak
- sc.exe sdset bits D:(A;;CCLCSWRPWPDTLOCRRC;;;SY)(A;;CCDCLCSWRPWPDTLOCRSDRCWDWO;;;BA)(A;;CCLCSWLOCRRC;;;AU)(A;;CCLCSWRPWPDTLOCRRC;;;PU)
- sc.exe sdset wuauserv D:(A;;CCLCSWRPWPDTLOCRRC;;;SY)(A;;CCDCLCSWRPWPDTLOCRSDRCWDWO;;;BA)(A;;CCLCSWLOCRRC;;;AU)(A;;CCLCSWRPWPDTLOCRRC;;;PU)
- cd /d %windir%system32
- regsvr32.exe atl.dll
- regsvr32.exe urlmon.dll
- regsvr32.exe mshtml.dll
- regsvr32.exe shdocvw.dll
- regsvr32.exe browseui.dll
- regsvr32.exe jscript.dll
- regsvr32.exe vbscript.dll
- regsvr32.exe scrrun.dll
- regsvr32.exe msxml.dll
- regsvr32.exe msxml3.dll
- regsvr32.exe msxml6.dll
- regsvr32.exe actxprxy.dll
- regsvr32.exe softpub.dll
- regsvr32.exe wintrust.dll
- regsvr32.exe dssenh.dll
- regsvr32.exe rsaenh.dll
- regsvr32.exe gpkcsp.dll
- regsvr32.exe sccbase.dll
- regsvr32.exe slbcsp.dll
- regsvr32.exe cryptdlg.dll
- regsvr32.exe oleaut32.dll
- regsvr32.exe ole32.dll
- regsvr32.exe shell32.dll
- regsvr32.exe initpki.dll
- regsvr32.exe wuapi.dll
- regsvr32.exe wuaueng.dll
- regsvr32.exe wuaueng1.dll
- regsvr32.exe wucltui.dll
- regsvr32.exe wups.dll
- regsvr32.exe wups2.dll
- regsvr32.exe wuweb.dll
- regsvr32.exe qmgr.dll
- regsvr32.exe qmgrprxy.dll
- regsvr32.exe wucltux.dll
- regsvr32.exe muweb.dll
- regsvr32.exe wuwebv.dll
- netsh winsock reset
- net start bits
- net start wuauserv
- net start cryptsvc
- Закройте Командную строку и перезагрузите ПК.
Не хотите вводить целую кучу команд? Тогда есть способ побыстрее: создание BAT-файла, который автоматически сделает все за вас. Все что вам нужно сделать — это создать текстовик, вставить в него особый скрипт, разработанный «головастыми» товарищами с просторов Интернета, и запустить его от имени администратора. На все про все у вас уйдет… минуты две-три. Вот что вам нужно сделать:
- Нажмите ПКМ на Рабочий стол и выберите пункты «Создать→Текстовый документ».
- Откройте созданный текстовик и вставьте в него следующий скрипт:
:: Run the reset Windows Update components.
:: void components();
:: /*************************************************************************************/
:components
:: —— Stopping the Windows Update services ——
call :print Stopping the Windows Update services.
net stop bitscall :print Stopping the Windows Update services.
net stop wuauservcall :print Stopping the Windows Update services.
net stop appidsvccall :print Stopping the Windows Update services.
net stop cryptsvccall :print Canceling the Windows Update process.
taskkill /im wuauclt.exe /f
:: —— Checking the services status ——
call :print Checking the services status.sc query bits | findstr /I /C:»STOPPED»
if %errorlevel% NEQ 0 (
echo. Failed to stop the BITS service.
echo.
echo.Press any key to continue . . .
pause>nul
goto :eof
)call :print Checking the services status.sc query wuauserv | findstr /I /C:»STOPPED»
if %errorlevel% NEQ 0 (
echo. Failed to stop the Windows Update service.
echo.
echo.Press any key to continue . . .
pause>nul
goto :eof
)call :print Checking the services status.
sc query appidsvc | findstr /I /C:»STOPPED»
if %errorlevel% NEQ 0 (
sc query appidsvc | findstr /I /C:»OpenService FAILED 1060″
if %errorlevel% NEQ 0 (
echo. Failed to stop the Application Identity service.
echo.
echo.Press any key to continue . . .
pause>nul
if %family% NEQ 6 goto :eof
)
)call :print Checking the services status.
sc query cryptsvc | findstr /I /C:»STOPPED»
if %errorlevel% NEQ 0 (
echo. Failed to stop the Cryptographic Services service.
echo.
echo.Press any key to continue . . .
pause>nul
goto :eof
):: —— Delete the qmgr*.dat files ——
call :print Deleting the qmgr*.dat files.del /s /q /f «%ALLUSERSPROFILE%Application DataMicrosoftNetworkDownloaderqmgr*.dat»
del /s /q /f «%ALLUSERSPROFILE%MicrosoftNetworkDownloaderqmgr*.dat»:: —— Renaming the softare distribution folders backup copies ——
call :print Deleting the old software distribution backup copies.cd /d %SYSTEMROOT%
if exist «%SYSTEMROOT%winsxspending.xml.bak» (
del /s /q /f «%SYSTEMROOT%winsxspending.xml.bak»
)
if exist «%SYSTEMROOT%SoftwareDistribution.bak» (
rmdir /s /q «%SYSTEMROOT%SoftwareDistribution.bak»
)
if exist «%SYSTEMROOT%system32Catroot2.bak» (
rmdir /s /q «%SYSTEMROOT%system32Catroot2.bak»
)
if exist «%SYSTEMROOT%WindowsUpdate.log.bak» (
del /s /q /f «%SYSTEMROOT%WindowsUpdate.log.bak»
)call :print Renaming the software distribution folders.
if exist «%SYSTEMROOT%winsxspending.xml» (
takeown /f «%SYSTEMROOT%winsxspending.xml»
attrib -r -s -h /s /d «%SYSTEMROOT%winsxspending.xml»
ren «%SYSTEMROOT%winsxspending.xml» pending.xml.bak
)
if exist «%SYSTEMROOT%SoftwareDistribution» (
attrib -r -s -h /s /d «%SYSTEMROOT%SoftwareDistribution»
ren «%SYSTEMROOT%SoftwareDistribution» SoftwareDistribution.bak
if exist «%SYSTEMROOT%SoftwareDistribution» (
echo.
echo. Failed to rename the SoftwareDistribution folder.
echo.
echo.Press any key to continue . . .
pause>nul
goto :eof
)
)
if exist «%SYSTEMROOT%system32Catroot2» (
attrib -r -s -h /s /d «%SYSTEMROOT%system32Catroot2»
ren «%SYSTEMROOT%system32Catroot2» Catroot2.bak
)
if exist «%SYSTEMROOT%WindowsUpdate.log» (
attrib -r -s -h /s /d «%SYSTEMROOT%WindowsUpdate.log»
ren «%SYSTEMROOT%WindowsUpdate.log» WindowsUpdate.log.bak
):: —— Reset the BITS service and the Windows Update service to the default security descriptor ——
call :print Reset the BITS service and the Windows Update service to the default security descriptor.sc.exe sdset wuauserv D:(A;;CCLCSWLOCRRC;;;AU)(A;;CCDCLCSWRPWPDTLOCRSDRCWDWO;;;BA)(A;;CCDCLCSWRPWPDTLCRSDRCWDWO;;;SO)(A;;CCLCSWRPWPDTLOCRRC;;;SY)S:(AU;FA;CCDCLCSWRPWPDTLOCRSDRCWDWO;;WD)
sc.exe sdset bits D:(A;;CCLCSWLOCRRC;;;AU)(A;;CCDCLCSWRPWPDTLOCRSDRCWDWO;;;BA)(A;;CCDCLCSWRPWPDTLCRSDRCWDWO;;;SO)(A;;CCLCSWRPWPDTLOCRRC;;;SY)S:(AU;FA;CCDCLCSWRPWPDTLOCRSDRCWDWO;;WD)
sc.exe sdset cryptsvc D:(A;;CCLCSWLOCRRC;;;AU)(A;;CCDCLCSWRPWPDTLOCRSDRCWDWO;;;BA)(A;;CCDCLCSWRPWPDTLCRSDRCWDWO;;;SO)(A;;CCLCSWRPWPDTLOCRRC;;;SY)S:(AU;FA;CCDCLCSWRPWPDTLOCRSDRCWDWO;;WD)
sc.exe sdset trustedinstaller D:(A;;CCLCSWLOCRRC;;;AU)(A;;CCDCLCSWRPWPDTLOCRSDRCWDWO;;;BA)(A;;CCDCLCSWRPWPDTLCRSDRCWDWO;;;SO)(A;;CCLCSWRPWPDTLOCRRC;;;SY)S:(AU;FA;CCDCLCSWRPWPDTLOCRSDRCWDWO;;WD):: —— Reregister the BITS files and the Windows Update files ——
call :print Reregister the BITS files and the Windows Update files.cd /d %SYSTEMROOT%system32
regsvr32.exe /s atl.dll
regsvr32.exe /s urlmon.dll
regsvr32.exe /s mshtml.dll
regsvr32.exe /s shdocvw.dll
regsvr32.exe /s browseui.dll
regsvr32.exe /s jscript.dll
regsvr32.exe /s vbscript.dll
regsvr32.exe /s scrrun.dll
regsvr32.exe /s msxml.dll
regsvr32.exe /s msxml3.dll
regsvr32.exe /s msxml6.dll
regsvr32.exe /s actxprxy.dll
regsvr32.exe /s softpub.dll
regsvr32.exe /s wintrust.dll
regsvr32.exe /s dssenh.dll
regsvr32.exe /s rsaenh.dll
regsvr32.exe /s gpkcsp.dll
regsvr32.exe /s sccbase.dll
regsvr32.exe /s slbcsp.dll
regsvr32.exe /s cryptdlg.dll
regsvr32.exe /s oleaut32.dll
regsvr32.exe /s ole32.dll
regsvr32.exe /s shell32.dll
regsvr32.exe /s initpki.dll
regsvr32.exe /s wuapi.dll
regsvr32.exe /s wuaueng.dll
regsvr32.exe /s wuaueng1.dll
regsvr32.exe /s wucltui.dll
regsvr32.exe /s wups.dll
regsvr32.exe /s wups2.dll
regsvr32.exe /s wuweb.dll
regsvr32.exe /s qmgr.dll
regsvr32.exe /s qmgrprxy.dll
regsvr32.exe /s wucltux.dll
regsvr32.exe /s muweb.dll
regsvr32.exe /s wuwebv.dll:: —— Resetting Winsock ——
call :print Resetting Winsock.
netsh winsock reset:: —— Resetting WinHTTP Proxy ——
call :print Resetting WinHTTP Proxy.if %family% EQU 5 (
proxycfg.exe -d
) else (
netsh winhttp reset proxy
):: —— Set the startup type as automatic ——
call :print Resetting the services as automatics.
sc.exe config wuauserv start= auto
sc.exe config bits start= delayed-auto
sc.exe config cryptsvc start= auto
sc.exe config TrustedInstaller start= demand
sc.exe config DcomLaunch start= auto:: —— Starting the Windows Update services ——
call :print Starting the Windows Update services.
net start bitscall :print Starting the Windows Update services.
net start wuauservcall :print Starting the Windows Update services.
net start appidsvccall :print Starting the Windows Update services.
net start cryptsvccall :print Starting the Windows Update services.
net start DcomLaunch:: —— End process ——
call :print The operation completed successfully.echo.Press any key to continue . . .
pause>nul
goto :eof
:: /*************************************************************************************/
- Нажмите на пункт «Файл» в строке меню окна и выберите «Сохранить как…».
- Выберите подходящее расположение для файла, задайте ему имя «Быстрый_Сброс_ЦО», измените его расширение на «.bat» и кликните на кнопку «Сохранить».
- Кликните на созданный «Быстрый_Сброс_ЦО.bat» и выберите «Запуск от имени администратора».
- Подождите окончания сброса Центра обновления, после чего перезагрузите свой ПК.
Такая вот несложная процедура хоть и не гарантирует, но имеет довольно высокие шансы на устранение неполадок с Центром обновления. Проверьте наличие ошибки 0x800f0989.
by Kazim Ali Alvi
Kazim has always been fond of technology, be it scrolling through the settings on his iPhone, Android device, or Windows. And at times, unscrewing the device to take… read more
Updated on March 15, 2023
- Have you been trying to upgrade to Windows 11 but received the 0x800f0989 install error each time? Read this article to find the solution.
- It’s most likely the corrupt system files, a conflicting third-party app, or a problematic piece of hardware behind the error.
- To fix it, you can run the DISM and SFC scan, install all available Windows 10 updates including the ones for the drivers, amongst other methods here.
XINSTALL BY CLICKING THE DOWNLOAD FILE
This tool repairs common computer errors by replacing the problematic system files with the initial working versions. It also keeps you away from system errors, BSoDs, and repairs damages made by malware and viruses. Fix PC issues and remove viruses damage now in 3 easy steps:
- Download and Install Fortect on your PC
- Launch the tool and Start scanning to find broken files that are causing the problems
- Right-click on Start Repair to fix issues affecting your computer’s security and performance
- Fortect has been downloaded by 0 readers this month.
With Windows 11 finally released, users have been trying to get their hands on the latest version. And the easiest way here is to upgrade to the latest iteration via Windows Update. However, many reported encountering the Windows 11 install error – 0x800f0989.
The error, as expected, would prevent you from installing Windows 11 on your PC. This would put you in a pickle and force you to go with the other ways to upgrade.
But before you do that, do check out the following sections to understand the underlying causes, and the most effective fixes for Windows 11 install error – 0x800f0989.
Why is the Windows 11 install error – 0x800f0989 encountered?
You could get this error for several reasons, but since you are eligible for the upgrade via Windows Update, it shouldn’t have to do with your PC not meeting the system requirements for Windows 11.
The primary reason here is a minor bug with the OS that’s preventing you from installing the update, and a simple restart should eliminate that. Other than that, if the critical services responsible for downloading updates are not running, you are likely to encounter issues.
Also, problems with the Windows Update components can prevent you from installing the update and upgrading to Windows 11.
So, let’s now walk you through the solutions to fix Windows 11 install error – 0x800f0989 and help you upgrade to the latest iteration.
How do I fix the Windows 11 install error – 0x800f0989?
- Why is the Windows 11 install error — 0x800f0989 encountered?
- How do I fix the Windows 11 install error — 0x800f0989?
- 1. Restart the PC
- 2. Remove non-critical external devices
- 3. Update Windows 10 and install all driver updates
- 4. Run the Windows Update troubleshooter
- 5. Perform the DISM and SFC scan
- 6. Uninstall third-party antivirus
- 7. Install Windows 11 using the installation assistant
1. Restart the PC
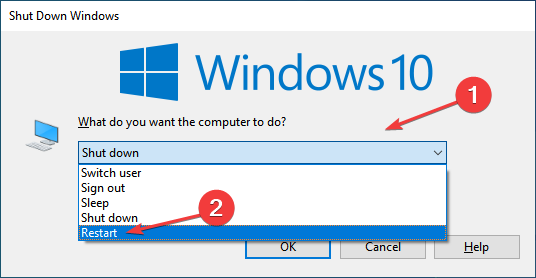
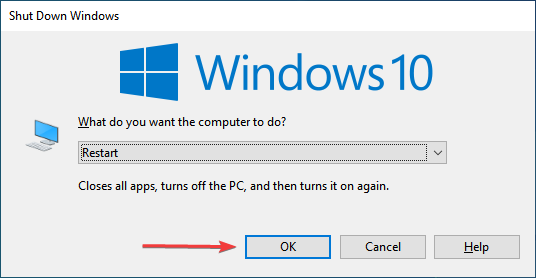
- Navigate to the desktop, press Alt + F4 to launch the Shut Down Windows box, and select Restart from the dropdown menu.

- Click on OK at the bottom.
A simple restart should fix the Windows 11 install error – 0x800f0989, in case it’s a bug with the OS that causing the error. After restarting the computer, check if you are able to install Windows 11.
2. Remove non-critical external devices
In many instances, it was malfunctioning or an incompatible external device connected to the PC that caused the Windows 11 install error – 0x800f0989. If that’s the case, you can try to identify and remove this device.
To do that, first, turn off the system, remove all non-critical devices, like the printer, speaker, headphones, and just keep the mouse, keyboard, and monitor connected. Now, check if you are able to install Windows 11.
If it works, reconnect the devices after upgrading to the latest iteration, and update the drivers for each of them.
3. Update Windows 10 and install all driver updates
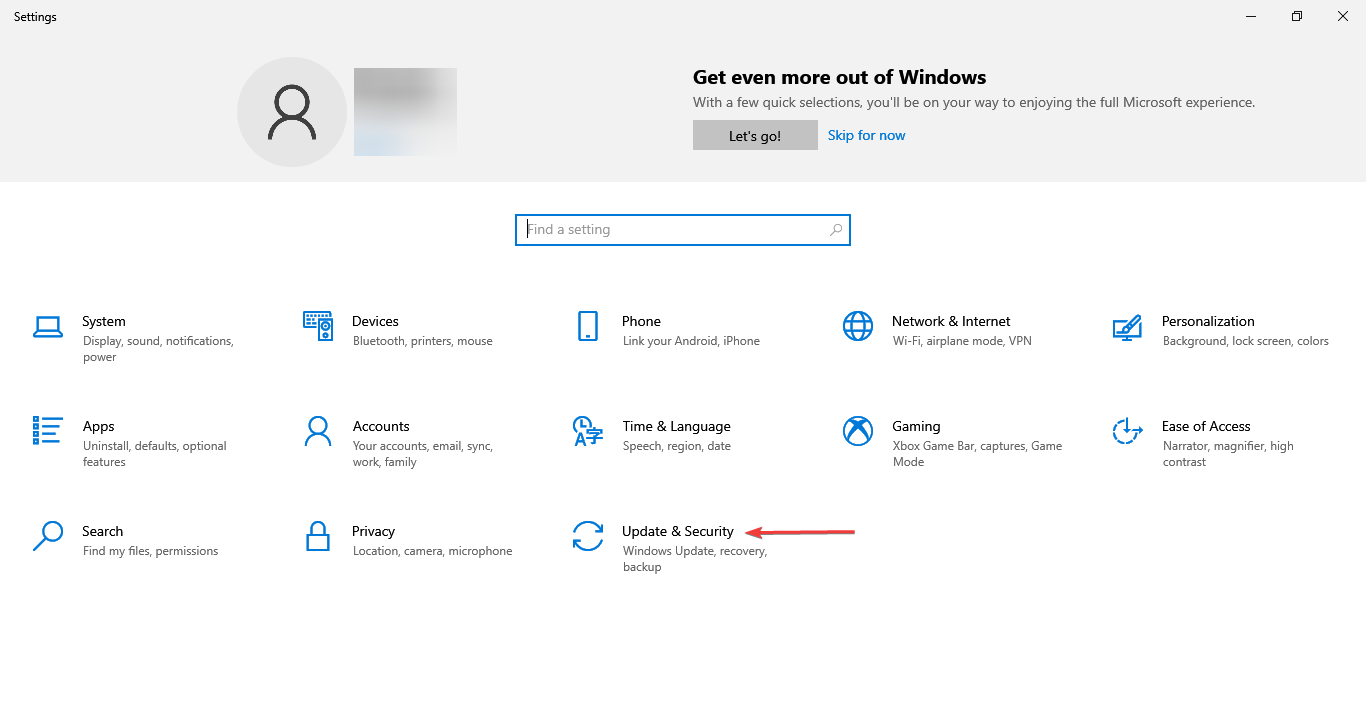
- Press Windows + I to launch the Settings app, and click on Update & Security from the options listed here.

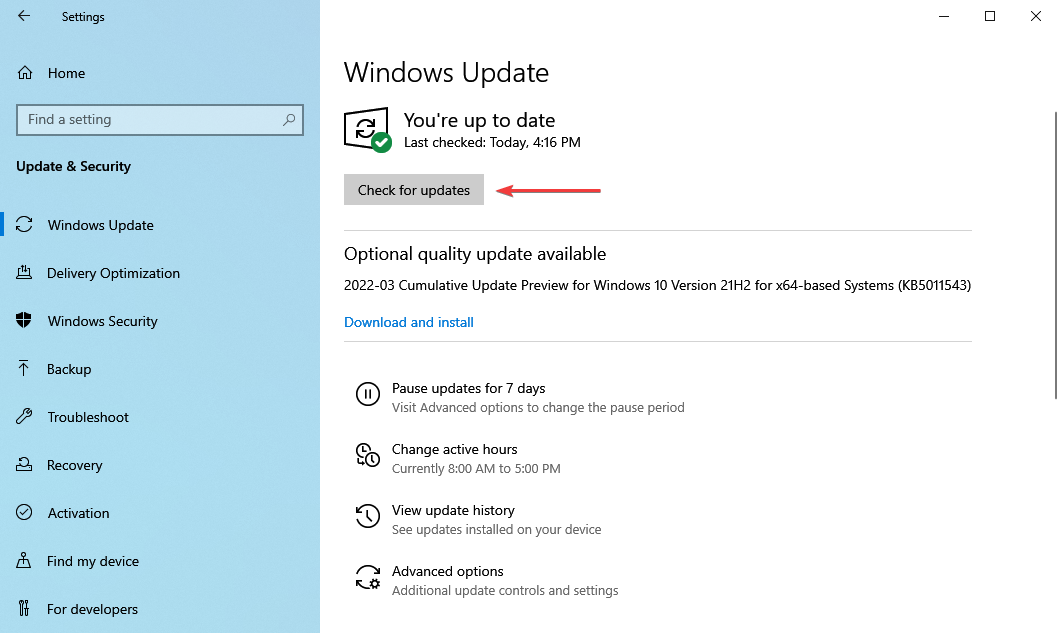
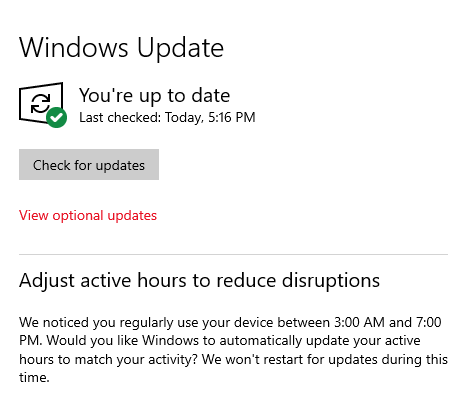
- Next, click on the Check for updates button on the right.

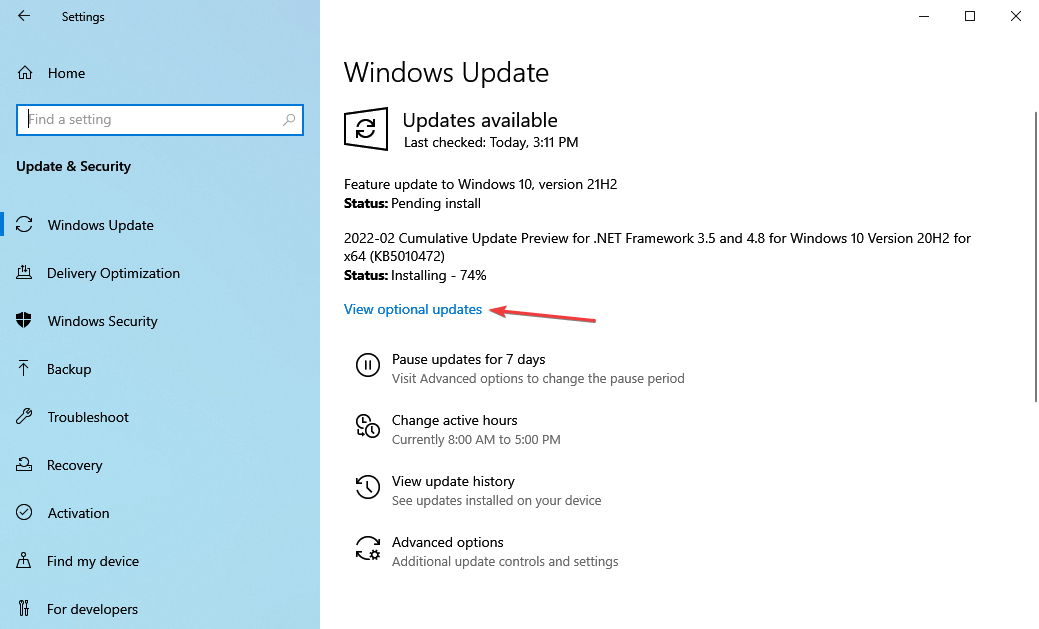
- While the pending updates are being installed, click on View optional updates.

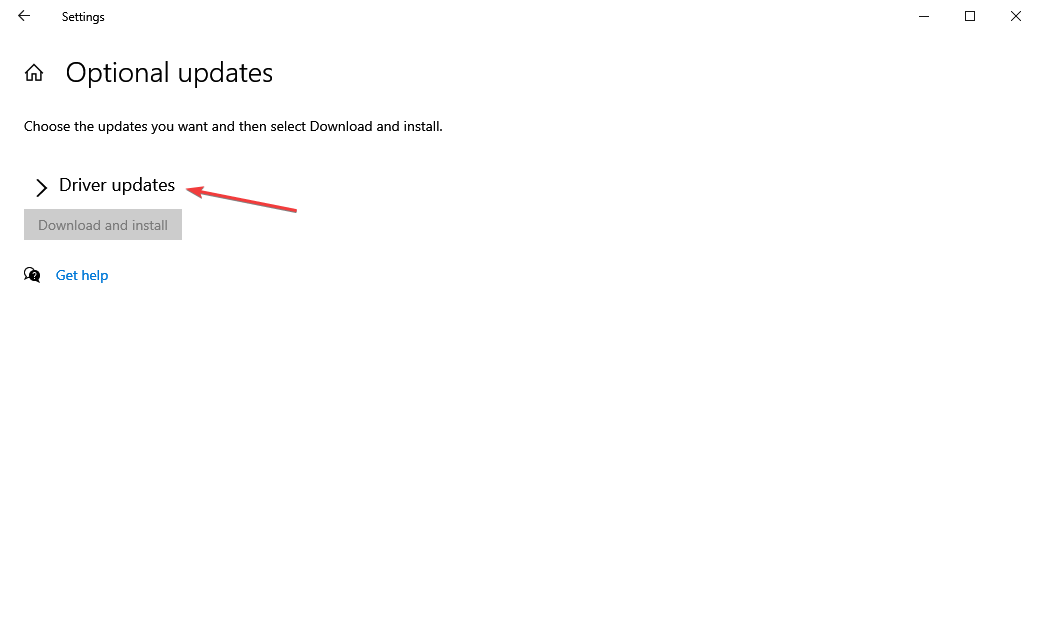
- Now, click on Drivers updates.
- Tick the checkboxes for the all the driver updates listed here, and click on Download and install at the bottom.
- Once done, restart the computer for the changes to fully come into effect.

If you don’t have the latest version of Windows 10 installed, there’s a chance that you might encounter the Windows 11 install error – 0x800f0989 when trying to make the upgrade.
Also, make sure to install the available driver updates since this would eliminate issues with hardware malfunctioning or incompatibility.
Some PC issues are hard to tackle, especially when it comes to missing or corrupted system files and repositories of your Windows.
Be sure to use a dedicated tool, such as Fortect, which will scan and replace your broken files with their fresh versions from its repository.
To update the drivers, you can also use a reliable third-party app. We recommend using DriverFix, a dedicated tool that will automatically keep all the drivers updated and prevent such errors from occurring in the future.
⇒ Get DriverFix
4. Run the Windows Update troubleshooter
- Press Windows + I to launch the Settings app, and click on Update & Security.
- Next, select the Troubleshoot tab from the navigation pane on the left.
- Click on the Additional troubleshooters option to view all the available ones.
- Next, click on the Windows Update option, and then on the Run the troubleshooter button.
- Now, folow the on-screen instructions and choose the appropriate response when prompted to complete the process.

Microsoft offers several built-in troubleshooters to diagnose and eliminate issues with Windows and connected devices. In this case, the Windows Update troubleshooter could help resolve the Windows 11 install error – 0x800f0989.
5. Perform the DISM and SFC scan
- Press Windows + R to launch the Run command, enter cmd in the text field, hold the Ctrl + Shift keys, and then either click on OK or hit Enter to launch an elevated Command Prompt.

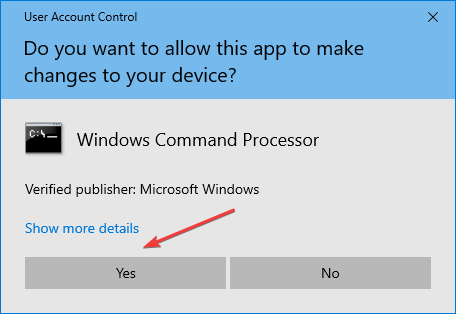
- Click Yes on the UAC (User Account Control) prompt that pops up.

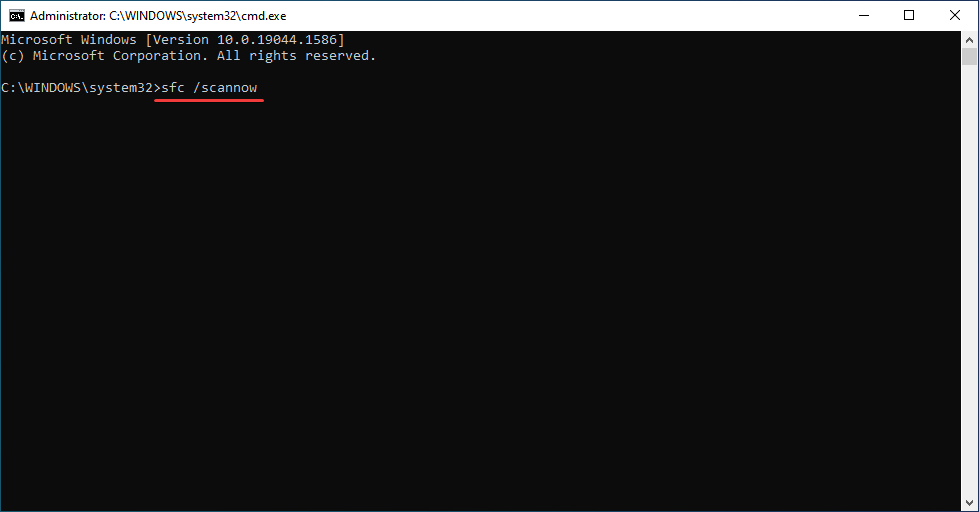
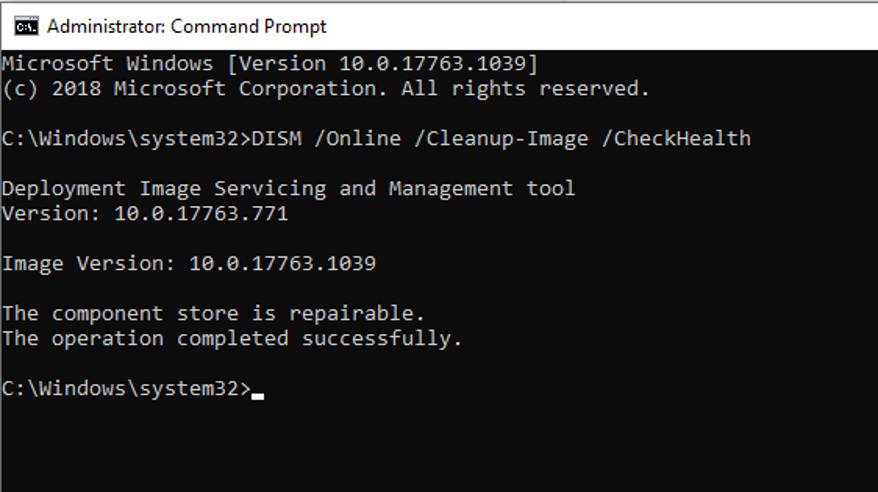
- Next, paste the following command and hit Enter to run the DISM tool.
DISM.exe /Online /Cleanup-image /Restorehealth - Once done, paste the following command and hit Enter to run the SFC scan.
sfc /scannow
The SFC (System File Checker) scan and DISM (Deployment Image Servicing and Management) tool are very effective when it comes to eliminating corrupt system files or replacing the missing ones.
And these two are found to fix a lot of errors, apart from Windows 11 install error – 0x800f0989.
Also, make sure to first run the DISM tool and then the SFC scan, since the former identifies and eliminates certain issues that might prevent the latter from doing the intended task.
- What is Event ID 16 & How to Quickly Fix it
- 0xc0000242 Boot Configuration Error: How to Fix it
- Event ID 4660: An Object was Deleted [Fix]
- A Service Installation Section in This INF Is Invalid [Error Fix]
6. Uninstall third-party antivirus
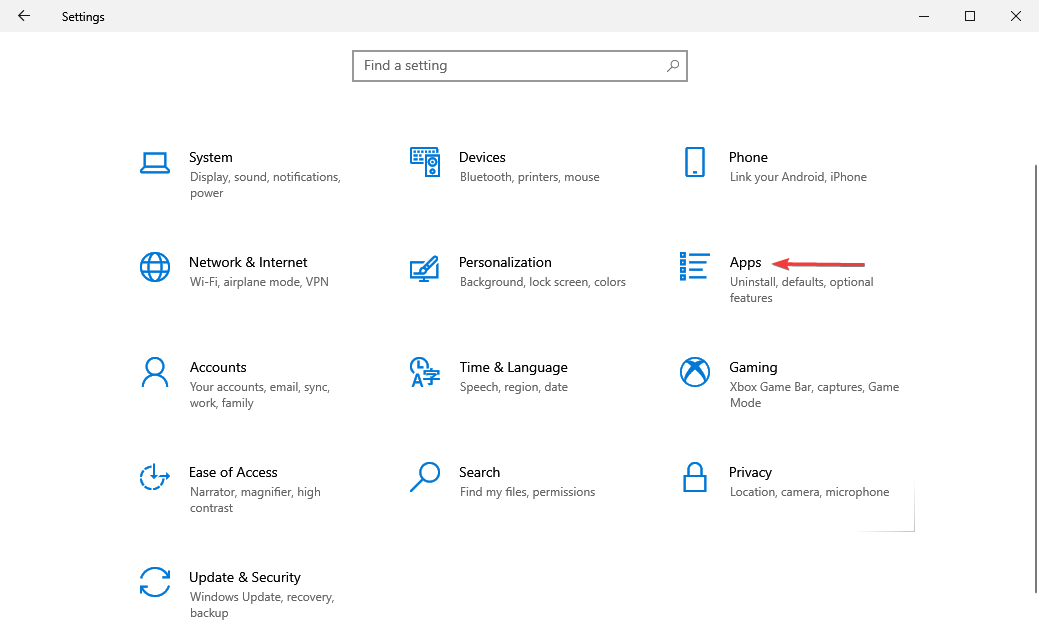
- Press Windows + I to launch Settings, and select Apps from the options here.
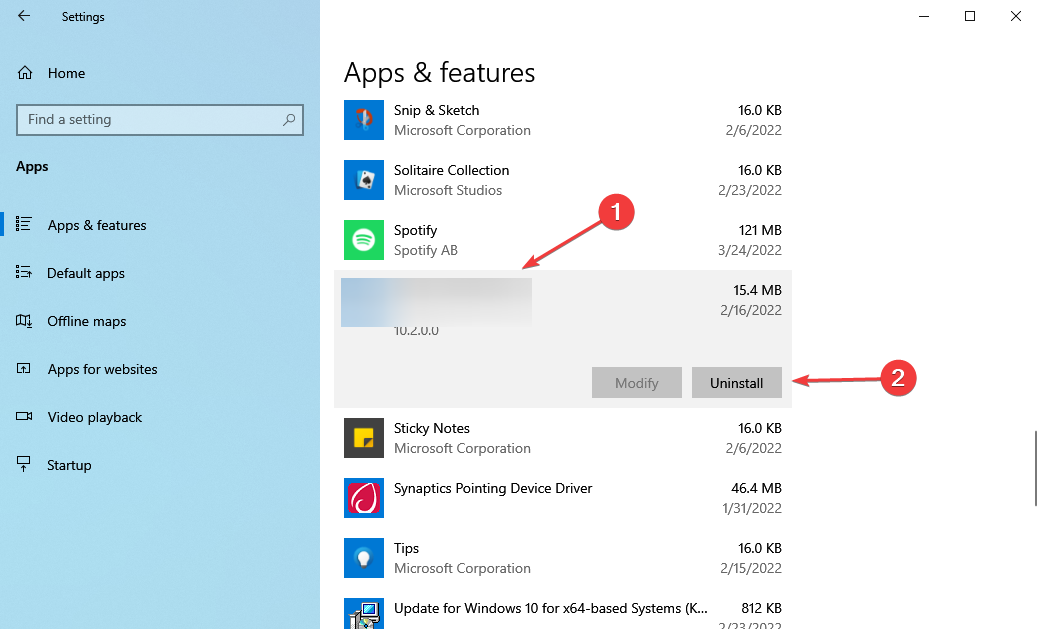
- Now, click on the installed third-party antivirus, and then select Uninstall from that options that appear.
- Again, click Uninstall in the prompt that pops up.
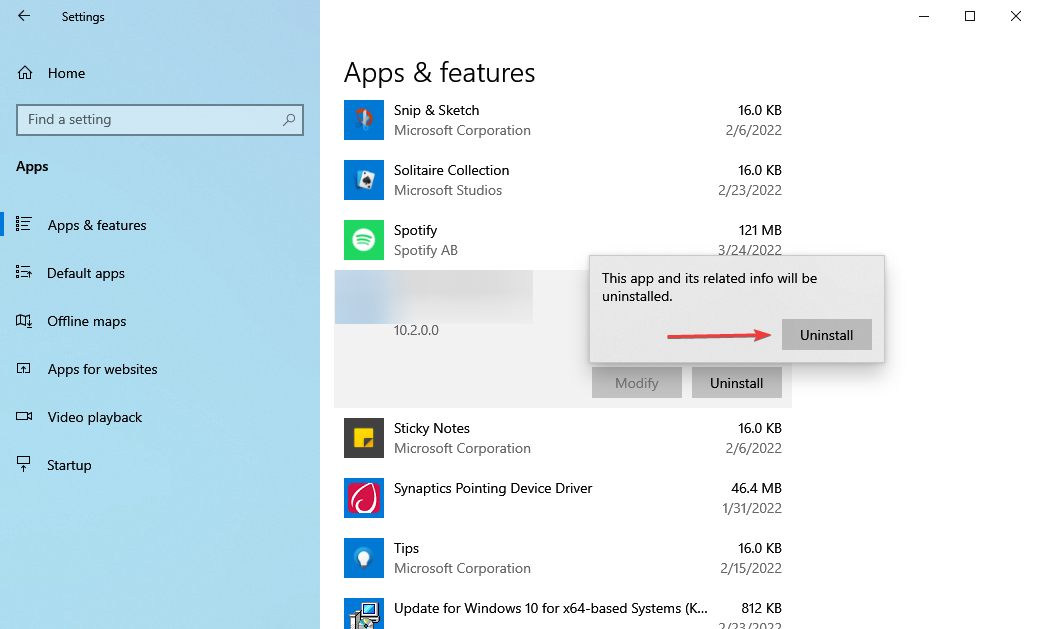
Certain third-party antiviruses are known to conflict with the functioning of the OS, and can cause the Windows 11 install error – 0x800f0989. In this case, it’s best that you remove any third-party antivirus installed on the system, and then try to upgrade to the latest iteration.
In case this too doesn’t work, head to the final method.
7. Install Windows 11 using the installation assistant
If nothing else works, don’t lose hope! There’s always the option to install Windows 11 using the installation assistant. Though not as simple as the Windows Update method, this too would get the latest iteration installed on your PC.
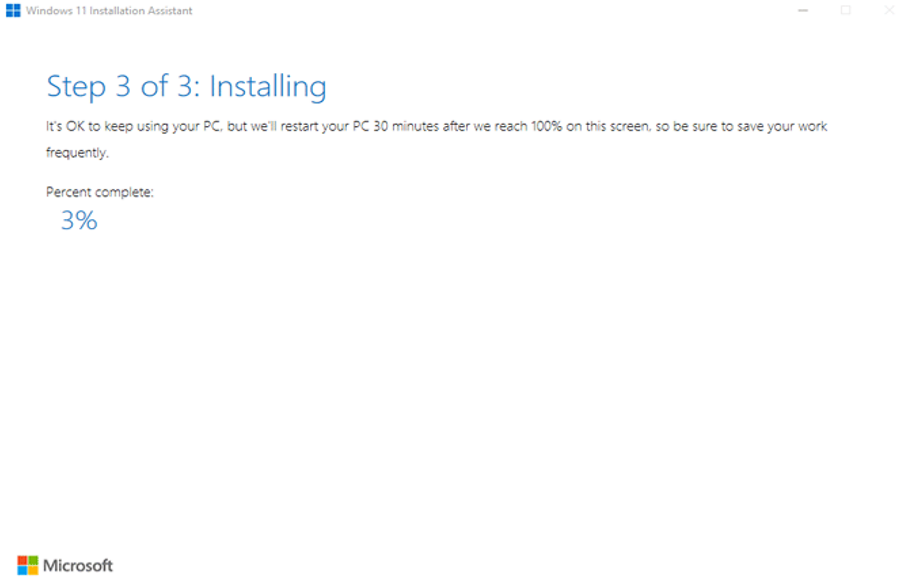
Do remember to download the PC Health Check app beforehand, and verify if your system supports Windows 11, though that shouldn’t be an issue since you already got an update for it.
More so, you can create a bootable USB drive for Windows 11 and upgrade using it. Besides, it might also come in handy if you have to repair critical issues that do not allow the OS to boot.
These are all the ways you can fix the Windows 11 install error – 0x800f0989. And once done with these, you can finally upgrade to the latest iteration, and enjoy a sleek-looking, better performing OS.
Also, read our comparison of Windows 10 and Windows 11, to better understand how the two differ and the new features that have been introduced in the latter. And in case you encounter the 0x800f0988 error while updating Windows, the same fixes should work.
Tell us which fix worked and your first experience of Windows 11, in the comments section below.
Still experiencing issues?
SPONSORED
If the above suggestions have not solved your problem, your computer may experience more severe Windows troubles. We suggest choosing an all-in-one solution like Fortect to fix problems efficiently. After installation, just click the View&Fix button and then press Start Repair.
![]()
Reading time: 10 Minutes
Experiencing the Windows 10/11 install error 0x800f0989 while trying to upgrade to the latest version of Windows 11 using Windows Update? You’re not alone. Here’s what you need to know.
The error code 0x800f0989 is commonly encountered when attempting to install the most recent cumulative updates on your computer. Corrupted system files, accumulated cache, problematic update installation, or disabled update-related services are just a few of the causes of this error code in Windows 11/10.
As expected, the error would prevent you from installing Windows 11 on your computer. This would put you in a bind and force you to resort to other methods of upgrading.
But, before you do, read the sections below to learn about the underlying causes and the most effective fixes for the Windows 11 install error 0x800f0989.
What Is the Install Error 0x800f0989 on Windows 10/11?
Microsoft issues updates on a regular basis, specifically every second Tuesday of the month. These updates include critical bug and vulnerability fixes, feature enhancements, UI changes, and much more. Because Windows is a service, new versions of the operating system are released on a regular basis — there have been over 13 releases of Windows 10 so far.
However, things do not always go as planned. Windows updates are notorious for breaking some features for some users, so it is understandable that those affected are hesitant to apply new patches. Despite this, the updates are critical, and the percentage of people who experience errors or other problems is relatively low. In other words, don’t stop updating Windows because Microsoft will quickly fix the majority of the problems that arise.
Meanwhile, others are experiencing a different issue: they are unable to update Windows and receive an error message in the process. This time, we’re discussing the Windows update error 0x800f0989, which has been plaguing users for years.
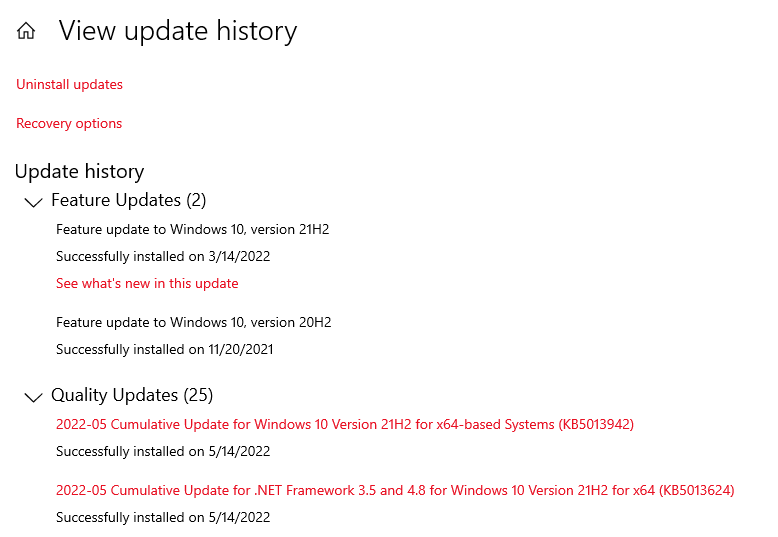
Microsoft recently released Windows update KB5013942 for devices running Windows 10 versions 21H2, 21H1, and 20H2. Installing KB5013942 updates the operating system to Windows 10 Build 19044.1645 and 19043.1645, which focus on security and non-security fixes. However, several Windows users report that the Windows update KB5013942 fails to install with various errors such as 0x800f0922, 0x8000ffff, and 0x800f0989. This guide focuses on fixing the error code 0x800f0989.
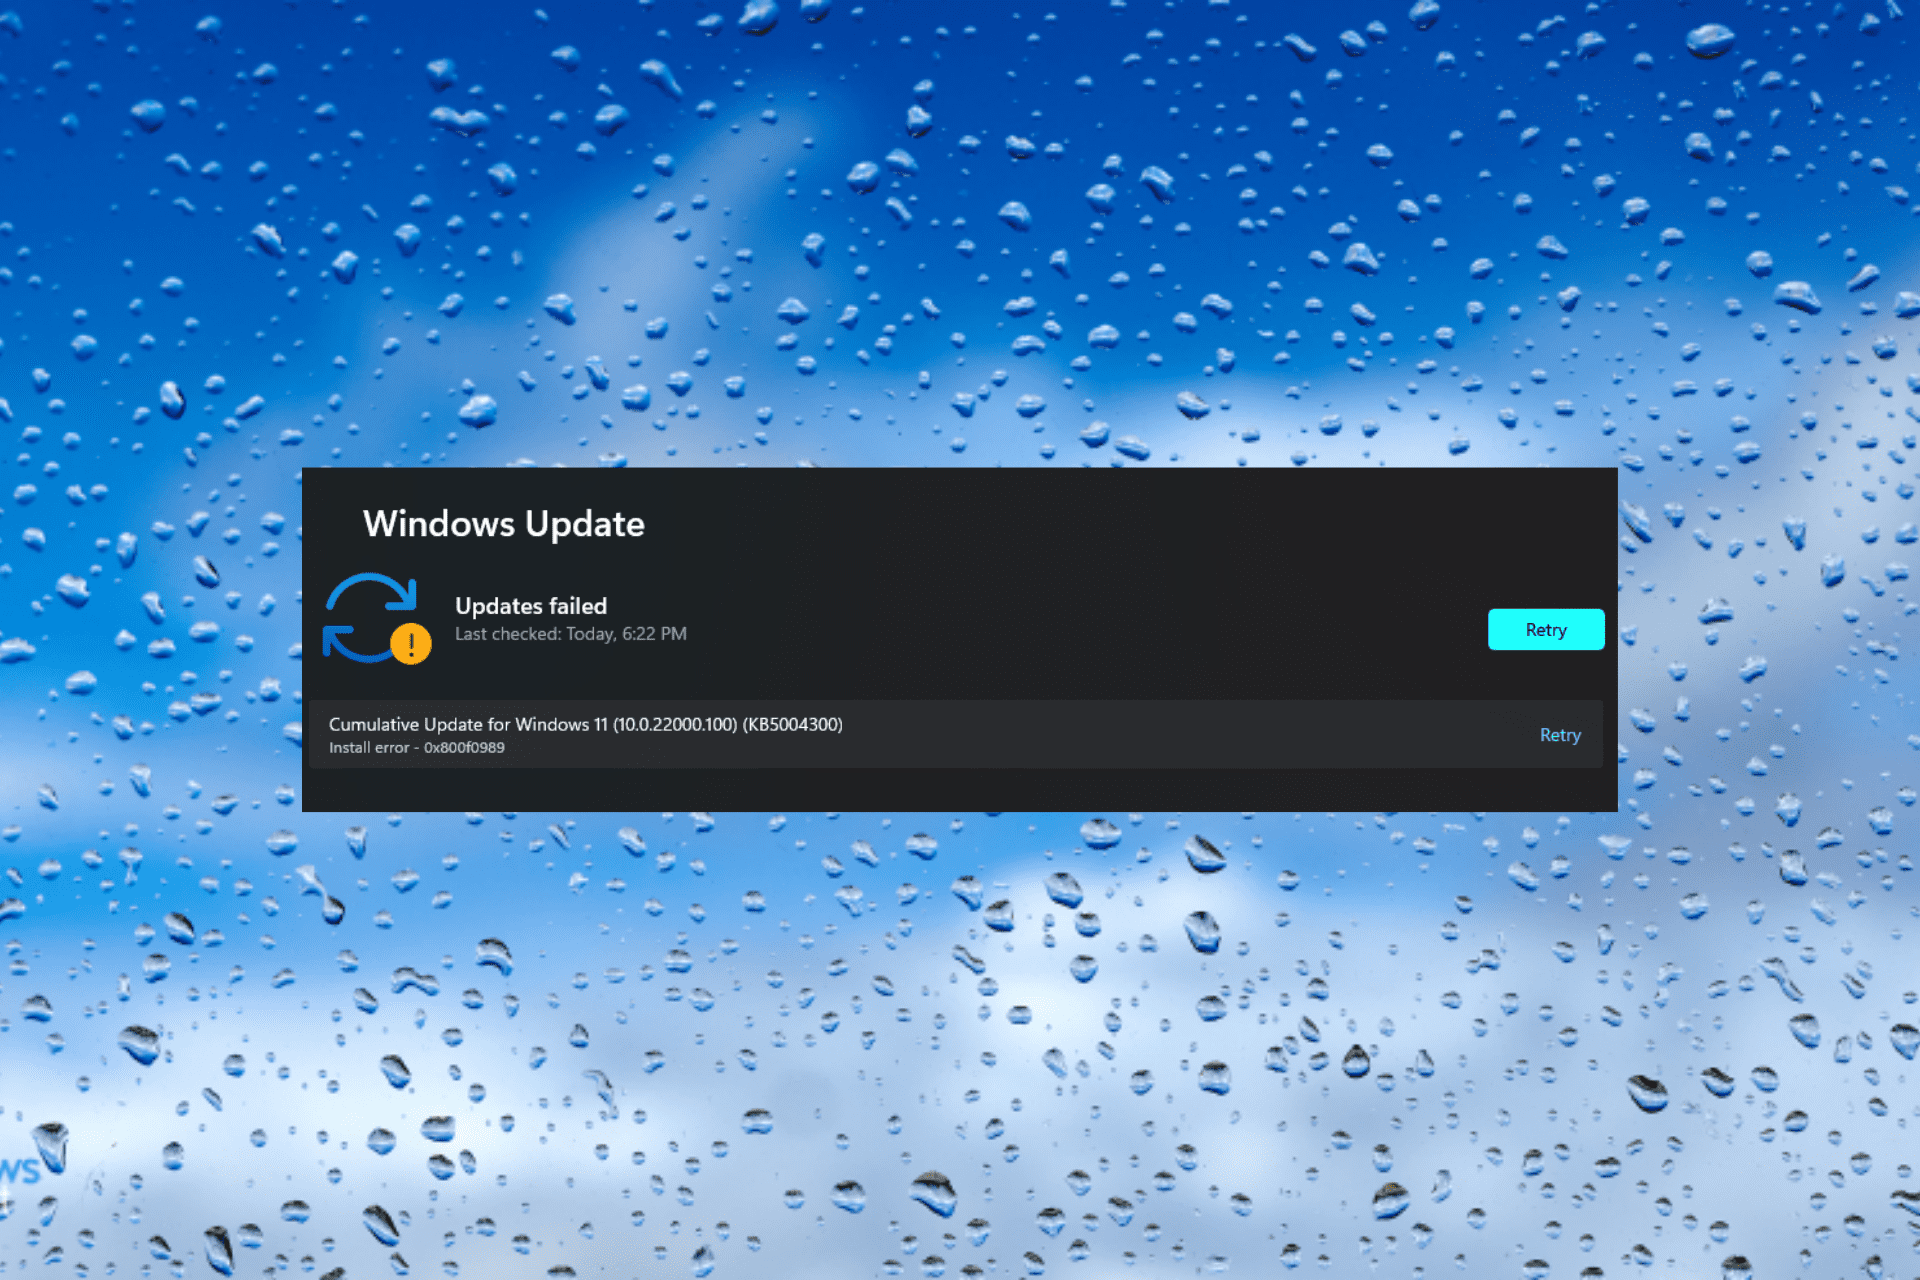
The error message reads:
There were problems installing some updates, but we’ll try again later. If you keep seeing this and want to search the web or contact support for information, this may help:
2022-05 Cumulative Update for Windows 10 Version 20H2 for x64-based Systems (KB5013942) – Error 0x800f0831, 0x800f0900 or 0x80070005
The same is true for Windows 10 November 2019 Update version 1909 devices. The KB5013945 update for Windows 10 Build 18363.2212 is either stuck or failed to install. This also happens to Windows users upgrading to Windows 11.
The symptoms are nearly identical in all cases. The update KB5013942 or KB5013945 either fails to install and returns users to the desktop before undoing changes, boots to a black screen, or appears to be installed successfully only to be re-offered to the same systems, requiring a machine restart to complete the process.
Windows update errors are nothing new; they have been reported on official and other IT forums since the release of the most recent operating system version in 2015. When an update fails to download, hundreds of error codes are assigned, such as 0x800f0984, 0x80070026, 0x80070541, and many others.
Some of these issues resolve themselves (or are resolved by Microsoft), but in most cases, users must fend for themselves in order to resolve these issues. If you encounter 0x800f0989 and it does not go away, you should not be concerned because there are several solutions you can try to ensure the update succeeds.
What Triggers the 0x800f0989 Windows 10/11 Error?
For Windows 10 users, there are numerous factors that can cause Windows Update to repeatedly fail. Corrupt or missing system files, outdated drivers, security software or VPN, problems with the Internet connection, or issues with the Windows update service are some of the most common. If Windows Update fails to install with various errors, updates do not download, or continue to fail, try the solutions listed below.
If you encountered this on a Windows 11 PC, it should not be due to your PC failing to meet the system requirements for Windows 11 since you are eligible for the upgrade via Windows Update.
The main reason for this is a minor bug in the operating system that prevents you from installing the update, which a simple restart should fix. Aside from that, you are likely to encounter problems if the critical services responsible for downloading updates are not running.
Furthermore, issues with Windows Update components may prevent you from installing the update and upgrading to Windows 11.
So, let’s go over how to fix Windows 11 install error 0x800f0989 and help you upgrade to the latest version.
How to Fix the Windows Update Error 0x800f0989
Now for the solution, what do you do when Windows updates do not install and you get the install error – 0x800f0989 Windows 11 error? The first step is to check your internet connection. You must have a stable internet connection to download and install Windows updates from the Microsoft server.
Try running a scan using a reliable PC Repair Tool, like Outbyte PC Repair, to get rid of bugs that might be causing the issue and clean up junk files as well.
You should also try to restart your PC. Go to the desktop, press Alt + F4 to open the Shut Down Windows box, and then choose Restart from the dropdown menu.
In the event that the error is caused by a bug in the operating system, a simple restart should resolve it. Check to see if you can install Windows 11 after restarting the computer. If these emergency steps did not work, proceed to the methods listed below.
Fix #1: Disconnect non-critical external devices.
In many cases, the Windows 11 install error 0x800f0989 was caused by a malfunctioning or incompatible external device connected to the PC. If this is the case, you can attempt to locate and remove the device.
To do so, turn off the system first, then disconnect all non-critical devices such as the printer, speaker, and headphones, leaving only the mouse, keyboard, and monitor connected. Check to see if you can install Windows 11.
If it works, reconnect the devices and update the drivers for each of them after upgrading to the most recent version.
Fix #2: Delete recently installed Windows updates.
If the error 0x800f0989 appears after a recent Windows upgrade, you must have installed a faulty patch update. To resolve the issue, locate the most recently installed security/non-security/optional update and remove it from your system.
Fix #3: Run the Windows Update Troubleshooter.
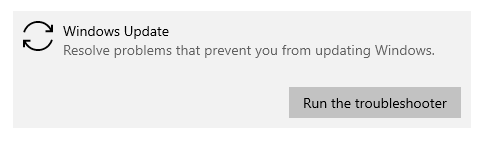
If you haven’t installed any updates on your computer recently and this error is occurring, you should check Windows Update for possible corruption. Here’s how to use the built-in tool:
- Open the Settings menu (Win + I).
- Select Update & Security > Troubleshooter from the menu.
- Select Additional troubleshooters from the right pane.
- Expand Windows Update and select Run the troubleshooter.
- Pay close attention to the on-screen instructions and do as instructed.
The troubleshooter will investigate the possible causes of the error code 0x800f0989 on your device. When it discovers the underlying causes, it automatically repairs them. In the event that it does not, this will tell you what to do next.
In many cases, this will report the problem and request your permission to apply a fix. Thus, click “Apply this fix.” Reboot Windows and check whether you can now install pending updates or not.
Fix #4: Clear the Windows Cache Folders.
Some cache is stored inside the Windows Update folders over time. When the cache stored exceeds the allowable limit, errors such as 0x800f0989 may occur. To resolve the issue, simply delete the folders.
Stop all update-related services on the computer before proceeding with the steps below. BITS, Windows Update, and Cryptographic are the services that must be disabled.
Now that the essential services have been disabled, navigate to the path provided below, locate the folders, and rename them “SD.old” and “Catroot2.old,” respectively.
- SoftwareDistribution – C:WindowsSoftwareDistribution
- Catroot2 – C:WindowsSystem32catroot2
After renaming the folders, restart any services that you had previously stopped. Next, restart your computer so that the changes you made take effect with the next logon.
Fix #5: Install the Windows update again.
Unplug any unnecessary devices, such as a USB flash drive or external HDD, headphones, or printers.
Again, there could be security software or a third-party antivirus interface on Windows Update that prevents it from installing. Disable or uninstall the antivirus software and, most importantly, disconnect from the VPN (if it is configured on your device) before checking for Windows updates.
Also, ensure that your Windows installation drive (basically, your C: drive) has enough disk space to download and install Windows updates.
Manually check for Windows updates now:
- Open Settings by pressing Windows key + X.
- Click on Update & Security, then Check for updates.
- Also, under Optional updates, make sure to click on the Download and Install link (if available)
- This will begin the process of downloading and installing Windows updates from the Microsoft server.
- To apply Windows updates, simply restart your computer.
Fix #6: Manually install the updates.

Microsoft uploads standalone packages for each of its cumulative updates to the Microsoft Update Catalog. If you are unable to update Windows due to the error code 0x800f0989, you can go to the official site and manually download the update that you wish to download/install.
Fix #7: Reset Windows Update.
If the problem persists after running the troubleshooter, windows update is stuck downloading or fails to install, then follow the steps below to reset windows update components.
Open Command Prompt as administrator, and then enter the following commands, pressing Enter after each one:
- net stop wuauserv
- net stop cryptSvc
- net stop bits
- net stop msiserver
- Ren C:WindowsSoftwareDistribution SoftwareDistribution.old
- net start wuauserv
- net start cryptSvc
- net start bits
- net start msiserver
These commands will first terminate the Windows Update service and any associated services. Then, rename the SoftwareDistribution folder to SoftwareDistribution.old (where Windows stores update files; if any files in this folder become corrupted, Windows updates may fail to install.) Finally, restart Windows Update and its related services.
If you are not familiar with a command prompt, then do the following:
- Using services.msc, launch the Windows Services Console.
- Stop the Windows Update service and any associated services (BITS).
- Go to the following address: C:WindowsSoftwareDistributionDownload
- Delete everything in the folder, but leave the folder alone.
- To do so, press CTRL + A to select all files and then Delete to delete them.
Fix #8: Repair Corrupted Windows System Files.
Corrupted system files may prevent new Windows updates from being applied, resulting in a failed or stuck installation. Run the DISM (Deployment Image Servicing and Management) and SFC (System File Checker) utilities to automatically detect and repair missing system files.
- Launch the Command Prompt as an administrator.
- Next, execute the following commands:
- exe /Online /Cleanup-image /Restorehealth
- sfc /scannow
- Both commands check the health of the system image, look for corruption in system files, and replace them with the correct ones if any are found.
- Allow the scanning process to complete entirely before restarting your PC and attempting to install the Windows update again.
Fix #9: Use the Windows Installation Assistant.
If you’re upgrading to Windows 11 and encounter this issue, there is always the option to use the installation assistant to install Windows 11. Though not as simple as using Windows Update, this method will also install the most recent version on your computer.
Remember to download the PC Health Check app beforehand, and check to see if your system supports Windows 11, which shouldn’t be a problem since you’ve already received an update for it.
You can also create a bootable USB drive for Windows 11 and use it to upgrade. Furthermore, it may be useful if you need to repair critical issues that prevent the OS from booting.
Wrapping Up
The 0x800f0989 Windows Update error indicates a problem with installing the most recent cumulative update. This error code can be caused by a faulty installation, corrupted system files, or antivirus software, and it will prevent the update from being installed.
This error message may appear on Windows 10/11 if your system fails to verify the update. Although the Restart button resolves this issue in the majority of cases, you may need to run the Windows Update troubleshooter, delete contents from the Temporary folder, and so on to resolve this issue.
Did these solutions assist you in resolving the Windows update error 0x800f0989? Please let us know in the comments section below.
Give us some love and rate our post!

John Viszneveczky
John is a tech enthusiast who loves to explore and improve the latest technology. He shares his knowledge and opinions on the latest gadgets, apps, software, and games on Software Tested. With years of experience in writing about technology, John has a keen eye for identifying new and noteworthy products. His articles offer in-depth, opinionated insights for both tech enthusiasts and casual readers alike.
Перейти к контенту
В Сети стали появляться жалобы пользователей на проблемы с автоматической установкой последних накопительных обновлений для Windows 10.
Компания Microsoft выпустила очередные ежемесячные обновления для Windows 10 (версий 1909, 1903 и 2004) 11 августа нынешнего года. По словам некоторых пользователей, патчи не устанавливаются как положено и вызывают сообщения об ошибках.
В частности, проблемы с автоматической установкой возникли с KB4565351 и KB4566782 на Windows 10 November 2019 Update (версия 1909) и 2020 Update (версия 2004) соответственно. По словам пользователей, процесс инсталляции прерывается, и появляются малоинформативные сообщения об ошибках, в том числе с кодами 0×800f0988, 0×800f081f и 0×800f08a.
«В процессе установки обновления возникли некоторые проблемы, но мы попытаемся снова через некоторое время. Если вы видите это сообщение и хотите найти информацию в интернете или обратиться в службу техподдержки, это может помочь: (0×800f081f)», — гласит текст одного из сообщений об ошибке.
Чаще всего появляется сообщение с кодом 0×800f081f. Вероятнее всего, оно связано с исчезновением файлов из папки WinSXS, где хранятся различные копии DLL и системных файлов.
На данный момент никакого официального исправления для проблемы не существует. Пользователи могут вручную загрузить обновления из Каталога обновлений Microsoft и установить их. Это позволит избежать автоматической установки и предотвратить упомянутые выше сбои.
Помимо неполадок с автоматической установкой, на некоторых компьютерах KB4565351 «ломает» аудиодрайверы и вызывает синий экран смерти.