
")
Если у вас есть ошибка VAN 9003, то вам необходимо включить TPM 2.0. Данный процессор поддерживает стандарт или отсутствует? Старые модели имеют TPM 1.0, 2.1 или другие устаревшие варианты. Благодаря этой технологии происходит шифрование данных в игре перед отправкой на серверы, поэтому компьютер должен быть включен. ТПМ 2.0 нужен для того чтобы ваш ПК поддерживал TPM 2.0. Для того чтобы узнать о поддержке, следует изучить технические характеристики процессора.
Как убрать ошибку VAN 9003 в Valorant?
Большая часть пользователей, которые столкнулись с этой проблемой и сталкивались с ней ранее смогли исправить ее, изменив некоторые настройки BIOS. По данным производителя, чаще всего сбой происходит на компьютерах ASUS из-за каких-то особенностей предустановленного BIOS (UEFI).
Инструкция:
- Перезагружаем компьютер и в момент, когда появится подсказка внизу экрана, нажимаем F2, Del или другую клавишу (должна быть указана в строке снизу). Нам нужно попасть в BIOS.
- Идем в раздел «Advanced» и выбираем вкладку «PCH-FW Configuration».
- Кликаем по строке «TPM Device Selection» и устанавливаем значение «Enable Firmware TPM»
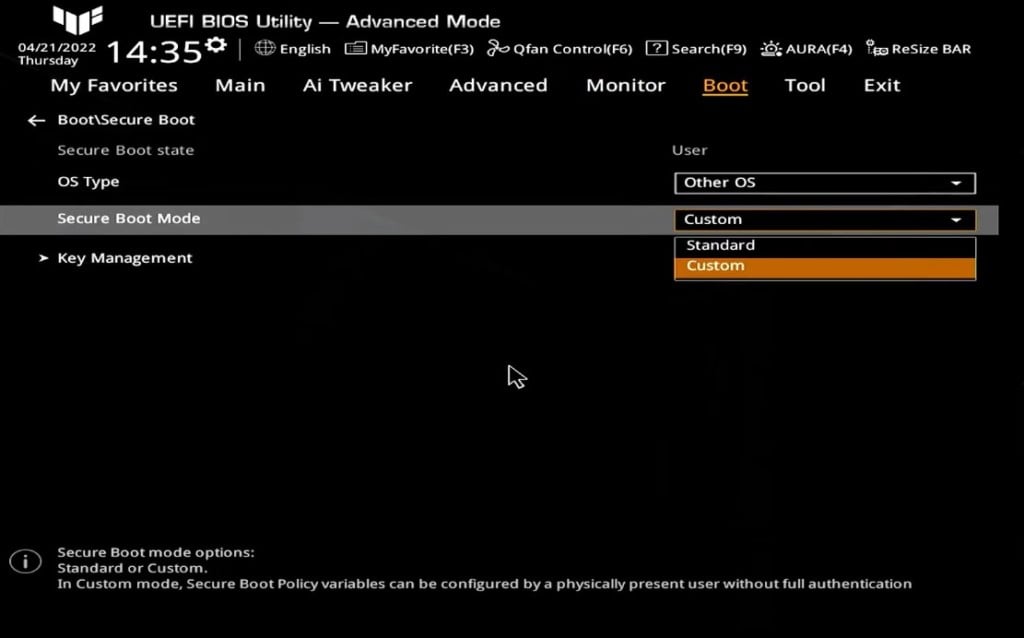
- На вкладке «Boot» открываем «Secure Boot» – «Secure Boot Mode» и выбираем «Standart».
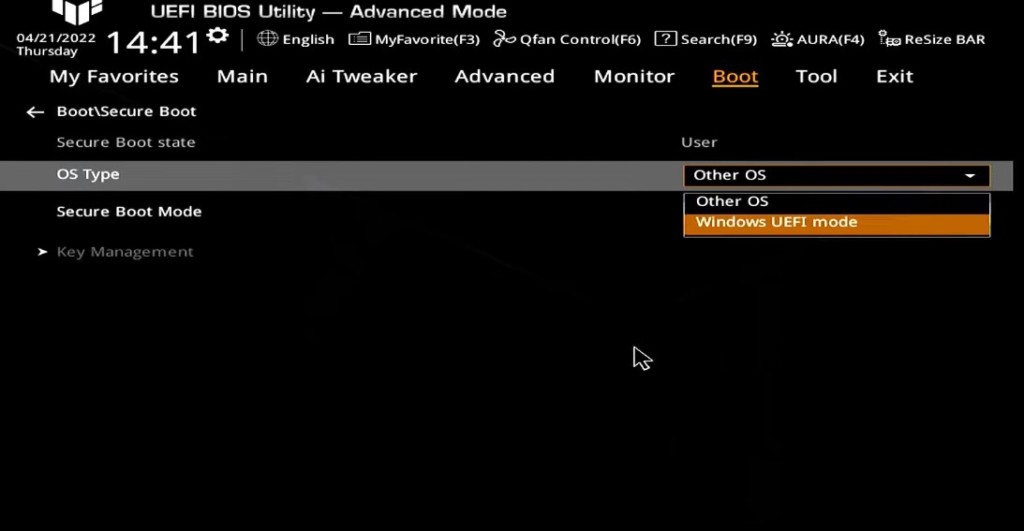
- Для параметра «OS Type» устанавливаем вариант «Windows UEFI Mode».
- Перезагружаем компьютер через вкладку «Exit» и проверяем, работает ли Valorant.
Как оказалось, многие из тех кто прошел данную операцию не подтвердили, что она была проведена. Возможно, это указывает либо на проблему совместимости,либо же на отсутствие TPM 2.1. Пока что нет никакой другой причины появления ошибки, но это может быть связано с тем, что кто-то из сотрудников допустил ошибку в тексте или же просто забыл о ней. Эта инструкция — ваш лучший шанс исправить ошибку VAN 9003.
Видео
Fix VAN9003 Valorant Windows 11 || Fix This Build of Vanguard is Out of Compliance Valorant Error
If you are getting the Van9003 Valorant error on Windows 11, then watch this video till the end to know to fix this build of Vanguard is out of compliance Valorant error.
If you have any sort of query, let us know in the comment section given below, and we will be helping you with your queries.
If you like the video please don’t forget to subscribe and hit the bell icon!
Timestamps:
00:00 Intro
01:04 Fix 1
01:40 Fix 2
02:18 Fix 3
Эта статья предназначена только для пользователей Windows 11.
О БЕЗОПАСНОЙ ЗАГРУЗКЕ И TPM 2.0
Доверенный платформенный модуль (TPM) и безопасная загрузка – это защитные технологии, которые позволяют Windows 11 запускать программы на более высоком уровне доверия и безопасности. Поэтому Vanguard требует запуска этих двух функций, чтобы определить доверенный статус системы.
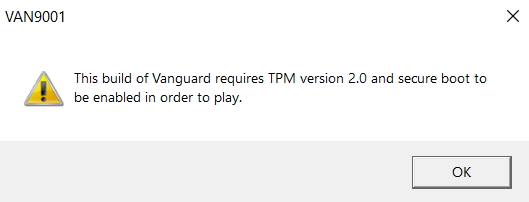
Если безопасная загрузка или TPM 2.0 отключены в Windows 11, VALORANT не сможет корректно запуститься, и игроки увидят ошибку VAN9001 или VAN9003:

Как проверить, что безопасная загрузка поддерживается и включена
- Нажмите клавишу Windows.
- Введите «msinfo32» и нажмите Enter. Откроется меню «Сведения о системе».
- Щелкните по пункту «Сведения о системе» на панели слева.
- Прокрутите вниз панель справа и найдите эти значения:
- У параметра «Режим BIOS» должно быть значение «UEFI»
- У параметра «Состояние безопасной загрузки» должно быть значение «Вкл.».
- Если у этого параметра отображается значение «Выкл.», значит, он отключен. Его можно включить в любое время. (Ниже указаны способы решения проблем.)
- Если у этого параметра отображается значение «Не поддерживается», значит, ваше оборудование не поддерживает эту функцию. Чтобы узнать возможности своего оборудования, свяжитесь с его производителем.
Как проверить, что TPM 2.0 поддерживается и включен
- Нажмите клавишу Windows.
- Введите «tpm.msc» и нажмите Enter.
- Если TPM не поддерживается или не включен, вы увидите примерно следующее:
Если TPM поддерживается, вы увидите примерно следующее:
- Статус: TPM готов к использованию.
- Версия спецификации: 2.0
КАК ПРОВЕРИТЬ, ПОДДЕРЖИВАЕТ ЛИ ВАША СИСТЕМА БЕЗОПАСНУЮ ЗАГРУЗКУ И TPM 2.0
Для начала давайте убедимся, что ваша система поддерживает эти технологии.
ВАЖНО: РЕДАКТИРОВАНИЕ ВАШИХ НАСТРОЕК BIOS
Если вы не очень хорошо знакомы с навигацией в своей версии BIOS, пожалуйста, обратитесь за помощью к специалисту. Неправильные настройки BIOS могут вызвать проблемы с вашим компьютером, вплоть до того, что он не сможет запуститься.
Кроме того, BIOS может сильно отличаться в зависимости от типа и производителя вашего компьютера или материнской платы. Поэтому мы настоятельно рекомендуем вам обратиться к справочным ресурсам производителя вашего компьютера или материнской платы, чтобы сделать все правильно.
РЕШЕНИЕ ПРОБЛЕМ С БЕЗОПАСНОЙ ЗАГРУЗКОЙ
Внимание: ресурсы, указанные в этом руководстве, не принадлежат и не контролируются Riot Games, поэтому используйте их на свой страх и риск!
Вот несколько справочных ресурсов, где рассказывается, как включить безопасную загрузку и UEFI:
| Dell | https://www.dell.com/support/kbdoc/en-us/000190116/How-to-Enable-Secure-Boot-on-Your-Dell-Device |
| HP | https://support.hp.com/us-en/document/ish_4300937-4295746-16 |
| Lenovo | https://support.lenovo.com/ru/ru//solutions/ht509044 |
| MSI | https://www.msi.com/blog/Windows-11-guidance |
У Microsoft также есть страница с общей информацией о включении безопасной загрузки: https://support.microsoft.com/ru-ru/windows/windows-11-%D0%B8-%D0%B1%D0%B5%D0%B7%D0%BE%D0%BF%D0%B0%D1%81%D0%BD%D0%B0%D1%8F-%D0%B7%D0%B0%D0%B3%D1%80%D1%83%D0%B7%D0%BA%D0%B0-a8ff1202-c0d9-42f5-940f-843abef64fad
РЕШЕНИЕ ПРОБЛЕМ С TPM 2.0
Внимание: ресурсы, указанные в этом руководстве, не принадлежат и не контролируются Riot Games, поэтому используйте их на свой страх и риск!
Вот несколько справочных ресурсов, где рассказывается, как включить TPM 2.0:
| ASUS | https://www.asus.com/support/FAQ/1046215/ |
| Dell | https://www.dell.com/support/kbdoc/en-us/000189676/windows-10-how-to-enable-the-tpm-trusted-platform-module |
| HP | https://support.hp.com/us-en/document/ish_4300937-4295746-16 |
| Lenovo | https://support.lenovo.com/ru/ru/solutions/ht512598 |
| MSI | https://www.msi.com/blog/How-to-Enable-TPM-on-MSI-Motherboards-Featuring-TPM-2-0 |
У Microsoft также есть страница с общей информацией о включении TPM 2.0: https://support.microsoft.com/ru-ru/windows/%D0%B2%D0%BA%D0%BB%D1%8E%D1%87%D0%B5%D0%BD%D0%B8%D0%B5-tpm-2-0-%D0%BD%D0%B0-%D0%BA%D0%BE%D0%BC%D0%BF%D1%8C%D1%8E%D1%82%D0%B5%D1%80%D0%B5-1fd5a332-360d-4f46-a1e7-ae6b0c90645c
Все рабочие решения для исправления ошибки van9003 в Valorant
Вы можете реализовать одно из следующих решений, чтобы исправить ошибку van9003 в Valorant.
Связанный: Valorant «Очередь отключена» — как исправить
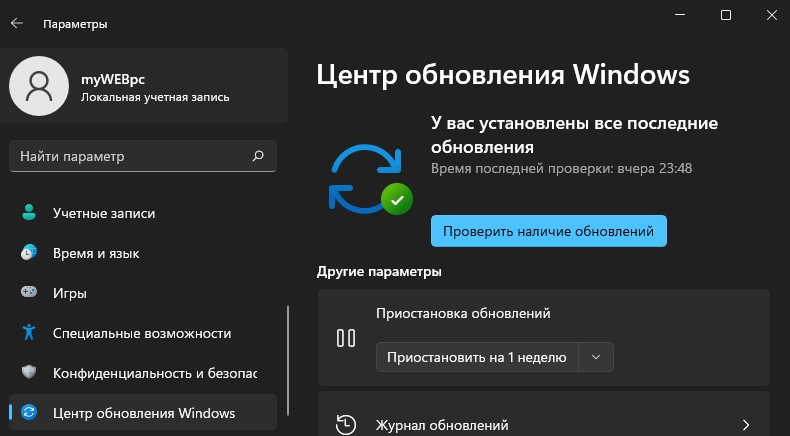
- Обновление Windows 11: наиболее распространенным исправлением данной ошибки является обновление Windows 11. Найдите Настройки из панели поиска Windows в нижней части экрана и щелкните значок, когда он появится. В настройках выберите «Обновление и безопасность» и нажмите кнопку «Центр обновления Windows». Проверьте наличие последних обновлений и установите последний патч. Перезагрузите компьютер и перезапустите игру.
- Включение безопасной загрузки: Другое популярное исправление для игры — включить безопасную загрузку для вашего ПК. Сначала проверьте, включена ли безопасная загрузка, выполнив поиск Системная информация в строке поиска Windows. Щелкните значок «Информация о системе» и в новом окне проверьте Сводка системы чтобы узнать, включена ли безопасная загрузка. Если он не включен, откройте BIOS, нажав F2(стандартная кнопка для большинства материнских плат) при запуске устройства. Перейдите к UEFI настройки и включите безопасную загрузку.
- Превращение TPM 2.0: отключение TPM 2.0 также приведет к той же ошибке. Вы можете включить его, открыв BIOS и посетив Настройки доверенного платформенного модуля. Внутри этого включите Доверенный платформенный модуль вариант и сохранить все. Перезагрузите систему и попробуйте запустить Valorant.
Помните, что это некоторые из наиболее распространенных решений для исправления ошибки van9003, доступных в Интернете. Если ничего из этого не работает, мы настоятельно рекомендуем обратиться в службу поддержки Riot Games для получения дополнительных запросов и предложений.
This build of Vanguard is out of compliance — VAN 9003 Valorant
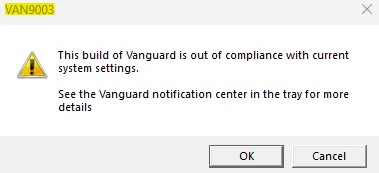
При запуске игры Valorant в Windows 11 может возникнуть ошибка VAN 9003 This build of Vanguard is out of compliance with current system settings, что сборка Vanguard не соответствует текущим системным настройкам.
Виновником ошибки This build of Vanguard is out of compliance с кодом VAN 9003 является анти-чит Vanguard, который устарел или несовместим с текущей версии игры. Кроме того, это может быть неправильные настройками Secure Boot и TPM 2.0 в BIOS.
Как исправить VAN 9003 This build of Vanguard is out of compliance
В данной инструкции разберем, как исправить ошибку This build of Vanguard is out of compliance with current system settings с кодом VAN 9003 при запуске игры Voliorant в Windows 11.
1. Обновите Windows 11
Обновите Windows 11 до последней версии, так как с обновлениями идут нужные компоненты для правильной работы игр.
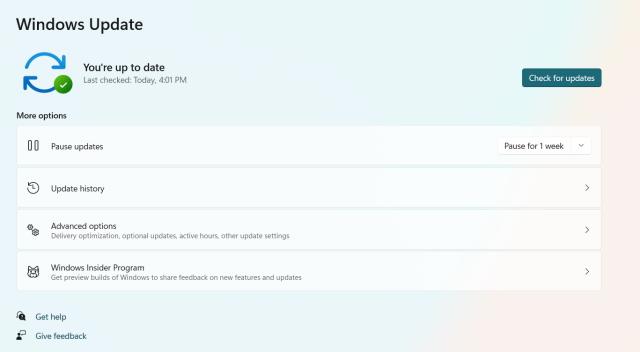
- Перейдите в Центр обновления Windows
- Нажмите Проверить наличие обновлений
2. Переустановить Vanguard
Чтобы исправить ошибку VAN 9003 при запуске игры Valorant в Windows 11 нужно удалить Vanguard и установить его заново.
- Нажмите Win+R и введите appwiz.cpl
- Найдите и удалите Riot Vanguard
- Перезагрузите ПК
- Далее зайдите на официальный сайт игры и скачайте последнюю версию
- Vanguard установится автоматически после запуска Riot Games
- Перезагрузите ПК

3. Включить Secure Boot, TPM и UEFI
Для анти-чита Vanguard в Windows 11 нужна безопасная загрузка и наличие TPM 2.0 чипа для корректной работы игр от Rio Games, которые включаются в BIOS.
Чтобы зайти в BIOS, при включении ноутбука или ПК нажимайте непрерывно кнопку Delete. Кроме того, вы можете набрать в поиске Google «Как зайти в биос …» и указать модель ноутбука или материнской платы ПК. Это касается и включения ниже параметров, которые тоже придется искать самостоятельно в поиске по картинкам, так как у всех BIOS разный, но я прикреплю картинки для некоторых BIOS/UEFI.
Включите ниже UEFI, Secure Boot и TPM:
- Измените режим загрузки CSM или Legacy на UEFI
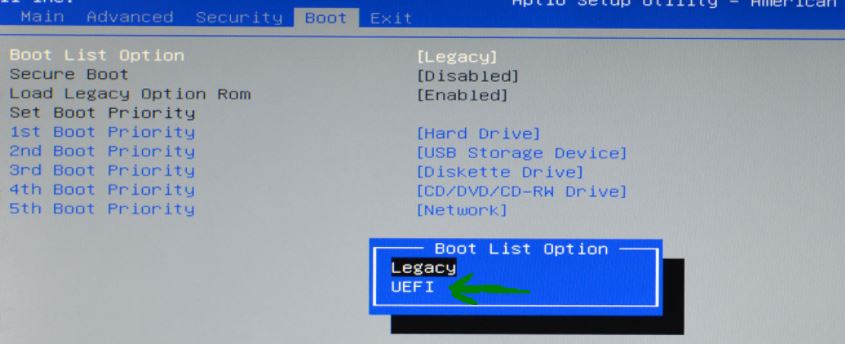

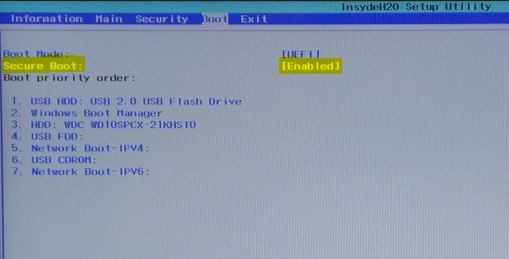
- Включите Secure Boot (Enabled)
- Включите TPM 2.0. Имеется подробное руководство по включению TPM 2.0 для разных BIOS
С момента своего запуска Valorant быстро стала одной из лучших и самых популярных игр FPS сегодня. С учетом того, что игра сильно конкурирует с играми в жанре королевской битвы, такими как Apex Legends, и скоро появится собственный порт Valorant Mobile, все выглядит хорошо. Однако, как и во всех играх, в Valorant случаются ошибки.
Одной из наиболее распространенных проблем является ужасная ошибка Vanguard TPM 2.0, которая блокирует вас от Valorant, если на вашем ПК не включен TPM 2.0 и безопасная загрузка. Хотя вы можете подумать, что это невозможно исправить, я здесь, чтобы сказать вам, что это можно легко исправить. Так что включите свой компьютер и следуйте инструкциям, как я покажу вам, как исправить ошибку «Для этой сборки Vanguard требуется TPM 2.0 и безопасная загрузка» в Valorant.
Исправить ошибку Vanguard TPM 2.0 в Valorant (2022)
Пока я покажу вам, как исправить эту надоедливую ошибку Valorant TPM 2.0, я также объясню, почему это происходит в первую очередь.
Почему возникает ошибка Valorant Vanguard TPM 2.0?
Доверенный платформенный модуль (TPM 2.0) и безопасная загрузка — два наиболее важных требования для пользователей при установке и запуске Windows 11. Короче говоря, микросхема TPM хранит ключи, пароли и цифровые сертификаты, необходимые для безопасности вашего ПК. Таким образом, чтобы обеспечить безопасность своих игроков и держать мошенников в страхе, программное обеспечение безопасности Riot Games Vanguard внедрило те же требования. Это означает, что для того, чтобы вы могли играть в Valorant на своем компьютере, он должен соответствовать TPM 2.0 и безопасной загрузке, в противном случае вы увидите ошибку, подобную приведенной ниже.

Ошибка TPM 2.0 Valorant существует уже некоторое время, и игроки Valorant разочарованы. Однако есть простое и эффективное решение, которое мы воспользуемся и объясним в этом руководстве. Если вы беспокоитесь о потере своих данных, не беспокойтесь, так как решение не потребует сброса настроек к заводским. С учетом сказанного давайте узнаем, как исправить ошибку Valorant TPM 2.0.
Как исправить ошибку Valorant TPM 2.0 в Windows 11/10
Самый простой способ исправить ошибку Vanguard TPM 2.0 в Valorant — включить модуль TPM 2.0 и SecureBoot на вашем ПК с Windows. Вам нужно будет войти в BIOS ПК и включить функции оттуда. Если вы не уверены, есть ли на вашем ПК микросхема TPM, воспользуйтесь нашим руководством по TPM, чтобы узнать. Хотя это может показаться сложным, сделать это достаточно просто. Просто выключите компьютер и выполните следующие действия:
1. После выключения компьютера нажмите кнопку питания, а затем несколько раз нажмите кнопку BIOS. Хотя у компаний есть разные ключи BIOS, наиболее распространенными являются F2, F10 или F12. Вы можете найти ключ BIOS для вашего ноутбука или материнской платы в Интернете. Несколько раз нажмите клавишу, пока не войдете в настройки BIOS вашей системы.

2. Когда вы войдете в BIOS, найдите параметр «Безопасная загрузка». Хотя BIOS различается от системы к системе, скорее всего, его можно будет найти в категории «Конфигурация загрузки». По крайней мере, так было на моем ноутбуке Alienware.

3. Здесь найдите параметр «Безопасная загрузка» и включите его. Подтвердите любые диалоговые окна или проверки, которые появляются на вашем экране. Не перезагружайте компьютер, так как мы еще не закончили.

4. Теперь найдите настройку для включения модуля TPM. Вы можете обнаружить, что он помечен как Intel Trusted Platform Module Technology или просто как TPM-устройство. Просто включите настройку и подтвердите все появившиеся диалоговые окна.

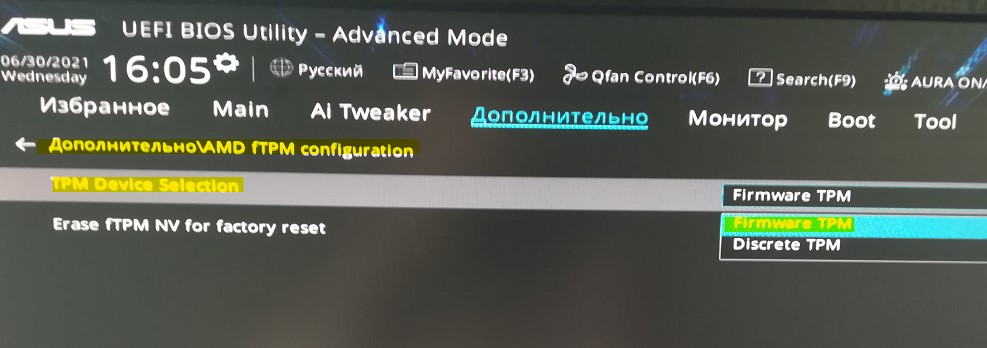
Примечание. Если у вас процессор AMD, вы, скорее всего, найдете параметр, помеченный в разделе «Конфигурация AMD fTPM». С этого момента вы можете выбрать программно реализованный TPM с микропрограммой или дискретный TPM, если у вас есть чип. Используйте Firmware TPM, чтобы включить его на своем ПК.
5. После этого нажмите кнопку «Перезагрузить», чтобы перезагрузить компьютер и войти в Riot Launcher, как обычно. Вот и все! Все, что вам нужно сделать, это дважды проверить, запущен ли Vanguard, а затем запустить игру. Поздравляем, вы исправили ошибку Valorant TPM 2.0!
Valorant все еще не работает? Попробуйте эти исправления!
Если Valorant по-прежнему отказывается работать на вашем компьютере, вы можете попробовать некоторые из этих распространенных методов, которые могут исправить ошибку. Вот некоторые из этих методов:
1. Проверьте наличие обновлений Windows
Как бы это ни раздражало, бывают случаи, когда Центр обновления Windows исправляет некоторые неуловимые ошибки, которые в противном случае не были бы устранены. Убедитесь, что у вас нет ожидающих обновлений Windows, и всегда обновляйте свое устройство.

Чтобы проверить наличие обновлений Windows, перейдите в «Настройки» -> «Центр обновления Windows» и нажмите синюю кнопку «Проверить наличие обновлений», чтобы убедиться, что у вас установлены последние обновления.
2. Удалите и переустановите игровые файлы.
Повреждение установки игры — не редкость. Если в вашей копии Valorant повреждены файлы, это может быть причиной проблемы с TPM 2.0. В таком случае вам необходимо удалить, а затем установить свою копию игры. Для этого найдите «Установка и удаление программ» в поиске Windows и удалите Riot Vanguard и Valorant со своего ПК.

После этого вам нужно будет переустановить игру из Riot Launcher, чтобы увидеть, сохраняется ли проблема. После перезапуска ошибка Valorant TPM 2.0, скорее всего, будет исправлена.
3. Обратитесь в службу поддержки Valorant
Если ничего не помогает, всегда лучше обратиться прямо к источнику. К счастью, у Riot Games есть хорошая служба поддержки. Все, что вам нужно сделать, это перейти на веб-сайт поддержки Valorant, а затем отправить заявку на ошибку TPM 2.0. После этого сотрудники службы поддержки свяжутся с вами и предоставят решение вашей проблемы, которая все еще не была решена после выполнения описанных выше шагов.
Исправьте ошибку Vanguard Requires TPM 2.0 с легкостью
Я надеюсь, что это руководство помогло вам исправить ошибку Valorant TPM 2.0 в вашей игре на Windows 10/11. Если исправление сработало, то пришло время узнать о новом агенте Valorant Fade и весело провести время.
A lot of Valorant players are facing the “This build of Vanguard is out of compliance with current system settings.” error on their Windows 11 PC. This error is one of the variants of the commonly occurring VAN9003 Vanguard error.
If you are also facing this issue on your Windows 11 PC, you have landed at the right place. Here I have discussed the way by which you can solve the VAN9003 error in Valiant.

Why you are getting the “This build of Vanguard is out of compliance with current system settings.” error
The “This build of Vanguard is out of compliance” error occurs when the Secure Boot is not enabled on your Windows 11 PC.
Valorant’s anti-cheat system requires a safe and secure system to run properly. And since Microsoft’s Secure Boot and TPM are security features that allow the system to programs to run with a higher level of safety and trust, Valorant relies heavily on them.
Attention Windows Users!!
Facing issues on your Windows PC every now and then? We would recommend you use the Restoro PC Repair tool.
It is a one-stop solution to repair common computer errors, protect your Windows PC from data loss, malware, hardware failure, Registry issues, BSOD errors, etc. and optimize your PC for maximum performance in just three simple steps:
- Download Restoro Tool that comes with Patented Technologies (see patents here).
- Install and click on Start Scan to find the issues on your Windows PC.
- Finally, click on Repair All to fix the issues.
475,131 readers have downloaded Restoro this month.
How to Fix the “This build of Vanguard is out of compliance with current system settings.” error
Now, that we know that the Secure Boot is the one whose absence is causing the VAN9003 error in Valorant, the simple way to fix it is to just enable the Secure Boot. To enable it:
- You are first required to boot into the BIOS for your Motherboard. To boot into the BIOS, restart the PC and press the BIOS hotkey while the PC is turning on. Now, this BIOS hotkey may differ depending on the manufacturer of your PC’s motherboard. Check the list below to know the BIOS hotkey for your PC.
- BIOS Hotkey for HP laptops: F10 or Esc
- BIOS Hotkey for Asus laptops: F2
- BIOS Hotkey for Dell laptops: F2 or F12
- BIOS Hotkey for Acer laptops: F2 or DEL
- BIOS Hotkey for Lenovo laptops: F2 or Fn + F2
- BIOS Hotkey for Samsung laptops: F2
- BIOS Hotkey for Sony laptops: F1, F2, or F3
- BIOS Hotkey for Toshiba laptops: F2
- BIOS Hotkey for Xiaomi laptops: F9 or F12
- BIOS Hotkey for Realme laptops: F2
- BIOS Hotkey for Asus motherboards: F2 or DEL
- BIOS Hotkey for MSI motherboards: DEL
- BIOS Hotkey for Gigabyte motherboards: DEL
- BIOS Hotkey for ASRock motherboards: F2
- BIOS Hotkey for Zebronics motherboards: F2
- Once you are into the BIOS of your Windows PC, navigate to the “Security” or “System Configuration” or “Boot” section depending on your motherboard manufacturer’s BIOS layout.
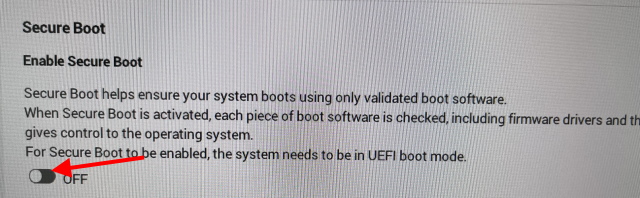
- Here, you’ll see the Secure Boot option. Navigate to it and set it to Enabled.
- Once the Secure Boot is enabled, save the changes and restart your PC.

Once the PC is restarted, check if the Secure Boot is successfully enabled or not. To check it, open the Run dialog box by pressing Win + R on your keyboard and type in msinfo32, and press enter.

This will open up the System Information window. Click on System Summary from the left pane and check the status of the Secure Boot Mode from the right. If it shows On then the Secure Boot is enabled for your Windows 11 PC.

Now, launch Valorant and see if the issue is fixed or not.
Is secure Boot Still Not Enabled?
In some motherboards like MSI or Gigabyte, there is kind of a BIOS glitch due to which the Secure Boot gets enabled but it also shows Not Active. In that case, you are required to follow a couple of more steps as described below.
- Boot into BIOS, navigate to the Boot section, and set Boot Mode to UEFI.

- Thereafter, navigate to Secure Boot and disable it.
- Once disabled, the Secure Boot Settings. For my MSI Motherboard, it is in Settings > Advanced > Windows OS Configuration > Secure Boot.
- Here, set the Secure Boot Mode to Custom.

- Now, without saving the changes, change the Secure Boot Mode again to Standard.
- This will result in BIOS asking you to reset the Secure Boot Mode to the factory default. Confirm by selecting Yes.
- Your PC will now shut down. Boot your PC again into BIOS and finally enable the Secure Boot we just Disabled.


And by following the above steps carefully, you should be able to see the Secure Boot Mode to On in the System Information window of your PC.
Why is the Secure Boot option missing in my BIOS?
If you are not able to see the Secure Boot option in the computer BIOS then it may be becausE of the CSM being enabled. CSM stands for Compatibility Support Module that lets your UEFI system boot in legacy BIOS.
In order to enable or disable Secure Boot, you are first required to disable CSM. The process to disable may vary depending on your motherboard manufacturer. You can refer to the list below to find out where you’ll get the CSM option for some popular motherboards.
- Asus Motherboard: Boot > CMS > CMS Launch.

- Gigabyte Motherboard: Boot into BIOS, go to BIOS or Security and there you’ll see the CMS option.

- ASRock Motherboard: BIOS > Boot > CMS.

- MSI Motherboard: Boot into BIOS, go to Boot tab, and then go to the Boot mode select section and select UEFI only. This will disable CMS automatically.


Why is Secure Boot Greyed Out in my BIOS?
If you are able to see the Secure Boot option but it is greyed out or unselectable, you are needed to set the Administrator Password for your BIOS first. As this is the Admin passcode, you will need it every time you boot into the BIOS. To set the administrator password (also known as Supervisor Password) for your BIOS:
- Boot into the BIOS of your PC and navigate to the Security tab.
- Under the Security tab, look for the Administrator Password or Supervisor Password and select it.

- Now, enter the password that you want to set and you are done.

Once the Administrator password is set successfully, you should now be able to enable or disable the Secure Boot in your BIOS.
Bottom Line
And there you go! This is how you can solve the Valorant VAN9003 error that says “This build of Vanguard is out of compliance with current system settings.” I hope this guide was successful in resolving your issue. If you have any problem or query related to the fixing guide or error, please feel free to share it with us in the comments below.
Also Read:
- How to Fix if Efficiency Mode is Greyed Out or Not Working in Windows 11
- Fix “Failed to open NVENC CODEC” OBS error
- How to Fix game_ship.exe Crashing Error in Call of Duty: Modern Warfare 2
- Download Windows Drivers for Steam Deck
- How to Stop the “Xbox Driver Installation” Popup on STEAM
- Fix: Xbox controller driver not installed error in STEAM
- Fix WSUS Import Update Error 80131509 from Microsoft Update Catalog
- Ultimate Guide to make Windows 11 look Exactly like Mac
- Fix This Installation Is Forbidden by System Policy on Windows 11, 10
- How to Fix if File Explorer Tabs are Not Showing in Windows 11

Bhanu Prataphttp://mefmobile.org
Hi! I am Bhanu Pratap, co-founder of Yorker Media Group. A die-heart fan of tech and keeps track of every little happening of the same. When not writing, I usually keep myself busy on YouTube making and exploring new and awesome tech content.

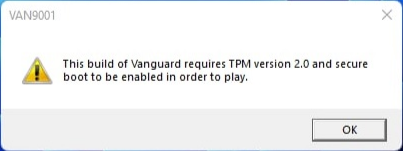
В Valorant, как известно, теперь реализованы TPM и Secure Boot. И всё бы хорошо, но у пользователей предварительных сборок Windows 11 с игрой давеча возникли проблемы. А именно ошибка VAN 9001, которая как раз и гласит, что данной сборке Valorant нужны TPM и Secure Boot, иначе ничего не получится и игра работать не будет.
Отсюда вопрос, что делать, когда в Valorant возникла ошибка VAN 9001
Ответ, собственно, в описании ошибки и содержится: надо включить TPM и Secure Boot. Однако делается это в BIOS-е компа, потому делать это надо грамотно и аккуратно (и если раньше сталкиваться с этим не приходилось, то лучше обратиться за помощью к специалисту — так будет проще и дешевле).
Уточним на всякий случай, TPM (он же Trusted Platform Module или «Доверенный платформенный модуль«) предусмотрен практически во всех более-менее новых ПК, потому с ним проблем быть не должно. За исключением ситуации, когда комп точно не новый и Windows 11 на нём установлена в обход проверок (да, такое тоже возможно).
Кроме того, Trusted Platform Module на разных ПК Intel и AMD обозначается по-разному: компьютерах с AMD TPM называется fTPM, а на компьютерах с Intel — PTT. Это если очень вкратце. Теперь, как включить TPM и Secure Boot для Valorant на компе с AMD/Intel
Значит, делается это следующим образом:
#1 — проверяем и включаем TPM 2.0:
- жмем Win+R с клавиатуры, в строке «Выполнить» пишем tpm.msc и кликаем OK;
- в открывшемся окне «Управление TPM на локальном компьютере» смотрим раздел «Состояние«;
- если он не только отображается, но там еще и написано «Модуль TPM включен«, значит, можно переходить к п.#2 этого поста;
- в противном же случае, т.е. когда видим надпись, «Не удается найти совместимый доверенный платформенный модуль«, то:
-
- перезагружаем комп и открываем меню загрузки системы (клавиши F1, F2, F10, F11 или DEL в зависимости от модели ПК);
- в меню загрузки переходим во вкладку «Security» (или Advanced);
- находим раздел «TPM» и устанавливаем значение «Available» для параметра fTPM или PTT;
- сохраняем настройки (Save), снова перезагружаем комп и проверяем состояние TPM (см. выше).
Не пропустите: В VALORANT ЧЕРНЫЙ ЭКРАН ПОСЛЕ ЗАПУСКА: ЧТО МОЖНО СДЕЛАТЬ
#2 — включаем Secure Boot:
Только успешно разобравшись с TPM, идем дальше. Алгоритм действий аналогичный:
- еще раз перезагружаем комп и снова заходим в меню загрузки;
- переходим в раздел «Bios Setup» и оттуда — во вкладку «Advanced«;
- находим раздел «Boot Options«, затем параметр «Secure Boot» и устанавливаем для него значение»Enabled«;
- сохраняем настройки (Save) и теперь устанавливаем для параметра Secure Boot значение «Standard» (вместо Custom);
- и сохраняем настройки (Save).
Выходим из BIOS, дожидаемся загрузки Windows и запускаем Valorant. Теперь игра должна запуститься нормально и ошибка VAN 9001 больше мешать не будет.
Видео
Valorant не работает на Windows 11, если не включены TPM 2.0 и Secure Boot, — это новый слой защиты от читеров
По умолчанию Windows 11 просит, чтобы на материнской плате вашего PC был модуль безопасности TPM 2.0. Он предназначается для защиты данных и, похоже, приведёт к новому уровню борьбы с читерами в видеоиграх: если у вас не включён TPM, игра может просто отказаться запускаться.
Как пишет Anti-Cheat Police Department, как минимум одна игра с таким требованием уже есть: античит Vanguard от Riot Games не даёт играть в Valorant на Windows 11, если в системе не работают TPM 2.0 и Secure Boot — вместе они препятствуют запуску подозрительных программ при включении компьютера.
Valorant не работает на Windows 11, если не включены TPM 2.0 и Secure Boot, — это новый слой защиты от читеров
Ошибка, которая возникает при попытке запустить Valorant на Windows 11 без TPM 2.0 и Secure Boot. Кто-то рассказывает, что ограничение обходится программным эмулятором, а кто-то жалуется, что Vanguard выдаёт это предупреждение, даже когда указанные системы защиты включены. Возможно, оба случая связаны с тем, что Windows 11 ещё не доросла до официального релиза.
Вокруг Vanguard уже поднимался небольшой скандал: пользователи считали, что античит требует слишком глубокого доступа к процессам в операционной системе. Riot Games настаивала, что это необходимо для отлова самых хитрых читов: если у них будет доступ к ядру ОС, а у античита нет, то Vanguard не сможет бороться с хаками.
Видимо, требование TPM 2.0 и Secure Boot на Windows 11 возникает примерно из тех же соображений: таким образом Vanguard убеждается, что в памяти нет посторонних программ, у которых уровень доступа выше, чем у античита. И так как технология безопасности TPM 2.0 — это отдельный чип на материнской плате, гипотетически обмануть защиту становится намного сложнее, чисто программные трюки не срабатывают, а баны по железу оказываются надёжнее.

Некоторые считают, что обязательное наличие TPM 2.0 приведёт к ужесточению DRM во многих его проявлениях, не только как античитов в видеоиграх. «Всё будет вертеться вокруг фактора доверия к вашему PC. Представьте, что хотите посмотреть любимый сериал на Netflix в 4K, но фактор доверия у вашего железа низкий. Очень жаль, вам придётся довольствоваться стримом в 720p», — пишет группа обеспокоенных «белых» хакеров.
Они считают, что TPM 2.0 нужен не пользователям, а корпорациям, чтобы наконец закрутить гайки на исторически свободном рынке программного обеспечения для PC. Что-то похожее уже случилось с консолями и телефонами — мобильные приложения могут не запускаться, если на устройстве обнаружен «рут».
В ближайшие месяцы повсеместного введения «факторов доверия» не ожидается, так как очень многие компьютеры продолжат работать на Windows 10 — у этой ОС столь жёсткой привязки к TPM 2.0 нет. Но что будет лет через пять, когда официальная поддержка Windows 10 окончится?
Microsoft предусматривает способы установки Windows 11 на PC, у которых нет TPM 2.0. Однако программы, где есть соответствующая защита, всё равно будут видеть состояние чипа и, если так устроена их логика, не станут запускаться, пока вы не повысите «фактор доверия».

Valorant будет применять Windows 11 TPM 2.0
Плохие или хорошие новости, в зависимости от вашего мнения, исходят от RIOT для их игры Valorant. Похоже, что Riot решила внедрить функцию Windows 11 TPM 2.0 в Valorant, работающую в Windows 11, и ходят слухи, что она станет стандартом де-факто и перейдет на Valorant в целом, независимо от того, в какой системе он работает.
Кроме того, ходят слухи, что другие разработчики также говорят о реализации требований TPM 2.0, чтобы они могли использовать расширенные функции безопасности Windows 11 для предотвращения взлома и других читов в своих играх.
Это интересный момент, с одной стороны, конечно, расширенные функции, которые предотвратят мошенничество и взлом, — это здорово. С другой стороны, отказ в доступе ко многим компьютерам, не поддерживающим TPM 2.0, и их удаление из игры может привести к безвозвратной потере клиентов и, как следствие, к потере денег. Конечно, это риск, и я не совсем уверен, что отчуждение геймеров — хороший выбор для долгосрочного дохода, особенно когда вы сможете установить Windows 11 на неподдерживаемый ПК, как заявляет Microsoft.
Мы все увидим, как это решение Riot отразится на их бизнесе, поскольку я сам не являюсь крупным игроком Valorant, на меня это решение не сильно повлияло, но будет интересно посмотреть, действительно ли другие пойдут с этой тенденцией или они решат подождать некоторое время, пока не будет обновлено гораздо больше ПК.
С другой стороны, если ваш компьютер испытывает проблемы, связанные с системой, которые необходимо исправить, существует решение в один клик, известное как Ресторо вы можете проверить, чтобы решить их.
Эта программа — полезный инструмент, который может восстановить поврежденные реестры и оптимизировать общую производительность вашего ПК. Помимо этого, он также очищает ваш компьютер от любых ненужных или поврежденных файлов, что помогает вам удалить любые нежелательные файлы из вашей системы. По сути, это решение, которое доступно вам всего одним щелчком мыши. Его легко использовать, поскольку он удобен в использовании. Полный набор инструкций по загрузке и использованию см. В приведенных ниже инструкциях.
Выполните полное сканирование системы, используя Ресторо. Для этого следуйте приведенным ниже инструкциям.
- Скачать и установить Ресторо с официального сайта.
- После завершения процесса установки запустите Ресторо выполнить полное сканирование системы.

- После завершения сканирования нажмите «Начать ремонт»Кнопка.


Амитеш Дхар Изменено 06 октября 2022 г., 11:55 IST

Следуйте за нами Комментировать Поделиться Valorant на сегодняшний день является одним из самых популярных тактических шутеров на рынке. Несмотря на то, что флагманский шутер от первого лица от Riot довольно новый, ему удалось собрать множество поклонников по всему миру. Ему также удалось создать активную профессиональную сеть, в которой участвуют игроки практически из всех стран мира.

Несмотря на то, что это хорошо сделанная игра, у Valorant есть свой набор проблем, с которыми иногда сталкиваются игроки. Одной из самых распространенных проблем, которые в последнее время встречаются в игре, является ошибка TPM 2.0. Всякий раз, когда возникает эта ошибка, они блокируются в игре до тех пор, пока она не будет устранена.
Как включить безопасную загрузку для Valorant
Самый простой способ исправить ошибку TPM 2.0 и безопасной загрузки в Valorant — погрузиться в настройки BIOS системы и включить там две функции. Как правило, эти функции включены по умолчанию в каждой системе. Однако, если они отключены с самого начала, вот шаги, которые должны предпринять игроки, чтобы включить их:
- Шаг 1: Игрокам придется перезагрузить свой компьютер/ноутбук. Когда устройство снова включится, им придется непрерывно нажимать кнопку BIOS. Хотя это отличается от устройства к устройству, обычно используются кнопки F2, F10 или F12. При правильном выполнении они перейдут на экран настройки BIOS на своем устройстве.
- Шаг 2: Попав на экран настройки BIOS, игрокам сначала нужно будет перейти к «Конфигурации загрузки». Это также зависит от системы к системе, но не должно сильно отличаться. В меню «Конфигурация загрузки» им нужно перейти к параметру «Безопасная загрузка», а затем включить его.
- Шаг 3. После этого игрокам теперь придется пробираться на вкладку «Безопасность». На этой вкладке можно найти параметр для включения Trusted Platform Module. Для наборов микросхем Intel эта опция представлена как Intel Trusted Platform Module Technology .или просто устройство TPM. Для устройств AMD это отображается как Конфигурация AMD TPM. Затем они также должны будут включить это.
- Шаг 4: После того, как обе эти функции будут включены, игрокам придется перезагрузить свой компьютер, а затем попытаться запустить Valorant. Теперь игра должна работать без сбоев.
Если вышеупомянутые шаги не помогли решить проблему или если вышеуказанные функции уже включены в BIOS, следующей лучшей идеей будет выполнить чистую установку Valorant.
Почему «TPM 2.0 и требуется безопасная загрузка»?
В настоящее время неясно, почему возникает эта ошибка, но, похоже, она как-то связана с Riot Vanguard. Vanguard — это собственная античитерская программа Riot, предназначенная для защиты от мошенников и хакеров. Для любого тактического шутера читерство является серьезной проблемой, поэтому всегда необходимо иметь античитерскую программу для соревновательных многопользовательских игр. Эта проблема возникает, если файлы Vanguard каким-то образом повреждены или повреждены другими программами.
Для тех, кто не чувствует себя достаточно уверенно, чтобы изменить настройки BIOS, как указано в шагах выше, чистая установка Valorant и Riot Vanguard должны решить эту проблему, если они с ней столкнутся.
Опрос:
< p class=»poll-option-text»>
0 голосов
Быстрые ссылки
Гайд по Valorant Esports Socials Еще от Fox-Guide
Ever since its launch, Valorant has quickly become one of the best and most played FPS games today. With the game strongly rivaling battle royale titles such as Apex Legends and coming with its own Valorant Mobile port soon, things look good. However, like all games, Valorant is prone to running into errors. One of the most common problems is the dreaded Vanguard TPM 2.0 error that locks you out of Valorant if you don’t have TPM 2.0 and Secure Boot enabled on your PC. While you might think it’s not fixable, I’m here to tell you it can be fixed with ease. So power up your computer and follow along as I show you how to fix the “This build of Vanguard requires TPM 2.0 and Secure Boot” error in Valorant.
While I will show you how to fix this pesky Valorant TPM 2.0 error, I will also explain why it is happening in the first place. However, if you would rather just skip to the process, use the table below to do so.
Table of Contents
Why Does the Valorant Vanguard TPM 2.0 Error Occur?
Trusted Platform Module (TPM 2.0) and Secure Boot are two of the most important requirements for users to install and run Windows 11. In short, a TPM chip stores keys, passwords, and digital certificates essential to your PC’s security. So, to ensure their players’ security and keep cheaters at bay, Riot Games’ security software Vanguard has implemented the same requirements. That means in order for you to play Valorant on your computer, it will need to comply with TPM 2.0 and Secure Boot, otherwise, you will see an error like the one below.
The TPM 2.0 Valorant error has been going around for some time, with Valorant players being frustrated. However, there is a simple and effective fix that we will use and explain in this guide. If you are worried about losing your data, don’t be, as the solution won’t require any factory reset. With that said, let’s learn how to fix the Valorant TPM 2.0 error.
How to Fix Valorant TPM 2.0 Error on Windows 11/ 10
The easiest way to fix the Vanguard TPM 2.0 error in Valorant is to turn on the TPM 2.0 module and SecureBoot on your Windows PC. You will need to go into the PC’s BIOS and enable the features from there. If you’re unsure if your PC has a TPM chip, use our TPM guide to find out. While it may sound complex, it’s easy enough to do so. Simply shut down your PC and follow the steps below to do so:
1. After shutting down your PC, press the power button and then repeatedly tap your BIOS button. While companies have different BIOS keys, the most common ones are F2, F10, or F12. You can look for the BIOS key for your laptop or motherboard online. Repeatedly tap the key until you get into your system’s BIOS settings.

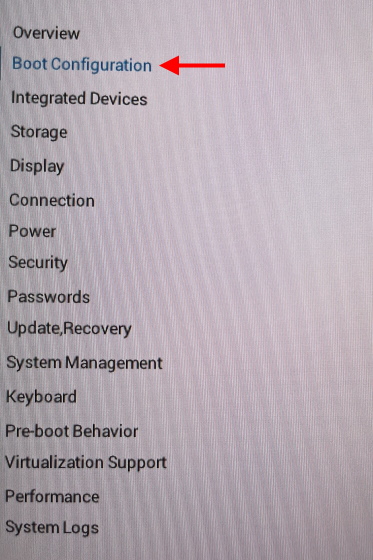
2. Once you are in the BIOS, look for the Secure Boot option. While the BIOS varies from system to system, it will most likely be found in the “Boot Configuration” category. At least, that was the case on my Alienware laptop.
3. Here, look for the “Secure Boot” option and toggle it on. Confirm any dialogs or checks that appear on your screen. Don’t restart your PC, as we are not done just yet.
4. Now look for the setting to turn on the TPM module. You might find it labeled as Intel Trusted Platform Module Technology or just a TPM device. Simply toggle on the setting and confirm any dialog boxes that appear.

Note: If you have an AMD CPU, you will likely find the option labeled under AMD fTPM configuration. From there on, you can either choose Firmware TPM, which is software-implemented or Discrete TPM, provided you have the chip. Go with Firmware TPM to enable it on your PC.
5. Once done, tap the Restart button to reboot your PC and log into the Riot Launcher as usual. And that’s it! All you need to do is double-check if Vanguard is running and then run the game. Congratulations, you have now fixed the Valorant TPM 2.0 error!
Valorant Still Not Working? Try Out These Fixes!
If Valorant still refuses to work on your computer, you can try some of these common methods that just might fix the error. Some of these methods are:
1. Check for Windows Updates
As annoying as it may be, there are times when Windows Update fixes some elusive errors that would be unresolved otherwise. Ensure that you do not have pending Windows Updates and always keep your device up to date.
To check for Windows updates, go to Settings -> Windows Update and tap the Blue Check for updates button to make sure you’re up to date.
2. Uninstall and Reinstall Game Files
Game installation going corrupt is not an uncommon occurrence. If your copy of Valorant has damaged files, this could be causing the TPM 2.0 issue. In a case like this, you need to uninstall and then install your copy of the game. To do that, search for “Add or Remove Program” in Windows Search and uninstall Riot Vanguard and Valorant from your PC.

Once done, you will need to reinstall the game from the Riot Launcher to see if the issue still persists. Upon restarting, the Valorant TPM 2.0 error will most likely be fixed.
3. Contact Valorant Support
If all fails, it’s always best to go right to the source. Thankfully, Riot Games has a good support team on standby. All you need to do is go to the Valorant Support website and then submit a ticket for the TPM 2.0 error. Once done, the support staff will get back to you and provide a solution to your problem that still wasn’t solved after following the steps above.
Fix Vanguard Requires TPM 2.0 Error with Ease
I hope this guide helped you fix the Valorant TPM 2.0 error in your game on Windows 10/ 11. If the fix worked, then it’s time to learn about Valorant’s new agent Fade, and have fun playing. Do you want more FPS variety that doesn’t stop at a PC? Check out Apex Legends Mobile, and you just might find your new favorite game.
Valorant is by far one of the most popular tactical shooters in the market today. Despite being fairly new, Riot’s flagship first-person shooter has managed to amass a substantial fan following all over the world. It has also managed to build an active professional circuit, with players from almost every nation around the globe participating in it.
Although it’s a well-made game, Valorant has its own set of problems that players sometimes come across. One of the most common problems that fans will find in the game recently is the TPM 2.0 error. Whenever this error is encountered, they are locked out of the game until it is resolved.
How to enable secure boot for Valorant
The easiest way to fix the TPM 2.0 and secure boot error in Valorant is by diving into the BIOS settings of the system and enabling two features there. Generally, these features are enabled by default on each and every system. However, on the off chance that they are disabled from the get-go, here are the steps that players must take in order to enable them:
- Step 1: Players will have to restart their computer/laptop. When the device turns back on, they will have to continuously press the BIOS button. While this differs from device to device, the usual buttons are F2, F10, or F12. If performed correctly, they will be taken to the BIOS setup screen on their device.
- Step 2: Once in the BIOS setup screen, players will first have to navigate to the «Boot Configuration». This also varies from system to system, but it shouldn’t be too different. Under the «Boot Configuration» menu, they will need to navigate to the «Secure Boot» option and then turn it on.
- Step 3: With that out of the way, players will now have to make their way to the «Security» tab. Under this tab, the option to enable Trusted Platform Module can be found. For Intel chipsets, the option comes up as Intel Trusted Platform Module Technology or just TPM Device. For AMD devices, it shows up as AMD TPM Configuration. They will then have to enable this as well.
- Step 4: Once both these features have been enabled, players will now have to restart their PC, and then try to launch Valorant. The game should run smoothly now.
If the aforementioned steps fail to fix the issue, or if the above features are already enabled in the BIOS, the next best idea would be to perform a clean install of Valorant.
Why does the «TPM 2.0 and secure boot required» error occur?
It’s currently unclear as to why this error occurs, but it seems to have something to do with Riot Vanguard. Vanguard is Riot’s own anti-cheat program designed to keep cheaters and hackers at bay. For any tactical shooter, cheating is a major problem, so there is always a requirement to have an anti-cheat program in place for competitive multiplayer games. This issue seems to occur if Vanguard’s files get corrupted or damaged by other programs in some way.
For those who don’t feel confident enough to adjust their BIOS settings, as mentioned in the steps above, a clean install of Valorant and Riot Vanguard should fix this issue, should they encounter it.
Edited by Atul S
Thank You!
GIF
Cancel
![]() Reply
Reply
GIF
Cancel
![]() Reply
Reply
Most of the players are complaining about Valorant error code VAN 9001 on the communities such as Reddit.
Valorant — How To Fix Error Code 43…
Please enable JavaScript
According to the players, they start getting VAN 9001 when they upgrade to Windows 11.
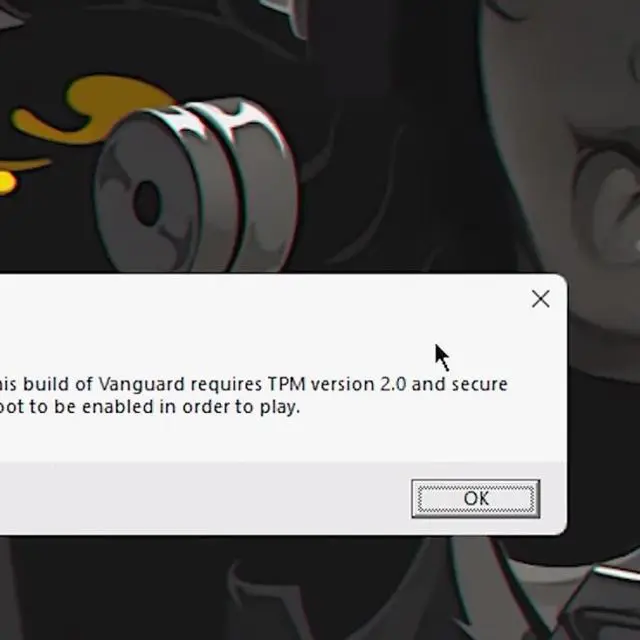
The VAN 9001 error message says”This build of Vanguard requires Version 2.0 and secure boot to be enabled in order to play“
Don’t worry about it!
The CPU Guide brings you the best working solutions to solve the Valorant error code VAN 9001.
We’d start with some basic fixes, and if those don’t help, Solution 5 definitely would.
In Windows 11 the Valorant requires and enforces the user to enable TPM and Secure Boot In Windows 11. Valorant wants to make sure it’s running on a trusted platform.
So, now we are going to enable the TPM and Secure boot. But, if you are sure that both are enabled then first we do some troubleshooting solutions in order to remove Valorant Error VAN 9001.

Solution 1: Restart the Game
Whenever you encounter Valorant Error Code VAN 9001 and any game bug, you should restart the game before trying any further solutions.
Restarting the game will eliminate any temporary error which is occurring due to the old cookies and cache or the system’s other software is clashing with your gaming software.
All of these errors will be eradicated after a simple restart of the PC or any other platform you use.
Read More: Valorant Error code VAN9002 Control Flow Guard
Solution 2: Performing a Clean Boot to Initialize Valorant
Clean boot will help you to eliminate the unnecessary applications which are running on the backend.
And shut down any applications which are conflicting with each other and causing a Valorant Error VAN 9001.
Here is how to perform a Clean Boot:
- Press Windows Button + R Key

- The Run Dialogue Box will appear
- Type “msconfig“
- Press Enter
- The System Configuration window will open

- Select Services tab
- Uncheck all the unnecessary service

- Only check those you need now
- Now click OK


Now your clean boot is done and the unnecessary services are eliminated which will enable you to play Valorant without getting Error VAN 9001.
If the error persists, then proceed to the next solution to solve the VAN error.
Read More: How to Change the Language in Valorant?
Solution 3: Keep your PC Updated
Sometimes your outdated PC is the main cause of the Outdated Wi-Fi Drivers on Windows 11.
Outdated drivers in your PC or your current Windows version are not able to support the new connectivity parameter of your internet.
As you update your Windows, all the drivers are updated too and this will fix the Valorant Error Code VAN 9001.
So, here is how you can update your PC:
- Click on the Windows icon

- Click on the Settings icon
- A new window will pop up
- Select Windows Update from the left menu

- The new window will pop up
- Then click on Check for updates
- If there is any update, it will start updating the PC
- After the updating is done check if the “there was an error connecting to the platform valorant” is fixed or not.


Read More: How to Change Username and Tagline in Valorant
Solution 4: Close Unwanted Programs
If the above solution didn’t work, then closing unwanted programs will help you to eliminate the Valorant Error Code 9001.
If there are too many programs running in the background that is using too much internet and causing “This build of Vanguard requires Version 2.0 and secure boot to be enabled in order to play” Error.
So, let’s close unwanted programs:
- Press Ctrl + Shift + ESC keys to open Task Manager
- Now check which program is using more Network
- Right-click on that program and select End task
- And check if the Valorant Error VAN 9001 is solved or not.
If this solution didn’t help you then it’s time to enable the TPM and Secure Boot in your PC to solve Error 9001 Valorant.
Solution 5: Enable TPM & Secure Boot
It is better to enable the TPM on PC before the installation of Windows 11, otherwise, you will get an error while using any gaming software on Windows 11.
Here is how you can enable TPM & Secure Boot on your PC.
Note: This solution is based on DELL BIOS
- Go into BIOS of Your PC by restarting the PC
- When the manufacturer logo comes press “F12 or F10, or F9” different keys will with different brands of PC
- Now BIOS menu will open
- Select the BIOS setup
- Then go in “Security” a further menu will open

- Select “PTT Security” on the right side a window will open
- Check the “PTT On” box

- Click on save and exit
- Now your TPM chip activated
- After that select the Secure Boot option from the left
- Now enable the secure boot and save the settings and exit from BIOS.


Now TPM chip and Secure boot are enabled in your Windows 11 successfully.
Now open the Valorant game and VAN 9001 will be gone.
If the VAN error 9001 persists then we have the last solution for you.
Solution 6: Contact Support
After performing all of the above solutions if the error persists then this is time to contact Valorant support.
Tell the support Valorant error code VAN 9001 is bothering you and you are unable to play Valorant due to this error plus tell them all of the fixes you try in order to solve this error.
The Valorant support team will contact you and address your matter in a better manner.
Here is how you can contact Valorant support:
After submitting the ticket, Valorant support will contact you within 7 Working days max. Usually, the response comes up in two to three days. So, now you have to wait until a representative will reach out to you by email.
Hope the above-mentioned solutions help you to solve the Valorant Error VAN 9001.
If you have a query feel free to share your experiences and question in the comments section down below
FAQs
How do I fix Valorant error code 9001?
Here is how you can solve Valorant error code 9001:
1. Restart your device
2. Enable the TPM and Secure Boot
3. Contact support
Do you need TPM 2.0 for Valorant?
Yes, if you are Windows 11 user then definitely the Valorant will require TPM 2.0 to run the game.
В этом посте представлены решения для исправления «Эта сборка Vanguard не соответствует требованиям» при попытке запустить Valorant. Valorant — это бесплатная игра в жанре шутер от первого лица, разработанная и изданная Riot Games специально для Windows. Его сюжетная линия вращается вокруг агентов со всего мира, которым поручено защищать свои территории от врагов. Но в последнее время многие пользователи жалуются на некоторые ошибки при игре в Valorant. К счастью, вы можете воспользоваться некоторыми простыми способами, чтобы устранить эту проблему. Полное сообщение об ошибке гласит:
Эта сборка Vanguard не соответствует текущим настройкам системы.
Подробнее см. в центре уведомлений Vanguard в трее.

Почему мой Valorant говорит, что эта сборка не соответствует требованиям?
Ошибка «Эта сборка не соответствует требованиям» в Valorant возникает, когда AntiCheat Riot обнаруживает, что файлы игры каким-то образом изменены. В некоторых случаях эта ошибка может быть вызвана вмешательством стороннего программного обеспечения. Другие причины, по которым это может произойти:
- Поврежденные файлы игры
- Устаревший клиент
- Вредоносное ПО или вирусы в системе
Исправить Эта сборка Vanguard не соответствует требованиям ошибка, сначала попробуйте перезапустить клиент Riot и перезапустить игру. Однако, если это не сработает, вы можете попробовать следующие проверенные методы:
- Проверьте файлы игры
- Включить безопасную загрузку
- Разрешить игру через брандмауэр
- Устранение неполадок Valorant в режиме чистой загрузки
- Переустановите Riot Vanguard
Теперь давайте посмотрим на них подробно.
1]Восстановите файлы игры
Ошибка может возникнуть, если внутренние файлы игры каким-то образом повреждены. Клиент Riot предлагает функцию исправления подобных повреждений. Вот как:
- Откройте клиент Riot, щелкните значок профиля и выберите «Настройки».
- Перейдите в Valorant и нажмите Восстановить.
2]Включить безопасную загрузку
Безопасная загрузка — это стандарт безопасности Microsoft, который гарантирует, что ваше устройство загружается с использованием только программного обеспечения, которому доверяет производитель. Включение безопасной загрузки может помочь исправить ошибку Vanguard не соответствует требованиям. Вот как:
- Нажмите клавишу Windows + I, чтобы открыть настройки.
- Перейдите в «Система»> «Восстановление» и нажмите «Перезагрузить сейчас» рядом с «Расширенный запуск».
- Здесь нажмите «Устранение неполадок»> «Дополнительные параметры»> «Настройки прошивки UEFI»> «Перезагрузить».
- Перейдите в «Безопасность» и включите безопасную загрузку.
- Сохраните изменения, перезагрузите систему и проверьте, устранена ли проблема.
3]Разрешить игру через брандмауэр
Брандмауэр Windows иногда мешает процессам Valorant и приводит к сбоям в его работе. Создание некоторых исключений в брандмауэре Windows может помочь исправить код ошибки VAN 1067 в Valorant. Вот как:
- Нажмите клавишу Windows + I, чтобы открыть настройки.
- Перейдите в раздел «Конфиденциальность и безопасность» > «Безопасность Windows» > «Брандмауэр и защита сети».
- На вкладке «Брандмауэр» нажмите «Разрешить приложение через брандмауэр».
- На следующей странице нажмите «Изменить настройки» и выберите «Разрешить другое приложение».
- Найдите папку Riot Vanguard; скорее всего, он находится в Program Files в разделе C («C:Program FilesRiot Vanguard»), затем выберите приложение «vgc», выберите «Открыть» и нажмите «Добавить».
- В окне «Разрешенные приложения» найдите службу пользовательского режима Vanguard и установите флажки «Частное» и «Общедоступное».
4]Устранение неполадок Valorant в режиме чистой загрузки
Сторонние приложения могут иногда вызывать сбои в работе приложений и игр, блокируя их. Выполнение чистой загрузки гарантирует, что ваша операционная система загружается с минимальным количеством системных файлов и драйверов устройств. Вот как вы можете выполнить чистую загрузку:
- Нажмите «Пуск», найдите «Конфигурация системы» и откройте его.
- Перейдите на вкладку «Общие» и установите флажок «Выборочный запуск» и «Параметры загрузки системных служб» под ним.
- Затем перейдите на вкладку «Службы» и установите флажок «Скрыть все службы Microsoft».
- Нажмите «Отключить все» в правом нижнем углу и нажмите «Применить», затем «ОК», чтобы сохранить изменения.
Если ошибка не появляется в состоянии чистой загрузки, вам может потребоваться вручную включить один процесс за другим и посмотреть, кто виноват. Как только вы определили его, отключите или удалите программное обеспечение.
5]Переустановите Riot Vanguard
Если ни один из этих шагов не может вам помочь, рассмотрите возможность переустановки Riot Vanguard. Известно, что это помогает большинству геймеров избавиться от этой ошибки.
Как исправить сборку Vanguard Valorant?
Эта ошибка в Riot Vanguard возникает, когда игра не может инициализировать античит. Обычно простой перезапуск может помочь решить проблему. Однако, если это не сработает, рассмотрите возможность включения TPM 2.0 и переустановки Vanguard.

Valorant, a popular first-person shooter game, has attracted a large following of players worldwide. However, the release of Windows 11 has caused many players to encounter a common error, the VAN9003 error. This error states that “This build of Vanguard is out of compliance with current system settings.”
If you are one of the many players who have encountered this error, do not worry. We have put together a step-by-step guide to help you fix the VAN9003 error in Valorant on Windows 11.
Why you are getting the “This build of Vanguard is out of compliance with current system settings.” error
Valorant’s anti-cheat system requires a secure and safe system to run properly, so when Secure Boot is not enabled on your Windows 11 PC, the “This build of Vanguard is out of compliance” error will occur.
Secure Boot and TPM are security features that allow programs to run with a higher level of safety and trust. This is why Valorant relies heavily on them.
Attention Windows Users!!
Facing issues on your Windows PC every now and then? We would recommend you use the Restoro PC Repair tool.
It is a one-stop solution to repair common computer errors, protect your Windows PC from data loss, malware, hardware failure, Registry issues, BSOD errors, etc. and optimize your PC for maximum performance in just three simple steps:
- Download Restoro Tool that comes with Patented Technologies (see patents here).
- Install and click on Start Scan to find the issues on your Windows PC.
- Finally, click on Repair All to fix the issues.
4,533,876 users have downloaded Restoro till now.
To fix the VAN9003 error in Valorant, you need to enable Secure Boot on your Windows 11 PC. Here’s how:
1. You are first required to boot into the BIOS for your Motherboard. To boot into the BIOS, restart the PC and press the BIOS hotkey while the PC is turning on.
Now, this BIOS hotkey may differ depending on the manufacturer of your PC’s motherboard. Check the list below to know the BIOS hotkey for your PC.
- BIOS Hotkey for HP laptops: F10 or Esc
- BIOS Hotkey for Asus laptops: F2
- BIOS Hotkey for Dell laptops: F2 or F12
- BIOS Hotkey for Acer laptops: F2 or DEL
- BIOS Hotkey for Lenovo laptops: F2 or Fn + F2
- BIOS Hotkey for Samsung laptops: F2
- BIOS Hotkey for Sony laptops: F1, F2, or F3
- BIOS Hotkey for Toshiba laptops: F2
- BIOS Hotkey for Xiaomi laptops: F9 or F12
- BIOS Hotkey for Realme laptops: F2
- BIOS Hotkey for Asus motherboards: F2 or DEL
- BIOS Hotkey for MSI motherboards: DEL
- BIOS Hotkey for Gigabyte motherboards: DEL
- BIOS Hotkey for ASRock motherboards: F2
- BIOS Hotkey for Zebronics motherboards: F2
2. Once you are into the BIOS of your Windows PC, navigate to the “Security” or “System Configuration” or “Boot” section depending on your motherboard manufacturer’s BIOS layout.
3. Here, you’ll see the Secure Boot option. Navigate to it and set it to Enabled. Once the Secure Boot is enabled, save the changes and restart your PC.

4. Once the PC is restarted, check if the Secure Boot is successfully enabled or not. To check it, open the Run dialog box by pressing Win + R on your keyboard and type in msinfo32, and press enter.

5. This will open up the System Information window. Click on System Summary from the left pane and check the status of the Secure Boot Mode from the right. If it shows On then the Secure Boot is enabled for your Windows 11 PC.

Now, launch Valorant and see if the issue is fixed or not.
Is secure Boot Still Not Enabled?
In some motherboards like MSI or Gigabyte, there is kind of a BIOS glitch due to which the Secure Boot gets enabled but it also shows Not Active. In that case, you are required to follow a couple of more steps as described below.
1. Boot into BIOS, navigate to the Boot section, and set Boot Mode to UEFI.

2. Thereafter, navigate to Secure Boot and disable it.
3. Once disabled, the Secure Boot Settings. For my MSI Motherboard, it is in Settings > Advanced > Windows OS Configuration > Secure Boot.
4. Here, set the Secure Boot Mode to Custom.

5. Now, without saving the changes, change the Secure Boot Mode again to Standard.
6. This will result in BIOS asking you to reset the Secure Boot Mode to the factory default. Confirm by selecting Yes.
7. Your PC will now shut down. Boot your PC again into BIOS and finally enable the Secure Boot we just Disabled.
And by following the above steps carefully, you should be able to see the Secure Boot Mode to On in the System Information window of your PC.
Why is the Secure Boot option missing in my BIOS?
If you are not able to see the Secure Boot option in the computer BIOS then it may be becausE of the CSM being enabled. CSM stands for Compatibility Support Module that lets your UEFI system boot in legacy BIOS.
In order to enable or disable Secure Boot, you are first required to disable CSM. The process to disable may vary depending on your motherboard manufacturer.
You can refer to the list below to find out where you’ll get the CSM option for some popular motherboards.
Asus Motherboard: Boot > CMS > CMS Launch.

Gigabyte Motherboard: Boot into BIOS, go to BIOS or Security and there you’ll see the CMS option.

ASRock Motherboard: BIOS > Boot > CMS.

MSI Motherboard: Boot into BIOS, go to the Boot tab, and then go to the Boot mode select section and select UEFI only. This will disable CMS automatically.
Why is Secure Boot Greyed Out in my BIOS?
If you are able to see the Secure Boot option but it is greyed out or unselectable, you are needed to set the Administrator Password for your BIOS first. As this is the Admin passcode, you will need it every time you boot into the BIOS. To set the administrator password (also known as Supervisor Password) for your BIOS:
1. Boot into the BIOS of your PC and navigate to the Security tab.
2. Under the Security tab, look for the Administrator Password or Supervisor Password and select it.

3. Now, enter the password that you want to set and you are done.
Once the Administrator password is set successfully, you should now be able to enable or disable the Secure Boot in your BIOS.
Additional fixes to resolve the VAN9003 (This build of Vanguard is out of compliance with current system settings.) Error
Here are the steps on how to fix the Valorant VAN9003 Error on Windows 11:
Update to the latest version of the Vanguard anti-cheat software.
Go to the Vanguard website and download the latest version of the software. Once the download is complete, run the installer and follow the on-screen instructions.
Update to the latest version of Windows 11.
Go to the Windows website and download the latest version of the operating system. Once the download is complete, install the update and follow the on-screen instructions.
Restart your computer.
Once you have updated both Vanguard and Windows 11, restart your computer. This will allow the new software to take effect.
Contact Riot Games support for further assistance.
If you are still having problems, contact Riot Games support for further assistance. They will be able to help you troubleshoot the issue and find a solution.
Frequently Asked Questions (FAQs)
-
What is the VAN9003 error?
The VAN9003 error is an error that occurs when the Vanguard anti-cheat software is not compatible with the Windows 11 operating system.
-
What causes the VAN9003 error?
The VAN9003 error can be caused by a number of things, including
outdated Vanguard anti-cheat software, interference from the Windows Firewall, a problem with the Vanguard anti-cheat itself, etc. -
How do I fix the VAN9003 error?
There are a few things that you can do to try to fix the VAN9003 error e.g.
update to the latest version of the Vanguard anti-cheat software, update to the latest version of Windows 11, restart your computer, contact Riot Games support for further assistance, etc. -
How can I prevent the VAN9003 error from happening again?
There are a few things that you can do to try to prevent the VAN9003 error from happening again. The precautions include keeping your Vanguard anti-cheat software up to date, keeping your Windows 11 operating system up to date, and restarting your computer regularly. If nothing works, then contact Riot Games support if you have any questions or problems.
-
What are some other common Valorant errors?
Some other common Valorant errors include the VAN9001 error, which occurs when Vanguard is not installed or is not running properly, the VAN9002 error which occurs when Vanguard is unable to connect to the internet, the VAN9004 error which occurs when Vanguard is unable to update itself.
-
How can I fix other Valorant errors?
There are a few things that you can do to try to fix other Valorant errors e.g. check if Vanguard is installed and running properly, check if Vanguard is able to connect to the internet, and check if Vanguard is able to update itself. lately, contact Riot Games support if you have any questions or problems.
Bottom Line
And there you go! This is how you can solve the Valorant VAN9003 error that says “This build of Vanguard is out of compliance with current system settings.” I hope this guide was successful in resolving your issue. If you have any problem or query related to the fixing guide or error, please feel free to share it with us in the comments below.
Also Read:
- How to Fix if Efficiency Mode is Greyed Out or Not Working in Windows 11
- Fix the “Failed to open NVENC CODEC” OBS error
- How to Fix game_ship.exe Crashing Error in Call of Duty: Modern Warfare 2
- Download Windows Drivers for Steam Deck
- How to Stop the “Xbox Driver Installation” Popup on STEAM
Riot recently removed support for older devices.
Riot requires you to have Vanguard installed on your computer to ensure the competitive integrity of your game. However, if you are returning to VALORANT after a long time, or maybe you are paying on a new computer you may come across an error. Here’s a step-by-step guide on how to fix «This Build of Vanguard is out of compliance» error in VALORANT.
There are obviously multiple factors that can impact why Vanguard is not working as intended on your computer. We have created multiple sections for the same. You can find them below.
On February 25, Riot Games announced Vanguard (and by extension, VALORANT) would no longer work on Windows 8 and 8.1. This would ensure better security for VALORANT players but Riot had to take the tough decision of dropping support for older systems.
Update Windows
- Open Windows settings (Win key + I)
- Click on Update and Security
- Click on Check for Updates
- After the updates are downloaded, you will get a prompt to install the new update. Follow through next steps
Firstly, make sure your Windows is up to date. Vanguard often refers to the latest Windows security to ensure your system is in compliance with the Riot standards. So make sure your system is up to date with the latest security patch.
Reinstall Vanguard
You can also attempt to reinstall Vanguard. For this you need to go through the following steps.
- Search for Control Panel in the Start Menu
- Click Programs
- Go to Uninstall a Program
- Search for ‘Riot Vanguard’
- Right-click on the program
- Click Uninstall
- Restart your system
- Download and install Vanguard from the official website
When you play the VALORANT, you shuold get a prompt to download and install Vanguard on your system.
Enable Secure boot
Before we go forward, it is very very important to consult the manual for your motherboard. Since different manufacturers have different recommendations any unwanted changes to the BIOS might often result in startup problems.
- To fix this you need to turn Secure Boot on in the BIOS Tab of BIOS
- The Secure Boot option won’t be available until you turn CSM (Compatibility Support Module) off in BIOS
- If you’re like me, Secure Boot will show as «Enabled» but also «Not Active», and this issue will persist through reboots
- To fix this, change Secure Boot Mode from Standard to Custom, then immediately back to Standard. It’ll ask you if you want to restore defaults or something. Say yes.
- If it boots you out of BIOS, go back into BIOS and ensure that Secure Boot is enabled
We want to remind you to use your computer’s manual for this and not rely only on this article. This is very important.
ASUS and GIGABYTE motherboards:
- Enter the BIOS settings
- If the Boot mode is CSM or Legacy, change it to UEFI
- Go to the top menu, navigate to the Secure option, and disable it
- Change the Secure Boot mode to custom
- Change the mode back to standard
- Set the BIOS to factory defaults or restore defaults and confirm the changes
- Re-enter the BIOS settings and enable Secure Boot again
- Confirm any message that appears, save changes, and exit the BIOS
- Now Secure Boot should be activated successfully.
- Access the BIOS settings
- If the Boot mode is set to CSM or Legacy, change it to UEFI
- Navigate to the Security option, then go to Secure Boot and disable it
- Change the mode back to standard
- Go to Settings, then Advanced, and finally enable Secure Boot
- Save the modifications and exit the BIOS
With this, your Vanguard should hopefully, be devoid of any bugs and it should work flawlessly.
What is Vanguard in VALORANT?
Vanguard is Riot’s security system that requires permission to read your computer data to ensure a fair and competitive game. Vanguard is the anti-cheat module for VALORANT app.
When you launch VALORANT, the Riot Vanguard app also runs in the background. This will ensure you are not using any illegal cheats to gain an unfair advantage.