
the tool is used to view the ped models and edit its attributes …..
i checked all the files …. but none were with read — only attributes …. i wanted to get the ped model to use it to get a player model …. any recommendation for any other tool ???
i want to get only the head model of a ped …. so it would bt quite useful if any tool was available for stuff like that ….
That is going to take you more work, you will need an IMG editor, look for the peds index and extract TXD (texture) and DFF (3d model), if you just want to edit the texture, any graphic editor but MS PAint will be of use, but for peds you will need 3D Studio Max or G Max, this last is freeware, and get GTA Kam’s Tools, which is in the topic with the same name in tools forum, i recommend you to look for tutorials about 3D Editing, specially animation, if you want to edit PEDs, some of these information i for you to know
thanks for the info … i just thought the model of head and body are available separately …..
Mc Simmo — the name of the editor is simply » Pedestrian editor »
This topic has been deleted. Only users with topic management privileges can see it.
So I went ahead and installed the basic requirements for GTA 5 mods as instructed in the quick-start guide, and it seems to be working just fine. The built-in trainer seems to be working perfectly, I get no errors, etc. I’m running the latest version of GTA V on Steam, alongside with the latest versions of ScriptHookV, OpenIV and ScriptHookVDotNet.
However, I seem to be struggling in installing/using AddonPeds (the latest version being 3.0.1, as of the day this post was made). It seems that I have installed the mod correctly and followed the Readme by the letter, but custom peds just aren’t showing up when I select them with the L key. In fact, even the ones that seem to come with the mod (Superman and the other one which name escapes me) give me the ‘etc was not located in ped.rpf). I do use the ‘Rebuild’ function (running it in admin mode) after adding the files to the folder in question as well.
I have no idea what I’m doing wrong, as again, I’m following the installation instructions by the letter. I use OpenIV, turn on Edit mode, use ‘Add’ to place the files from the peds in the correct folder, but it still says the ped in question is missing. Bare in mind I’m completely new to GTA 5 modding. Any help?
@camperstrike
So, you have increased poolsizes on peds in gameconfig?
Added the Addon peds dlc to dlclist.xml?
Made sure the names in the external tool to load in DLL and meta XML are the same as inside the rpf (so the model name matches the spawn name) ?
@camperstrike said in AddonPeds simply not working:
So I went ahead and installed the basic requirements for GTA 5 mods as instructed in the quick-start guide, and it seems to be working just fine. The built-in trainer seems to be working perfectly, I get no errors, etc. I’m running the latest version of GTA V on Steam, alongside with the latest versions of ScriptHookV, OpenIV and ScriptHookVDotNet.
However, I seem to be struggling in installing/using AddonPeds (the latest version being 3.0.1, as of the day this post was made). It seems that I have installed the mod correctly and followed the Readme by the letter, but custom peds just aren’t showing up when I select them with the L key. In fact, even the ones that seem to come with the mod (Superman and the other one which name escapes me) give me the ‘etc was not located in ped.rpf). I do use the ‘Rebuild’ function (running it in admin mode) after adding the files to the folder in question as well.
I have no idea what I’m doing wrong, as again, I’m following the installation instructions by the letter. I use OpenIV, turn on Edit mode, use ‘Add’ to place the files from the peds in the correct folder, but it still says the ped in question is missing. Bare in mind I’m completely new to GTA 5 modding. Any help?
Make sure you added your new dlclist.xml to the mods folder.
Also, it’s generally not advisable to make external changes to the GTA V dirs while OpenIV is running. I would just close OpenIV, run addonpeds, and reopen OpenIV again to see the results (peds should be there). Then try to spawn them (with the exact same name) in-game.
@ReNNie said in AddonPeds simply not working:
@camperstrike
So, you have increased poolsizes on peds in gameconfig?
Added the Addon peds dlc to dlclist.xml?
Made sure the names in the external tool to load in DLL and meta XML are the same as inside the rpf (so the model name matches the spawn name) ?
By «added the Addon peds dlc to dlclist.xml?», do you mean following this part of the Readme?
«*Using a text editor, open dlclist.xml and add the following line before the </Paths> line:
<Item>dlcpacks:addonpeds</Item>*»
Yes, I have.
And no, I haven’t made any changes in gameconfig. How would one do that? Do I need to download any external tools?
And about naming the ped, well I’m not quite sure. I just made a folder with the name of the ped in question in updatex64dlcpacksaddonpedsdlc.rpfpeds.rpf, dropped the ped files inside that folder, and when using AddonPeds Editor v3.0, I gave it the same name as the folder. Bare in mind, I have also already tried dropping the files as they were in updatex64dlcpacksaddonpedsdlc.rpfpeds.rpf without actually creating a folder first, just in case that’s actually what you have to do, and that didn’t work either.
@meimeiriver said in AddonPeds simply not working:
@camperstrike said in AddonPeds simply not working:
So I went ahead and installed the basic requirements for GTA 5 mods as instructed in the quick-start guide, and it seems to be working just fine. The built-in trainer seems to be working perfectly, I get no errors, etc. I’m running the latest version of GTA V on Steam, alongside with the latest versions of ScriptHookV, OpenIV and ScriptHookVDotNet.
However, I seem to be struggling in installing/using AddonPeds (the latest version being 3.0.1, as of the day this post was made). It seems that I have installed the mod correctly and followed the Readme by the letter, but custom peds just aren’t showing up when I select them with the L key. In fact, even the ones that seem to come with the mod (Superman and the other one which name escapes me) give me the ‘etc was not located in ped.rpf). I do use the ‘Rebuild’ function (running it in admin mode) after adding the files to the folder in question as well.
I have no idea what I’m doing wrong, as again, I’m following the installation instructions by the letter. I use OpenIV, turn on Edit mode, use ‘Add’ to place the files from the peds in the correct folder, but it still says the ped in question is missing. Bare in mind I’m completely new to GTA 5 modding. Any help?
Make sure you added your new dlclist.xml to the mods folder.
Also, it’s generally not advisable to make external changes to the GTA V dirs while OpenIV is running. I would just close OpenIV, run addonpeds, and reopen OpenIV again to see the results (peds should be there). Then try to spawn them (with the exact same name) in-game.
Yes, the dlclist.xml file is in the mods folder. Though, should it be in /update/x64/dlcpacks/addonpeds folder, or just in the mods folder in itself?
@camperstrike said in AddonPeds simply not working:
@ReNNie said in AddonPeds simply not working:
@camperstrike
So, you have increased poolsizes on peds in gameconfig?
Added the Addon peds dlc to dlclist.xml?
Made sure the names in the external tool to load in DLL and meta XML are the same as inside the rpf (so the model name matches the spawn name) ?
By «added the Addon peds dlc to dlclist.xml?», do you mean following this part of the Readme?
«*Using a text editor, open dlclist.xml and add the following line before the </Paths> line:
<Item>dlcpacks:addonpeds</Item>*»
Yes, I have.
And no, I haven’t made any changes in gameconfig. How would one do that? Do I need to download any external tools?
And about naming the ped, well I’m not quite sure. I just made a folder with the name of the ped in question in updatex64dlcpacksaddonpedsdlc.rpfpeds.rpf, dropped the ped files inside that folder, and when using AddonPeds Editor v3.0, I gave it the same name as the folder. Bare in mind, I have also already tried dropping the files as they were in updatex64dlcpacksaddonpedsdlc.rpfpeds.rpf without actually creating a folder first, just in case that’s actually what you have to do, and that didn’t work either.
@meimeiriver said in AddonPeds simply not working:
@camperstrike said in AddonPeds simply not working:
So I went ahead and installed the basic requirements for GTA 5 mods as instructed in the quick-start guide, and it seems to be working just fine. The built-in trainer seems to be working perfectly, I get no errors, etc. I’m running the latest version of GTA V on Steam, alongside with the latest versions of ScriptHookV, OpenIV and ScriptHookVDotNet.
However, I seem to be struggling in installing/using AddonPeds (the latest version being 3.0.1, as of the day this post was made). It seems that I have installed the mod correctly and followed the Readme by the letter, but custom peds just aren’t showing up when I select them with the L key. In fact, even the ones that seem to come with the mod (Superman and the other one which name escapes me) give me the ‘etc was not located in ped.rpf). I do use the ‘Rebuild’ function (running it in admin mode) after adding the files to the folder in question as well.
I have no idea what I’m doing wrong, as again, I’m following the installation instructions by the letter. I use OpenIV, turn on Edit mode, use ‘Add’ to place the files from the peds in the correct folder, but it still says the ped in question is missing. Bare in mind I’m completely new to GTA 5 modding. Any help?
Make sure you added your new dlclist.xml to the mods folder.
Also, it’s generally not advisable to make external changes to the GTA V dirs while OpenIV is running. I would just close OpenIV, run addonpeds, and reopen OpenIV again to see the results (peds should be there). Then try to spawn them (with the exact same name) in-game.
Yes, the dlclist.xml file is in the mods folder. Though, should it be in /update/x64/dlcpacks/addonpeds folder, or just in the mods folder in itself?
It should go where it always goes, in
modsupdateupdate.rpfcommondata
As the original game one is in
updateupdate.rpfcommondata
Any custom gameconfig you may have goes inside said mods data folder too.
@meimeiriver said in AddonPeds simply not working:
I just made a folder with the name of the ped in question in updatex64dlcpacksaddonpedsdlc.rpfpeds.rpf
And don’t do that. Put your mods inside your mods folder, aka
modsupdatex64dlcpacksaddonpeds
The mods folder is essentially a replica, structure-wise, of your game folders. So, if you needed a modified version of, say, mpapartment, you would copy it into the mods folder too, so as to get:
modsupdatex64dlcpacksmpapartment
The mods folder is not really an extra folder, but more of an override folder: anything in the mods folder OpenIV treats as overriding what’s in the original game folders.
But I did… I extracted the ped files to /mods/update/x64/dlcpacks/addonpeds/dlc.rpf/peds.rpf, and they’re still not showing up in-game.
@camperstrike said in AddonPeds simply not working:
But I did… I extracted the ped files to /mods/update/x64/dlcpacks/addonpeds/dlc.rpf/peds.rpf, and they’re still not showing up in-game.
And do you have this extra line in this?
modsupdateupdate.rpfcommondatadlclist.xml
<Item>dlcpacks:addonpeds</Item>@camperstrike Also, it may be due to forum formatting, but you’re missing a backslash:
<Item>dlcpacks:addonpeds</Item>
Right before </Item>
good call, fingers crossed
It’s indeed due to bad forum formatting. This is how my dlclist.xml which is in the mods folder looks like:
<?xml version=»1.0″ encoding=»UTF-8″?>
<SMandatoryPacksData>
<Item>dlcpacks:addonpeds</Item>
<Paths> (etc. etc.)
I have installledd step by step the menu doesnt come on pressing L
Before I download Map Editor, Addon Peds works perfectly fine for me. After I downloaded Map Editor, when I pressed «L», it’s not working! I removed all files from Map editor but it’s just won’t work. Help! I don’t wanna install Addon Peds again!
My addon peds doesnt show any of the peds and I put addon peds and all the required mods all together but when i open the menu and click peds it doesnt show any of them
 HERE IS SOLUTION!!!
Hi
So i think i have found a solution for you.
Try this:
Open you OPENIV then select tools from the top,and then select ASI loader.
Check if every program in there is installed, if not, install all of them.
That’s it! I hope it works because mine wasn’t working too and then i tried this and it worked.
Good luck!
@camperstrike I dont know is it still needed,but let me help.
You need to place <Iitem> After <Paths>
So like this:
<?xml version=»1.0″ encoding=»UTF-8″?>
<SMandatoryPacksData>
<Paths> (etc. etc.)
<Item>dlcpacks:addonpeds</Item>
I know this is an old topic, but I got it to work for me. First, make sure that you have NativeUI version 1.7.0, since that is what the last version of PedSelector is looking for. Then, copy NativeUI.dll into the same folder as PedSelector.dll (aka scripts folder). PedSelector.dll and NativeUI.dll must be in the same folder. I hope this helps someone.
@jharingkaye Thanks alot mate, it really helped me out. I can’t believe i’ve been searching for about two weeks for the problem to find out that nativeu.dll has to be in the scripts folder aswell.
Once again cheers mate and you have a blessed day. ")
ok,i know this is very old now but what i encountered is that i followed everything a tutorial did, everything works out fine until when i get in the game.Yes, my «L» works, the only thing thats not working is the mods, when i select one nothing happens, i tried all of em: vito, superman and other mods and when i select one of them, nothing happens so i cant use a mod
it doesnt work for me any solutions? 
@camperstrike said in AddonPeds simply not working:
So I went ahead and installed the basic requirements for GTA 5 mods as instructed in the quick-start guide, and it seems to be working just fine. The built-in trainer seems to be working perfectly, I get no errors, etc. I’m running the latest version of GTA V on Steam, alongside with the latest versions of ScriptHookV, OpenIV and ScriptHookVDotNet.
However, I seem to be struggling in installing/using AddonPeds (the latest version being 3.0.1, as of the day this post was made). It seems that I have installed the mod correctly and followed the Readme by the letter, but custom peds just aren’t showing up when I select them with the L key. In fact, even the ones that seem to come with the mod (Superman and the other one which name escapes me) give me the ‘etc was not located in ped.rpf). I do use the ‘Rebuild’ function (running it in admin mode) after adding the files to the folder in question as well.
I have no idea what I’m doing wrong, as again, I’m following the installation instructions by the letter. I use OpenIV, turn on Edit mode, use ‘Add’ to place the files from the peds in the correct folder, but it still says the ped in question is missing. Bare in mind I’m completely new to GTA 5 modding. Any help?
I have the solution,
you can’t run ped editor as an administrator, you must click 3 times on Ped Editor.exe and he opens (skip the information window) there you see that the peds have not been added. Add your peds there and click rebuild, you’re done. Run gta 5 and you will see it works
@QK________________ best solution is stop using an outdated mod and use a trainer.
@JohnFromGWN No it works, he isn’t outdated, I had the same problem but now it works and yes I have 2372
why is no one talking on here anymore? i just got addonpeds recently and its still not working. i followed a youtube tutorial to the letter and i did everything camperstrike did and it still dosent work. when i press L in game the addonpeds menu dose come up but the mods in it wont load or do anything and everytime i click one of the mods in it it gives me the error «this mod could not be found in addon peds folder» or something like that. nothing works on here. please help.
Не так давно ко мне обратился пользователь за помощью в установке скина в игру. Поэтому я решил открыть эту тему. Итак, приступим, будем пробовать на скине красивой девушки Gala girl. Для начала нам понадобятся две программы: Ped Editor и Alci’s IMG Editor.
Итак, мы скачали понравившийся нам скин и решили поставить его в игру. Для начала открываем программу Ped Editor и находим скин на который мы хотим заменить пешехода. Предположим что мы решили заменить скин с id 40 и названием hfyri:

Открываем архив с файлом и смотрим название файлов с разрешением dff и txd:

В нашем архиве это swmotr5.dff и swmotr5.txd, как мы можем посмотреть в программе Ped Editor это скин женщины — бомжа. Если нас это устраивает, то оставляем название файлов без изменения, если нет, то переименовываем в нужные нам. В нашем случае это скин с id 40 и названием hfyri. Переименовываем название файлов с swmotr5 на hfyri. У нас должно получиться так:

Важно знать!
Многие файлы на нашем сайте имеют произвольное название, такие как к примеру: Fabiana и в большинстве в описание имеется запись типа «Можно заменить на любого нужного вам пешехода, предварительно переименовав файлы из архива». В таких случаях делается точно так же как описано выше, т.е. название файлов dff и txd заменяются на нужные выбранные вами в программе Ped Editor.
При переименовывании файлов обязательно использовать маленький шрифт, КАПС не допускается!!!
Ну вот пол — дела сделано, переходим непосредственно к установке нашего скина. Открываем программу Alci’s IMG Editor:

Открываем архив gta3.img (находится он в папке models вашей игры). Для этого жмем File, в открывшемся окне нажимаем Open и в открывшемся окне указываем путь и выбираем gta3.img. Если вы все правильно сделали, то у Вас должно получиться следующее:

Мы видим все файлы хранящиеся в этом архиве. Для того, что бы заменить стандартный скин из игры на свой, жмем на полукруглую зеленую стрелочку указывающую вниз:

В открывшемся окне выбираем и добавляем свои файлы, если все сделано правильно, вы их увидите в самом низу, шрифт их названия будет окрашен в зеленый цвет:

Далее для замене в архиве стандартных файлов на ваши жмем на кнопочку с двумя голубыми стрелками образующими круг:

Закрываем программу Alci’s IMG Editor. Все, ваш скин в игре, в этом мы можем убедиться открыв программу Ped Editor:

При желании можно в этой же программе изменить параметры пешехода, такие как поведение, анимация, использование транспортных средств, локация и т.д.
Примечание:
Некоторые скины могут не отображаться программой Ped Editor, может выдаваться ошибка, в этом нет ничего страшного, происходит это в основном если автор файла залочил или закодировал файл. В игре все будет нормально и скин будет прекрасно работать.
Ну вот вроде бы и все, о чем я хотел рассказать. Если возникнут вопросы, пишите в этой теме на форуме, с радостью отвечу.
Удачи!
Прочитано 25 326 раз.
Содержание
- Как установить Add-On Ped скины в GTA 5
- Установка нужных программ и компонентов
- Стандартная установка:
- Упрощенная установка
- Настройки и установка Add-On Ped скинов
- Настройки:
- Установка скинов
- Как поменять скин в игре
- Не открывается ped selector гта 5. Как добавить новую модель в мод AddonPeds
- Скриншоты мода AddonPeds:
- Как установить мод AddonPeds?
- Как добавить новую модель в мод AddonPeds?
- Why Use the AddonPeds GTA 5 Mod?
- Не работает addon peds gta 5
Как установить Add-On Ped скины в GTA 5
В этой статье мы расскажем, как установить скины в ГТА 5. Это не только текстовая инструкция – после всех важных пунктов вы сможете посмотреть визуальный пример установки, чтобы исключить любые недоразумения.
Если вам покажется, что установить скины Add-On Ped для GTA 5 очень сложно, то это не так, основные процедуры проделываются всего один раз и далее нужно будет только выбирать скины и добавлять их в игру. Потому немного терпения понадобится только для первоначальной настройки всех компонентов. Далее всё будет очень просто.
Важно! Мы сделали инструкцию со стандартной и упрощенной установками. В стандартной описаны все шаги и желательно следовать именно им, чтобы персонально знать всю последовательность установки, но после полной инструкции мы подготовили немного упрощенный вариант на случай, если у вас возникли какие-либо проблемы или путаница.
Приступим к первоначальной установке нужных компонентов.
Установка нужных программ и компонентов
Перед добавлением новых скинов, нужно скачать и установить все необходимые программы, которые понадобятся!
Стандартная установка:
1. Script Hook V: распаковываем файлы .dll в папку с игрой.
2. Script Hook V .Net: распаковываем файлы .asi, .ini, .dll и .xml в папку с игрой.
3. Lua Plugin: распаковываем файл LUA.asi и папку «scrips», которая находится в папке с игрой.
4. NativeUI: распаковываем все файлы архива в папку «scripts», которая находится в папке с игрой.
5. AddonPeds:
– Распаковать файлы AddonPeds EPedsditor.exe и AddonPedsVars.xml в папку с установленной игрой.
– Откройте в архиве папку «scripts» и перенесите файл PedSelector.dll также в папку «scripts», которая находится в директории с уставленной игрой.
В архиве остается папка «dlcpacks», она нам тоже понадобится, но для начала нужно установить программу OpenIV.
6. OpenIV: у программы стандартная установка, как и у любых других программ.
Проделали все пункты вручную? Поздравляем! Вы можете переходить к инструкции по настройке и добавлению скинов, пропуская упрощенную установку. Если же что-то не вышло, то ознакомьтесь с упрощённой установкой, которая находится ниже и следуйте её пунктам.
Упрощенная установка
Важно! Мы собрали архив, с помощью которого нет необходимости проделывать большинство пунктов, описанных в стандартной инструкции, этот вариант легче и избавляет от возможных ошибок, но некоторые действия все равно нужно сделать самостоятельно.
Качаем архив EasySkins – Скачать, в нём находятся папки:
1. OpenIV – устанавливаем, как обычную программу.
2. Components – распакуйте содержимое в папку с игрой.
3. Addonpeds – зачем нужна, узнаете далее.
На этом с установкой нужных файлов всё, правда легко? Но не забывайте, что нам далее ещё понадобится папка «addonpeds». Поэтому, переходим к настройкам.
Настройки и установка Add-On Ped скинов
Настройки:
Наступает финишная прямая, остаётся всё настроить и узнать, как добавить скины в GTA 5 и выбирать их в игре.
Что же, приступим:
1. Запускаем установленный OpenIV и выбираем Grand Theft Auto V – Windows.
2. Указываем расположение папки с установленной GTA 5 и жмём продолжить.
3. После запуска программы жмём кнопку «Редактирование», это необходимо для того, чтобы включить режим редактирования файлов.
4. Переходим в «Инструменты — ASI менеджер», чтобы убедиться, что установлены Asi Loader и OpenIV.ASI. Если они не установлены, то нажмите установить.
Когда нажмёте установить OpenIV.ASI, появится окошко с предложением «Создать папку “mods”?» – жмём «Да». Она понадобится для установки Addon Peds.
5. Теперь нужно в боковом меню выбрать папку «update» и в ней открываем путь x64 – data – dlcpacks в последней папке будет много других папок, открываем любую, например «mpairraces», и нажимаем на файл dlc.rpf, откроется окошко, в котором будет красный баннер, жмём в нём кнопку «Копировать в папку “mods”».
После этих действий в папке «mods» появится копия выбранных файлов (путь папок можно создать вручную, но так быстрее).
6. Далее снова возвращаемся к оригинальной папке «update» и выбираем файл update.rpf, выбрав его, также появится красный баннер – копируем.
7. Остаётся поместить папку «addonpeds» (в стандартной установке находится в архиве AddonPeds 3.0.1 – dlcpacks) по адресу: mods – update – x64 – dlcpacks и добавить строку dlcpacks:addonpeds в файл по адресу: mods – update.rpf – common – data – dlcpck.xml.
На этом с установками и настройками всё! Поздравляем!
Установка скинов
Теперь речь пойдёт о том, как установить скин в ГТА 5 – после всех первоначальных настроек остаётся только добавлять новых Add-On Ped персонажей и играть за них.
1. Для начала нужно скачать скин, мы для примера возьмём – Doom Guy [Add-On Ped] 1.0.
2. Открываем в OpenIV (не забываем включить режим редактирования) путь, куда нужно копировать файлы скина Addon Peds: mods – update – x64 – dlcpacks – addonpeds – dlc.rpf – peds.rpf
Переносите в открывшееся окошко все файлы и папки скачанного скина, в нашем случае это doomguy.

Теперь можете закрывать программу Опен 4 и нужно проделать ещё несколько небольших действий.
3. Переходите в папку с GTA 5 и запускаете (обязательно от имени Администратора) ранее скопированный в неё файл AddonPeds Editor.exe, откроется окошко, в котором будут отображаться все установленные скины.
4. Теперь нужно прописать добавленный скин, чтобы его можно было выбрать в игре. Жмём Peds – New Ped и появится окошко, в котором нужно заполнить некоторые параметры:
– Model Name: Имя модели, которым назван скин, в нашем случае это doomguy.
– Ped Type: Male/Female (мужчина или женщина).
– Is Streamed: True или false. Если файлы скина имеют папку, то ставьте true, если не имеют, то false. В любом случае, если возникли проблемы, то пробуйте оба варианта.
Когда проделали все действия – жмите кнопку «REBUILD», если не нажать, то скин не появится, потому не забывайте.
На этом всё, Add-On Ped скин установлен, остаётся только выбрать добавленного персонажа в GTA 5.
Как поменять скин в игре
В игре нажмите кнопку L и в открывшемся окошке можно выбрать и включить любой скин, который добавили. После выбора нажимайте Enter.
Вот и всё, надеемся, что у вас всё получилось! А если возникли трудности, то задавайте вопросы в комментариях, возможно именно там будет найдено решение вашей проблемы.
А также предлагаем подписаться на наши группы VK, FB, TG и YOUTUBE канал, перейти на них можно, нажав на специальные кнопки, которые находятся над иконками «поделиться с друзьями». Поделиться также не забывайте, для нас это лучшая благодарность. Спасибо!
Источник
Не открывается ped selector гта 5. Как добавить новую модель в мод AddonPeds
Мод AddonPeds позволяет добавлять свои модели людей в игру, внутри новости я так же покажу как установить мод и как им пользоваться.
Итак, после установки AddonPeds у вас будет специальное меню в котором вы сможете вбирать любую модель любого человека который вы в него добавите, так же стандартно в моде добавлено 2 модели, супермен и Vito из Мафии.
Скриншоты мода AddonPeds:


Как установить мод AddonPeds?
Как добавить новую модель в мод AddonPeds?
The AddonPeds GTA 5 is a mod that allows you to change and add new ped models into your game. Unlike other mods, you do not need to replace any files in the game with AddonPeds. All the information about how to install the mod and tutorials about how to use the mod are included in the download.
Version 3.0 of the AddonPeds
The latest version of the mod AddonPeds menu adds skin, walking animations, combat mode, and personality. There are many other ped settings that you can edit with the mod. Version 3.0 has a new editing software and PedSelector script that makes it easier than before to make these changes to your game.
Why Use the AddonPeds GTA 5 Mod?
The AddonPeds GTA 5 mod is a great option, especially if you are looking to create videos in the game to post online. This mod can also make interactions in the game more interesting, and you can easily change characters on the fly.


Along with creating videos, you can also use the AddonPeds mod to make your own characters in the game. This is great for extending the amount of gameplay that you can get from GTA V. The mod is simple to install, and you can adjust the settings when you are in-game. So, with just a few clicks you can have a whole new character.

AddonPeds requires that you have a copy of GTA 5 installed on your computer. You will need to download AddonPeds and install the program. Along with the main game and the mod, you will need the latest version of Scriphook, NativeUI, and . If you are running any other mods, you most likely will have all the required software installed already. If not, you can easily find all the programs online, so you will just need to install them.

There is only one hotkey that is used in the mod, which is ‘L’. This hotkey will open the Ped Selector Menu, which will have a list of all the skins, personalities, and walking animations that you have installed. You just need to click on the option that you would like to have set, and the mod will make the changes for you.
The Ped Selector menu also allows you to make changes to any model that you have installed or created yourself. This makes it easy to switch out walking animations and personalities while you are still playing the game.


If you have any other mods that use the ‘L’ key, you should change the hotkey. This can be done in the game or mod settings, depending on the other mods that you have installed.

AddonPeds is a great mod that allows you to change your character’s skin, walking animations, personality and so much more with just a few clicks of a button. There is no need to repair files in the game because AddonPeds will change the selected item without repairing any files. AddonPeds is easy to install, and there are tutorials in the files if you need any help with the mod.
Источник
Не работает addon peds gta 5
So I went ahead and installed the basic requirements for GTA 5 mods as instructed in the quick-start guide, and it seems to be working just fine. The built-in trainer seems to be working perfectly, I get no errors, etc. I’m running the latest version of GTA V on Steam, alongside with the latest versions of ScriptHookV, OpenIV and ScriptHookVDotNet.
However, I seem to be struggling in installing/using AddonPeds (the latest version being 3.0.1, as of the day this post was made). It seems that I have installed the mod correctly and followed the Readme by the letter, but custom peds just aren’t showing up when I select them with the L key. In fact, even the ones that seem to come with the mod (Superman and the other one which name escapes me) give me the ‘etc was not located in ped.rpf). I do use the ‘Rebuild’ function (running it in admin mode) after adding the files to the folder in question as well.
I have no idea what I’m doing wrong, as again, I’m following the installation instructions by the letter. I use OpenIV, turn on Edit mode, use ‘Add’ to place the files from the peds in the correct folder, but it still says the ped in question is missing. Bare in mind I’m completely new to GTA 5 modding. Any help?
![]()
So, you have increased poolsizes on peds in gameconfig?
Added the Addon peds dlc to dlclist.xml?
Made sure the names in the external tool to load in DLL and meta XML are the same as inside the rpf (so the model name matches the spawn name) ?
» «if you’re packin’ keep it on the lee low»
So I went ahead and installed the basic requirements for GTA 5 mods as instructed in the quick-start guide, and it seems to be working just fine. The built-in trainer seems to be working perfectly, I get no errors, etc. I’m running the latest version of GTA V on Steam, alongside with the latest versions of ScriptHookV, OpenIV and ScriptHookVDotNet.
However, I seem to be struggling in installing/using AddonPeds (the latest version being 3.0.1, as of the day this post was made). It seems that I have installed the mod correctly and followed the Readme by the letter, but custom peds just aren’t showing up when I select them with the L key. In fact, even the ones that seem to come with the mod (Superman and the other one which name escapes me) give me the ‘etc was not located in ped.rpf). I do use the ‘Rebuild’ function (running it in admin mode) after adding the files to the folder in question as well.
I have no idea what I’m doing wrong, as again, I’m following the installation instructions by the letter. I use OpenIV, turn on Edit mode, use ‘Add’ to place the files from the peds in the correct folder, but it still says the ped in question is missing. Bare in mind I’m completely new to GTA 5 modding. Any help?
Make sure you added your new dlclist.xml to the mods folder.
Also, it’s generally not advisable to make external changes to the GTA V dirs while OpenIV is running. I would just close OpenIV, run addonpeds, and reopen OpenIV again to see the results (peds should be there). Then try to spawn them (with the exact same name) in-game.
«Are you having fun? You remember fun? It’s that thing you pretend to have while documenting every moment, meal and faux memory. I’ve got a challenge for you: turn your phone off for a day and see how uncomfortable you get.» — Cara Delevingne
So, you have increased poolsizes on peds in gameconfig?
Added the Addon peds dlc to dlclist.xml?
Made sure the names in the external tool to load in DLL and meta XML are the same as inside the rpf (so the model name matches the spawn name) ?
By «added the Addon peds dlc to dlclist.xml?», do you mean following this part of the Readme?
«*Using a text editor, open dlclist.xml and add the following line before the
And no, I haven’t made any changes in gameconfig. How would one do that? Do I need to download any external tools?
And about naming the ped, well I’m not quite sure. I just made a folder with the name of the ped in question in updatex64dlcpacksaddonpedsdlc.rpfpeds.rpf, dropped the ped files inside that folder, and when using AddonPeds Editor v3.0, I gave it the same name as the folder. Bare in mind, I have also already tried dropping the files as they were in updatex64dlcpacksaddonpedsdlc.rpfpeds.rpf without actually creating a folder first, just in case that’s actually what you have to do, and that didn’t work either.
So I went ahead and installed the basic requirements for GTA 5 mods as instructed in the quick-start guide, and it seems to be working just fine. The built-in trainer seems to be working perfectly, I get no errors, etc. I’m running the latest version of GTA V on Steam, alongside with the latest versions of ScriptHookV, OpenIV and ScriptHookVDotNet.
However, I seem to be struggling in installing/using AddonPeds (the latest version being 3.0.1, as of the day this post was made). It seems that I have installed the mod correctly and followed the Readme by the letter, but custom peds just aren’t showing up when I select them with the L key. In fact, even the ones that seem to come with the mod (Superman and the other one which name escapes me) give me the ‘etc was not located in ped.rpf). I do use the ‘Rebuild’ function (running it in admin mode) after adding the files to the folder in question as well.
I have no idea what I’m doing wrong, as again, I’m following the installation instructions by the letter. I use OpenIV, turn on Edit mode, use ‘Add’ to place the files from the peds in the correct folder, but it still says the ped in question is missing. Bare in mind I’m completely new to GTA 5 modding. Any help?
Make sure you added your new dlclist.xml to the mods folder.
Also, it’s generally not advisable to make external changes to the GTA V dirs while OpenIV is running. I would just close OpenIV, run addonpeds, and reopen OpenIV again to see the results (peds should be there). Then try to spawn them (with the exact same name) in-game.
Yes, the dlclist.xml file is in the mods folder. Though, should it be in /update/x64/dlcpacks/addonpeds folder, or just in the mods folder in itself?
It should go where it always goes, in
modsupdateupdate.rpfcommondata
As the original game one is in
Any custom gameconfig you may have goes inside said mods data folder too.
«Are you having fun? You remember fun? It’s that thing you pretend to have while documenting every moment, meal and faux memory. I’ve got a challenge for you: turn your phone off for a day and see how uncomfortable you get.» — Cara Delevingne
I just made a folder with the name of the ped in question in updatex64dlcpacksaddonpedsdlc.rpfpeds.rpf
And don’t do that. Put your mods inside your mods folder, aka
modsupdatex64dlcpacksaddonpeds
The mods folder is essentially a replica, structure-wise, of your game folders. So, if you needed a modified version of, say, mpapartment, you would copy it into the mods folder too, so as to get:
modsupdatex64dlcpacksmpapartment
The mods folder is not really an extra folder, but more of an override folder: anything in the mods folder OpenIV treats as overriding what’s in the original game folders.
«Are you having fun? You remember fun? It’s that thing you pretend to have while documenting every moment, meal and faux memory. I’ve got a challenge for you: turn your phone off for a day and see how uncomfortable you get.» — Cara Delevingne
But I did. I extracted the ped files to /mods/update/x64/dlcpacks/addonpeds/dlc.rpf/peds.rpf, and they’re still not showing up in-game.
But I did. I extracted the ped files to /mods/update/x64/dlcpacks/addonpeds/dlc.rpf/peds.rpf, and they’re still not showing up in-game.
And do you have this extra line in this?
«Are you having fun? You remember fun? It’s that thing you pretend to have while documenting every moment, meal and faux memory. I’ve got a challenge for you: turn your phone off for a day and see how uncomfortable you get.» — Cara Delevingne
@camperstrike Also, it may be due to forum formatting, but you’re missing a backslash:
«Are you having fun? You remember fun? It’s that thing you pretend to have while documenting every moment, meal and faux memory. I’ve got a challenge for you: turn your phone off for a day and see how uncomfortable you get.» — Cara Delevingne
![]()
good call, fingers crossed
» «if you’re packin’ keep it on the lee low»
It’s indeed due to bad forum formatting. This is how my dlclist.xml which is in the mods folder looks like:
I have installledd step by step the menu doesnt come on pressing L
Before I download Map Editor, Addon Peds works perfectly fine for me. After I downloaded Map Editor, when I pressed «L», it’s not working! I removed all files from Map editor but it’s just won’t work. Help! I don’t wanna install Addon Peds again!
My addon peds doesnt show any of the peds and I put addon peds and all the required mods all together but when i open the menu and click peds it doesnt show any of them
HERE IS SOLUTION.
Hi
So i think i have found a solution for you.
Try this:
Open you OPENIV then select tools from the top,and then select ASI loader.
Check if every program in there is installed, if not, install all of them.
That’s it! I hope it works because mine wasn’t working too and then i tried this and it worked.
@camperstrike I dont know is it still needed,but let me help.
You need to place After
(etc. etc.)
dlcpacks:addonpeds
Persistence is my greatest strength.
I know this is an old topic, but I got it to work for me. First, make sure that you have NativeUI version 1.7.0, since that is what the last version of PedSelector is looking for. Then, copy NativeUI.dll into the same folder as PedSelector.dll (aka scripts folder). PedSelector.dll and NativeUI.dll must be in the same folder. I hope this helps someone.
@jharingkaye Thanks alot mate, it really helped me out. I can’t believe i’ve been searching for about two weeks for the problem to find out that nativeu.dll has to be in the scripts folder aswell.
Once again cheers mate and you have a blessed day.
ok,i know this is very old now but what i encountered is that i followed everything a tutorial did, everything works out fine until when i get in the game.Yes, my «L» works, the only thing thats not working is the mods, when i select one nothing happens, i tried all of em: vito, superman and other mods and when i select one of them, nothing happens so i cant use a mod
it doesnt work for me any solutions?
So I went ahead and installed the basic requirements for GTA 5 mods as instructed in the quick-start guide, and it seems to be working just fine. The built-in trainer seems to be working perfectly, I get no errors, etc. I’m running the latest version of GTA V on Steam, alongside with the latest versions of ScriptHookV, OpenIV and ScriptHookVDotNet.
However, I seem to be struggling in installing/using AddonPeds (the latest version being 3.0.1, as of the day this post was made). It seems that I have installed the mod correctly and followed the Readme by the letter, but custom peds just aren’t showing up when I select them with the L key. In fact, even the ones that seem to come with the mod (Superman and the other one which name escapes me) give me the ‘etc was not located in ped.rpf). I do use the ‘Rebuild’ function (running it in admin mode) after adding the files to the folder in question as well.
I have no idea what I’m doing wrong, as again, I’m following the installation instructions by the letter. I use OpenIV, turn on Edit mode, use ‘Add’ to place the files from the peds in the correct folder, but it still says the ped in question is missing. Bare in mind I’m completely new to GTA 5 modding. Any help?
I have the solution,
you can’t run ped editor as an administrator, you must click 3 times on Ped Editor.exe and he opens (skip the information window) there you see that the peds have not been added. Add your peds there and click rebuild, you’re done. Run gta 5 and you will see it works
@QK________________ best solution is stop using an outdated mod and use a trainer.
Источник
Моддинг San Andreas v2.0
Версия 2.0 GTA: San Andreas появилась из-за мода Hot Coffee, она удаляет скрипты сцен сексуального характера и добавляет в exe файл специальную проверку gta3.img, которая происходит при каждом запуске игры. Если у вас gta3.img большего или меньшего размера чем оригинальный (файл модифицирован), игра работать не будет.
Существует два способа решения проблемы. Первый способ — использование downgrader-а.
Содержание
Downgrader
Downgrader изменит версию gta_sa.exe с 2.0 на 1.0.
Просто запустите патч и укажите директорию с игрой. Теперь вы можете модифицировать игру как и раньше.
Без downgrader’а
Суть второго способа — переименовывание нужных файлов в gta3.img (без пересборки и изменения архива).
Программы для модифицирования версии 2.0
- IMG Tool 2.0 — для переименовывания файлов
- Alci’s IMG Editor 1.5 — позволяет добавлять файлы и создавать новые .img архивы.
Шаг 1. Резервные копии
Рекомендуется сделать резервные копии gta3.img и gta.dat
Шаг 2. Объявление нового архива
Добавьте новую строчку в gta.dat (внимание: строки могут быть закомментированы символом #):
«VEHICLES.IMG» — новый .img архив для ваших модов. Он может быть назван как угодно.
Первые 7 строк gta.dat должны выглядеть так:
Шаг 3. Создание нового архива
Теперь надо создать новый .img файл. С помощью IMG Tool 2.0 вы не можете создавать новые архивы. Итак, чтобы избежать проблем и не тратить время, лучше пользоваться Alci’s IMG Editor 1.5.
Откройте Alci’s IMG Editor 1.5 и создайте новый .img файл:
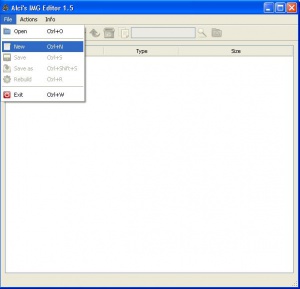
Нажмите File -> New для создания
Пользуйтесь созданным архивом как захочется, например, положите туда .dff и .txd файлы того транспортного средства, которые вы хотите заменить. В Alci’s IMG Editor 1.5 нажмите «Actions -> Import», выберите нужные файлы и нажмите «Open» для добавления их в архив:
Теперь импортируйте файлы в новый архив
Сохраните IMG файл (Ctrl+S).
Шаг 4. Переименовывание старых файлов
Откройте GTA3.IMG в IMG Tool 2.0. Переименуйте старый файл из .XXX в .old. Расширение .old не будет читаться игрой.
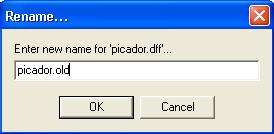
Commands -> Rename
Итак, вы переименовали старые файлы в архиве. Теперь просто выйдите из IMG Tool 2.0, без пересборки архива. Можно запускать игру.
Установка скинов в GTA San Andreas
Не так давно ко мне обратился пользователь за помощью в установке скина в игру. Поэтому я решил открыть эту тему. Итак, приступим, будем пробовать на скине красивой девушки Gala girl. Для начала нам понадобятся две программы: Ped Editor и Alci’s IMG Editor.
Итак, мы скачали понравившийся нам скин и решили поставить его в игру. Для начала открываем программу Ped Editor и находим скин на который мы хотим заменить пешехода. Предположим что мы решили заменить скин с id 40 и названием hfyri:
Открываем архив с файлом и смотрим название файлов с разрешением dff и txd:
В нашем архиве это swmotr5.dff и swmotr5.txd, как мы можем посмотреть в программе Ped Editor это скин женщины — бомжа. Если нас это устраивает, то оставляем название файлов без изменения, если нет, то переименовываем в нужные нам. В нашем случае это скин с id 40 и названием hfyri. Переименовываем название файлов с swmotr5 на hfyri. У нас должно получиться так:
Важно знать! Многие файлы на нашем сайте имеют произвольное название, такие как к примеру: Fabiana и в большинстве в описание имеется запись типа «Можно заменить на любого нужного вам пешехода, предварительно переименовав файлы из архива». В таких случаях делается точно так же как описано выше, т.е. название файлов dff и txd заменяются на нужные выбранные вами в программе Ped Editor.
При переименовывании файлов обязательно использовать маленький шрифт, КАПС не допускается.
Ну вот пол — дела сделано, переходим непосредственно к установке нашего скина. Открываем программу Alci’s IMG Editor:
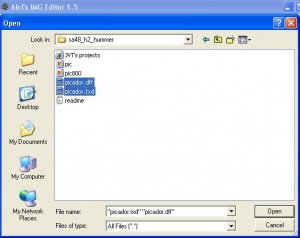
Открываем архив gta3.img (находится он в папке models вашей игры). Для этого жмем File, в открывшемся окне нажимаем Open и в открывшемся окне указываем путь и выбираем gta3.img. Если вы все правильно сделали, то у Вас должно получиться следующее:
Мы видим все файлы хранящиеся в этом архиве. Для того, что бы заменить стандартный скин из игры на свой, жмем на полукруглую зеленую стрелочку указывающую вниз:
В открывшемся окне выбираем и добавляем свои файлы, если все сделано правильно, вы их увидите в самом низу, шрифт их названия будет окрашен в зеленый цвет:
Далее для замене в архиве стандартных файлов на ваши жмем на кнопочку с двумя голубыми стрелками образующими круг:
Закрываем программу Alci’s IMG Editor. Все, ваш скин в игре, в этом мы можем убедиться открыв программу Ped Editor:
При желании можно в этой же программе изменить параметры пешехода, такие как поведение, анимация, использование транспортных средств, локация и т.д.
Примечание: Некоторые скины могут не отображаться программой Ped Editor, может выдаваться ошибка, в этом нет ничего страшного, происходит это в основном если автор файла залочил или закодировал файл. В игре все будет нормально и скин будет прекрасно работать.
Ну вот вроде бы и все, о чем я хотел рассказать. Если возникнут вопросы, пишите в этой теме на форуме, с радостью отвечу.
Alcis Img Editor v1.5

Программа полностью написана на qt4, поэтому она имеет сравнительно большую скорость работы с img файлами, большой функционал и очень приятный интерфейс.
Так же программа поддерживает добавление и извлечение, одновременно более 2-х файлов (в отличие от Img Tool).
Скачать Alcis Img Editor v1.5 для GTA San Andreas вы можете по ссылкам, расположенным ниже на странице.
Дабы снизить подобное кол-во мусора в инете, я решил написать простенькую, !вводную! статью, раскрывающую азы моддинга нашей всеми любимой ГТА-шеньки. Да-да, не брезгайте ждать от меня более длинных статей с нарастающей сложностью. Наследие моё, так сказать.
Ну что же, доброго времени суток, друзья! Благодаря ознакомлению с данным уроком, вы, начинающие игростроители, перестанете обходить стороной модификации для GTA, требующие работы с «img» архивами.
Прежде всего нам нужно знать, что файлы «img» просто-напросто являются сжатыми библиотеками моделей и текстур. Тут можно провести аналогию с тем, как вы помещаете в zip-архив ваши фото, видео, или документы прочих форматов. Единственное различие — разный софт.
Для того, чтобы открывать и редактировать файлы «img» из San Andreas, Vice City или GTA III, существует великое множество программ. Однако, не все они справляются с поставленными задачами так же легко и непринуждённо, как Alci’s Img Editor. Стоит заметить, что принцип работы с подобными архивами в вышеперечисленных играх аналогичен.
Скачать можете отсюда:
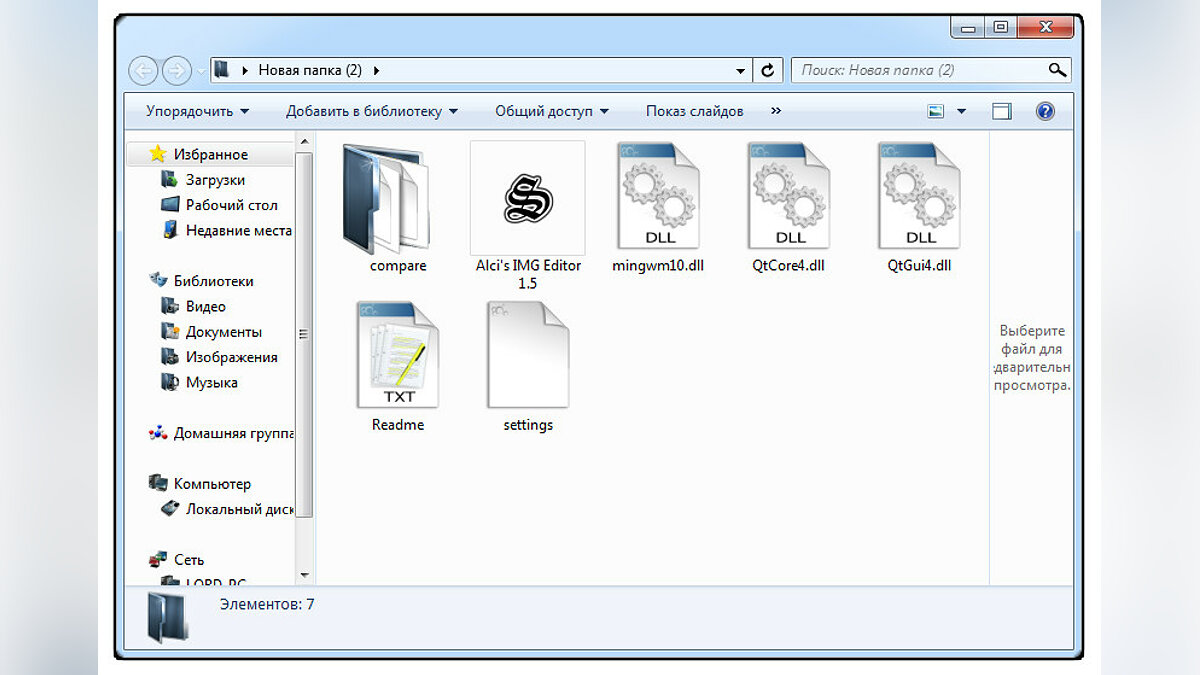
Скачали дистрибутив, распаковываем в любое удобное место:
Мне, например, до жути надоела угловатая модель автомата с каким-то пятном вместо текстуры.
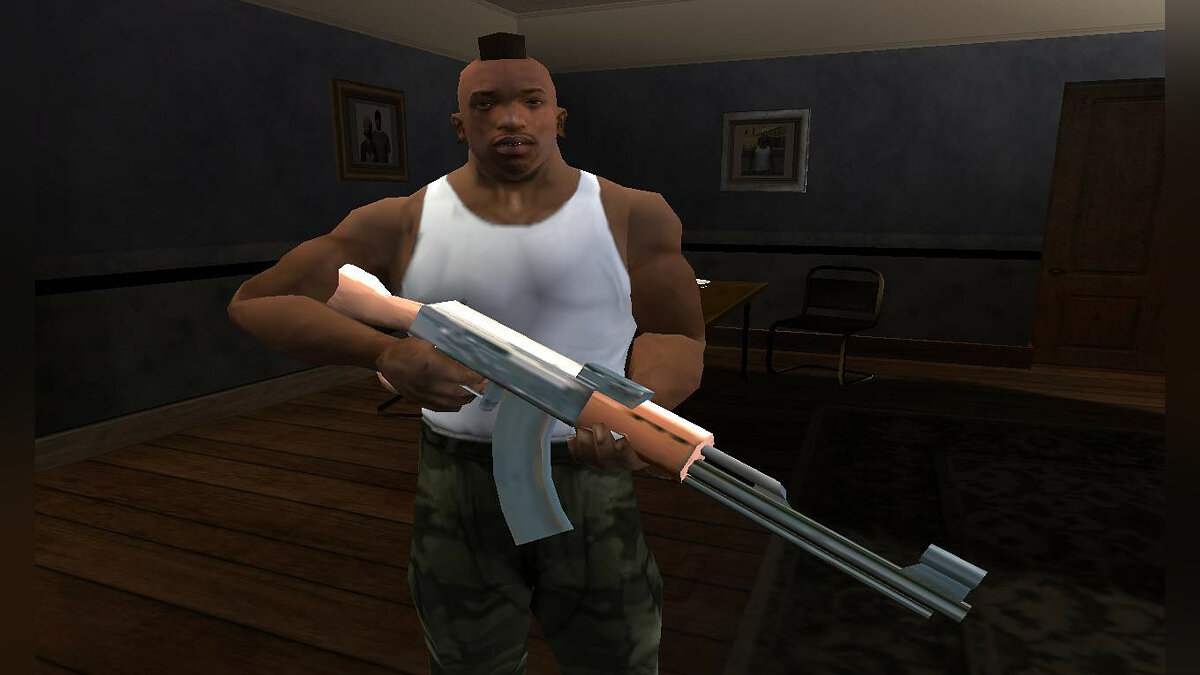
На что бы стоящее заменить?
Заменю, пожалуй, на качественную модель AK-47. Модель конвертирована мною из игры «Left 4 Dead 2».
Скачать можете здесь: /files/gta-san-andreas/54724-ak-47-from-left4dead2.html
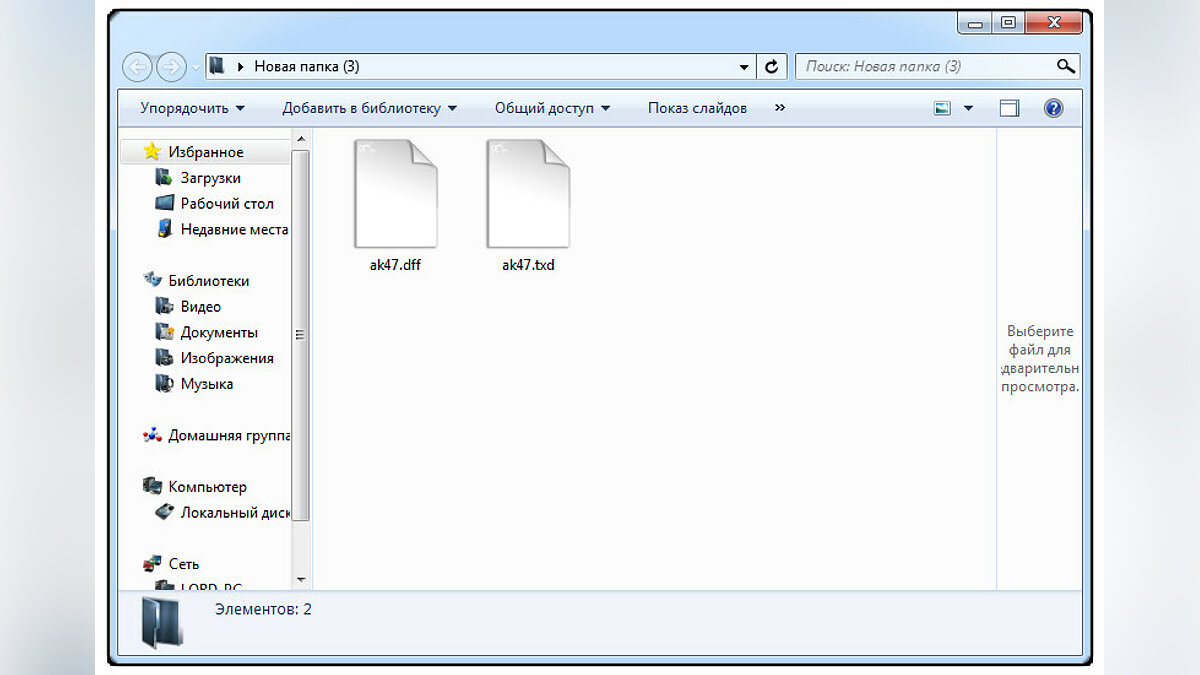
Извлекаем из архива файлы «ak47.dff», «ak47.txd»
Теперь же пришло время разобраться с интерфейсом нашего img-редактора.

- open – открыть (открыть img файл)
- new – создать (создать img файл)
- save – сохранить (используется для применения всех изменений в конце работы)
- save as – сохранить как.
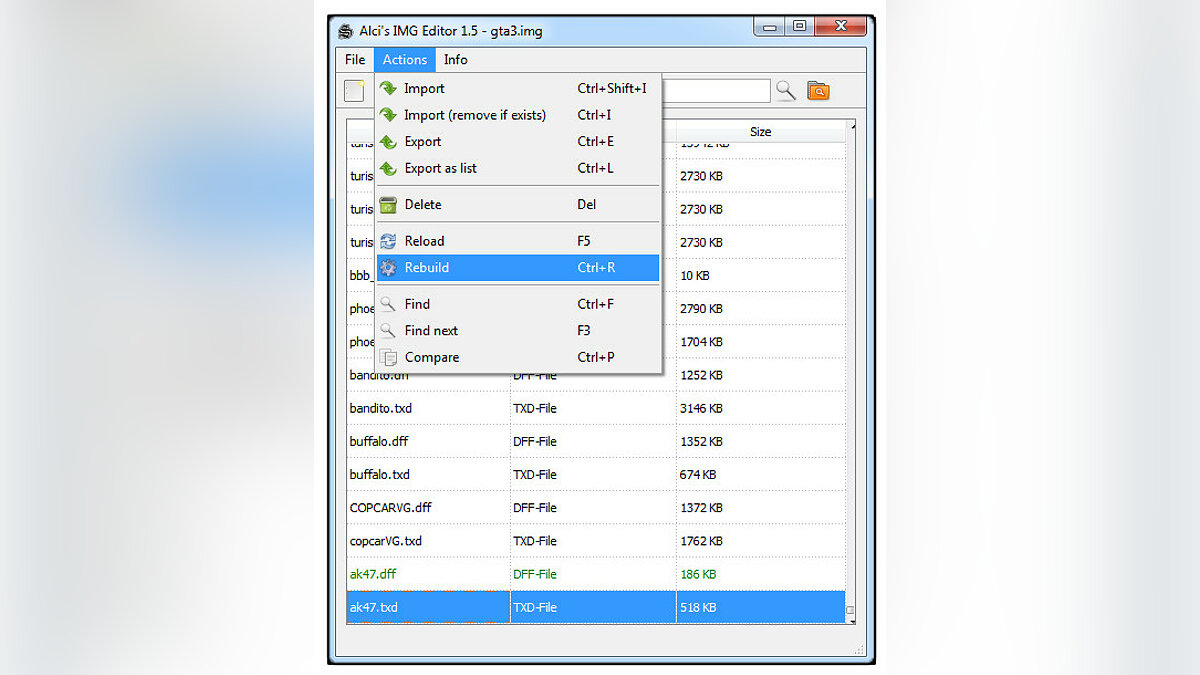
- rebuild – перепостроить архив img (лучше не трогайте)
- exit – выход
- Import – вставить файл (например текстуру txd или файл dff или ifp ит.п.)
- import (remove if exist) – вставить файл (удалить похожие если есть) (если название добавляемого файла и стандартного совпадут, то стандартный заменится вашим)
- export – извлечь выбранные файлы из архива img
- delete – удалить выбранные файлы
- reload – обновить архив (перезагрузить)
- rebuild – перепостроить архив img (лучше не трогайте)
- find – найти
- find next – следующий найденный файл по запросу
- compare – сравнить два img архива
Нажимаем File – Open, ищем файл gta3.img. Путь указан на скрине:
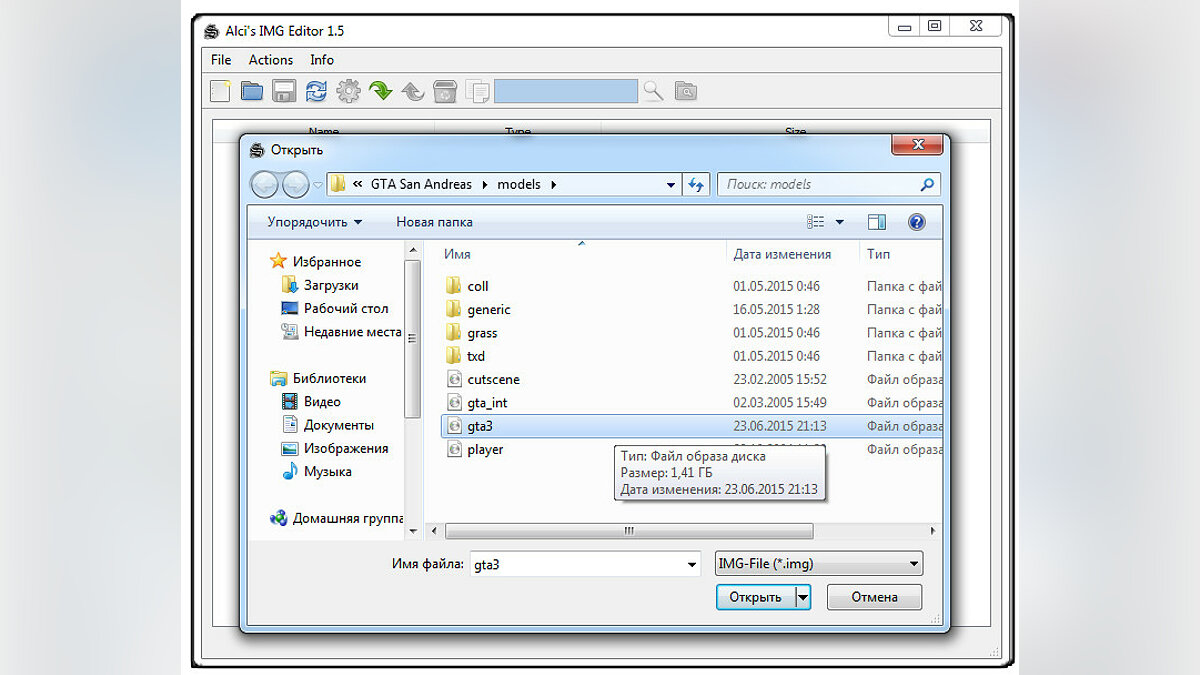
Пред нашим взором нескончаемый список моделей и текстур. Не бойтесь, со всеми ними нам работать не придётся. Автоматика, так сказать!
Нажимаем Actions — Import (remove it exists), и выбираем файлы, которые мы совсем недавно извлекли из скачанного архива:
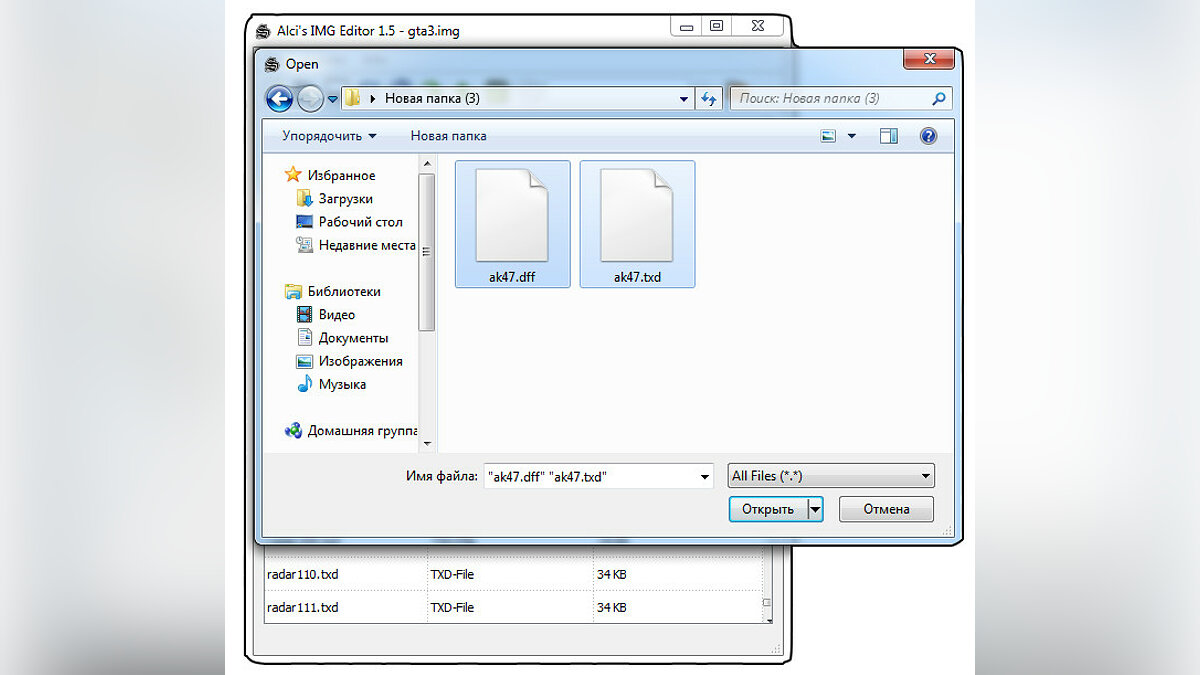
Жмякаем “Открыть”. Наши файлы появились в конце списка:
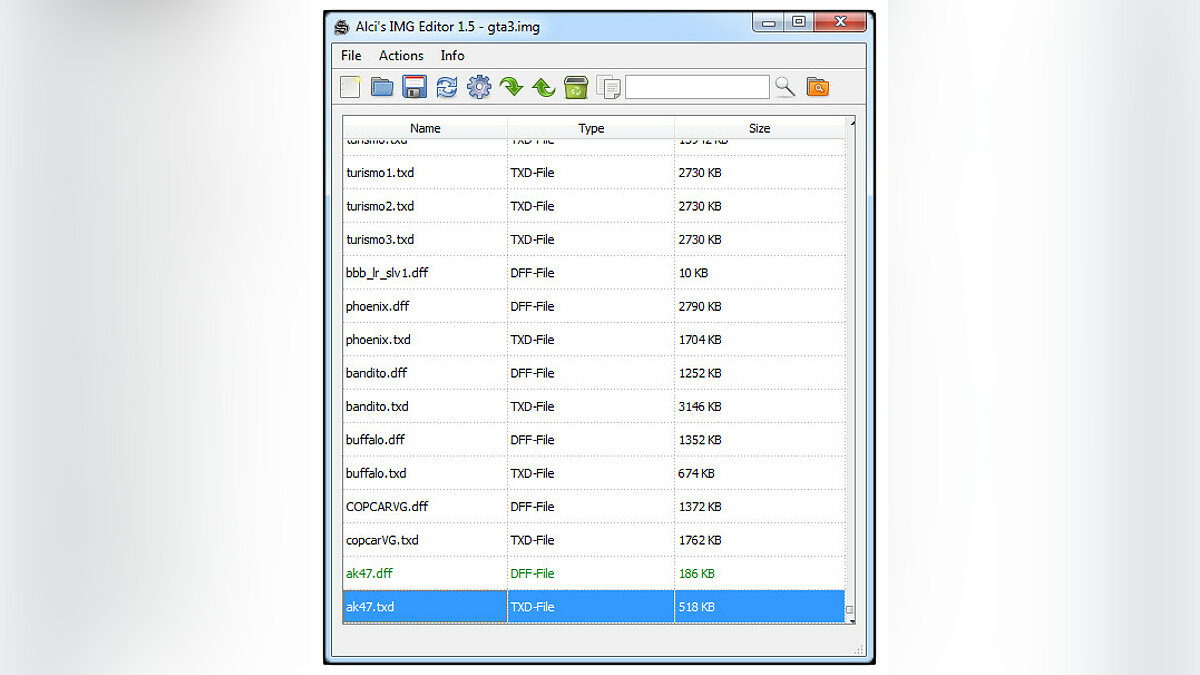
!ATTENTION! — Целесообразно будет пересобрать архив после того, как вы установили/удалили несколько модов, либо после установки одного большого мода. Процесс пересборки «img» архива аналогичен с процессом дефрагментации жесткого диска.
Сейчас нам это не нужно. На будущее:
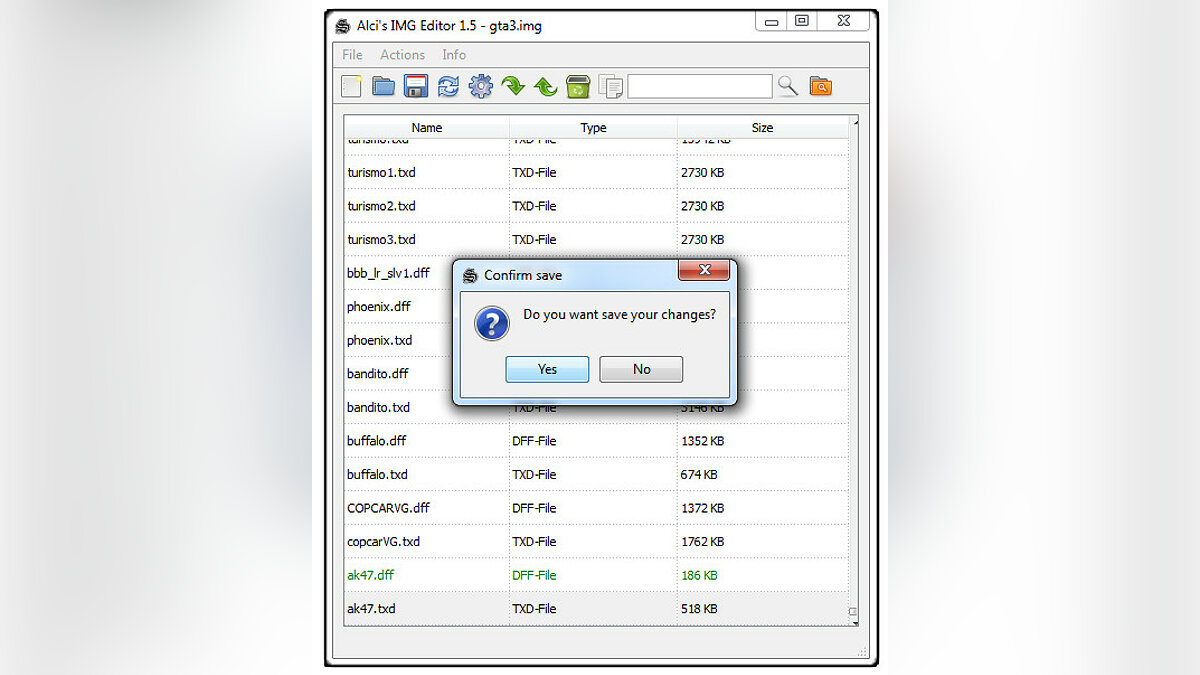
При выходе программа спросит нас, желаем ли мы сохранить изменения. Жмём “Yes”, очевидно же.
Готово! Идём проверять!
Результат, как говорится, на лицо!
На этой позитивной нотке мы завершаем урок. Удачи в новых начинаниях!