
Forensically is a set of free tools for digital image forensics. It includes clone detection, error level analysis, meta data extraction and more. It is made by Jonas Wagner.
You can read a bit more about it in this blog post.
You should think of forensically as a kind of magnifying glass.
It helps you to see details that would otherwise be hidden.
Just like a magnifying glass it can’t tell true from false or good from evil,
but it might just help you to uncover the truth.
Also absence of evidence is still not evidence of absence
and Extraordinary claims require extraordinary evidence.
Tutorial Video
The Tools
Magnifier
The magnifier allows you to see small hidden details in an image.
It does this by magnifying the size of the pixels and the contrast within the window.
MagnificationAlso known as the zoom factor.
EnhancementThere are three different enhancements available at the moment. Histogram Equalization, Auto Contrast and Auto Contrast by Channel. Auto Contrast mostly keeps the colors intact, the others can cause color shifts. Histogram Equalization is the most robost option. You can also set this to none.
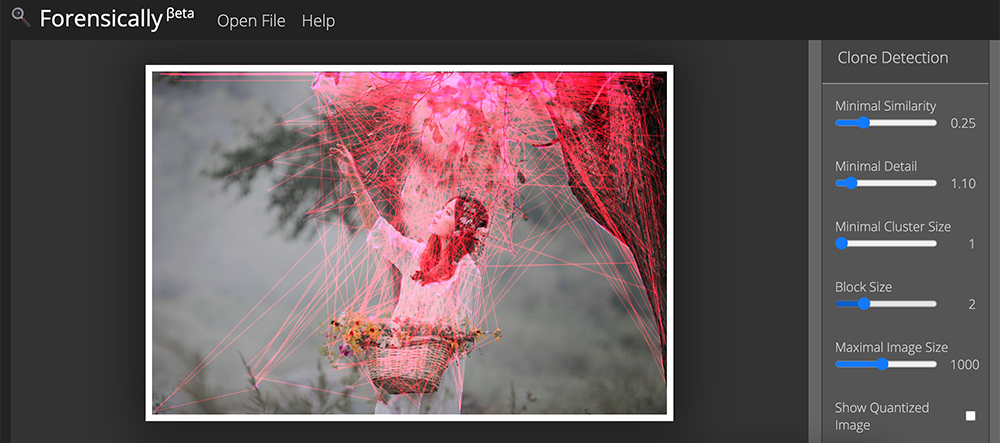
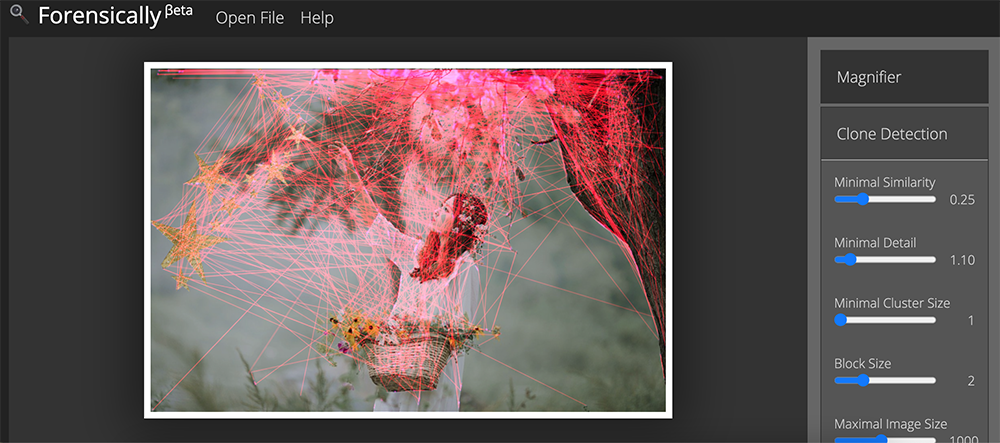
Clone Detection
The clone detector highlights similar regions within an image. These can be a good indicator that a picture
has been manipulated using the clone tool. Note that this tool is a first attempt and not yet very refined.
Regions that are similar are marked in blue and connected with a red line.
If a lot of regions overlap the result can look white.
Minimal SimilarityDetermines how similar the cloned pixels need to be to the original.
Minimal DetailBlocks with less detail than this are not considered when searching for clones.
Minimal Cluster SizeDetermines how many clones of a similar region need to be found in order for them to show up as results.
Blocksize (2n)Determines how big the blocks used for the clone detection are.
You generally don’t want to touch this.
Maximal Image SizeThe maximal width or height of the image used to perform the clone search. Bigger images take longer to analyze.
Show Quantized ImageShows the image after it has been compressed. Can be useful to tweak Minimal Similarity and Minimal Detail. Blocks that have been rejected because they do not have enough detail show up as black.
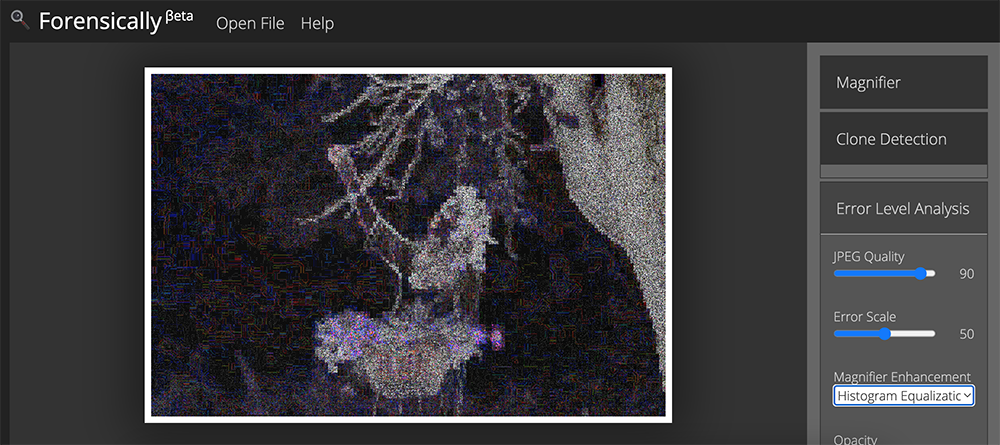
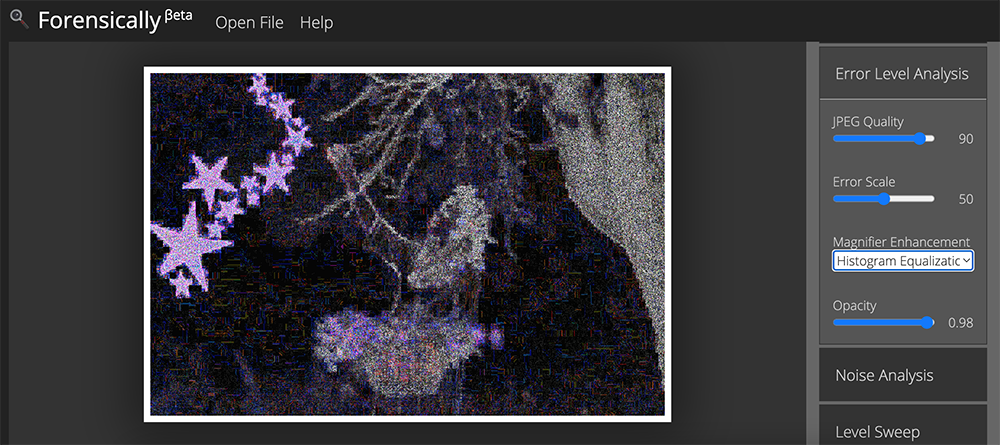
Error Level Analysis
This tool compares the original image to a recompressed version.
This can make manipulated regions stand out in various ways.
For example they can be darker or brighter than similar regions which
have not been manipulated.
There is a good tutorial on ELA on fotoforensics.com.
The results of this tool can be misleading, watch the video and read the tutoria for details.
JPEG QualityThis should match the original quality of the image that has been photoshopped.
Error ScaleMakes the differences between the original and the recompressed image bigger
Magnifier EnhancementThere are three different enhancements available at the moment. Histogram Equalization, Auto Contrast and Auto Contrast by Channel. Auto Contrast mostly keeps the colors intact, the others can cause color shifts. Histogram Equalization is the most robost option. You can also set this to none.
OpacityThe opacity of the differences layer. If you lower it you will see more of the original image.
Noise Analysis
This is tool is basically a reverse denoising algorithm. Rather than
removing the noise it removes the rest of the image.
It is using a super simple separable median filter to isolate the noise.
It can be useful for identifying manipulations to the image like
airbrushing, deformations, warping and perspective corrected cloning.
It works best on high quality images. Smaller images tend to contain to
little information for this to work.
You can read more about noise analysis in my blog post Noise Analysis for Image Forensics.
Noise AmplitudeMakes the noise brighter.
Equalize HistogramApplies histogram equalization to the noise.
This can reveal things but it can also hide them.
You should try both histogram equalization and scale
to analyze to noise.
Magnifier EnhancementThere are three different enhancements available at the moment. Histogram Equalization, Auto Contrast and Auto Contrast by Channel. Auto Contrast mostly keeps the colors intact, the others can cause color shifts. Histogram Equalization is the most robost option. You can also set this to none.
OpacityThe opacity of the noise layer. If you lower it you will see more of the original image.
Level Sweep
This tool allows you to quicky sweep through the histogram of an image.
It magnifies the contrast of certain brightness levels.
On use of this tool is to make edges that were introduced when copy pasting content more visible.
To use this tool simple move your mouse over the image and scroll with your mouse wheel.
Look for interesting discontinuities in the image.
A position of 0.5 and a width of 32 would mean that
127-32/2 would be the equal to 0 in the output. 127+32/2 would be equal to 256.
SweepThe position in the histogram to be inspected.
You can quickly change this parameter by using the mouse wheel while hovering over the image,
this allows you to sweep through the histogram.
WidthThe amount of values (or width of the slice of the histogram) to be inspected.
You the default should be fine.
OpacityThe opacity of the sweep layer. If you lower it you will see more of the original image.
Luminance Gradient
The luminance gradient tool analyses the changes in brightness along the x and y axis of the image.
It’s obvious use is to look at how different parts of the image are illuminated in order to find anomalies.
Parts of the image which are at a similar angle (to the light source) and under similar illumination should have a similar color;
Another use is to check edges. Similar edges should have similar gradients.
If the gradients at one edge are significantly sharpe than the rest it’s a sign that the image could have been copy pasted.
It does also reveal noise and compression artifacts quite well.
PCA
This tool performs principal component analysis on the image.
This provides a different angle to view the image data which makes discovering
certain manipulations & details easier. This tool is currently single threaded and quite
slow when running on big images.
I have provided an example of how this tool can be used in my short article Principal Component Analysis for Photo Forensics.
InputThe data to run the PCA on.
Mode
- Projection: projection of the value in the image onto the principal component.
- Difference: Difference between the input and the closest point on the selected principal component.
- Distance: Distance between the input and the closest point on the selected principal component.
- Component: The closest point on the selected principal component.
ComponentThe component of the PCA you want to inspect.
The first component contains the most variance.
The later components can reveal more hidden details.
LinearizeEnables operation in linear space rather than in gamma space. Slower.
InvertInverts the output data.
EnhancementThere are three different enhancements available at the moment. Histogram Equalization, Auto Contrast and Auto Contrast by Channel. Auto Contrast mostly keeps the colors intact, the others can cause color shifts. Histogram Equalization is the most robost option. You can also set this to none.
OpacityThe opacity of the sweep layer. If you lower it you will see more of the original image.
Meta Data
This tool displays the hidden exif meta data in the image, if there is any.
Geo Tags
This tool shows the GPS location where the image was taken, if it is stored in the image.
Thumbnail Analysis
This tool shows the hidden preview image inside of the original image if there is one.
The preview can reveal details of the original image or the camera it was taken with.
Opacityopacity of the preview image on top of the original image.
Show Differencesenabled this will show the differences between the original image and the preview stored within it.
JPEG Analysis
This tool extracts meta data out of JPEG Files. You can learn more about it in my post JPEG Forensics in Forensically.
Comments
Some applications store interesting data in the comments of a JPEG file.
Quantization Tables
The quantization matrices used to compress a JPEG file
reveals information about what software was last used to save the file in question.
Forensically currently recognizes three types of quantization matrices:
- Standard JPEG
- Adobe (latest CC should be complete, the rest is still incomplete)
- Non Standard
I’m missing a complete set of sample images for older photoshop versions using the 0-12 quality scale. If you happen to have one and would be willing to share it please let me know.
Most software and internet services save their files using the quantization matrices defined by the standard.
The exception to this rule are Adobe products, which use their own custom quantization tables.
Jpegs produces by digital cameras often use non standard color matrices.
So if you know that the camera that an image was supposedly taken with uses one type of quantization matrix
and the image you are trying to verify uses a different type of quantization matrix this can be a good indicator
that the file has been edited or at least resaved.
From what I have seen iPhones use non standard quantization tables with qualities around 92.
Android phones tend to use the standard quantization matrices, but there are exceptions to this.
For more information about this technique please look at the presentation
Using JPEG Quantization Tables to Identify Imagery Processed by Software
by Jesse Kornblum.
Structure
The sequence of markers in a JPEG file.
In general JPEG images taken with a camera with the same settings should result in the same sequence.
String Extraction
This tool scans for binary contents of the image looking for sequences of ascii characters.
It is a great fallback to view meta data that is in an image in a format that Forensically does not understand yet.
It will output sequences of alpha numeric characters longer than 4, or sequences of 8 or more non control ascii characters.
This allows you to discover meta data that is hidden or not recognized by forensically.
The relevant data is genreally stored at the beginning or end of the file.
An interesting string to look for is bFBMD followed by a sequence of numbers and letters a-f (hex encoding).
This string is added to (some) images by facebook.
It is inspired by the classic unix strings command.
You can find some more information about how to use this tool in my post JPEG Forensics in Forensically.
FAQ
Are my images uploaded to your server?
No! I respect your privacy. All of your images stay on your computer. They are never uploaded to any cloud or server.
Can I open RAW images using this app?
No, RAW images are not supported. The highest
quality format you can use is 24-bit PNG.
Can I use this app offline?
Yes you can if you are using a modern web browser like firefox or chrome.
Offline mode is enabled. You can open this application even if you are offline.Offline mode is not working with your current setup.
What other similar software can you recommend?
Ghiro looks pretty cool and is open source. You can try it online on imageforensic.org.
Changelog
2017-06-14
Fixed a typo in the JPEG module which recognized progressive JPEGs as lossless. Updated help page.
2017-02-05
Added JPEG Analysis and String Extraction tools. See JPEG Forensics in Forensically.
2016-07-14
Added PCA tool.
2016-07-02
Added luminance gradient tool. Tweaked clone detection default settings.
2016-06-30
Added offline support for modern browsers via service workers.
2015-08-21
Added noise analysis tool.
2015-08-20
Added a new enhancement option to the magnifier (histogram equalization). Added magnifier to Error Level Analysis.
2015-08-16
Initial Public release
Credits
Clone Detection
The clone detection tool was inspired by the paper Detection of Copy-Move Forgery in Digital Images by Jessica Fridrich, David Soukal, and Jan Lukáš. But the actual algorithm used is my own.
Error Level Analysis
I got the concept out of the presentation A Picture’s Worth… Digital Image Analysis and Forensics by Neal Krawetz
Luminance gradient
This is another tecnique inspired by Neal Krawetz
Open Source Libraries
This software was built using the following open source components.
I want to thank all of their authors for making my life easier, and projects like this possible.
- babel
- babel-polyfill
- babel-preset-es2015
- babelify
- bluebird
- canvas-to-blob
- chai
- chai-as-promised
- chai-spies
- console-polyfill
- exif-parser
- grunt
- grunt-autoprefixer
- grunt-browserify
- grunt-contrib-compress
- grunt-contrib-connect
- grunt-contrib-copy
- grunt-contrib-cssmin
- grunt-contrib-jade
- grunt-contrib-uglify
- grunt-contrib-watch
- grunt-rsync
- grunt-sass
- grunt-shell
- hammerjs
- jquery
- ml-matrix
- ml-pca
- mocha
- natural-sort
- sass
- sinon
- sinon-chai
- source-map-support
- sw-precache
- underscore
- yargs
Обработка изображений, PHP, Блог компании .io
Рекомендация: подборка платных и бесплатных курсов php — https://katalog-kursov.ru/
Поврежденный джипег узнать нетрудно – при загрузке в веб выскочит ошибка и файл не откроется. Но когда дело доходит до тысяч и сотен тысяч файлов, проверить каждый ручками физически невозможно. Нужна автоматизация.

Перед любыми манипуляциями с большими галереями нужно позаботиться о создании бэкапа. Всякое бывает, лучше «пере», чем «недо». Резервных версий можно делать несколько, например, одну на жестком диске, а вторую — в облаке.
Найти

Imagecreatefromjpeg
Imagecreatefromjpeg создает новое изображение из URL или из файла:
imagecreatefromjpeg(string $filename);
При наличии ошибок возвращает пустую строку.
Jpeginfo
Jpeginfo находит поврежденные джипеги в указанной директории и субдиректориях. Показывает ошибку или предупреждение:
find . -name "*jpg" -exec jpeginfo -c {} ; | grep -E "WARNING|ERROR"
Для получения списка поврежденных файлов:
find ./ -name *jpg -exec jpeginfo -c {} ; | grep -E "WARNING|ERROR" | cut -d " " -f 1
ImageMagick
Можно попробовать в ImageMagick через функцию identify проверять картинки на наличие инородных байтов:
$ identify broken.jpg
broken.jpg JPEG 3264x2448 3264x2448+0+0 8-bit DirectClass 1.018MB 0.000u 0:00.010
identify: Corrupt JPEG data: 29359 extraneous bytes before marker 0xda `broken.jpg' @ warning/jpeg.c/JPEGWarningHandler/346
Также полезной будет функция convert:
$ convert test.jpg out.jpg
convert: Corrupt JPEG data: 1072 extraneous bytes before marker 0xd8 `test.jpg' @ warning/jpeg.c/EmitMessage/231.
Но следует помнить, что IMagick проверяет только header, и при этом может провтыкать другие дефекты.
Bad Peggy
Программа сканирует картинки пачками. Работает просто — установить — указать путь папки — сканировать. Результаты можно посмотреть в виде превьюшек, а можно просто запросить список поврежденных файлов. Работает также с PNG, BMP и GIF.
Починить

ImageMagick
Поможет удалить посторонние/поврежденные байты. Для комплексного процесса поиска/починки поврежденных фоток можно использовать следующее:
$ for i in *.jpg; do
 identify -regard-warnings "$i" > /dev/null;
 if [ $? -eq 1 ]; then
  mkdir fixed
  echo "Writing fixed/$i"
  jpegtran -perfect -copy all -outfile "fixed/$i" "$i"
 fi
done
Можно также опробовать Perl-скрипт:
#!/usr/bin/perl

processFile("$_") foreach (@ARGV);

#recursively fix images
sub processFile {
   my $file=shift;
   return (-d "$file")?( do{ processFile("$_") foreach (<"$file"/*>) }) : `convert "$file" "$file"`;
}
Восстановление побитых изображений — платное удовольствие. Одна из самых популярных программ в сети — Stellar Phoenix JPEG Repair. Заявляют, что за 39$ могут починить абсолютно нечитабельные файлы.
PixRecovery — дорого и сердито, зато качественно. Можно скачать демо-версию и попробовать на деле.
Конспект:
- Поиск поврежденных фоток в больших галереях следует автоматизировать.
- Перед любыми манипуляциями с большим количеством изображений нужно создать бэкап.
- Искать поврежденные фотки можно с помощью imagecreatefromjpeg или jpeginfo.
- Починить изображение поможет ImageMagick или платные программы.
Обработка изображений, PHP, Блог компании .io
Рекомендация: подборка платных и бесплатных курсов php — https://katalog-kursov.ru/
Поврежденный джипег узнать нетрудно – при загрузке в веб выскочит ошибка и файл не откроется. Но когда дело доходит до тысяч и сотен тысяч файлов, проверить каждый ручками физически невозможно. Нужна автоматизация.
Перед любыми манипуляциями с большими галереями нужно позаботиться о создании бэкапа. Всякое бывает, лучше «пере», чем «недо». Резервных версий можно делать несколько, например, одну на жестком диске, а вторую — в облаке.
Найти
Imagecreatefromjpeg
Imagecreatefromjpeg создает новое изображение из URL или из файла:
imagecreatefromjpeg(string $filename);
При наличии ошибок возвращает пустую строку.
Jpeginfo
Jpeginfo находит поврежденные джипеги в указанной директории и субдиректориях. Показывает ошибку или предупреждение:
find . -name "*jpg" -exec jpeginfo -c {} ; | grep -E "WARNING|ERROR"
Для получения списка поврежденных файлов:
find ./ -name *jpg -exec jpeginfo -c {} ; | grep -E "WARNING|ERROR" | cut -d " " -f 1
ImageMagick
Можно попробовать в ImageMagick через функцию identify проверять картинки на наличие инородных байтов:
$ identify broken.jpg
broken.jpg JPEG 3264x2448 3264x2448+0+0 8-bit DirectClass 1.018MB 0.000u 0:00.010
identify: Corrupt JPEG data: 29359 extraneous bytes before marker 0xda `broken.jpg' @ warning/jpeg.c/JPEGWarningHandler/346
Также полезной будет функция convert:
$ convert test.jpg out.jpg
convert: Corrupt JPEG data: 1072 extraneous bytes before marker 0xd8 `test.jpg' @ warning/jpeg.c/EmitMessage/231.
Но следует помнить, что IMagick проверяет только header, и при этом может провтыкать другие дефекты.
Bad Peggy
Программа сканирует картинки пачками. Работает просто — установить — указать путь папки — сканировать. Результаты можно посмотреть в виде превьюшек, а можно просто запросить список поврежденных файлов. Работает также с PNG, BMP и GIF.
Починить
ImageMagick
Поможет удалить посторонние/поврежденные байты. Для комплексного процесса поиска/починки поврежденных фоток можно использовать следующее:
$ for i in *.jpg; do
 identify -regard-warnings "$i" > /dev/null;
 if [ $? -eq 1 ]; then
  mkdir fixed
  echo "Writing fixed/$i"
  jpegtran -perfect -copy all -outfile "fixed/$i" "$i"
 fi
done
Можно также опробовать Perl-скрипт:
#!/usr/bin/perl

processFile("$_") foreach (@ARGV);

#recursively fix images
sub processFile {
   my $file=shift;
   return (-d "$file")?( do{ processFile("$_") foreach (<"$file"/*>) }) : `convert "$file" "$file"`;
}
Восстановление побитых изображений — платное удовольствие. Одна из самых популярных программ в сети — Stellar Phoenix JPEG Repair. Заявляют, что за 39$ могут починить абсолютно нечитабельные файлы.
PixRecovery — дорого и сердито, зато качественно. Можно скачать демо-версию и попробовать на деле.
Конспект:
- Поиск поврежденных фоток в больших галереях следует автоматизировать.
- Перед любыми манипуляциями с большим количеством изображений нужно создать бэкап.
- Искать поврежденные фотки можно с помощью imagecreatefromjpeg или jpeginfo.
- Починить изображение поможет ImageMagick или платные программы.
 После восстановления фото с флешки или карты памяти, а иногда и при простом копировании JPG файлов они могут оказаться повреждены. Обычно это выглядит как сообщение о том, что формат этого файла не поддерживается, «Средству просмотра фотографий Windows не удается открыть это изображение, так как файл поврежден», «Файл не является изображением» и подобного рода ошибки в различных программах просмотра фото, а также артефакты на изображении. В некоторых случаях возможно восстановление поврежденных JPG файлов.
В этой инструкции подробно о доступных методах восстановить поврежденные JPG файлы фото и изображений как онлайн, так и с помощью программ для Windows, две из которых бесплатные. Также может быть полезно: Лучшие бесплатные программы для восстановления данных.
Единственный отлично работающий онлайн сервис восстановления поврежденных JPG файлов и других типов изображений, который мне удалось найти — PixRecovery на сайте officerecovery.com
Проблема с этим сервисом — он слишком платный (бесплатно поверх восстановленного фото будут наложены огромные водяные знаки), но есть у него и плюс: он позволяет быстро, без установки сторонних программ, оценить, насколько возможно восстановление этого JPG (хоть и с водяными знаками, но мы увидим, что да — этот файл восстановить удалось).
Порядок действий будет следующим:
- Зайдите на сайт https://online.officerecovery.com/ru/pixrecovery/ укажите путь к файлу и нажмите кнопку «Безопасная загрузка и восстановление».

- Подождите немного, а затем нажмите «Получить восстановленный файл».
- Загрузите демонстрационный бесплатный результат восстановления.

Если в результате мы получим восстановленный файл с нужным содержимым (водяные знаки выглядят как на фото ниже), можно сделать вывод, что файл подлежит восстановлению и можно им заняться более серьезно.

Дополнительно, этот же сервис предоставляет программу PixRecovery для восстановления JPEG на вашем локальном компьютере, но тоже не бесплатно, скачать пробную версию можно здесь: http://www.officerecovery.com/pixrecovery/.
Программы восстановления поврежденных JPG файлов
К сожалению, большинство программ, позволяющих восстановить поврежденные JPG фото и другие изображения, являются платными, однако мне удалось найти и две исправно выполняющих свою задачу бесплатных утилиты, они — первые в нижеследующем списке.
JPEGfix
JPEGfix — полностью бесплатная утилита для восстановления поврежденных JPG файлов: не только тех, которые не открываются, но и открываются с какими-либо артефактами. В общем случае использование программы выглядит следующим образом:
- В меню «Main» нажимаем Load Jpeg и указываем путь к поврежденному файлу.

- Программа сразу пробует восстановить его и, если все получилось сделать автоматически, вы сразу увидите свой восстановленный файл.

- В меню Main сохраните восстановленный файл JPG.
- Также, в разделе меню Repair присутствуют дополнительные средства для восстановления JPG, которые открываются с различными артефактами.


Официальная страница автора программы: https://overquantum.livejournal.com/ — на ней можно не только скачать JPEGFix, но и более подробно прочесть об использовании утилиты.
JPEGsnoop
Бесплатная программа с открытым исходным кодом JPEGsnoop предназначена не только для восстановления JPG файлов, но и для других целей. Тем не менее, мы будем использовать её именно для открытия и сохранения фотографии, которая не открывается:
- Зайдите в меню Options — Scan Segment и отметьте пункт «Full IDCT».
- В программе в меню File выберите «Open Image» и укажите путь к поврежденному файлу JPEG.
- Если вы увидите сообщение «File did not start with JPEG marker», в меню программы выберите Tools — Image Search Fwd (искать следующее изображение в файле, можно использовать несколько раз).

- Если содержимое было найдено (отобразится в нижней части окна программы), сохраните файл: в меню выберите Tools — Export JPEG. Если в окне экспорта поставить отметку «Extract All JPEGs», то будут сохранены все найденные в файле изображения (в одном JPEG файле их может быть несколько).


Страница загрузки JPEGSnoop — https://github.com/ImpulseAdventure/JPEGsnoop/releases
Stellar Repair for Photo
Stellar Repair for Photo — платная, но эффективная программа восстановления поврежденных файлов изображений, в том числе в формате JPEG. Бесплатная пробная версия, доступная для Windows и Mac OS, позволяет лишь просмотреть результаты, но не сохранить их.
- В главном окне программы нажмите кнопку «Add File» и добавьте поврежденные файлы в список.

- Нажмите кнопку «Repair» и дождитесь завершения процесса восстановления.
- Просмотрите результаты. Для сохранения восстановленных JPG придется приобрести и ввести лицензионный ключ программы.
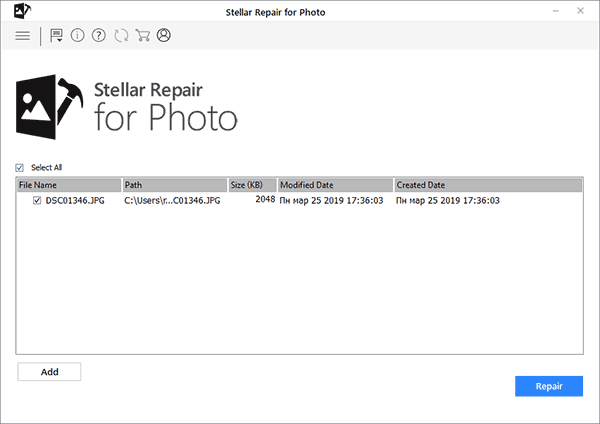

Официальный сайт Stellar Repair for Photo https://www.stellarinfo.com/jpeg-repair.php
JPEG Recovery Pro
JPEG Recovery Pro в бесплатной версии позволяет восстановить и сохранить восстановленные JPG файлы, но при этом накладывает водяные знаки поверх изображения. Порядок использования программы выглядит следующим образом:
- В поле вверху указываем папку с поврежденными JPG файлами. При необходимости отмечаем пункт «Scan subfolder» (сканировать вложенные папки).
- Ожидаем получения результата и выделяем фотографии, которые нужно восстановить. В поле «Output folder» указываем папку, куда требуется сохранить восстановленные фотографии и нажимаем кнопку Recover.

- При восстановлении без регистрации получим результат в полном разрешении, но с водяными знаками.

Скачать JPEG Recovery Pro можно с официального сайта https://www.hketech.com/JPEG-recovery/download.php
SoftOrbits Picture Doctor (Jpeg Repair)
SoftOrbits Picture Doctor, возможно, самая дешевая программа восстановления JPG файлов для русскоязычного пользователя. Порядок использования:
- Включить русский язык интерфейса в программе можно в меню Rescue — Language.
- Нажать кнопку «Добавить файлы» и добавить в список поврежденные файлы JPG (поддерживаются также PSD).
- В поле «Выходная директория» указать папку, куда следует сохранять файлы.

- Нажать кнопку «Начать». Файлы будут автоматически обработаны и сохранены в указанной вами папке. С большим черным прямоугольником с информацией о покупке программы.
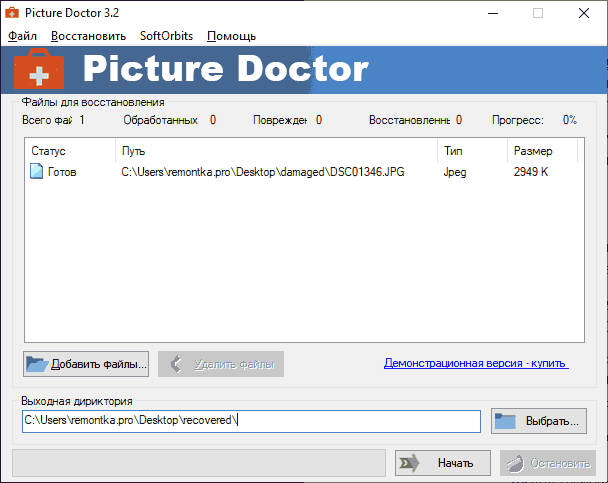
Официальный сайт загрузки пробной версии Picture Doctor и приобретения лицензии — https://www.softorbits.ru/picdoctor/
Comfy File Repair
Comfy File Repair — ещё одна не бесплатная программа восстановления поврежденных файлов, в том числе подходящая для JPG, сохранение без ввода ключа продукта недоступно. Доступна на русском языке. Несмотря на то, что давно не обновлялась, продолжает исправно работать.
- Запустите программу и выберите файл, который нужно восстановить. Нажмите кнопку «Анализ» или «Исследование» (второй вариант выполняется дольше, но чаще дает положительный результат).
- После завершения анализа, если удалось найти графическое содержимое JPG файла, вы увидите его в панели предварительного просмотра внизу окна программы. В одном файле может быть найдено более одного изображения.

- Используйте кнопки сохранения для того, чтобы сохранить восстановленный файл. Без регистрации программы сохранение работать не будет.

Надеюсь, материал оказался полезен и позволил вернуть ваши фото в нужном виде. К сожалению, это не всегда возможно: иногда файлы оказываются сильно повреждены и их восстановление невозможно.
Forensically is a set of free tools for digital image forensics. It includes clone detection, error level analysis, meta data extraction and more. It is made by Jonas Wagner.
You can read a bit more about it in this blog post.
You should think of forensically as a kind of magnifying glass.
It helps you to see details that would otherwise be hidden.
Just like a magnifying glass it can’t tell true from false or good from evil,
but it might just help you to uncover the truth.
Also absence of evidence is still not evidence of absence
and Extraordinary claims require extraordinary evidence.
Tutorial Video
The Tools
Magnifier
The magnifier allows you to see small hidden details in an image.
It does this by magnifying the size of the pixels and the contrast within the window.
MagnificationAlso known as the zoom factor.
EnhancementThere are three different enhancements available at the moment. Histogram Equalization, Auto Contrast and Auto Contrast by Channel. Auto Contrast mostly keeps the colors intact, the others can cause color shifts. Histogram Equalization is the most robost option. You can also set this to none.
Clone Detection
The clone detector highlights similar regions within an image. These can be a good indicator that a picture
has been manipulated using the clone tool. Note that this tool is a first attempt and not yet very refined.
Regions that are similar are marked in blue and connected with a red line.
If a lot of regions overlap the result can look white.
Minimal SimilarityDetermines how similar the cloned pixels need to be to the original.
Minimal DetailBlocks with less detail than this are not considered when searching for clones.
Minimal Cluster SizeDetermines how many clones of a similar region need to be found in order for them to show up as results.
Blocksize (2n)Determines how big the blocks used for the clone detection are.
You generally don’t want to touch this.
Maximal Image SizeThe maximal width or height of the image used to perform the clone search. Bigger images take longer to analyze.
Show Quantized ImageShows the image after it has been compressed. Can be useful to tweak Minimal Similarity and Minimal Detail. Blocks that have been rejected because they do not have enough detail show up as black.
Error Level Analysis
This tool compares the original image to a recompressed version.
This can make manipulated regions stand out in various ways.
For example they can be darker or brighter than similar regions which
have not been manipulated.
There is a good tutorial on ELA on fotoforensics.com.
The results of this tool can be misleading, watch the video and read the tutoria for details.
JPEG QualityThis should match the original quality of the image that has been photoshopped.
Error ScaleMakes the differences between the original and the recompressed image bigger
Magnifier EnhancementThere are three different enhancements available at the moment. Histogram Equalization, Auto Contrast and Auto Contrast by Channel. Auto Contrast mostly keeps the colors intact, the others can cause color shifts. Histogram Equalization is the most robost option. You can also set this to none.
OpacityThe opacity of the differences layer. If you lower it you will see more of the original image.
Noise Analysis
This is tool is basically a reverse denoising algorithm. Rather than
removing the noise it removes the rest of the image.
It is using a super simple separable median filter to isolate the noise.
It can be useful for identifying manipulations to the image like
airbrushing, deformations, warping and perspective corrected cloning.
It works best on high quality images. Smaller images tend to contain to
little information for this to work.
You can read more about noise analysis in my blog post Noise Analysis for Image Forensics.
Noise AmplitudeMakes the noise brighter.
Equalize HistogramApplies histogram equalization to the noise.
This can reveal things but it can also hide them.
You should try both histogram equalization and scale
to analyze to noise.
Magnifier EnhancementThere are three different enhancements available at the moment. Histogram Equalization, Auto Contrast and Auto Contrast by Channel. Auto Contrast mostly keeps the colors intact, the others can cause color shifts. Histogram Equalization is the most robost option. You can also set this to none.
OpacityThe opacity of the noise layer. If you lower it you will see more of the original image.
Level Sweep
This tool allows you to quicky sweep through the histogram of an image.
It magnifies the contrast of certain brightness levels.
On use of this tool is to make edges that were introduced when copy pasting content more visible.
To use this tool simple move your mouse over the image and scroll with your mouse wheel.
Look for interesting discontinuities in the image.
A position of 0.5 and a width of 32 would mean that
127-32/2 would be the equal to 0 in the output. 127+32/2 would be equal to 256.
SweepThe position in the histogram to be inspected.
You can quickly change this parameter by using the mouse wheel while hovering over the image,
this allows you to sweep through the histogram.
WidthThe amount of values (or width of the slice of the histogram) to be inspected.
You the default should be fine.
OpacityThe opacity of the sweep layer. If you lower it you will see more of the original image.
Luminance Gradient
The luminance gradient tool analyses the changes in brightness along the x and y axis of the image.
It’s obvious use is to look at how different parts of the image are illuminated in order to find anomalies.
Parts of the image which are at a similar angle (to the light source) and under similar illumination should have a similar color;
Another use is to check edges. Similar edges should have similar gradients.
If the gradients at one edge are significantly sharpe than the rest it’s a sign that the image could have been copy pasted.
It does also reveal noise and compression artifacts quite well.
PCA
This tool performs principal component analysis on the image.
This provides a different angle to view the image data which makes discovering
certain manipulations & details easier. This tool is currently single threaded and quite
slow when running on big images.
I have provided an example of how this tool can be used in my short article Principal Component Analysis for Photo Forensics.
InputThe data to run the PCA on.
Mode
- Projection: projection of the value in the image onto the principal component.
- Difference: Difference between the input and the closest point on the selected principal component.
- Distance: Distance between the input and the closest point on the selected principal component.
- Component: The closest point on the selected principal component.
ComponentThe component of the PCA you want to inspect.
The first component contains the most variance.
The later components can reveal more hidden details.
LinearizeEnables operation in linear space rather than in gamma space. Slower.
InvertInverts the output data.
EnhancementThere are three different enhancements available at the moment. Histogram Equalization, Auto Contrast and Auto Contrast by Channel. Auto Contrast mostly keeps the colors intact, the others can cause color shifts. Histogram Equalization is the most robost option. You can also set this to none.
OpacityThe opacity of the sweep layer. If you lower it you will see more of the original image.
Meta Data
This tool displays the hidden exif meta data in the image, if there is any.
Geo Tags
This tool shows the GPS location where the image was taken, if it is stored in the image.
Thumbnail Analysis
This tool shows the hidden preview image inside of the original image if there is one.
The preview can reveal details of the original image or the camera it was taken with.
Opacityopacity of the preview image on top of the original image.
Show Differencesenabled this will show the differences between the original image and the preview stored within it.
JPEG Analysis
This tool extracts meta data out of JPEG Files. You can learn more about it in my post JPEG Forensics in Forensically.
Comments
Some applications store interesting data in the comments of a JPEG file.
Quantization Tables
The quantization matrices used to compress a JPEG file
reveals information about what software was last used to save the file in question.
Forensically currently recognizes three types of quantization matrices:
- Standard JPEG
- Adobe (latest CC should be complete, the rest is still incomplete)
- Non Standard
I’m missing a complete set of sample images for older photoshop versions using the 0-12 quality scale. If you happen to have one and would be willing to share it please let me know.
Most software and internet services save their files using the quantization matrices defined by the standard.
The exception to this rule are Adobe products, which use their own custom quantization tables.
Jpegs produces by digital cameras often use non standard color matrices.
So if you know that the camera that an image was supposedly taken with uses one type of quantization matrix
and the image you are trying to verify uses a different type of quantization matrix this can be a good indicator
that the file has been edited or at least resaved.
From what I have seen iPhones use non standard quantization tables with qualities around 92.
Android phones tend to use the standard quantization matrices, but there are exceptions to this.
For more information about this technique please look at the presentation
Using JPEG Quantization Tables to Identify Imagery Processed by Software
by Jesse Kornblum.
Structure
The sequence of markers in a JPEG file.
In general JPEG images taken with a camera with the same settings should result in the same sequence.
String Extraction
This tool scans for binary contents of the image looking for sequences of ascii characters.
It is a great fallback to view meta data that is in an image in a format that Forensically does not understand yet.
It will output sequences of alpha numeric characters longer than 4, or sequences of 8 or more non control ascii characters.
This allows you to discover meta data that is hidden or not recognized by forensically.
The relevant data is genreally stored at the beginning or end of the file.
An interesting string to look for is bFBMD followed by a sequence of numbers and letters a-f (hex encoding).
This string is added to (some) images by facebook.
It is inspired by the classic unix strings command.
You can find some more information about how to use this tool in my post JPEG Forensics in Forensically.
FAQ
Are my images uploaded to your server?
No! I respect your privacy. All of your images stay on your computer. They are never uploaded to any cloud or server.
Can I open RAW images using this app?
No, RAW images are not supported. The highest
quality format you can use is 24-bit PNG.
Can I use this app offline?
Yes you can if you are using a modern web browser like firefox or chrome.
Offline mode is enabled. You can open this application even if you are offline.Offline mode is not working with your current setup.
What other similar software can you recommend?
Ghiro looks pretty cool and is open source. You can try it online on imageforensic.org.
Changelog
2017-06-14
Fixed a typo in the JPEG module which recognized progressive JPEGs as lossless. Updated help page.
2017-02-05
Added JPEG Analysis and String Extraction tools. See JPEG Forensics in Forensically.
2016-07-14
Added PCA tool.
2016-07-02
Added luminance gradient tool. Tweaked clone detection default settings.
2016-06-30
Added offline support for modern browsers via service workers.
2015-08-21
Added noise analysis tool.
2015-08-20
Added a new enhancement option to the magnifier (histogram equalization). Added magnifier to Error Level Analysis.
2015-08-16
Initial Public release
Credits
Clone Detection
The clone detection tool was inspired by the paper Detection of Copy-Move Forgery in Digital Images by Jessica Fridrich, David Soukal, and Jan Lukáš. But the actual algorithm used is my own.
Error Level Analysis
I got the concept out of the presentation A Picture’s Worth… Digital Image Analysis and Forensics by Neal Krawetz
Luminance gradient
This is another tecnique inspired by Neal Krawetz
Open Source Libraries
This software was built using the following open source components.
I want to thank all of their authors for making my life easier, and projects like this possible.
- babel
- babel-polyfill
- babel-preset-es2015
- babelify
- bluebird
- canvas-to-blob
- chai
- chai-as-promised
- chai-spies
- console-polyfill
- exif-parser
- grunt
- grunt-autoprefixer
- grunt-browserify
- grunt-contrib-compress
- grunt-contrib-connect
- grunt-contrib-copy
- grunt-contrib-cssmin
- grunt-contrib-jade
- grunt-contrib-uglify
- grunt-contrib-watch
- grunt-rsync
- grunt-sass
- grunt-shell
- hammerjs
- jquery
- ml-matrix
- ml-pca
- mocha
- natural-sort
- sass
- sinon
- sinon-chai
- source-map-support
- sw-precache
- underscore
- yargs
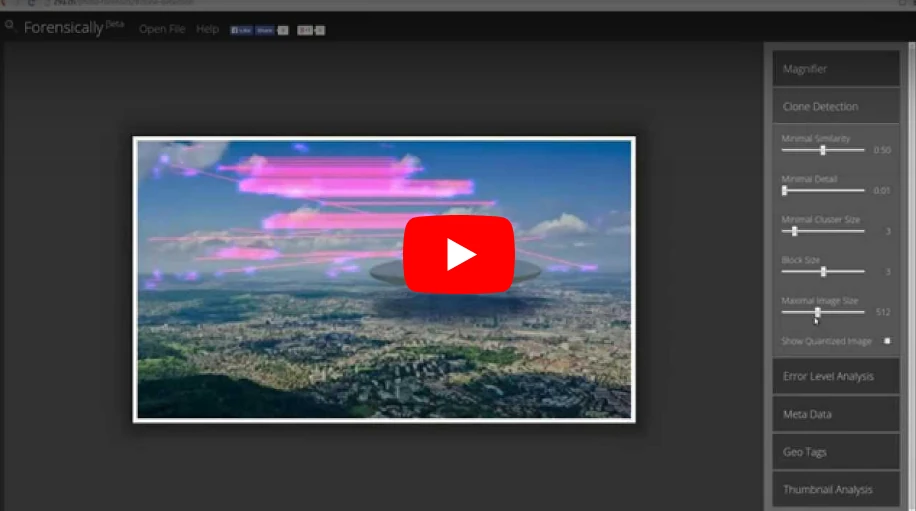
Для проверки иллюстраций в сервисе Forensically мы использовали две фотографии. : одна с сайта pixabay.com (пользователя под ником friday2022), вторая — она же, но дополнительно обработанная и с добавленным элементом.
Откройте сервис Forensically. Нажмите «Open File» (открыть файл) в верхней строке, загрузите изображение для проверки.

Инструменты для экспертизы фотографий находятся в колонке справа.
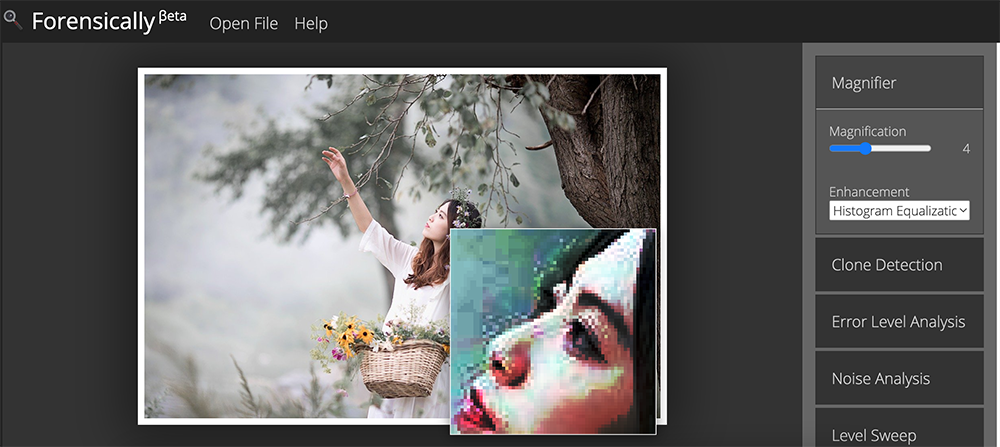
Magnifier (Лупа)
Цифровое увеличительное стекло — наведите мышку на фотографию, чтобы поближе рассмотреть даже самые мелкие детали на изображении. Цифровая лупа увеличивает размер файла в пикселях в дополнение к контрасту в окне.
Чтобы изменить контраст файла для анализа, выберите в «Enhancement» (улучшение) одну функцию из трех:
- Histogram Equalization (выравнивание гистограммы) — более продвинутый вариант, он сохраняет исходное качество файла и предотвращает потенциальную потерю данных,
- Auto Contrast (автоконтраст) — сохраняет цвета нетронутыми,
- Auto Contrast by Channel (автоконтраст по каналам) — вы может изменить исходную контрастность изображения или файла.
Clone Detection (клон)
Детектор клонов выделяет похожие области на изображении и служит индикатором того, что изображение было изменено с помощью инструмента клонирования. Каждый скопированный элемент имеет синюю отметку и соединен с красной линией. Если функция обнаруживает несколько перекрывающихся областей, это означает, что фотография является клоном или была изменена. В последнем случае все эти области будут белыми.
Настройки функции:
- Minimal Similarity (минимальное сходство) — определяет, насколько клонированные пиксели должны быть похожи на оригинал,
- Minimal Detail (минимальные детали) — блоки с меньшей детализацией не учитываются при поиске клонов,
- Minimal Cluster Size (минимальный размер кластера) — определяет, сколько клонов необходимо найти, чтобы они отображались в результатах,
- Blocksize (размер блока) — определяет размер блоков, используемых для обнаружения клонов,
- Maximal Image Size (максимальный размер изображения) — максимальная ширина или высота изображения, используемого для поиска клона. Для анализа больших изображений требуется больше времени,
- Show Quantized Image (показать квантованное изображение) — показывает изображение после его сжатия. Полезно настроить минимальное сходство и минимальную детализацию. Блоки, которые были отклонены из-за недостаточной детализации, отображаются черным цветом.
Error Level Analysis (анализ уровня ошибок)
Изображение делается для сравнения со сжатой версией. Этот процесс очень помогает в обнаружении манипуляций на фотографии. При анализе уровня ошибок любая область, которая светлее или темнее других, свидетельствует о том, что она была изменена.
Рекомендуется использовать этот инструмент с осторожностью, поскольку результаты могут поначалу несколько сбивать с толку.
На что обращать внимание:
- края — они должны иметь одинаковую яркость в результате анализа уровня ошибок. Все высококонтрастные края должны быть похожи друг на друга, все низкоконтрастные края должны выглядеть одинаково. На оригинальной фотографии низкоконтрастные края должны быть почти такими же яркими, как и высококонтрастные,
- текстуры — похожие текстуры должны иметь аналогичную окраску. Области с большей детализацией поверхности, такие как крупный план баскетбольного мяча, скорее всего, будут иметь более высокий результат анализа уровня ошибок, чем гладкая поверхность,
- поверхности — независимо от фактического цвета поверхности, все плоские поверхности должны иметь примерно одинаковую окраску.
Исходная фотография с камеры должна иметь много белых областей при отправке указанной фотографии на анализ ошибок. Эти белые области должны выглядеть как белый шум или белая краска, нанесенная аэрографом. Когда фотография загружается в различные программы просмотра или редактирования и сохраняется в формате JPEG, теряется высокий уровень детализации и частоты.
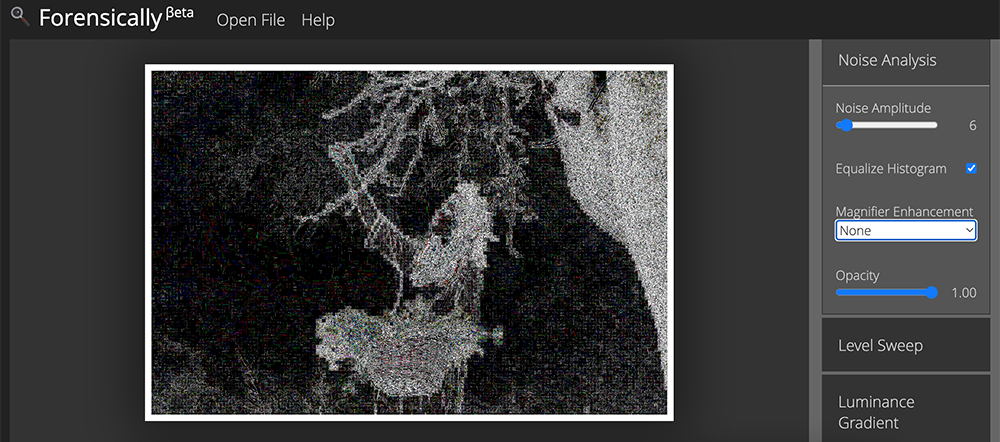
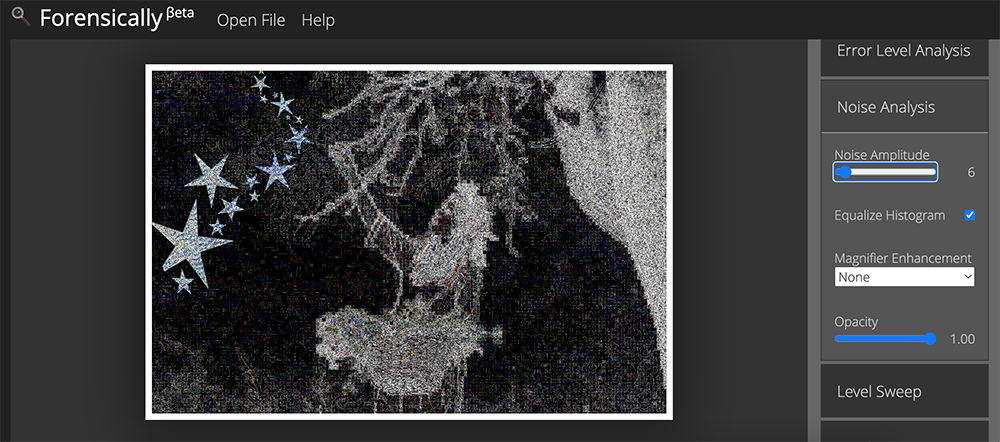
Noise Analysis (анализ шума)
Основан на алгоритме обратного подавления шума. Вместо того, чтобы удалять шум из изображения, он удаляет остальную часть изображения. Это чрезвычайно полезно, если вы хотите обнаружить определенные манипуляции с изображением, таких как аэрография, деформации, деформация и клонирование с коррекцией перспективы. Для достижения наилучших результатов рекомендуется использовать изображения очень высокого качества.
Функции инструмента:
- Noise Amplitude (амплитуда шума) — делает шум ярче;
- Equalize Histogram (выравнивание гистограммы) — применяет выравнивание гистограммы к шуму. Это может раскрыть вещи, но также может их скрыть. Вы должны попробовать как выравнивание гистограммы, так и масштабирование для анализа на шум;
- Magnifier Enhancement (улучшение лупы) — доступно три различных улучшения: выравнивание гистограммы, автоконтраст и автоконтраст по каналам;
- Opacity (непрозрачность) — если вы уменьшите его, увидите больше исходного изображения.
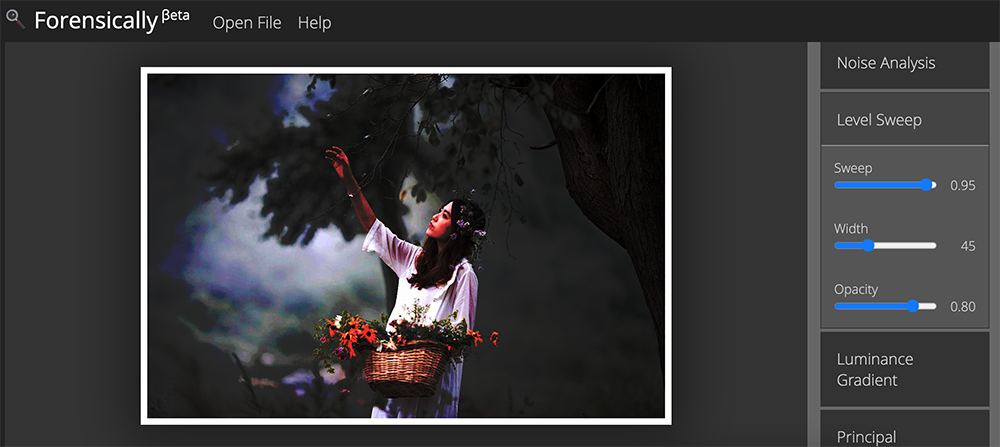
Level Sweep (развертка уровня)
Инструмент позволяет быстро просмотреть гистограмму изображения. Он увеличивает контраст определенных уровней яркости. Использование этого инструмента заключается в том, чтобы сделать края, которые были введены при копировании и вставке содержимого, более заметными.
Чтобы использовать этот инструмент, просто наведите указатель мыши на изображение и прокрутите колесико мыши. Ищите интересные разрывы в изображении.
В настройки инструмента входит:
- Sweep — позиция на гистограмме для проверки, параметр меняется колесиком мыши при наведении курсора на изображение, это позволяет прокручивать гистограмму,
- Width — ширина среза гистограммы для проверки,
- Opacity — если вы уменьшите его, увидите больше исходного изображения.

Luminance Gradient (градиент яркости)
Инструмент анализирует изменения яркости по осям «x» и «y» изображения. Он показывает, как освещены разные части изображения, чем помогает найти аномалии. Части изображения, находящиеся под одинаковым углом (к источнику света) и при одинаковом освещении, должны иметь одинаковый цвет.
Другое использование — проверка краев. Подобные ребра должны иметь одинаковые градиенты. Если градиенты на одном краю значительно острее, чем на остальных, это признак того, что изображение могло быть скопировано. Инструмент также хорошо выявляет шумы и артефакты сжатия.
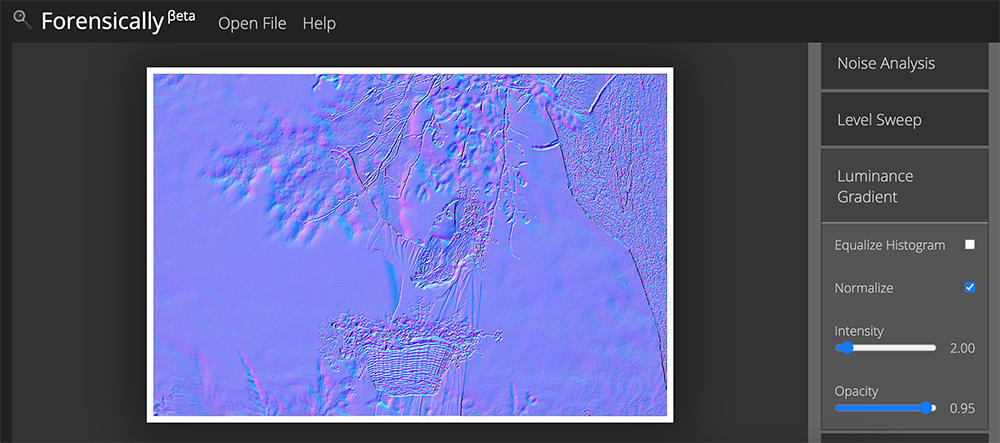
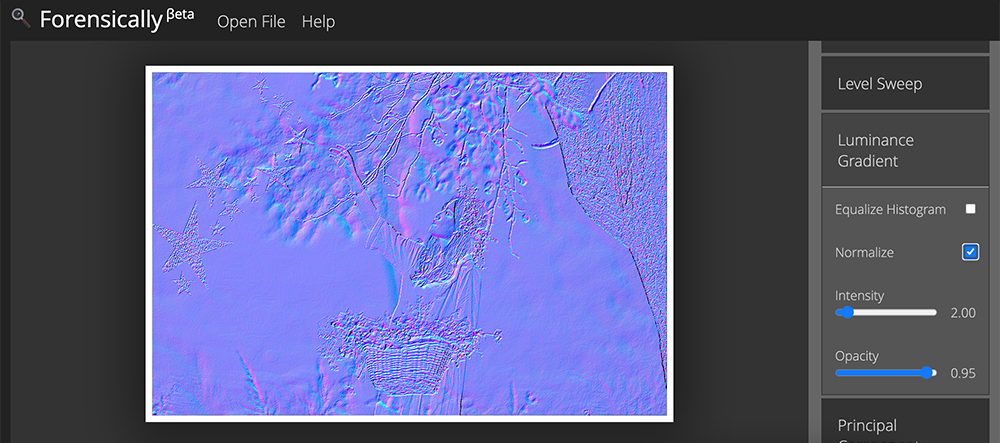
Исходя из анализа иллюстраций, проведенного в сервисе Forensically, первоначальное изображение было обработано, на нем был замене фон. Или на новый фон добавлены элементы: женщина и дерево.
Инструкция актуальна на май 2022 года.
Пять сервисов для поиска скрытых деталей и ошибок в изображениях, и технологии, которые пока в разработке.
Набор бесплатных инструментов для анализа изображений.
- «Лупа» позволяет увидеть скрытые детали на фото. Она увеличивает размер пикселей и контрастность.
- «Детектор клонов» выделяет цветом участки изображения, которые были скопированы.
- «Анализ уровня ошибок» сравнивает снимок с его сжатой версией. Помогает понять, какую часть изображения изменяли: она может быть темнее или ярче, чем аналогичная область, которой не манипулировали.
- И другие функции.
Сервис бесплатно определяет, были ли изменения в снимке. Если были, сообщает, в каком графическим редакторе их сделали. Сервис анализирует фото на уровне пикселей и их цветов.
В основу сервиса легли алгоритмы анализа: ELA — определение уровня ошибок, и Jpeg% — оценка уровня качества изображения после последнего сохранения.
Бесплатная программа с открытым исходным кодом ищет ошибки в изображениях и на их основе выявляет монтаж. Также сравнивает фото с их миниатюрами — если есть разница, сообщает, что снимок изменяли.
Также может извлекать из файлов текстовую информацию, например, URL-адреса. Если находит геотеги и связанную с ними информацию, показывает возможное место снимка на карте.
Сервис с открытым исходным кодом бесплатно анализирует видео на дипфейки. Также есть приложение Deepware, оно работает только на Android.
Корейское приложение KaiCatch распознаёт поддельные фото и видео с помощью ИИ — он определяет аномальные искажения лиц с точностью 90%.
Проверить фото или видео стоит около $1,7. Приложение работает только на Android и на корейском языке. В будущем разработчики обещают добавить поддержку английского, китайского и японского языков, а также перенести приложение на iOS.
Анонсированные разработки
Разработка Adobe
В 2019 году подразделение Adobe Research вместе с Калифорнийским университетом в Беркли создали функцию Photoshop Face Aware Liquify, в основу которой легла свёрточная нейросеть.
Её обучили на тысячах обработанных ИИ фотографиях из интернета. По оценке Adobe Research, определение фото- и видеомонтажа в экспериментах показал эффективность 99%, в то время как люди смогли распознать лишь 53% подделок.
К работе над проектом исследователи привлекли художника и попросили его вручную изменить некоторые из изображений. Так в обучение нейросети добавился «элемент человеческого творчества».
Опыты с программой показали, что она может не только выявлять подделки, но и возвращать изменённые снимки в их первоначальное состояние. Однако в открытый доступ разработка пока не вышла.
Это важный шаг в обнаружении определенных типов редактирования изображений. Функция отмены — восстановления оригинального вида — работает на удивление хорошо.
Помимо подобных технологий, лучшей защитой будет искушённая публика. Которая знает: контентом можно манипулировать, часто чтобы доставить им удовольствие, но иногда — чтобы ввести их в заблуждение.
Гэвин Миллер, глава Adobe Research
Microsoft Video Authenticator
В сентябре 2020 года Microsoft создала ПО для борьбы с дипфейками — Video Authenticator. Программа оценивает фото и видео и определяет вероятность монтажа.
Её создали с помощью общедоступного набора изменённых фотографий и видео Face Forensic++ и дополнительно обучили на другом наборе — DeepFake Detection Challenge.
Когда компания выпустит технологию, неизвестно.
Разработка Facebook
В июне 2021 года исследователи Facebook создали ИИ, который может идентифицировать дипфейк-контент и отслеживать его происхождение. Над программой работали специалисты Мичиганского государственного университета.
«Наш метод облегчит поиск подделок, когда сама подделка — единственная информация, с которой приходится работать», — рассказали учёные-исследователи Facebook Си Инь и Тал Хасснер.
По словам Facebook, их программа ищет в фото и видео следы изменений в их цифровых «отпечатках». Распространять программу будут вне Facebook, чтобы облегчить расследования «инцидентов скоординированной дезинформации».
В открытый доступ разработка пока не вышла.
FakeBuster
FakeBuster помогает выявлять дипфейки во время онлайн-конференций и в соцсетях. Разработчики протестировали программу во время звонков в Zoom и Skype.
В основу FakeBuster легла 3D-свёрточная нейросеть, которую обучили на комбинации наборов данных, таких как Deeperforensics, DFDC, VoxCeleb, и неназванных видеороликов. В открытый доступ программа ещё не вышла.
Инициативы по борьбе с дипфейками
В сентябре 2020 года Microsoft предложила крупным медиакомпаниям поддержать инициативу Project Origin. Фирма предлагает маркировать онлайн-контент так, чтобы автоматически находить изменения в оригинальных фотографиях и видео.
Реализовать Project Origin специалисты предложили в два этапа:
- Сначала создать инструмент для загрузки цифровых «отпечатков» в виде сертификатов и значений «хэша» в метаданные медиаконтента.
- Создать считыватель, чтобы определять в нём сторонние изменения.
Microsoft рассказала, что проверку технологии по «маркировке» контента она планирует провести в сотрудничестве с BBC, The New York Times, Вашингтонским университетом и другими.
По оценке разработчиков, в будущем считыватели цифровых «отпечатков» станут доступны пользователям в виде расширений браузера. Они позволят в проверять подлинность информации и определить источник его происхождения.
#подоборка #дипфейк