
Команда xfs_repair восстанавливает поврежденные или поврежденные файловые системы XFS.
Она отличается высокой масштабируемостью, производительностью и предназначена для эффективного восстановления даже очень больших файловых систем с большим количеством inodes.
В отличие от других файловых систем Linux, xfs_repair не запускается во время загрузки, даже если файловая система XFS не была чисто размонтирована.
Это 64-битная журналируемая файловая система, которая поддерживает очень большие файлы (8 EB) и файловые системы (16 EB) на одном хосте.
XFS является файловой системой по умолчанию для Red Hat Enterprise Linux 7.
Восстанавливаемая файловая система не должна быть смонтирована перед выполнением xfs_repair, иначе результирующая файловая система может быть непоследовательной или поврежденной.
Эту же процедуру можно использовать для других системных разделов, которые нельзя размонтировать во время работы системы.
В этом руководстве мы покажем вам, как использовать команду ‘xfs_repair’ в Linux для восстановления поврежденной файловой системы XFS.
⛬ Файловая система XFS устанавливается только для чтения (CentOS / RHEL)
Общий синтаксис:
xfs_repair [option] [device or partition or mount point]
Содержание
- Повреждение файловой системы XFS
- 1) Восстановление файловой системы XFS
- Шаг-1: Размонтируйте файловую систему, для которой вы хотите запустить fsck.
- Шаг-2: Запустите xfs_repair с опцией ‘-n’, чтобы выполнить пробный запуск.
- Шаг-3: Запустите xfs_repair для восстановления файловой системы:
- Шаг-4: Как только файловая система будет восстановлена, смонтируйте раздел.
- 2) Восстановление тома XFS LVM с помощью xfs_repair
- Шаг-1: Убедитесь, что конкретный том LVM находится в активном состоянии для запуска xfs_repair. Чтобы проверить состояние LVM, выполните:
- Шаг-2: Размонтируйте устройство или файловую систему, для которой вы хотите запустить xfs_repair.
- Шаг-3: Запустите xfs_repair для восстановления файловой системы.
- Шаг-4: Как только файловая система будет восстановлена, смонтируйте раздел.
- Заключение
Повреждение файловой системы XFS
Мы намеренно испортим файловую систему XFS, выполнив следующую команду.
Она удалит случайно выбранные блоки метаданных файловой системы.
Примечание: Пожалуйста, не тестируйте это на производственном сервере, так как это может сильно повредить ваши данные.
Эта команда доступна только в отладочных версиях ‘xfs_db’.
Это полезно для тестирования xfs_repair и xfs_check.
sudo umount /data
Повреждение файловой системы xfs с помощью команды xfs_db.
sudo xfs_db -x -c blockget -c "blocktrash -s 512109 -n 1000" /dev/sdb1

blocktrash: 2/3 btino block 14 bits starting 2837:5 flipped
blocktrash: 3/5 btrefcnt block 411 bits starting 3714:0 flipped
blocktrash: 2/2 btcnt block 3 bits starting 2143:4 flipped
blocktrash: 2/2 btcnt block 1024 bits starting 523:4 flipped
blocktrash: 3/3 btino block 467 bits starting 1047:6 flipped
blocktrash: 3/4 btfino block 524 bits starting 1775:2 flipped
blocktrash: 0/5 btrefcnt block 224 bits starting 3086:6 flipped
.
.
blocktrash: 2/2 btcnt block 5 bits starting 3026:4 flipped
blocktrash: 2/5 btrefcnt block 1 bit starting 288:2 flipped
blocktrash: 0/4 btfino block 63 bits starting 1014:5 flipped
blocktrash: 0/17 inode block 24 bits starting 3533:1 flipped
blocktrash: 3/5 btrefcnt block 956 bits starting 2970:2 flipped
blocktrash: 2/3 btino block 482 bits starting 2368:3 flipped
Когда вы попытаетесь загрузить файловую систему, вы увидите следующее сообщение об ошибке, поскольку она была повреждена.
sudo mount -a

mount: /data: mount(2) system call failed: Structure needs cleaning.
1) Восстановление файловой системы XFS
Вы можете восстановить поврежденную файловую систему XFS без рута на работающей системе Linux.
Вам может понадобиться загрузить систему в режиме Rescue Mode или Emergency Mode для восстановления файловой системы, если ее невозможно размонтировать во время работы системы.
Шаг-1: Размонтируйте файловую систему, для которой вы хотите запустить fsck.
sudo umount /data
Шаг-2: Запустите xfs_repair с опцией ‘-n’, чтобы выполнить пробный запуск.
Обратите внимание, что инструмент ‘xfs_check’ был упразднен в пользу ‘xfs_repair -n’.
sudo xfs_repair -n /dev/sdb1

Phase 1 - find and verify superblock...
Phase 2 - using internal log
        - zero log...
        - scan filesystem freespace and inode maps...
Metadata CRC error detected at 0x564a76dad251, xfs_allocbt block 0x27fe08/0x1000
btree block 1/1 is suspect, error -74
Metadata CRC error detected at 0x564a76dad251, xfs_allocbt block 0x77fa08/0x1000
btree block 3/1 is suspect, error -74
invalid start block 4294967285 in record 0 of bno btree block 3/1
Metadata CRC error detected at 0x564a76dad251, xfs_allocbt block 0x4ffc08/0x1000
btree block 2/1 is suspect, error -74
.
.
free inode 190 contains errors, would correct
bad CRC for inode 191, would rewrite
UUID mismatch on inode 191
would have cleared inode 191
        - agno = 1
        - agno = 2
        - agno = 3
would rebuild corrupt refcount btrees.
No modify flag set, skipping phase 5
Inode allocation btrees are too corrupted, skipping phases 6 and 7
Maximum metadata LSN (2161919:-1) is ahead of log (1:20).
Would format log to cycle 2161922.
No modify flag set, skipping filesystem flush and exiting.
Шаг-3: Запустите xfs_repair для восстановления файловой системы:
sudo xfs_repair /dev/sdb1

Phase 1 - find and verify superblock...
Phase 2 - using internal log
        - zero log...
        - scan filesystem freespace and inode maps...
Metadata CRC error detected at 0x55ff18867251, xfs_allocbt block 0x4ffc08/0x1000
btree block 2/1 is suspect, error -74
Metadata CRC error detected at 0x55ff18867251, xfs_allocbt block 0x8/0x1000
btree block 0/1 is suspect, error -74
bad magic # 0xb1bdccbd in btbno block 0/1
Metadata CRC error detected at 0x55ff18867251, xfs_allocbt block 0x77fa08/0x1000
btree block 3/1 is suspect, error -74
.
.
clearing reflink flag on inode 133
Phase 5 - rebuild AG headers and trees...
        - reset superblock...
Phase 6 - check inode connectivity...
reinitializing root directory
reinitializing realtime bitmap inode
reinitializing realtime summary inode
        - resetting contents of realtime bitmap and summary inodes
        - traversing filesystem ...
        - traversal finished ...
        - moving disconnected inodes to lost+found ...
disconnected inode 133, moving to lost+found
disconnected inode 137, moving to lost+found
disconnected inode 139, moving to lost+found
disconnected inode 140, moving to lost+found
Phase 7 - verify and correct link counts...
Maximum metadata LSN (2161919:-1) is ahead of log (1:20).
Format log to cycle 2161922.
done
Шаг-4: Как только файловая система будет восстановлена, смонтируйте раздел.
sudo mount /dev/sdb1
2) Восстановление тома XFS LVM с помощью xfs_repair
xfs_repair можно запускать на логических томах LVM так же, как файловые системы на стандартных разделах.
Для восстановления LVM-раздела следуйте приведенной ниже процедуре:
Шаг-1: Убедитесь, что конкретный том LVM находится в активном состоянии для запуска xfs_repair. Чтобы проверить состояние LVM, выполните:
sudo lvscan

  ACTIVE              '/dev/myvg/vol01' [1.00 GiB] inherit
  inactive            '/dev/myvg/vol02' [1.00 GiB] inherit
  ACTIVE              '/dev/rhel/swap' [2.07 GiB] inherit
  ACTIVE              '/dev/rhel/root' [<26.93 GiB] inherit
Если он “inactive“, активируйте его, выполнив следующую команду:
sudo lvchange -ay /dev/myvg/vol02 -v

  Activating logical volume myvg/vol02.
  activation/volume_list configuration setting not defined: Checking only host tags for myvg/vol02.
  Creating myvg-vol02
  Loading table for myvg-vol02 (253:3).
  Resuming myvg-vol02 (253:3).
Шаг-2: Размонтируйте устройство или файловую систему, для которой вы хотите запустить xfs_repair.
sudo umount /dev/myvg/vol02
Шаг-3: Запустите xfs_repair для восстановления файловой системы.
Для запуска xfs_repair необходимо ввести путь к LVM-тому, а не к реальному физическому разделу.
sudo xfs_repair /dev/myvg/vol02

Phase 1 - find and verify superblock...
Phase 2 - using internal log
        - zero log...
        - scan filesystem freespace and inode maps...
Metadata CRC error detected at 0x5581eed67251, xfs_allocbt block 0x180008/0x1000
btree block 3/1 is suspect, error -74
invalid start block 4294967285 in record 0 of bno btree block 3/1
Metadata CRC error detected at 0x5581eed67251, xfs_allocbt block 0x100008/0x1000
btree block 2/1 is suspect, error -74
.
.
junking entry "messages-20211004" in directory inode 128
bad attribute format 1 in inode 140, resetting value
        - agno = 1
        - agno = 2
        - agno = 3
clearing reflink flag on inode 133
Phase 5 - rebuild AG headers and trees...
        - reset superblock...
Phase 6 - check inode connectivity...
reinitializing root directory
reinitializing realtime bitmap inode
reinitializing realtime summary inode
        - resetting contents of realtime bitmap and summary inodes
        - traversing filesystem ...
        - traversal finished ...
        - moving disconnected inodes to lost+found ...
disconnected inode 133, moving to lost+found
disconnected inode 137, moving to lost+found
disconnected inode 139, moving to lost+found
disconnected inode 140, moving to lost+found
disconnected inode 144, moving to lost+found
Phase 7 - verify and correct link counts...
Maximum metadata LSN (2161919:-1) is ahead of log (1:31).
Format log to cycle 2161922.
done
Шаг-4: Как только файловая система будет восстановлена, смонтируйте раздел.
sudo mount /apps1
Заключение
В этом руководстве мы показали вам, как восстановить поврежденную файловую систему XFS в Linux.
Также мы показали, как запустить xfs_repair на томах LVM.
Если у вас есть какие-либо вопросы или замечания, не стесняйтесь оставлять комментарии.
см. также:
🐧 Как проверить и восстановить файловую систему EXT4 на Linux
🐧 Как увеличить существующую файловую систему XFS на логический том LVM
🐧 Как вывести список служб, которые запускаются при загрузке на Linux
🐧 Советы по обеспечению безопасности сервера CentOS – часть 1

In this article, you will learn how to repair Linux disk errors by using fsck and xfs_repair commands.
Table of Contents:
- What is FSCK?
- List Linux Disk Partitions and Types
- Get Last Scanned Time of a Linux Disk
- Scan & Repair a Ext4 Type Disk Partition
- Enable Scanning of Ext4 Disk Partitions at Linux Startup
- What is XFS_REPAIR?
- Scan & Repair a XFS Type Disk Partition
- Enable Scanning of XFS Disk Partitions at Linux Startup
- Conclusion
What is FSCK?:
The system utility fsck (file system consistency check) is a tool for checking the consistency of a file system in Unix and Unix-like operating systems, such as Linux, macOS, and FreeBSD.
Generally, fsck is run either automatically at boot time, or manually by the system administrator. The command works directly on data structures stored on disk, which are internal and specific to the particular file system in use — so an fsck command tailored to the file system is generally required. The exact behaviors of various fsck implementations vary, but they typically follow a common order of internal operations and provide a common command-line interface to the user. (Source: Wikipedia)

List Linux Disk Partitions and Types:
First of all you need to identify the disk partitions in your Linux server, their respective file systems and the path where they are being mounted.
If you are not used to Linux commandline then we recommend that you should attend online training Linux Command Line: From novice to wizard![]()
By using a console or a ssh client, connect with your Linux server as root user.
You can execute the lsblk command with following switches at the Linux bash prompt to list the required information.
# lsblk -o NAME,FSTYPE,MOUNTPOINT
NAME        FSTYPE      MOUNTPOINT
sda
├─sda1      ext4        /boot
└─sda2      LVM2_member
  ├─cl-root xfs         /
  ├─cl-swap swap        [SWAP]
  └─cl-home xfs         /home
sr0
Get Last Scanned Time of a Linux Disk:
You can find the last scan time for Linux Ext4 type partitions with the help of following command.
# tune2fs -l /dev/sda1 | grep checked
Last checked:             Sun Sep 29 20:03:14 2019
Scan & Repair a Ext4 Type Disk Partition:
To scan a Linux disk partition, you can use fsck (File System Consistency Check) command. But you are required to unmount that partition before checking and repairing it.
# umount /dev/sda1
After successful unmount, execute fsck command at Linux bash prompt.
# fsck.ext4 /dev/sda1
e2fsck 1.45.6 (20-Mar-2020)
/dev/sda1: clean, 320/65536 files, 61787/262144 blocks
After checking and repairing your Linux disk, mount the partition again at its respective mountpoint.
For this purpose, execute following Linux command to mount all the disk partitions listed in /etc/fstab file.
# mount -a
Enable Scanning of Ext4 Disk Partitions at Linux Startup:
To enable disk checking at the time of Linux startup. You have to modify the Mount Count parameter for that disk partition.
# tune2fs -c 1 /dev/sda1
tune2fs 1.45.6 (20-Mar-2020)
Setting maximal mount count to 1
Reboot your Linux server now.
# reboot
Linux command fsck is now check your Ext4 disk partition on startup.
After reboot, get the Last Checked value for your disk partition, now it will show you the time of last Linux startup.
# tune2fs -l /dev/sda1 | grep checked
Last checked:             Sun Aug  1 22:50:46 2021
Set back the Mount Count parameter, or it will keep performing disk scans on each Linux boot.
# tune2fs -c -1 /dev/sda1
tune2fs 1.45.6 (20-Mar-2020)
Setting maximal mount count to -1
What is XFS_REPAIR?:
XFS is a high-performance 64-bit journaling file system created by Silicon Graphics, Inc (SGI) in 1993. It was the default file system in SGI’s IRIX operating system starting with its version 5.3. XFS was ported to the Linux kernel in 2001; as of June 2014, XFS is supported by most Linux distributions, some of which use it as the default file system.
The xfs_repair utility is highly scalable and is designed to repair even very large file systems with many inodes efficiently. Unlike other Linux file systems, xfs_repair does not run at boot time, even when an XFS file system was not cleanly unmounted. In the event of an unclean unmount, xfs_repair simply replays the log at mount time, ensuring a consistent file system.
Scan & Repair a XFS Type Disk Partition:
XFS type disk partitions have their own set of commands, that are a little bit different from Ext4.
You must unmount a XFS disk partition before checking it for consistency.
# umount /dev/mapper/cl-home
We have xfs_repair command for checking and repairing the disk errors.
In some Linux distros, you may also find xfs_check command. This command only perform scanning of XFS type disk partitions and do not perform any repair.
But xfs_check command is not available in all Linux distros.
Alternatively, you can use xfs_repair command with -n switch to get the same functionality as of xfs_check.
# xfs_repair -n /dev/mapper/cl-home
Phase 1 - find and verify superblock...
Phase 2 - using internal log
        - zero log...
        - scan filesystem freespace and inode maps...
        - found root inode chunk
Phase 3 - for each AG...
        - scan (but don't clear) agi unlinked lists...
        - process known inodes and perform inode discovery...
        - agno = 0
        - agno = 1
        - agno = 2
        - agno = 3
        - process newly discovered inodes...
Phase 4 - check for duplicate blocks...
        - setting up duplicate extent list...
        - check for inodes claiming duplicate blocks...
        - agno = 0
        - agno = 1
        - agno = 2
        - agno = 3
No modify flag set, skipping phase 5
Phase 6 - check inode connectivity...
        - traversing filesystem ...
        - traversal finished ...
        - moving disconnected inodes to lost+found ...
Phase 7 - verify link counts...
No modify flag set, skipping filesystem flush and exiting.
The above command only perform disk checking and do not try to repair any error.
Now, execute the xfs_repair command without -n switch and it will perform scanning and repairing of Linux disk partitions.
# xfs_repair /dev/mapper/cl-home
Phase 1 - find and verify superblock...
Phase 2 - using internal log
        - zero log...
        - scan filesystem freespace and inode maps...
        - found root inode chunk
Phase 3 - for each AG...
        - scan and clear agi unlinked lists...
        - process known inodes and perform inode discovery...
        - agno = 0
        - agno = 1
        - agno = 2
        - agno = 3
        - process newly discovered inodes...
Phase 4 - check for duplicate blocks...
        - setting up duplicate extent list...
        - check for inodes claiming duplicate blocks...
        - agno = 0
        - agno = 1
        - agno = 2
        - agno = 3
Phase 5 - rebuild AG headers and trees...
        - reset superblock...
Phase 6 - check inode connectivity...
        - resetting contents of realtime bitmap and summary inodes
        - traversing filesystem ...
        - traversal finished ...
        - moving disconnected inodes to lost+found ...
Phase 7 - verify and correct link counts...
done
Remount the XFS partition at its original mountpoint as listed in /etc/fstab file.
# mount -a
Enable Scanning of XFS Disk Partitions at Linux Startup:
In some scenarios you cannot unmount a disk partition, if the disk is in use by the Linux operating system. For this reason you may have to defer the disk checking until next system boot.
To enable xfs_repair command to run on Linux startup, add «fsck.mode=force fsck.repair=yes» at the end of GRUB menu kernel command.
You can refer to our previous post about Editing GRUB menu.
After Linux startup, check the system log to verify the execution of disk repair command.
# journalctl | grep systemd-fsck
To permanently enable disk checking at startup, you have to add «fsck.mode=force fsck.repair=yes» in GRUB configuration files.
Edit grub configuration file in vim text editor.
# vi /etc/default/grub
Locate GRUB_CMDLINE_LINUX parameter and append «fsck.mode=force fsck.repair=yes» at the end of line.
GRUB_CMDLINE_LINUX="resume=/dev/mapper/cl-swap rd.lvm.lv=cl/root rd.lvm.lv=cl/swap rhgb quiet fsck.mode=force fsck.repair=yes"
Regenerate GRUB menu configurations based on new parameters.
# grub2-mkconfig
Reboot your Linux operating system to verify the new settings.
# reboot
Conclusion:
You have successfully performed scanning and repairing of Linux Disk partitions of Ext4 and XFS types. If you feel any difficulty understanding this Linux tutorial, we suggest that you should read The Linux Command Line, 2nd Edition by William Shotts.
xfs_repair command repairs corrupt or damaged XFS filesystems.
It’s highly scalable, high-performance and is designed to effectively repair even very large file systems with many inodes. Unlike other Linux file systems, xfs_repair does not run at boot time, even if the XFS file system was not cleanly unmounted.
It’s 64-bit journaling file system that supports very large files (8 EB) and file systems (16 EB) on a single host. XFS is the default file system for Red Hat Enterprise Linux 7.
The file system to be repaired must not be mounted before performing xfs_repair, otherwise the resulting file system may be inconsistent or corrupt.
This same procedure can be used for other system partitions that can’t be unmounted while the system is running.
In this guide, we’ll show you how to use the ‘xfs_repair’ command in Linux to repair a corrupted XFS file system.
Common Syntax:
xfs_repair [option] [device or partition or mount point]
Corrupting XFS File System
We are going to intentionally corrupt the XFS file system by executing the below command. It trash’s randomly selected file system metadata blocks.
Make a Note: Please don’t test this on Production server, as this may damage your data badly.
Trash occurs for randomly selected bits in selected blocks. This command is only available in debug versions of ‘xfs_db’. This is useful for testing xfs_repair and xfs_check.
sudo umount /data
Corrupting the xfs file system using the xfs_db command.
sudo xfs_db -x -c blockget -c "blocktrash -s 512109 -n 1000" /dev/sdb1

blocktrash: 2/3 btino block 14 bits starting 2837:5 flipped
blocktrash: 3/5 btrefcnt block 411 bits starting 3714:0 flipped
blocktrash: 2/2 btcnt block 3 bits starting 2143:4 flipped
blocktrash: 2/2 btcnt block 1024 bits starting 523:4 flipped
blocktrash: 3/3 btino block 467 bits starting 1047:6 flipped
blocktrash: 3/4 btfino block 524 bits starting 1775:2 flipped
blocktrash: 0/5 btrefcnt block 224 bits starting 3086:6 flipped
.
.
blocktrash: 2/2 btcnt block 5 bits starting 3026:4 flipped
blocktrash: 2/5 btrefcnt block 1 bit starting 288:2 flipped
blocktrash: 0/4 btfino block 63 bits starting 1014:5 flipped
blocktrash: 0/17 inode block 24 bits starting 3533:1 flipped
blocktrash: 3/5 btrefcnt block 956 bits starting 2970:2 flipped
blocktrash: 2/3 btino block 482 bits starting 2368:3 flipped
When you try to load the file system, you will see the following error message because it was corrupted.
sudo mount -a

mount: /data: mount(2) system call failed: Structure needs cleaning.
1) Repairing an XFS File System
You can repair a non-root corrupted XFS file system on a running Linux system. You may need to boot the system with Rescue Mode or Emergency Mode to repair the file system when it can’t be unmounted while the system is running.
Step-1: Unmount the filesystem that you want to run fsck.
sudo umount /data
Step-2: Run xfs_repair with '-n' option to perform a dry run. Please note that the ‘xfs_check’ tool has been deprecated in favor of ‘xfs_repair -n’.
sudo xfs_repair -n /dev/sdb1

Phase 1 - find and verify superblock...
Phase 2 - using internal log
        - zero log...
        - scan filesystem freespace and inode maps...
Metadata CRC error detected at 0x564a76dad251, xfs_allocbt block 0x27fe08/0x1000
btree block 1/1 is suspect, error -74
Metadata CRC error detected at 0x564a76dad251, xfs_allocbt block 0x77fa08/0x1000
btree block 3/1 is suspect, error -74
invalid start block 4294967285 in record 0 of bno btree block 3/1
Metadata CRC error detected at 0x564a76dad251, xfs_allocbt block 0x4ffc08/0x1000
btree block 2/1 is suspect, error -74
.
.
free inode 190 contains errors, would correct
bad CRC for inode 191, would rewrite
UUID mismatch on inode 191
would have cleared inode 191
        - agno = 1
        - agno = 2
        - agno = 3
would rebuild corrupt refcount btrees.
No modify flag set, skipping phase 5
Inode allocation btrees are too corrupted, skipping phases 6 and 7
Maximum metadata LSN (2161919:-1) is ahead of log (1:20).
Would format log to cycle 2161922.
No modify flag set, skipping filesystem flush and exiting.
Step-3: Run xfs_repair to repair the file system:
sudo xfs_repair /dev/sdb1

Phase 1 - find and verify superblock...
Phase 2 - using internal log
        - zero log...
        - scan filesystem freespace and inode maps...
Metadata CRC error detected at 0x55ff18867251, xfs_allocbt block 0x4ffc08/0x1000
btree block 2/1 is suspect, error -74
Metadata CRC error detected at 0x55ff18867251, xfs_allocbt block 0x8/0x1000
btree block 0/1 is suspect, error -74
bad magic # 0xb1bdccbd in btbno block 0/1
Metadata CRC error detected at 0x55ff18867251, xfs_allocbt block 0x77fa08/0x1000
btree block 3/1 is suspect, error -74
.
.
clearing reflink flag on inode 133
Phase 5 - rebuild AG headers and trees...
        - reset superblock...
Phase 6 - check inode connectivity...
reinitializing root directory
reinitializing realtime bitmap inode
reinitializing realtime summary inode
        - resetting contents of realtime bitmap and summary inodes
        - traversing filesystem ...
        - traversal finished ...
        - moving disconnected inodes to lost+found ...
disconnected inode 133, moving to lost+found
disconnected inode 137, moving to lost+found
disconnected inode 139, moving to lost+found
disconnected inode 140, moving to lost+found
Phase 7 - verify and correct link counts...
Maximum metadata LSN (2161919:-1) is ahead of log (1:20).
Format log to cycle 2161922.
done
Step-4: Once the file system is repaired, mount the partition.
sudo mount /dev/sdb1
2) Repairing XFS LVM Volume with xfs_repair
xfs_repair can be run on LVM logical volumes just like filesystems on standard partitions. Follow the below procedure for repairing a LVM partition:
Step-1: Make sure the specific LVM volume is in active state to run xfs_repair. To check the status of LVM, run:
sudo lvscan

  ACTIVE              '/dev/myvg/vol01' [1.00 GiB] inherit
  inactive            '/dev/myvg/vol02' [1.00 GiB] inherit
  ACTIVE              '/dev/rhel/swap' [2.07 GiB] inherit
  ACTIVE              '/dev/rhel/root' [<26.93 GiB] inherit
If it’s 'inactive', activate it by running the following command.
sudo lvchange -ay /dev/myvg/vol02 -v

  Activating logical volume myvg/vol02.
  activation/volume_list configuration setting not defined: Checking only host tags for myvg/vol02.
  Creating myvg-vol02
  Loading table for myvg-vol02 (253:3).
  Resuming myvg-vol02 (253:3).
Step-2: Unmount the device or filesystem that you want to run xfs_repair.
sudo umount /dev/myvg/vol02
Step-3: Run xfs_repair to repair the file system. You must enter the path of the LVM volume to run xfs_repair and not an actual physical partition.
sudo xfs_repair /dev/myvg/vol02

Phase 1 - find and verify superblock...
Phase 2 - using internal log
        - zero log...
        - scan filesystem freespace and inode maps...
Metadata CRC error detected at 0x5581eed67251, xfs_allocbt block 0x180008/0x1000
btree block 3/1 is suspect, error -74
invalid start block 4294967285 in record 0 of bno btree block 3/1
Metadata CRC error detected at 0x5581eed67251, xfs_allocbt block 0x100008/0x1000
btree block 2/1 is suspect, error -74
.
.
junking entry "messages-20211004" in directory inode 128
bad attribute format 1 in inode 140, resetting value
        - agno = 1
        - agno = 2
        - agno = 3
clearing reflink flag on inode 133
Phase 5 - rebuild AG headers and trees...
        - reset superblock...
Phase 6 - check inode connectivity...
reinitializing root directory
reinitializing realtime bitmap inode
reinitializing realtime summary inode
        - resetting contents of realtime bitmap and summary inodes
        - traversing filesystem ...
        - traversal finished ...
        - moving disconnected inodes to lost+found ...
disconnected inode 133, moving to lost+found
disconnected inode 137, moving to lost+found
disconnected inode 139, moving to lost+found
disconnected inode 140, moving to lost+found
disconnected inode 144, moving to lost+found
Phase 7 - verify and correct link counts...
Maximum metadata LSN (2161919:-1) is ahead of log (1:31).
Format log to cycle 2161922.
done
Step-4: Once the file system is repaired, mount the partition.
sudo mount /data
Conclusion
In this tutorial, we’ve shown you how to repair a corrupted XFS filesystems on Linux. Also, shown you how to run xfs_repair on the LVM volumes.
If you have any questions or feedback, feel free to comment below.
Hello, friends. In this post, we will explain a trick that can save a lot of work and even an entire system. So, today you will learn How to Check and Repair XFS Filesystem in RHEL/RockyLinux/CentOS.
Before we start, we need to talk a little about XFS.
XFS is a high-performance 64-bit journaling file system. Its virtues such as maturity, and debugged code, make it a preferred candidate for use on GNU/Linux servers.
Some main advantages of XFS are:
- Thanks to journaling, easy and fast recovery from data loss is possible. This feature is vital in a production server.
- With XFS, there is the possibility to enlarge the partition while it is mounted and active.
- XFS can execute I/O (Input/Output) operations in parallel.
And so on. That is why many servers with RHEL, RockyLinux and derivatives use it.
However, it is possible that it can fail us, so that is the reason for today’s post.
How to Repair XFS Filesystem in RHEL/RockyLinux/CentOS
Actually, to repair an XFS filesystem, you just need to run the following command
xfs_repair [option] [device]However, we have to have a corrupted XFS system, and this on a production system is fatal.
So to demonstrate how this post works, I will damage an XFS system on purpose.
Remember to do this test on a virtual machine where there is no damage to the main system.
Let’s suppose that our partition or device or system is mounted in /device first we must unmount it.
umount /deviceAnd now damage the file system by running
xfs_db -x -c blockget -c "blocktrash -s 512109 -n 1000" [device]For example,
sudo xfs_db -x -c blockget -c "blocktrash -s 512109 -n 1000" /dev/sdb1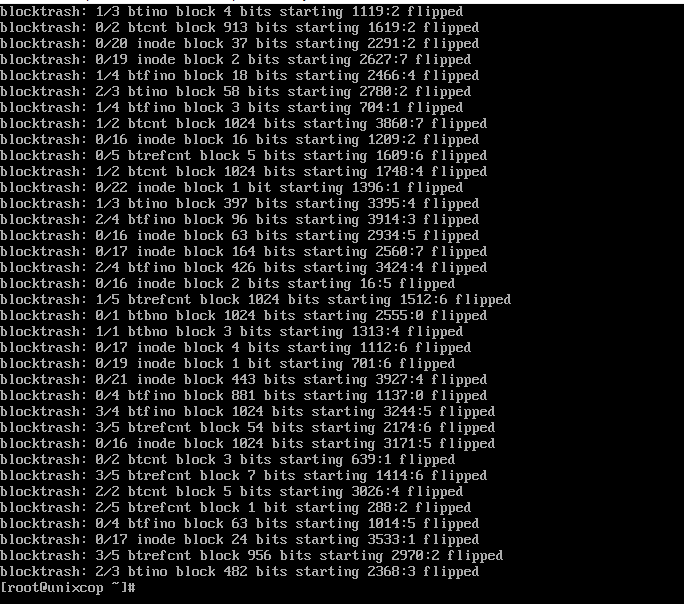
And of course if you try to mount it you should get an error similar to this one
mount: /device: mount(2) system call failed: Structure needs cleaning. So, let’s fix it.
For that, the volume has to be unmounted.
And to repair it run the following command
xfs_repair [device]For example,
xfs_repair /dev/sdb1 At the end you will see an output screen similar to this one
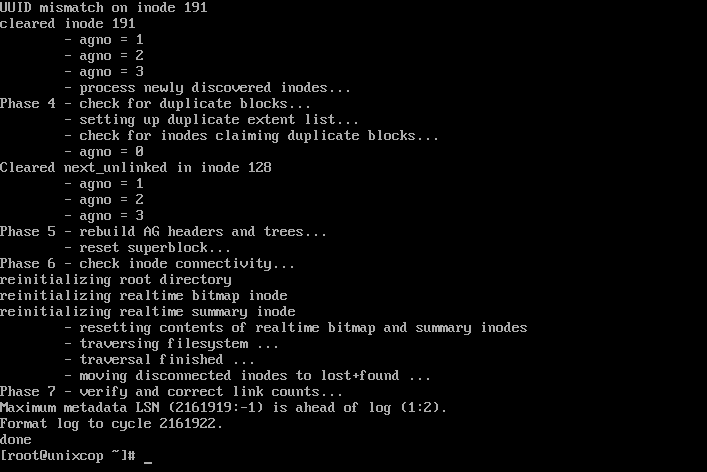
So, the process has been extensive.Now just mount.
mount /dev/sdb1Enjoy it.
Команда xfs_repair восстанавливает поврежденные или поврежденные файловые системы XFS.
Она отличается высокой масштабируемостью, производительностью и предназначена для эффективного восстановления даже очень больших файловых систем с большим количеством inodes.
В отличие от других файловых систем Linux, xfs_repair не запускается во время загрузки, даже если файловая система XFS не была чисто размонтирована.
Это 64-битная журналируемая файловая система, которая поддерживает очень большие файлы (8 EB) и файловые системы (16 EB) на одном хосте.
XFS является файловой системой по умолчанию для Red Hat Enterprise Linux 7.
Восстанавливаемая файловая система не должна быть смонтирована перед выполнением xfs_repair, иначе результирующая файловая система может быть непоследовательной или поврежденной.
Эту же процедуру можно использовать для других системных разделов, которые нельзя размонтировать во время работы системы.
В этом руководстве мы покажем вам, как использовать команду ‘xfs_repair’ в Linux для восстановления поврежденной файловой системы XFS.
⛬ Файловая система XFS устанавливается только для чтения (CentOS / RHEL)
Общий синтаксис:
xfs_repair [option] [device or partition or mount point]
Содержание
- Повреждение файловой системы XFS
- 1) Восстановление файловой системы XFS
- Шаг-1: Размонтируйте файловую систему, для которой вы хотите запустить fsck.
- Шаг-2: Запустите xfs_repair с опцией ‘-n’, чтобы выполнить пробный запуск.
- Шаг-3: Запустите xfs_repair для восстановления файловой системы:
- Шаг-4: Как только файловая система будет восстановлена, смонтируйте раздел.
- 2) Восстановление тома XFS LVM с помощью xfs_repair
- Шаг-1: Убедитесь, что конкретный том LVM находится в активном состоянии для запуска xfs_repair. Чтобы проверить состояние LVM, выполните:
- Шаг-2: Размонтируйте устройство или файловую систему, для которой вы хотите запустить xfs_repair.
- Шаг-3: Запустите xfs_repair для восстановления файловой системы.
- Шаг-4: Как только файловая система будет восстановлена, смонтируйте раздел.
- Заключение
Повреждение файловой системы XFS
Мы намеренно испортим файловую систему XFS, выполнив следующую команду.
Она удалит случайно выбранные блоки метаданных файловой системы.
Примечание: Пожалуйста, не тестируйте это на производственном сервере, так как это может сильно повредить ваши данные.
Эта команда доступна только в отладочных версиях ‘xfs_db’.
Это полезно для тестирования xfs_repair и xfs_check.
sudo umount /data
Повреждение файловой системы xfs с помощью команды xfs_db.
sudo xfs_db -x -c blockget -c "blocktrash -s 512109 -n 1000" /dev/sdb1

blocktrash: 2/3 btino block 14 bits starting 2837:5 flipped
blocktrash: 3/5 btrefcnt block 411 bits starting 3714:0 flipped
blocktrash: 2/2 btcnt block 3 bits starting 2143:4 flipped
blocktrash: 2/2 btcnt block 1024 bits starting 523:4 flipped
blocktrash: 3/3 btino block 467 bits starting 1047:6 flipped
blocktrash: 3/4 btfino block 524 bits starting 1775:2 flipped
blocktrash: 0/5 btrefcnt block 224 bits starting 3086:6 flipped
.
.
blocktrash: 2/2 btcnt block 5 bits starting 3026:4 flipped
blocktrash: 2/5 btrefcnt block 1 bit starting 288:2 flipped
blocktrash: 0/4 btfino block 63 bits starting 1014:5 flipped
blocktrash: 0/17 inode block 24 bits starting 3533:1 flipped
blocktrash: 3/5 btrefcnt block 956 bits starting 2970:2 flipped
blocktrash: 2/3 btino block 482 bits starting 2368:3 flipped
Когда вы попытаетесь загрузить файловую систему, вы увидите следующее сообщение об ошибке, поскольку она была повреждена.
sudo mount -a

mount: /data: mount(2) system call failed: Structure needs cleaning.
1) Восстановление файловой системы XFS
Вы можете восстановить поврежденную файловую систему XFS без рута на работающей системе Linux.
Вам может понадобиться загрузить систему в режиме Rescue Mode или Emergency Mode для восстановления файловой системы, если ее невозможно размонтировать во время работы системы.
Шаг-1: Размонтируйте файловую систему, для которой вы хотите запустить fsck.
sudo umount /data
Шаг-2: Запустите xfs_repair с опцией ‘-n’, чтобы выполнить пробный запуск.
Обратите внимание, что инструмент ‘xfs_check’ был упразднен в пользу ‘xfs_repair -n’.
sudo xfs_repair -n /dev/sdb1

Phase 1 - find and verify superblock...
Phase 2 - using internal log
        - zero log...
        - scan filesystem freespace and inode maps...
Metadata CRC error detected at 0x564a76dad251, xfs_allocbt block 0x27fe08/0x1000
btree block 1/1 is suspect, error -74
Metadata CRC error detected at 0x564a76dad251, xfs_allocbt block 0x77fa08/0x1000
btree block 3/1 is suspect, error -74
invalid start block 4294967285 in record 0 of bno btree block 3/1
Metadata CRC error detected at 0x564a76dad251, xfs_allocbt block 0x4ffc08/0x1000
btree block 2/1 is suspect, error -74
.
.
free inode 190 contains errors, would correct
bad CRC for inode 191, would rewrite
UUID mismatch on inode 191
would have cleared inode 191
        - agno = 1
        - agno = 2
        - agno = 3
would rebuild corrupt refcount btrees.
No modify flag set, skipping phase 5
Inode allocation btrees are too corrupted, skipping phases 6 and 7
Maximum metadata LSN (2161919:-1) is ahead of log (1:20).
Would format log to cycle 2161922.
No modify flag set, skipping filesystem flush and exiting.
Шаг-3: Запустите xfs_repair для восстановления файловой системы:
sudo xfs_repair /dev/sdb1

Phase 1 - find and verify superblock...
Phase 2 - using internal log
        - zero log...
        - scan filesystem freespace and inode maps...
Metadata CRC error detected at 0x55ff18867251, xfs_allocbt block 0x4ffc08/0x1000
btree block 2/1 is suspect, error -74
Metadata CRC error detected at 0x55ff18867251, xfs_allocbt block 0x8/0x1000
btree block 0/1 is suspect, error -74
bad magic # 0xb1bdccbd in btbno block 0/1
Metadata CRC error detected at 0x55ff18867251, xfs_allocbt block 0x77fa08/0x1000
btree block 3/1 is suspect, error -74
.
.
clearing reflink flag on inode 133
Phase 5 - rebuild AG headers and trees...
        - reset superblock...
Phase 6 - check inode connectivity...
reinitializing root directory
reinitializing realtime bitmap inode
reinitializing realtime summary inode
        - resetting contents of realtime bitmap and summary inodes
        - traversing filesystem ...
        - traversal finished ...
        - moving disconnected inodes to lost+found ...
disconnected inode 133, moving to lost+found
disconnected inode 137, moving to lost+found
disconnected inode 139, moving to lost+found
disconnected inode 140, moving to lost+found
Phase 7 - verify and correct link counts...
Maximum metadata LSN (2161919:-1) is ahead of log (1:20).
Format log to cycle 2161922.
done
Шаг-4: Как только файловая система будет восстановлена, смонтируйте раздел.
sudo mount /dev/sdb1
2) Восстановление тома XFS LVM с помощью xfs_repair
xfs_repair можно запускать на логических томах LVM так же, как файловые системы на стандартных разделах.
Для восстановления LVM-раздела следуйте приведенной ниже процедуре:
Шаг-1: Убедитесь, что конкретный том LVM находится в активном состоянии для запуска xfs_repair. Чтобы проверить состояние LVM, выполните:
sudo lvscan

  ACTIVE              '/dev/myvg/vol01' [1.00 GiB] inherit
  inactive            '/dev/myvg/vol02' [1.00 GiB] inherit
  ACTIVE              '/dev/rhel/swap' [2.07 GiB] inherit
  ACTIVE              '/dev/rhel/root' [<26.93 GiB] inherit
Если он “inactive“, активируйте его, выполнив следующую команду:
sudo lvchange -ay /dev/myvg/vol02 -v

  Activating logical volume myvg/vol02.
  activation/volume_list configuration setting not defined: Checking only host tags for myvg/vol02.
  Creating myvg-vol02
  Loading table for myvg-vol02 (253:3).
  Resuming myvg-vol02 (253:3).
Шаг-2: Размонтируйте устройство или файловую систему, для которой вы хотите запустить xfs_repair.
sudo umount /dev/myvg/vol02
Шаг-3: Запустите xfs_repair для восстановления файловой системы.
Для запуска xfs_repair необходимо ввести путь к LVM-тому, а не к реальному физическому разделу.
sudo xfs_repair /dev/myvg/vol02

Phase 1 - find and verify superblock...
Phase 2 - using internal log
        - zero log...
        - scan filesystem freespace and inode maps...
Metadata CRC error detected at 0x5581eed67251, xfs_allocbt block 0x180008/0x1000
btree block 3/1 is suspect, error -74
invalid start block 4294967285 in record 0 of bno btree block 3/1
Metadata CRC error detected at 0x5581eed67251, xfs_allocbt block 0x100008/0x1000
btree block 2/1 is suspect, error -74
.
.
junking entry "messages-20211004" in directory inode 128
bad attribute format 1 in inode 140, resetting value
        - agno = 1
        - agno = 2
        - agno = 3
clearing reflink flag on inode 133
Phase 5 - rebuild AG headers and trees...
        - reset superblock...
Phase 6 - check inode connectivity...
reinitializing root directory
reinitializing realtime bitmap inode
reinitializing realtime summary inode
        - resetting contents of realtime bitmap and summary inodes
        - traversing filesystem ...
        - traversal finished ...
        - moving disconnected inodes to lost+found ...
disconnected inode 133, moving to lost+found
disconnected inode 137, moving to lost+found
disconnected inode 139, moving to lost+found
disconnected inode 140, moving to lost+found
disconnected inode 144, moving to lost+found
Phase 7 - verify and correct link counts...
Maximum metadata LSN (2161919:-1) is ahead of log (1:31).
Format log to cycle 2161922.
done
Шаг-4: Как только файловая система будет восстановлена, смонтируйте раздел.
sudo mount /apps1
Заключение
В этом руководстве мы показали вам, как восстановить поврежденную файловую систему XFS в Linux.
Также мы показали, как запустить xfs_repair на томах LVM.
Если у вас есть какие-либо вопросы или замечания, не стесняйтесь оставлять комментарии.
см. также:
🐧 Как проверить и восстановить файловую систему EXT4 на Linux
🐧 Как увеличить существующую файловую систему XFS на логический том LVM
🐧 Как вывести список служб, которые запускаются при загрузке на Linux
🐧 Советы по обеспечению безопасности сервера CentOS – часть 1

In this article, you will learn how to repair Linux disk errors by using fsck and xfs_repair commands.
Table of Contents:
- What is FSCK?
- List Linux Disk Partitions and Types
- Get Last Scanned Time of a Linux Disk
- Scan & Repair a Ext4 Type Disk Partition
- Enable Scanning of Ext4 Disk Partitions at Linux Startup
- What is XFS_REPAIR?
- Scan & Repair a XFS Type Disk Partition
- Enable Scanning of XFS Disk Partitions at Linux Startup
- Conclusion
What is FSCK?:
The system utility fsck (file system consistency check) is a tool for checking the consistency of a file system in Unix and Unix-like operating systems, such as Linux, macOS, and FreeBSD.
Generally, fsck is run either automatically at boot time, or manually by the system administrator. The command works directly on data structures stored on disk, which are internal and specific to the particular file system in use — so an fsck command tailored to the file system is generally required. The exact behaviors of various fsck implementations vary, but they typically follow a common order of internal operations and provide a common command-line interface to the user. (Source: Wikipedia)
Recommended Book: Practical Guide to Linux Commands, Editors, and Shell Programming by Mark Sobell & Matthew Helmke
Recommended Training:1Z0-409 Oracle Linux Fundamentals Certified Practice Exam![]()
List Linux Disk Partitions and Types:
First of all you need to identify the disk partitions in your Linux server, their respective file systems and the path where they are being mounted.
By using a console or a ssh client, connect with your Linux server as root user.
You can execute the lsblk command with following switches at the Linux bash prompt to list the required information.
# lsblk -o NAME,FSTYPE,MOUNTPOINT
NAME        FSTYPE      MOUNTPOINT
sda
├─sda1      ext4        /boot
└─sda2      LVM2_member
  ├─cl-root xfs         /
  ├─cl-swap swap        [SWAP]
  └─cl-home xfs         /home
sr0
Get Last Scanned Time of a Linux Disk:
You can find the last scan time for Linux Ext4 type partitions with the help of following command.
# tune2fs -l /dev/sda1 | grep checked
Last checked:             Sun Sep 29 20:03:14 2019
Scan & Repair a Ext4 Type Disk Partition:
To scan a Linux disk partition, you can use fsck (File System Consistency Check) command. But you are required to unmount that partition before checking and repairing it.
# umount /dev/sda1
After successful unmount, execute fsck command at Linux bash prompt.
# fsck.ext4 /dev/sda1
e2fsck 1.45.6 (20-Mar-2020)
/dev/sda1: clean, 320/65536 files, 61787/262144 blocks
After checking and repairing your Linux disk, mount the partition again at its respective mountpoint.
For this purpose, execute following Linux command to mount all the disk partitions listed in /etc/fstab file.
# mount -a
Enable Scanning of Ext4 Disk Partitions at Linux Startup:
To enable disk checking at the time of Linux startup. You have to modify the Mount Count parameter for that disk partition.
# tune2fs -c 1 /dev/sda1
tune2fs 1.45.6 (20-Mar-2020)
Setting maximal mount count to 1
Reboot your Linux server now.
# reboot
Linux command fsck is now check your Ext4 disk partition on startup.
After reboot, get the Last Checked value for your disk partition, now it will show you the time of last Linux startup.
# tune2fs -l /dev/sda1 | grep checked
Last checked:             Sun Aug  1 22:50:46 2021
Set back the Mount Count parameter, or it will keep performing disk scans on each Linux boot.
# tune2fs -c -1 /dev/sda1
tune2fs 1.45.6 (20-Mar-2020)
Setting maximal mount count to -1
What is XFS_REPAIR?:
XFS is a high-performance 64-bit journaling file system created by Silicon Graphics, Inc (SGI) in 1993. It was the default file system in SGI’s IRIX operating system starting with its version 5.3. XFS was ported to the Linux kernel in 2001; as of June 2014, XFS is supported by most Linux distributions, some of which use it as the default file system.
The xfs_repair utility is highly scalable and is designed to repair even very large file systems with many inodes efficiently. Unlike other Linux file systems, xfs_repair does not run at boot time, even when an XFS file system was not cleanly unmounted. In the event of an unclean unmount, xfs_repair simply replays the log at mount time, ensuring a consistent file system.
Scan & Repair a XFS Type Disk Partition:
XFS type disk partitions have their own set of commands, that are a little bit different from Ext4.
You must unmount a XFS disk partition before checking it for consistency.
# umount /dev/mapper/cl-home
We have xfs_repair command for checking and repairing the disk errors.
In some Linux distros, you may also find xfs_check command. This command only perform scanning of XFS type disk partitions and do not perform any repair.
But xfs_check command is not available in all Linux distros.
Alternatively, you can use xfs_repair command with -n switch to get the same functionality as of xfs_check.
# xfs_repair -n /dev/mapper/cl-home
Phase 1 - find and verify superblock...
Phase 2 - using internal log
        - zero log...
        - scan filesystem freespace and inode maps...
        - found root inode chunk
Phase 3 - for each AG...
        - scan (but don't clear) agi unlinked lists...
        - process known inodes and perform inode discovery...
        - agno = 0
        - agno = 1
        - agno = 2
        - agno = 3
        - process newly discovered inodes...
Phase 4 - check for duplicate blocks...
        - setting up duplicate extent list...
        - check for inodes claiming duplicate blocks...
        - agno = 0
        - agno = 1
        - agno = 2
        - agno = 3
No modify flag set, skipping phase 5
Phase 6 - check inode connectivity...
        - traversing filesystem ...
        - traversal finished ...
        - moving disconnected inodes to lost+found ...
Phase 7 - verify link counts...
No modify flag set, skipping filesystem flush and exiting.
The above command only perform disk checking and do not try to repair any error.
Now, execute the xfs_repair command without -n switch and it will perform scanning and repairing of Linux disk partitions.
# xfs_repair /dev/mapper/cl-home
Phase 1 - find and verify superblock...
Phase 2 - using internal log
        - zero log...
        - scan filesystem freespace and inode maps...
        - found root inode chunk
Phase 3 - for each AG...
        - scan and clear agi unlinked lists...
        - process known inodes and perform inode discovery...
        - agno = 0
        - agno = 1
        - agno = 2
        - agno = 3
        - process newly discovered inodes...
Phase 4 - check for duplicate blocks...
        - setting up duplicate extent list...
        - check for inodes claiming duplicate blocks...
        - agno = 0
        - agno = 1
        - agno = 2
        - agno = 3
Phase 5 - rebuild AG headers and trees...
        - reset superblock...
Phase 6 - check inode connectivity...
        - resetting contents of realtime bitmap and summary inodes
        - traversing filesystem ...
        - traversal finished ...
        - moving disconnected inodes to lost+found ...
Phase 7 - verify and correct link counts...
done
Remount the XFS partition at its original mountpoint as listed in /etc/fstab file.
# mount -a
Enable Scanning of XFS Disk Partitions at Linux Startup:
In some scenarios you cannot unmount a disk partition, if the disk is in use by the Linux operating system. For this reason you may have to defer the disk checking until next system boot.
To enable xfs_repair command to run on Linux startup, add «fsck.mode=force fsck.repair=yes» at the end of GRUB menu kernel command.
You can refer to our previous post about Editing GRUB menu.
After Linux startup, check the system log to verify the execution of disk repair command.
# journalctl | grep systemd-fsck
To permanently enable disk checking at startup, you have to add «fsck.mode=force fsck.repair=yes» in GRUB configuration files.
Edit grub configuration file in vim text editor.
# vi /etc/default/grub
Locate GRUB_CMDLINE_LINUX parameter and append «fsck.mode=force fsck.repair=yes» at the end of line.
GRUB_CMDLINE_LINUX="resume=/dev/mapper/cl-swap rd.lvm.lv=cl/root rd.lvm.lv=cl/swap rhgb quiet fsck.mode=force fsck.repair=yes"
Regenerate GRUB menu configurations based on new parameters.
# grub2-mkconfig
Reboot your Linux operating system to verify the new settings.
# reboot
Conclusion:
You have successfully performed scanning and repairing of Linux Disk partitions of Ext4 and XFS types.
xfs_repair command repairs corrupt or damaged XFS filesystems.
It’s highly scalable, high-performance and is designed to effectively repair even very large file systems with many inodes. Unlike other Linux file systems, xfs_repair does not run at boot time, even if the XFS file system was not cleanly unmounted.
It’s 64-bit journaling file system that supports very large files (8 EB) and file systems (16 EB) on a single host. XFS is the default file system for Red Hat Enterprise Linux 7.
The file system to be repaired must not be mounted before performing xfs_repair, otherwise the resulting file system may be inconsistent or corrupt.
This same procedure can be used for other system partitions that can’t be unmounted while the system is running.
In this guide, we’ll show you how to use the ‘xfs_repair’ command in Linux to repair a corrupted XFS file system.
Common Syntax:
xfs_repair [option] [device or partition or mount point]
Corrupting XFS File System
We are going to intentionally corrupt the XFS file system by executing the below command. It trash’s randomly selected file system metadata blocks.
Make a Note: Please don’t test this on Production server, as this may damage your data badly.
Trash occurs for randomly selected bits in selected blocks. This command is only available in debug versions of ‘xfs_db’. This is useful for testing xfs_repair and xfs_check.
sudo umount /data
Corrupting the xfs file system using the xfs_db command.
sudo xfs_db -x -c blockget -c "blocktrash -s 512109 -n 1000" /dev/sdb1

blocktrash: 2/3 btino block 14 bits starting 2837:5 flipped
blocktrash: 3/5 btrefcnt block 411 bits starting 3714:0 flipped
blocktrash: 2/2 btcnt block 3 bits starting 2143:4 flipped
blocktrash: 2/2 btcnt block 1024 bits starting 523:4 flipped
blocktrash: 3/3 btino block 467 bits starting 1047:6 flipped
blocktrash: 3/4 btfino block 524 bits starting 1775:2 flipped
blocktrash: 0/5 btrefcnt block 224 bits starting 3086:6 flipped
.
.
blocktrash: 2/2 btcnt block 5 bits starting 3026:4 flipped
blocktrash: 2/5 btrefcnt block 1 bit starting 288:2 flipped
blocktrash: 0/4 btfino block 63 bits starting 1014:5 flipped
blocktrash: 0/17 inode block 24 bits starting 3533:1 flipped
blocktrash: 3/5 btrefcnt block 956 bits starting 2970:2 flipped
blocktrash: 2/3 btino block 482 bits starting 2368:3 flipped
When you try to load the file system, you will see the following error message because it was corrupted.
sudo mount -a

mount: /data: mount(2) system call failed: Structure needs cleaning.
1) Repairing an XFS File System
You can repair a non-root corrupted XFS file system on a running Linux system. You may need to boot the system with Rescue Mode or Emergency Mode to repair the file system when it can’t be unmounted while the system is running.
Step-1: Unmount the filesystem that you want to run fsck.
sudo umount /data
Step-2: Run xfs_repair with '-n' option to perform a dry run. Please note that the ‘xfs_check’ tool has been deprecated in favor of ‘xfs_repair -n’.
sudo xfs_repair -n /dev/sdb1

Phase 1 - find and verify superblock...
Phase 2 - using internal log
        - zero log...
        - scan filesystem freespace and inode maps...
Metadata CRC error detected at 0x564a76dad251, xfs_allocbt block 0x27fe08/0x1000
btree block 1/1 is suspect, error -74
Metadata CRC error detected at 0x564a76dad251, xfs_allocbt block 0x77fa08/0x1000
btree block 3/1 is suspect, error -74
invalid start block 4294967285 in record 0 of bno btree block 3/1
Metadata CRC error detected at 0x564a76dad251, xfs_allocbt block 0x4ffc08/0x1000
btree block 2/1 is suspect, error -74
.
.
free inode 190 contains errors, would correct
bad CRC for inode 191, would rewrite
UUID mismatch on inode 191
would have cleared inode 191
        - agno = 1
        - agno = 2
        - agno = 3
would rebuild corrupt refcount btrees.
No modify flag set, skipping phase 5
Inode allocation btrees are too corrupted, skipping phases 6 and 7
Maximum metadata LSN (2161919:-1) is ahead of log (1:20).
Would format log to cycle 2161922.
No modify flag set, skipping filesystem flush and exiting.
Step-3: Run xfs_repair to repair the file system:
sudo xfs_repair /dev/sdb1

Phase 1 - find and verify superblock...
Phase 2 - using internal log
        - zero log...
        - scan filesystem freespace and inode maps...
Metadata CRC error detected at 0x55ff18867251, xfs_allocbt block 0x4ffc08/0x1000
btree block 2/1 is suspect, error -74
Metadata CRC error detected at 0x55ff18867251, xfs_allocbt block 0x8/0x1000
btree block 0/1 is suspect, error -74
bad magic # 0xb1bdccbd in btbno block 0/1
Metadata CRC error detected at 0x55ff18867251, xfs_allocbt block 0x77fa08/0x1000
btree block 3/1 is suspect, error -74
.
.
clearing reflink flag on inode 133
Phase 5 - rebuild AG headers and trees...
        - reset superblock...
Phase 6 - check inode connectivity...
reinitializing root directory
reinitializing realtime bitmap inode
reinitializing realtime summary inode
        - resetting contents of realtime bitmap and summary inodes
        - traversing filesystem ...
        - traversal finished ...
        - moving disconnected inodes to lost+found ...
disconnected inode 133, moving to lost+found
disconnected inode 137, moving to lost+found
disconnected inode 139, moving to lost+found
disconnected inode 140, moving to lost+found
Phase 7 - verify and correct link counts...
Maximum metadata LSN (2161919:-1) is ahead of log (1:20).
Format log to cycle 2161922.
done
Step-4: Once the file system is repaired, mount the partition.
sudo mount /dev/sdb1
2) Repairing XFS LVM Volume with xfs_repair
xfs_repair can be run on LVM logical volumes just like filesystems on standard partitions. Follow the below procedure for repairing a LVM partition:
Step-1: Make sure the specific LVM volume is in active state to run xfs_repair. To check the status of LVM, run:
sudo lvscan

  ACTIVE              '/dev/myvg/vol01' [1.00 GiB] inherit
  inactive            '/dev/myvg/vol02' [1.00 GiB] inherit
  ACTIVE              '/dev/rhel/swap' [2.07 GiB] inherit
  ACTIVE              '/dev/rhel/root' [<26.93 GiB] inherit
If it’s 'inactive', activate it by running the following command.
sudo lvchange -ay /dev/myvg/vol02 -v

  Activating logical volume myvg/vol02.
  activation/volume_list configuration setting not defined: Checking only host tags for myvg/vol02.
  Creating myvg-vol02
  Loading table for myvg-vol02 (253:3).
  Resuming myvg-vol02 (253:3).
Step-2: Unmount the device or filesystem that you want to run xfs_repair.
sudo umount /dev/myvg/vol02
Step-3: Run xfs_repair to repair the file system. You must enter the path of the LVM volume to run xfs_repair and not an actual physical partition.
sudo xfs_repair /dev/myvg/vol02

Phase 1 - find and verify superblock...
Phase 2 - using internal log
        - zero log...
        - scan filesystem freespace and inode maps...
Metadata CRC error detected at 0x5581eed67251, xfs_allocbt block 0x180008/0x1000
btree block 3/1 is suspect, error -74
invalid start block 4294967285 in record 0 of bno btree block 3/1
Metadata CRC error detected at 0x5581eed67251, xfs_allocbt block 0x100008/0x1000
btree block 2/1 is suspect, error -74
.
.
junking entry "messages-20211004" in directory inode 128
bad attribute format 1 in inode 140, resetting value
        - agno = 1
        - agno = 2
        - agno = 3
clearing reflink flag on inode 133
Phase 5 - rebuild AG headers and trees...
        - reset superblock...
Phase 6 - check inode connectivity...
reinitializing root directory
reinitializing realtime bitmap inode
reinitializing realtime summary inode
        - resetting contents of realtime bitmap and summary inodes
        - traversing filesystem ...
        - traversal finished ...
        - moving disconnected inodes to lost+found ...
disconnected inode 133, moving to lost+found
disconnected inode 137, moving to lost+found
disconnected inode 139, moving to lost+found
disconnected inode 140, moving to lost+found
disconnected inode 144, moving to lost+found
Phase 7 - verify and correct link counts...
Maximum metadata LSN (2161919:-1) is ahead of log (1:31).
Format log to cycle 2161922.
done
Step-4: Once the file system is repaired, mount the partition.
sudo mount /data
Conclusion
In this tutorial, we’ve shown you how to repair a corrupted XFS filesystems on Linux. Also, shown you how to run xfs_repair on the LVM volumes.
If you have any questions or feedback, feel free to comment below.
To repair an XFS file system, use xfs_repair:
#xfs_repair /dev/device
The xfs_repair utility is highly scalable and is designed to repair even very large file systems with many inodes efficiently. Unlike other Linux file systems, xfs_repair does not run at boot time, even when an XFS file system was not cleanly unmounted. In the event of an unclean unmount, xfs_repair simply replays the log at mount time, ensuring a consistent file system.
The xfs_repair utility cannot repair an XFS file system with a dirty log. To clear the log, mount and unmount the XFS file system. If the log is corrupt and cannot be replayed, use the -L option («force log zeroing») to clear the log, that is, xfs_repair -L /dev/device. Be aware that this may result in further corruption or data loss.
For more information about repairing an XFS file system, see man xfs_repair.
Hello, friends. In this post, we will explain a trick that can save a lot of work and even an entire system. So, today you will learn How to Check and Repair XFS Filesystem in RHEL/RockyLinux/CentOS.
Before we start, we need to talk a little about XFS.
XFS is a high-performance 64-bit journaling file system. Its virtues such as maturity, and debugged code, make it a preferred candidate for use on GNU/Linux servers.
Some main advantages of XFS are:
- Thanks to journaling, easy and fast recovery from data loss is possible. This feature is vital in a production server.
- With XFS, there is the possibility to enlarge the partition while it is mounted and active.
- XFS can execute I/O (Input/Output) operations in parallel.
And so on. That is why many servers with RHEL, RockyLinux and derivatives use it.
However, it is possible that it can fail us, so that is the reason for today’s post.
How to Repair XFS Filesystem in RHEL/RockyLinux/CentOS
Actually, to repair an XFS filesystem, you just need to run the following command
xfs_repair [option] [device]However, we have to have a corrupted XFS system, and this on a production system is fatal.
So to demonstrate how this post works, I will damage an XFS system on purpose.
Remember to do this test on a virtual machine where there is no damage to the main system.
Let’s suppose that our partition or device or system is mounted in /device first we must unmount it.
umount /deviceAnd now damage the file system by running
xfs_db -x -c blockget -c "blocktrash -s 512109 -n 1000" [device]For example,
sudo xfs_db -x -c blockget -c "blocktrash -s 512109 -n 1000" /dev/sdb1
And of course if you try to mount it you should get an error similar to this one
mount: /device: mount(2) system call failed: Structure needs cleaning. So, let’s fix it.
For that, the volume has to be unmounted.
And to repair it run the following command
xfs_repair [device]For example,
xfs_repair /dev/sdb1 At the end you will see an output screen similar to this one

So, the process has been extensive.Now just mount.
mount /dev/sdb1Enjoy it.
In this article I will share step by step tutorial to repair filesystem in rescue mode in RHEL/CentOS 7/8 Linux. It happens many time that our file system on the partition gets corrupted so as a Linux Administrator we have to make sure that the file system is repaired assuming it is in a state to be repaired). But nevertheless we must tru to repair file system.
Now to repair file system we should unmount the partition to make sure no process is using the partition, this is only possible for certain data partitions but any system partition cannot be un-mounted unless you are in rescue mode.
Also it is possible that your Linux node is not reachable so in such cases it becomes mandatory to boot into rescue mode and then perform repair of your file system.
So let us check how we can repair file system in rescue mode. I have verified these steps on RHEL/CentOS 7/8 environment, but the snippets will be from CentOS 8.0 Linux node installed as a Virtual Machine on Oracle Virtualbox.
ALSO READ: How to renew expired root CA certificate with openssl
Step 1: Boot into rescue mode in CentOS/RHEL 7/8 Linux
You can use Live DVD to boot into rescue mode which you had used to install your RHEL/CentOS 7/8 Linux node. Since I have already explained these steps in another article, I will be very brief here:
NOTE:
Here the output may differ depending upon your Linux environment, for example on CentOS you may see «Install CentOS Linux 8.0.XXXX«. You should concentrate on «Troubleshooting» TAB
Install Red Hat Enterprise Linux 8.0.0
Test this media & install Red Hat Enterprise Linux 8.0.0
Troubleshooting                                    <--- Select
On the next screen you will get below list of options
Install Red Hat Enterprise Linux 7.0 in basic graphics mode
Rescue a Red Hat Enterprise Linux system          <--- Select
Run a memory test

Boot from local drive

Return to main menu
In the next screen press «3» to skip to shell so that we can manually mount required file system

Step 2: Activate partitions (logical volume/raid)
This step can be optional if you do not of raid devices or logical volumes.
HINT:
If you only have partitions such as /dev/sda1, /dev/sdb1 etc then you can skip this step and directly go to Step 3: Repair filesystem in rescue mode
If using Software RAID then initialize raid array first
# mdadm --examine --scan

# mdadm --assemble --scan

If using LVM, activate the volumes in order to scan them.
# vgchange -ay
Next you can list your logical volumes and volume group using
# lvs  <-- To list logical volumes

# vgs  <-- To list volume groups
ALSO READ: How to set GRUB2 password using grub2-setpassword (RHEL / CentOS 7)
Step 3: Repair filesystem in rescue mode
Now since we have our partitions and logical volumes in the rescue mode and since we have not mounted them, they are not in use by system processes. So we can safely repair filesystem in rescue mode at this stage.
HINT:
We will use -f for force check even if the filesystem is marked clean and -v to print verbose output with e2fsck
To repair ext4 filesystem (logical volumes)
We will use e2fsck to repair ext4 filesystem sitting on top of logical volume
# e2fsck -fv /dev/mapper/<vg>-<lv>
For example: check below image where we repair logical volumes
# e2fsck -fv /dev/mapper/rhel-root

To repair ext4 filesystem (normal partition)
We will again use e2fsck to repair ext4 filesystem sitting on top of normal partition
# e2fsck -fv /dev/<sd device>
For example: check below image where we repair normal partition
# e2fsck -fv /dev/sda1

To repair software raid device
We will use e2fsck to repair ext4 filesystem sitting on top of raid device
For example: check below image where we repair software raid devices
# e2fsck -fv /dev/md0

To repair XFS Filesystem with xfs_repair
Now currently I don’t have a XFS filesystem so I cannot show you the output of the steps to repair XFS filesystem. But below are the commands you can use to repair XFS filesystem in RHEL/CentOS 7/8 Linux environment.
# xfs_repair /dev/mapper/<vg>-<lv>
or
# xfs_repair /dev/<sd device>
or
# xfs_repair /dev/<md device>
ALSO READ: How to create, open, find, remove dashed filename in Linux
Lastly after you repair filesystem in rescue mode you can now exit the rescue mode and boot the system normally. So, let me know your suggestions and feedback using the comment section.
Related Searches: Repair ext4 filesystem in Linux. How to repair xfs filesystem in RHEL/CentOS 7/8 Linux. How to repair filesystem in rescue mode in red hat enterprise Linux or CentOS 7/8
References:
How to repair filesystem in rescue mode for RHEL/CentOS 7/8 Linux
Didn’t find what you were looking for? Perform a quick search across GoLinuxCloud
If you’re attempting to run xfs_repair, getting the error message that suggests mounting the filesystem to replay the log, and after mounting still receiving the same error message, you may need to perform a forced repair (using the -L flag with xfs_repair). This option should be a last resort.
For example, I’ll use a case where I had a corrupt root partition on my CentOS 7 install. When attempting to mount the partition, I continually received the below error message:
mount: mount /dev/mapper/centos-root on /mnt/centos-root failed: Structure needs cleaning
Unfortunately, forcing a repair would involve zeroing out (destroying) the log before attempting a repair. When using this method, there is a potential of ending up with more corrupt data than initially anticipated; however, we can use the appropriate xfs tools to see what kind of damage may be caused before making any permanent changes.
Using xfs_metadump and xfs_mdrestore, you can create a metadata image of the affected partition and perform the forced repair on the image rather than the partition itself. The benefits of this is the ability to see the damage that comes with a forced repair before performing it on the partition.
To do this, you’ll need a decent sized USB or external hard drive. Start by mounting the USB drive — my USB was located at /dev/sdb1, yours may be named differently.
mkdir -p /mnt/usb
mount /dev/sdb1 /mnt/usb
Once mounted, run xfs_metadump to create a copy of the partition metadata to the USB — again, your affected partition may be different. In this case, I had a corrupt root partition located at /dev/mapper/centos-root:
xfs_metadump /dev/mapper/centos-root /mnt/usb/centos-root.metadump
Next, you’ll want to restore the metadata in to an image so that we can perform a repair and measure the damage.
xfs_mdrestore /mnt/usb/centos-root.metadump /mnt/usb/centos-root.img
I found that in rescue mode xfs_mdrestore is not available, and instead you’ll need to be in rescue mode of a live CentOS CD.
Finally, we can perform the repair on the image:
xfs_repair -L /mnt/usb/centos-root.img
After the repair has completed and you’ve assessed the output and potential damage, you can determine as to whether you’d like to perform the repair against the partition.
To run the repair against the partition, simply run:
xfs_repair -L /dev/mapper/centos-root
Don’t forget to check the other partitions for corruption as well. After the repairs, reboot the system and you should be able to successfully boot.
Remember that the -L flag should be used as a last resort where there are no other possible options to repair.
I found that these online articles helped:
- https://web.archive.org/web/20140920034637/http://geekblood.com/2014/08/13/filesystem-corruption-xfs-and-rhelv7/
- https://web.archive.org/web/20160319163101/http://oss.sgi.com/archives/xfs/2015-01/msg00503.html
- http://dhoytt.com/blog/2015/07/26/xfs-filesystem-repair-gets-web-server-back/
The XFS File system is a high-performance journaling file system. XFS supports a maximum file system size of 500 TB and a maximum file size of 16 TB. You can create an XFS file system on a regular disk partition and on a logical volume. It performs incredibly well under a heavy load and scales with large files, but as a result, it is also susceptible to damage, and it is with this in mind that we now consider a set of tools that will enable us to troubleshoot the server and restore the filesystem.
Additional XFS utilities are available to perform file system maintenance. These utilities include the following:
- xfs_fsr: XFS is an extent-based file system. The xfs_fsr utility reorganizes and improves the layout of the file extents, which improves overall performance. Run this command on a mounted XFS file system or on individual files in the file system.
- xfs_repair: Repair a corrupted or damaged XFS file system. Unmount the file system before running this command. If the file system cannot be repaired, restore files from a backup with xfsrestore.
- xfs_db: Debug an XFS file system. This utility provides a command set that allows you to perform scans on the file system and to navigate and display its data structures.
Repair a XFS filesystem using xfs_repair
The xfs_repair utility can be used to repair a corrupted or damaged XFS file system. The basic syntax used by xfs_repair is as follows:
# xfs_repair /mount/point
NOTE: Make sure you umount the XFS filesystem first before running the xfs_repair command.
Similar to the fsck utility, the xfs_repair utility fixes unmounted xfs filesystems in series of phases. Sample output from an XFS repair is as shown below:
# xfs_repair /dev/mapper/vg_test-lv_test
Phase 1 - find and verify superblock...
        - reporting progress in intervals of 15 minutes
Phase 2 - using internal log
        - zero log...
        - scan filesystem freespace and inode maps...
        - 12:57:37: scanning filesystem freespace - 291 of 291 allocation groups done
        - found root inode chunk
Phase 3 - for each AG...
        - scan and clear agi unlinked lists...
        - 12:57:37: scanning agi unlinked lists - 291 of 291 allocation groups done
        - process known inodes and perform inode discovery...
        ...
        ...
Metadata corruption detected at xfs_inode block 0x60/0x2000
Metadata corruption detected at xfs_inode block 0x60/0x2000
Metadata corruption detected at xfs_inode block 0x60/0x2000
Metadata corruption detected at xfs_inode block 0x60/0x2000
Metadata corruption detected at xfs_inode block 0x60/0x2000
Metadata corruption detected at xfs_inode block 0x60/0x2000
Metadata corruption detected at xfs_inode block 0x60/0x2000
Metadata corruption detected at xfs_inode block 0x60/0x2000
Metadata corruption detected at xfs_inode block 0x60/0x2000
Metadata corruption detected at xfs_inode block 0x60/0x2000

Phase 4 - check for duplicate blocks...
        - setting up duplicate extent list...
        - 12:57:37: setting up duplicate extent list - 291 of 291 allocation groups done
        - check for inodes claiming duplicate blocks...
Phase 5 - rebuild AG headers and trees...
        - 12:57:37: rebuild AG headers and trees - 291 of 291 allocation groups done
        - reset superblock...
Phase 6 - check inode connectivity...
        - resetting contents of realtime bitmap and summary inodes
        - traversing filesystem ...
        - traversal finished ...
        - moving disconnected inodes to lost+found ...
Phase 7 - verify and correct link counts...
        - 12:57:37: verify and correct link counts - 291 of 291 allocation groups done
done
If you just want to check for filesystem problems, but not fix any problems, run the xfs_check command instead of the xfs_repair command.
# xfs_check /dev/mapper/vg_test-lv_test
Metadata corruption detected at xfs_inode block 0x40/0x8000
Metadata corruption detected at xfs_inode block 0x40/0x8000
Metadata corruption detected at xfs_inode block 0x40/0x8000
Metadata corruption detected at xfs_inode block 0x40/0x8000
Metadata corruption detected at xfs_inode block 0x40/0x8000
Metadata corruption detected at xfs_inode block 0x40/0x8000
Metadata corruption detected at xfs_inode block 0x40/0x8000
Metadata corruption detected at xfs_inode block 0x40/0x8000
Metadata corruption detected at xfs_inode block 0x40/0x8000
Metadata corruption detected at xfs_inode block 0x40/0x8000
bad magic number 0xfe3d for inode 100
bad magic number 0xa756 for inode 101
bad magic number 0xd375 for inode 102
bad magic number 0x88f5 for inode 103
bad magic number 0xc7cd for inode 104
bad magic number 0xc95 for inode 105
bad magic number 0xaeaf for inode 106
bad magic number 0x10c4 for inode 107
bad magic number 0xf137 for inode 108
bad magic number 0x8157 for inode 109
         69 file1
You can alsu use the “xfs_repair -n” command to do a dry run for xfs_repair. Some distributions does not include the xfs_check command. In that case you can use this option as they work in the same way.
# xfs_repair -n /dev/mapper/vg_test-lv_test
.....
Phase 7 - verify link counts...
        - 13:02:55: verify and correct link counts - 291 of 291 allocation groups done
No modify flag set, skipping filesystem flush and exiting.