

Описание индикаторов состояния
127
4. Устранение неисправностей
Status
Описание
Индикатор
Состояние
Выключен
Устройство выключено.
Зеленый
Мигает
Мигание означает, что устройство выполняет печать.
Включен
• Устройство включено и готово к использованию.
Красный
Мигает
• Произошла несущественная ошибка, и устройство ожидает ее сброса. Прочтите
сообщение на дисплее. После сброса ошибки устройство продолжит выполнение
операции. Эта функция недоступна для моделей, не оснащенных дисплеем на панели
управления.
• В картридже осталось небольшое количество тонера. Предположительный срок
службы картриджа истекает. Приготовьте новый картридж для замены. Качество
печати можно временно улучшить путем перераспределения тонера (см.
«Перераспределение тонера» на стр. 98).
Включен
• Предположительный срок службы картриджа почти истек
a
. Рекомендуется заменить
картридж с тонером (см. «Замена картриджа» на стр. 100).
• Открыта крышка. Закройте крышку.
• В лотке отсутствует бумага. Загрузите бумагу в лоток
• Работа устройства остановлена из-за серьезной ошибки. Прочтите сообщение на
дисплее (см. «Сведения о сообщениях на дисплее» на стр. 128).
a. Расчетный срок службы картриджа определяется средним количеством отпечатков согласно стандарту ISO/IEC 19752. Фактический ресурс,
исчисляемый в страницах, зависит от условий эксплуатации, интервала печати, типа и размера материалов для печати. Даже если индикатор
загорается красным и принтер прекращает печать, в картридже может оставаться некоторое количество тонера.
Индикатор
Беспрово
дн
Синий
Включен
Когда устройство подключено к беспроводной сети, индикаторБеспроводная сеть
загорается синим светом.
You are here: Home / error code / Samsung SCX5637FR model and fix error codes list
– Compatible Printer model: Samsung SCX5637FR
– Samsung SCX5637FR Error Codes with quick guides:
- Code: A1-1110
- Display: Error #A1-1110: Turn off then on.
- Description: After working the main BLDC motor, the Ready signal has not occurred within 1 sec. 1. Harness is defective. Connector is not connected properly. 2. OPC coupler in the toner cartridge has overloaded. 3. Main BLDC motor is defective. 4. Engine board is defective.
- Troubleshooting Guides: First, turn the machine off then on. If the error persists, refer to the following. 1. Check if the motor connector is connected properly. Reconnect it. 2. OPC coupler has overloaded. After removing the toner cartridge, rotate the OPC coupler. (Spec : 6 kgf.cm) If there is any damage, the OPC coupler can’t rotate well. Replace the toner cartridge. 3. The main BLDC motor is defective. – Unplug the connector from the motor carefully. – Replace the main BLDC motor with new one. 4. If the problem persists, replace the main board.
- Code: C1-1110, C1-1120
- Display: Prepare new cartridge / Replace new cartridge
- Description: The remaining toner cartridge is less than 10% The toner cartridge is at the end of its life.
- Troubleshooting Guides: 1. Print the supply information report. (Menu > System Setupr > Report > Supplies Info.) Check the life remaining of the toner cartridge. If its life is at the end, turn the machine off and replace the toner cartridge with new one.
- Code: C1-1410, C1-1411
- Display: Install toner cartridge.
- Description: The toner cartridge is not installed.
- Troubleshooting Guides: 1. Turn the machine off then on. 2. Remove the toner cartridge. Thoroughly roll the cartridge ve or six times to distribute the toner evenly inside the cartridge. And reinstall the toner cartridge
- Code: C1-1512
- Display: Not Compatible Toner cartridge.
- Description: Toner cartridge is not compatible.
- Troubleshooting Guides: 1. Print the supply information report. Check information of the toner cartridge. 2. If the toner cartridge is not a Samsung genuine toner cartridge, replace with new one.
- Code: H1-1210
- Display: Paper jam in Tray2.
- Description: A paper jam was detected in the feed area of the tray2. 1. Paper was inserted abnormally or was not loaded in the cassette properly. 2. Pick Up unit has a problem.
- Troubleshooting Guides: 1. Open the Tray2 and remove the jammed paper. 2. If there is any defective part in the pick up unit, replace it.
- Code: H1-1222
- Display: Pulled Out Tray2 Cassette
- Description: The option tray is not inserted perfectly.
- Troubleshooting Guides: 1. Remove and re-install the option tray.
- Code: H1-1252, M1-5212
- Display: Paper is empty in Tray2.
- Description: Paper is empty in Tray2. The status LED is red. 1. There is no paper in the tray2. 2. Actuator-Paper Empty is defective. 3. Photo Sensor is defective or connection is bad. 4. Main Board is defective.
- Troubleshooting Guides: 1. Load the paper in the tray2. 2. If the Actuator-Paper Empty is defective, replace it. 3. If the Photo Sensor is defective, replace it. Check if the connector is connected properly. 4. If the problem persists, replace the Main Board.
- Code: M1-1010, M1-1110, M1-1210
- Display: Paper Jam in Tray1. Paper Jam in Tray1. Paper Jam in Tray2.
- Description: The jammed paper has occurred in the tray1,2 1. Pick-Up or Torque Limiter Roller is contaminated or worn out. 2. There is some obstacles in the paper path.
- Troubleshooting Guides: 1. Clear the jammed paper (refer to 4.1.3.2). If the problem persists, check the following. 2. While pushing the Paper Empty Sensor, send the printing data. Check if the pick up roller is rotating normally. 3. Check if there is any obstacles in the paper path (from Pick-Up to Feed Sensor). The feed roller should be especially checked. 4. Print out the Supplies Information. Check the Tray 1,2 Roller Life and Tray1,2 Torque Limiter Life. If the life came to the end, replace the relative roller.
- Code: M1-1610
- Display: Paper Jam in MP tray.
- Description: The jammed paper has occurred in the MP tray. 1. MP Pick-Up or MP Torque Limiter Roller is contaminated or worn out. 2. There is some obstacles in the paper path.
- Troubleshooting Guides: 1. Clear the jammed paper. If the problem persists, check the following. 2. While pushing the Paper Empty Sensor, send the printing data. Check if the pick up roller is rotating normally. 3. Check if there is any obstacles in the paper path (from Pick-Up to Feed Sensor). The feed roller should be especially checked. 4. Print out the Supplies Information. Check the MP Tray Roller Life and MP Tray Torque Limiter Life. If the life came to the end, replace the relative roller or MP Unit.
- Code: M1-2210, M1-3221
- Display: Tray2 Door Open. Close it. Not installed tray2.
- Description: The option tray is not inserted perfectly.
- Troubleshooting Guides: Remove and re-install the option tray.
- Code: M1-5112
- Display: Paper is empty in tray 1.
- Description: Paper is empty in Tray1. The status LED is red. 1. There is no paper in the tray1. 2. Actuator-Paper Empty is defective. 3. Photo Sensor is defective or connection is bad. 4. Main Board is defective.
- Troubleshooting Guides: 1. Load the paper in the tray1. 2. If the Actuator-Paper Empty is defective, replace it. 3. If the Photo Sensor is defective, replace it. Check if the connector is connected properly. 4. If the problem persists, replace the Main Board.
- Code: M1-5612
- Display: Paper Empty in MP Tray.
- Description: Paper is empty in MP Tray. The status LED is red. 1. There is no paper in the MP tray. 2. Actuator-Paper Empty is defective. 3. Photo Sensor is defective or connection is bad. 4. Main Board is defective.
- Troubleshooting Guides: 1. Load the paper in the MP tray. 2. If the Actuator-Paper Empty is defective, replace it. 3. If the Photo Sensor is defective, replace it. Check if the connector is connected properly. 4. If the problem persists, replace the Main Board.

Solve Samsung SCX5637FR Error codes
- Code: M2-1110
- Display: Paper Jam inside machine.
- Description: A paper jam was detected at the feed sensor. 1. The feed sensor is defective. 2. The Regi Roller was contaminated or worn out. 3. There is some obstacles in the paper path. 4. The driving for the toner cartridge has some problem. 5. The driving for the fuser unit has some problem.
- Troubleshooting Guides: 1. Remove the jammed paper. If the error persists, check the followings. 2. Check if the feed sensor connector is connected properly. Feed sensor Regi. sensor 3. Check if the Regi roller is contaminated or worn out. If yes, replace it. 4. Check if there is any obstacles or contamination in the paper path. If yes, clean or remove it.
- Code: M2-2310
- Display: Paper Jam bottom of duplex.
- Description: A paper jam was detected in the bottom of duplex. 1. There is some obstacles in the paper path. 2. The paper guide in the tray was not adjusted properly. 3. The exit sensor was not assembled properly.
- Troubleshooting Guides: 1. Remove the jammed paper. 2. Remove the contamination or obstacles in the paper path. 3. Adjust the paper guide properly. 4. Check if the exit sensor is assembled properly. Reassemble it.
- Code: M3-1110
- Display: Paper Jam in exit area.
- Description: A paper jam was detected in the exit area. 1. There is some obstacles in the paper path.
- Troubleshooting Guides: 1. Remove the jammed paper. 2. Check if there is any obstacles or contamination in the paper path. If yes, clean or remove it.
- Code: M3-2130
- Display: Output bin full. Remove paper.
- Description: The machine detected that the output tray has got full or the bin-full sensor is defective. 1. Output tray is full. 2. Outbin full sensor connection is wrong.
- Troubleshooting Guides: 1. Remove the paper on the output tray. (The maximum loading capacity is 150 sheets based on standard paper(80g/m2).) 2. Check if the Bin-full Sensor connector is connected properly. Reconnect it or replace the Bin-full sensor.
- Code: S1-2411
- Display: Error #S1-2411 Turn off then on.
- Description: A communication error failure has occurred at HDD of main controller.
- Troubleshooting Guides: 1. Format the hard disk. 2. If the problem persists, replace the hard disk.
- Code: S2-4110
- Display: Door open. Close it.
- Description: Door is open or the cover open switch is defective. The status LED is red.
- Troubleshooting Guides: 1. Check if the front door is closed perfectly. 2. Check if the rear door is closed perfectly. 3. Check if the connection between the main board and HVPS board is correct. 4. Check if the cover open switch on HVPS board is operated properly. If it is defective, replace the HVPS board.
- Code: S3-3121
- Display: Scanner Locked.
- Description: Scanner lock error has occurred. CIS does not move.
- Troubleshooting Guides: 1. Check if the CIS unit is moving when power on. 2. Check if the at cable is connected to the CIS unit properly. Re-connect or replace the cable. 3. If the CIS is defective, replace it. 4. Check if there is any defective part in the scanner unit. (Gear, Belt, Motor etc.) 5. If the problem persists, replace the main board.
- Code: S4-2111, S4-2112
- Display: Memory Full. Remove Job.
- Description: The fax memory is almost full.
- Troubleshooting Guides: Print or remove the received fax job in Secure Recieve.
- Code: S6-3123
- Display: Network Problem: IP Con ict.
- Description: Network has some problem. – IP address con icts with that of other system. – Communication error – There is no response when checking the ping test.
- Troubleshooting Guides: Change the machine’s IP address. – Set-up the IP address in this order, Network -> TCP/IP (IPv4) -> STATIC. – In case of DHCP or Bootp, reboot the machine to receive a new IP address.
- Code: S6-3128
- Display: 802.1x Network Error.
- Description: 802.1x Network Error – The con rmation was requested for wired port, the server has rejected. – The con rmation protocol is not the same or user information (ID/Password) is wrong.
- Troubleshooting Guides: Check the setting-up for 802.1x con rmation server. – Re-enter the server information and con rmation protocol. – Re-enter the user information.new IP
- Code: U1-2320
- Display: Error #U1-2320 Turn off then on.
- Description: The temperature control of fuser unit is abnormal. (Open Heat Error)
- Troubleshooting Guides: 1. Turn the machine off. Re-install the fuser unit. Then turn the machine on. Is the error message is disappeared? 2. If the problem persists, turn the machine off and remove the fuser unit. Check if the fuser connector is connected properly. Check if the input voltage is normal.
- Code: U1-2330
- Display: Error #U1-2330 Turn off then on.
- Description: The temperature control of fuser unit is abnormal. (Low Heat Error)
- Troubleshooting Guides: 1. Turn the machine off. Re-install the fuser unit. Then turn the machine on. Is the error message is disappeared? 2. If the problem persists, turn the machine off and remove the fuser unit. a. Check if the fuser connector is connected properly. b. Check if the input voltage is normal. c. Check if the thermistor is twisted or contaminated.
- Code: U1-2340, U1-2341
- Display: Error #U1-2340 Turn off then on. Error #U1-2341 Turn off then on.
- Description: The temperature control of fuser unit is abnormal. (Over Heat Error)
- Troubleshooting Guides: 1. Turn the machine off. Re-install the fuser unit. Then turn the machine on. Is the error message is disappeared? 2. If the problem persists, turn the machine off and remove the fuser unit. a. Check if the fuser connector is connected properly. b. Check if the input voltage is normal. c. Check if the thermistor is twisted or contaminated.
- Code: U2-1111, U2-1113
- Display: Error #U2-1111 Turn off then on. / Error #U2-1113 Turn off then on.
- Description: LSU Motor does not work normally. 1. Harness connection error. 2. LSU is defective. 3. Main board is defective.
- Troubleshooting Guides: 1. Execute the LSU motor test in EDC mode. Check LSU motor operation sound. 2. If there is no sound, remove the right cover. Check if the LSU harness is connected on the main board properly. 3. If it is OK, remove the top cover. Check if the LSU harness is connected on LSU board properly. 4. Check if the LSU harness is defective. 5. Reconnect the LSU harness and then execute the LSU motor test again. 6. If the problem persists, replace the LSU. 7. If the problem persists after replacing LSU, replace the main board.
- Code: U3-3113, U3-3114, U3-3213, U3-3313, U3-3314
- Display: Document jam. Remove jam.
- Description: A document jam was detected in ADF/DADF unit.
- Troubleshooting Guides: 1. Remove the jammed paper. 2. If the problem persists, turn the machine off then on. 3. Open the ADF/DADF COVER-OPEN. Check if the roller in pick up unit is worn out or contaminated. Replace the pick up unit. 4. If the document jam occurs continually, check the following. a. Check if the ADF/DADF drive unit is working normally. b. Check if the connection between ADF/DADF and scanner is OK.
- Code: U3-4110
- Display: Door of scanner is open.
- Description: Scanner door is not closed correctly.
- Troubleshooting Guides: Close the scanner door.
– Get more information about Epson XP 15000 troubleshooting, click here
– Get more error code list with quick guide to fix printer product, click here
– About get help with reseting Epson inkpad or others, click here
Samsung printer reset software introduction:
Notes before resetting Samsung printer:
– Identify accurate version, serial and crum of Samsung printer.
– How to get Samsung printer model info: Click Here
– Before you continue with the reprogramming of the firmware, please make sure that the device is installed on your computer.
– It is very important that under no circumstances should you remove the chip from the cartridge while reprogramming the firmware. After you have succesfully reprogrammed the printer, remove the chip from the cartridge and store it somewhere safely (the chip – a key). In all cartridges which you are going to use in the printer, the chip has to be either removed or sealed. If you have accidently inserted a new cartridge without removing the chip, the device will be blocked. In order to unblock it, you can use the stored chip as a key which help you to unblock the printer.
– And make sure that any other devices (except mouse and keyboard), which are connected to your computer via USB or LPT ports are disconnected. It’s preferable that the computer is connected to the “UPS” (uninterruptible power source) device, because if during the reprogramming process the electricity source has any interruptions, then the reprogramming will be carried out with an error, which makes the device unable to work.
– This firmware will be installed directly to your printer. Before opening firmare link make sure that printer is turned on and connected to your computer and printer drivers are installed correctly.
Be aware that with the reprogramming of the firmware the manufacturer’s warranty goes lost!!
How To Run Firmware Fix Samsung printer
1. Connect the printer to the computer and turn it on.
2. Wait until the printer is ready for work.
3. Drag and drop *.hd to usbprns2.exe file.

4. The reprogramming process starts automatically.
5. Wait until the printer reprograms (10-20 minute) and restarts.
6. After that the reprogramming process is finished, restart the printer.
Contact us to get support with Samsung SCX5637FR Error case
Telegram: https://t.me/hyperaktiv
Facebook: https://www.facebook.com/dngnm/
Or click here to get more ways.
- Печать
Страницы: [1] Вниз

Тема: Samsung SCX-5637FR не инициализируется (Прочитано 8253 раз)
Назва модели Samsung SCX-5637FR
Серийный номер Z5W3BJIC70000JE
CRUM 12052936209
ВЕРСИЯ ПО V.2.00.01.23
Делал заявку в разделе «Мне нужна прошивка», прошивку не получил. Купил вот эту: FIX_NU_Z5W3BJIC70000JE
Прошился аппарат успешно, версия повысилась (по памяти вроде стала 30), буква добавилась. Чип заклеил. Где то неделю печатали на оставшемся тонере. Потом заправил. Где то еще две недели печатали. В пятницу выключили и вытянули с розетки. В понедельник включили, не проходит инициализацию. На дисплее пишет initializing.
Что может быть?
Где взять оригинальную прошивку? И какая версию зальется: 23 или 30?
Как войти в принудительный режим?
PS Нашел:
Принудительный режим: при зажатой [Stop] нажать [Power], отпустить [Stop] и быстро еще раз нажать [Stop]
Вход в сервисное меню: [Menu] # [1] [9] [3] [4]
Просмотр версии прошивки на дисплее: [Menu] # [1] [9] [3] [4] #
Печать отчета: [Menu] [System Setup] [Ok] [Left-Right найти Report] [Ok] [Configuration] [Suplies Info] [Ok]
Если МФУ заблокировано, войти в сервисное меню и затем [Report] [Configuration] [Suplies Info]
« Последнее редактирование: Июнь 28, 2013, 07:32:23 pm от SergeyKorotun »

Записан
Bключить аппарат удерживая кнопку [STOP], и отпустить её. Появится надпись «Download Mode Press Stop Key», нажать [STOP] ещё раз, появится надпись «Wait Image»
Оригинал 30 You are not allowed to view links.
Register or Login
Записан
Купить прошивку на Xerox B205, B210, B215; Samsung M2020, HP 135a, HP 107r, 150a, 150nw и другие: You are not allowed to view links.
Register or Login
МФУ на гарантии. Залить оригинальную, купить новый картридж и в ремонт? Или можно что-то сделать и самому?
Причина неинициализации может быть в прошивке, на которой мфу месяц отработал?
На форумах пишут что причина или в БП или форматере, а не в прошивке.
« Последнее редактирование: Июнь 28, 2013, 07:43:32 pm от SergeyKorotun »
Записан
МФУ на гарантии. Залить оригинальную, купить новый картридж и в ремонт? Или можно что-то сделать и самому?
Причина неинициализации может быть в прошивке, на которой мфу месяц отработал?
На форумах пишут что причина или в БП или форматере, а не в прошивке.
сколько копии пропечатало
Записан
На родном картридже около 3000. Сколько сейчас — не знаю. МФУ не у меня. Завтра или послезавтра узнаю. Вы ожидаете 5000?
А после заливки оригинальной прошивки удастся повторно залить фикс при том же чипе на картридже, что и при первой прошивке?
Записан
а где был куплен фикс? туда обращался?
Записан
Не обращался. У меня есть еще одна прошивка. Завтра-послезавтра попробую ей прошить и если с ней заработает, тогда опубликую продавца.
Записан
Сразу после включение выключателем, тем что возле шнура 220В, без нажатия на кнопку Power, моментально пишет initializing и вроде бы ничего далее не тестирует (не слышно чтобы прокручивал валы картриджа). Отчеты распечатать не дает. В принудительный режим входит, но снова без кнопки Power (т.е. при зажатой Stop включил тумблером, отпустил Stop и еще раз нажал Stop). На чипе скотч снял, запустил заливку оригинальной прошивки, пробежало от 0 до 100%, потом на долю секунды что-то еще на мониторе написало, прочитать не успеваю и сразу ж без перезагрузки initializing.
Фикс не стал заливать. Предложил купить новый картридж и сдать на ремонт по гарантии. Вот только не уверен — загрузилась ли оригинальная прошивка.
Записан
Я не видел данный аппарат, если был бы не на гарантии, посмотрел бы можно ли туда воткнуть дебаг, но я думаю что можно… 
Записан
зашита от лутова там 0х1400 (5120) или 0х1100 (4352) вот такие число копии. но после заливки оригинала должен работать, и прошить под другой крум чип не получится, нужен именно этот крум чип которым первый раз прошивали.
Записан
Распечатать отчет не дает.
Оригинал заливал с Ответ #1
Чип был тот же, что и при первой прошивке.
Записан
- Печать
Страницы: [1] Вверх
Samsung SCX-5637FR — при включении «initializing»
Модератор: vetal

![]() pitercom » Вт апр 30, 2013 8:43 am
pitercom » Вт апр 30, 2013 8:43 am


 есть флешка SanDisk
Добавлено спустя 1 минуту 1 секунду:
Терминал начало срезал
-

pitercom
- Заправил картридж
-
![]()
![]() pitercom » Вт апр 30, 2013 8:55 am
pitercom » Вт апр 30, 2013 8:55 am
Пробовали то же самое
Добавлено спустя 40 минут 27 секунд:
Может у кого есть оригинальная прошивка, попробовать её залить
-
pitercom
- Заправил картридж
-
![]()
![]() si7 » Вт апр 30, 2013 11:36 am
si7 » Вт апр 30, 2013 11:36 am
-
si7
- Осматривается
-
![]()
![]() flipper » Ср июн 12, 2013 5:24 pm
flipper » Ср июн 12, 2013 5:24 pm
В общем у меня ситуация практически такаяже.МФУ пишит инициализация циклически перезагружаясь.В принудительный режим входит,обновил прошивку оригинальную версии 33 (влилась на ура)но ситуация осталась такаяже-циклический перезагруз.Б.П проверил.Заметил одну особенность если выдернуть флешку san disk -пишит инициализация но уже без перезагрузок.
Вот и возникает вопросик может у когото есть образ этой флешки чтобы форматнуть и записать данные.
Свою я прочитал вот что там есть
http://rghost.ru/46703308
Мне кажется что чегото там не хватает ведь перезагруз идёт тогда когда идёт обращение к флешке.
-

flipper
- Заправщик
-

![]()
-
-
samsung clx-3305 «замятие 1» HELP
scrcrw в форуме Принтеры, МФУ, факсы, копиры формата A4
- 14
- 15638
scrcrw

Пт сен 08, 2017 2:49 pm
-
samsung clx-3305 «замятие 1» HELP
-
-
«Двудулка» Samsung 2015
Greka в форуме Принтеры, МФУ, факсы, копиры формата A4
- 3
- 7030
sm1100
Чт июл 02, 2015 11:00 pm
-
«Двудулка» Samsung 2015
-
-
Samsung CLP-315 «Замятие» Ны выходе
FREIDE в форуме Принтеры, МФУ, факсы, копиры формата A4
- 27
- 25933
Князь
Вт авг 13, 2013 6:20 am
-
Samsung CLP-315 «Замятие» Ны выходе
-
-
Samsung C460W и разминка для «ума»
Юрий Шипуля в форуме Принтеры, МФУ, факсы, копиры формата A4
- 10
- 11102
sm1100
Вт апр 11, 2017 12:40 pm
-
Samsung C460W и разминка для «ума»
-
-
Samsung SCX-3400 «Черный фон»
Алишер Рузиев в форуме Принтеры, МФУ, факсы, копиры формата A4
- 13
- 14683
OLIGATOR
Ср фев 24, 2021 5:18 am
-
Samsung SCX-3400 «Черный фон»
Вернуться в Принтеры, МФУ, факсы, копиры формата A4
Кто сейчас на форуме
Сейчас этот форум просматривают: нет зарегистрированных пользователей и гости: 112
hp-detect-load-my-device-portlet
![]()
Действия
- ${title}
Загрузка…
hp-product-information-portlet
![]()
Действия
- ${title}
Загрузка…
У вас уже есть учетная запись HP? Выберите продукты, которыми вы владеете.
Войти
/
Зарегистрироваться
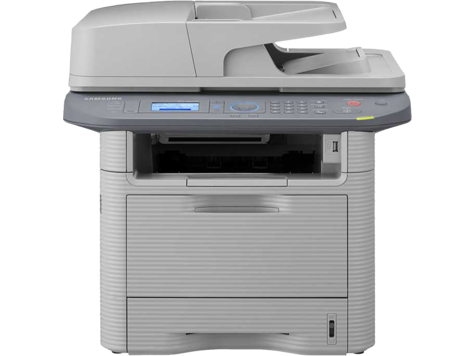
Серия лазерных МФУ Samsung SCX-5637
Выбрать другие серии продуктов
![]()
Добавить этот продукт в личную панель


Этот продукт был добавлен в личную панель
hp-product-builder-portlet
![]()
Действия
- ${title}
Загрузка…
hp-pdp-secondary-navigation-portlet
![]()
Действия
- ${title}
Загрузка…
hp-promotion-tiles-portlet
![]()
Действия
- ${title}
Загрузка…
hp-country-locator-portlet
![]()
Действия
- ${title}
Загрузка…
Страна/регион:

Казахстан
hp-product-warranty-check
![]()
Действия
- ${title}
Загрузка…