

VR has come a long way to the point where it’s a viable consumer experience now. Games like VRChat continue to push the boundaries of what you can do in a virtual world. That said, it’s still a relatively new technology, and some bugs and glitches are to be expected from time to time.
In this article, we’re talking about the “error saving blueprint” in VRChat issue, its causes and what you can do to fix the problem.
What causes this error?
The error can be caused by a number of errors. Common causes include:
- Outdated VRChat SDK version.
- Outdated Unity version.
- Issues with the blueprint itself.
Also read: How to fix UPNP not successful?
How to fix this?
Here are three fixes you can try out.
Update VRChat SDK
The first thing you should do is try and update the VRChat SDK. You can download the latest SDK version from VRChat’s website here. Once the SDK is downloaded, delete the VRCSDK folder and VRCSDK.meta files in the Assets and Plugins folders within your VRChat asset project’s folder. Finally, import the new SDK in Unity by clicking on Assets followed by Import Package and then Custom Package.
Also read: Why is Guided Access not working? Quick Fix
Remove the Animator Controller
Since VRChat assets require motion, a lot of users use the Unity Animator Controller to add animations for motions to their modes. This can sometimes mess with a VRChat blueprint import. Try removing the Animator Controller and importing your model again to see if that resolves the error
Update Unity version
Updating Unity to the latest version can also help resolve the error. While Unity should keep itself updated by default, in case you’ve disabled that behaviour, you can head over to the Unity website and download the latest version. You can chose to keep two separate versions of Unity on your PC but it’s recommended that you use the latest one for VRChat related projects.

Also read: Why is Vizio sound bar not working?

Yadullah is a Computer Science graduate who writes/edits/shoots/codes all things cybersecurity, gaming, and tech hardware. When he’s not, he streams himself racing virtual cars. He’s been writing and reporting on tech and cybersecurity with websites like Candid.Technology and MakeUseOf since 2018.
You can contact him here: [email protected]
Go to VRchat
r/VRchat
r/VRchat
Welcome to the community-driven subreddit for VRChat, a virtual universe home to thousands of unique worlds!
Members
Online
•
by
Swellionite
Following the Unity 2019 I get this error message followed by a start-up crash. Is there anyone else experiencing this issue? I am unable to play VRChat due to this. I’ve updated all graphics drivers and have reinstalled fully my version of VRChat. Any help appreciated.

Archived post. New comments cannot be posted and votes cannot be cast.
More posts you may like
VRChat
MMO
Gaming
Oculus Rift HMD doesn’t turn on or display when loading world in VRChat[]
Make sure if your scene has fog enabled, that you have a value specified higher than 0, or turn off fog. You can find fog settings under your scene lighting.
Unity3D crashes when building a scene[]
This is known to occur when a reference camera is assigned in the scene descriptor (such as when adding post processing effects), and a water object is added to the scene that uses its own camera to produce reflections. Either remove the reference camera, or remove the water.
It is also useful to know that you can figure out what causes a crash by a process of elimination by way of disabling half the objects in your scene (except those you need to be able to build) and then building to see what happens. Keep disabling more and more until the crash goes away, and you’ve found the offending object.
Model/Avatar is see through from the front, or seems like the visible faces of the model is inside out[]
You need to flip the ‘normals’ of any polygon that is not facing the right direction so that Unity knows the correct side of a polygon is never seen and thus shouldn’t be drawn (culled).
Either try click ‘recalculate normals’ in Unity in the inspector window when the model is selected in the project window, and pray… or you will have to manually ‘flip’ the normal in a 3D modeling program such as Maya or Blender.
Model/Avatar has blinking white dots in VRChat[]
In Unity try removing any specular map or setting the material from Standard (Specular) to just Standard.
Model tears apart during animation, polygons are not connected[]
Open the model in a 3D Modeling studio such as Maya or Blender and make sure that you remove doubles for vertices to force nearby vertices to combine, thus joining nearby polygons.
You may need to combine multiple mesh objects (if available) into one single mesh object before removing doubles.
Some parts of the model stretch weirdly or do not move at all during animating[]
Some bones may need to be manually rotated in Unity’s bone assignment configuration screen. For instance the fingers of your model may be malformed, due to the bones assigned to the fingers having a bad rotation applied.
You may need to manually fix some of the rigging weights (which vertices of your models polygons are influenced by the motions of which bones, and how strong that influence may be) and in the case of polygons that don’t move, make sure their vertices have been weighted to the required bone. Sometimes you may also have vertices that are weighted too strongly or simply to the wrong bone. This requires a 3D modeling studio to repair such as Maya or Blender.
My model/avatar looks far too flat, I can see all the polygons[]
Try applying a smooth shader operation in the 3D modeling studio of your choice. Make sure you understand how to mark edges as ‘sharp’ or how to manually shade only the polygon faces that need it.
My avatar causes everyone in VR Chat to have severely reduced frame rate[]
In general, try to make sure your avatar has less than 20,000 polygons. Use a 3D modeling studio to reduce the polygon count. In particular you may use the ‘Decimate’ modifier in Blender to easily reduce the polygon count to below 20,000 polygons with only a few clicks.
Additionally, ensure your model has as few materials as possible, preferably only one(Less than 5 if you don’t know how to texture atlas). A technique to do this is called «Texture Atlasing» and can be done either automatically through a tool like CATS Blender tool, or manually (for significantly better results)
Having more than 1 mesh will also cause an decrease in performance due to render times.
Particle effects can also lead to performance issues if set too high or too dense.
Certain types of shaders that change textures into a more 3 dimensional shape or cause a lot of render times will also cause performance issues.
My avatar appears partially in the ground[]
You need to make sure the feet of your avatar are at the x,y and z 0 location in the 3d modeling program before it is exported as an FBX, etc. Alternatively, you can make your avatar a child of an empty gameobject and apply any rotations to the gameobject instead, however it is better to fix the orientations on the model itself than to work around it using empty parents, as using empties for various models will eventually clutter and get your scene messy.
My avatar does not appear/I am a stuck as a blue transparent person[]
Make sure you set the models animation type to humanoid and applied the change before you compile the .vrca file.
The bump/normal map on my Avatar looks weird, or slightly off[]
If Unity warns you that the texture hasn’t been marked as a normal map, navigate to the normal map section of the selected material and select the «Fix This» button. It is recommended that you manually alter the many settings to get it to look just right. An example of this being particular imported game models from other game engines may implement normal maps inverted, however «CrazyBump» allows you to reverse this by simply setting the strength modifier to the opposite parity, example being going from 50 strength, to -50 strength.
It may also be useful to remove any other textures such as height maps and occlusion maps, and instead leave only the albedo and normal map when evaluating your model to make sure the other maps aren’t obscuring your objective view of the normal maps influence.
Spawn on top of a grey block in custom map that has no grey block in the Unity Editor[]
If you spawn in your world and a grey block appears below you, usually this indicates an issue with your player spawn location objects. Make sure you have properly configured and added your spawns, and that they are children of the map root object.
Room based key events won’t trigger[]
If you have keys that are supposed to trigger something for anyone that hits the key in the room, and it does not work.. make sure you do NOT have the event handler and key events on the root object of your scene. Instead you will want to add a child object to the root, and place all your scripts on this child object. Adding a 3D cube as a child of the root and turning off the mesh visibility works really well as an object to hold these scripts.
Custom DLL isn’t working[]
Make sure the domain hosting your DLL is whitelisted by the VRChat developers if you are testing it online. If it does not work offline, and you are running your room directly from Unity’s Build and Run feature, make sure you have a copy of the DLL in BOTH the Plugins folder AND the same location where you save the room .vrcs file. In all cases, the DLL should physically exist in the same location as the .vrcs file and the .vrcs file name should be the same as the DLL.
My Avatars Mouth Stays Open[]
Added new section in the Avatar Import You can find the solution here
VRChat crashes when trying to enter my world and I don’t know the cause?[]
If you experience issues loading world or avatar it may be beneficial to check the output_log.txt as you may find addition information on what went wrong! Find the .txt file at C:/Program Files(x86)/VRChat/VRChat_Data/output_log.txt
My static objects in the scene have a bunch of VRC Static Reference components that increase in number with every build[]
[MenuItem("VRChat/Clean Excess References")]
       static void CleanExcessReferences()
       {
        VRCSDK2.VRC_ReflectionReference[] reflectionReferences = GameObject.FindObjectsOfType<VRCSDK2.VRC_ReflectionReference> ();
        foreach (VRCSDK2.VRC_ReflectionReference rr in reflectionReferences)
         DestroyImmediate(rr);
         VRCSDK2.VRC_LightmapReference[] lightMapReferences = GameObject.FindObjectsOfType<VRCSDK2.VRC_LightmapReference> ();
         foreach (VRCSDK2.VRC_LightmapReference lmr in lightMapReferences)
          DestroyImmediate(lmr);

        VRCSDK2.VRC_StaticReference[] staticReferences = GameObject.FindObjectsOfType<VRCSDK2.VRC_StaticReference> ();
        foreach (VRCSDK2.VRC_StaticReference sr in staticReferences)
         DestroyImmediate(sr);
       }
Mixamo animations do not work right in Unity, animation stuck half in floor or makes my avatar preview look like it is in a fetal position or stuck in T-pose[]
Make sure when you save animations from Mixamo that you pick the option that also uses the skin. Now make sure you set your model to type ‘Humanoid’ and then just duplicate animations out of your model in the Unity project view by expanding the caret on the model, selecting the animation and pressing Control + D.
I can only see a few avatars in the game. The rest of them a invisible. I can only see their shadows[]
You are probably using a AMD RX400 or RX500 GPU. There is currently a bug in the Flat Lit Toon shader many avatars are using (Bugreport). There is nothing you can do in that case.
World and avatar loading gets stuck or is very slow[]
If you are using an IPv6 connection you might check out this tutorial. Revert these changes, if it didn’t help.
In blender my avatar looks fine but when I bring it into unity its hair is transparent[]
Make sure that you set the materials rendering mode from transparent to opaque.
As a person who loves having a well set up game, it is essential to establish the SDK or the System Development Kit as an initial step. Also, it is an easy thing with a proper understanding.
When there are some errors and bug fixes, you will eventually fall with the game in an instant.
Since VRchat is a new game and not having older or modified versions, it is important to know the right path.
Here are few things you need to be aware of about the fix VRchat SDK not working Issue.
Not Appearing The Build Control Panel VRchat SDK Menu Dropdown
It can be considered as one of the major problems VRchat gamers face right now. There are two reasons or causes behind this error.
The first one is not having a later version of the VRchat game. If you haven’t updated or installed the VRchat into the latest version, doing so will fix this issue.
When it comes to the second reason, checking the console will let you know if there is any kind of error. Having errors in the console will also restrict you to have the Build Control Panel in the game.
Also, having third party applications may produce some errors in the script as well. Therefore getting rid of such scripts or compilations will welcome the game without such errors.
Not Appearing The Uploaded Content

VRchat can be enjoyed with the content you have uploaded as well. At a time when you can’t see the content that has been uploaded into the game that will be a time you have to consider a few things.
Obviously few causes can be understood as the cause for this error. It will be better if the unity has been updated to its latest version.
If you are running with an outdated version of the unity, your uploaded content won’t appear in the list for sure.
Also, when it comes to your account, you must be logged into your and you should have logged out of a platform account.
When you are logged into both above accounts that will be a cause for not appearing the uploaded files. Also, it is important to see the content correctly.
To do so, you need to see the Content Manager tab to verify if things are doing fine. It is a mistake that most of the gamers do, thinking the things haven’t been uploaded by not seeing them properly with the content manager tab.
Editor console is a place where you need to keep your eyes on when uploading anything into the game. If any errors can be seen in the console, you will have to solve them first. The community will educate you regarding such things indeed.
Windows Not Appearing And VRchat SDK Not Working Issue
This is a somewhat complicated error in the game In this case unity tabs will go missing and you won’t find any error either.
Although you are trying to figure out the real problem, there will not be anything you find for this error. .
You need to follow few steps to fix this VRchat SDK not working Issue.
01)As the very first set up, you need to close the Unity. Although how much progress you have achieved or accomplished at this stage, you must close the Unity.
02) Now you can make changes to the settings. As the next step, you should type Regedit after pressing the Windows key. You may find this setting in the search bar as well. If you are prompted to grant the administrator’s access, that also should be allowed.
You need to remember that this is a hard thing not just about the VRchat game but for your Pc too. Therefore it is vital to follow only the advised steps.
As this set contains all the settings that have been installed on your computer, one small thing will vanish in just a second. As a better way to fix Windows Not appearing and VRchat SDK not working Issue this is a risk, you need to bear.
03. The following key has to be pasted in the regedit. ( ComputerHKEY_CURRENT_USERSoftwareUnity TechnologiesUnity Editor 5.x.) You should paste the mentioned list on the bar or if there is not a bar, you will have to navigate to the mentioned destination.
04. Although it is the 4th step, this can be the most crucial step in the process. All you need to do here is to remove all the keys that have been titled as VRC. As a common thing, you will be able to find a key titled VRCSDK2. That should also be removed. It is a vital factor that you must delete only the files named as VRC.
05. As the final step, you may close the regedit. Then after you will be able to get rid of the troubles that arose with the Windows Not appearing and VRchat SDK not working Issue.
Finally
VRchat doesn’t always create errors and they are intentional neither. With the given proof and the causes, you will find that you are also a reason for such problems.
Understanding the error properly and decoding it on the internet will let you enjoy the game at its best for sure.
When there is a time you don’t read any error in the console, you will be able to find the best solutions by searching the related terms. In case of a lost moment, an opening of a ticket will let you have immediate assistance.
VRChat — одна из самых популярных виртуальных онлайн-платформ для стримеров. Однако иногда это может раздражать, многие пользователи недавно сообщали, что приложение часто зависает на экране загрузки; в результате они не могут подключиться к VRChat.
Содержание страницы
- Исправления проблемы с загрузкой VRChat
- Исправление 1. Очистите временные файлы VRChat.
- Исправление 2: обновите графический драйвер.
- Исправить 3 Отключить IPV6
- Исправление 4. Удалите VRChats из реестра.
- Исправление 5: Добавьте исключение антивируса для VRChat.
- Исправление 6. Используйте службу VPN.
- Исправление 7: восстановление системных файлов
Исправления проблемы с загрузкой VRChat
Та же проблема стала более частой, и пострадавшие пользователи не могут продолжить потоковую передачу из-за этого раздражающего сбоя. В то время как некоторые видят, что приложение не отвечает в середине игры, другие страдают от проблем с подключением. Если у вас такая же проблема с VRChat и вы ищете надежный способ ее решения, не волнуйтесь; мы собрали несколько исправлений для зависания VRChat на экране загрузки. Взгляни,
Исправление 1. Очистите временные файлы VRChat.
Как правило, VRChat после новой установки занимает очень мало собственных установочных файлов. Однако, когда вы встречаетесь в приложении с новыми друзьями с новыми персонализированными аватарами, это может привести к огромному увеличению размера файлов приложения. Здесь вам нужно время от времени очищать эти файлы. Для этого выполните следующие действия:
- Сначала перейдите по следующему пути и удалите файлы,
% Имя пользователя% AppDataLocalTempVRChat
- Затем попробуйте перезапустить приложение, чтобы проверить, сохраняется ли ошибка.
- Если проблема не загружается, попробуйте перезагрузить компьютер и повторите попытку.
Примечание: Если вы не знаете, как перемещаться по скрытой папке AppData, вставьте % Имя пользователя% AppDataLocalTempVRChat в проводник Виндоус Адресная строка.
Исправление 2: обновите графический драйвер.
Графические драйверы играют решающую роль во время потоковой передачи, поскольку они вносят большой вклад в обеспечение плавного игрового процесса. Если ваш графический драйвер поврежден или устарел, это может привести к возникновению многих игровых проблем. Это также может быть причиной зависания или отсутствия загрузки приложения VRChat. Вы можете просто решить эту проблему, обновив графический драйвер. Для этого выполните следующие действия:
- Откройте окно поиска на панели задач и введите Диспетчер устройств.
- Внутри Диспетчер устройств, перейдите в раздел Видеоадаптеры.

- Выберите свой графический драйвер, щелкните его правой кнопкой мыши и в подменю выберите Обновить драйвер вариант.
- После этого перезапустите систему и проверьте, сохраняется ли указанная проблема.

Если вам сложно следовать процессу обновления вручную, вы можете использовать сторонний инструмент для обновления драйверов. Этот инструмент обновит не только графический драйвер, но и все драйверы, установленные в вашей системе. В Интернете доступно несколько таких инструментов; среди них можно выбрать надежного.
Исправить 3 Отключить IPV6
По мнению некоторых пострадавших пользователей, простое отключение IPV6 может помочь вам решить ту же проблему. Для этого выполните следующие действия:
Исправление 4. Удалите VRChats из реестра.
Иногда удаление определенных настроек VRChat из реестра может помочь вам решить проблемы с загрузкой чатов VR, которые не загружаются быстро. Для этого выполните следующие действия:
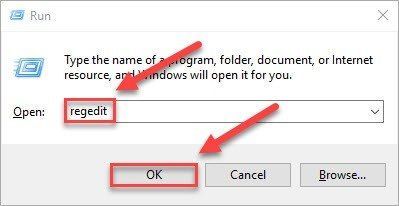
- Нажмите Windows + R все вместе, чтобы открыть Диалоговое окно ЗАПУСК.
- Затем в текстовом поле введите, regeditи нажмите В ПОРЯДКЕ.
- Перейдите к HKEY_CURRENT_USERSoftwareVRChatvrchat, затем выберите и удалите все файлы в этой папке.
- После этого перезапустите систему и убедитесь, что проблема решена.
Исправление 5: Добавьте исключение антивируса для VRChat.
Если вы регулярно используете антивирусную программу защиты, это может быть основной причиной проблемы с загрузкой VRChat. Многие антивирусные программы блокируют Интернет, что может привести к потере связи между вашими приложениями. В этом сценарии вы можете добавить VRChat в качестве исключения в свое антивирусное программное обеспечение.
Исправление 6. Используйте службу VPN.
Если описанные выше методы не помогли решить проблему с загрузкой VRChat, вам необходимо использовать службу VPN для воспроизведения VRChat. Многие пользователи сообщают, что использование службы VPN может решить такие проблемы, как задержка и буферизация.
Исправление 7: восстановление системных файлов
И последнее, но не менее важное: если проблема с загрузкой VRChat не устранена, вам необходимо запустить инструмент SFC, чтобы проверить, не повреждены ли какие-либо системные файлы в вашей системе. Если это так, инструмент SFC быстро обнаружит и исправит их автоматически и поможет вам решить ту же проблему. Для этого выполните следующие действия:
Чтобы запустить сканирование SFC,
- Открыть Диалоговое окно ЗАПУСК нажав на Windows + R все вместе.
- Затем введите cmd и нажмите Ctrl + Shift + Enter запустить Командная строка как админ. Когда он запрашивает разрешение на внесение изменений в ваше устройство, выберите да.
- Внутри Командная строка, введите следующую команду и нажмите Входить,

sfc / scannow
- Он запустит процесс сканирования и автоматически восстановит все поврежденные или отсутствующие файлы.
Если после запуска инструмента SFC проблема не исчезнет, вам также необходимо запустить инструмент DISM. Для этого
- Открыть Диалоговое окно ЗАПУСК нажав на Windows + R все вместе.
- Затем введите cmd и нажмите Ctrl + Shift + Enter запустить Командная строка как админ.
- В окне командной строки введите следующие команды одну за другой и нажмите Enter после каждой команды,
DISM.exe / онлайн / очистка-изображение / scanhealthDISM.exe / онлайн / очистка-изображение / RestorehealthDISM / онлайн / очистка-изображение / startcomponentcleanup
Если вы столкнетесь с Ошибка: 0x800F081F после выполнения всех вышеперечисленных команд перезапустите систему и выполните следующую команду, чтобы избавиться от той же ошибки,
DISM.exe / Online / Cleanup-Image / AnalyzeComponentStore
- После этого перезапустите систему и убедитесь, что указанная проблема сохраняется.
Это были 7 лучших способов решить проблему с загрузкой VRChat. Все исправления испытаны, протестированы и проверены экспертами. В дополнение ко всему этому вы также можете попробовать некоторые специальные варианты запуска.
В конце статьи мы надеемся, что вся приведенная выше информация будет вам полезна. Если у вас есть какие-либо вопросы или отзывы, напишите комментарий в поле для комментариев ниже.
Skip to content
В это руководстве мы разберемся как же исправить ошибку в Unity «this avatar has too many polygons».
Иногда при попытке опубликовать аватар в VRChat у вас может возникнуть ошибка «This avatar has too many polygons. It must have less than 20k and should have less than 10k.».

Она обозначает, что количество полигонов у модели вашего аватара превышает допустимый лимит в 20 000. По сути, чтобы исправить эту ошибку, нам нужно увеличить этот лимит.
- Закройте Unity, если программа у вас открыта.
- Теперь перейдите в папку, в которой у вас установлен Unity. У меня это F:Unity
- Оттуда перейдите в папку с вашим сохраненным проектом. (его название и расположение вы выбираете при запуске Unity). У меня это стандартный «New Unity Project».

- Далее перемещаемся по пути AssetsVRCSDKDependenciesVRChatEditor
- Там находим файл VRC_SdkControlPanel.cs и открываем его через блокнот.

- Теперь находим в этом файле число «20000» и меняем его на «65000» и сохраняем файл.

- Готово! Теперь лимит полигонов у нас увеличился до 65000. Можете заходить в Unity и спокойно публиковать свой аватар, ошибки больше нет!


Лимит выше 65000 можете даже не пытаться устанавливать, поскольку Unity физические не принимает модели с таким количеством полигонов.
Гайды
Когда вы запускаете свой VRChat, может быть более чем раздражающим видеть вечно загрузочный экран . Бесконечный цикл входа в систему может просто свести вас с ума.
Многие игроки VRChat сообщают об одной и той же ошибке подключения:
Не удается подключиться к VRChat (убедитесь, что на вашем устройстве есть подключение к Интернету, и перезапустите VRChat)
Но хуже всего то, что Ошибка подключения к VRChat происходит часто . Этот причудливо крутой виртуальный мир не должен блокироваться такой раздражающей ошибкой. К счастью, это довольно легко исправить…
Испытываете ли вы VRChat не загружает проблемы , ошибки «Не удается подключиться к VRChat», или VRChat не отвечает во время игры основными причинами обычно являются большой кеш игры, проблемы с подключением к Интернету или сама игра.
Какой бы ни была причина, вы можете попробовать решить эту проблему с помощью обходных путей, указанных ниже, которые оказались полезными для многих пользователей VRChat:
- Очистите временные файлы VRChat. Попробуйте некоторые специальные параметры запуска Обновите драйвер видеокарты Отключить IPV6 Удалить VRChat в реестре Добавить антивирусное исключение для VRChat Используйте VPN-сервис Восстановите системные файлы
Исправление 1. Очистите временные файлы VRChat.
Хотя сам VRChat имеет очень маленькие установочные файлы, размер файла становится чрезвычайно большим, когда вы продолжаете встречать новых друзей с пользовательскими аватарами.
Чтобы обеспечить бесперебойную работу VRChat, время от времени следует очищать эти файлы:
- Удалите файлы в %Username%AppDataLocalTempVRChat .
- Попробуйте запустить VRChat, чтобы увидеть, повторяется ли проблема.
- Если VRChat не загружается, перезагрузите компьютер и повторите попытку.
Если вы не знаете, как перейти к скрытой папке AppData, вставьте %Username%AppDataLocalTempVRChat в адресной строке проводника Windows.
Исправление 2. Попробуйте специальные параметры запуска.
Это должно дать вам возможность сориентироваться и получить свои границы без задержек и уменьшить проблемы со входом в систему, поскольку с тех пор, как я начал это делать, у меня было гораздо меньше проблем.
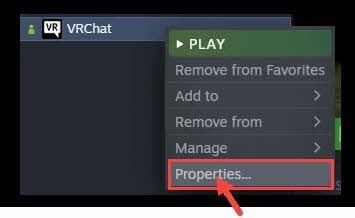
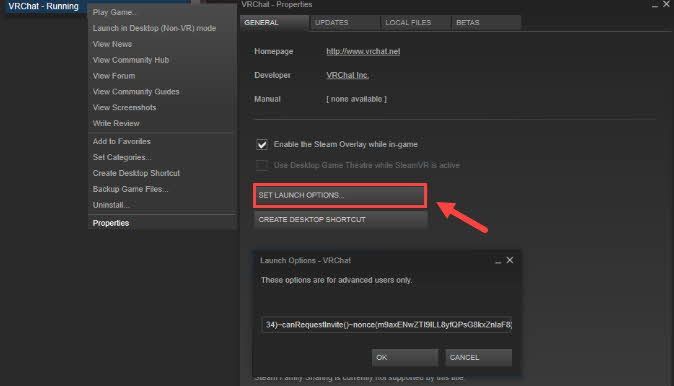
- Перейдите в библиотеку вашего Steam, затем щелкните правой кнопкой мыши VRChat и выберите Характеристики .
- Нажмите Установить параметры запуска .
- Добавьте одну из следующих строк:
- vrchat: // запуск?id = wrld_1a6f881b-fdd0-4551-af2c-6ef8e16577f6
- Чтобы войти в другой мир, просто измените идентификатор мира соответствующим образом.
(Это загрузит вас в подземелье аватара Zarniwoop)vrchat: // запуск?id = wrld_d0b62423-fd59-48f7-9e4b-e6fece81b7ed
(Гиперпространство OziCom)vrchat: // запуск?id = wrld_69ab9cdf-5436-46bd-98b5-714837a53b4f
(X1 Сейсокен Сити)
Исправление 3. Обновите графический драйвер
Графический драйвер имеет большое значение для геймеров, поскольку он может иметь большое значение для вашего игрового процесса. Если драйвер видеокарты устарел или поврежден, в конечном итоге вы столкнетесь со всевозможными игровыми проблемами, такими как VRChat, который не загружается или вылетает. Чтобы исправить это, вы можете обновить драйвер видеокарты.
Есть два способа обновить драйверы:
Опция 1 — Вручную — Вам потребуются некоторые навыки работы с компьютером и терпение, чтобы обновить драйверы таким образом, потому что вам нужно найти именно тот драйвер в Интернете, загрузить его и установить шаг за шагом.
ИЛИ
Вариант 2 – Автоматически (рекомендуется) – Это самый быстрый и простой вариант. Все это делается всего за пару кликов мыши — легко, даже если вы новичок в компьютере.
Вариант 1. Обновите графический драйвер вручную
Производители видеокарт любят NVIDIA и AMD продолжайте выпускать новые драйверы для исправления ошибок и повышения производительности, поэтому вы всегда можете получить последнюю версию драйвера на их официальном сайте.
Загрузите правильный графический драйвер для вашей системы, затем следуйте инструкциям на экране, чтобы установить драйвер. После этого не забудьте перезагрузить компьютер, чтобы изменения вступили в силу.
Вариант 2. Обновите графический драйвер автоматически.
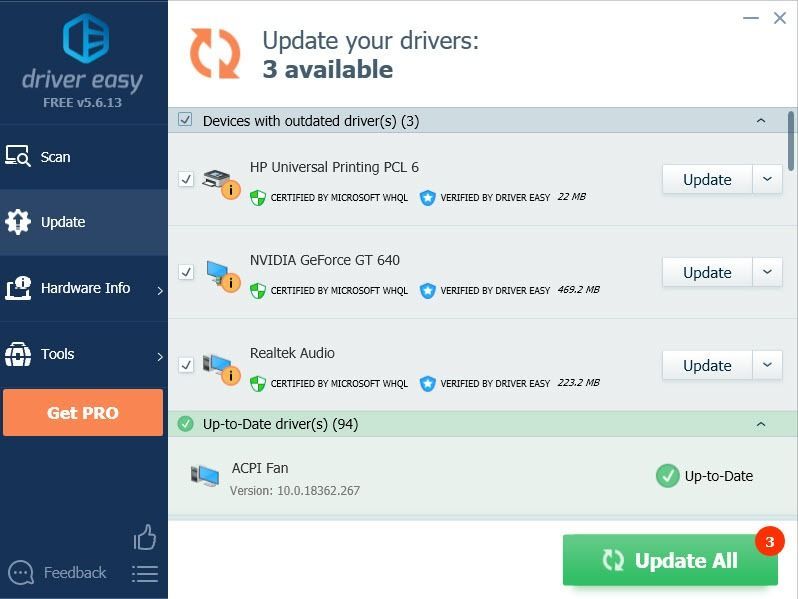
Если у вас нет времени, терпения или навыков работы с компьютером для обновления графического драйвера вручную, вы можете сделать это автоматически с участием Драйвер Легкий .
Driver Easy автоматически распознает вашу систему и найдет для нее правильные драйверы. Вам не нужно точно знать, какая система работает на вашем компьютере, вам не нужно рисковать загрузкой и установкой не того драйвера, и вам не нужно беспокоиться об ошибке при установке.
Вы можете автоматически обновлять драйверы с помощью БЕСПЛАТНОЙ или профессиональной версии Driver Easy. Но с Про версия это займет всего 2 клика:
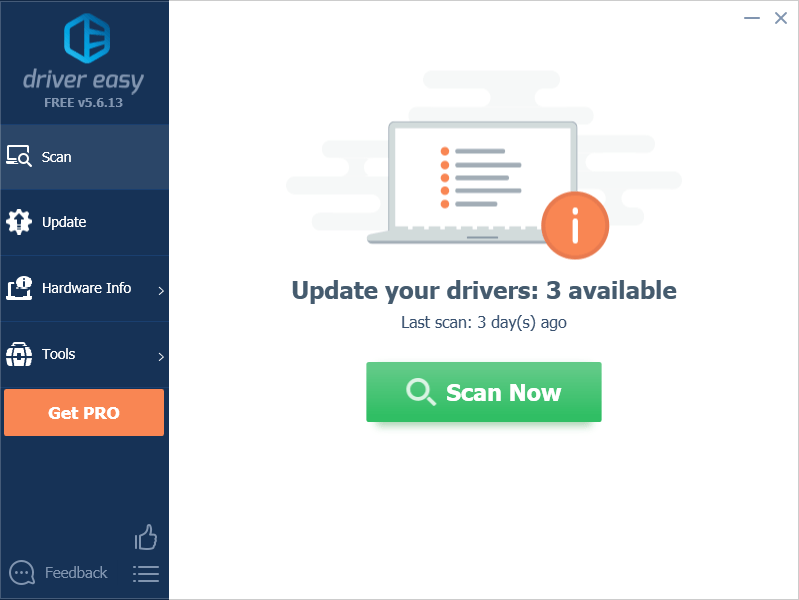
- Скачатьи установите драйвер Easy.
- Запустите Driver Easy и нажмите кнопку Сканировать сейчас кнопка. Затем Driver Easy просканирует ваш компьютер и обнаружит проблемные драйверы.
- Нажмите Обновить все для автоматической загрузки и установки правильной версии всех отсутствующих или устаревших драйверов в вашей системе (для этого требуется Про версия — вам будет предложено обновить, когда вы нажмете Обновить все . Ты получаешь полная поддержка и 30-дневная гарантия возврата денег .)
Примечание. Вы можете сделать это бесплатно, если хотите, но это частично вручную. - Перезагрузите компьютер, чтобы изменения вступили в силу.
Если у вас возникли проблемы при использовании Driver Easy Pro, обратитесь в нашу службу поддержки по адресу
Исправление 4: отключить IPV6
Возможно, ваш интернет-провайдер (интернет-провайдер), маршрутизатор или система плохо поддерживает IPV 6. Многие пользователи считают, что отключение IPV 6, наконец, решило их проблемы с загрузкой VRChat. Вот как это сделать:
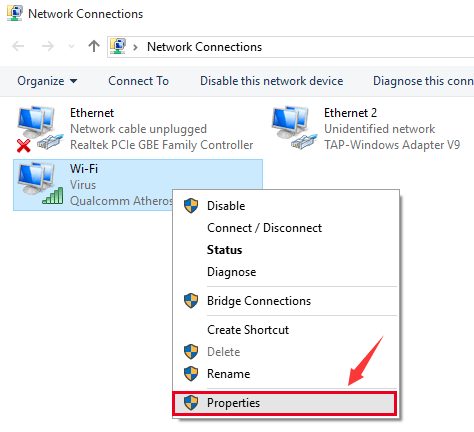
- Щелкните правой кнопкой мыши значок сети на рабочем столе и выберите «Открыть центр управления сетями и общим доступом».
- Щелкните Изменить настройки адаптера.
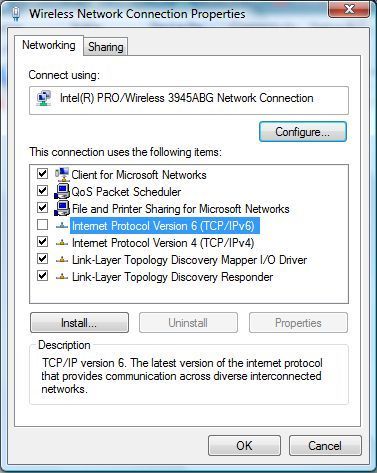
- Щелкните правой кнопкой мыши используемое подключение к Интернету и выберите Характеристики .
- Под Сеть вкладку, снимите флажок рядом с Интернет-протокол версии 6 (IPv6) .
- Нажмите В ПОРЯДКЕ чтобы сохранить изменения.
- Теперь вы готовы к работе. Попробуйте запустить VRChat, чтобы проверить проблему.
Примечание: Вы также можете снять флажок IPV6 для остальных сетевых подключений, присутствующих на этом экране. Если это не работает для вас, попробуйте перезагрузить маршрутизатор и попробуйте снова войти в систему.
Исправление 5: удалить VRChat в реестре
Если отключение IPV 6 и перезагрузка маршрутизатора не помогли, вы можете открыть редактор реестра Windows — Regedit — чтобы удалить предпочтительные настройки VRChat в реестре.
- нажмите Окна ключ + р чтобы открыть окно «Выполнить».
- Тип regedit в поле и нажмите В ПОРЯДКЕ .
- Перейдите к HKEY_CURRENT_USERПрограммное обеспечениеVRChatvrчат и удалите все файлы в этой папке.
Исправление 6: добавить антивирусное исключение для VRChat
Если вы установили какие-либо антивирусные приложения, виновником может быть ваш антивирус, блокирующий ваш интернет, из-за чего ваш VRChat не загружается. Поэтому вы можете добавить VRChat в исключение в своей антивирусной программе.
Если вы не знаете, как это сделать, проверьте ссылки ниже:
- Битдефендер Нортон Макафи ESET NOD32 Тренд Микро Аваст AVG Антивирус
Исправление 7: используйте службу VPN
Если решения, прежде всего, не помогли вам пройти экран загрузки, вам может понадобиться VPN для воспроизведения вашего VRChat. Многие пользователи сообщили, что все проблемы исчезли после использования службы VPN.
Если вы заботитесь о безопасности и скорости, вам следует избегать использования этих бесплатных VPN-сервисов, поскольку отставание может свести вас с ума. Поэтому мы рекомендуем использовать СеверVPN .
| ЭкспрессVPN | НордВПН | |
|---|---|---|
| Периоды подписки | 1 месяц, 6 месяцев, 1 год | 1 месяц, 1 год, 2 года |
| Специальное предложение | Три месяца бесплатно при годовой подписке | Скидка 72% и 3 месяца бесплатно на 2-летний план |
| Самая высокая цена в месяц | ,95 | 11,95 долларов США |
| Самая низкая цена в месяц | ,67 | 3,71 доллара США |
| Цена за год | ,95 (фактически на 15 месяцев) | |
| Гарантия возврата денег | 30 дней | 30 дней |
Исправление 8: восстановление системных файлов
Если все вышеперечисленные исправления не помогли, вам может потребоваться проверить, есть ли на вашем компьютере поврежденные системные файлы. Ваш VRChat может использовать один и тот же DLL-файл с вашей системой Windows, что приводит к тому, что ваша игра не загружается. Есть два способа восстановить системные файлы:
- Вариант 1 — автоматически (рекомендуется)
Используйте инструмент восстановления, чтобы проверить различные области вашего компьютера, чтобы определить точную причину вашей проблемы. Он решит проблемы, связанные с системными ошибками, критическими системными файлами и найдет для вас подходящее решение.
Вариант 2 — вручную
Средство проверки системных файлов — это встроенный инструмент для проверки поврежденных системных файлов и восстановления их, если таковые имеются. Однако этот инструмент может диагностировать только основные системные файлы и не будет работать с поврежденными DLL, ключами реестра Windows и т. д.
Вариант 1 — автоматически (рекомендуется)
Реставрация это программное обеспечение для ремонта компьютеров, которое может диагностировать проблемы на вашем компьютере и немедленно их устранять.
Restoro адаптирован к вашей конкретной системе и работает конфиденциально и автоматически. Сначала он проверит проблемы, связанные с оборудованием, чтобы выявить проблемы, а затем проблемы с безопасностью (на основе Avira Antivirus), и, наконец, обнаружит аварийные программы и отсутствующие системные файлы. После завершения он найдет решение вашей конкретной проблемы.
Restoro — надежный инструмент для ремонта, который не причинит вреда вашему компьютеру. Самое приятное то, что вам не нужно беспокоиться о потере каких-либо программ и ваших личных данных. Читать Отзывы Trustpilot .
- Образ Restoro заменит ваши отсутствующие/поврежденные DLL-файлы свежими, чистыми и актуальными.
- Restoro заменит ВСЕ файлы DLL, которые отсутствуют и/или повреждены, даже те, о которых вы не знаете!
один) Скачать и установить Ресторо.
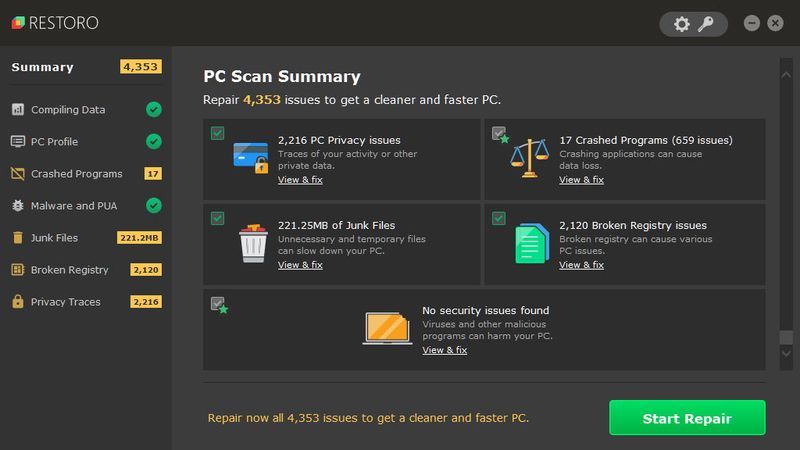
2) Откройте Restoro и запустите бесплатное сканирование. Это может занять 3-5 минут, чтобы полностью проанализировать ваш компьютер. После завершения вы сможете просмотреть подробный отчет о сканировании.
3) Вы увидите сводку обнаруженных проблем на вашем ПК. Нажмите НАЧАТЬ РЕМОНТ и все проблемы будут исправлены автоматически. (Вам необходимо приобрести полную версию. Она поставляется с 60-дневной гарантией возврата денег, поэтому вы можете вернуть деньги в любое время, если Restoro не решит вашу проблему).
 Примечание: Restoro поставляется с круглосуточной технической поддержкой 7 дней в неделю. Если вам нужна помощь при использовании Restoro, вы можете воспользоваться одним из следующих способов:
• Телефон: 1-888-575-7583
• Электронная почта: support@restoro.com
• Чат: https://tinyurl.com/RestoroLiveChat
Вариант 2 — вручную
Для проверки и восстановления системного файла может потребоваться время и навыки работы с компьютером. Вам нужно будет выполнить множество команд, дождаться завершения процесса или рискнуть своими личными данными.
Шаг 1. Сканирование поврежденные файлы с помощью средства проверки системных файлов
Средство проверки системных файлов (SFC) — это встроенный в Windows инструмент для выявления и восстановления поврежденных системных файлов.
1) На клавиатуре одновременно нажмите клавишу с логотипом Windows и R, чтобы открыть окно «Выполнить». Тип команда и нажмите Ctrl+Shift+Ввод для запуска командной строки от имени администратора.
Нажмите да при запросе разрешения на внесение изменений в ваше устройство.
2) В командной строке введите следующую команду и нажмите Входить .
|_+_|
3) Проверка системных файлов начнет сканировать все системные файлы и восстанавливать все обнаруженные поврежденные или отсутствующие файлы. Это может занять 3-5 минут.

4) После проверки вы можете получить что-то вроде следующих сообщений.
- нет ошибок
- это исправило некоторые ошибки
- не удалось исправить все ошибки
- никак не мог исправить ошибки
- ……
Независимо от того, какое сообщение вы получите, вы можете попробовать запустить dism.exe (Обслуживание образов развертывания и управление ими), чтобы проверить производительность устройства и работоспособность вашего ПК.
Шаг 2. Запустите dism.exe
1) Запустите командную строку от имени администратора и введите следующие команды.
- Эта командная строка просканирует работоспособность вашего ПК:
|_+_|
- Эта командная строка восстановит работоспособность вашего ПК:
|_+_|
2) После завершения процесса восстановления работоспособности вы можете получить некоторые сообщения об ошибках.
- Если при восстановлении здоровья возникли ошибки, вы всегда можете попробовать эту командную строку. Это займет до 2 часов.
|_+_|
- Если вы получите Ошибка: 0x800F081F с восстановлением работоспособности, перезагрузите компьютер и запустите эту командную строку.
|_+_|
Если проверка системных файлов обнаружит какие-либо файлы поврежденными, следуйте инструкциям на экране, чтобы восстановить их, а затем перезагрузите компьютер, чтобы изменения вступили в силу.
Вот и все — 8 исправлений для вашей проблемы с загрузкой VRChat. Не стесняйтесь оставлять нам комментарии, если у вас есть какие-либо вопросы или другие возможные решения, которыми вы можете поделиться с другими!
- игры
- проблема с сетью
- VPN
How to Deal With Unity Errors [VRChat]
Hellow guys, Welcome to my website, and you are watching How to Deal With Unity Errors [VRChat]. and this vIdeo is uploaded by poiyomi at 2022-06-27. We are pramote this video only for entertainment and educational perpose only. So, I hop you like our website.
Info About This Video
| Name | How to Deal With Unity Errors [VRChat] |
| Video Uploader | Video From poiyomi |
| Upload Date | This Video Uploaded At 27-06-2022 00:00:00 |
| Video Discription | Discord: https://poiyomi.com Patreon https://www.patreon.com/poiyomi |
| Category | Gaming |
| Tags | Gaming Download MP4 | Gaming Download MP3 | Gaming Download MP4 360p | Gaming Download MP4 480p | Gaming Download MP4 720p | Gaming Download MP4 1080p |
More Videos


Last Updated on June 4, 2022
Vrchat SDK error cs0117 is a common issue you may come across when using the SDK.
Continue reading to learn how to solve it easily.
Close Unity and delete any SDK-related folders and their meta files according to the SDK removal instructions.
Under Player > Other Settings, look for Scripting Define Symbols in your Project Settings.
Remove any symbols that aren’t related to the SDK you used to create your project. Remove UDON and VRC SDK3 from applications created with SDK2. VRC SDK2 should be removed from SDK3 projects. The symbols are separated by a semicolon (;). After that, hit Enter to save your changes.
Add the appropriate SDK to the project.
What Is the VRChat SDK and How Does It Work?
The Software Development Kit is what the SDK in the VRChat SDK stands for. And, as the name implies, in an app that was created specifically for the VRChat platform to allow users to build their own avatars, interactive worlds, and other content.
VRChat runs on the Unity 3D game engine, which means that practically all of Unity’s capabilities, such as lighting, navigation mesh, and animations, function effortlessly in VRChat.
The VRChat SDK is available in three distinct versions. The VRChat SDK3 – Avatars is perhaps the most popular. This may be used to make VRChat Avatar 3.0 avatars. This allows you to establish one or more distinct identities for the VRChat platform.
VRChat SDK-created avatars provide unrivaled personalization, facial and bodily expression, and control.
There’s also the VRChat SDK3 – World app, which allows you to develop whole new and fascinating gaming worlds. You may create a variety of relaxed hangout areas and clubs for you and your virtual avatar buddies to meet up and have a good time. You may also make virtual games.
There’s VRChat SDK2. This isn’t as up to date as the VRChat SDK3 applications, and it’s only for supporting old content.
Can I execute “Deletion Reinstalls” for SDK3-Avatars?
State behaviors will be lost if you delete the SDK directories while Unity is closed and then open Unity without the SDK loaded. They’re frail, and they don’t persist through full elimination upgrades. Make regular backups of your work and save/document your state-behavior configurations.
If you need to reinstall your SDK3-Avatars package from scratch, make a backup of your project first. You’ll have to re-create your state behaviors, so make sure they’re carefully documented.
How To Set Up The VRChat SDK
Please keep in mind that the instructions for installing VRChat SDK assume that you are running the essential programs on a Windows PC and not on any other operating system.
Before you get started, the first thing you should do is double-check that you’re using the right Unity version.
However, you should check the VRChat website’s Guides section to see which version is the proper one in case it changes. Please keep in mind that if you want to create content for VRChat on Oculus Quest at this time, you’ll need to configure your Unity app correctly.
Make a project
You’ll need to launch Unity Hub, select Create a new project, and set it to 3D at this stage.
After that, you’re free to start working on your first project. However, as a heads-up, Unity files may be rather enormous, so make sure you save all of your projects to a mass storage system with plenty of capacity.
It’s a good idea to start a new project for each new planet you discover. However, with avatars, this is less of an issue, and it will be completely OK to maintain your multiple avatars in distinct scenes within the same project.
After you’ve opened the project, make sure the title bar ends in PC, Mac, and Linux Standalone DX11>. If it doesn’t, something needs to be done about it.
Install the SDK
Now, open Explorer and double-click on the SDK’s Unity package to open it, with Unity open to your project.
It’s also possible to import it via Assets > Import Package > Custom Package.
Please make sure you’re using the correct SDK.When the import is finished, examine the console window to see if there are any issues that need to be fixed. (There should be no issues unless you downloaded the wrong version of Unity.)
Login
To utilize the SDK, you must first log in with your VRChat information. You’ll need to go to VRChat SDK > Show Control Panel > Authentication to achieve this.
Unfortunately, you cannot upload content using your Steam, Oculus, or Viveport accounts. You’ll also need a VRChat account with at least a New User Trust Rank.
But don’t worry, increasing your trust rank is simple; all you have to do is play VRChat, explore places, and meet new people.