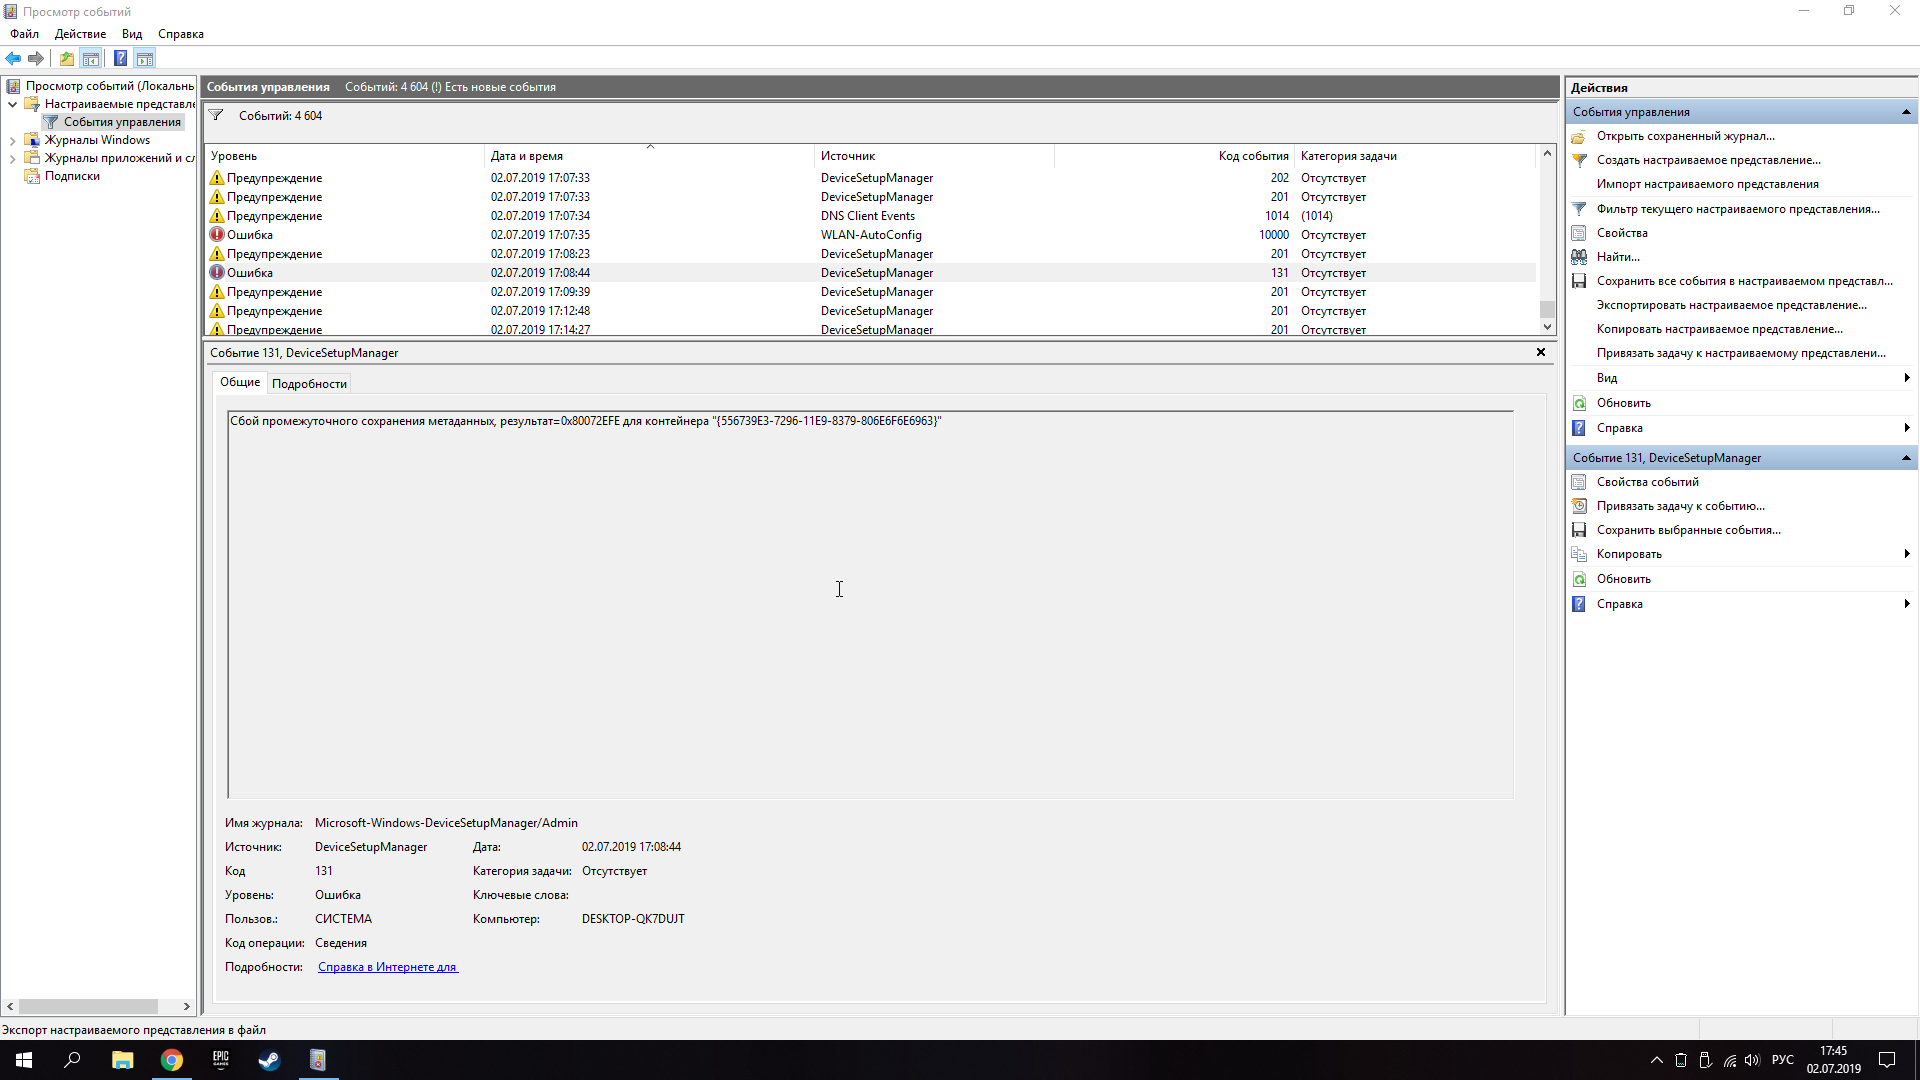
Log name: Microsoft-Windows-DeviceSetupManager/Admin
Source: DeviceSetupManager
Event ID: 131
Level: Error
User: SYSTEMMetadata staging failed, result=0x80070490 for container ‘{00000000-0000-0000-FFFF-FFFFFFFFFFFF}’
Открыл редактор реестра под админом:
HKEY_LOCAL_MACHINESOFTWAREMicrosoftWindowsCurrentVersionDevice MetadataDeviceMetadataServiceURL
Было значение
http://go.microsoft.com/fwlink/?LinkID=252669&clcid=0x409
Поменял на
http://dmd.metaservices.microsoft.com/dms/metadata.svc
Детали здесь.
- Об авторе
- Недавние публикации
После замены процессора и установки драйверов компьютер начал перезагружаться в играх
сначала подумал что проблема из-за ошибки 10016 DistributedCom и исправил её, но всё равно компьютер работал также, потом попытался обновить систему до windows 10 (до этого была 7)
но компьютер всё равно выключался. Недавно обновил bios и он до сих пор выключается! В этот раз посмотрел в «просмотре событий» ошибка 131. На ютубе ничего подобного не нашёл. Помогите пожалуйста!
забыл сказать что перед обновлением bios компьютер сильно шумел
Hi Folks,
Amtino on the «Microsoft Community» wrote on this Subject:
A new resolution to the issue without changing the url in the registry or touching anything we shouldn’t really:
Click on time and date at bottom right of screen.
select Internet time
change the server in the drop down list from windows time to nist.gov. Update the time.
Your system should now be error free: I have tested this by refreshing all hardware devices etc. all OK.
The nist.gov time server is obviously correct to the millisecond and the window time server is not!
http://answers.microsoft.com/en-us/windows/forum/windows8_1-performance/multiple-errors-in-event-viewer-eventid-131-from/e5054c3b-bc91-4beb-894f-4d0d9f0dd8ca?page=10&msgId=c7ebffc8-93c7-4c7c-a009-4e972596adf3
I can attest that this does work the why the Meta System was suppose to work in the first place! Set everything back to the why Microsoft Recommends and change the Time Updating Source. Since I am in the North West I chose accordingly as follows:
Verification:
Control Panel
Printers and Devices
Right Click with mouse on any blank space
Click refresh
Finally a real answer to this long term problem. Even though I did not have an issue in Windows 8.1 Pro, I changed them too, as a preventative precaution.
I am going to «Unanswer» the Former Answers. There time has passed. I hope the moderators support this….
Best Regards,
Crysta
PhotM Phantom of the Mobile
-
Marked as answer by
Phantom of the Mobile
Sunday, October 11, 2015 2:20 PM
Go to Windows10
Hey, guys!
I’ve been getting these weird event id 131 errors since the 14th out of the blue and I can’t seem to figure out what’s wrong:
Metadata staging failed, result=0x80070057 for container ‘{90DAD2D0-811B-11E9-AFA9-7085C2750CB6}’
Full details look like this:
Log Name: Microsoft-Windows-DeviceSetupManager/Admin
Source: Microsoft-Windows-DeviceSetupManager
Date: 16.09.2019 19:53:24
Event ID: 131
Task Category: None
Level: Error
Keywords:
User: SYSTEM
Computer: SANJURO-PC
Description:
Metadata staging failed, result=0x80070057 for container ‘{90DAD2D0-811B-11E9-AFA9-7085C2750CB6}’
Event Xml:
<Event xmlns=»[http://schemas.microsoft.com/win/2004/08/events/event](http://schemas.microsoft.com/win/2004/08/events/event)»>
<System>
<Provider Name=»Microsoft-Windows-DeviceSetupManager» Guid=»{fcbb06bb-6a2a-46e3-abaa-246cb4e508b2}» />
<EventID>131</EventID>
<Version>0</Version>
<Level>2</Level>
<Task>0</Task>
<Opcode>0</Opcode>
<Keywords>0x4000000000000000</Keywords>
<TimeCreated SystemTime=»2019-09-16T16:53:24.397793400Z» />
<EventRecordID>869</EventRecordID>
<Correlation />
<Execution ProcessID=»1372″ ThreadID=»2712″ />
<Channel>Microsoft-Windows-DeviceSetupManager/Admin</Channel>
<Computer>SANJURO-PC</Computer>
<Security UserID=»S-1-5-18″ />
</System>
<EventData>
<Data Name=»Prop_ContainerId»>{90DAD2D0-811B-11E9-AFA9-7085C2750CB6}</Data>
<Data Name=»HRESULT»>2147942487</Data>
</EventData>
</Event>
I’ve googled around and so far I’ve changed the URL in registry for Windows metadata and also changed the internet time source to time.nist.gov.
They keep popping up.
I’m running Windows 10 1903 (latest updates).
Any help is appreciated. Thanks in advance!
Archived post. New comments cannot be posted and votes cannot be cast.
Возникает ошибка 131 при попытке обновления приложения Creative Cloud для настольных ПК? Воспользуйтесь приведенными ниже решениями.
Почему возникает ошибка 131 в приложении Creative Cloud для настольных ПК?
Если вы столкнулись с ошибкой 131, может отображаться одно из следующих сообщений об ошибке в приложении Creative Cloud для настольных ПК:
- Не удалось синхронизировать. Установите синхронизированный компонент и повторите попытку. Код ошибки 131
- Обнаружены проблемы при обновлении Creative Cloud. Код ошибки 131
- Не удалось обновить Creative Cloud. К сожалению, нам не удалось обновить приложение. Код ошибки 131
Код ошибки 131 означает, что вам необходимо закрыть определенные фоновые процессы Creative Cloud, такие как Adobe Content Synchronizer (ранее называвшийся CoreSync), Creative Cloud Libraries Synchronizer (ранее называвшийся CCLibrary), Creative Cloud Content Manager (ранее называвшийся CCXProcess) и Node, прежде чем вы сможете обновить приложение Creative Cloud для настольных ПК.
Как исправить ошибку 131?
Чтобы исправить ошибку 131, просто принудительно завершите следующие фоновые процессы Creative Cloud:
- Creative Cloud Content Manager
- Creative Cloud Libraries Synchronizer
- Adobe Content Synchronizer
- Node
Чтобы узнать, как закрыть эти фоновые процессы, следуйте инструкциям для своей операционной системы.
-
Щелкните правой кнопкой мыши на панели задач и выберите Task Manager.
-
(Необязательно) Нажмите Подробнее, если Диспетчер задач не полностью развернут
. -
На вкладке Процессы выберите Creative Cloud Content Manager. Затем выберите Снять задачу.
-
Повторите шаг 3 для Creative Cloud Libraries Synchronizer, Adobe Content Synchronizer и Node.
-
Попробуйте обновить приложение Creative Cloud для настольных ПК еще раз.
-
В меню Finder выберите Перейти > Утилиты.
-
Дважды нажмите значок приложения «Мониторинг системы».
-
Введите Creative Cloud Content Manager в поле поиска в правом верхнем углу.
Закройте Creative Cloud Content Manager -
Дважды щелкните Creative Cloud Content Manager в списке и выберите Выйти.
-
Выберите Завершить принудительно.
-
Повторите шаги 3–5 в отношении Adobe Content Synchronizer, Creative Cloud Libraries Synchronizer и Node.
-
Попробуйте обновить приложение Creative Cloud настольных ПК еще раз.

